
Purpose of the Brake ducts is to direct airflow from the front of the car onto the Brake Disks so that if you are doing a lot of braking or track work it helps to keep the brakes at a better temp.
I have just been told some of the smaller brake systems may have issues with fowling on the plastic but its easy to trim. Also my understanding is the Golf R and Cupra both support this with no issues and i have it on my big brake kit with no issues.
Part Number
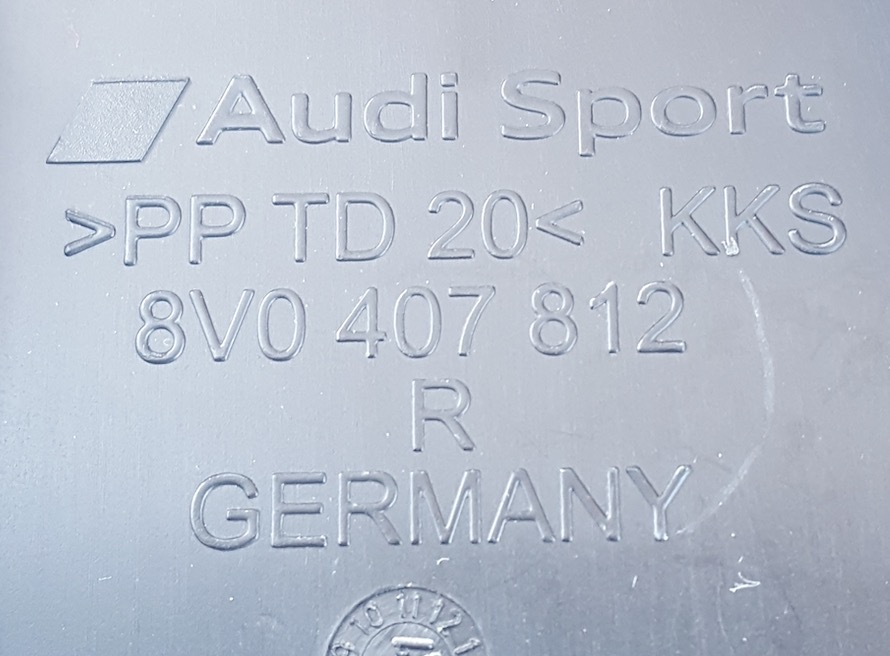
These are fitted as standard on the Audi Range and cost about £30-00 to buy.
There were no fitting instructions but its fairly easy to work out what to do and you don't need to be a mechanical wizard to do this.
Firstly a couple simple picture to show the point of these ducts

The air flow to cool the brakes comes from the front of the car and comes through a small duct in the front
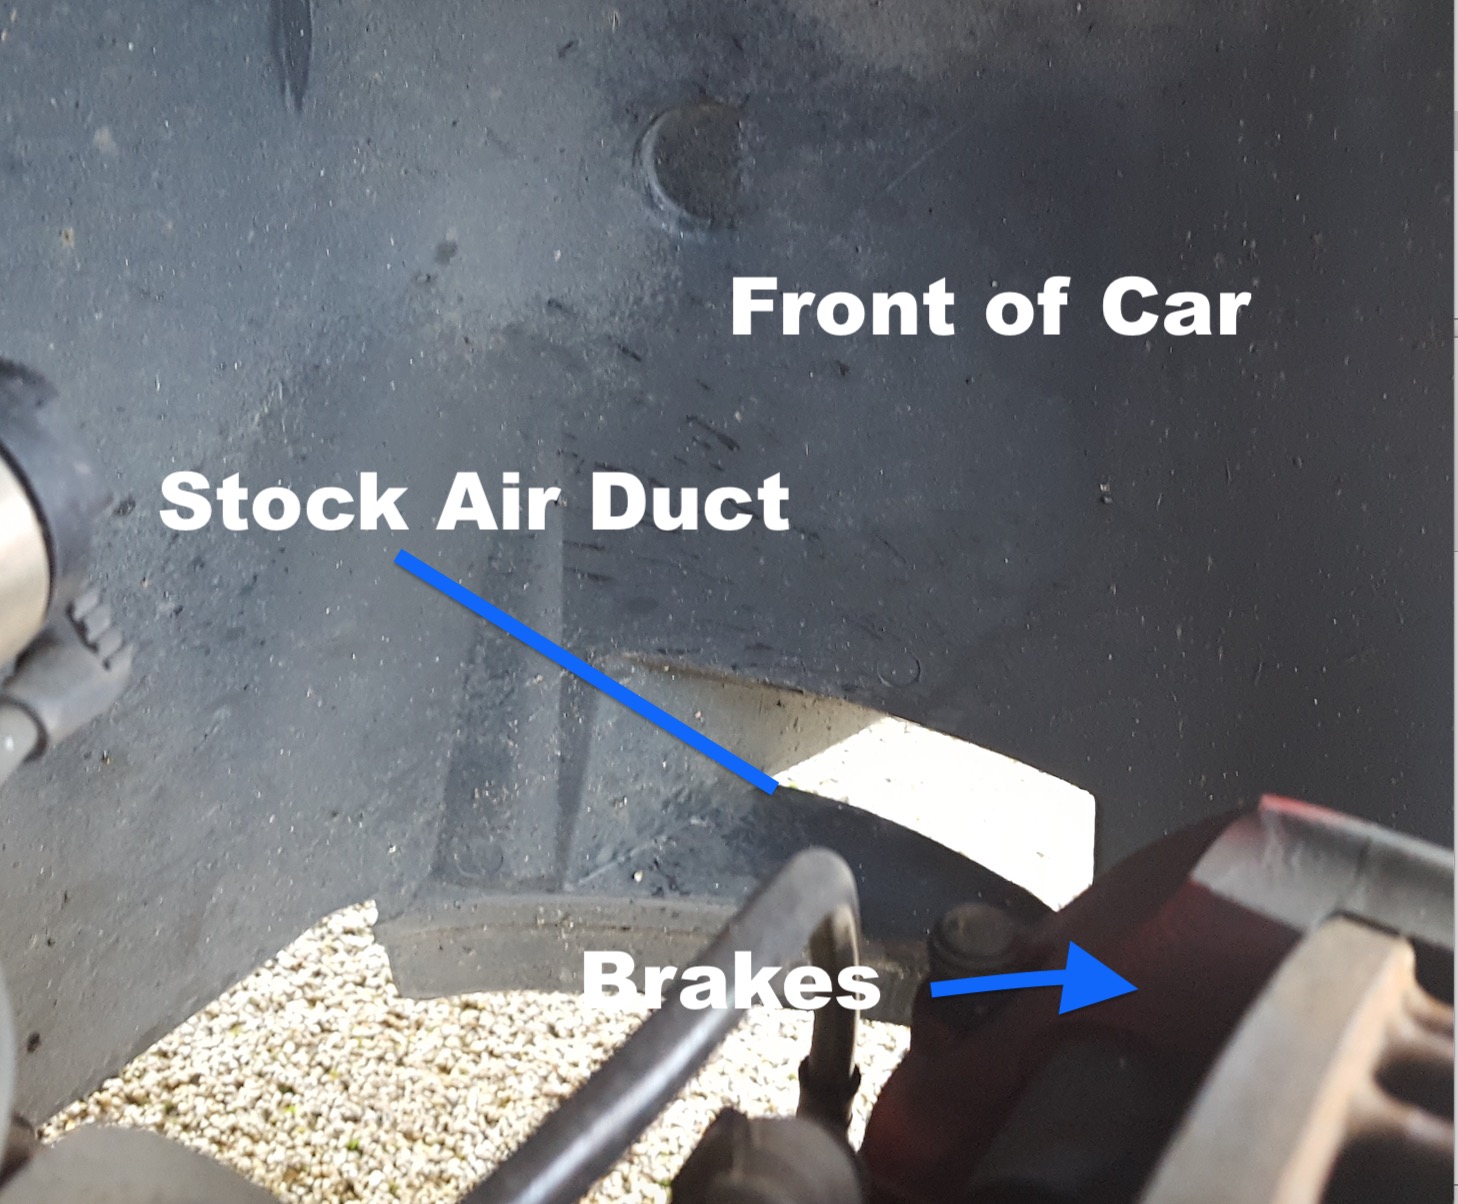
But on the stock cars is not directed at the Brakes, The point of this simple bit of kit it to flow air directly at the brake disk's
So what to do.
1/ Doing the usual process Jack the Car up and take the wheels off.
2/ Get the Plastic fitting ready to install
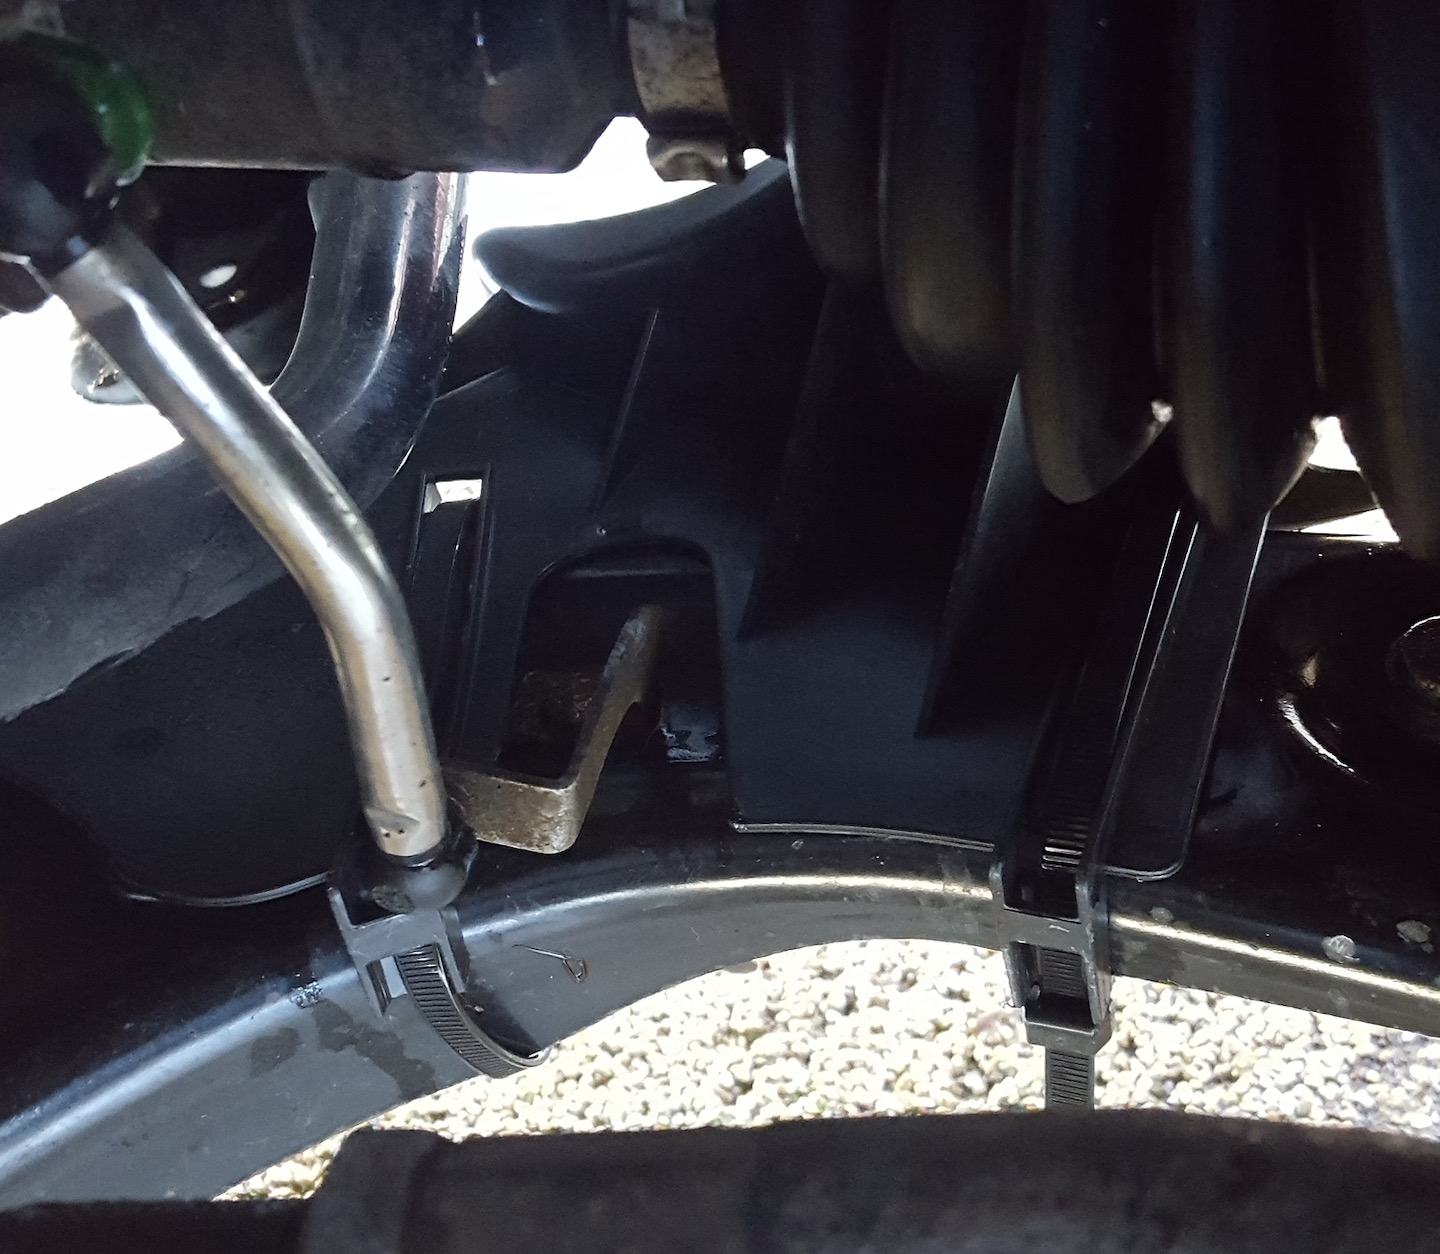
As you can see in the below picture the brake duct will point towards the incoming air flow and re-direct it to the disk. This is the Drivers side being fitted.
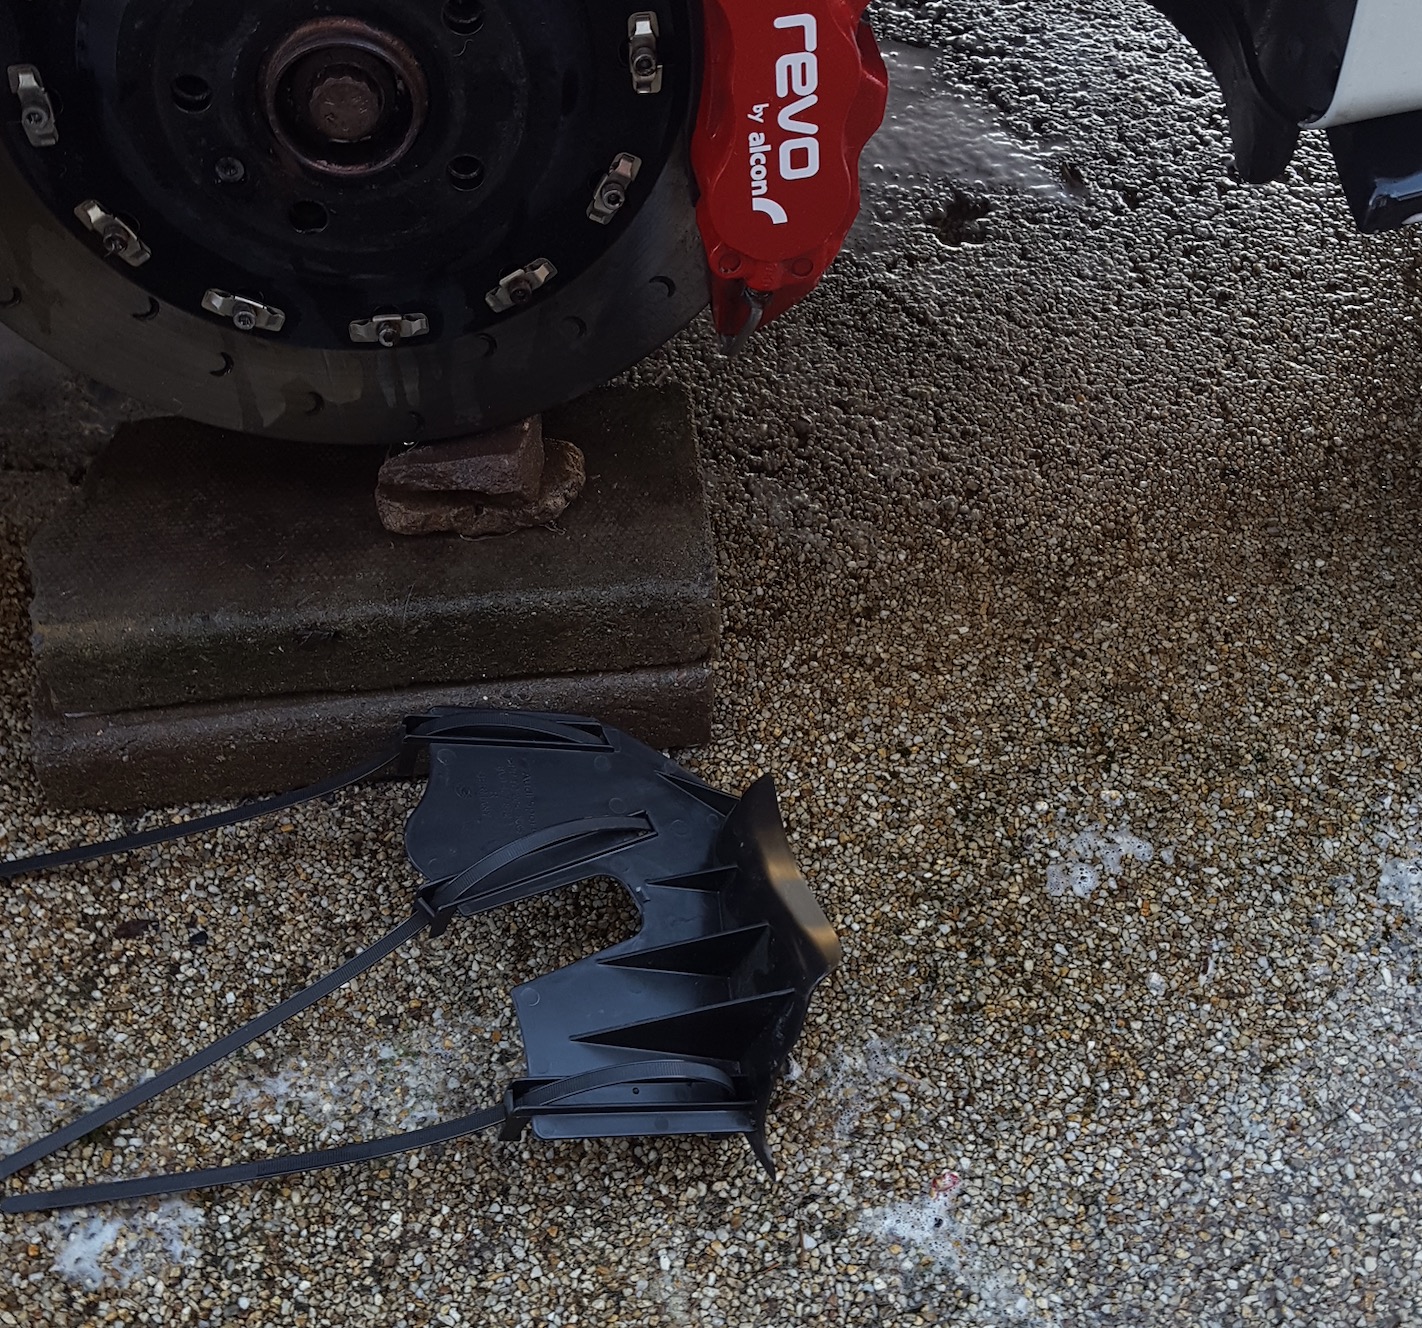
This simple item is help in place with 3 cable tie's .
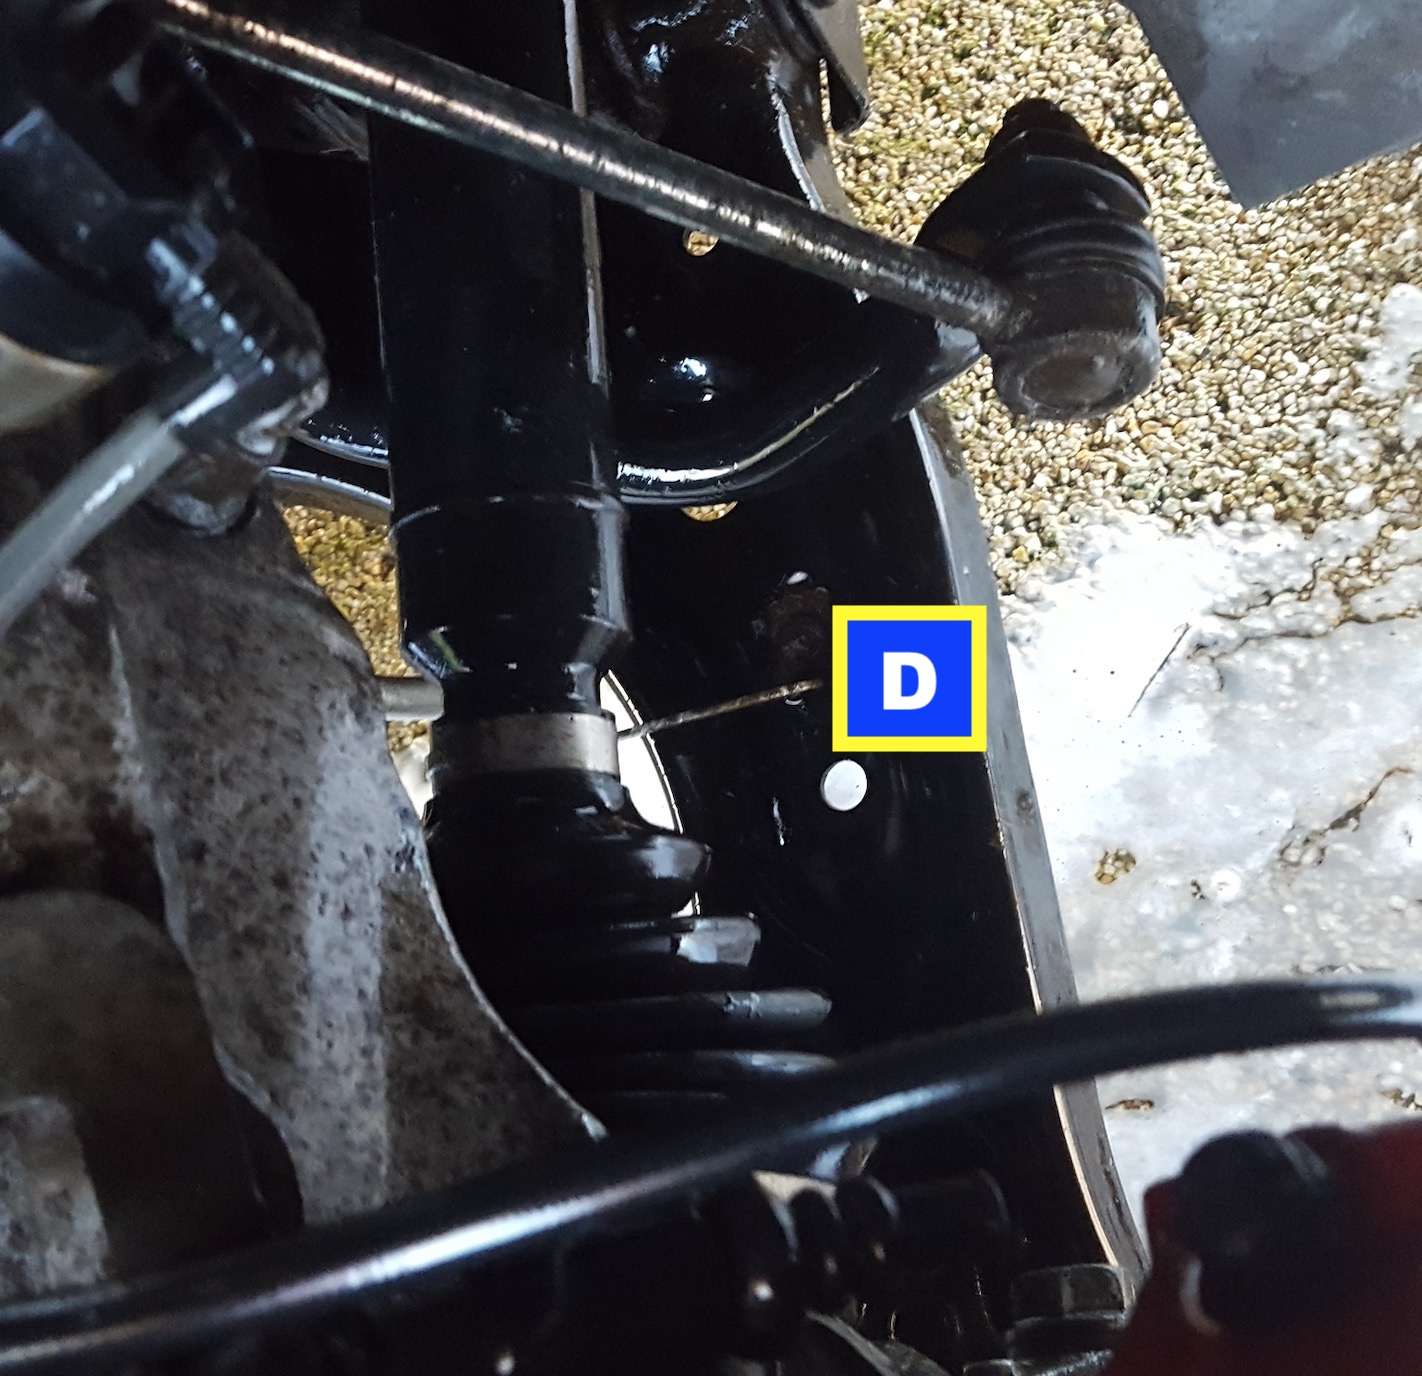
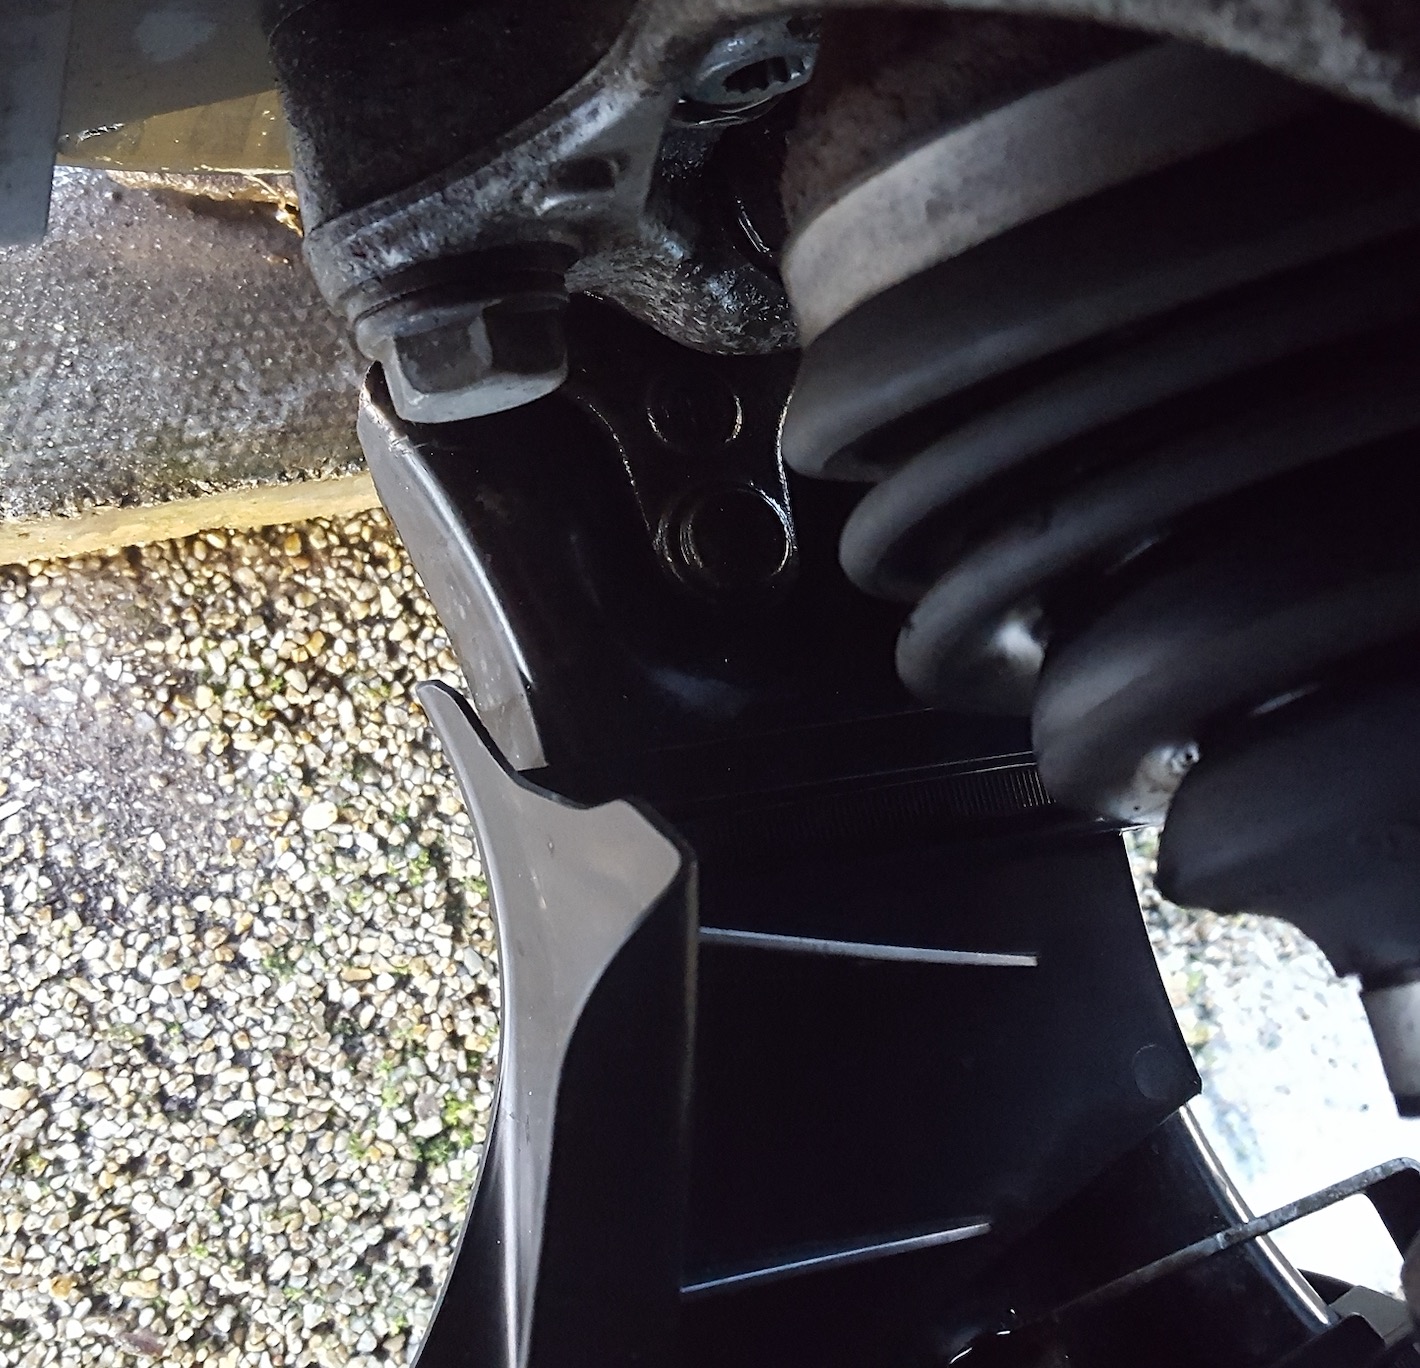
3/ Put you head over the disk's and you will see the following
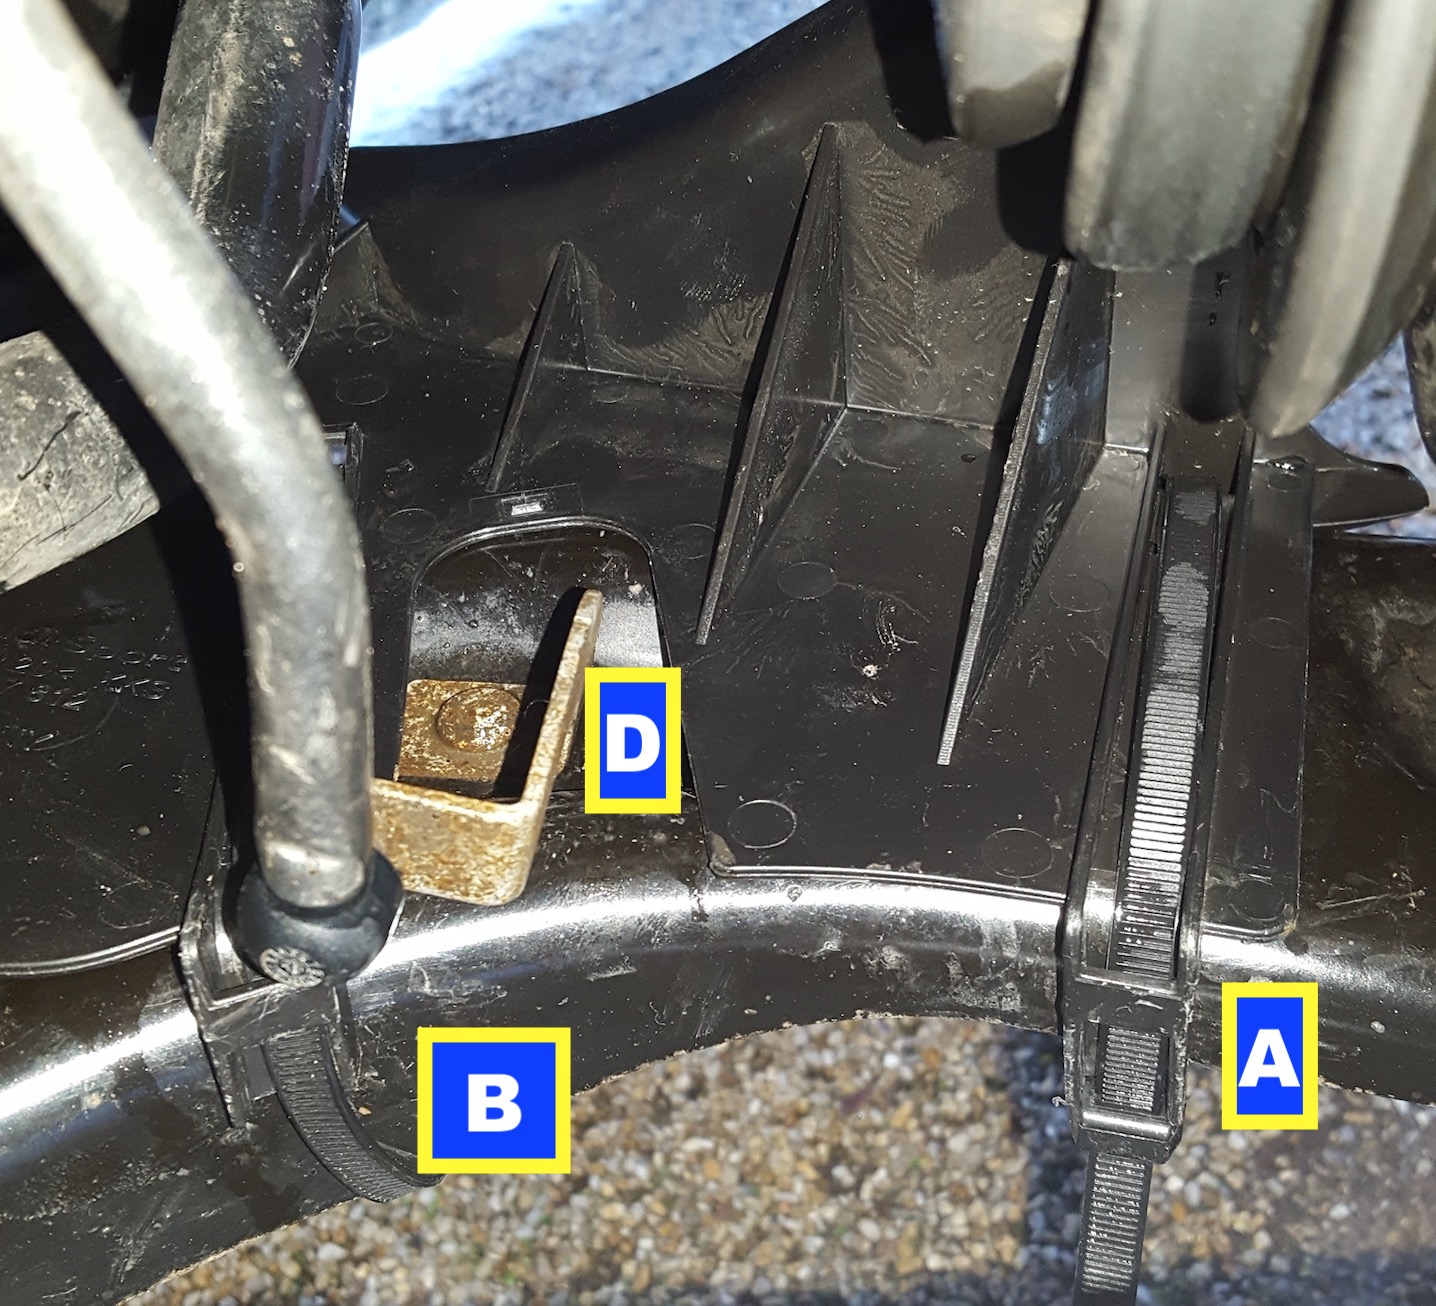
The area marked a D is in the way hence there being a cut out part that goes around it.
4/ Now you have to fiddle around getting the Duct on to the wishbone mount
As you can see in this picture along with the 3 cable ties you have three edges that go over the wishbone but only A actually clips in place the other two are just guides and keep the table ties taught.
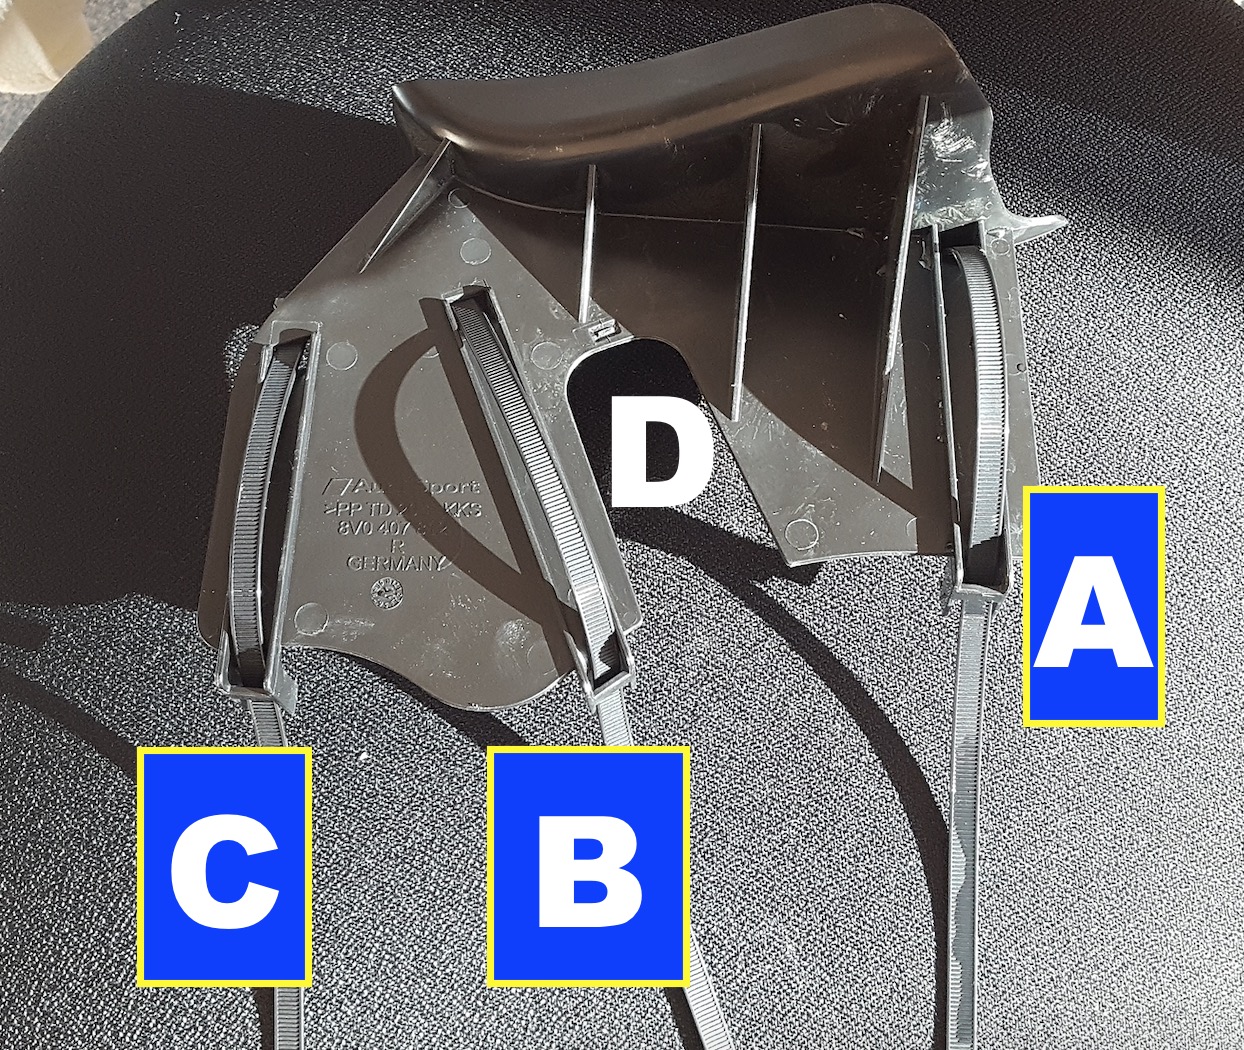
With the Duct upside down you can see all the clips that hold it in place.
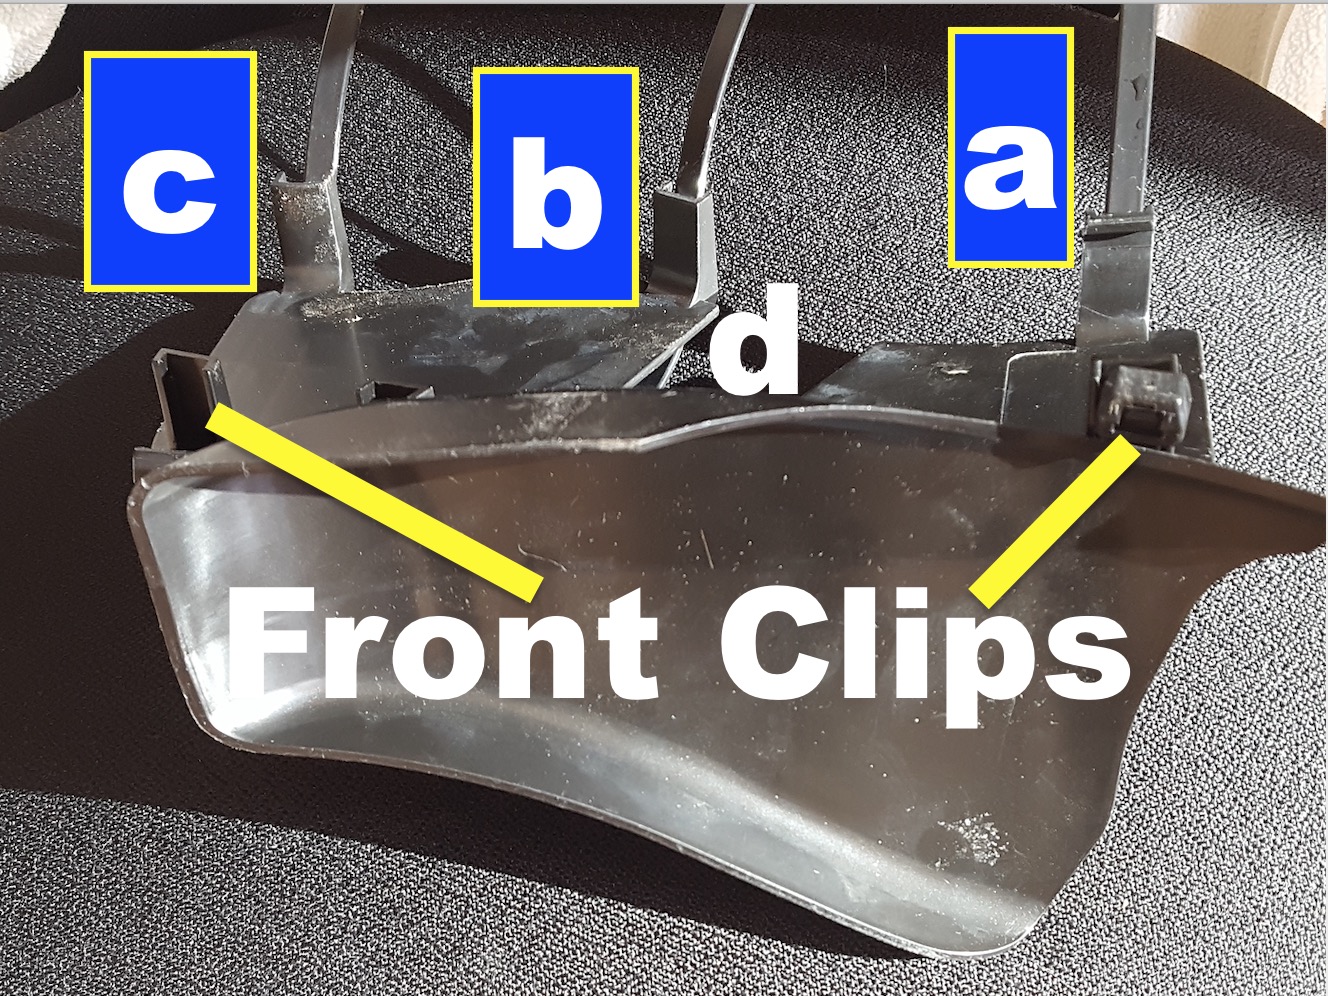
So all you have to do is lay the plastic duct on the Wishbone you will hear a firm click when you push bit A down but the rest do not they are just there as guides.
Once you have it in place and happy with it then using the cable ties just tighten it up as much as you can.
Job Done.
And here if the completed item from the rear
From the Top
From the Front (passenger side this time)

I have just been told some of the smaller brake systems may have issues with fowling on the plastic but its easy to trim. Also my understanding is the Golf R and Cupra both support this with no issues and i have it on my big brake kit with no issues.
Part Number
These are fitted as standard on the Audi Range and cost about £30-00 to buy.
There were no fitting instructions but its fairly easy to work out what to do and you don't need to be a mechanical wizard to do this.
Firstly a couple simple picture to show the point of these ducts
The air flow to cool the brakes comes from the front of the car and comes through a small duct in the front
But on the stock cars is not directed at the Brakes, The point of this simple bit of kit it to flow air directly at the brake disk's
So what to do.
1/ Doing the usual process Jack the Car up and take the wheels off.
2/ Get the Plastic fitting ready to install
As you can see in the below picture the brake duct will point towards the incoming air flow and re-direct it to the disk. This is the Drivers side being fitted.
This simple item is help in place with 3 cable tie's .
3/ Put you head over the disk's and you will see the following
The area marked a D is in the way hence there being a cut out part that goes around it.
4/ Now you have to fiddle around getting the Duct on to the wishbone mount
As you can see in this picture along with the 3 cable ties you have three edges that go over the wishbone but only A actually clips in place the other two are just guides and keep the table ties taught.
With the Duct upside down you can see all the clips that hold it in place.
So all you have to do is lay the plastic duct on the Wishbone you will hear a firm click when you push bit A down but the rest do not they are just there as guides.
Once you have it in place and happy with it then using the cable ties just tighten it up as much as you can.
Job Done.
And here if the completed item from the rear
From the Top
From the Front (passenger side this time)
