Leon Cupra Outer CV Joint removal / boot replacement

Status
Not open for further replies.

DPJ

...........
Dec 13, 2004
7,996
2
NN Yorks / Salento
www.seatcupra.net
Comments please on the following.

Normal warnings apply. Working on cars is dangerous etc. It's not my fault if anything is wrong in this thread and you die. or break something.......
 
Last edited:

DPJ

...........
Dec 13, 2004
7,996
2
NN Yorks / Salento
www.seatcupra.net
Outer CV Joint Removal / Boot Replacement. Seat Leon Cupra 1.8T

Essential
30mm 12 point socket
Long breaker Bar
13mm spanner.
Small allen key
Short extension.
Hammer
long M10 spline bit (if removing driveshaft)


Useful
External circlip pliers.
Retaining clip pliers.


CV Joint boot kit. (Contains plastic boot / wire clip / grease / thrust ring / concave spring washer/ large clip / small clip.)
3B 0 498 203 E on LC - LCR is probably the same.
New 12 point socket shouldered self-locking nut


Step 1
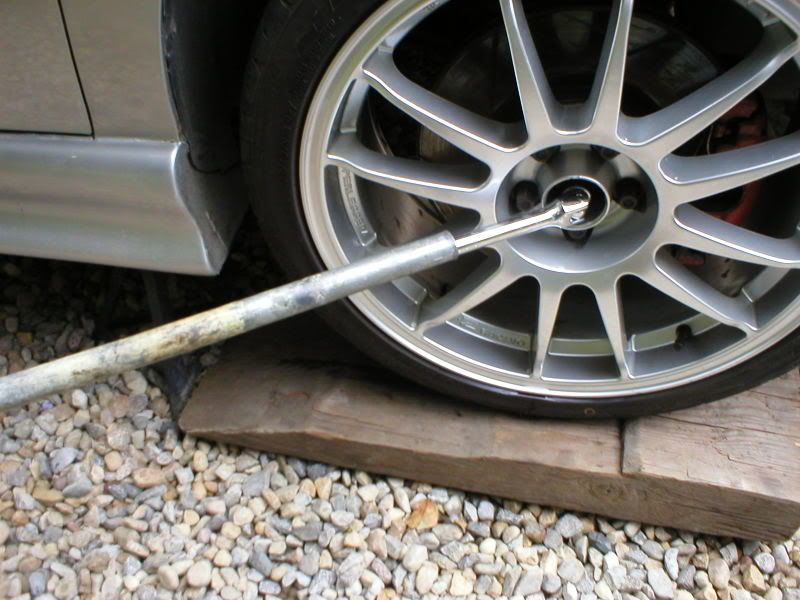
With the car still on the ground and in gear / handbrake on, remove the centre cap to the wheel to expose the centre nut. Using the 30mm socket on a long breaker bar, loosen the nut and unscrew (but do not remove) so that no threads are showing
Picture01.jpg


Step 2
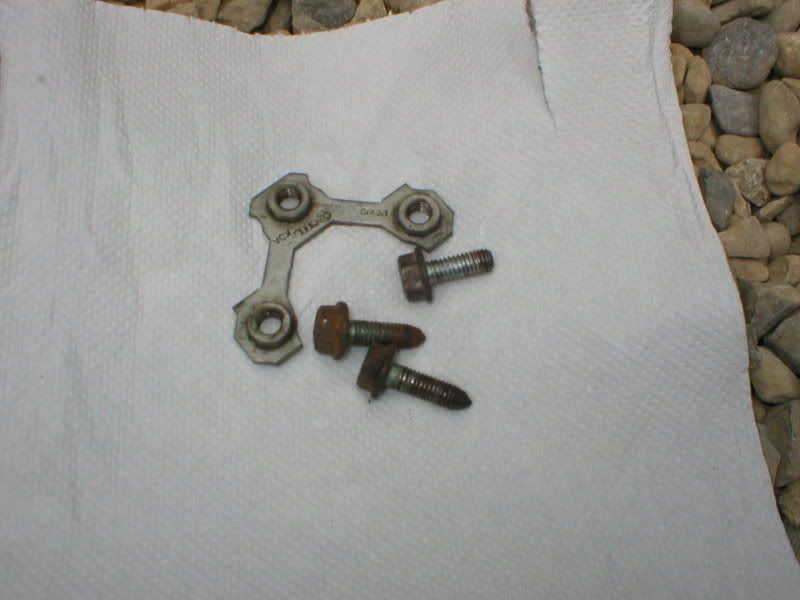
Jack the car up to lift the appropriate wheel off the ground. Support the car on axle stands. Remove wheel. At the end of the wishbone, there are three 13mm bolts securing the bottom ball joint flange. The bolts pass through wishbone and flange and secure into a bracket. Remove the three bolts and bracket, taking care not to knock the ball joint flange out of the end of the wishbone. Put a small allen key through the rearmost hole in the wishbone and flange. The following picture shows the bolts and bracket removed.
Picture02.jpg


Step 3
Using a hammer and a short extension, give the centre nut a few taps and the cv joint will pop backwards. You can now remove the nut. If you now pull hard on the brake calliper, the disc/hub assembly will pivot round and you should now be able to pull the cv joint (attached to the end of the driveshaft) out of the back.

Step 4. (optional)

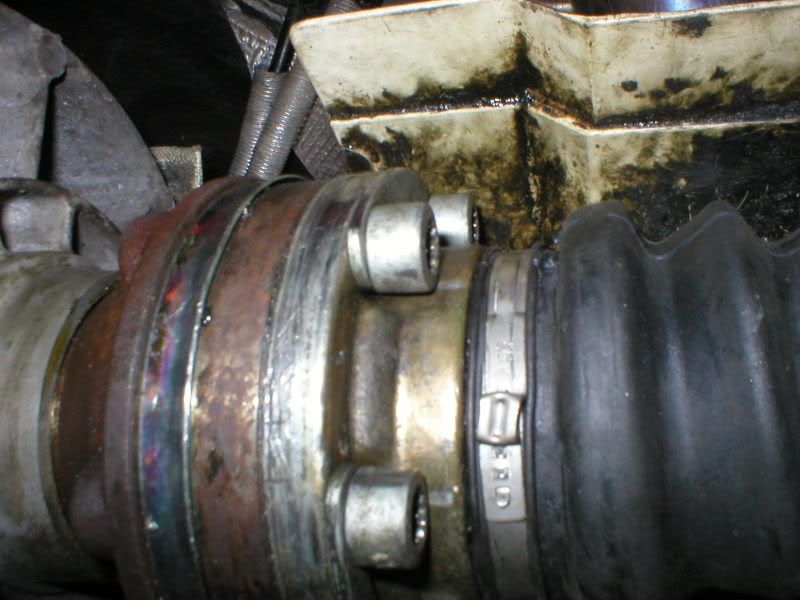
You may find it easier to work on the driveshaft if you remove it from the car. (But it is possible to remove the CV joint without doing so). There is another CV joint at the inboard end of the driveshaft and this is attached to the differential flange by 6 cap headed bolts.
Picture03.jpg

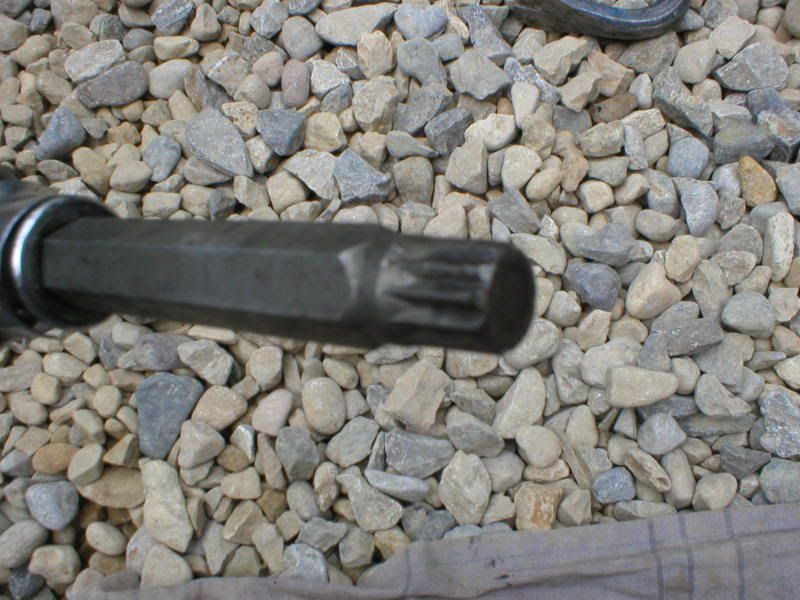
Undo the six bolts using a long M10 spline bit. (If these bolts are undone, I recommend replacing with new ones.)
Picture04.jpg

Once the bolts are undone, the driveshaft can be lowered and extracted from the inboard end.

Step 5.

****Note this step is a departure from usual advice - you are supposed to strike the outer part of the CV joint with a copper headed hammer whilst holding the splined end of the joint to remove the joint from the clip. See discussion on this at the end of the thread *****
Remove the two clips securing the outer cv joint boot and cut off the old boot. Place the driveshaft in a vice. Position a short extension carefully as shown in the next picture, so that the end is squarely touching the shoulder and nothing else.
Picture05.jpg

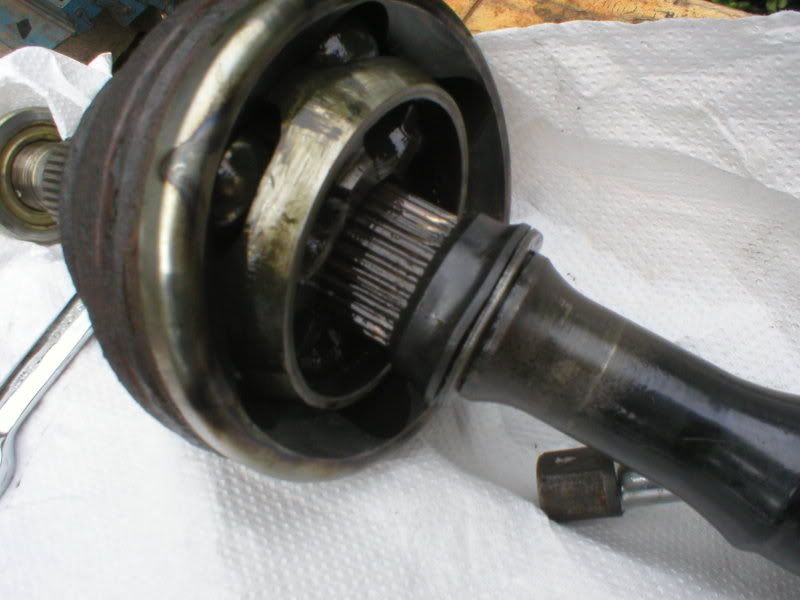
Hit the end of the extension hard with a hammer. The cv joint will move down the splines as shown.
Picture06.jpg

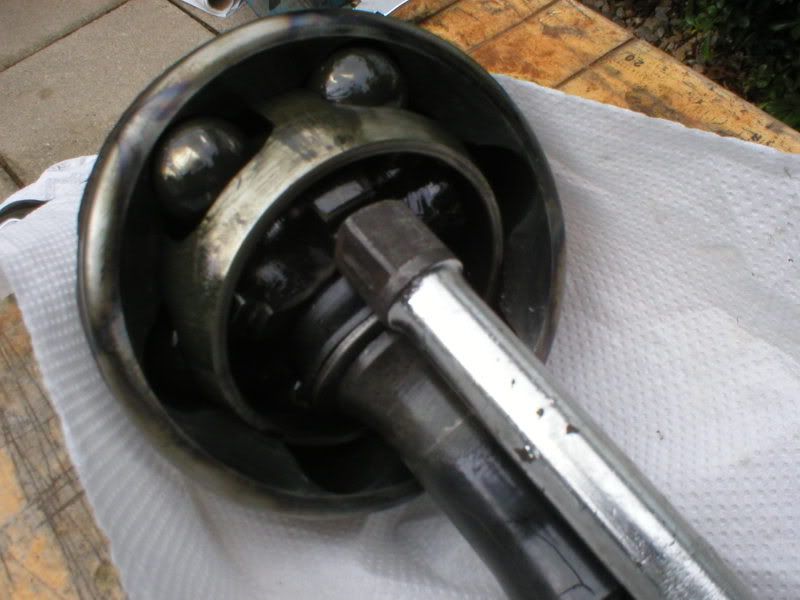
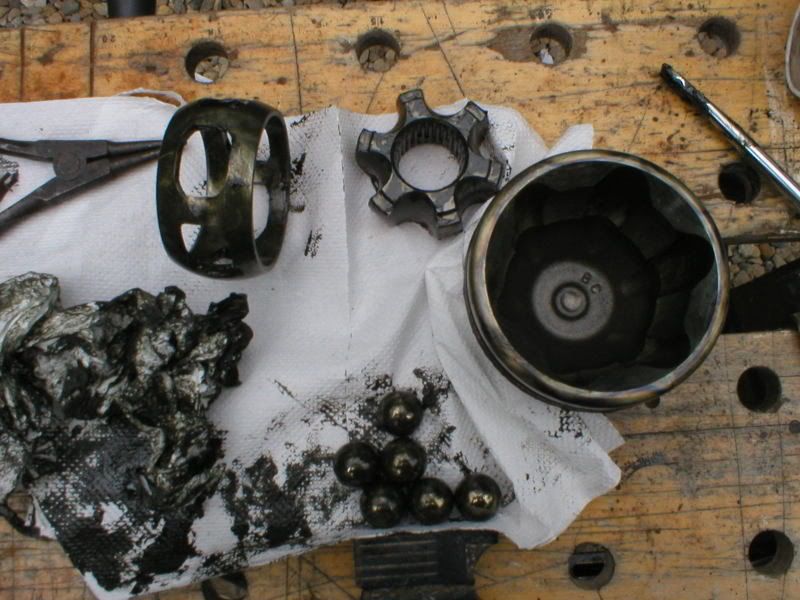
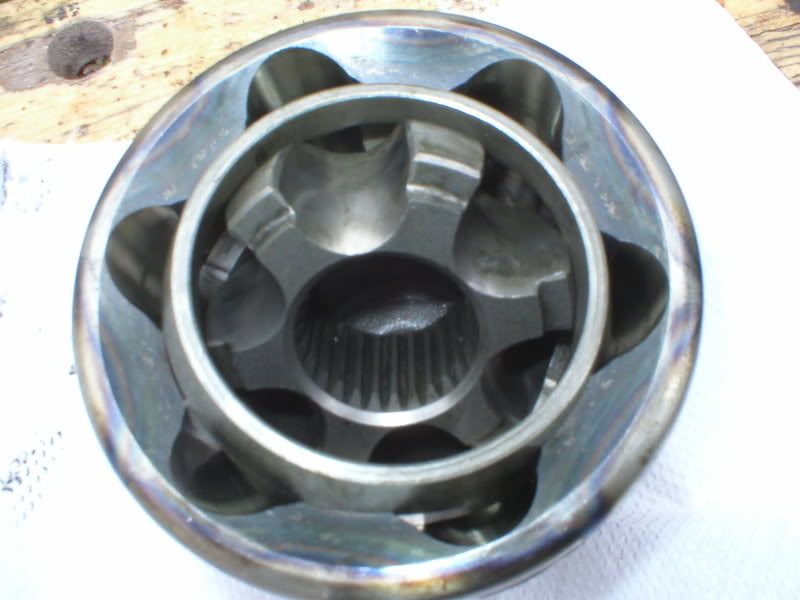
Remove the cv joint from the end of the driveshaft, noting that the wire clip is still in the groove near the end. If you are re-using the CV joint, work the joint round so that you can remove the six large ball bearings, then remove the circular cage and six-pointed inner section.
Picture07.jpg

Clean all the old grease off all the items. Inspect them for any noticeable wear or scratches.
 
Last edited:

DPJ

...........
Dec 13, 2004
7,996
2
NN Yorks / Salento
www.seatcupra.net
Step7
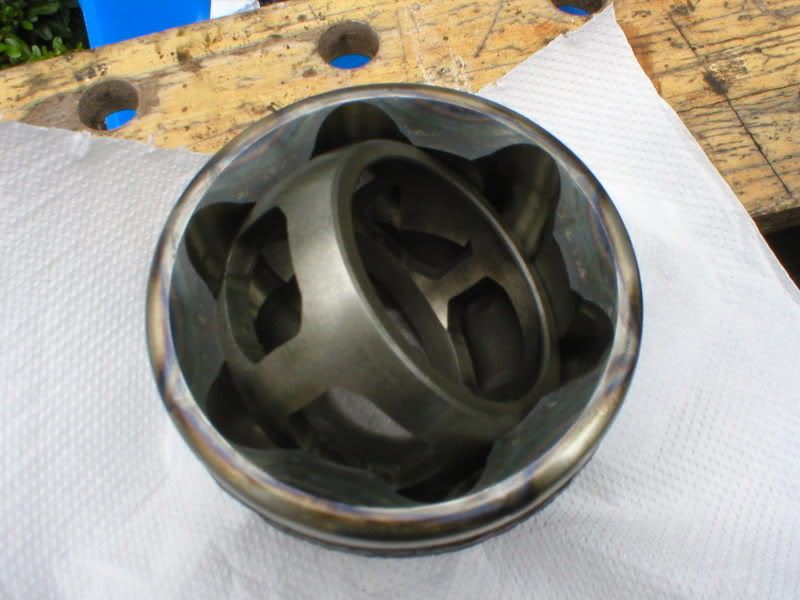
Reassemble the cv joint. Note that the circular bearing cage has a larger circular hole on one side. Place it into the joint smaller hole down.
Picture08.jpg

Now place the six-pointed inner section inside.
Picture09.jpg

Manipulate the inner sections so that both the smaller circular face of the cage and the stepped face of the six pointed section face upwards.
Start to insert the ball bearings.
Picture10.jpg

Picture11.jpg

Picture12.jpg

Check that the orientation of cage and six pointed sction has not changed, then pack the joint with all of the grease from the tube.

Step 8.

Remove the old wire clip from the driveshaft end, then fit the boot onto the end of the driveshaft.
Picture13.jpg

Fit the concave spring washer so that it cups towards the outer end of the driveshaft, then the thrust ring so that its smaller end is towards the outer end of the driveshaft.
Picture14.jpg

Picture15.jpg

Now fit the new wire clip to the end of the driveshaft so that it is tight in the groove.
Picture16.jpg


Step 9.
With the driveshaft upright, carefully place the cv joint on the end, ensuring it is on the splines. Put the old nut on the end of the cv joint to protect the threads. Strike the nut smartly and the cv joint will pop over the clip.
Picture17.jpg

Check that the joint is secure on the end of the driveshaft.
 
Last edited:

DPJ

...........
Dec 13, 2004
7,996
2
NN Yorks / Salento
www.seatcupra.net
Step 10
Fit the new clips over the new boot and secure. (Having the right tool helps).
Picture18.jpg

Picture19.jpg

Picture20.jpg


Step 11
Refit the driveshaft assembly, and put the cv joint through the hub. Put a new nut on and tighten a few threads only. Now align the inner coupling to the differential flange and secure 6 new bolts. Now torque all the 6 bolts to 40 NM (M8) or 70 NM (M10).

Step 12

Push the bottom ball joint flange into the end of the wishbone and align the mounting holes. Remove your small allen key. Refit the three bolts and their retaining bracket. The holes in the wishbone are oval. I recommend you push the bottom joint in so that each bolt is in its most inward position. (You should have 4-wheel alignment done after this). Torque each of the three bolts to 20Nm, then a further 90 degrees

Step 11

Hand tighten the centre CV joint nut then refit your wheel. Remove axle stands and lower the car to the ground.
Now tighten the hub nut .....
Note Haynes torque settings for the nut are:
Stage 1: tighten to 200Nm
Stage 2: Slacken by one half-turn
Stage 3: rotate wheel one half-turn
Stage 4: tighten to 50Nm
Stage 5: Angle tighten through 60 degrees

Picture21.jpg


Step12

Road test.
 
Last edited:

Neg.

Active Member
May 11, 2007
132
0
Bristol
cheers for the guide mate, got a feeling mines gone, so ill probs have a go in a week! Or I could be lazy and take it back to the dealer under 2nd hand warranty (done 700miles since ive had it!)

Top write up anyhow!
 

siren73

Guest
Great work, I'm assuming you remebered to grease up the CV joint, otherwise it would have been a very short Road Test. ;)
 

siren73

Guest
Ok, you got me. However, it should be noted that it is not advisable to remove the CV joint by hitting the inner race as you did in step 5. The correct procedure is to vice the drive shaft and firmly stike the outer cage, preferably with a Copper Hammer. Also, I would not have reconnected the joint while the axle was standing upright on a gravel path. Never the less, still a very good guide, I just like to nit-pick LOL.
 

siren73

Guest
Ok Dave, this is done to avoid damaging the internal CV joint components. To remove the CV joint by hitting the inner cage with a socket extension was downright foolish. Please don't spoil all your good work now !!!!!!!!!!!!!!
 

MarkE

Acceptable in the 80s
Jul 20, 2003
1,705
0
Lancaster
www.markeaston.org
To remove the CV joint by hitting the inner cage with a socket extension was downright foolish.

Hitting the inner cage transmits the force directly to the joint that you need to break. Applying force anywhere else will put unnecessary strain on the bearing elements. Have to agree with DPJ on this one.
 

siren73

Guest
You disagree do you ? Did you not start another topic begging for help on how to remove the joint ?????
You did not even in know which direction to hit the thing, now all of a sudden you're a friggin expert. MarkE is talking through his proverbial, you hit anywhere but the housing and you may damage the cage, race or ball bearings then its £40 for a new CV joint. I guess it a case of a little knowledge is a bad thing.
 

DPJ

...........
Dec 13, 2004
7,996
2
NN Yorks / Salento
www.seatcupra.net
Hitting the inner cage transmits the force directly to the joint that you need to break. Applying force anywhere else will put unnecessary strain on the bearing elements. Have to agree with DPJ on this one.

Cheers, Mark. I was coming back to post exactly the same thing.

No I'm not an expert, but I posted this thread having carefully studied the dissembled joint.

Smacking away at the outer part of the joint is an unscientific way of applying the force required to pop the inner race over the clip. You need far less force doing as I suggest.
 
  • Like
Reactions: Dedrevil

Wilko

Badge snob
nice guide dave.
Got a funny clunking coming from my drivetrain at slow speeds, so I may have to follow it soon.
You can get the shaft out without undoing the bottom ball joint, by applying full lock (front of wheel as far out as possible). It's more difficult, but no need to get an alignment done after.

Totaly agree with the way you split the joint. Apart from using a hardened steel, rather than soft drift. But us diy ers have to make do with what we have:D
 

dholdi

Active Member
Jul 3, 2008
931
4
Preston
You disagree do you ? Did you not start another topic begging for help on how to remove the joint ?????
You did not even in know which direction to hit the thing, now all of a sudden you're a friggin expert. MarkE is talking through his proverbial, you hit anywhere but the housing and you may damage the cage, race or ball bearings then its £40 for a new CV joint. I guess it a case of a little knowledge is a bad thing.

How to win friends ........
Your earlier post mentions avoiding damage to the internal components of the joint, your method of hitting the outer cage relies on transmitting the force through all the components you are trying to protect. Carefully applying force to the inner seems the best engineering solution to me.
 

siren73

Guest
OK folks, 17 years in a VAG garage says i'm right. If you want to hit the cage with a socket extension, good luck.

WARNING WARNING !!!!!!!!!!!!

TO ALL OTHER READERS, ONLY HIT THE OUTER HOUSING TO REMOVE CV JOINT, IT SHOULD SLIDE OFF WITH A SHARP HIT (COPPER HAMMER IF YOU HAVE ONE). HITTING THE CAGE OR THE RACE TO REMOVE THE CV JOINT MAY CAUSE DAMAGE ££££.

listen to the Physicists talking about angle forces or do it the right way. Don't belive me ? search 'youtube' for 'cv boot' or 'cv joint'

Job done.
 
Status
Not open for further replies.