
Well, as the weather was sort of 'nice' today in Essex I thought I'd start on the mission of the Cupra R conversion. I thought I'd put together a proper guide with pics as no one seems to have actually put up any useful info !
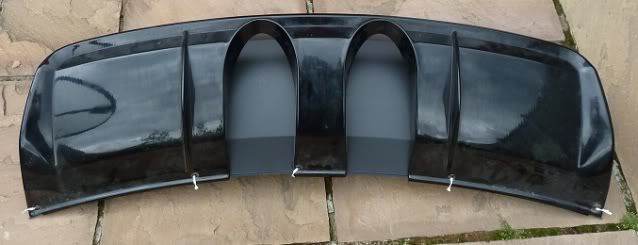
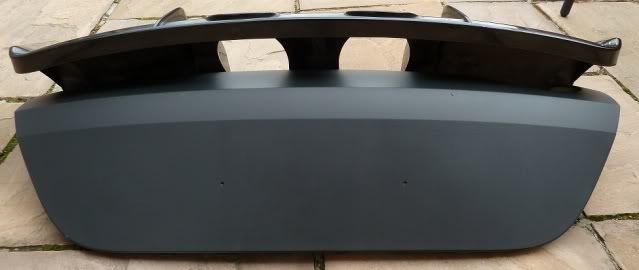
The new spare valence arrived at the dealer the other day, and the second hand Cupra R rear bottom part came Friday at work.
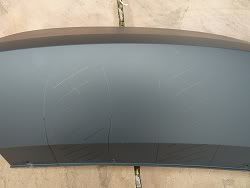
Now as far as I'm aware there isn't any template for cutting the rear FR/Cupra valence, so out came the marker pen and a couple of new stanley blades

Simple job to lay the 'R' part over the new valence
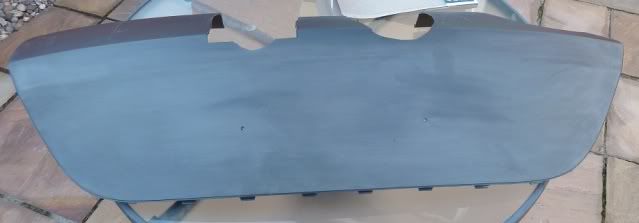
The plastic is quite tough, so if you have a dremel then it will be MUCH easier. I cut two rough holes then enlarged them as necessary, not massively neat but as I'm going to seal it all up from behind I wasn't fussed !

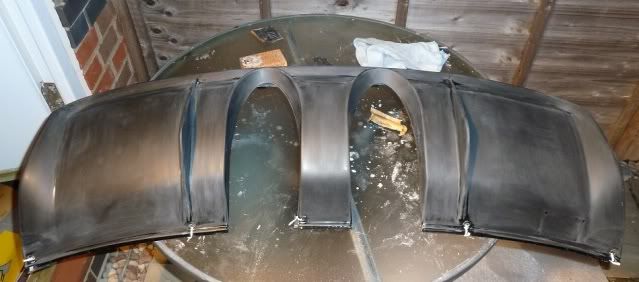
Then I spent ages sanding down the upper valence so it completely smooth, as I'm having the whole rear painted white. Took ages to get rid of the rough texture, but some 600 grade wet and dry sorted it !
Next stage is to key up the lower part and then get it bonded onto the upper half. I'll then give it to the bodyshop to paint for me.
Ordered the rear box from Dave @ Sera Saturday, so the rear box should be here during the week.
I'll post up some more pics of when I remove the original valence and also when we cut off the 'old' rear box.
Andy
21/6/11
OK, well spent all evening keying up the bottom part of the valence ready to primer up, bit of a mission due to loads of little angles etc, but its coming along nicely. Still a little bit more rubbing down to do on the very ends and leading top edge tomorrow / Thursday. Must go get some more 600grade wet and dry
24/6/11
Big thanks goes to Dave @ Sere for the super fast delivery of the backbox.
Even though I have a trade account with Remus in the UK, the Cupra R box is made especially by Remus for Seat, so I was a little 'annoyed' that I couldn't buy it from Remus UK ! Well Dave managed to sort out the proper 'Seat' part for me !
Build quality is fine, I have seen better and I've certainly seen a lot worse though. The exhaust comes with full fitting instructions on how to cut the rear valence/bumper assembly with a 3 page printout of diagrams showing where to cut the original exhaust and all of the bumper assembly.
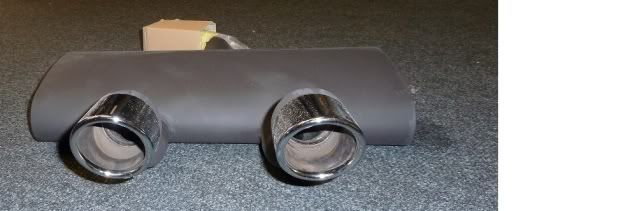

For those of you wondering if I've had the end tips gold plated - the simple answer is NO !!! Its just the lighting in our warehouse that makes it look like that ! However I'm toying with having the tips painted gloss black as a contrast to the bumper all being white!

The new spare valence arrived at the dealer the other day, and the second hand Cupra R rear bottom part came Friday at work.
Now as far as I'm aware there isn't any template for cutting the rear FR/Cupra valence, so out came the marker pen and a couple of new stanley blades
Simple job to lay the 'R' part over the new valence
The plastic is quite tough, so if you have a dremel then it will be MUCH easier. I cut two rough holes then enlarged them as necessary, not massively neat but as I'm going to seal it all up from behind I wasn't fussed !
Then I spent ages sanding down the upper valence so it completely smooth, as I'm having the whole rear painted white. Took ages to get rid of the rough texture, but some 600 grade wet and dry sorted it !
Next stage is to key up the lower part and then get it bonded onto the upper half. I'll then give it to the bodyshop to paint for me.
Ordered the rear box from Dave @ Sera Saturday, so the rear box should be here during the week.
I'll post up some more pics of when I remove the original valence and also when we cut off the 'old' rear box.
Andy
21/6/11
OK, well spent all evening keying up the bottom part of the valence ready to primer up, bit of a mission due to loads of little angles etc, but its coming along nicely. Still a little bit more rubbing down to do on the very ends and leading top edge tomorrow / Thursday. Must go get some more 600grade wet and dry
24/6/11
Big thanks goes to Dave @ Sere for the super fast delivery of the backbox.
Even though I have a trade account with Remus in the UK, the Cupra R box is made especially by Remus for Seat, so I was a little 'annoyed' that I couldn't buy it from Remus UK ! Well Dave managed to sort out the proper 'Seat' part for me !
Build quality is fine, I have seen better and I've certainly seen a lot worse though. The exhaust comes with full fitting instructions on how to cut the rear valence/bumper assembly with a 3 page printout of diagrams showing where to cut the original exhaust and all of the bumper assembly.
For those of you wondering if I've had the end tips gold plated - the simple answer is NO !!! Its just the lighting in our warehouse that makes it look like that ! However I'm toying with having the tips painted gloss black as a contrast to the bumper all being white!
Last edited:

")