well im sure we have a sticky somewhere around here explaining exactly how to wire up a sub / amp off the standard HU. well below is how i have done it and im pretty sure how everyone else has.
if i have missed something out then pm and i will add it in. DONT POST IN THIS THREAD.
well here goes nothing.
i hope this lot from here on helps you out a bit, please contact me in you need any pictures or more advice. and if you need a chat when doing the wiring then ask for my mobile number and we can have a chat
-----------------------------------------------------------------------
i cheated when wiring in my amp just to let you know.
i will dop a step by step guide here then a more advanced chat on each section lower down.
1)buy all the stuff you think you will need.
2)wire in the power cable from engine bay to car
3)remove the glove box
4)remove plastic tray
5)cabling
6)removing the HU
7)find another source of REM if step 6 is not for you.
8)removing side trim
9)rear door card
10)help with wiring in
11)wiring in the power to the boot
12)grounding point
13) signal input to amp
1) buy:
power cable roughly 1.5 x the length of your car
small cable for rem around the same length as the power cable.
2 or 3 o ring connectors, see what size you will need with regard to battery connectors and grounding points.
about 30 cable ties (optional)
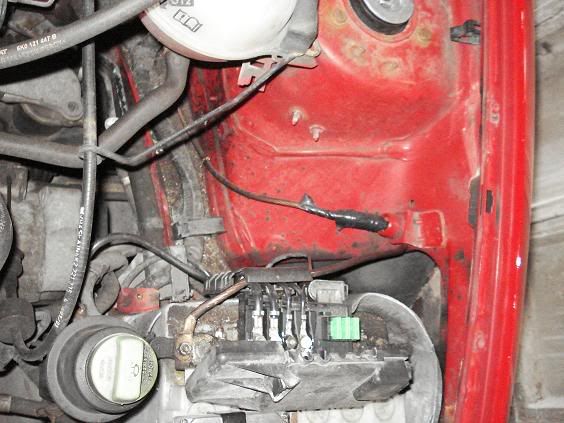
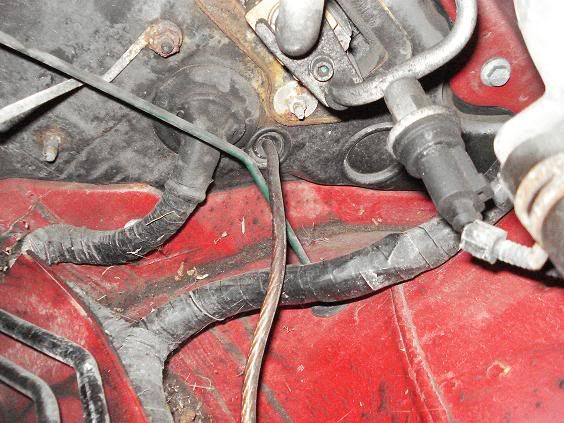
2) start fitting the power cable. start in the engine bay, and look at the battery, look towards the bulk head and about a foot down there will be a rubber grommet about the size of a 2 pound coin. if you pull this out and make a small hole in the centre of it. (make it smaller than the power cable so it is hard to get through)
push most of the cable through you have left enough to get the battery.
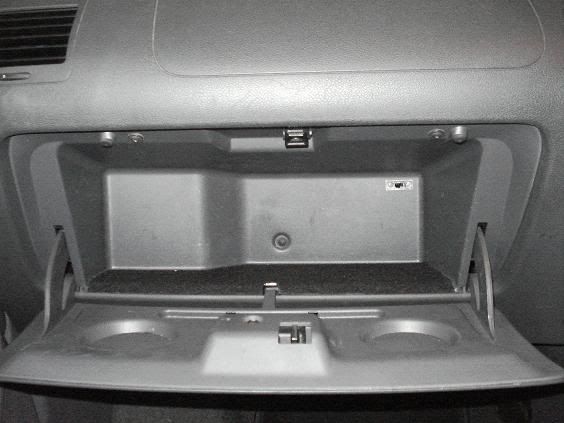
3) go in to the car and remove the glove box, there should be about 4 or 5 screws to remove it (its not too difficult) but dont remove the screw that is holding the catch in at the top.
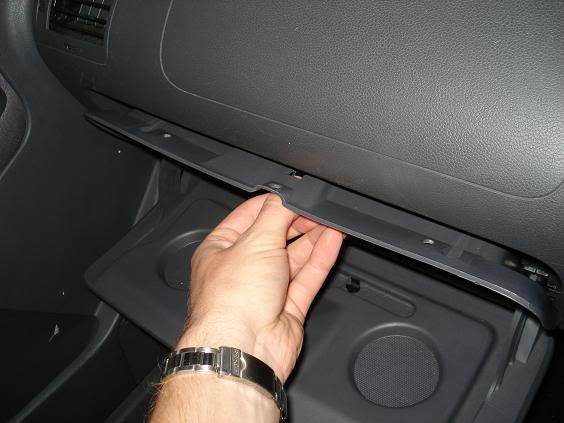
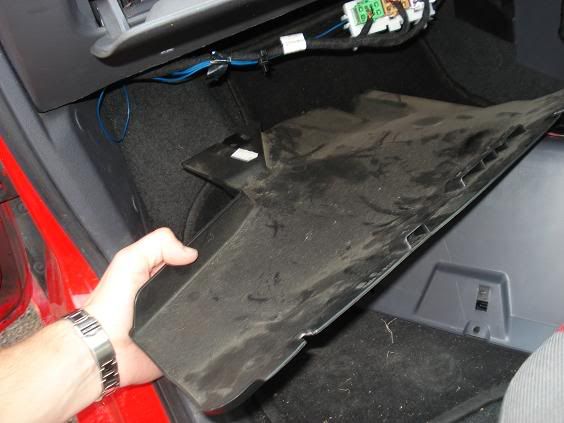
4) remove the plastic plate underneath the glove box (above the passangers feet) by removing the two screws that hold it in place. remove the plastic white block that is attached to it (try not break it).
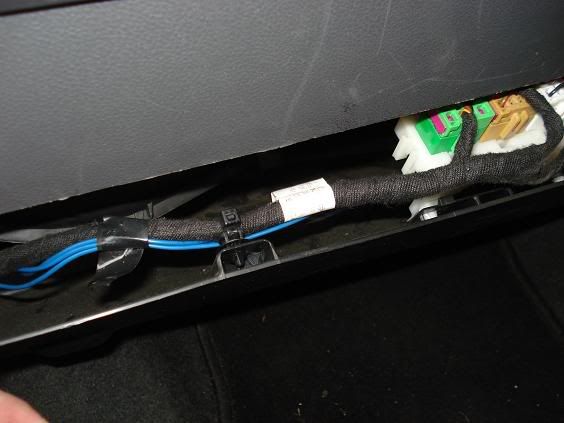
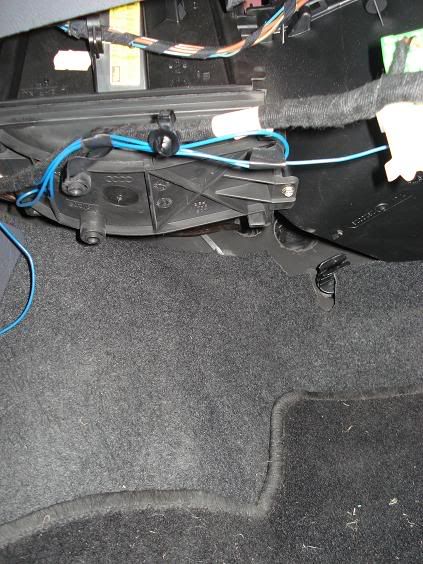
5) you should now see the rest of the power cable that you have pushed through the bulk head from engine bay in to the car. from here pull what you can through and leave it on the floor.
6) if you are going to wire up the REM to the HU then read this, if not skip to step 7.
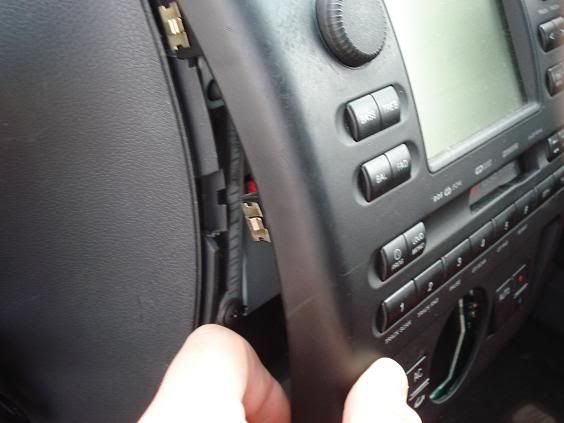
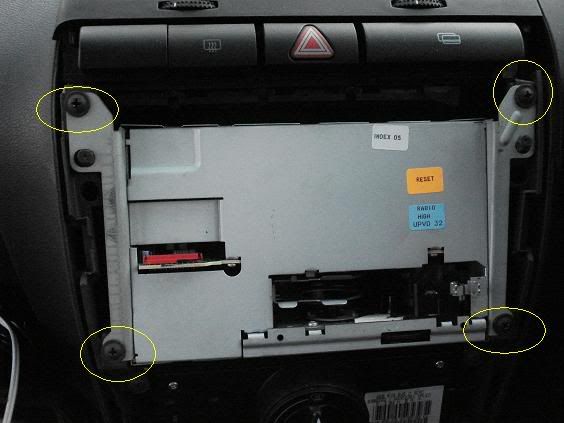
undo the 2 screws under neath the HU (left and right side at the front just underneath the facia)
the HU faci should then slowly prize off.
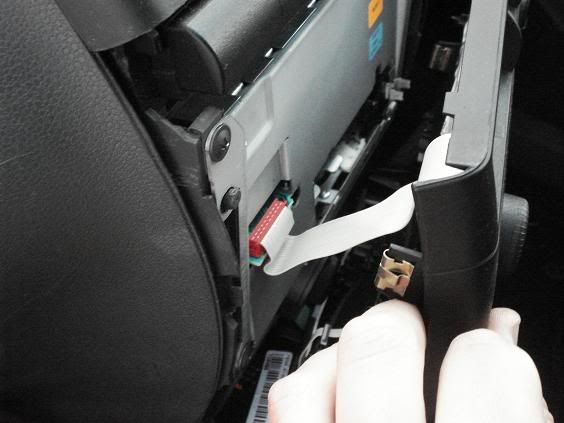
carefull at this point as there is a ribbon cable attached from the facia to the HU behind. detach this and put the facia to one side. (i have not removed the HU but i will give you the best account i can out of memory from other cars) undo maybe 2 screws and then the bottom part of the HU should pull out, you may need some HU pins to pull it out.
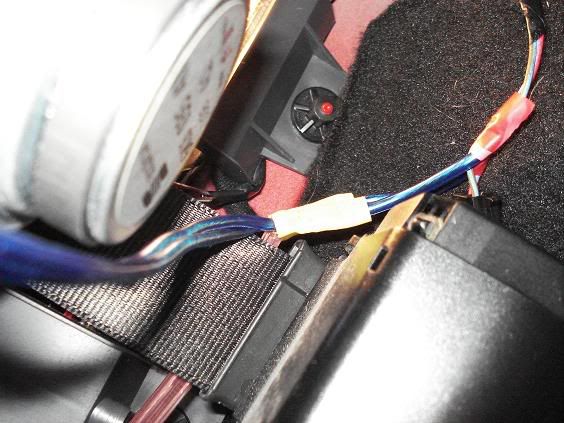
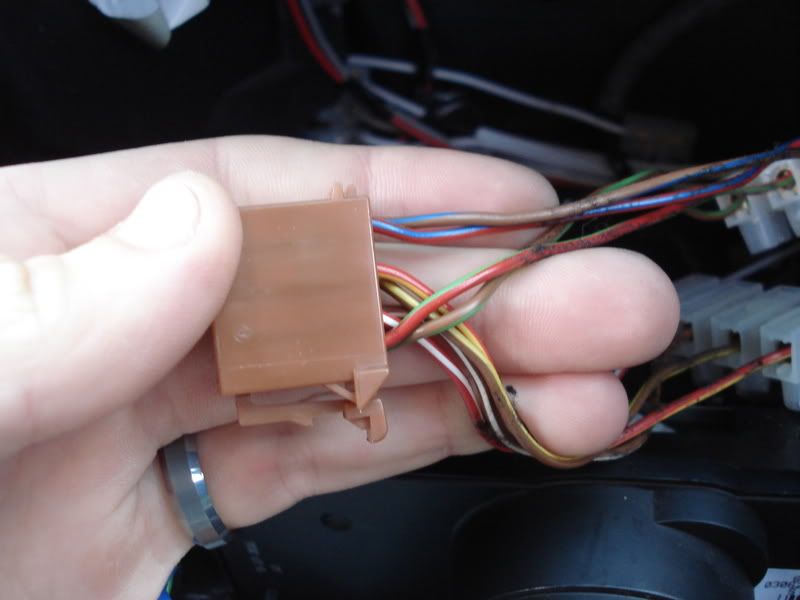
once this is done there will be a serise of conectors at the back on the bottom left hand side. the black ISO connector sould have numbers on it in small print, if not then look for the ONLY BLACK WIRE. pair in to this by splicing or soldering. attach the REM cable to the BLACK WIRE then feed it around to the passanger foot well.
put everything back to how it was (regarding the HU and facia)
7)
this way ONLY TURNS ON THE AMP WHEN THE IGNITION IS ON.!
other way of doing it is a bit more of a guessing game, get some one to turn the ignition on and off while you hold a multi metre over an earth and another colour. when ignition is off you want to see 0v, but when turned on you want to be seeing 12v. (will be around 12.4v)
from this cable pair off and this will feed your REM.
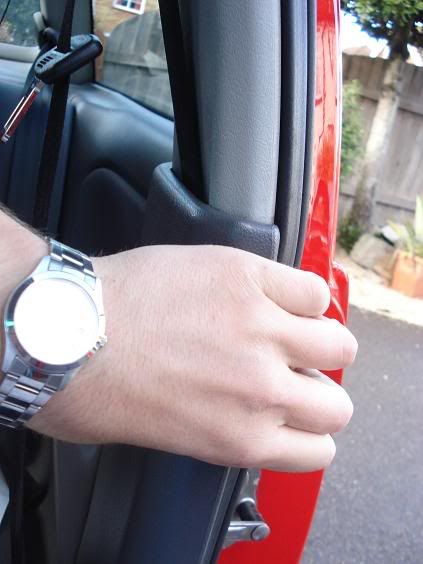
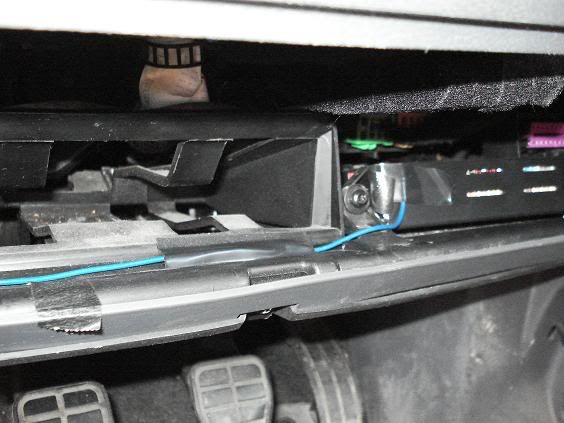
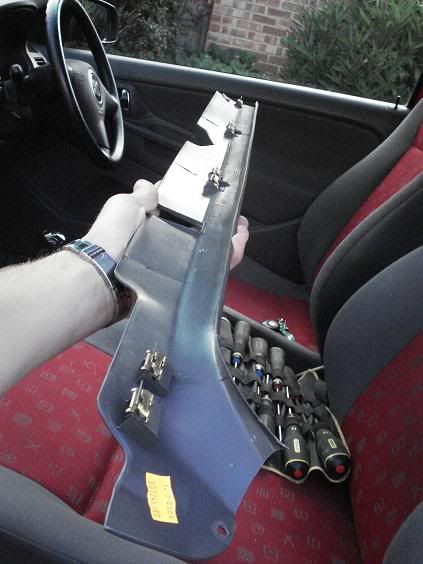
8) now from here you should have an REM cable and a power cable in the well of the passanger foot area. i found it easier if i taped the two cables together every 150mm with a small bit of electrical tape to keep the wires togetheron the passanger side there will be a greyish trim running along by the sill. remove ALL the screws.
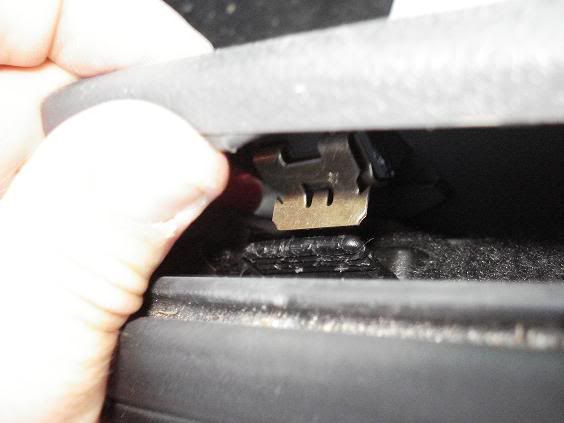
from here you can either grab hold and sharply pull up, or you can carefully push the plastic in towards the seat and get a flat bladed screwdriver and prize the metal hooks off the plastic support, again carefull not to break anything.
from here once these are removed, wire in the power cable with the factory loom, (using the cable ties to hold them in).
now the slightly tricky bit!!!
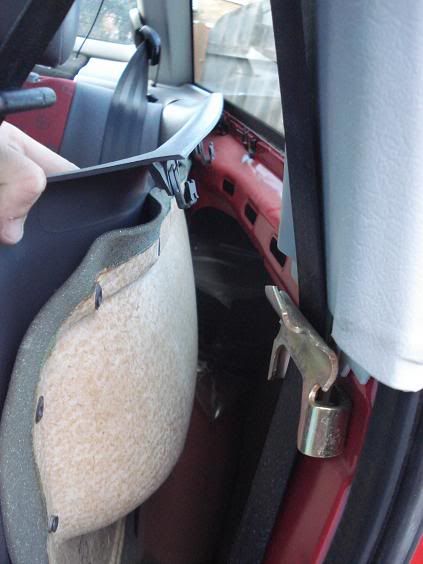
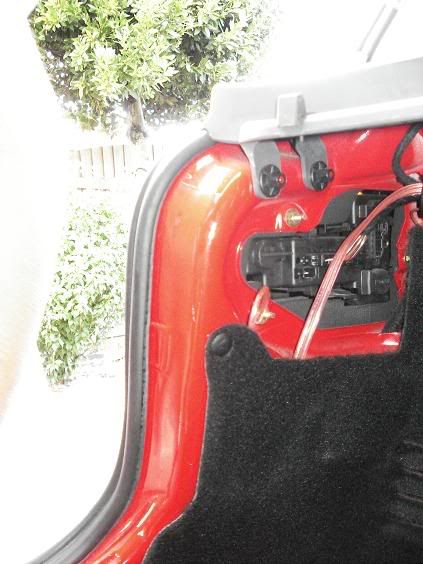
9) go in to the boot and look to the left hand side, right at the top where the seat belt ankor is. you will see a small loom of cable going in through a hole around here running towards the rear passanger side passanger. this is where the power cable is going to come out of!
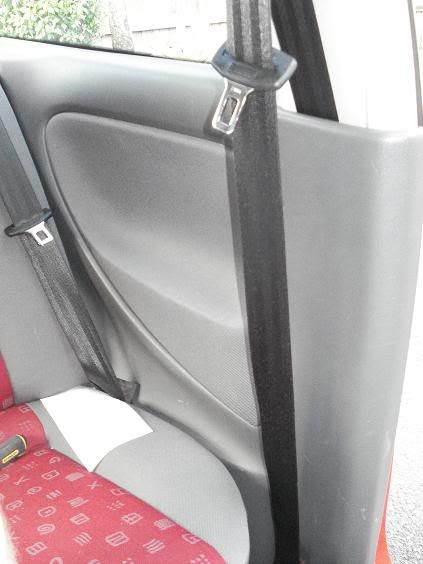
slide the passanger seat right forward and play about the rear passanger door card. unfortunatly to compleatly remove the door card you have to remove the seat too. dont bother unless your happy with doing that.
i just pulled the top of the door card off and kinda bent it over, and put my hand down between the door skin and the door card. , you will see the loom going up towards where i mentioned earlier.
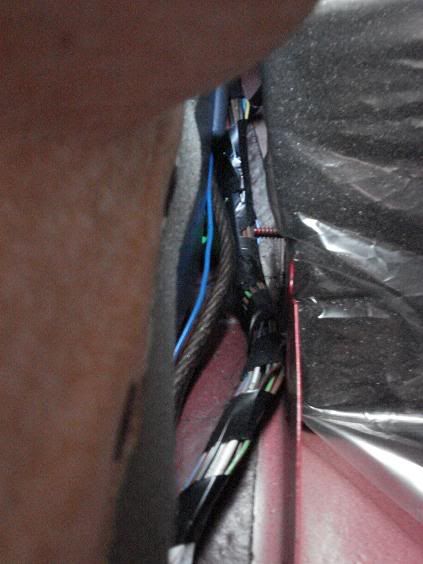
10) if you have metal tape (used for wiring) this is very helpfull at this point, if you dont have this use a coat hanger but becarfull of the door skin!!!! it is very thin.
poke this through the hole from the boot in to where the rear passanger sits then tape the power and rem to it then pull the hanger back through and your power cable and REM are now in the boot!
11) there are many ways of getting the rem and power to the bottom of the boot.
the easiest is wire it along the top where the standard loom is then wire it either under the carpet or between the skins of the boot (behind the light cluster going down)
12) now both cables are in your boot ready for instalation of an amp. for a grounding point i used the stud where the spare wheel is kept as this is already exposed metal and is a good earth point, just make sure you get a decent connection of metal to metal or you will suffer gounding problems. andother place is to use an existing bolt somewhere in the boot.
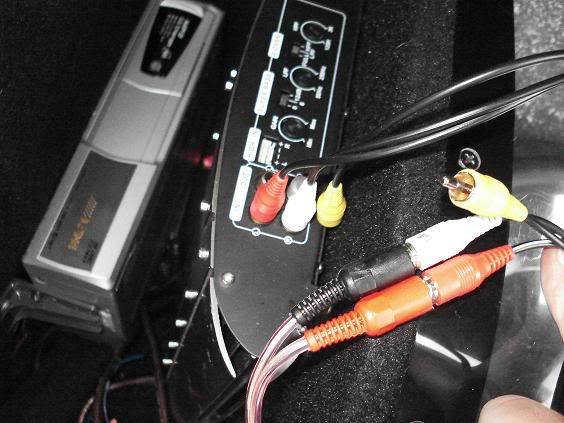
13) for signal to the sub:
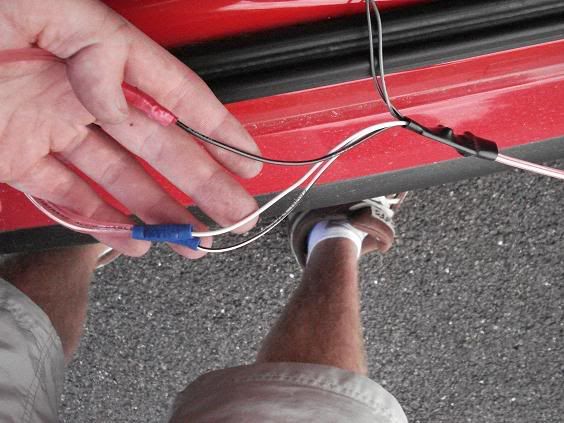
if the amp has high level imputs (can except speaker wire) then this is brilliant, pair off from the left rear speaker and join these to the amp, if it will excect 2 inputs then get some more speaker cable and pair off from the right rear speaker aswell.
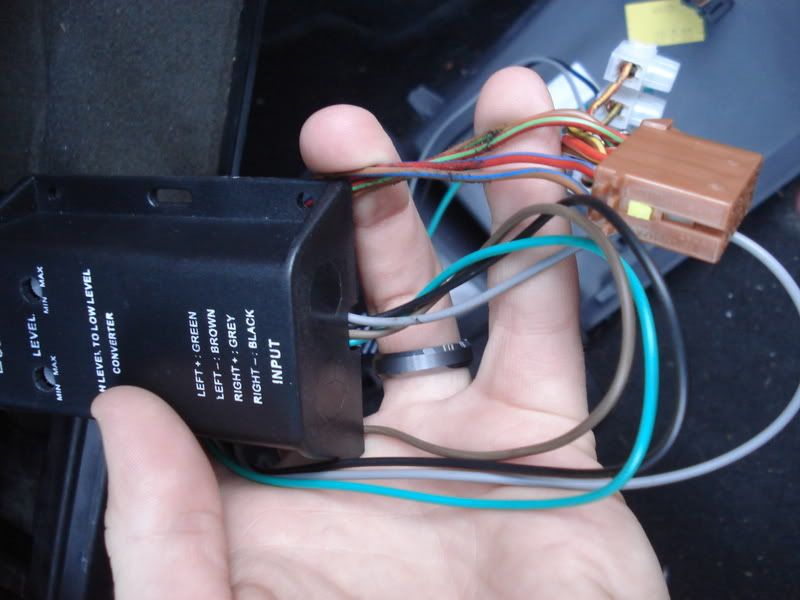
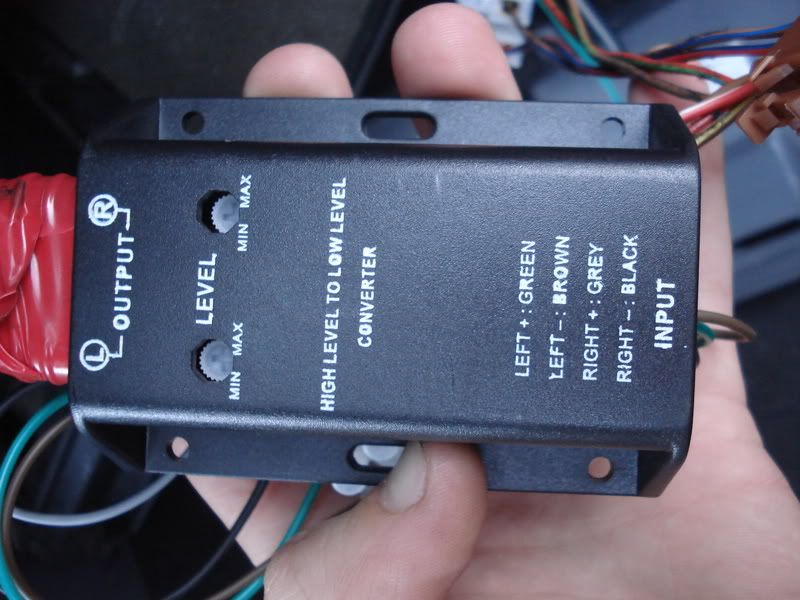
if it only have RCA (phono) input then buy a high level input to a RCA adapter (around 8 quid) then wire that up as per instructions. do not use the same earthing point for the adapter as the amp, as this will cause an earth feedback loop!
well after a lot of rambling on i hope this helps you out.
as a usual disclaimer. sad to say this but the world is turning in to a horrible place.
i dont accept any injury, damage or loss of anything or blah blah blah.
Regards
Adam
(PS I WILL PUT PICTURES UP. i will do the whole thing again (kinda) and take pictures of what i am doing. i am not home untill 6pm so the pictures will be up around 8pm tonight or before if im lucky.)
Again PLEASE DONT POST IN THIS THREAD, PM ME INSTEAD!!!
if i have missed something out then pm and i will add it in. DONT POST IN THIS THREAD.
well here goes nothing.
i hope this lot from here on helps you out a bit, please contact me in you need any pictures or more advice. and if you need a chat when doing the wiring then ask for my mobile number and we can have a chat
-----------------------------------------------------------------------
i cheated when wiring in my amp just to let you know.
i will dop a step by step guide here then a more advanced chat on each section lower down.
1)buy all the stuff you think you will need.
2)wire in the power cable from engine bay to car
3)remove the glove box
4)remove plastic tray
5)cabling
6)removing the HU
7)find another source of REM if step 6 is not for you.
8)removing side trim
9)rear door card
10)help with wiring in
11)wiring in the power to the boot
12)grounding point
13) signal input to amp
1) buy:
power cable roughly 1.5 x the length of your car
small cable for rem around the same length as the power cable.
2 or 3 o ring connectors, see what size you will need with regard to battery connectors and grounding points.
about 30 cable ties (optional)
2) start fitting the power cable. start in the engine bay, and look at the battery, look towards the bulk head and about a foot down there will be a rubber grommet about the size of a 2 pound coin. if you pull this out and make a small hole in the centre of it. (make it smaller than the power cable so it is hard to get through)
push most of the cable through you have left enough to get the battery.
3) go in to the car and remove the glove box, there should be about 4 or 5 screws to remove it (its not too difficult) but dont remove the screw that is holding the catch in at the top.
4) remove the plastic plate underneath the glove box (above the passangers feet) by removing the two screws that hold it in place. remove the plastic white block that is attached to it (try not break it).
5) you should now see the rest of the power cable that you have pushed through the bulk head from engine bay in to the car. from here pull what you can through and leave it on the floor.
6) if you are going to wire up the REM to the HU then read this, if not skip to step 7.
undo the 2 screws under neath the HU (left and right side at the front just underneath the facia)
the HU faci should then slowly prize off.
carefull at this point as there is a ribbon cable attached from the facia to the HU behind. detach this and put the facia to one side. (i have not removed the HU but i will give you the best account i can out of memory from other cars) undo maybe 2 screws and then the bottom part of the HU should pull out, you may need some HU pins to pull it out.
once this is done there will be a serise of conectors at the back on the bottom left hand side. the black ISO connector sould have numbers on it in small print, if not then look for the ONLY BLACK WIRE. pair in to this by splicing or soldering. attach the REM cable to the BLACK WIRE then feed it around to the passanger foot well.
put everything back to how it was (regarding the HU and facia)
7)
this way ONLY TURNS ON THE AMP WHEN THE IGNITION IS ON.!
other way of doing it is a bit more of a guessing game, get some one to turn the ignition on and off while you hold a multi metre over an earth and another colour. when ignition is off you want to see 0v, but when turned on you want to be seeing 12v. (will be around 12.4v)
from this cable pair off and this will feed your REM.
8) now from here you should have an REM cable and a power cable in the well of the passanger foot area. i found it easier if i taped the two cables together every 150mm with a small bit of electrical tape to keep the wires togetheron the passanger side there will be a greyish trim running along by the sill. remove ALL the screws.
from here you can either grab hold and sharply pull up, or you can carefully push the plastic in towards the seat and get a flat bladed screwdriver and prize the metal hooks off the plastic support, again carefull not to break anything.
from here once these are removed, wire in the power cable with the factory loom, (using the cable ties to hold them in).
now the slightly tricky bit!!!
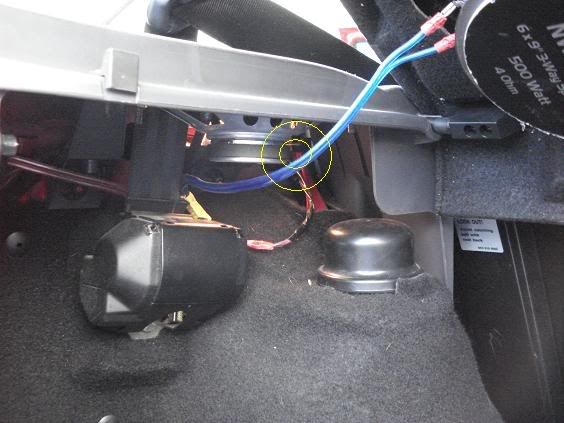
9) go in to the boot and look to the left hand side, right at the top where the seat belt ankor is. you will see a small loom of cable going in through a hole around here running towards the rear passanger side passanger. this is where the power cable is going to come out of!
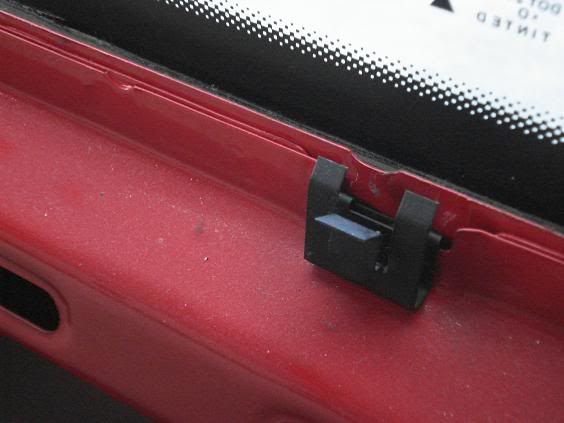
slide the passanger seat right forward and play about the rear passanger door card. unfortunatly to compleatly remove the door card you have to remove the seat too. dont bother unless your happy with doing that.
i just pulled the top of the door card off and kinda bent it over, and put my hand down between the door skin and the door card. , you will see the loom going up towards where i mentioned earlier.
10) if you have metal tape (used for wiring) this is very helpfull at this point, if you dont have this use a coat hanger but becarfull of the door skin!!!! it is very thin.
poke this through the hole from the boot in to where the rear passanger sits then tape the power and rem to it then pull the hanger back through and your power cable and REM are now in the boot!
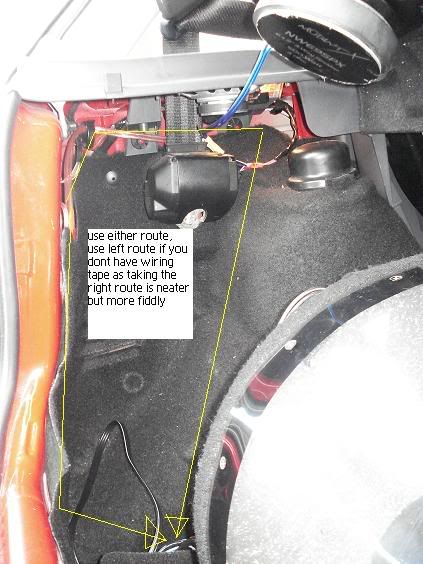
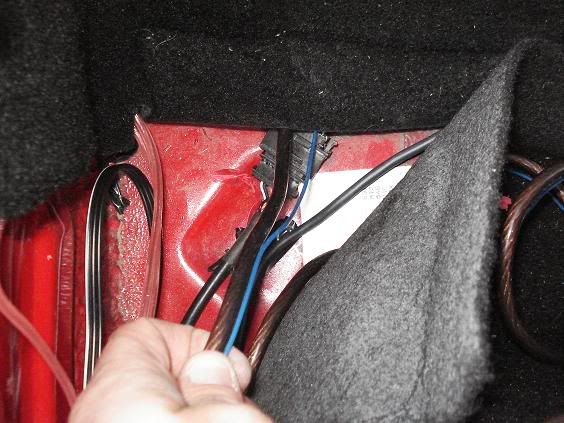
11) there are many ways of getting the rem and power to the bottom of the boot.
the easiest is wire it along the top where the standard loom is then wire it either under the carpet or between the skins of the boot (behind the light cluster going down)
12) now both cables are in your boot ready for instalation of an amp. for a grounding point i used the stud where the spare wheel is kept as this is already exposed metal and is a good earth point, just make sure you get a decent connection of metal to metal or you will suffer gounding problems. andother place is to use an existing bolt somewhere in the boot.
13) for signal to the sub:
if the amp has high level imputs (can except speaker wire) then this is brilliant, pair off from the left rear speaker and join these to the amp, if it will excect 2 inputs then get some more speaker cable and pair off from the right rear speaker aswell.
if it only have RCA (phono) input then buy a high level input to a RCA adapter (around 8 quid) then wire that up as per instructions. do not use the same earthing point for the adapter as the amp, as this will cause an earth feedback loop!
well after a lot of rambling on i hope this helps you out.
as a usual disclaimer. sad to say this but the world is turning in to a horrible place.
i dont accept any injury, damage or loss of anything or blah blah blah.
Regards
Adam
(PS I WILL PUT PICTURES UP. i will do the whole thing again (kinda) and take pictures of what i am doing. i am not home untill 6pm so the pictures will be up around 8pm tonight or before if im lucky.)
Again PLEASE DONT POST IN THIS THREAD, PM ME INSTEAD!!!
Last edited:


")