Does your 1.8T sound like a Dyson (or Henry or whatever) when starting from cold? This seems to be a common complaint, and no great surprise given how badly these things are put together.
The problem is caused by air leaking from the pump due to it being held together by six rivets which eventually corrode and fall apart, ruining any chance of an effective seal.
The job itself is pretty easy and can be done in well under an hour. Tools required are a 10mm spanner, cross-head screwdriver, small flat-head screwdriver, T20 Torx bit and a drill. Parts required are six bolts, washers and nuts. Use either M4 or M5 x40mm bolts (M5 gives a nice snug fit if used with a 5mm drill bit). I would suggest using nyloc nuts, the only reason I didn't was I didn't have any and I couldn't exactly use the car to go buy some...
Step 1. Remove the centre cover from under the engine.
I'm not going into detail here as it's obvious how it comes off, and if you struggle then you should really seek adult assistance. Screws are a combination of cross-head and Torx.
Step 2. Locate the pump.
Dead easy, it's at the front of the engine accessible from below.

Step 3. Remove the mounting nuts.
There are three 10mm securing nuts, all are fairly easy to access (arrowed). The topmost one has slightly restricted access but it's not a major problem.

Step 4. Disconnect the pump.
There are three connections - two air hoses and a two-pin power connector. The power connection (arrowed in red) has a small latch, insert the small flat-head screwdriver into the latch to release it.

The two air connections (arrowed in yellow) are released by squeezing the serrated sections on either side and pulling the hose upwards as shown below. There may be some resistance, giving the air hose a wiggle while pulling it upwards should do the trick.

Step 4. Remove the pump.
At first it looks like there isn't enough room to get it out, but there is enough space if you follow the path shown below. It helps to pull the power steering hose down to give a little extra clearance as the air pump needs to come out over the PAS pump, not below it...

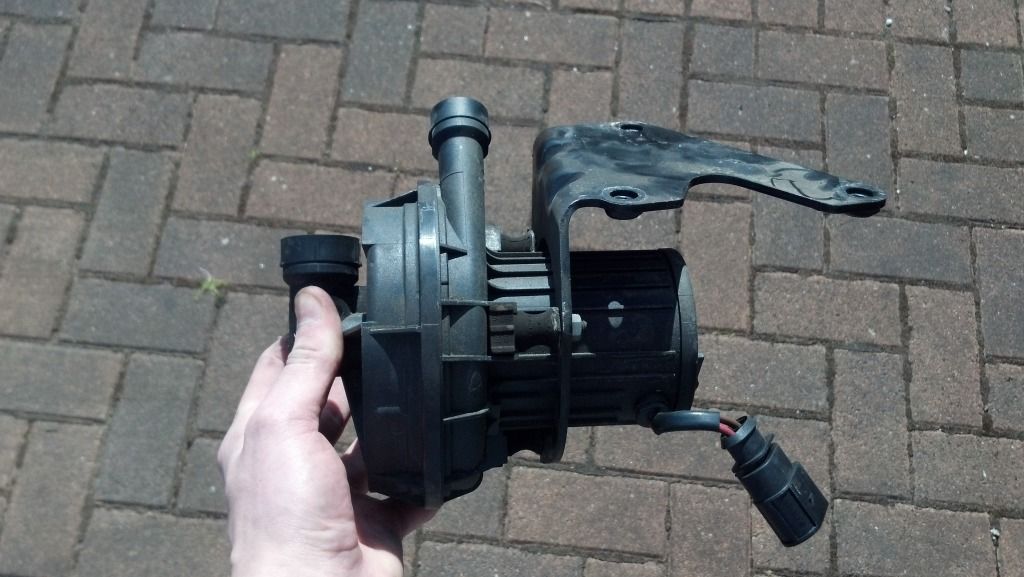
Step 5. Have a cuppa/smoke/whatever and check the air pump over.
Here it is...

This is the business-end where we need to get to work...

Step 6. Drill out the rivets.
Pretty straightforward, drill the heads off from this side. Try to secure the pump as best as you can so there's no unexpected trips to A&E. As mentioned earlier I used a 5mm drill to take the heads off and bore the holes out slightly, they are too snug as standard for 5mm bolts and 4mm bolts are a slightly loose fit. Rivet heads arrowed in yellow...

Step 7. Fit new bolts.
Self-explanatory, fit the nuts, bolts and washers in place of the old rivets. Here's mine...


Much better!
Step 8. Refit the pump.
Again, pretty easy if you've got this far. Fit the pump into its bracket, refit its securing nuts and replace the air and power connections. Pull the air hoses down and latch into place (giving them a wiggle if necessary).
All being well the secondary air pump will be almost silent when starting from cold, and you will have saved a small fortune by not having to buy a new one. Hurrah!
Cheers, DubSteve
The problem is caused by air leaking from the pump due to it being held together by six rivets which eventually corrode and fall apart, ruining any chance of an effective seal.
The job itself is pretty easy and can be done in well under an hour. Tools required are a 10mm spanner, cross-head screwdriver, small flat-head screwdriver, T20 Torx bit and a drill. Parts required are six bolts, washers and nuts. Use either M4 or M5 x40mm bolts (M5 gives a nice snug fit if used with a 5mm drill bit). I would suggest using nyloc nuts, the only reason I didn't was I didn't have any and I couldn't exactly use the car to go buy some...
Step 1. Remove the centre cover from under the engine.
I'm not going into detail here as it's obvious how it comes off, and if you struggle then you should really seek adult assistance. Screws are a combination of cross-head and Torx.
Step 2. Locate the pump.
Dead easy, it's at the front of the engine accessible from below.
Step 3. Remove the mounting nuts.
There are three 10mm securing nuts, all are fairly easy to access (arrowed). The topmost one has slightly restricted access but it's not a major problem.
Step 4. Disconnect the pump.
There are three connections - two air hoses and a two-pin power connector. The power connection (arrowed in red) has a small latch, insert the small flat-head screwdriver into the latch to release it.
The two air connections (arrowed in yellow) are released by squeezing the serrated sections on either side and pulling the hose upwards as shown below. There may be some resistance, giving the air hose a wiggle while pulling it upwards should do the trick.
Step 4. Remove the pump.
At first it looks like there isn't enough room to get it out, but there is enough space if you follow the path shown below. It helps to pull the power steering hose down to give a little extra clearance as the air pump needs to come out over the PAS pump, not below it...
Step 5. Have a cuppa/smoke/whatever and check the air pump over.
Here it is...
This is the business-end where we need to get to work...
Step 6. Drill out the rivets.
Pretty straightforward, drill the heads off from this side. Try to secure the pump as best as you can so there's no unexpected trips to A&E. As mentioned earlier I used a 5mm drill to take the heads off and bore the holes out slightly, they are too snug as standard for 5mm bolts and 4mm bolts are a slightly loose fit. Rivet heads arrowed in yellow...
Step 7. Fit new bolts.
Self-explanatory, fit the nuts, bolts and washers in place of the old rivets. Here's mine...
Much better!
Step 8. Refit the pump.
Again, pretty easy if you've got this far. Fit the pump into its bracket, refit its securing nuts and replace the air and power connections. Pull the air hoses down and latch into place (giving them a wiggle if necessary).
All being well the secondary air pump will be almost silent when starting from cold, and you will have saved a small fortune by not having to buy a new one. Hurrah!
Cheers, DubSteve
Last edited:

")