I’ve always loved my cars, for as long as I can remember. As I age, that love doesn’t disappear within like so many of our child hood memories, it just stays there like its where it was meant to be. Destiny almost you might say.
Since passing my driving test at 17 I’ve always enjoyed driving cars, and rarely tire from the enjoyment gained. A natural progression to having one’s own cars was the progression into detailing. In my early years an ‘off the shelf’ Autoglym kit allowed me to show off my dedication and care for my four wheeled possession. These days things in detailing terms have moved on somewhat.
Below is my stage by stage account of how I have detailed my latest purchase, to bring back the ‘good as factory’ finish we all crave. The car is a SEAT Altea, 2.0 TDi PD 140 Sport. The colour is Tinta Black and its fitted with the optional bodykit and upgraded 18 inch alloys. Below are some pictures of the car collected from SEAT.


As you can see, whilst its an attractive looking car, the bodywork is in need of some attention. The paintwork hasn’t got the slickness you would expect from a car that has covered only 2700 miles, and to top it off, its covered in swirl marks. There are also three of four minor scratches which will require some care in the early detail stages.
First job was to get the car home, show the relatives and family the new wheels, and have a day to drive and get to know my new friend. After this I gave it the first wash and dry before locking away in the garage. The project has begun…….
Like a spanner to a mechanic, a saw to a carpenter, and an oven to a chef the Porter Cable has become quite possibly the most well known and regarded polishing tool used within the Detailing World. Not just by the full time professionals, but also many home enthusiasts too.
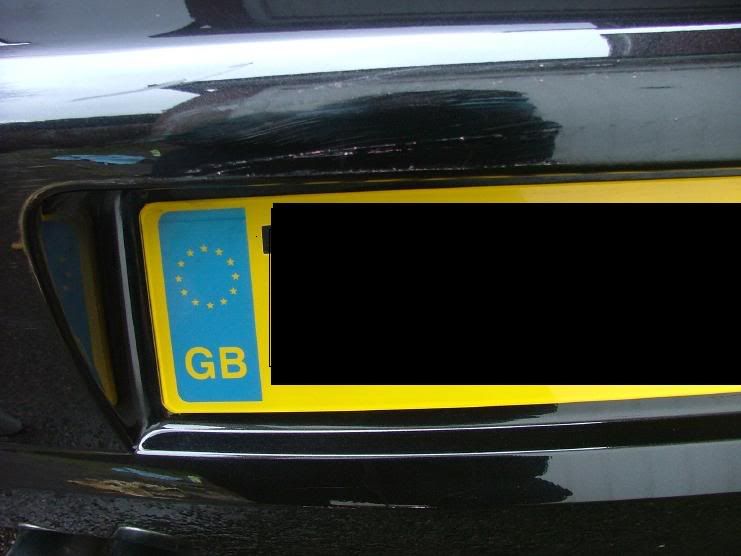
Next day, I opened the garage and set about collating some before shots, concentrating on those areas which required the most attention, see below.


The pictures above show the scratches, lack of paint reflection and the ground in dirt which was haunting the car’s finish. My first task was to Clay the whole car. To do this is one of the best ways to remove any surface contaminants and ensure the paintwork is left silky smooth. You can purchase a clay kit from Meguiars as shown below, or buy the clay bars separately and make up your own lubricant. From this detail I am using items purchased separately. Below is a picture of the clay kit and the clay was divided, warmed and prepped ready for use.


As well as the clay kit you will also need a good quality Micro fibre cloth, and my tip for you – a bucket containing hot tap water with a shot of fairy liquid. Do not ever use any clay which has been in contact with any dirty surface (especially the floor). Cut a clay bar into three sections, and place in an air tight tub, leaving the lid rested onto place the tub into the microwave for 30 seconds to soften the clay. You will now be able to roll and mould into a flat disc. Whilst learning I would suggest you mould the clay over the bucket to ensure if you do drop the clay it is not ruined. Moulding the clay and having to apply the lube to retain moisture can be likened to playing catch with a bar of soap in the shower, lol.
Spray the lubricant onto the area you intend to clay first. I suggest if you are new to this, you start with a 2 foot square section of the roof. It’s best to start on a flat surface whilst you get to grips with the amount of pressure required and how easily the clay can be dropped. The pictures below show the area sprayed ready for work, and then an after shot once the clay has passed over the areas. Applying the clay using only the weight of the clay, do not apply any pressure. If the clay feels to be grabbing at the paintwork, then apply more lube. Pass the clay over the section until the passes are grab free, you will feel and hear the clay collecting any unwanted dirt particles


Once you have finished gliding the clay over the area, drop the clay into the bucket of hot clean water and wipe the area down with the clean MF cloth. Once this has been done, drop the cloth into the bucket to rinse and remove the clay, re-work, roll and mould ready for the next section. Storing the clay in the bucket brings two advantages, one- prevents unwanted drops, two-the clay is warm and will remain easy to ‘work’.
Continue with this process on all of the car, try to work the areas which will have the most affected contamination last. For example lower door sills, front and rear bumpers.
Below are pictures of the clay once the whole car had been done. Each picture contains a new clay bar for reference. The first picture was taken after completing the boot panel.


Below are some pictures of the car once the claying was complete.


Once the claying was complete, I was ready to move onto the next section of the detail. This was isn’t as labour demanding as the clay process but does require equal levels of patience and determination towards the end goal. Scratch and Swirl removal. In order to remove the scratches and swirls seen earlier I am going to use the Porter Cable with 4 inch pads and two of the Meguiars range. Scratch X for the scratches, and Swirl remover for the swirls. Not rocket science is it? Hahaha. The picture below shows the porter cable fitted with an orange pad, designed for heavy cutting, and the yellow for light to medium cutting.

I used the orange pad with the scratch X to remove any light scratches and the paint work defects, should as bird markings. To use the Scratch X apply a blob of paste to the pad, equal to the size of your thumb nail, and using level 2 on the PC apply to the affected area. Once a layer has been achieved, increase the PC level to 5/5.5 and allow the abrasive to break down and do their work. Make slow paces with the PC until the products begins to dry. Be sure to remove before completely dry with a clean MF cloth.

With all scratches removed, the next task is those swirl marks. Using the yellow medium cutting pad, Meguiars Swirl Remover and a clean MF cloth. Apply the Swirl Remover in a similar method to that just mentioned, with the exception of using increased amounts of liquid, apply to the PC pad by creating a cross on the pad. Then apply to the paintwork ensuring the final covering left behind is well worked and a nice thin coating. Apply a section at a time and remove before drying. If needed, do a second pass of the area. First picture below shows the applied SR prior to removal. The second and third pictures show the roof and bonnet once de-swirled.


I left the detailing at this point, and went off to have a break. I’d completed three hours, and managed to clay the whole car, and de-swirl roof and bonnet panels.
Returning into the garage in the early evening saw the completion of the remaining panels with the swirl remover, 4 inch medium cut pad and a clean MF. Once done I found there was still time to get some more stages done so progressed onto the first Glaze stage.
Detailers all have their own ‘signature’ combinations, some use the same ones time and time, others like to experiment. Due to the dark colouring of this car, my daily commute involving the M60 around Manchester and a dual carriage ways I am going to be using a glaze which provides good shine, but great durability. I also don’t want to be undertaking this high cut level of detail for some time. I have been using this Glaze around the house, and a couple of times on other details. The results have been very impressive.
Stage one of the glaze is applied a section at a time and removed likewise. Applied using a 7 inch polishing pad on level 3.5, removed with a clean MF. I just managed to complete the whole car before being called in for Sunday Roast! That’s another two hours added to the clock, 5 in total. I’m feeling tired at this point, and my lack of detailing fitness over the winter months is showing…..
Next day, and after a night’s sleep I’m ready to attack and finish the detail ready for a cruise back to the dealership to show off the bling! Out with the PC, a 7 inch waxing/finishing pad, and I applied the second coat of Glaze to the whole car, and left to cure. The images below show this part of the detail. Have a look at the car closely, noting the pattern for the PC and Glaze, and also the thickness of the layer applied.


Whilst the Glaze was curing I took the opportunity to apply a layer of Meguiars Number 20 Polymer Sealant to the inside and outside of the alloys. Due to their size (18 inches) and only being 5 spoke I am able to fully clean and seal without removing them. I applied using a Megs foam pad. Below you can see the cured sealant on the right hand side.

Home straight! With the Second Glaze coat buffed off I applied a layer of Meguiars NXT by hand using a MF pad. I really like what NXT does for dark coloured cars and find it is a very easy product to use. Another advantage is that it can be layered, given curing time. As I don’t want to be cutting back each time, using NXT as the last stage will enable me to repeat this final stage when required.
When applying this I have applied using a light, consistent motion to achieve as thin a layer as possible. The two photos below show the car wearing the NXT once cured/hazed.


Whilst the NXT cured I removed the #20 sealant from the alloy fronts and applied some Meguiars Endurance Gloss Tyre Shine using a two inch paint brush. I have deliberately left the sealant on the insides to enable the first wash to remove any break dust that the cured sealant holds. I just squeezed some of the tyre shine onto the brush and then gently paint it onto the tyre wall, making sure to avoid the tread of the tyre. With all four alloys and tyres buffed and shined and then took another clean MF for the final buffing. Below is a selection of the finished car, in total seven hours later:


With the detail complete, I’m just left with one last page to talk you through. What I feel has become my signature on the detailing world, my side by side before and after shots! The first image will always be the before – like it should need explaining anyway! Tut!


I hope my review has entertained you, feel welcome to contact me with any questions you may have!
![[B)]](/forums/styles/seatcupra/oldforumsmileys/shades.gif "Cool [B)]")

Since passing my driving test at 17 I’ve always enjoyed driving cars, and rarely tire from the enjoyment gained. A natural progression to having one’s own cars was the progression into detailing. In my early years an ‘off the shelf’ Autoglym kit allowed me to show off my dedication and care for my four wheeled possession. These days things in detailing terms have moved on somewhat.
Below is my stage by stage account of how I have detailed my latest purchase, to bring back the ‘good as factory’ finish we all crave. The car is a SEAT Altea, 2.0 TDi PD 140 Sport. The colour is Tinta Black and its fitted with the optional bodykit and upgraded 18 inch alloys. Below are some pictures of the car collected from SEAT.
As you can see, whilst its an attractive looking car, the bodywork is in need of some attention. The paintwork hasn’t got the slickness you would expect from a car that has covered only 2700 miles, and to top it off, its covered in swirl marks. There are also three of four minor scratches which will require some care in the early detail stages.
First job was to get the car home, show the relatives and family the new wheels, and have a day to drive and get to know my new friend. After this I gave it the first wash and dry before locking away in the garage. The project has begun…….
Like a spanner to a mechanic, a saw to a carpenter, and an oven to a chef the Porter Cable has become quite possibly the most well known and regarded polishing tool used within the Detailing World. Not just by the full time professionals, but also many home enthusiasts too.
Next day, I opened the garage and set about collating some before shots, concentrating on those areas which required the most attention, see below.
The pictures above show the scratches, lack of paint reflection and the ground in dirt which was haunting the car’s finish. My first task was to Clay the whole car. To do this is one of the best ways to remove any surface contaminants and ensure the paintwork is left silky smooth. You can purchase a clay kit from Meguiars as shown below, or buy the clay bars separately and make up your own lubricant. From this detail I am using items purchased separately. Below is a picture of the clay kit and the clay was divided, warmed and prepped ready for use.
As well as the clay kit you will also need a good quality Micro fibre cloth, and my tip for you – a bucket containing hot tap water with a shot of fairy liquid. Do not ever use any clay which has been in contact with any dirty surface (especially the floor). Cut a clay bar into three sections, and place in an air tight tub, leaving the lid rested onto place the tub into the microwave for 30 seconds to soften the clay. You will now be able to roll and mould into a flat disc. Whilst learning I would suggest you mould the clay over the bucket to ensure if you do drop the clay it is not ruined. Moulding the clay and having to apply the lube to retain moisture can be likened to playing catch with a bar of soap in the shower, lol.
Spray the lubricant onto the area you intend to clay first. I suggest if you are new to this, you start with a 2 foot square section of the roof. It’s best to start on a flat surface whilst you get to grips with the amount of pressure required and how easily the clay can be dropped. The pictures below show the area sprayed ready for work, and then an after shot once the clay has passed over the areas. Applying the clay using only the weight of the clay, do not apply any pressure. If the clay feels to be grabbing at the paintwork, then apply more lube. Pass the clay over the section until the passes are grab free, you will feel and hear the clay collecting any unwanted dirt particles
Once you have finished gliding the clay over the area, drop the clay into the bucket of hot clean water and wipe the area down with the clean MF cloth. Once this has been done, drop the cloth into the bucket to rinse and remove the clay, re-work, roll and mould ready for the next section. Storing the clay in the bucket brings two advantages, one- prevents unwanted drops, two-the clay is warm and will remain easy to ‘work’.
Continue with this process on all of the car, try to work the areas which will have the most affected contamination last. For example lower door sills, front and rear bumpers.
Below are pictures of the clay once the whole car had been done. Each picture contains a new clay bar for reference. The first picture was taken after completing the boot panel.
Below are some pictures of the car once the claying was complete.
Once the claying was complete, I was ready to move onto the next section of the detail. This was isn’t as labour demanding as the clay process but does require equal levels of patience and determination towards the end goal. Scratch and Swirl removal. In order to remove the scratches and swirls seen earlier I am going to use the Porter Cable with 4 inch pads and two of the Meguiars range. Scratch X for the scratches, and Swirl remover for the swirls. Not rocket science is it? Hahaha. The picture below shows the porter cable fitted with an orange pad, designed for heavy cutting, and the yellow for light to medium cutting.
I used the orange pad with the scratch X to remove any light scratches and the paint work defects, should as bird markings. To use the Scratch X apply a blob of paste to the pad, equal to the size of your thumb nail, and using level 2 on the PC apply to the affected area. Once a layer has been achieved, increase the PC level to 5/5.5 and allow the abrasive to break down and do their work. Make slow paces with the PC until the products begins to dry. Be sure to remove before completely dry with a clean MF cloth.
With all scratches removed, the next task is those swirl marks. Using the yellow medium cutting pad, Meguiars Swirl Remover and a clean MF cloth. Apply the Swirl Remover in a similar method to that just mentioned, with the exception of using increased amounts of liquid, apply to the PC pad by creating a cross on the pad. Then apply to the paintwork ensuring the final covering left behind is well worked and a nice thin coating. Apply a section at a time and remove before drying. If needed, do a second pass of the area. First picture below shows the applied SR prior to removal. The second and third pictures show the roof and bonnet once de-swirled.
I left the detailing at this point, and went off to have a break. I’d completed three hours, and managed to clay the whole car, and de-swirl roof and bonnet panels.
Returning into the garage in the early evening saw the completion of the remaining panels with the swirl remover, 4 inch medium cut pad and a clean MF. Once done I found there was still time to get some more stages done so progressed onto the first Glaze stage.
Detailers all have their own ‘signature’ combinations, some use the same ones time and time, others like to experiment. Due to the dark colouring of this car, my daily commute involving the M60 around Manchester and a dual carriage ways I am going to be using a glaze which provides good shine, but great durability. I also don’t want to be undertaking this high cut level of detail for some time. I have been using this Glaze around the house, and a couple of times on other details. The results have been very impressive.
Stage one of the glaze is applied a section at a time and removed likewise. Applied using a 7 inch polishing pad on level 3.5, removed with a clean MF. I just managed to complete the whole car before being called in for Sunday Roast! That’s another two hours added to the clock, 5 in total. I’m feeling tired at this point, and my lack of detailing fitness over the winter months is showing…..
Next day, and after a night’s sleep I’m ready to attack and finish the detail ready for a cruise back to the dealership to show off the bling! Out with the PC, a 7 inch waxing/finishing pad, and I applied the second coat of Glaze to the whole car, and left to cure. The images below show this part of the detail. Have a look at the car closely, noting the pattern for the PC and Glaze, and also the thickness of the layer applied.
Whilst the Glaze was curing I took the opportunity to apply a layer of Meguiars Number 20 Polymer Sealant to the inside and outside of the alloys. Due to their size (18 inches) and only being 5 spoke I am able to fully clean and seal without removing them. I applied using a Megs foam pad. Below you can see the cured sealant on the right hand side.
Home straight! With the Second Glaze coat buffed off I applied a layer of Meguiars NXT by hand using a MF pad. I really like what NXT does for dark coloured cars and find it is a very easy product to use. Another advantage is that it can be layered, given curing time. As I don’t want to be cutting back each time, using NXT as the last stage will enable me to repeat this final stage when required.
When applying this I have applied using a light, consistent motion to achieve as thin a layer as possible. The two photos below show the car wearing the NXT once cured/hazed.
Whilst the NXT cured I removed the #20 sealant from the alloy fronts and applied some Meguiars Endurance Gloss Tyre Shine using a two inch paint brush. I have deliberately left the sealant on the insides to enable the first wash to remove any break dust that the cured sealant holds. I just squeezed some of the tyre shine onto the brush and then gently paint it onto the tyre wall, making sure to avoid the tread of the tyre. With all four alloys and tyres buffed and shined and then took another clean MF for the final buffing. Below is a selection of the finished car, in total seven hours later:
With the detail complete, I’m just left with one last page to talk you through. What I feel has become my signature on the detailing world, my side by side before and after shots! The first image will always be the before – like it should need explaining anyway! Tut!
I hope my review has entertained you, feel welcome to contact me with any questions you may have!