
Audi S3 GT3582R stroker Build (previously GT3071r)
- Thread starter tufftybloke
- Start date
You are using an out of date browser. It may not display this or other websites correctly.
You should upgrade or use an alternative browser.
You should upgrade or use an alternative browser.
That engine will be purring like a cat when she's fired up. Very impressed with your small end honing tool, I didn't realise they made the that small.
my small honing too

Reasonably productive day... noticed a bit of oil around the comp housing and on the transfer box... on further inspection I noticed the oil feed was loose!!??!!... luckily how I had it fixed round the back of the block meant it wasn't going anywhere soon and the amount of oil was more a seep than a flood so thankfully no damage or other drama there... phew!
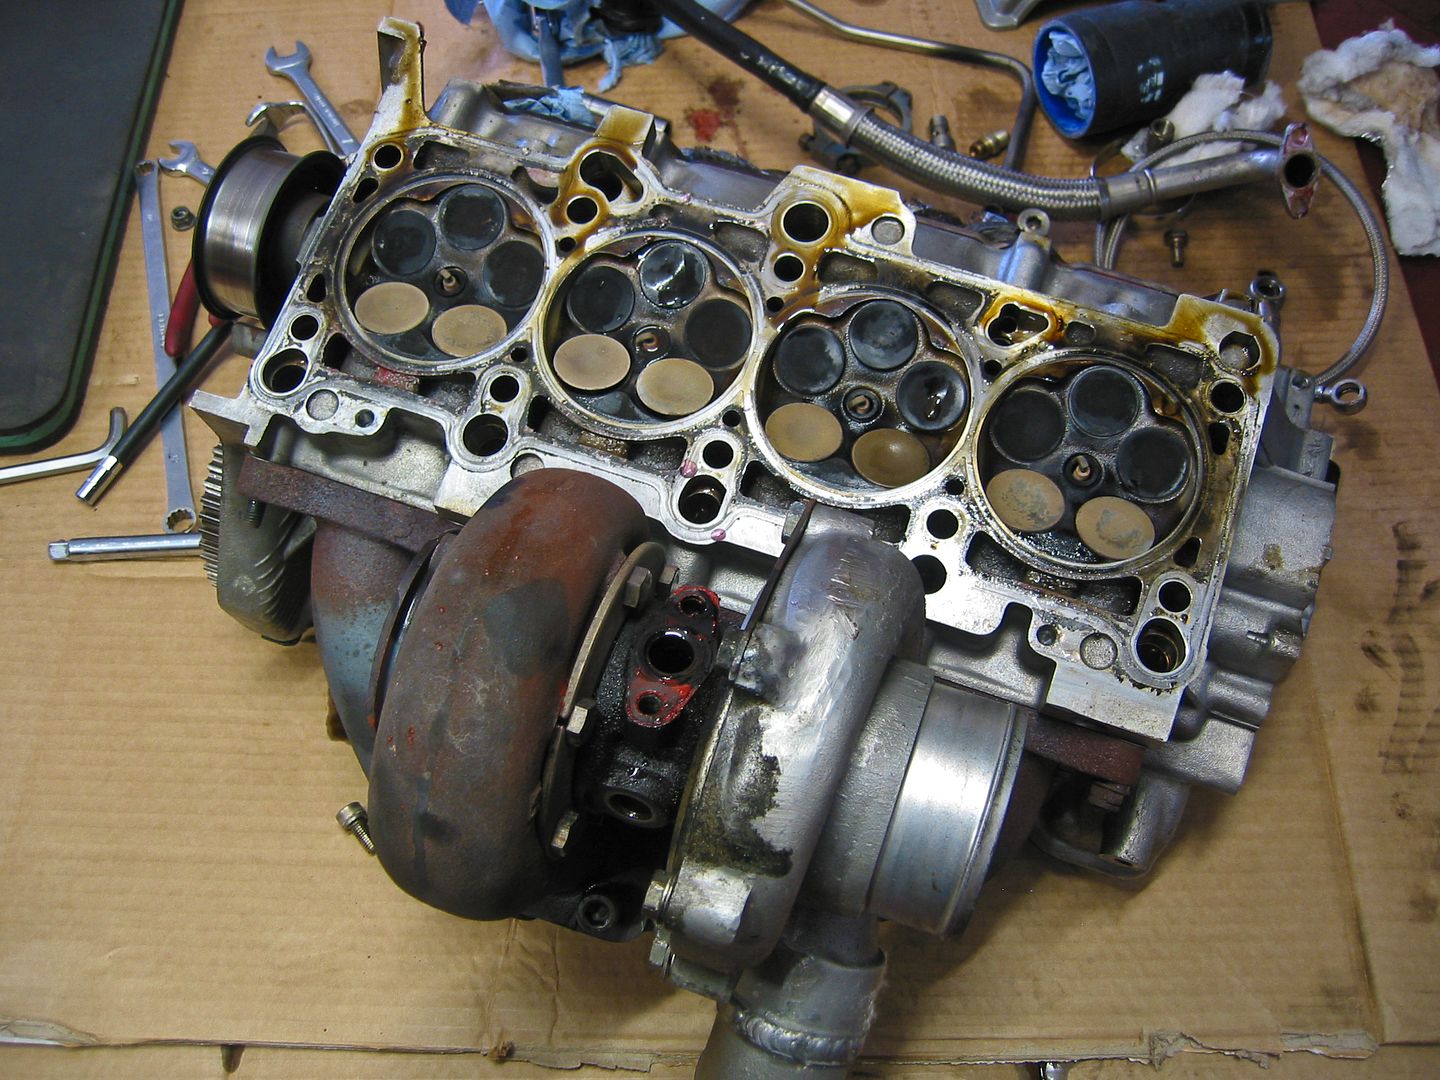
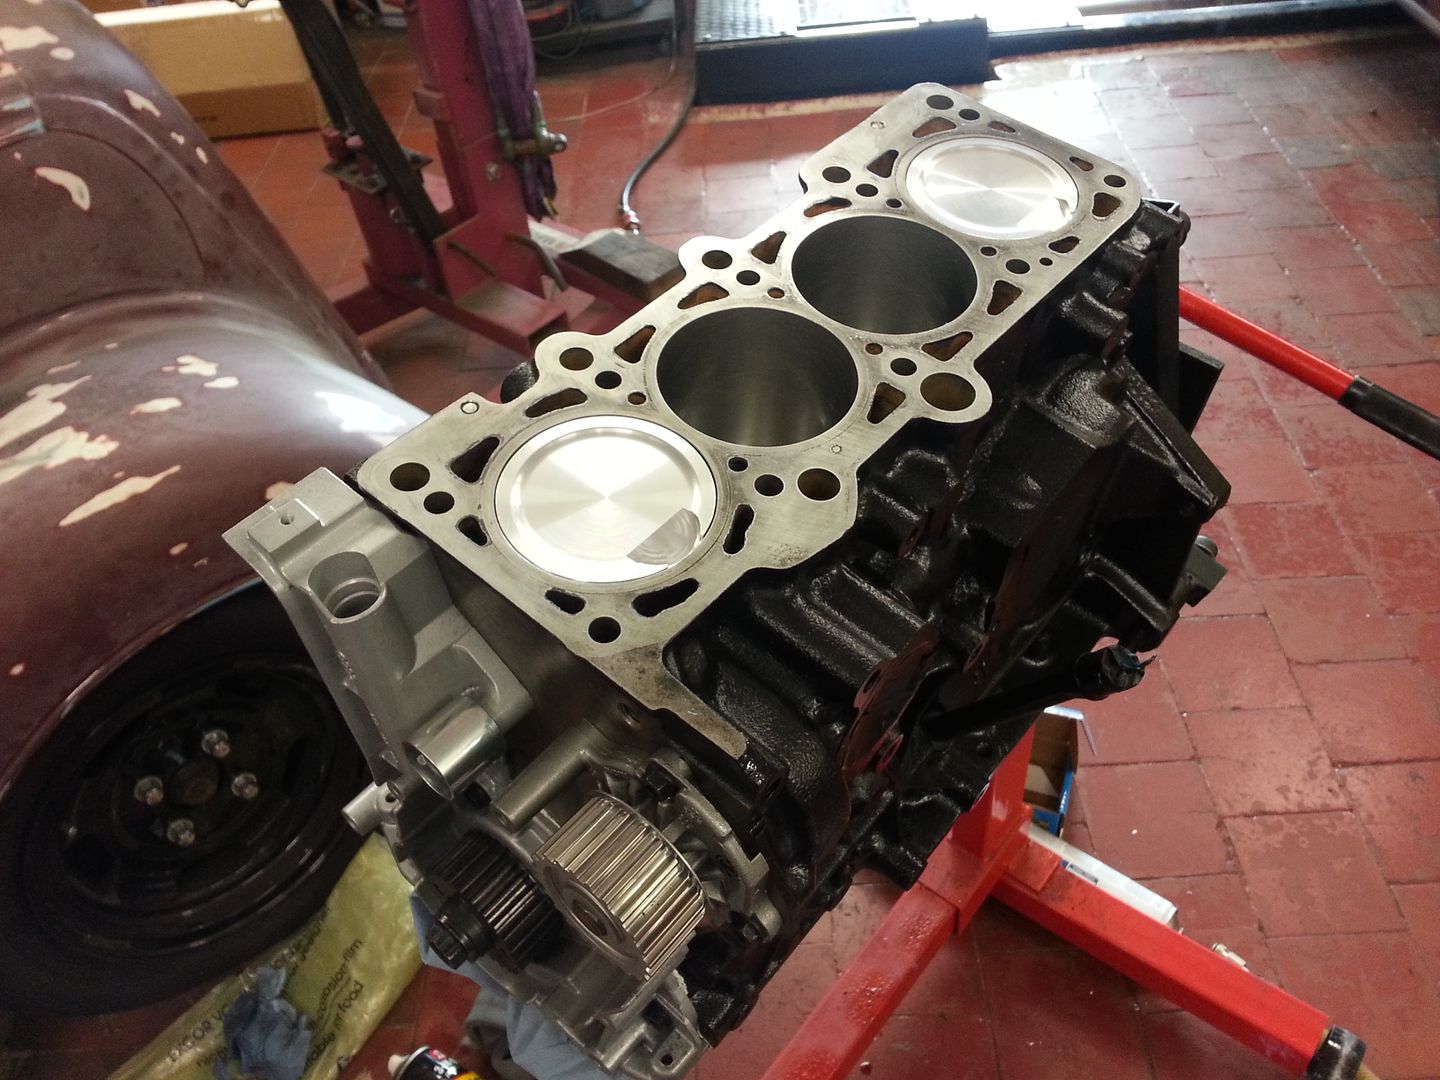
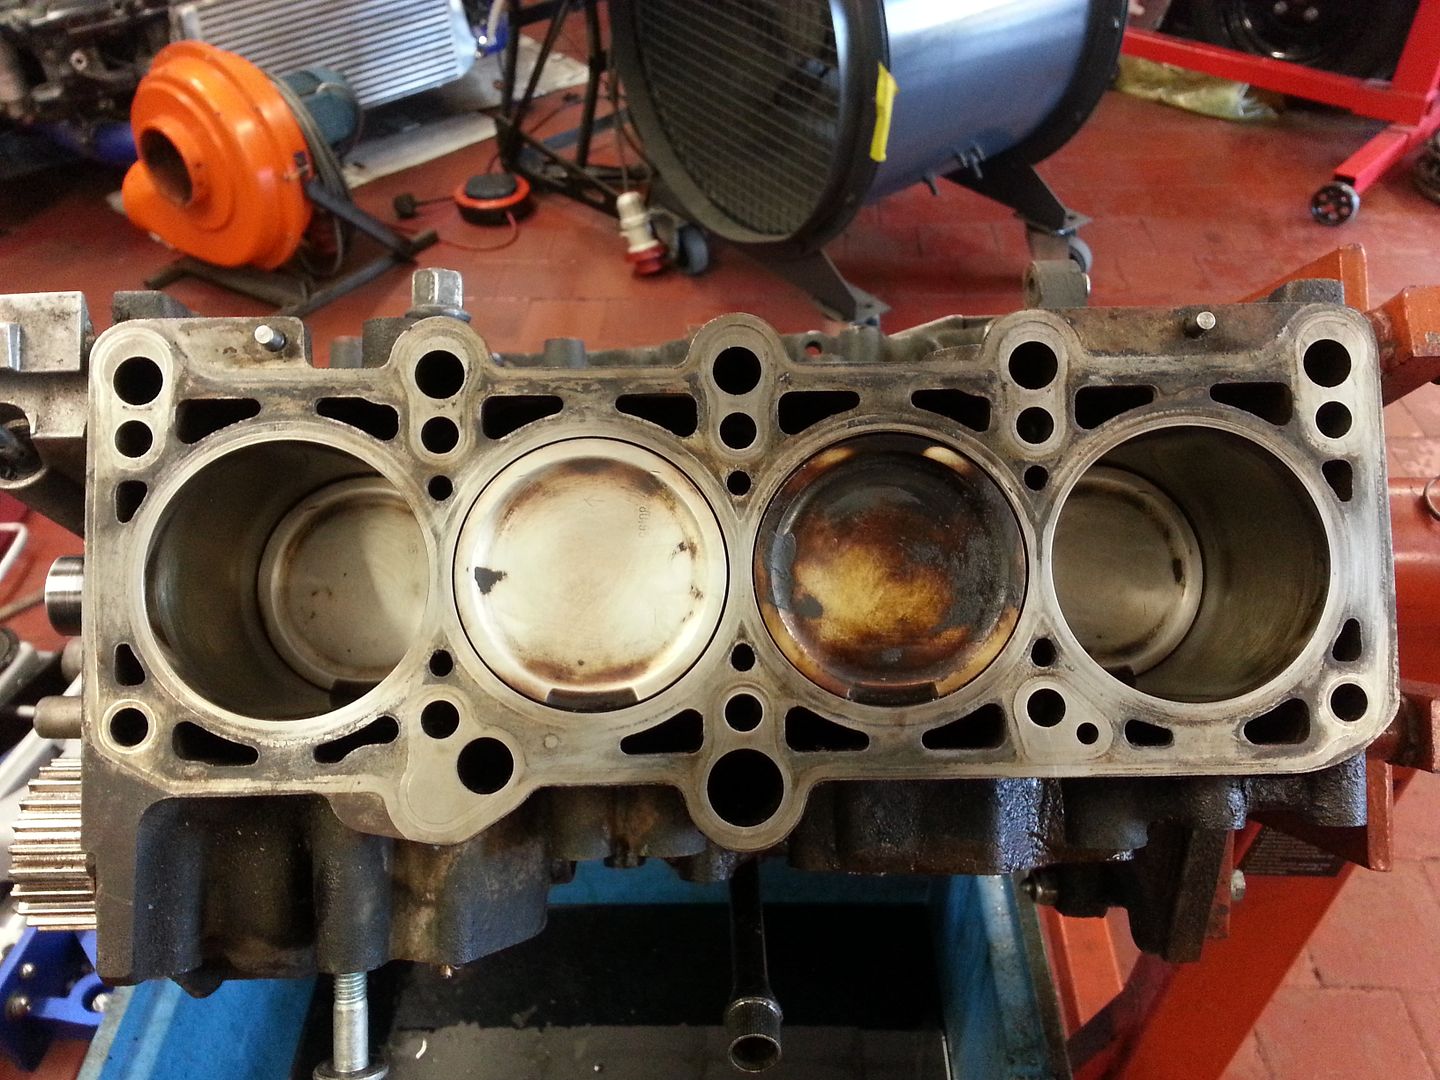
So removed the turbo and the manifold... all I can say is nordlocks and the M10 conversion just works!... bloody things took a little effort to move, nothing was loose so pleased that worked at least lol.. removed the comp housing to clean the oil off and took the chance to do a little comparison...
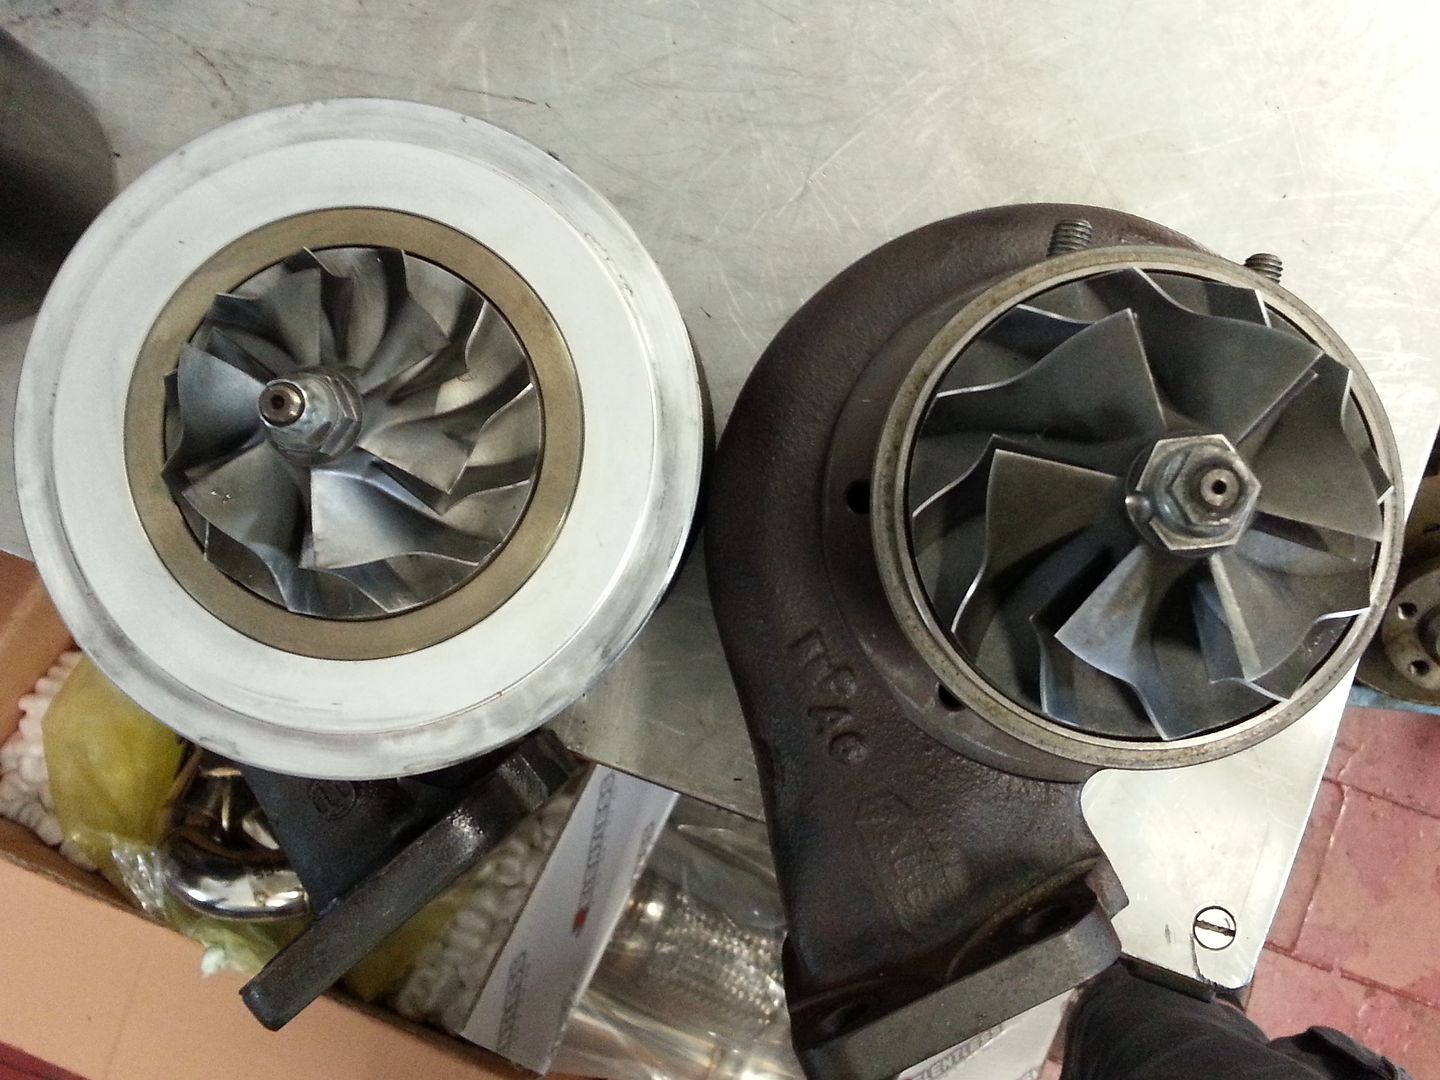
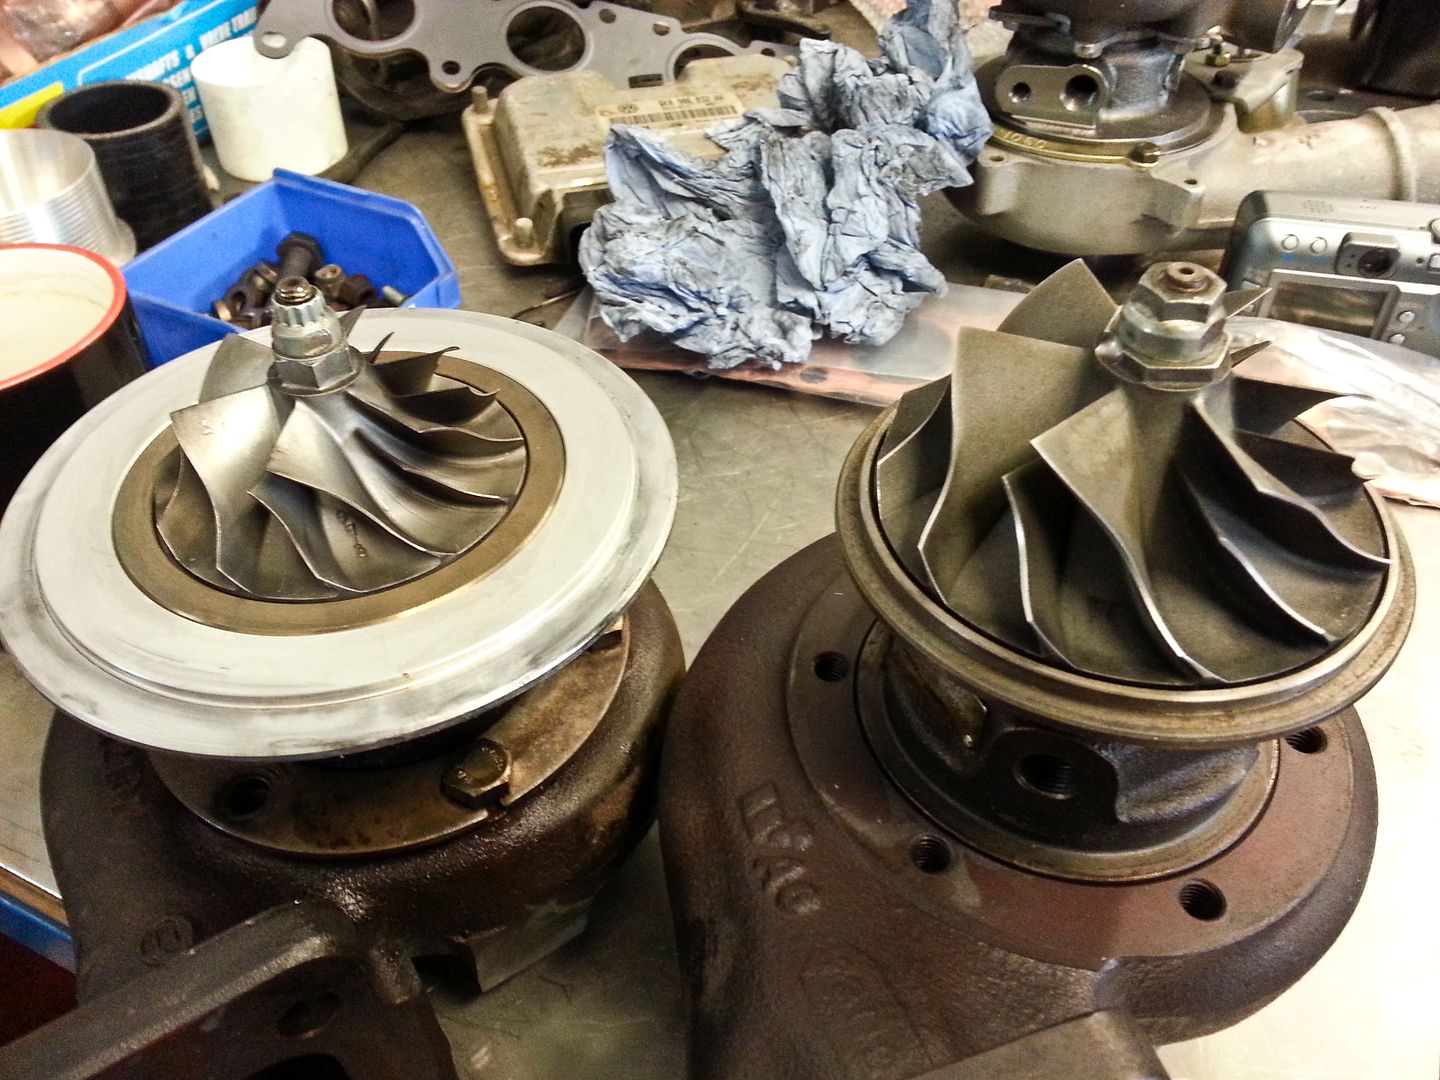
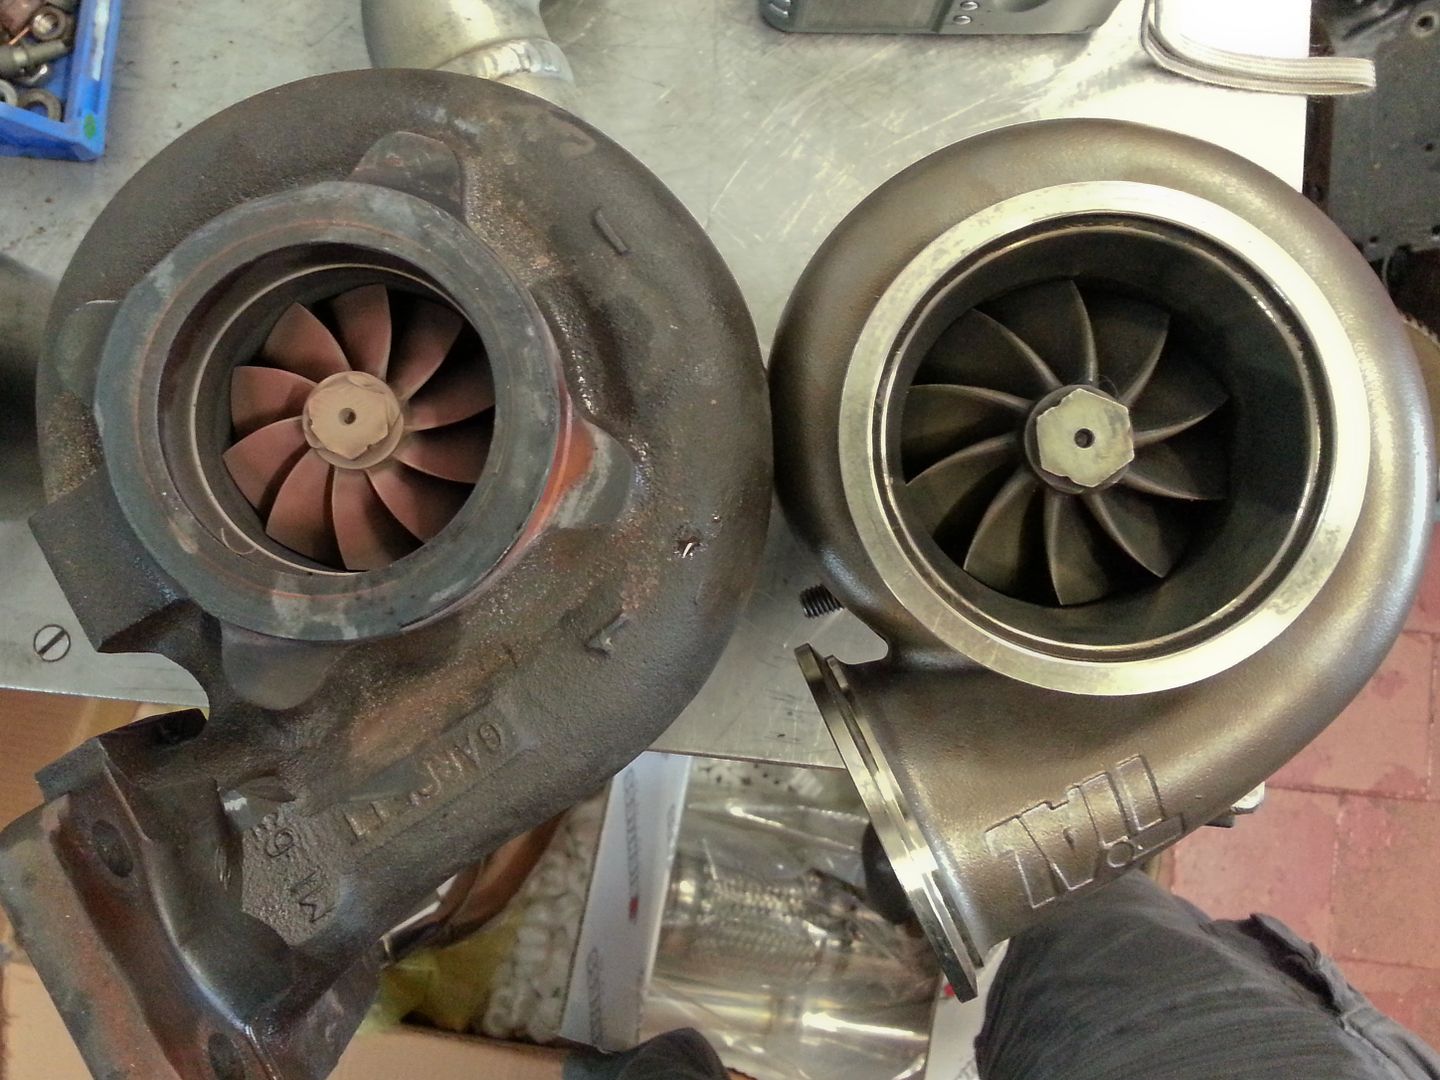
Quite a difference...
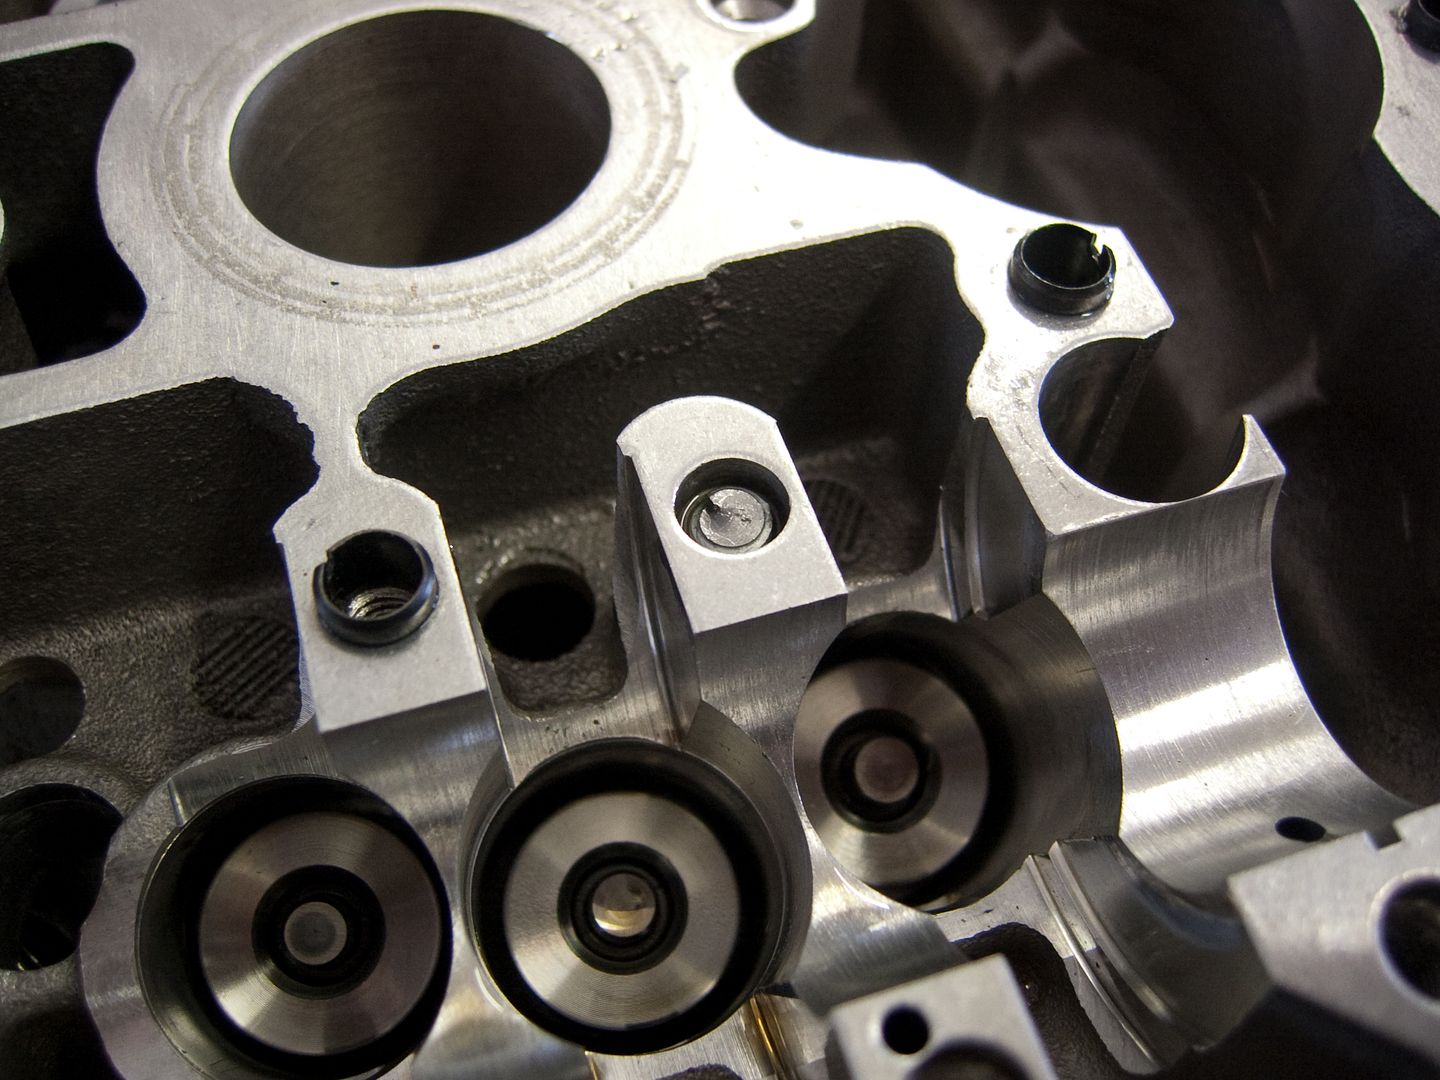
Next was to strip out the cams so I could remove the valves... I still had the ADR cams in but will be putting my std cams back in when I rebuild the head... however... not all went as planned... I was doing the usual crack off the bolts then wind out gradually but was surprised to find two bolts sheared off!... needless to say those bolts have been retired and I will buy 32 new ones!
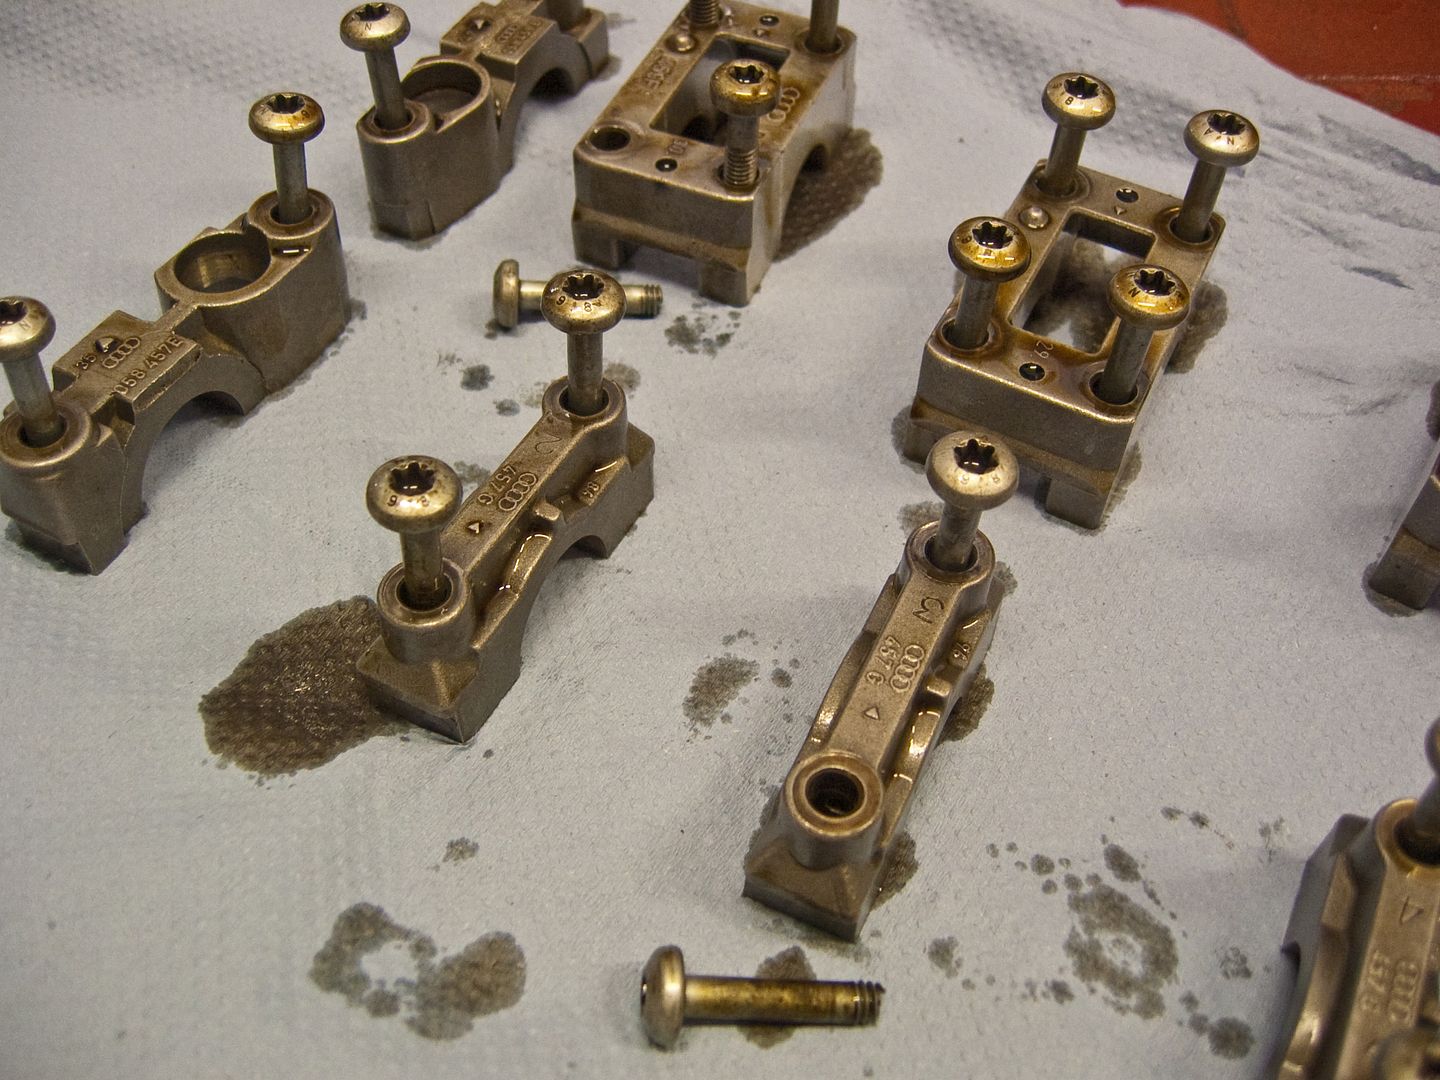
Brilliant!!!... will have to sort that later... cleaned the head and put all the followers/caps away
...and started taking the exhaust valves out... I have supertech single groove valves and bugger me they are grippy!... the collets are designed to grip the valve stem rather than rely on the grooves which can act as a weak point for high load/revving setups... the exhausts have double spring so grip tightly and they mark the valve stems so you have to use a bit of wet and dry (plus oil) to de-burr them else they can damage the guides on the way out..
..then onto the inlets... only nine more to go!!! (20v heads... what a silly idea!!)
Finally done!!...

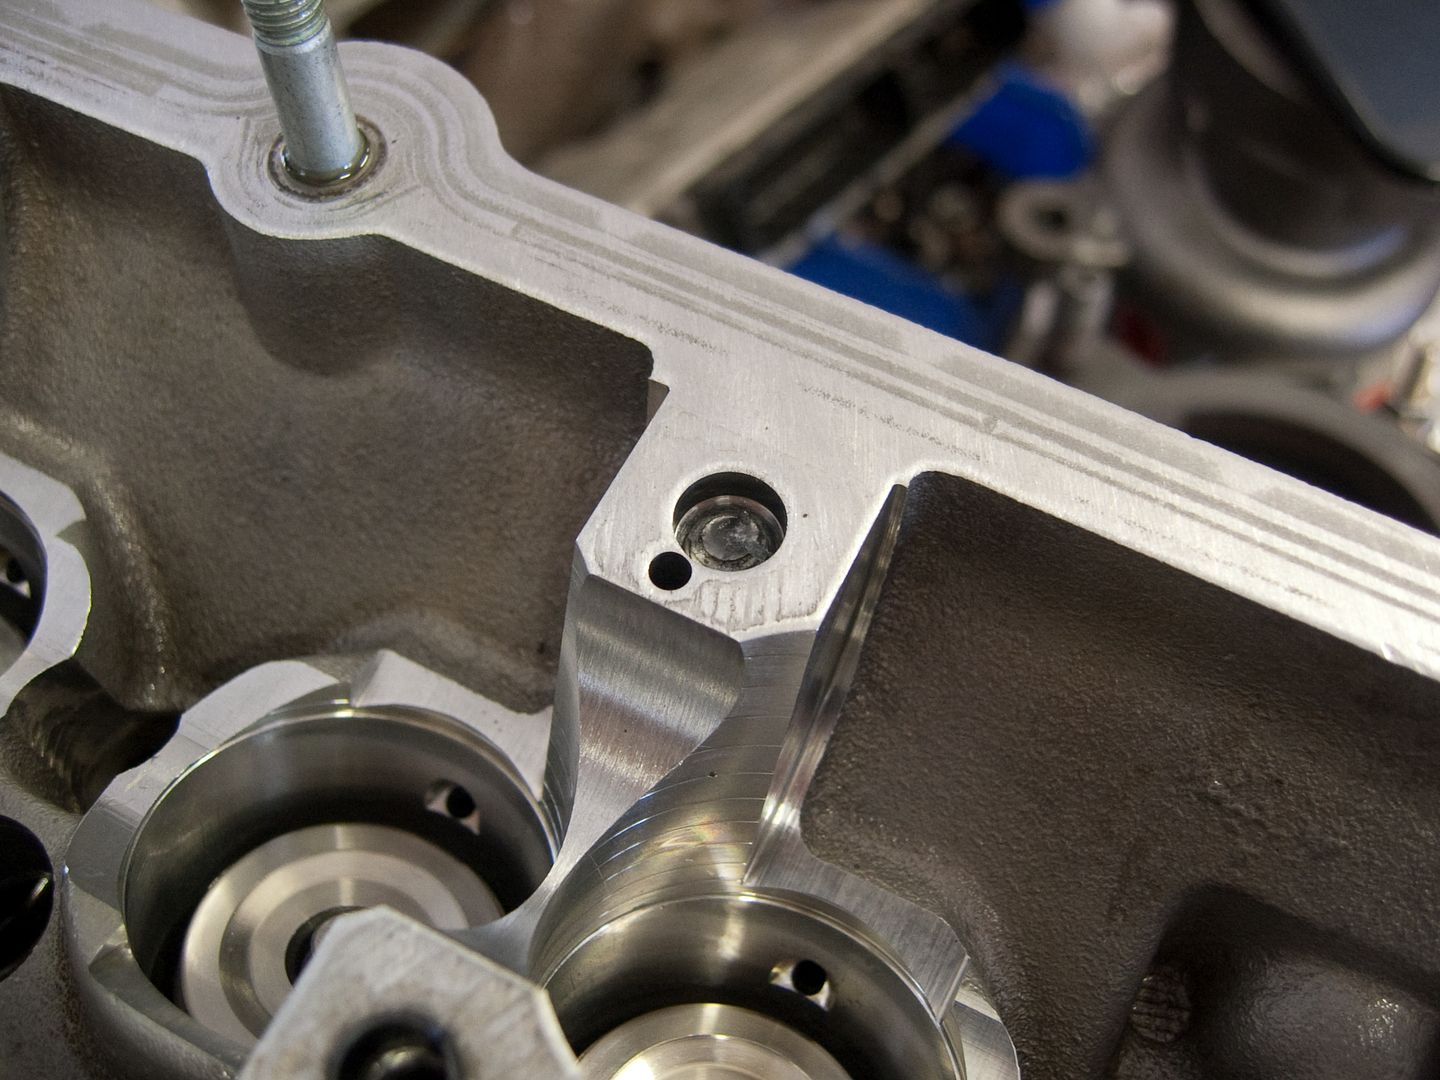
Will let Bill have a look and see what he suggests to get the broken studs out... means I won't be sending the head off just yet
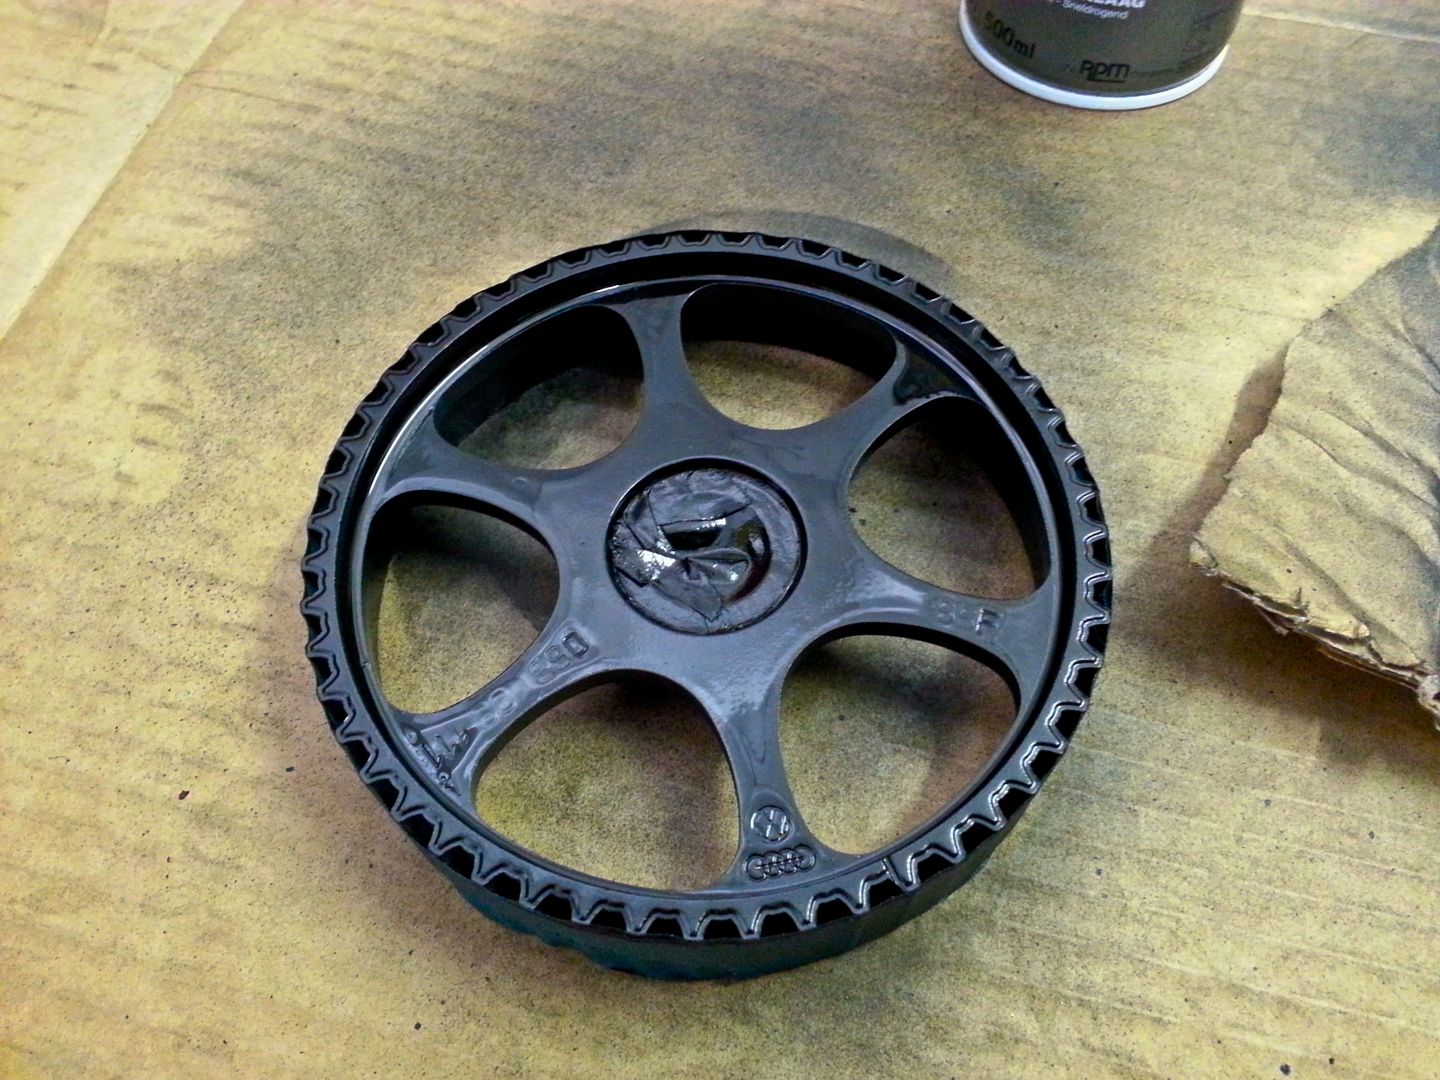
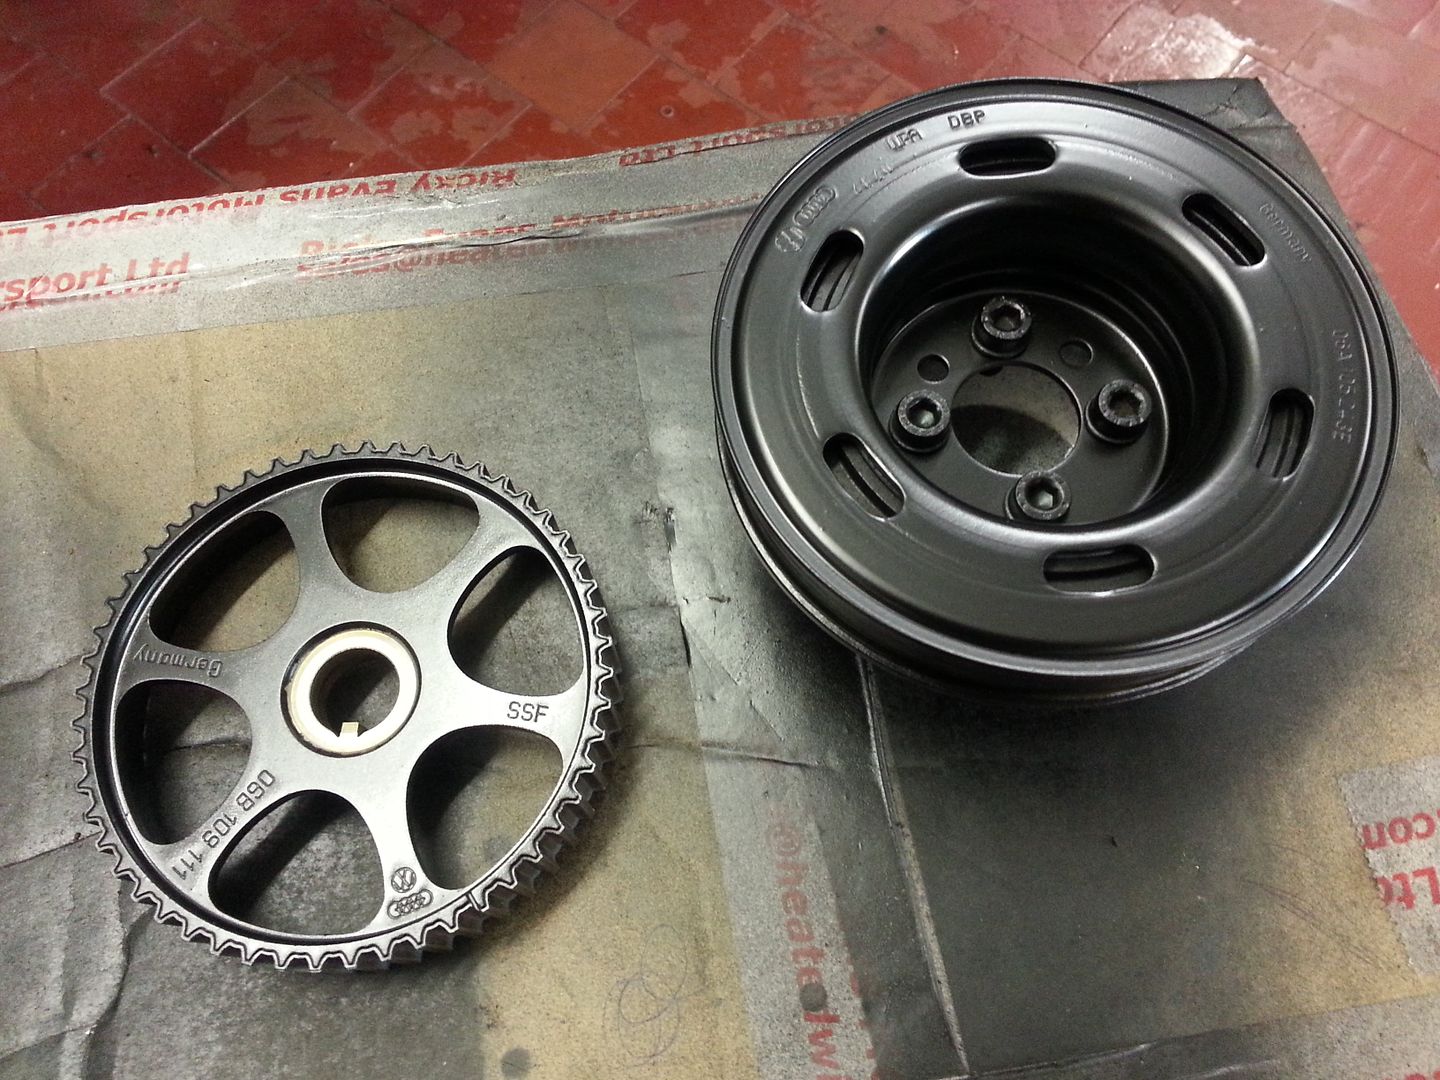
To get over my disappointment I painted the cam pulley
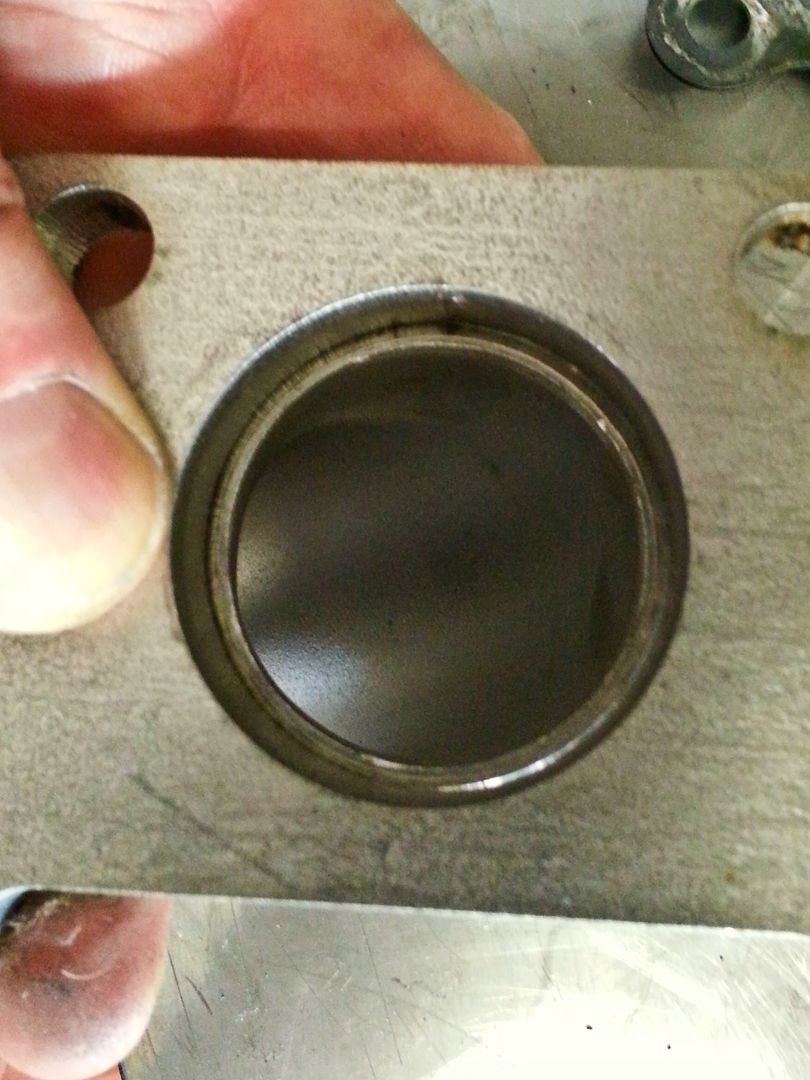
So... I decided to have a look at the exhaust ports and try and get an idea of the direction for the porting and exhaust manifold...
Exhaust port (large port AEB head)..
The exhaust flange I'll be using...
..and the size of fittings...
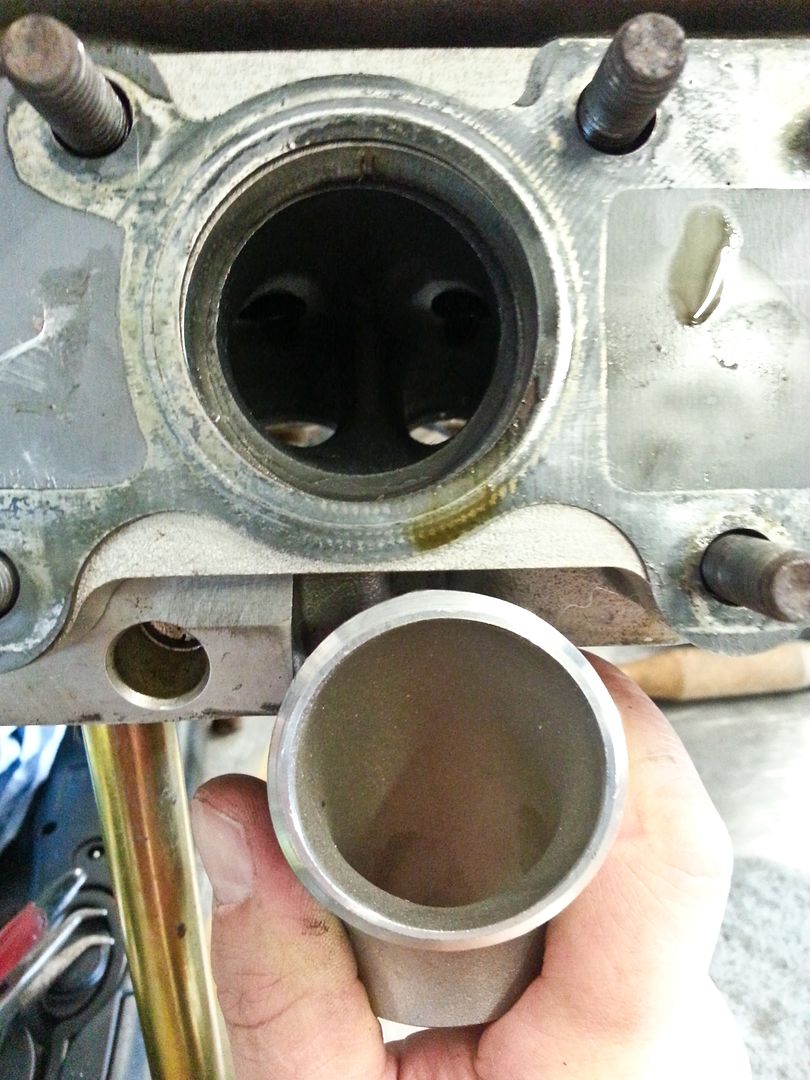
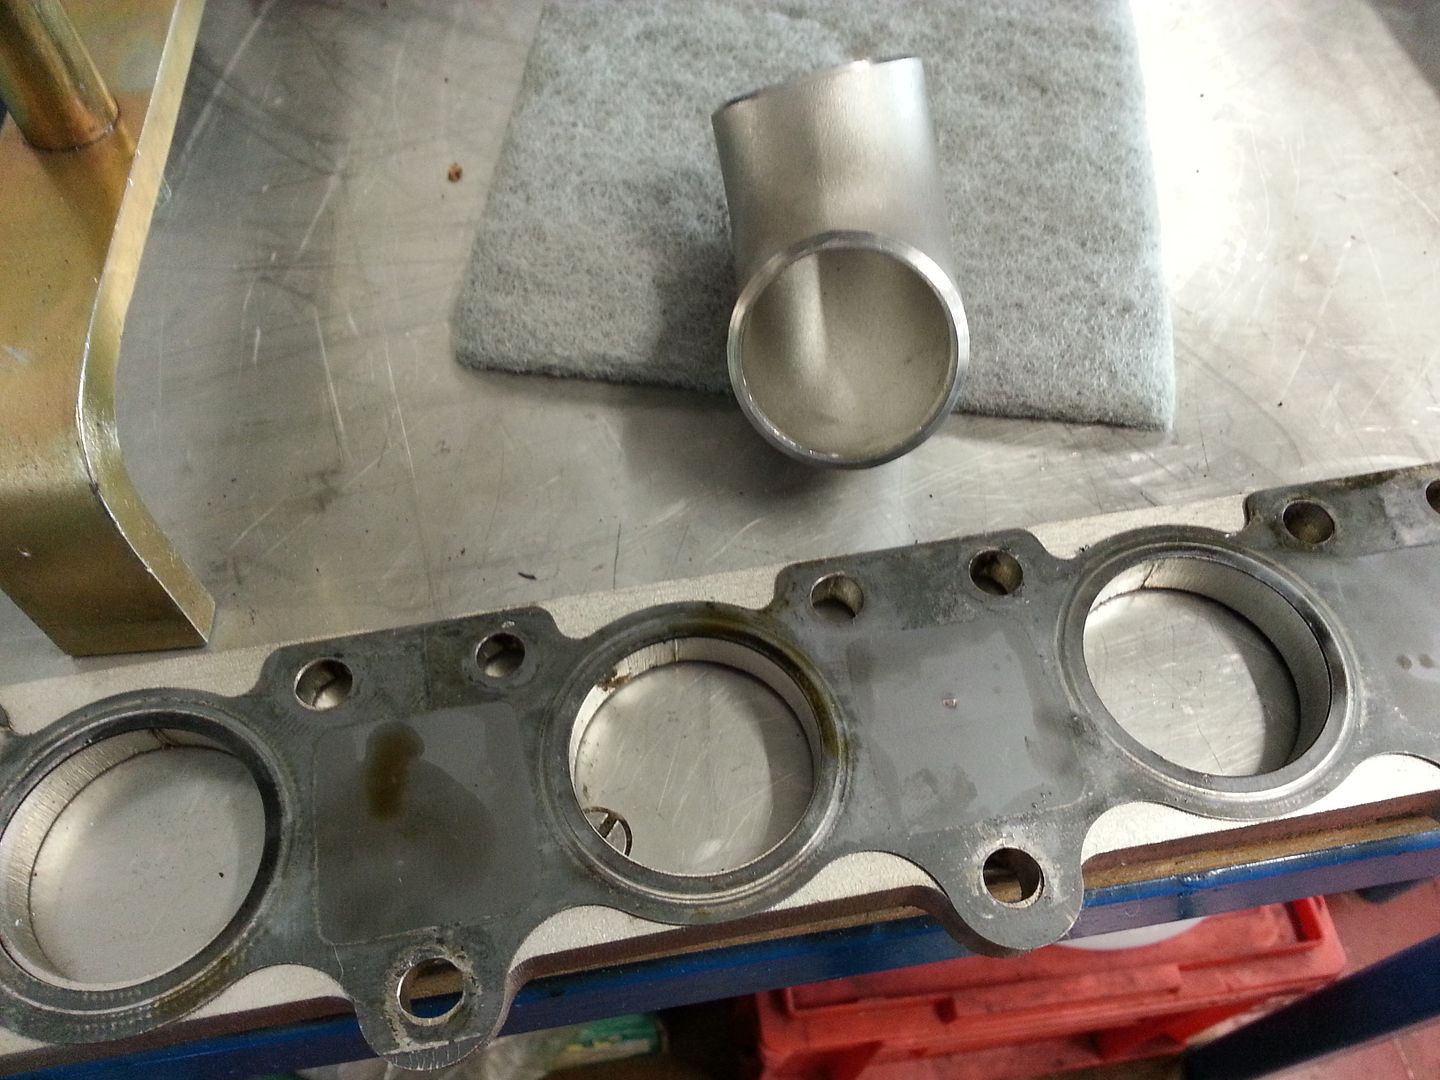
While it may seem a little small there is method to the madness... for a start its the same size as used on the TSR exhaust manifold that Stacey has on his engine, its being used to help get a big ass turbo to spool and its easier to work with than the larger fittings...
Will have a proper faff around at some point later but thats it for now... productive but a little disappointing at the same time... however I did find some issues I wasn't aware of so not all bad and rather it happened this way than after the engine grenaded itself...
<tuffty/>
So removed the turbo and the manifold... all I can say is nordlocks and the M10 conversion just works!... bloody things took a little effort to move, nothing was loose so pleased that worked at least lol.. removed the comp housing to clean the oil off and took the chance to do a little comparison...
Quite a difference...
Next was to strip out the cams so I could remove the valves... I still had the ADR cams in but will be putting my std cams back in when I rebuild the head... however... not all went as planned... I was doing the usual crack off the bolts then wind out gradually but was surprised to find two bolts sheared off!... needless to say those bolts have been retired and I will buy 32 new ones!
Brilliant!!!... will have to sort that later... cleaned the head and put all the followers/caps away
...and started taking the exhaust valves out... I have supertech single groove valves and bugger me they are grippy!... the collets are designed to grip the valve stem rather than rely on the grooves which can act as a weak point for high load/revving setups... the exhausts have double spring so grip tightly and they mark the valve stems so you have to use a bit of wet and dry (plus oil) to de-burr them else they can damage the guides on the way out..
..then onto the inlets... only nine more to go!!! (20v heads... what a silly idea!!)
Finally done!!...
Will let Bill have a look and see what he suggests to get the broken studs out... means I won't be sending the head off just yet
To get over my disappointment I painted the cam pulley
So... I decided to have a look at the exhaust ports and try and get an idea of the direction for the porting and exhaust manifold...
Exhaust port (large port AEB head)..
The exhaust flange I'll be using...
..and the size of fittings...
While it may seem a little small there is method to the madness... for a start its the same size as used on the TSR exhaust manifold that Stacey has on his engine, its being used to help get a big ass turbo to spool and its easier to work with than the larger fittings...
Will have a proper faff around at some point later but thats it for now... productive but a little disappointing at the same time... however I did find some issues I wasn't aware of so not all bad and rather it happened this way than after the engine grenaded itself...
<tuffty/>
That one serious turbo there tuffty.
There is always something to take the shine off a productive day.... bit of lube with stud extractor and the jobs a good un.
There is always something to take the shine off a productive day.... bit of lube with stud extractor and the jobs a good un.
bit of lube with stud extractor and the jobs a good un.
oooh err

Looking good Tuffty. Its about to get to the exciting bit for me

What about the anti sieze fluid that people use to extract injectors or would that be a bit corrosive to the head?
just reading through this and i read the bit about nordlocks and i said to my self "what the fek is a nordlock" a quick google and i found out, they say you learn something new everyday so that must be my new bit of information for today learned, oh and yeh that is a rather large turbo cant wait to see it all together and running
cant wait to see it all together and runningThat one serious turbo there tuffty.
There is always something to take the shine off a productive day.... bit of lube with stud extractor and the jobs a good un.
Thanks Carl... these things are bound to happen... its one of those things... you learn from the experiences and do what you can to fix them... all part of the fun
oooh err
Looking good Tuffty. Its about to get to the exciting bit for me
Yeah... will sort some pics of the bottom end once I have pulled it out
What about the anti sieze fluid that people use to extract injectors or would that be a bit corrosive to the head?
The stud extraction is in hand... the guy doing the head work is going to sort it out and failing that I have a super duper engineering shop on speed dial
just reading through this and i read the bit about nordlocks and i said to my self "what the fek is a nordlock" a quick google and i found out, they say you learn something new everyday so that must be my new bit of information for today learned, oh and yeh that is a rather large turbo
Half the reason I have a thread like this is so that hopefully somebody will read it and get something from it... hopefully it shows what can be done if you put you mind to it and of course the amount of work and thought that goes into builds like these that a lot of people don't realise and take for granted...
While mine isn't quite in the same league as other builds it makes me happy that people are learning stuff off the back of it.... even if it is just about a lowly little washer... that little washer has prevented a repeat of this...
<tuffty/>
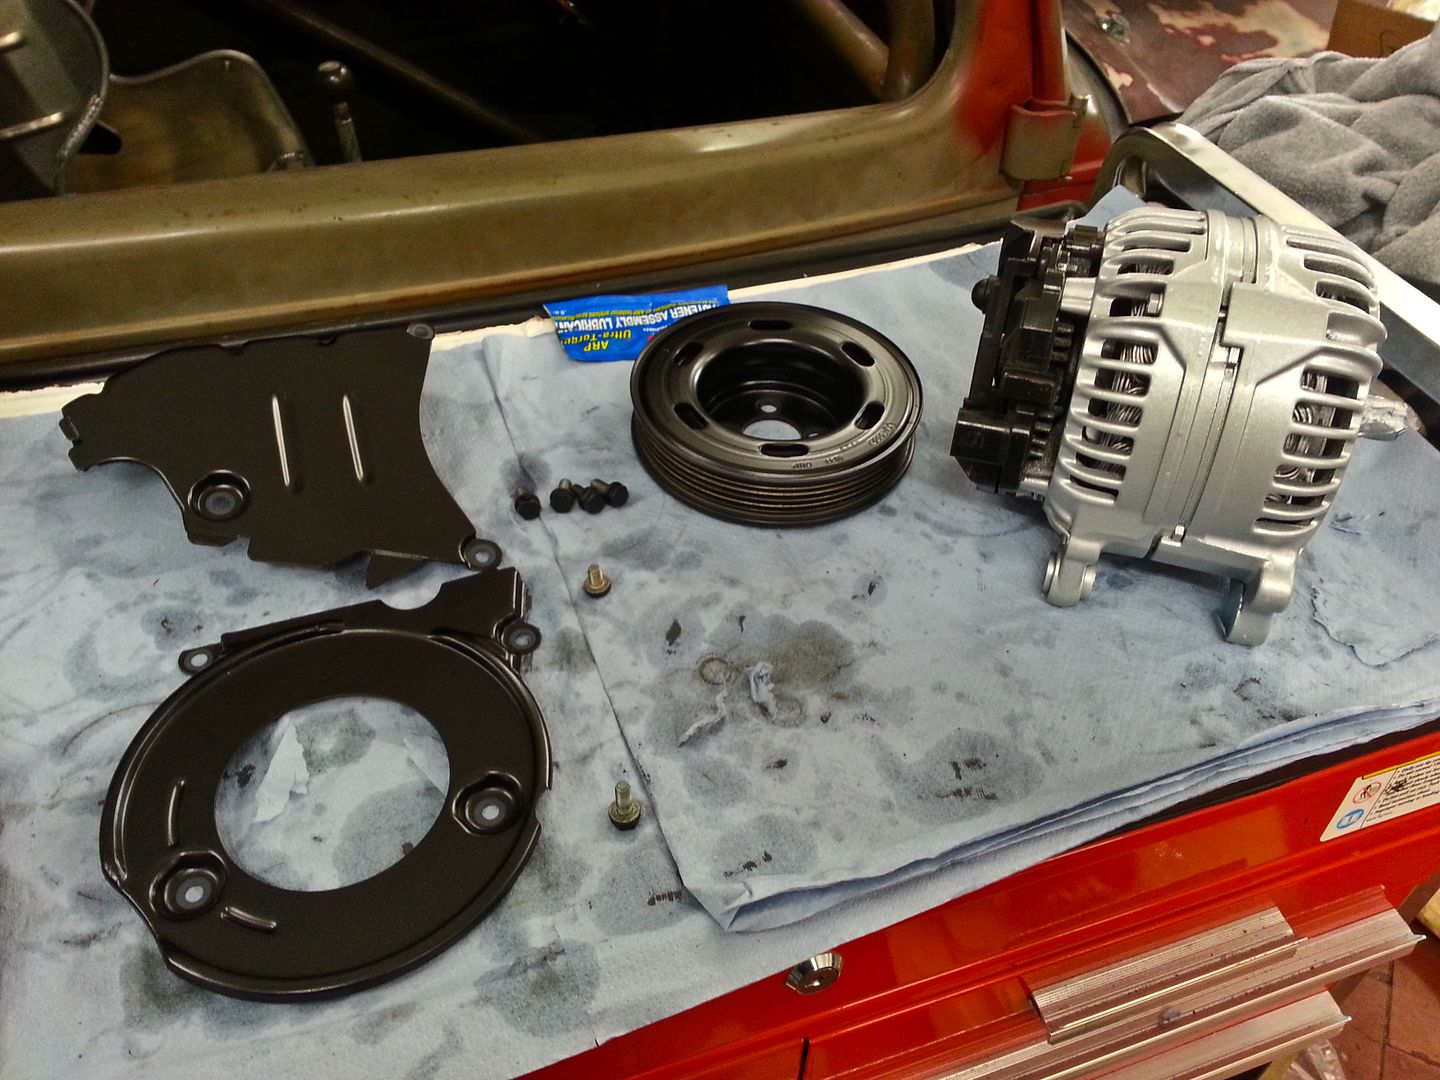
Got a few more things done...
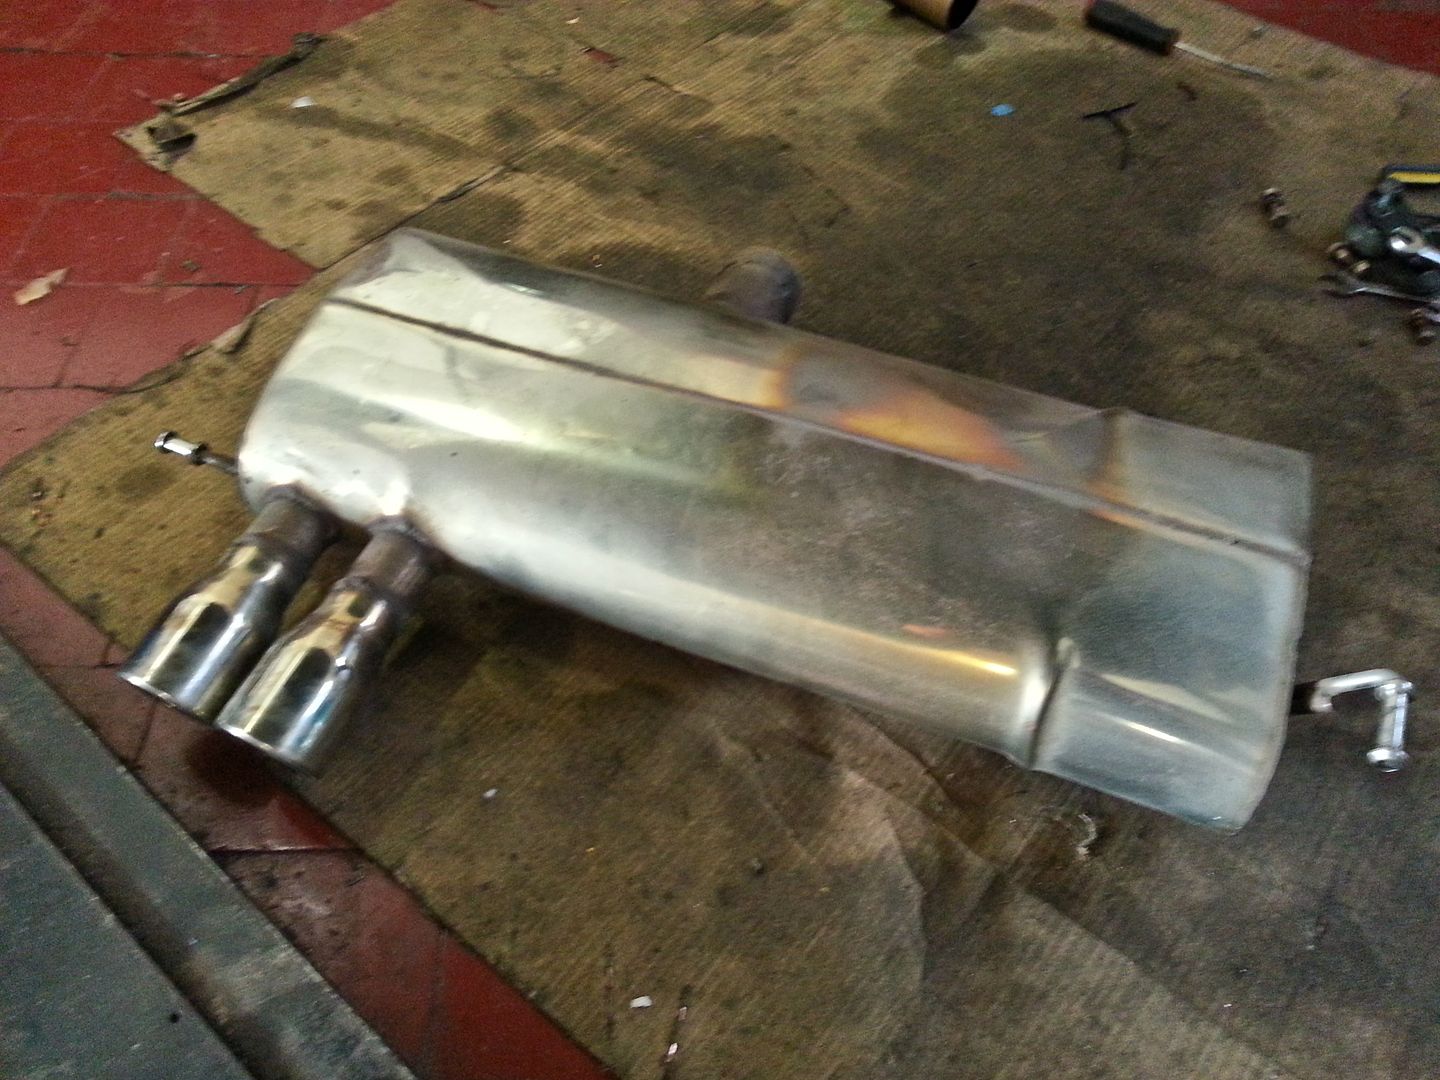
Miltek is off... will be using a similar setup to the GTX3071 turbo'd S3 Bill had in the other week (3" custom back box) as the miltek is struggling and if I end up with more power then it will just be inadequate...
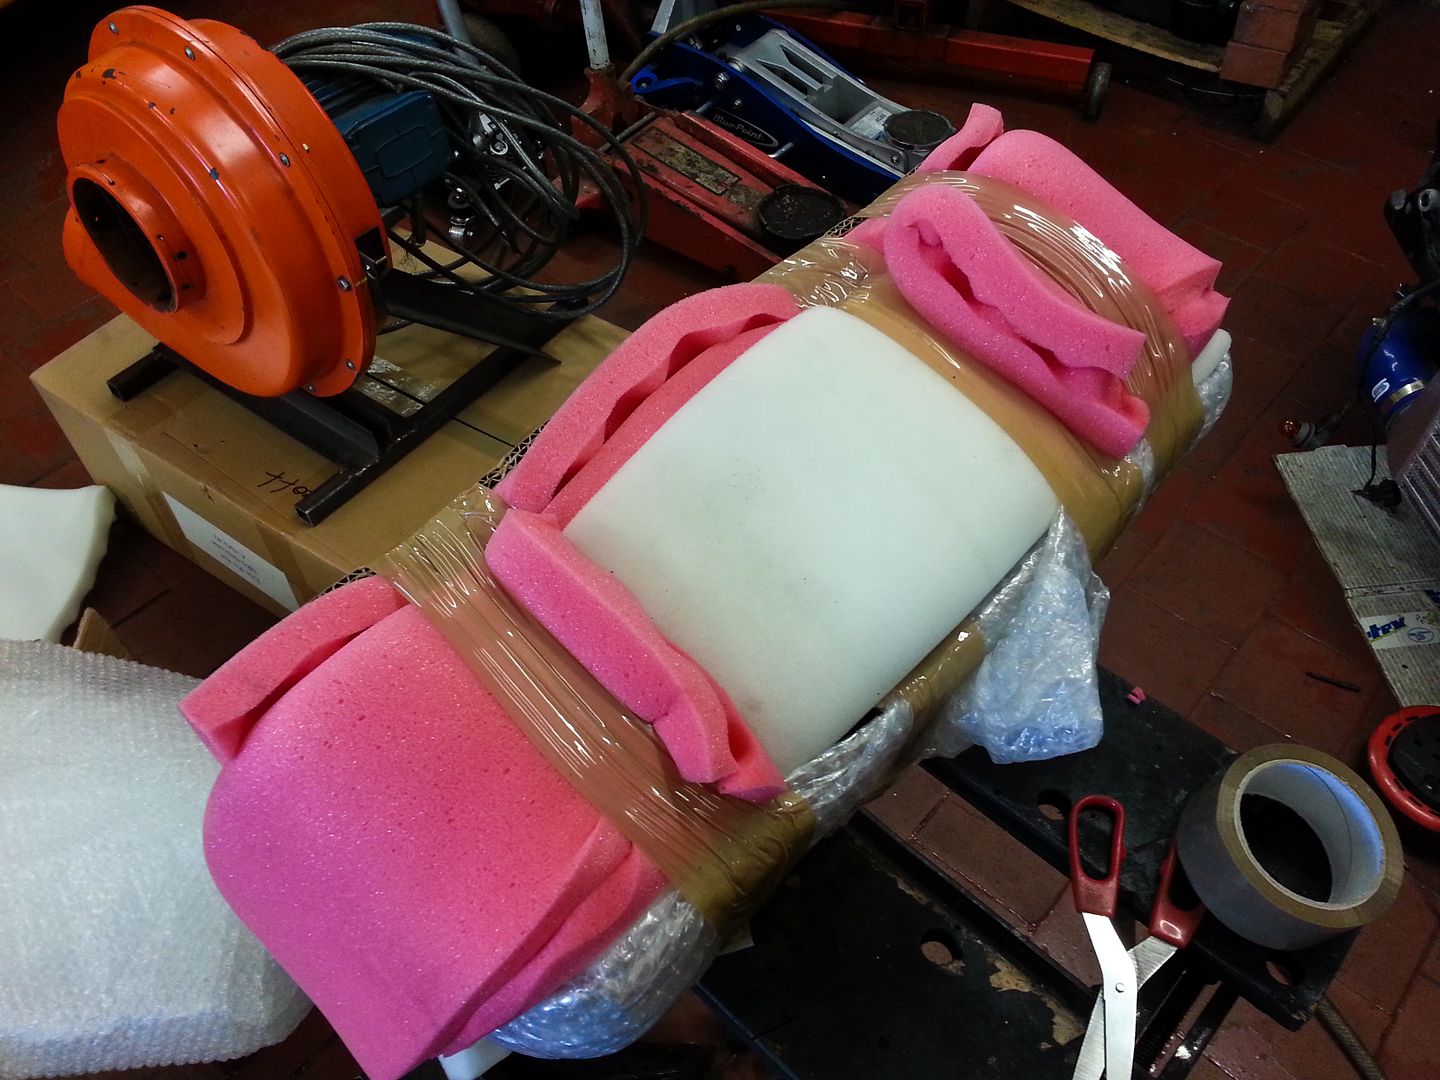
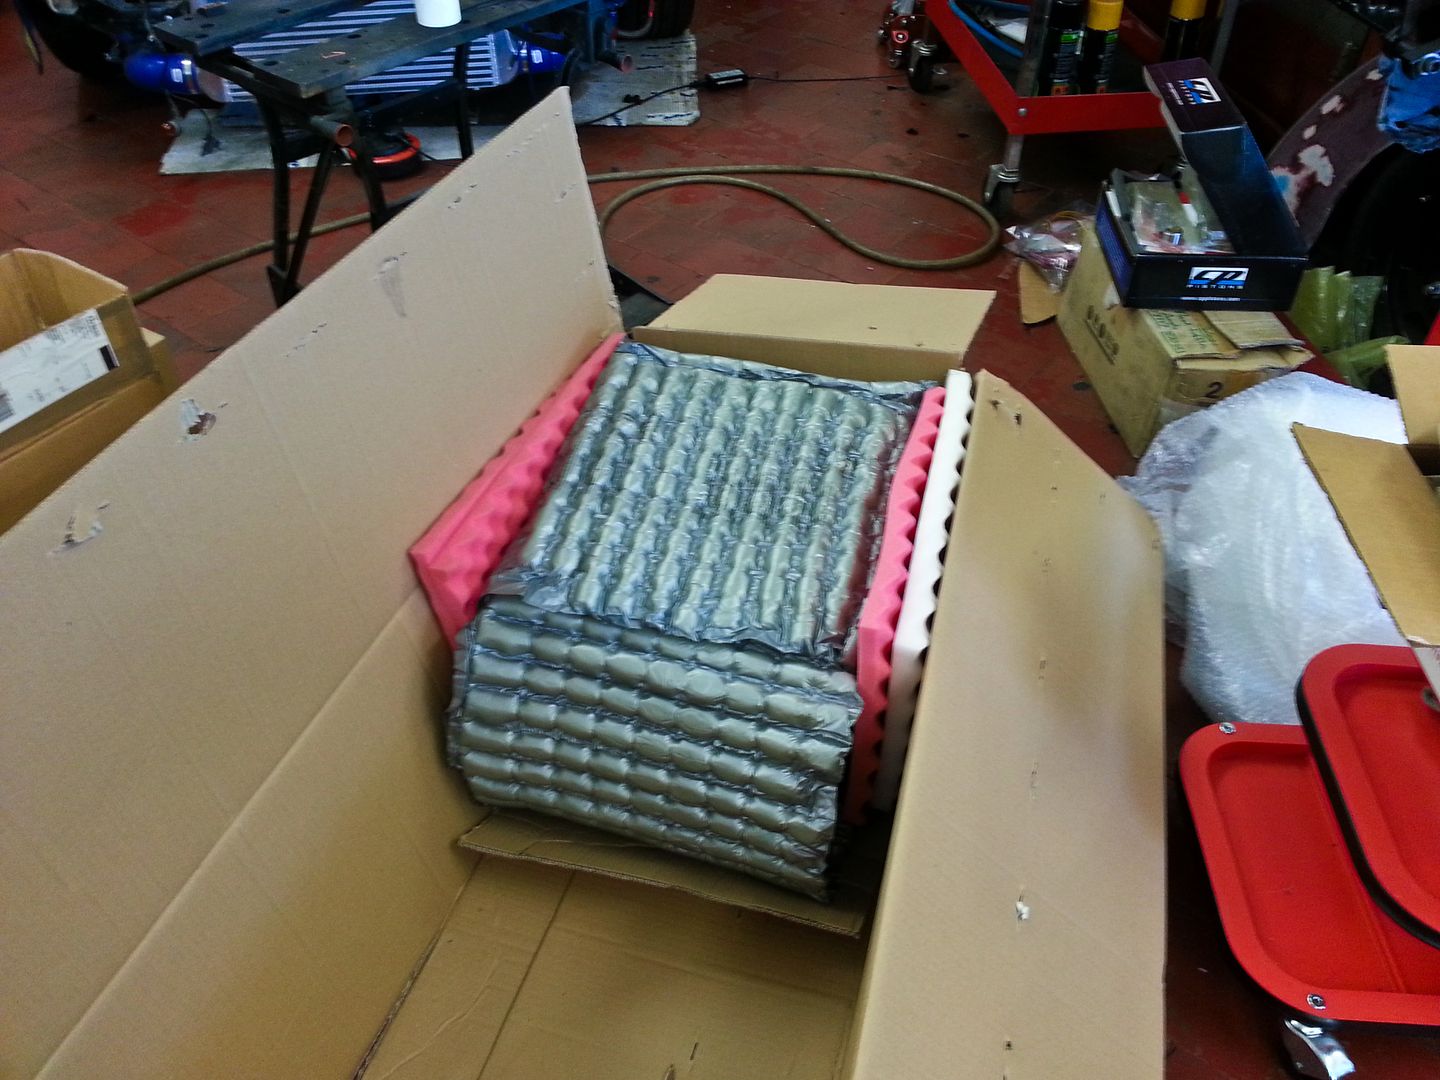
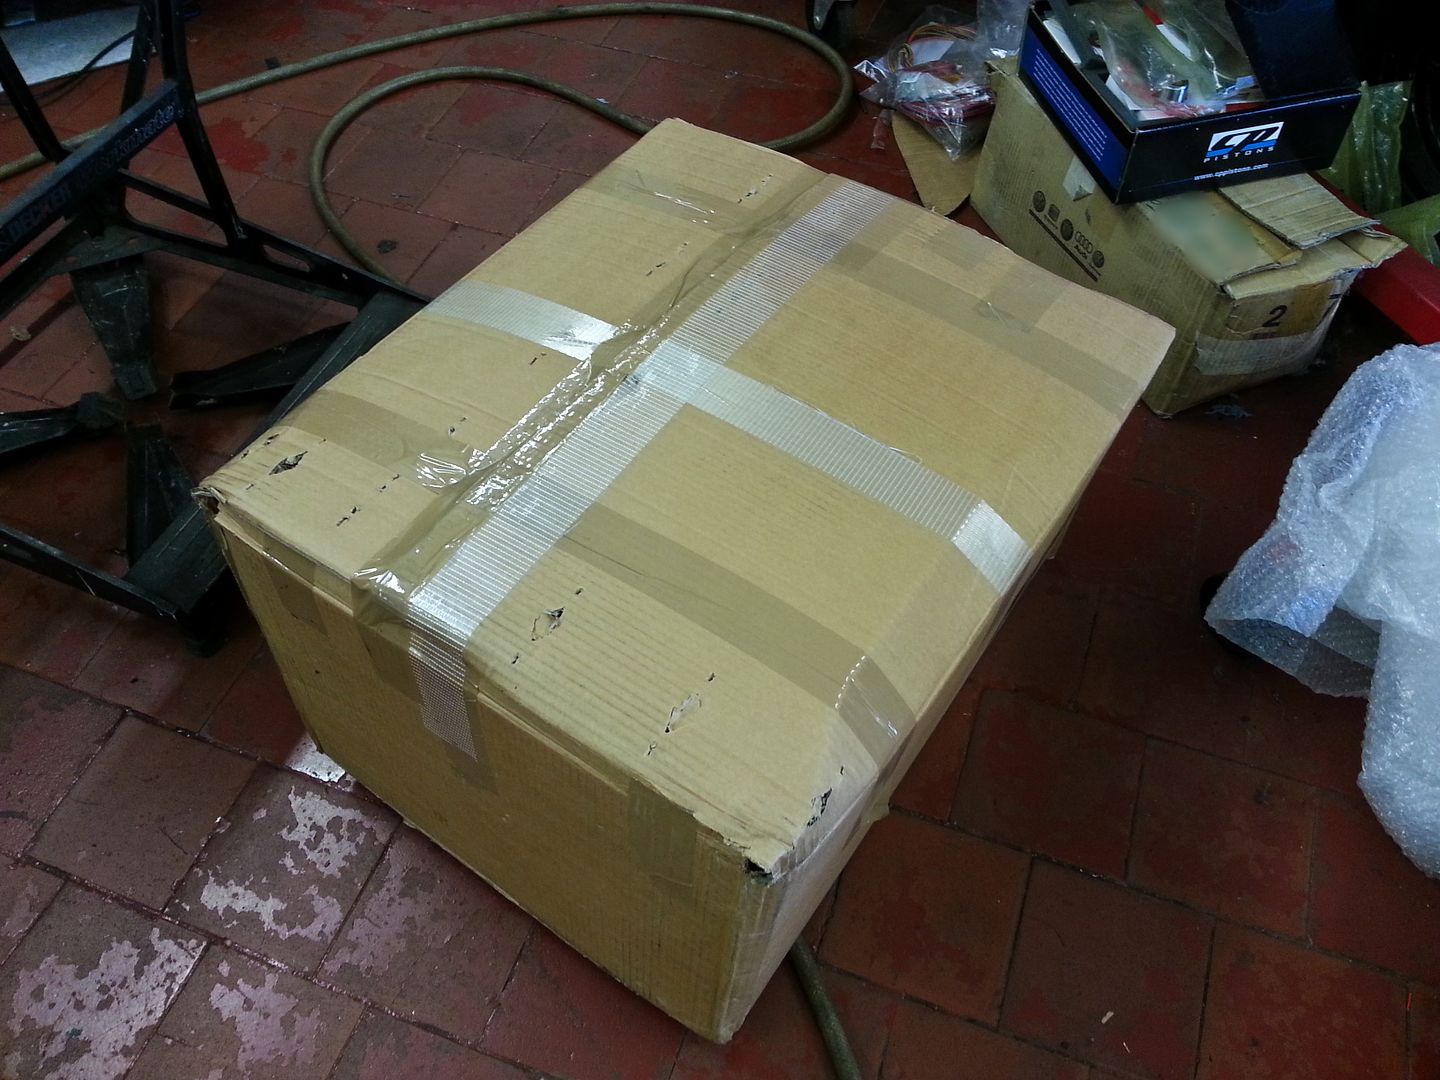
Packed the head ready to go to be ported... Bill has had a couple of heads damaged by couriers in the past so I may have gone a little OTT on the packing
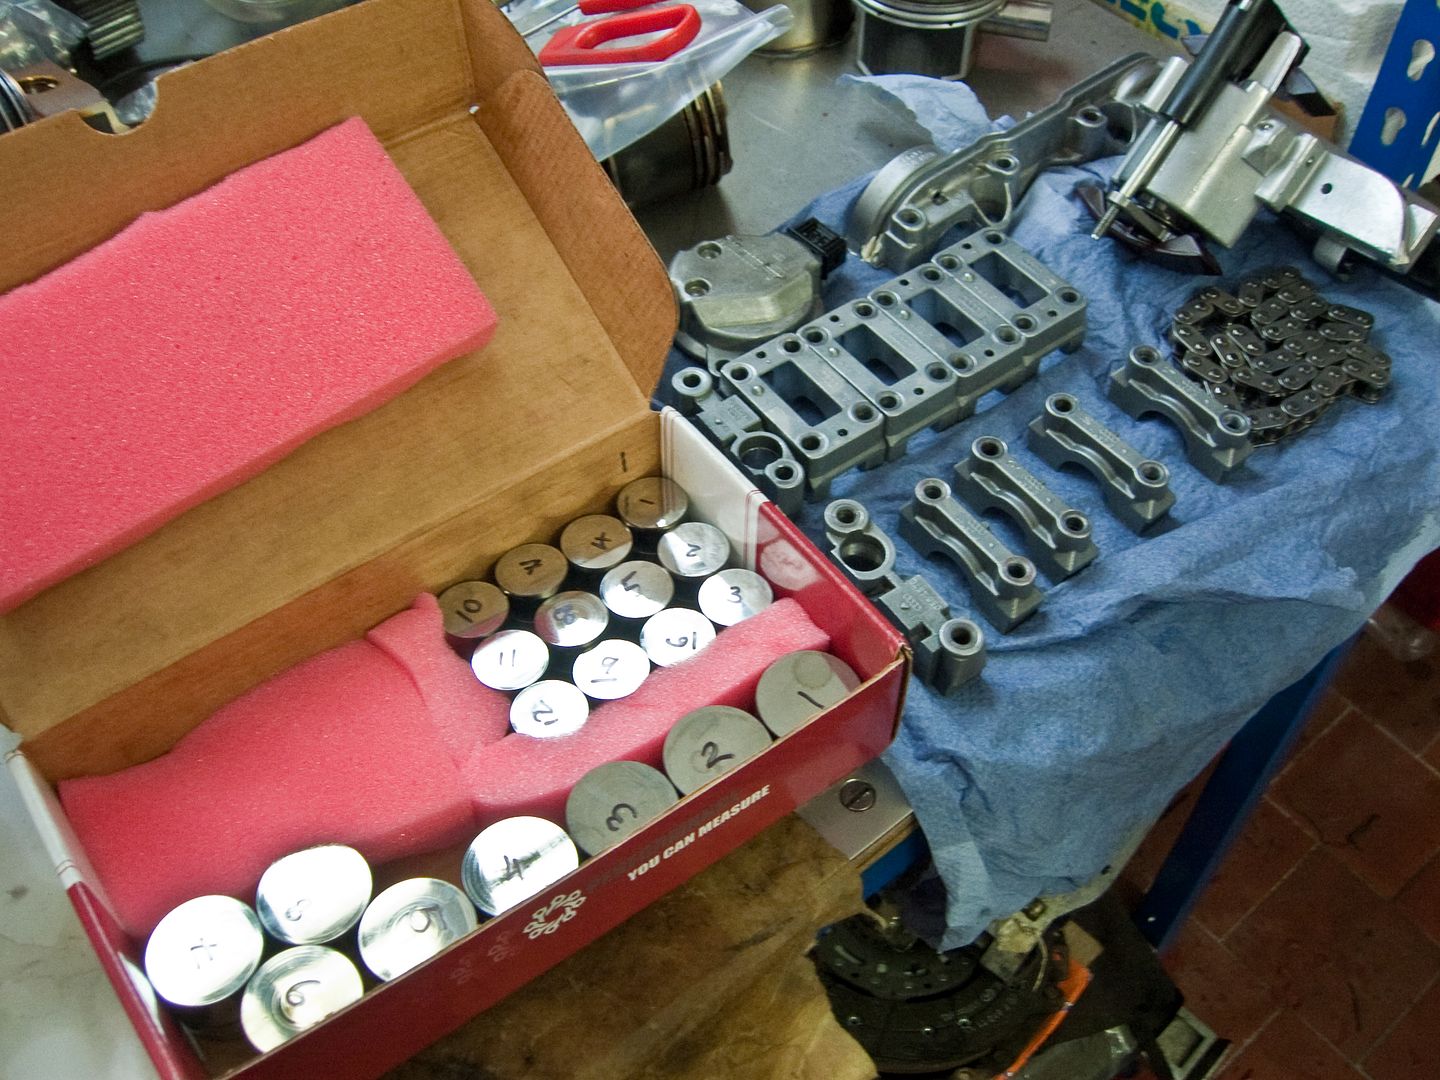
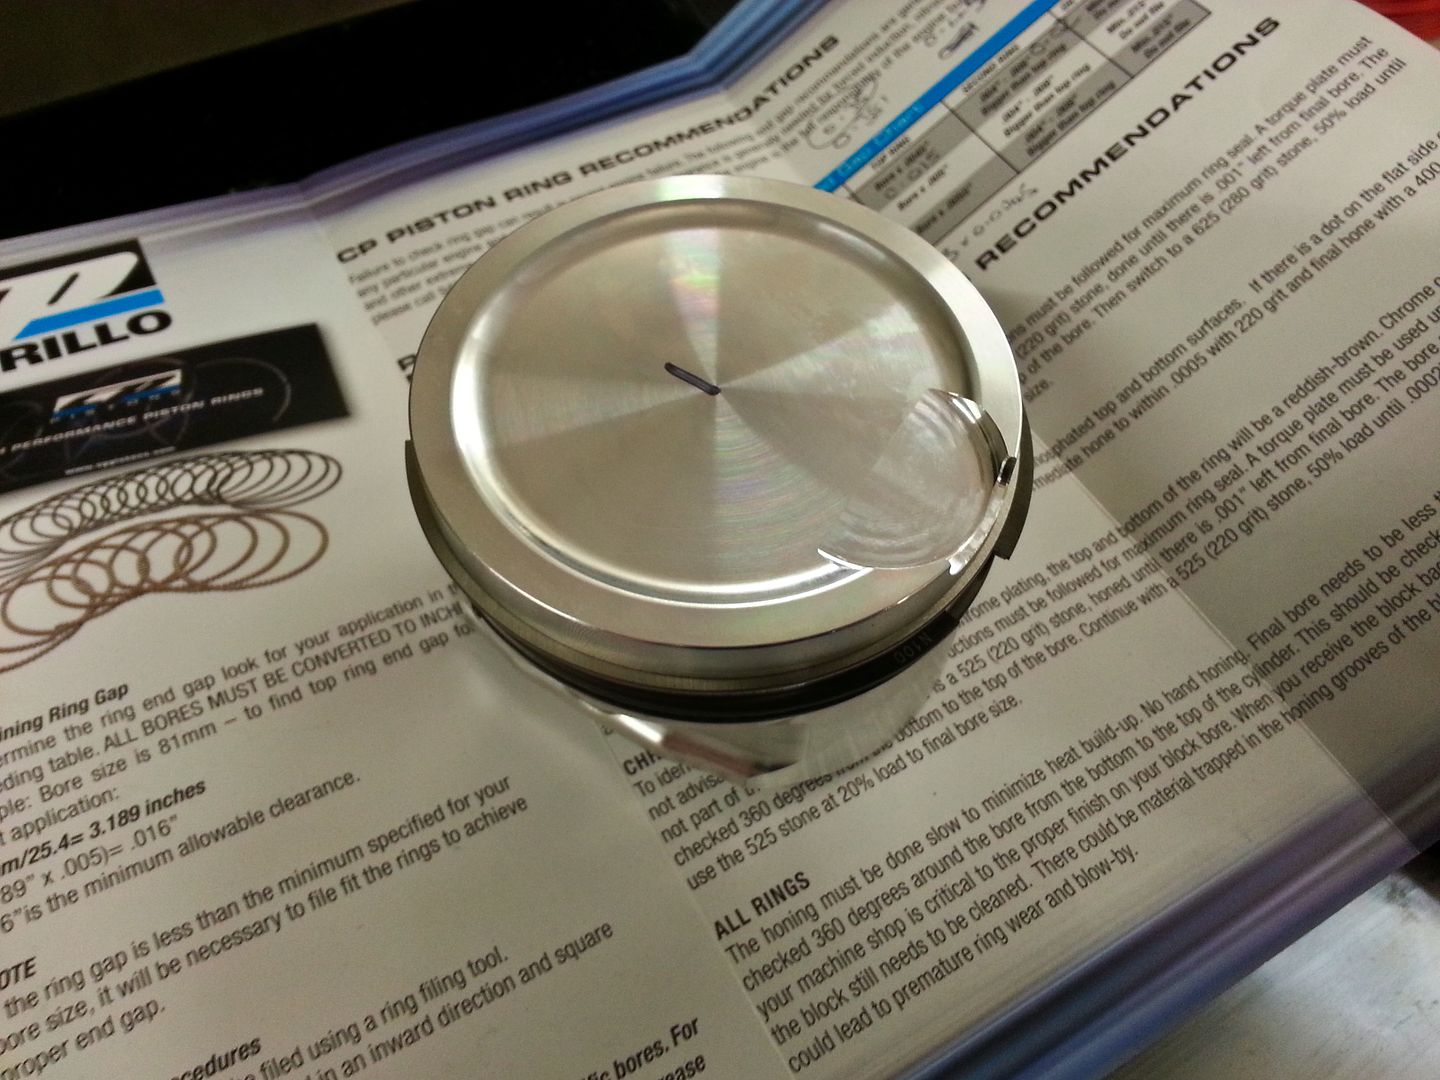
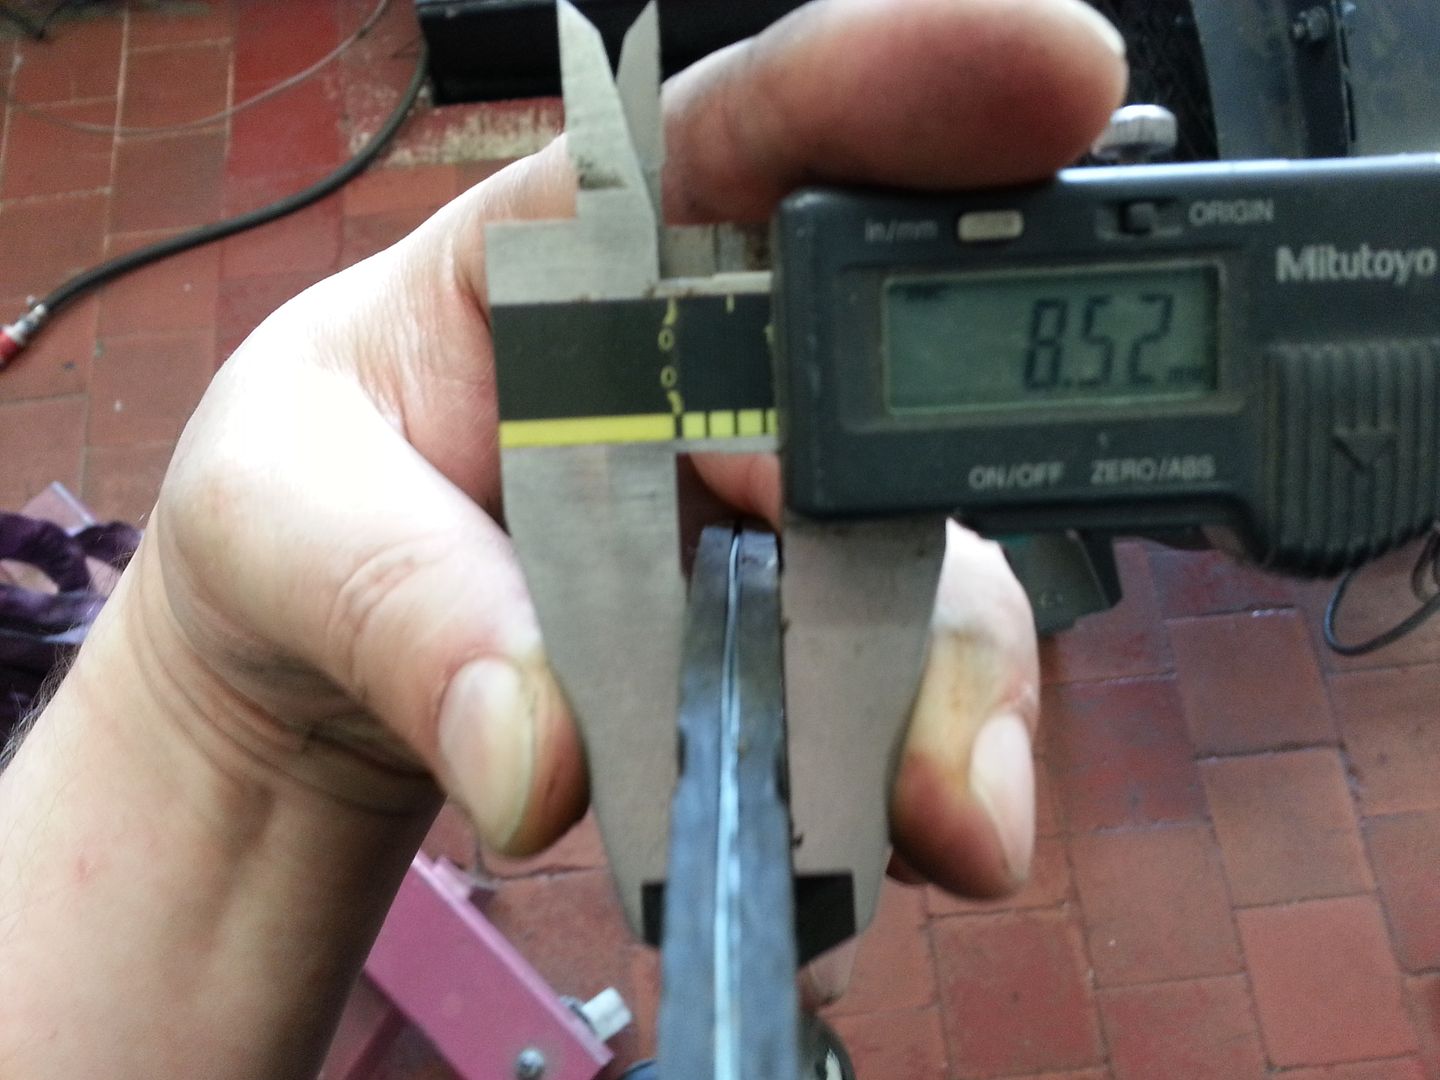
Next... rings... not the most fun job in the world... lots of measuring and filing and measuring and filing... etc...
Started on Cyl 1... the top rings are chrome and are hard as nails... nothing we had would touch the buggers and the last set I seen of these got ruined when my mate got slightly over zealous with a file as they were that hard!... so, used a grind wheel on a dremel and carefully held the ring in the vice (using packing and not too tight as to stress it... fragile little buggers!!) I then very carefully ground a little at a time checking that the ring closed properly and after a few measure/grind cycles the first piston was done... the second compression ring was filed as this was not a hard material like the top ring but the two supporting rings for the oil ring were a spring steel so needed grinding too...
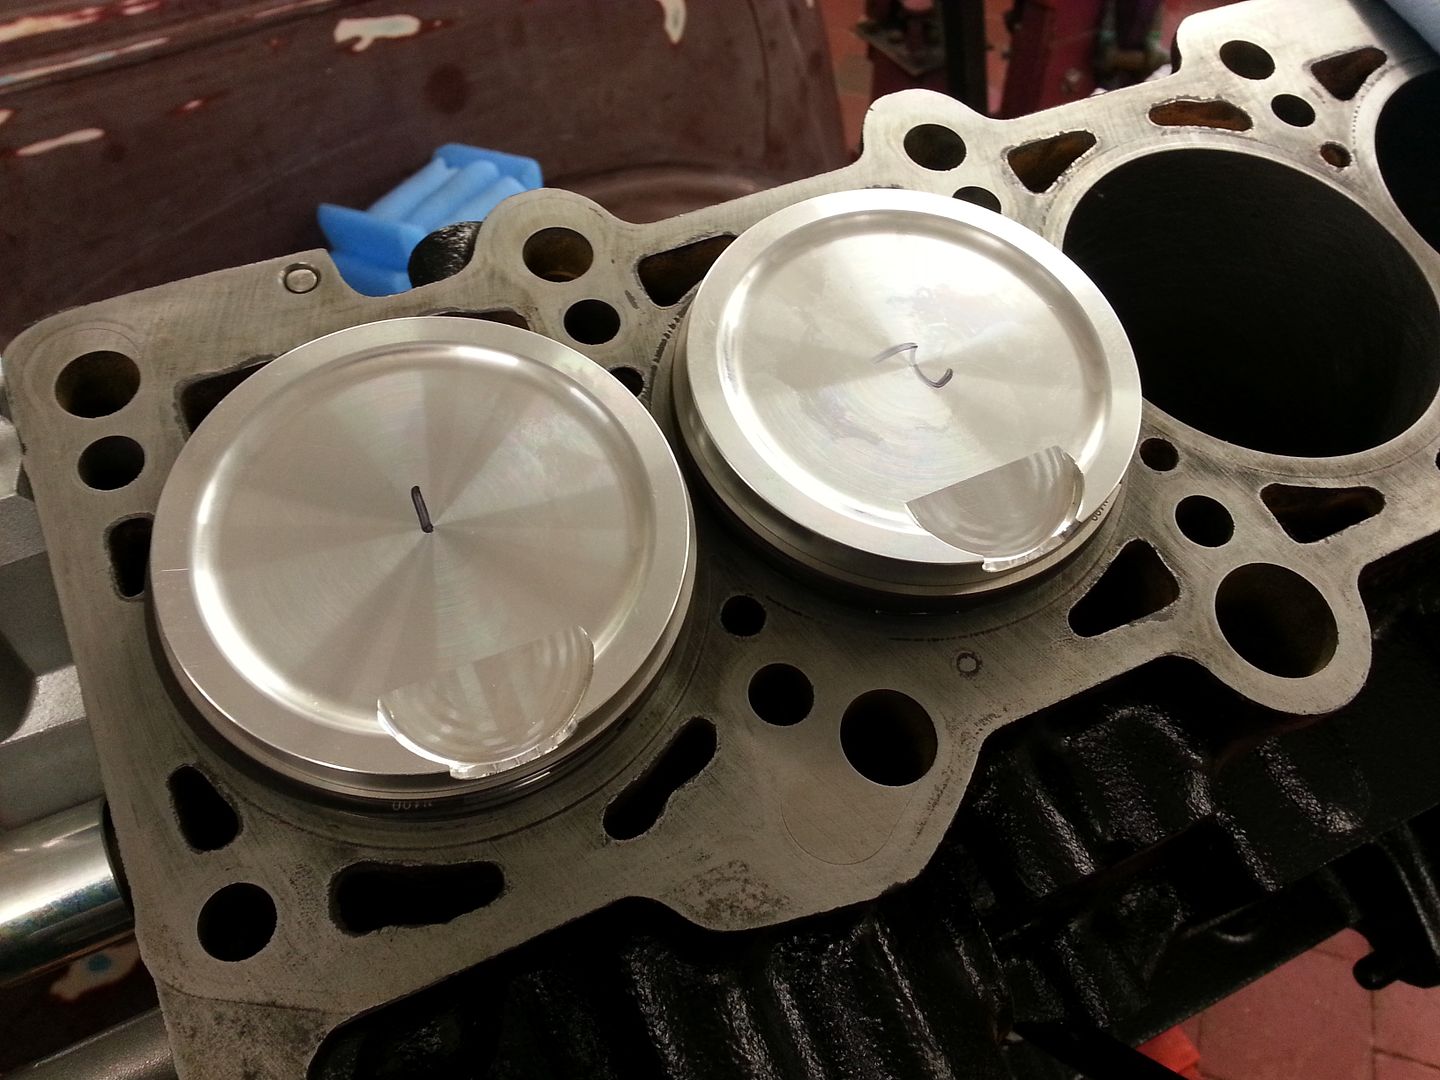
1 & 2 done...
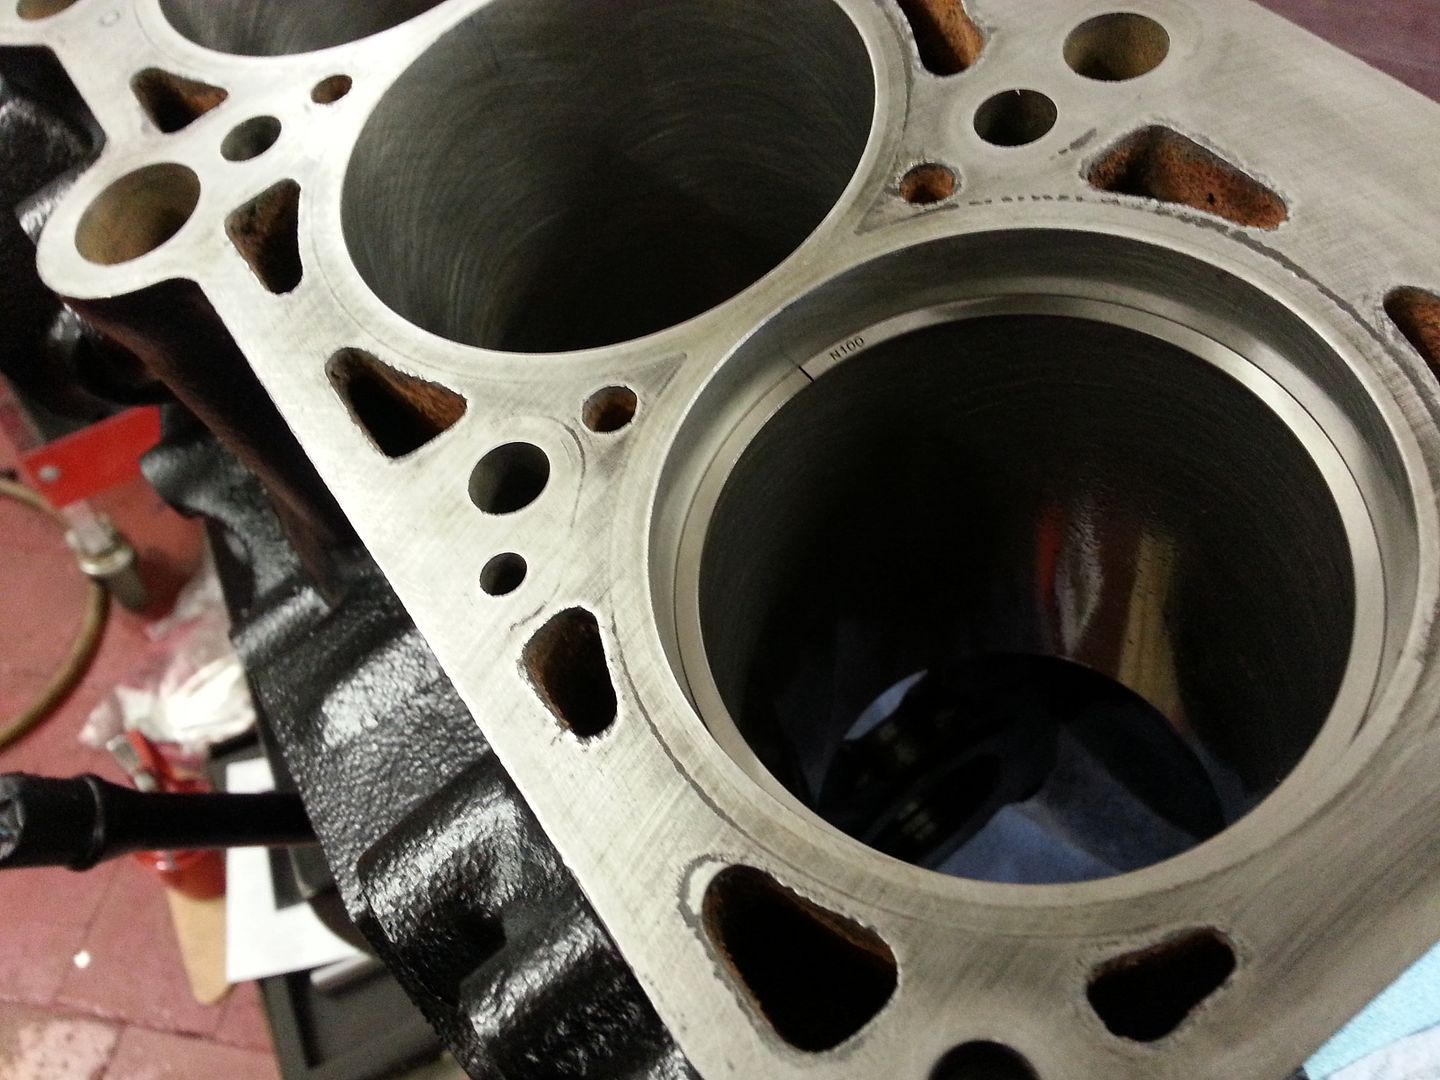
...home stretch, cyl 4 top ring gapped...
Phew!... thats one job less to do... next up will be plasti gauge the mains and big ends just to satisfy myself everything is good and will be a nice learning experience too...
Next weekend I hope to have the engine and gear box out and the bottom end built
<tuffty/>
Miltek is off... will be using a similar setup to the GTX3071 turbo'd S3 Bill had in the other week (3" custom back box) as the miltek is struggling and if I end up with more power then it will just be inadequate...
Packed the head ready to go to be ported... Bill has had a couple of heads damaged by couriers in the past so I may have gone a little OTT on the packing
Next... rings... not the most fun job in the world... lots of measuring and filing and measuring and filing... etc...
Started on Cyl 1... the top rings are chrome and are hard as nails... nothing we had would touch the buggers and the last set I seen of these got ruined when my mate got slightly over zealous with a file as they were that hard!... so, used a grind wheel on a dremel and carefully held the ring in the vice (using packing and not too tight as to stress it... fragile little buggers!!) I then very carefully ground a little at a time checking that the ring closed properly and after a few measure/grind cycles the first piston was done... the second compression ring was filed as this was not a hard material like the top ring but the two supporting rings for the oil ring were a spring steel so needed grinding too...
1 & 2 done...
...home stretch, cyl 4 top ring gapped...
Phew!... thats one job less to do... next up will be plasti gauge the mains and big ends just to satisfy myself everything is good and will be a nice learning experience too...
Next weekend I hope to have the engine and gear box out and the bottom end built
<tuffty/>
Last edited:
Todays fun and games....
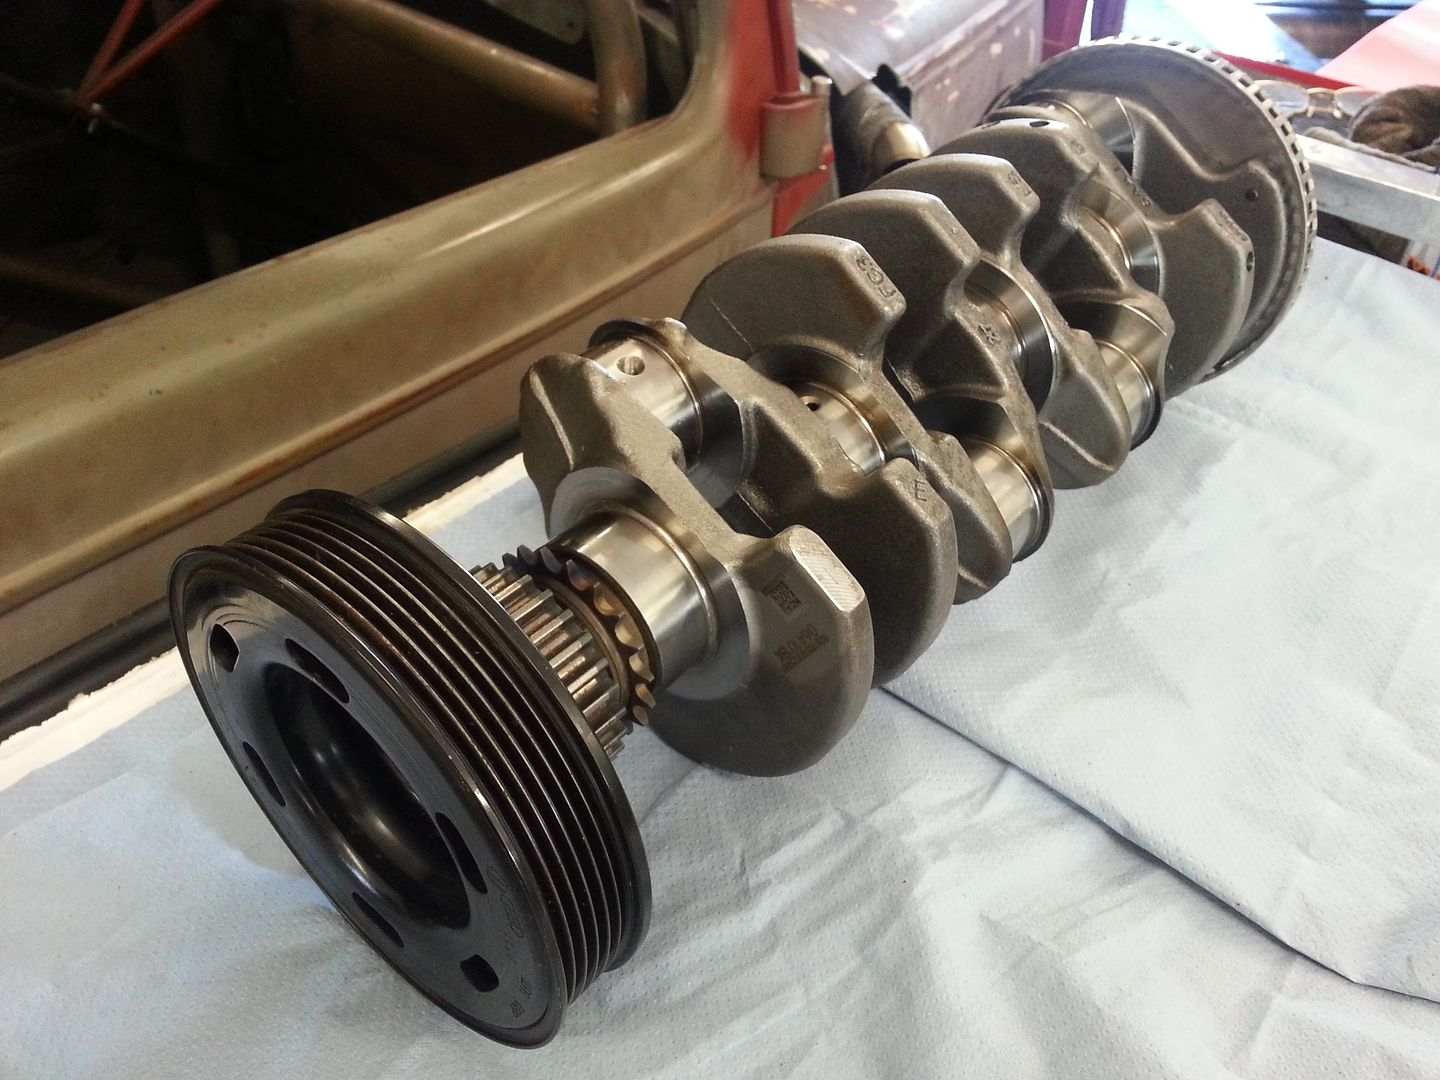
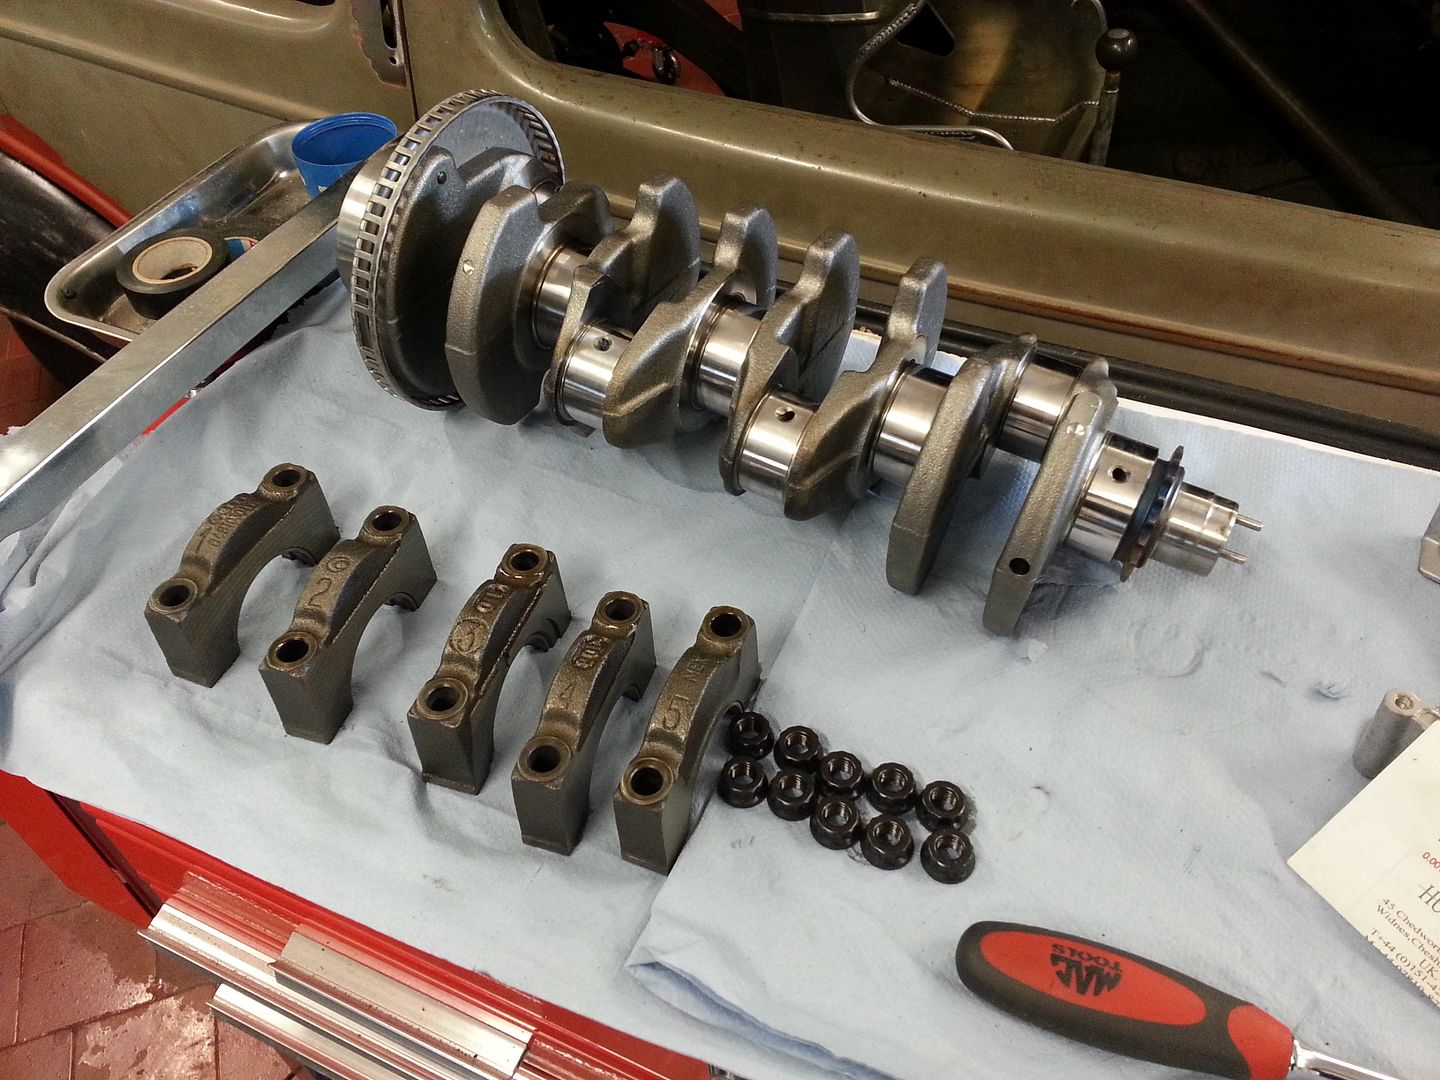
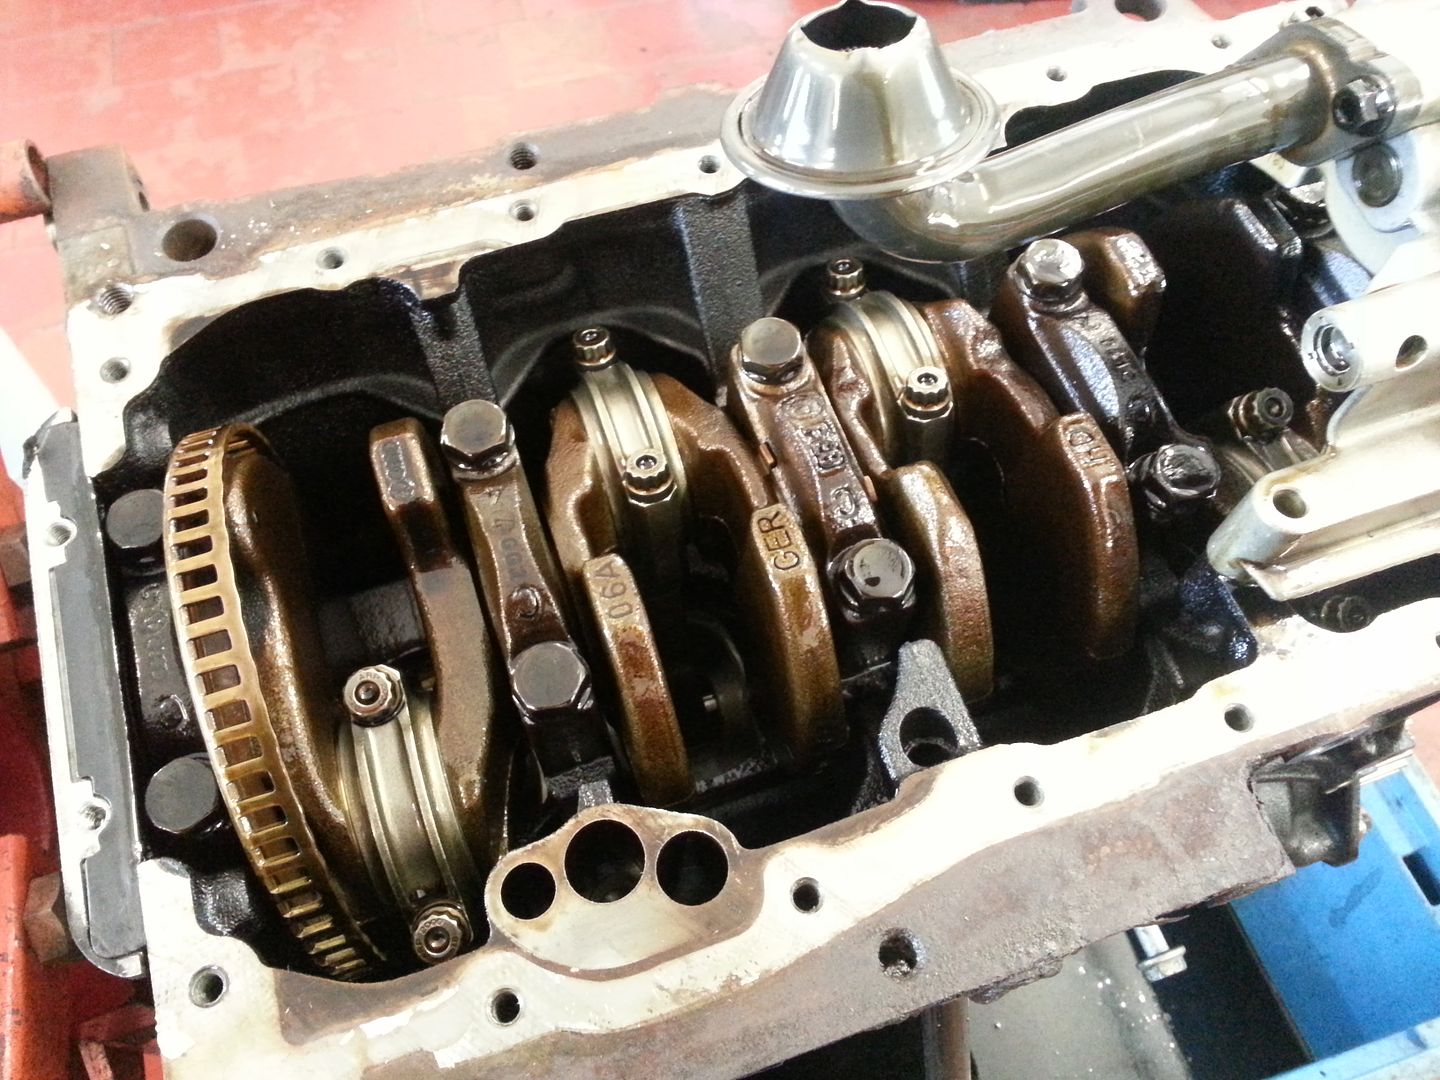
Started by putting the new bottom end together... crank as it came back from balancing..
Removed caps from block and cleaned bearings... also cleaned the crank...
Popped a bit of ARP lube on the threads and the mating surface of the nuts...
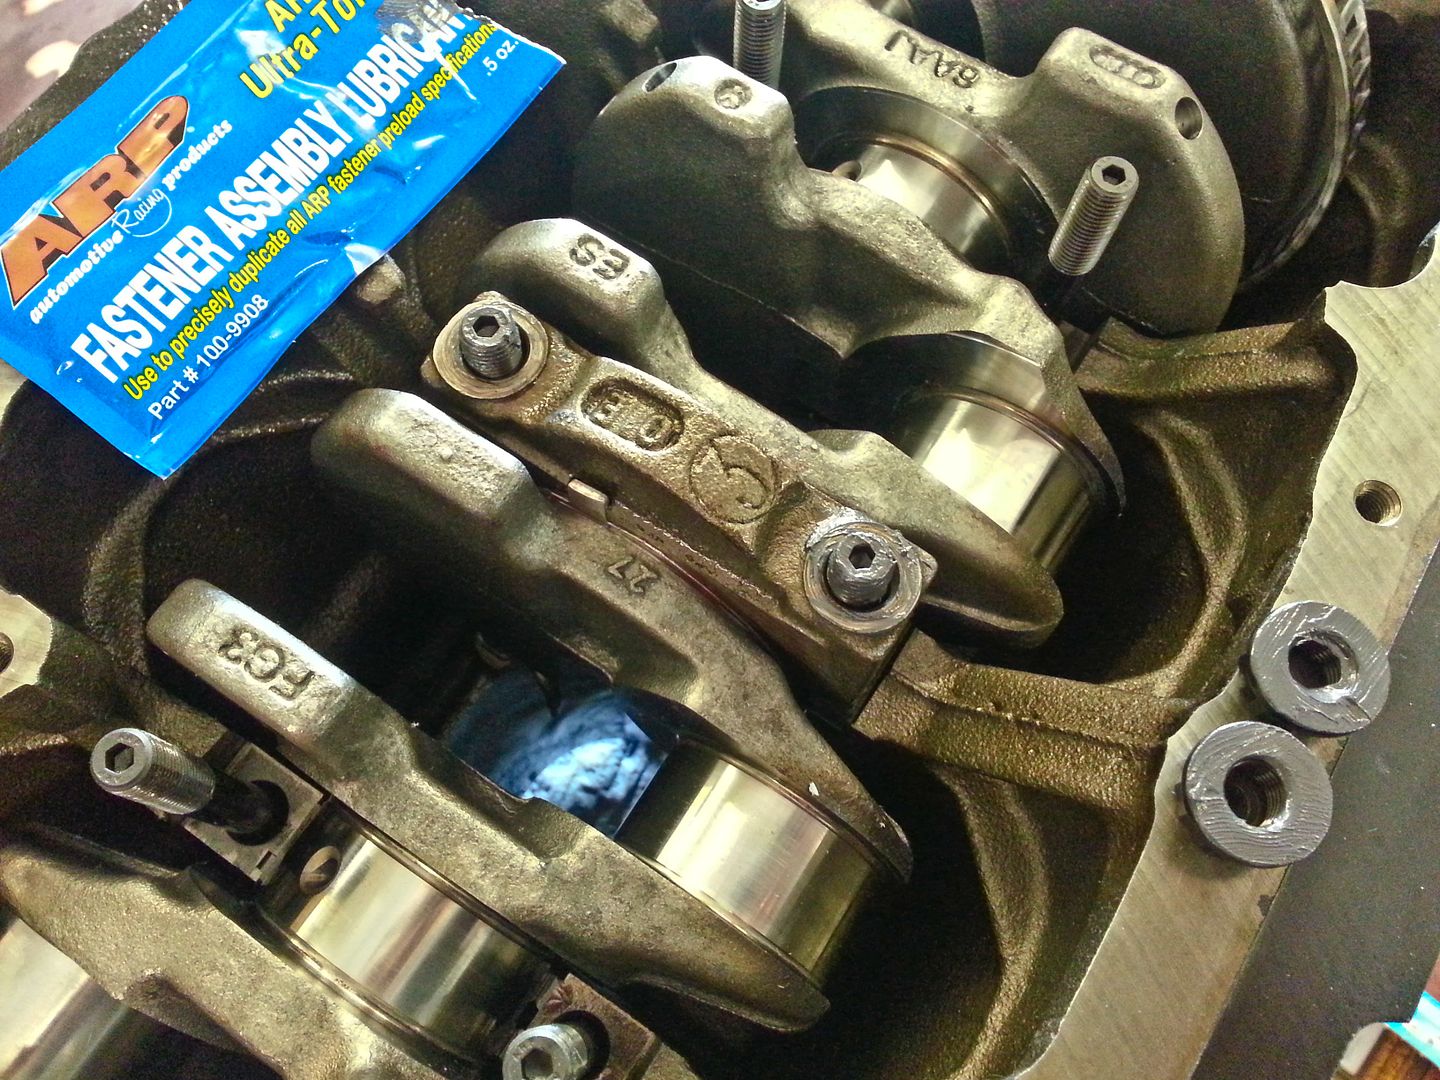
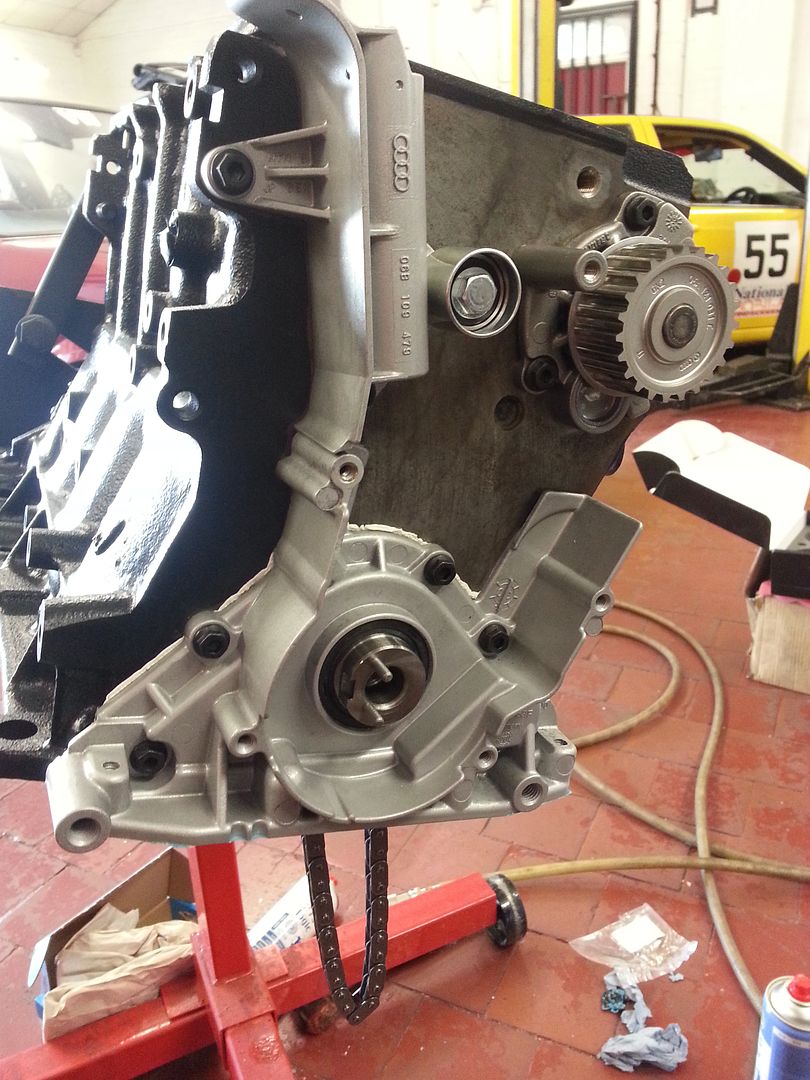
Torqued the mains as per the spec working from the middle cap out... next fitted the new oil pump chain and tensioner...
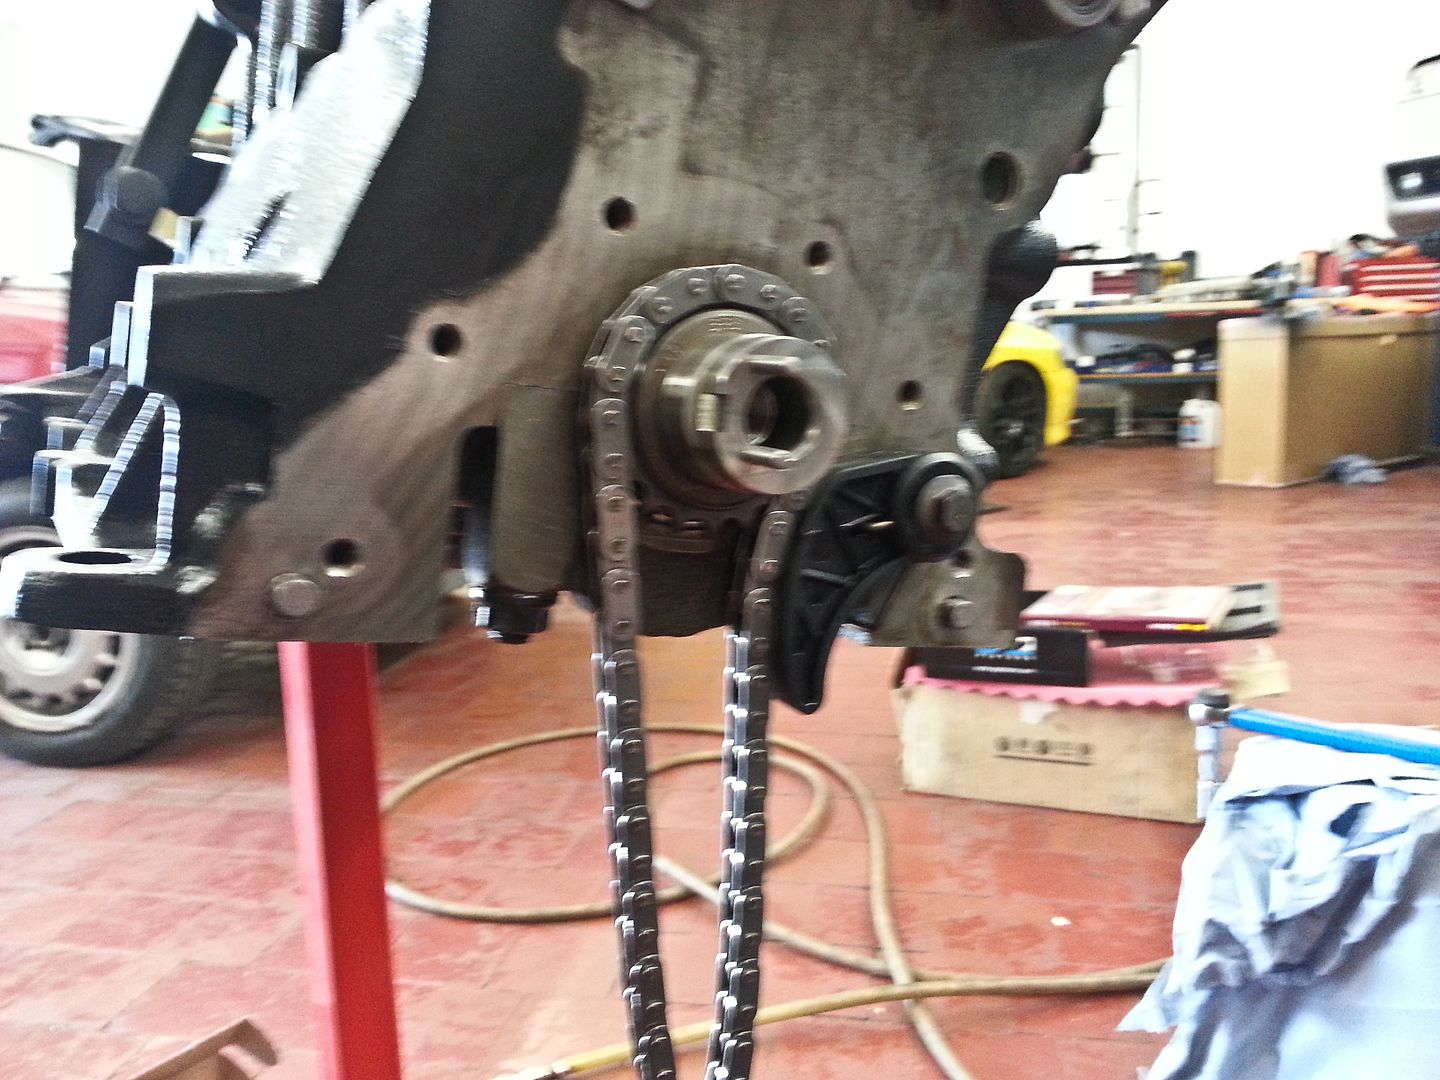
...followed by the front crank seal/cover...
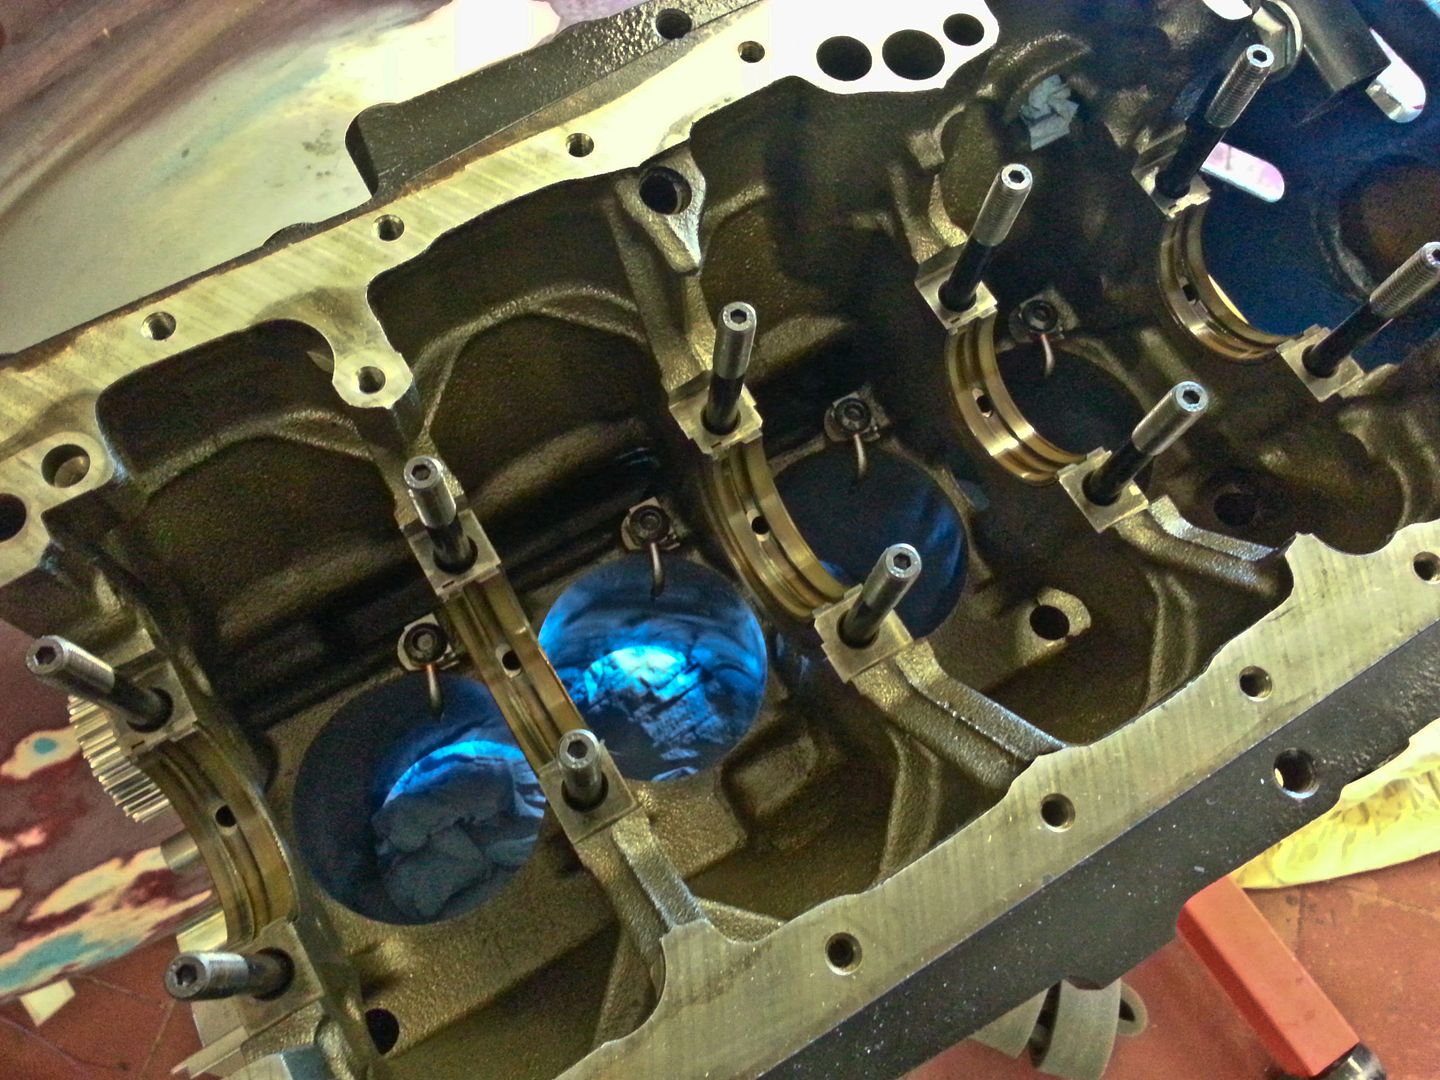
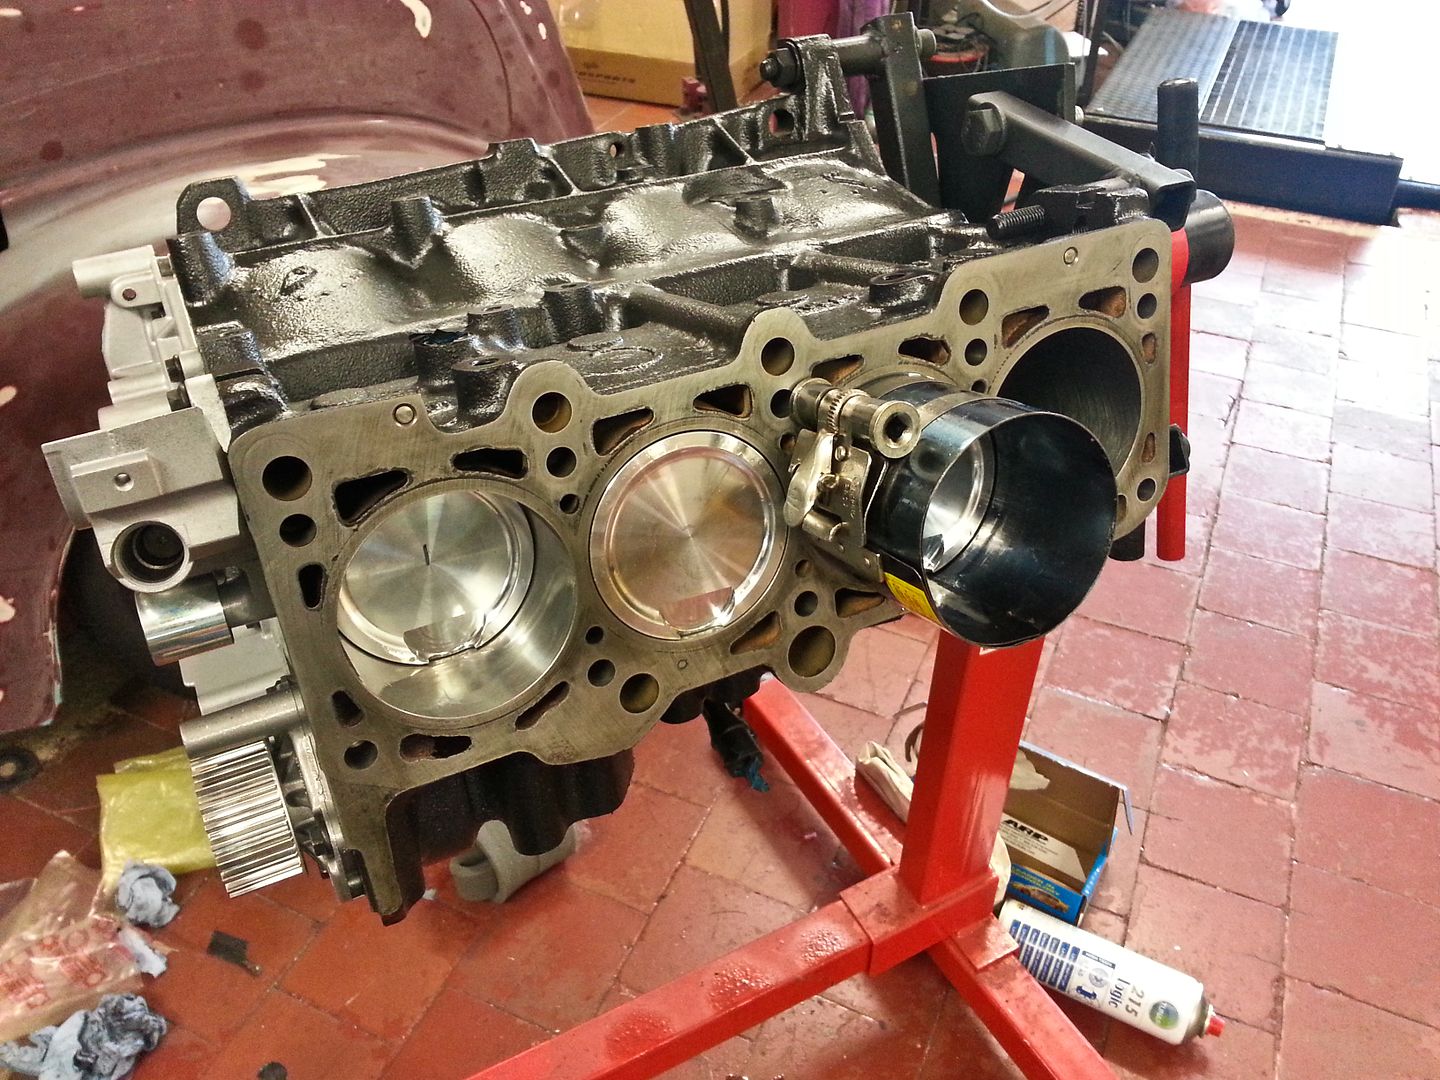
Laid out the rods/pistons ready for fitting...

...after which they went in the block...
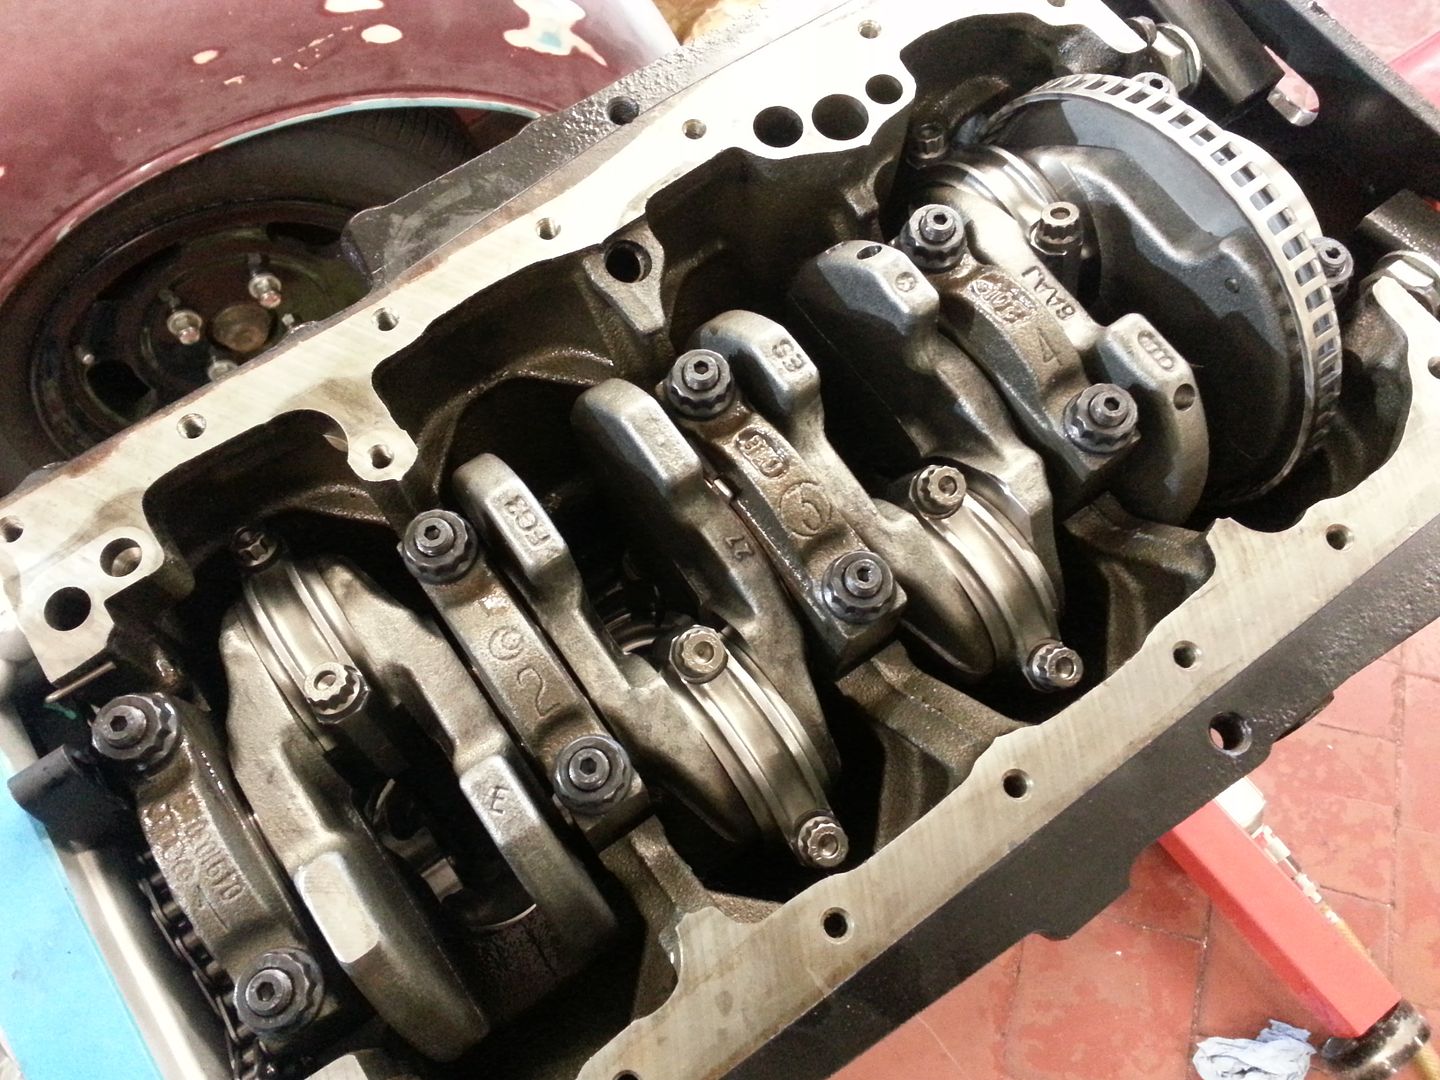
...big ends all torqued up...
...new oil pump and pick up...
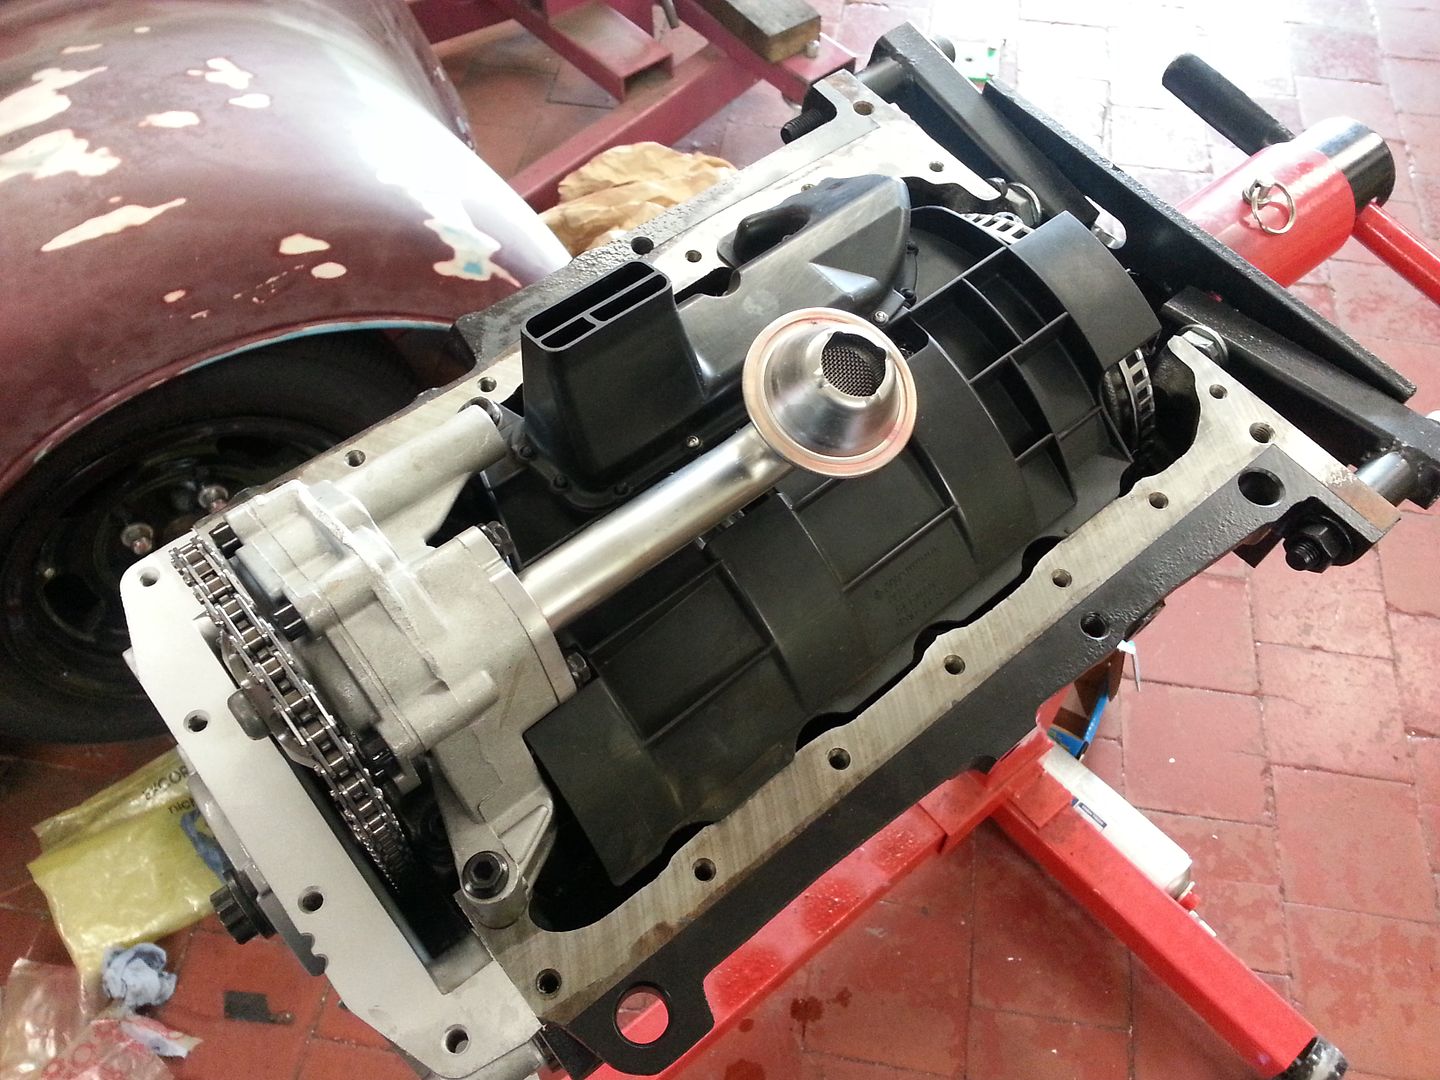
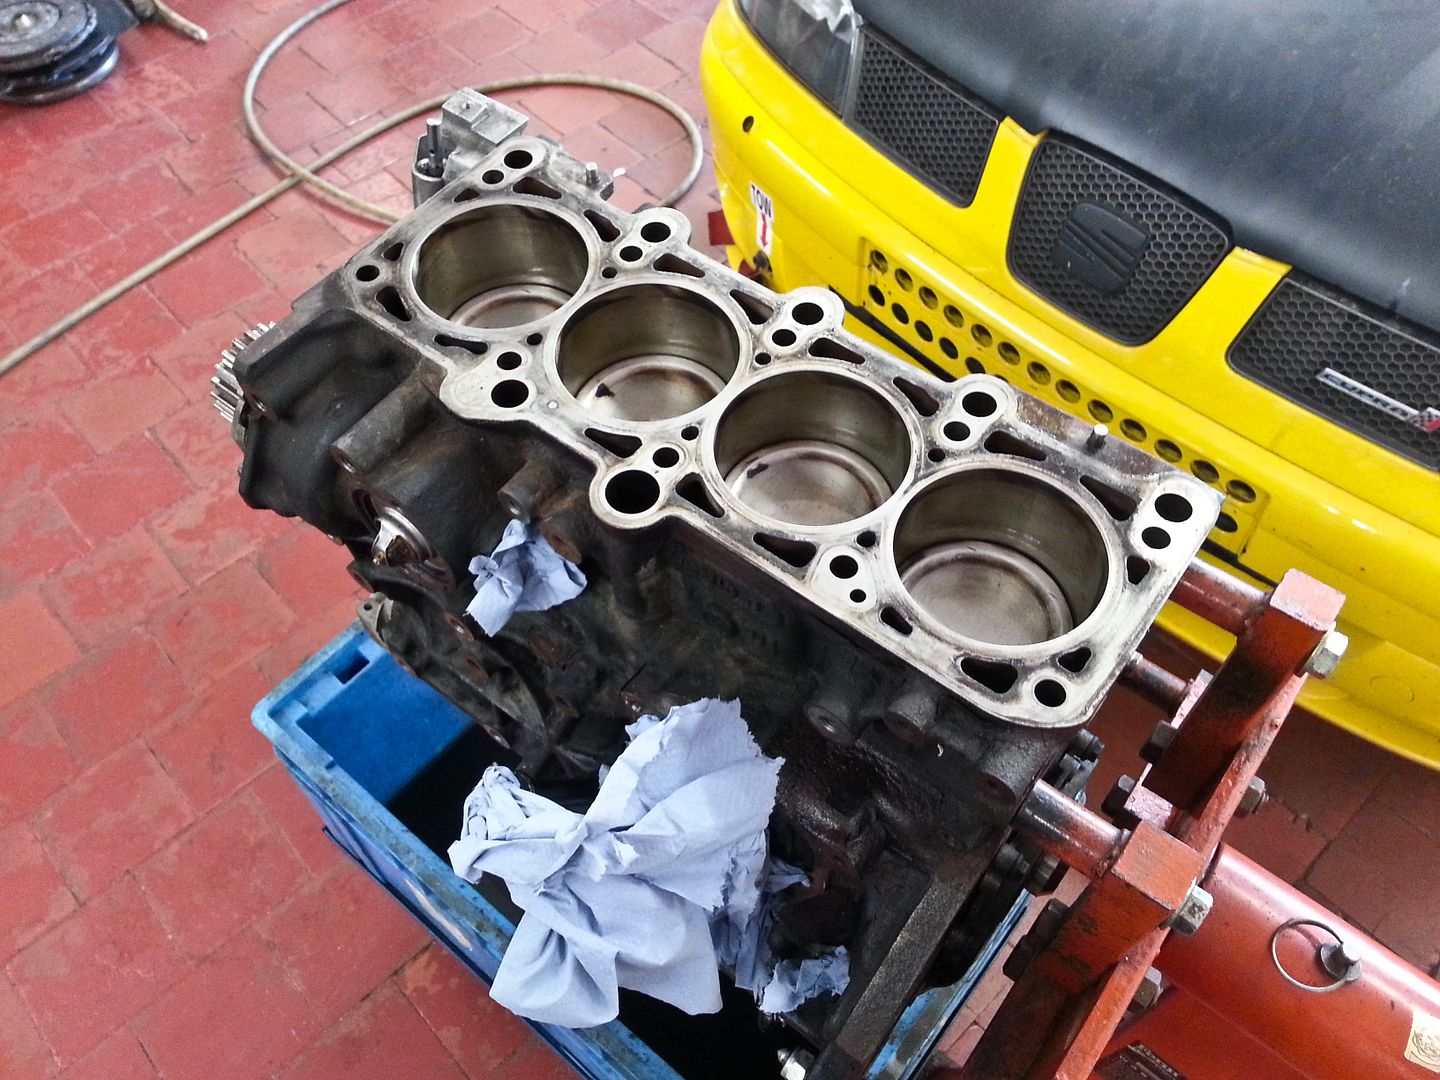
Done!...
...and even found time to paint the pulley (had to paint one thing at least..)
Now I need to get a sump... most likely going to be a Forge baffled one...
Tomorrow I will be mostly taking the front off the car and getting the engine/box out
<tuffty/>
Started by putting the new bottom end together... crank as it came back from balancing..
Removed caps from block and cleaned bearings... also cleaned the crank...
Popped a bit of ARP lube on the threads and the mating surface of the nuts...
Torqued the mains as per the spec working from the middle cap out... next fitted the new oil pump chain and tensioner...
...followed by the front crank seal/cover...
Laid out the rods/pistons ready for fitting...
...after which they went in the block...
...big ends all torqued up...
...new oil pump and pick up...
Done!...
...and even found time to paint the pulley
(had to paint one thing at least..)
Now I need to get a sump... most likely going to be a Forge baffled one...
Tomorrow I will be mostly taking the front off the car and getting the engine/box out
<tuffty/>
Todays progress...
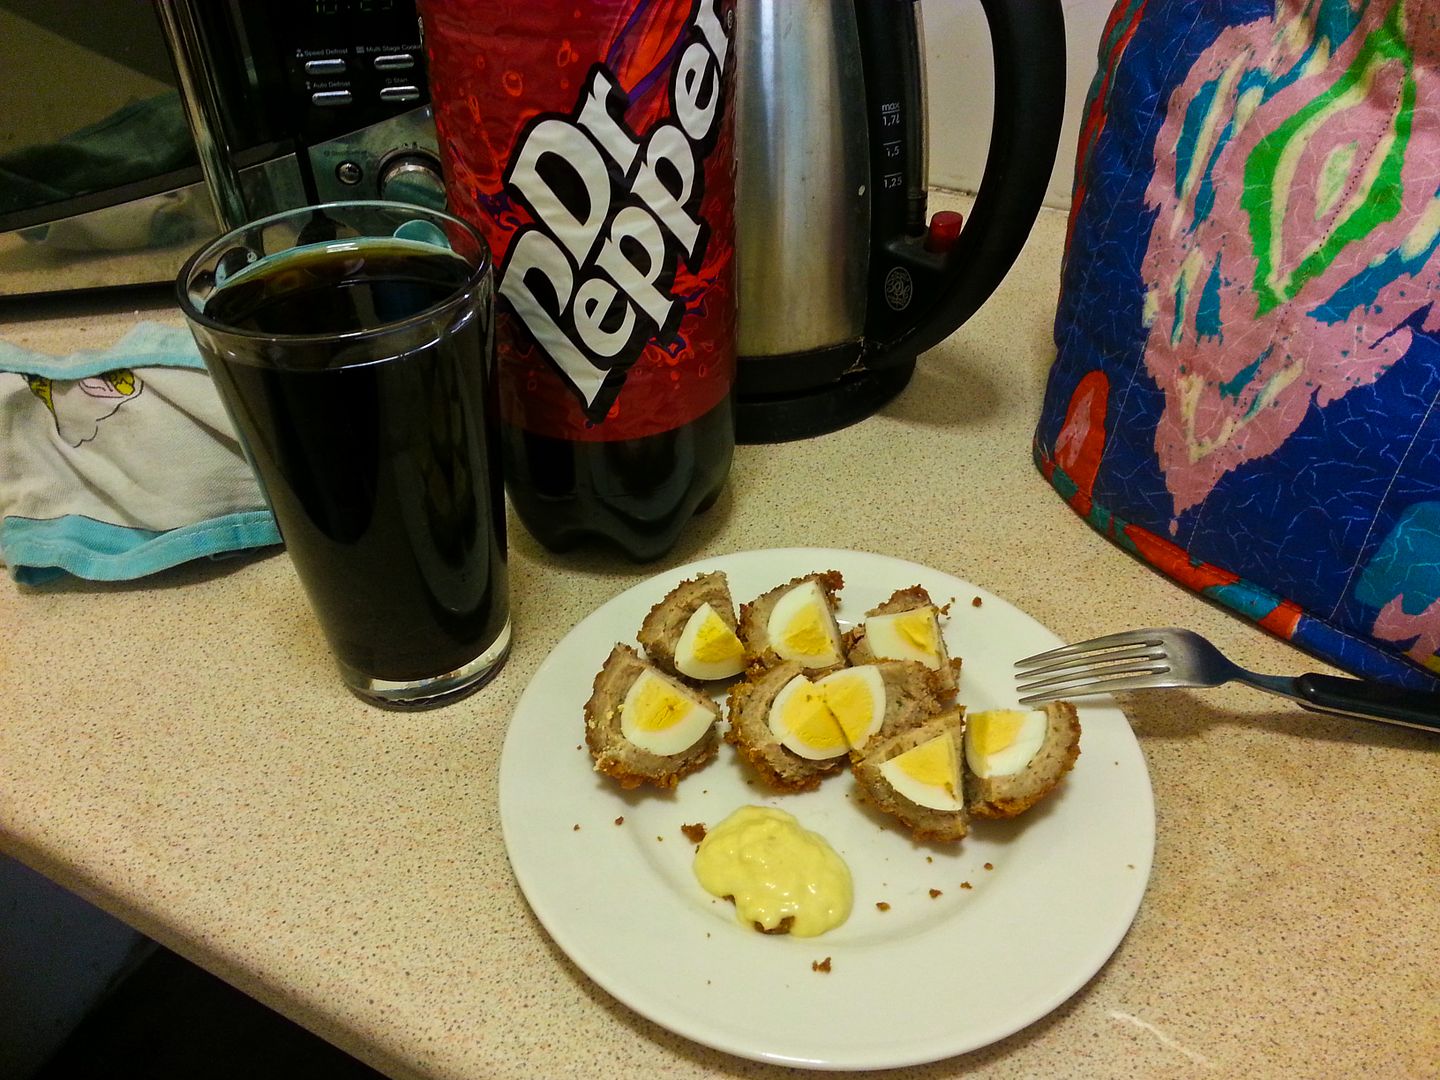
Started with a sophisticated breakfast of Tesco finest scotch egg and of course Dr Pepper
...then on with the job in hand... off with the bumper to start the journey through all the wiring and hoses to the engine...
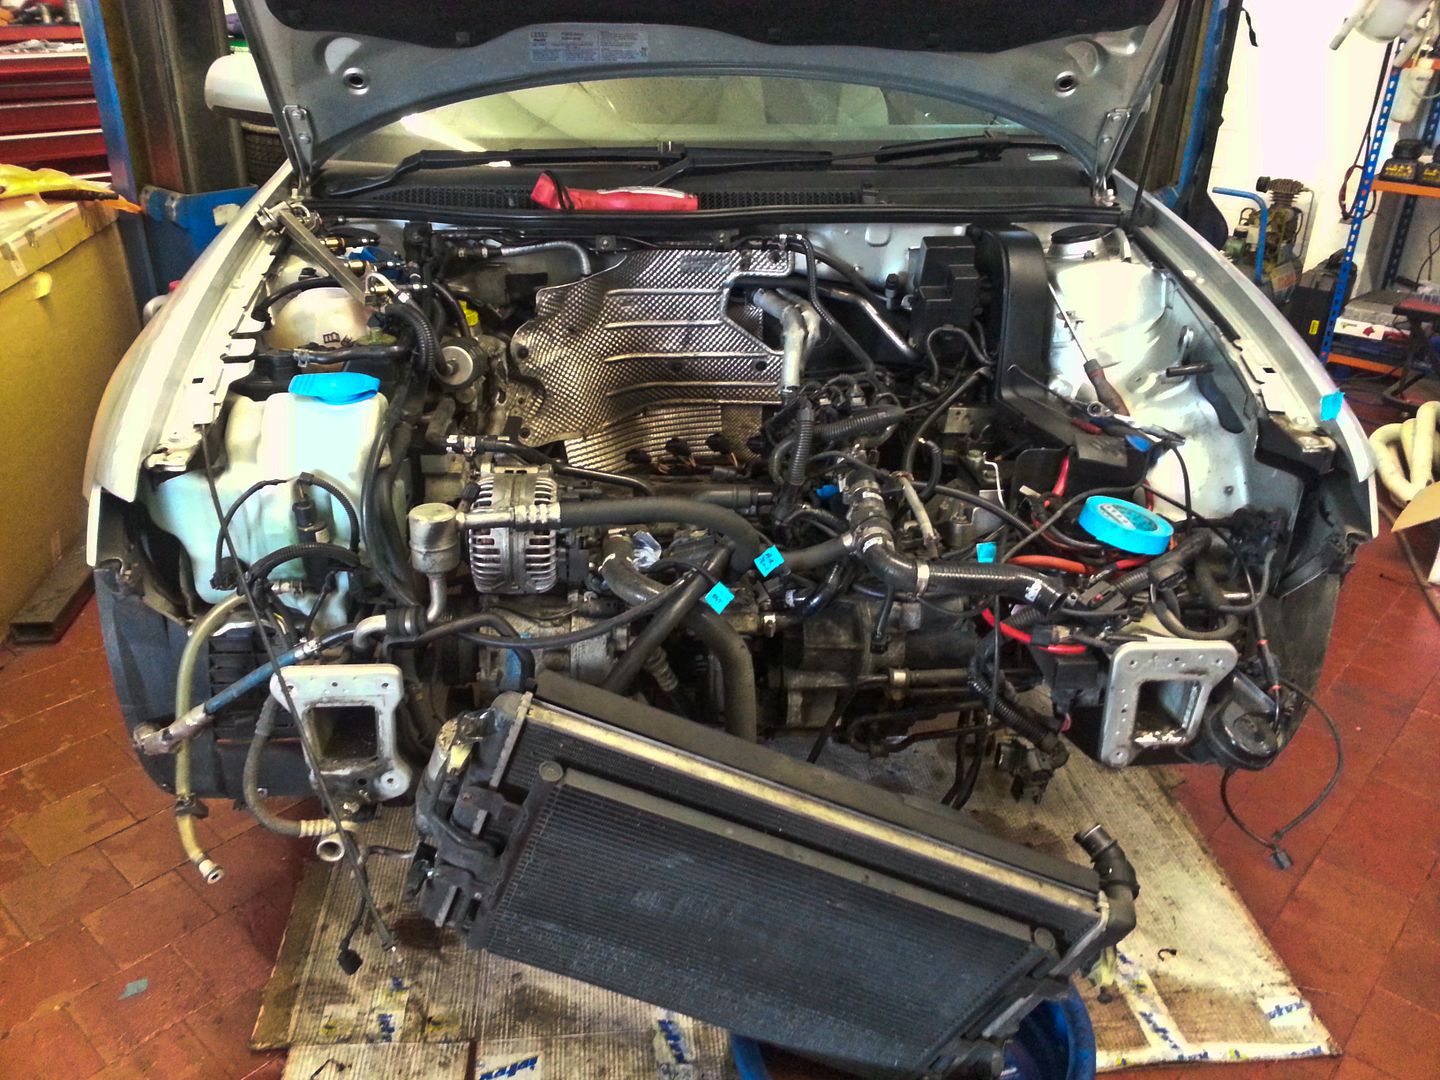
While the engine is out I am going to see if I can reroute the PAS return hose as its a right royal PITA where it is...

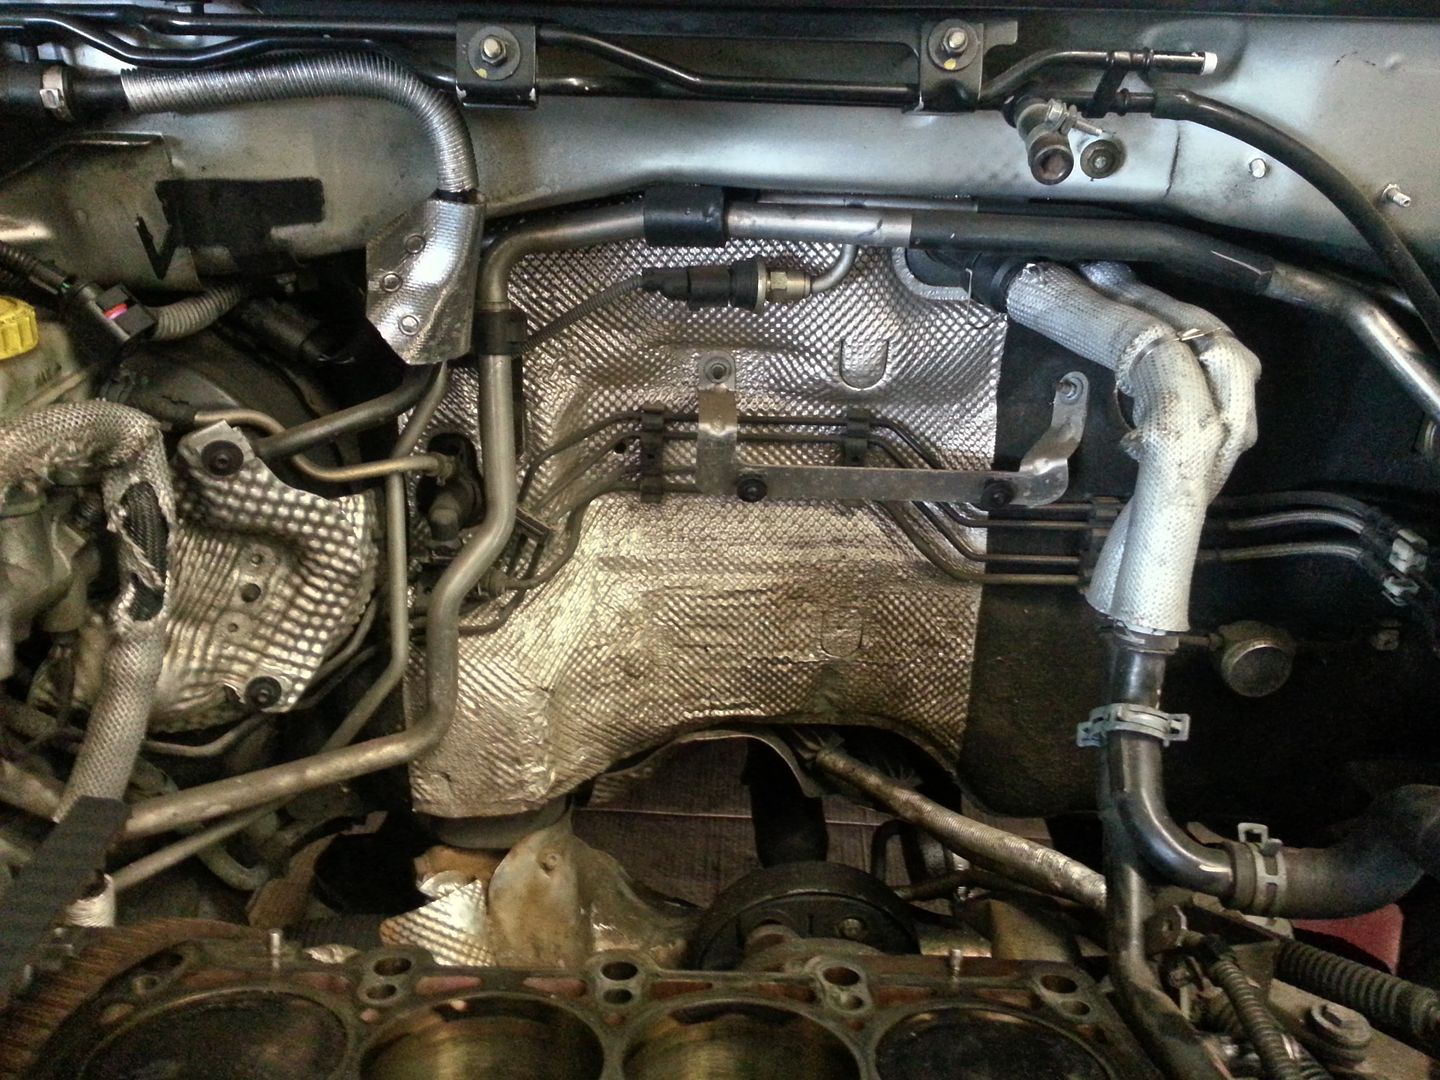
I also plan to redo all the heat shielding and get rid of the pipes currently running along the top of the scuttle... these are the coolant return to the expansion tank and the EVAP to the TIP which I don't have connected anyway...
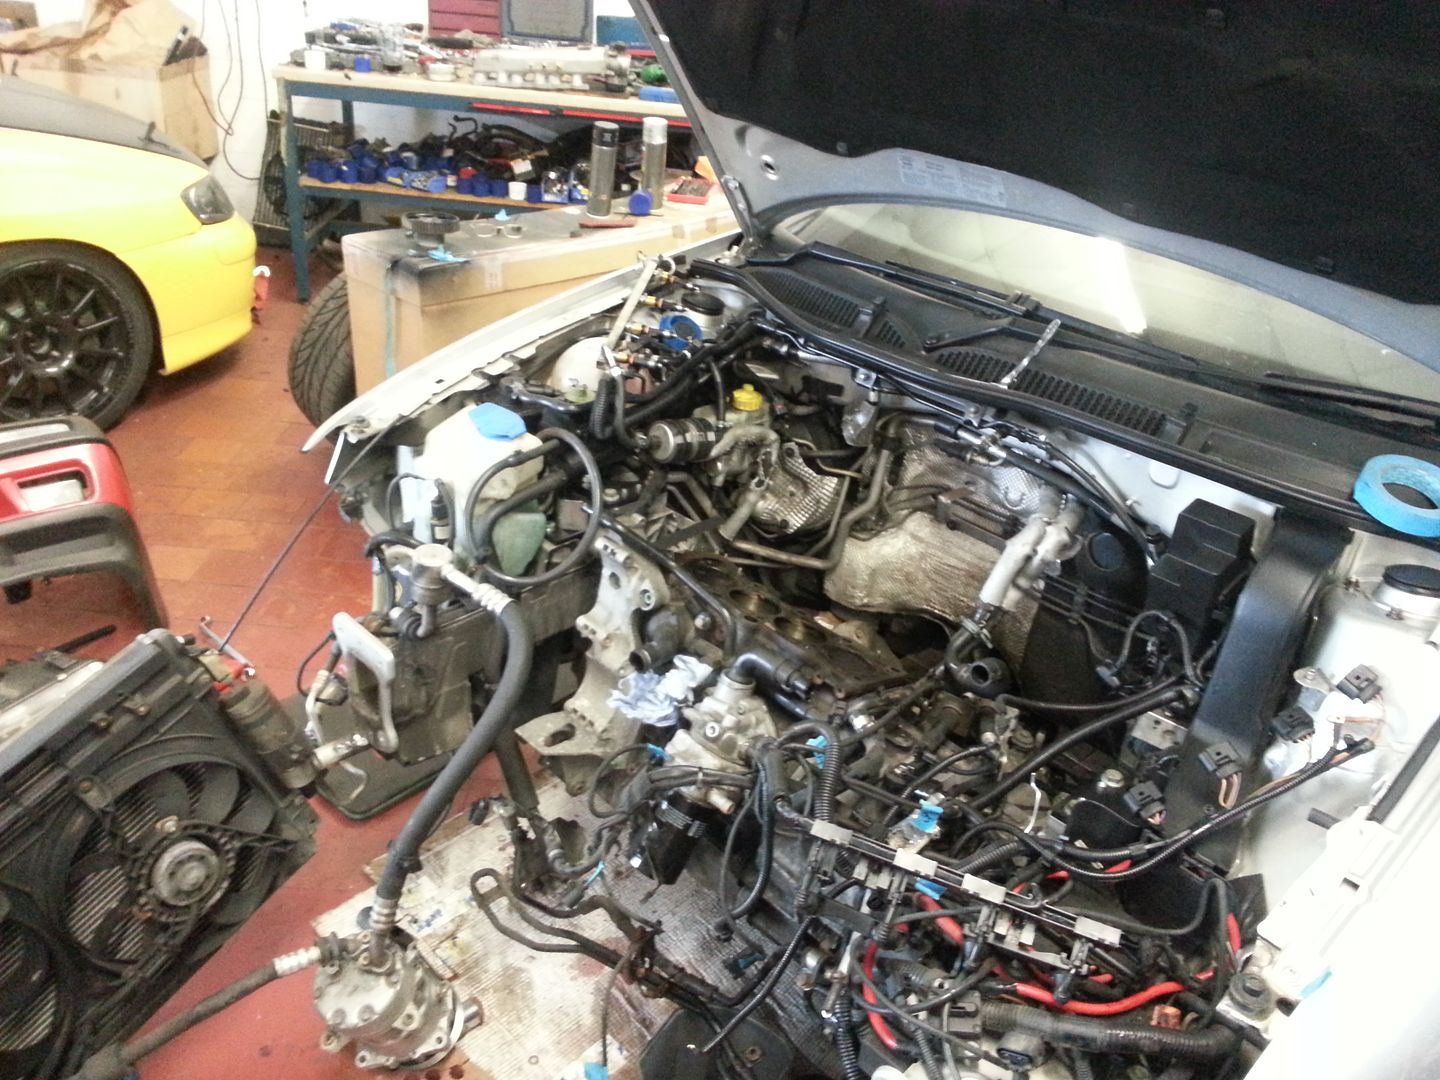
Finally everything disconnected and moved out the way ready to remove...
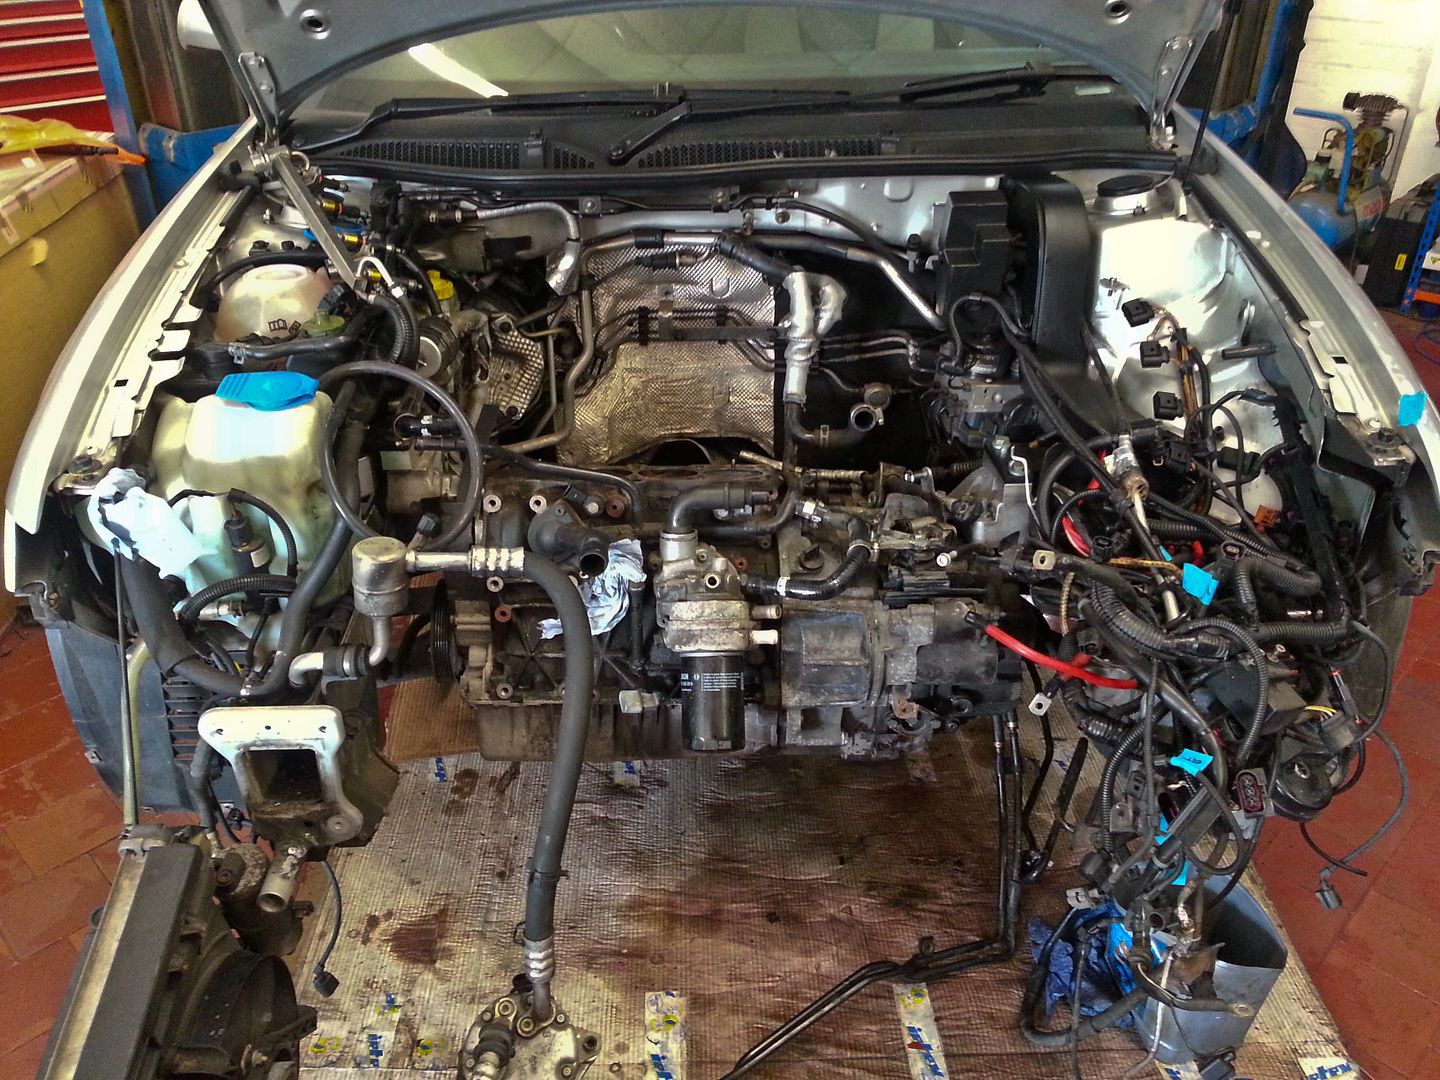
Et voila... (told you I was sophisticated...)
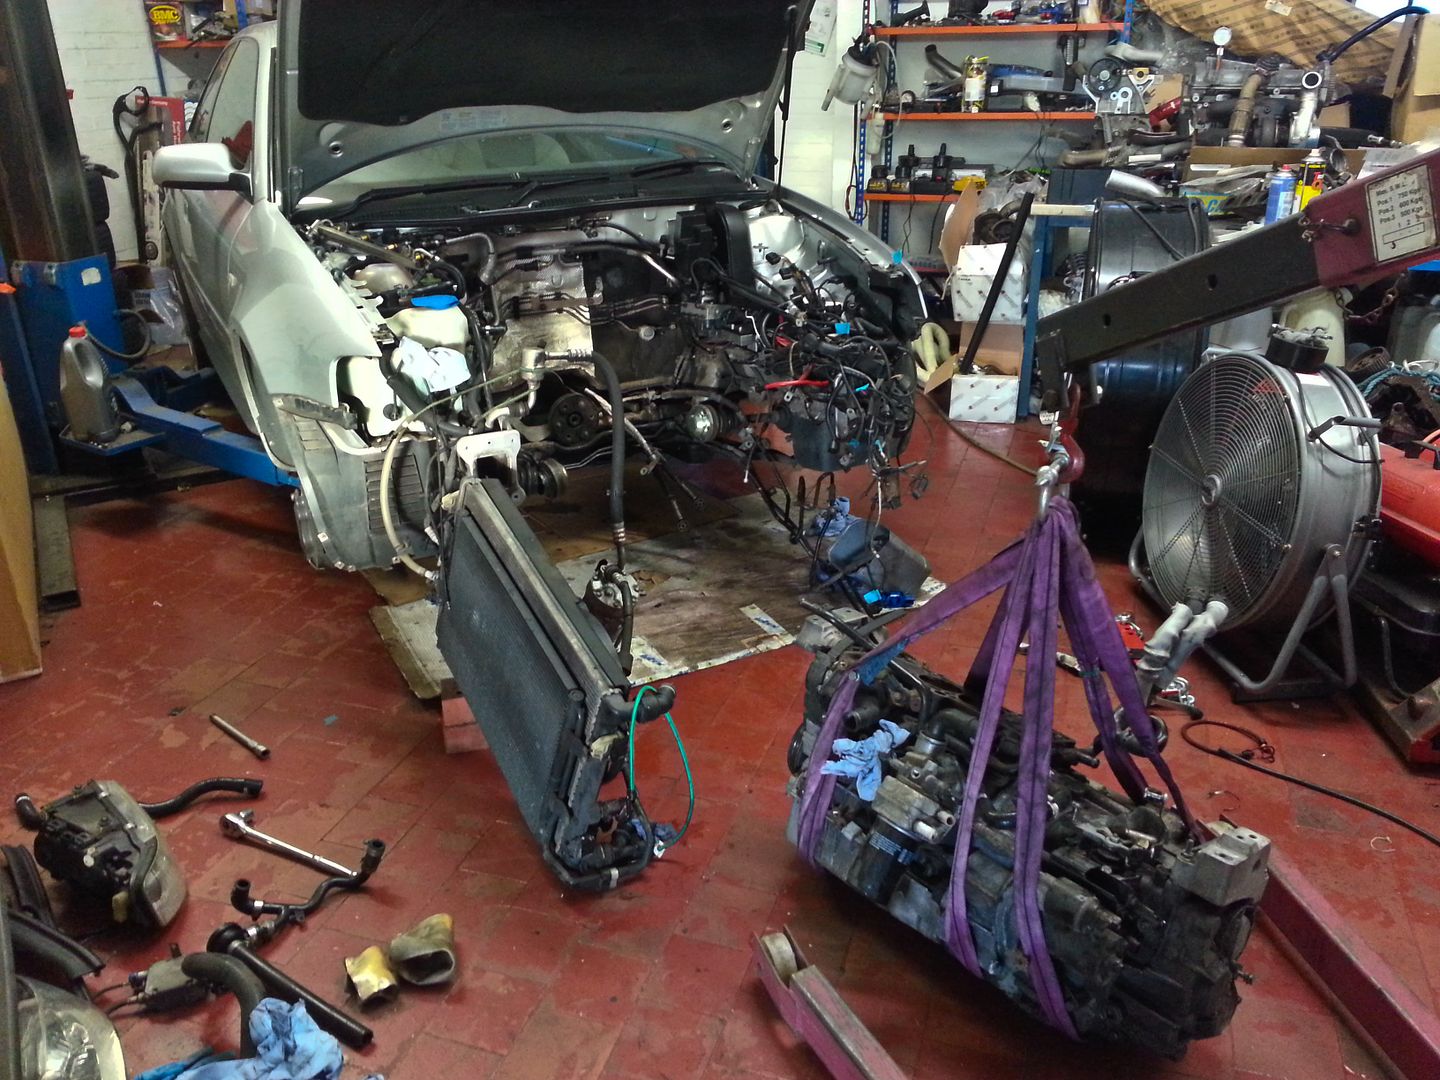
Tomorrow I will crack off the box and start stripping the bits I need for the new engine...
<tuffty/>
Started with a sophisticated breakfast of Tesco finest scotch egg and of course Dr Pepper
...then on with the job in hand... off with the bumper to start the journey through all the wiring and hoses to the engine...
While the engine is out I am going to see if I can reroute the PAS return hose as its a right royal PITA where it is...
I also plan to redo all the heat shielding and get rid of the pipes currently running along the top of the scuttle... these are the coolant return to the expansion tank and the EVAP to the TIP which I don't have connected anyway...
Finally everything disconnected and moved out the way ready to remove...
Et voila... (told you I was sophisticated...)
Tomorrow I will crack off the box and start stripping the bits I need for the new engine...
<tuffty/>
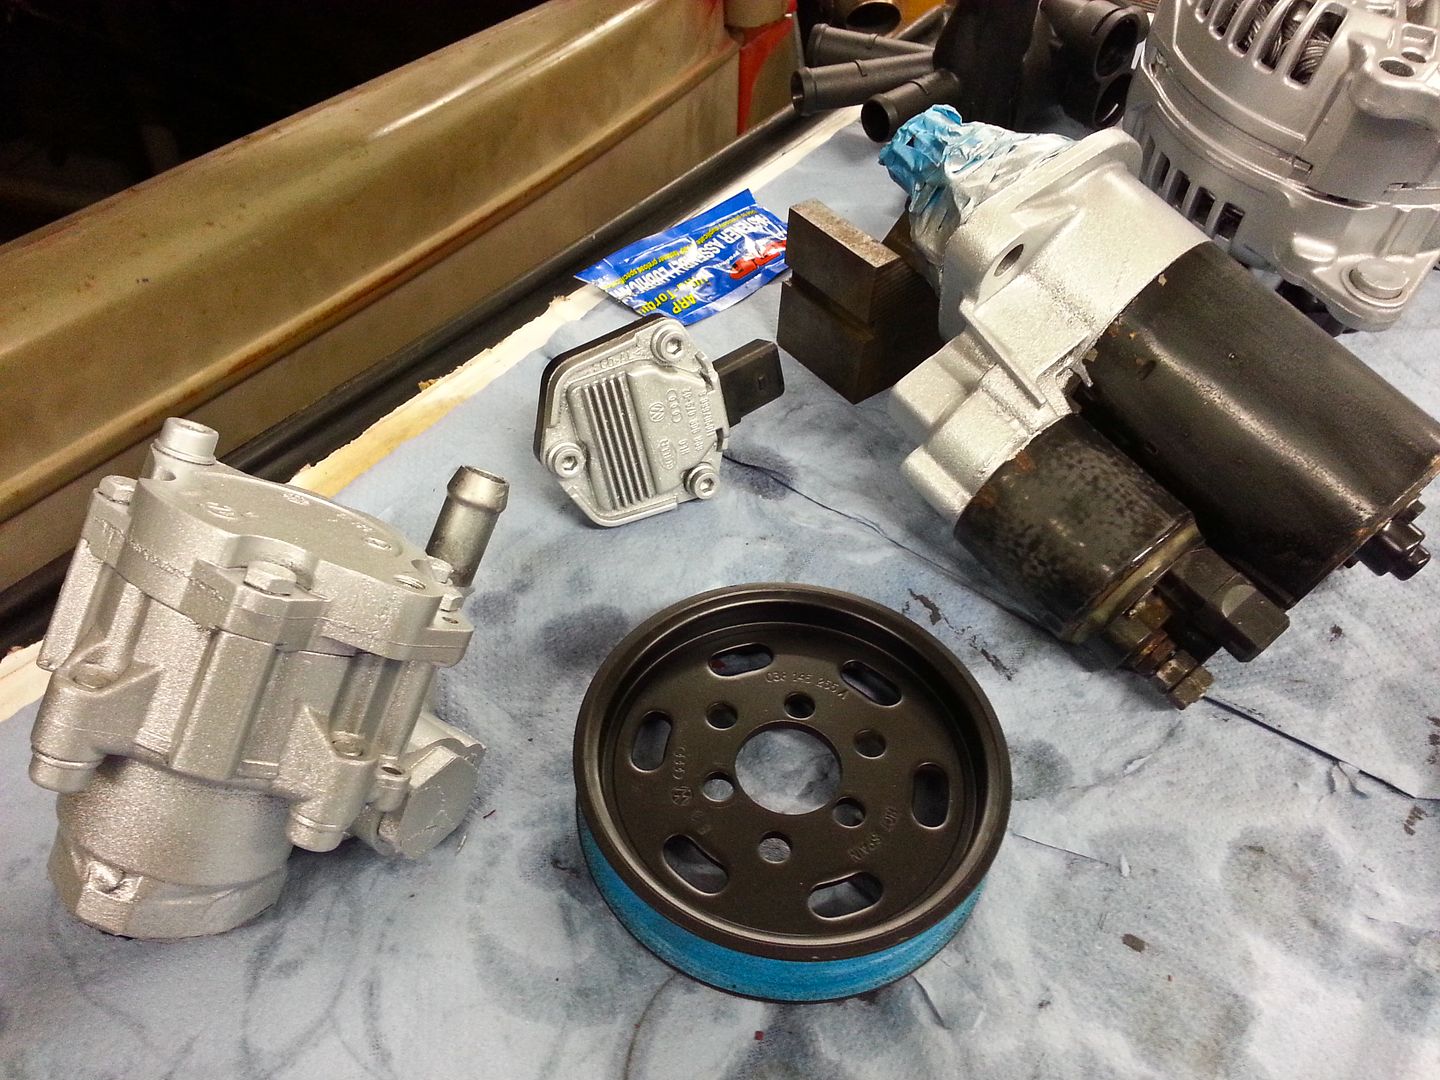
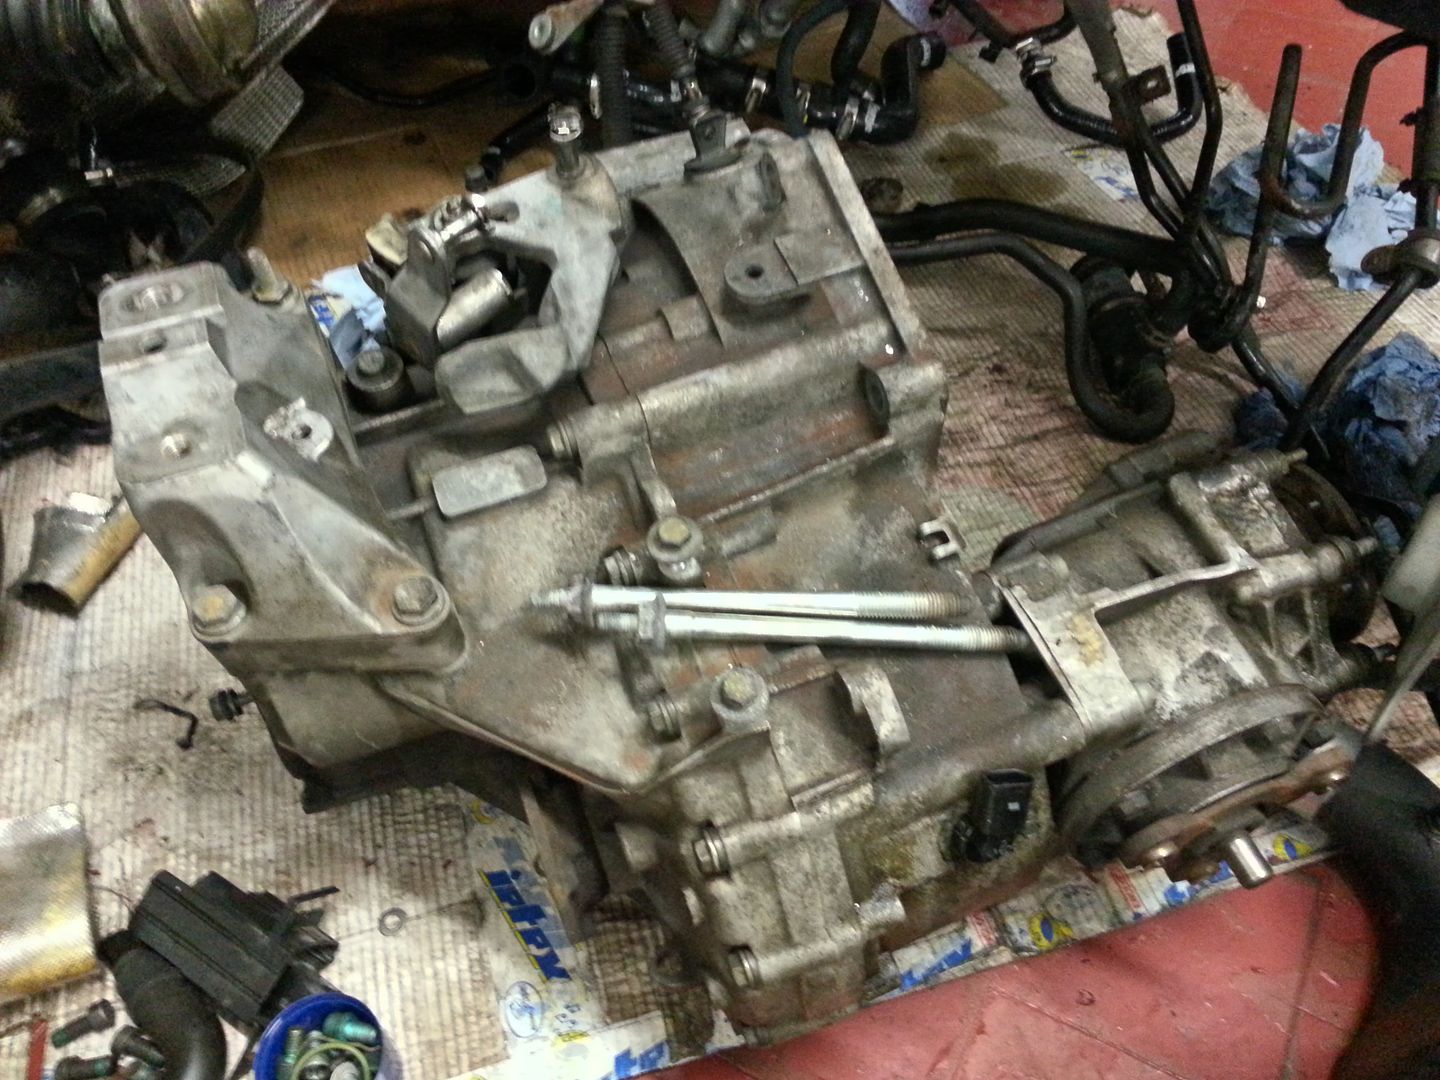
Todays update....
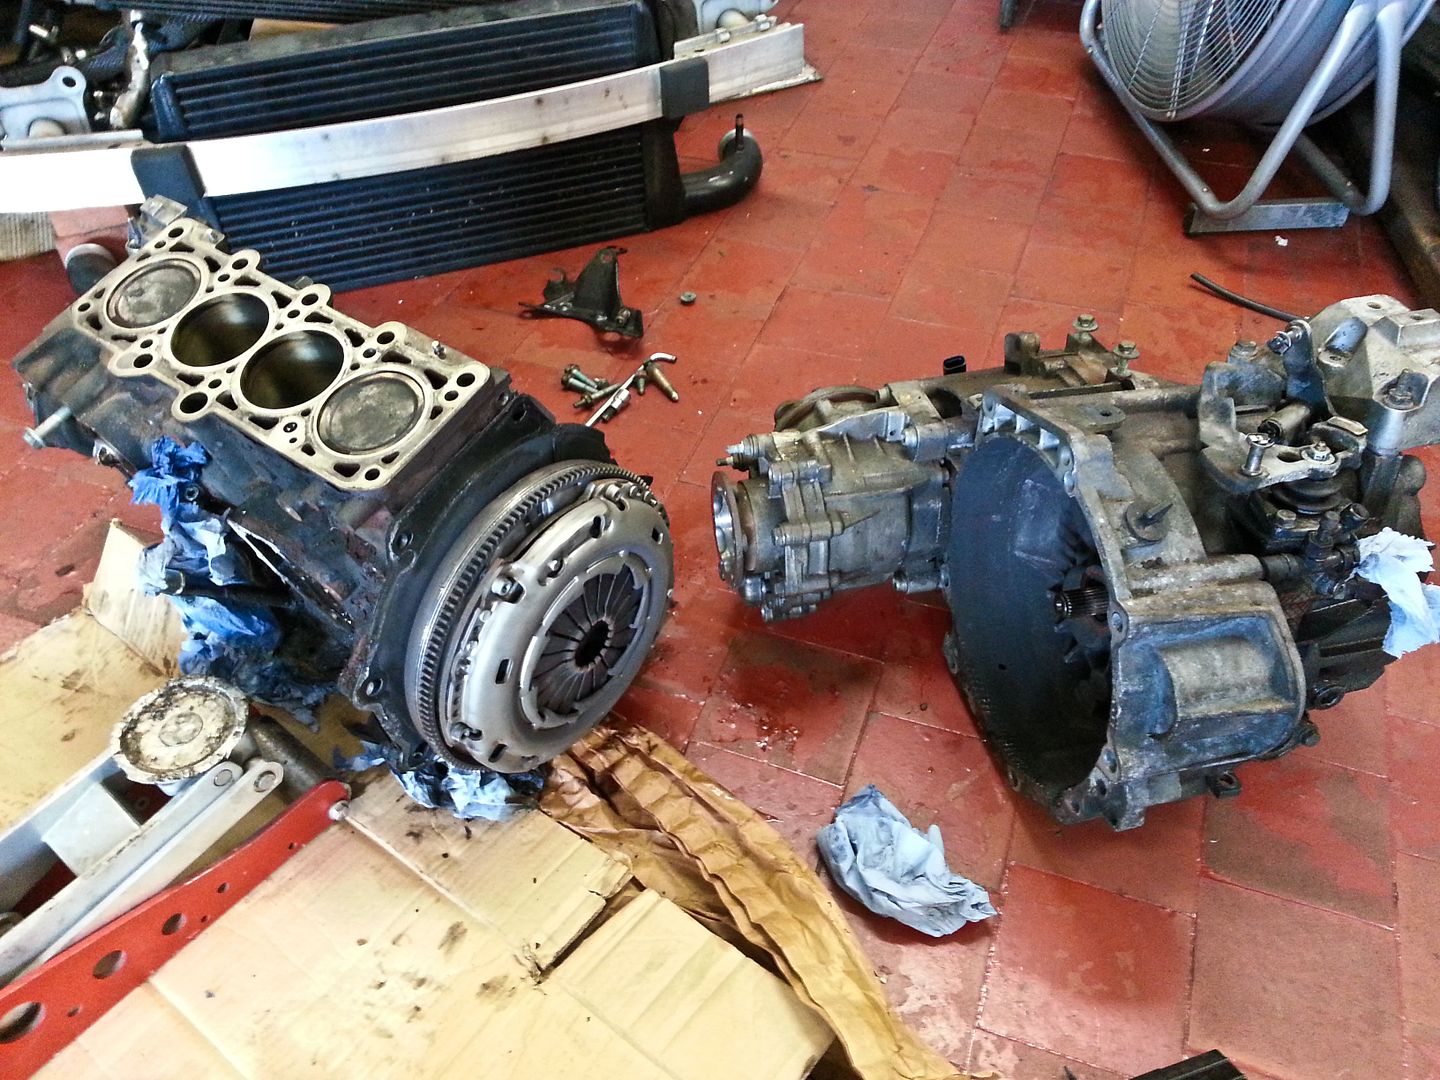
So split the box from the engine and stripped off parts I need to transfer to the new block...
It was then I realised I hadn't covered all the bosses when I painted the block so I started cleaning off the paint... DOH!!... reason for this (in case you didn't know) is with heat the paint will soften slightly and 'give' a little... this can potentially loosen the bolt and of course stuff falls off... you can see how thick it was...
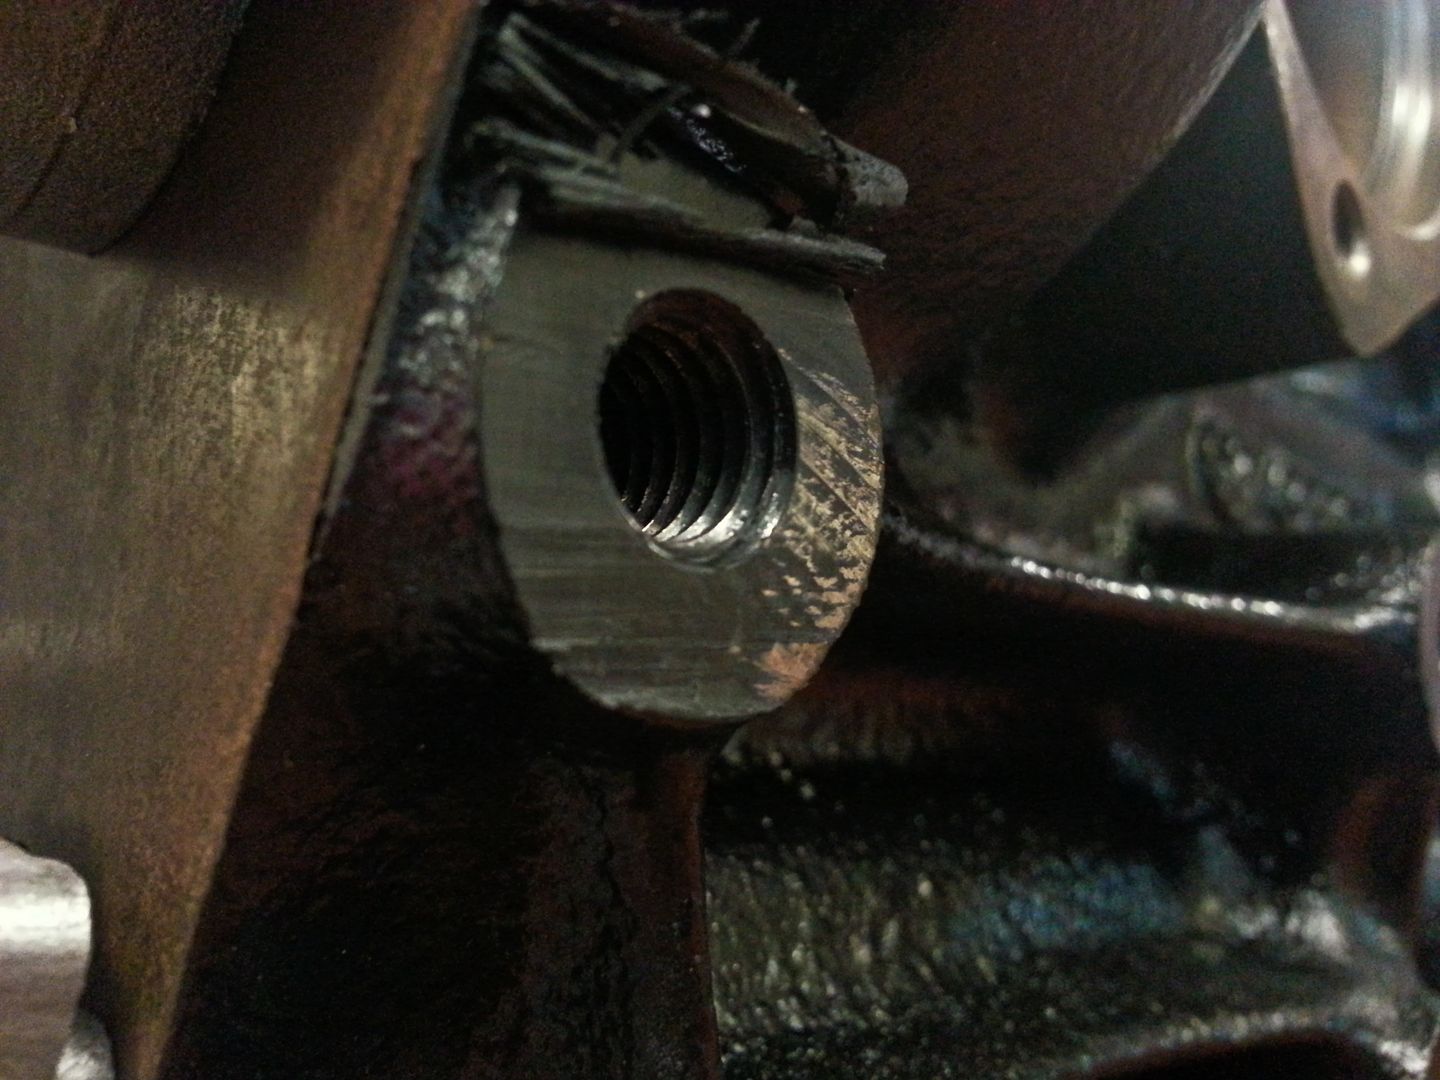
After a scrape and rub over with a wire brush wheel on the dremal...
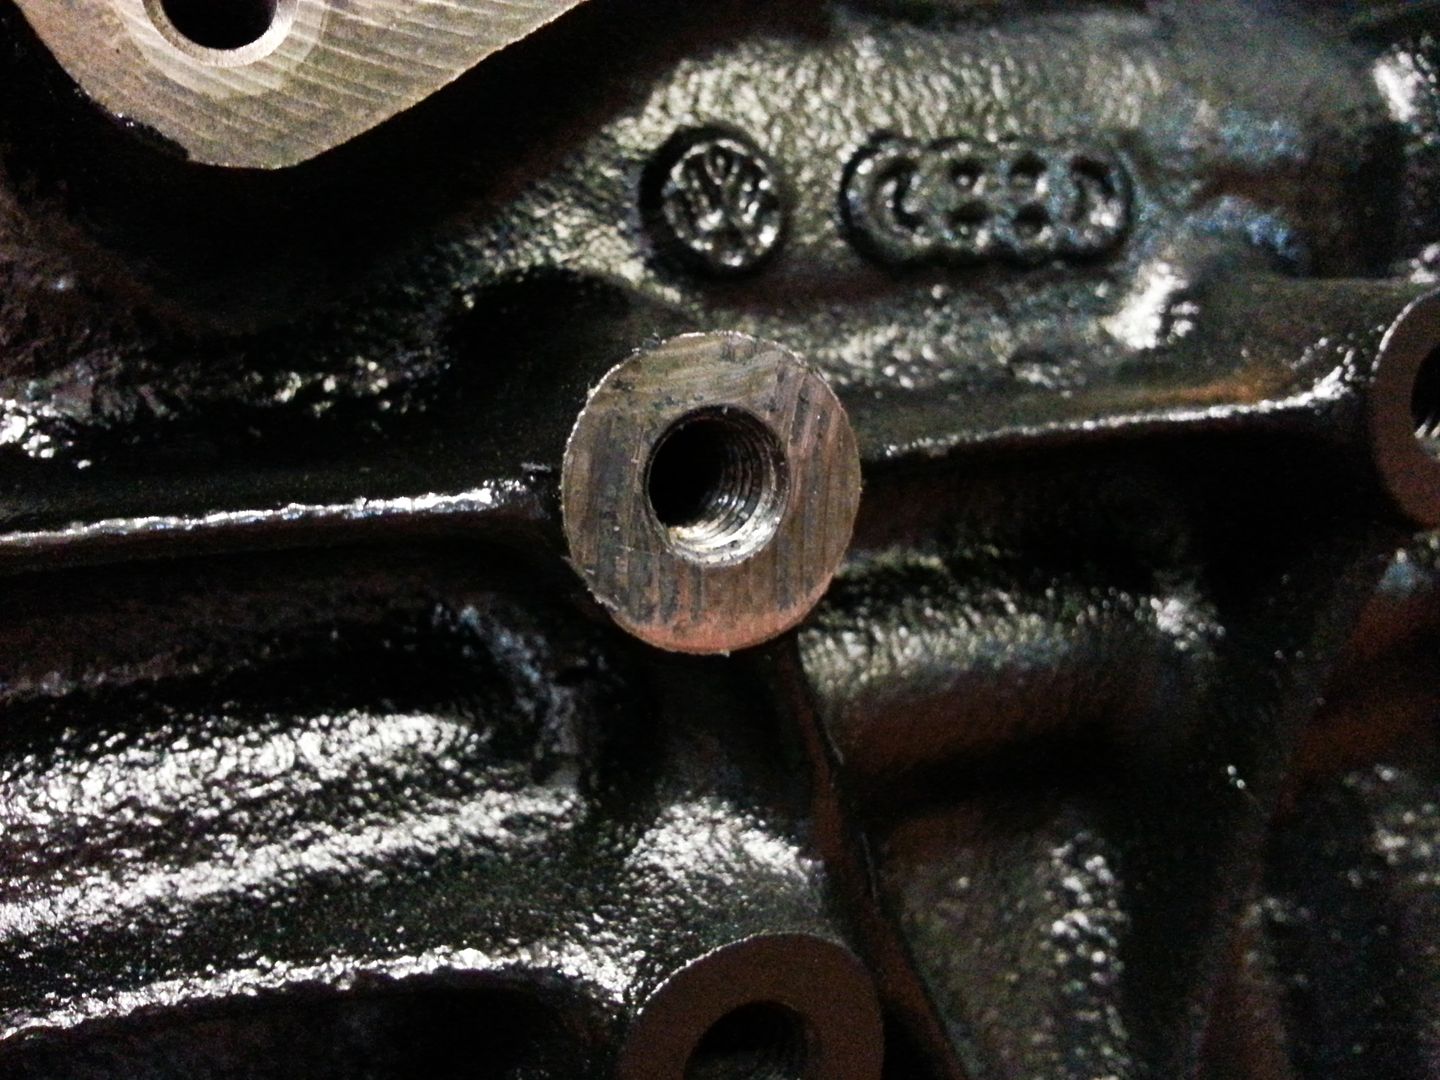
...and chased the threads too...
...done...

New stat (OE)...
Removed the clutch and flywheel from the old engine... pressure cover had no bluing or excessive wear...
...same with the DMF... no excessive play (although I do need to check the specs later to confirm) and again, same wear patterns as the cover...
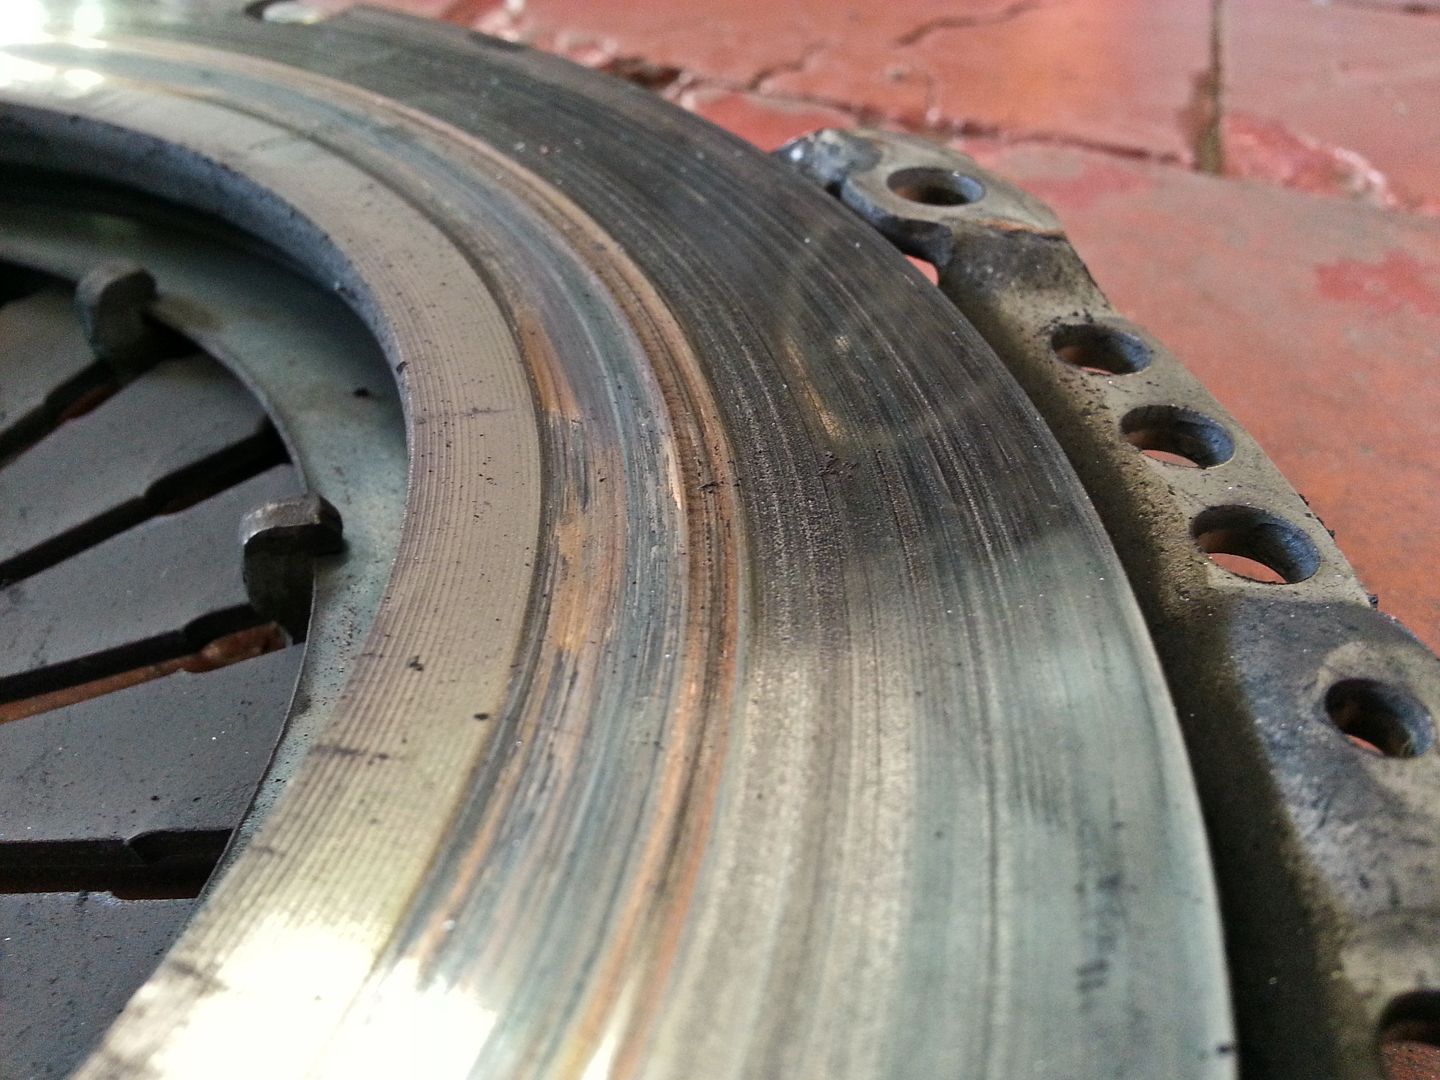
...the plate however...
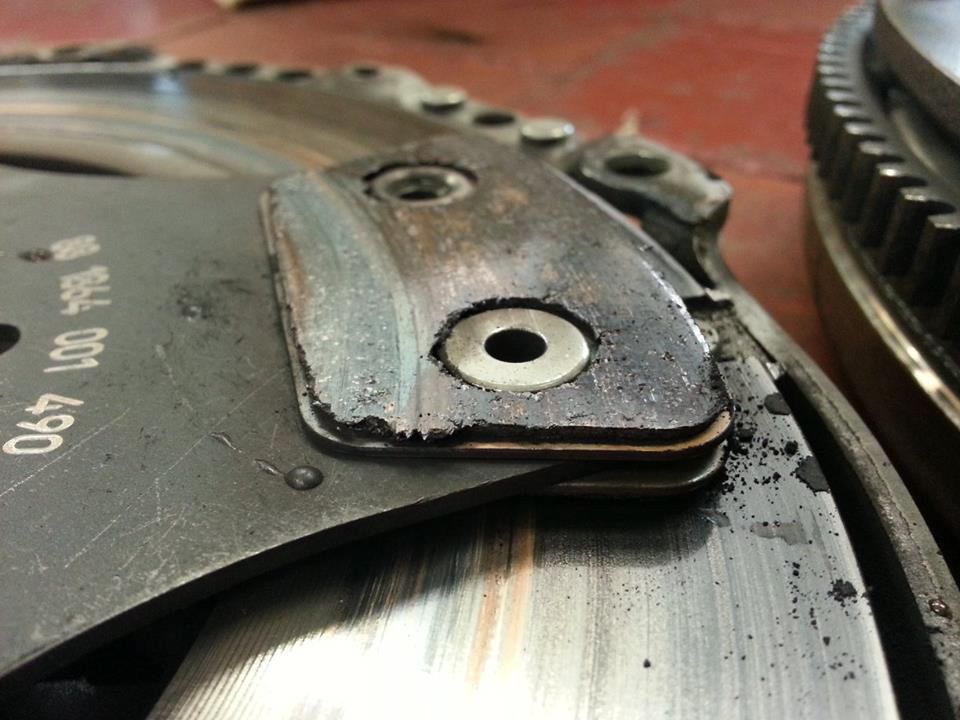
In fairness the clutch still felt good, no judder or slipping but obviously it was close to the rivets...
Std plate...

Ah well... the cover and DMF will go again but will need to get a new plate but its lasted well considering.. 20k miles, quite a few launches and a bit of NLS plus 18 months of hill starts on my way home from my old job...
To get over this I painted some more stuff...
Need to clean up the old engine a bit ready for its new home and sort out my old turbo and other parts as thats potentially sold too providing its not going to ave an issue with the earlier style transfer box as this is different to my later one... and anyone that has read this thread will know the interesting times I had trying to get clearance
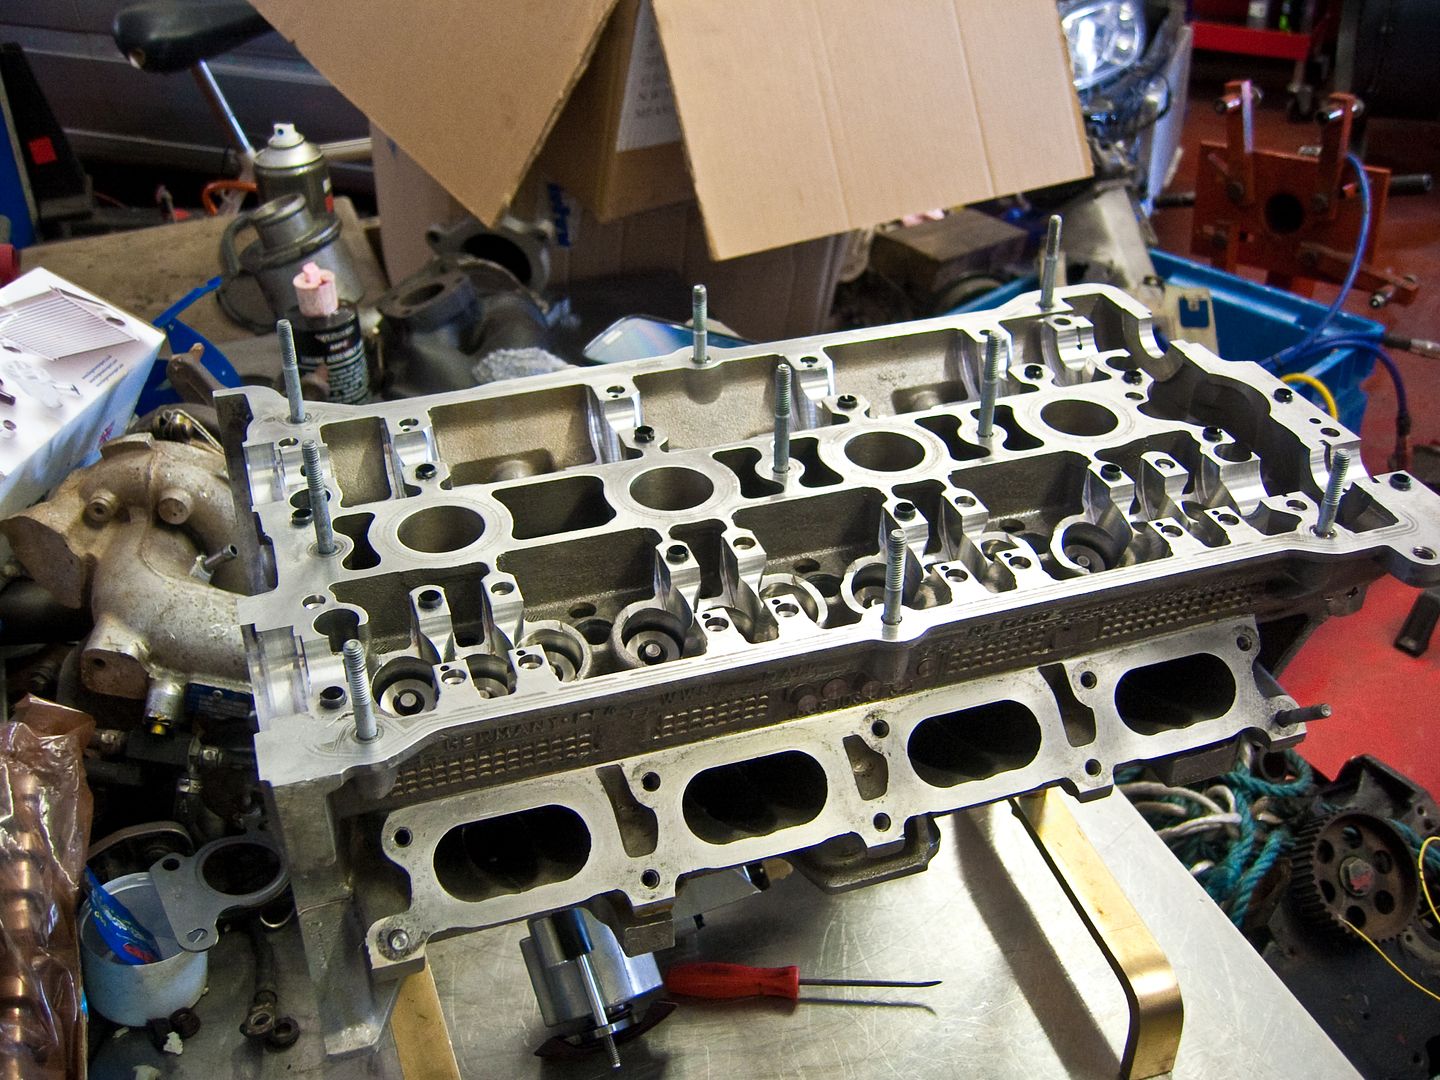
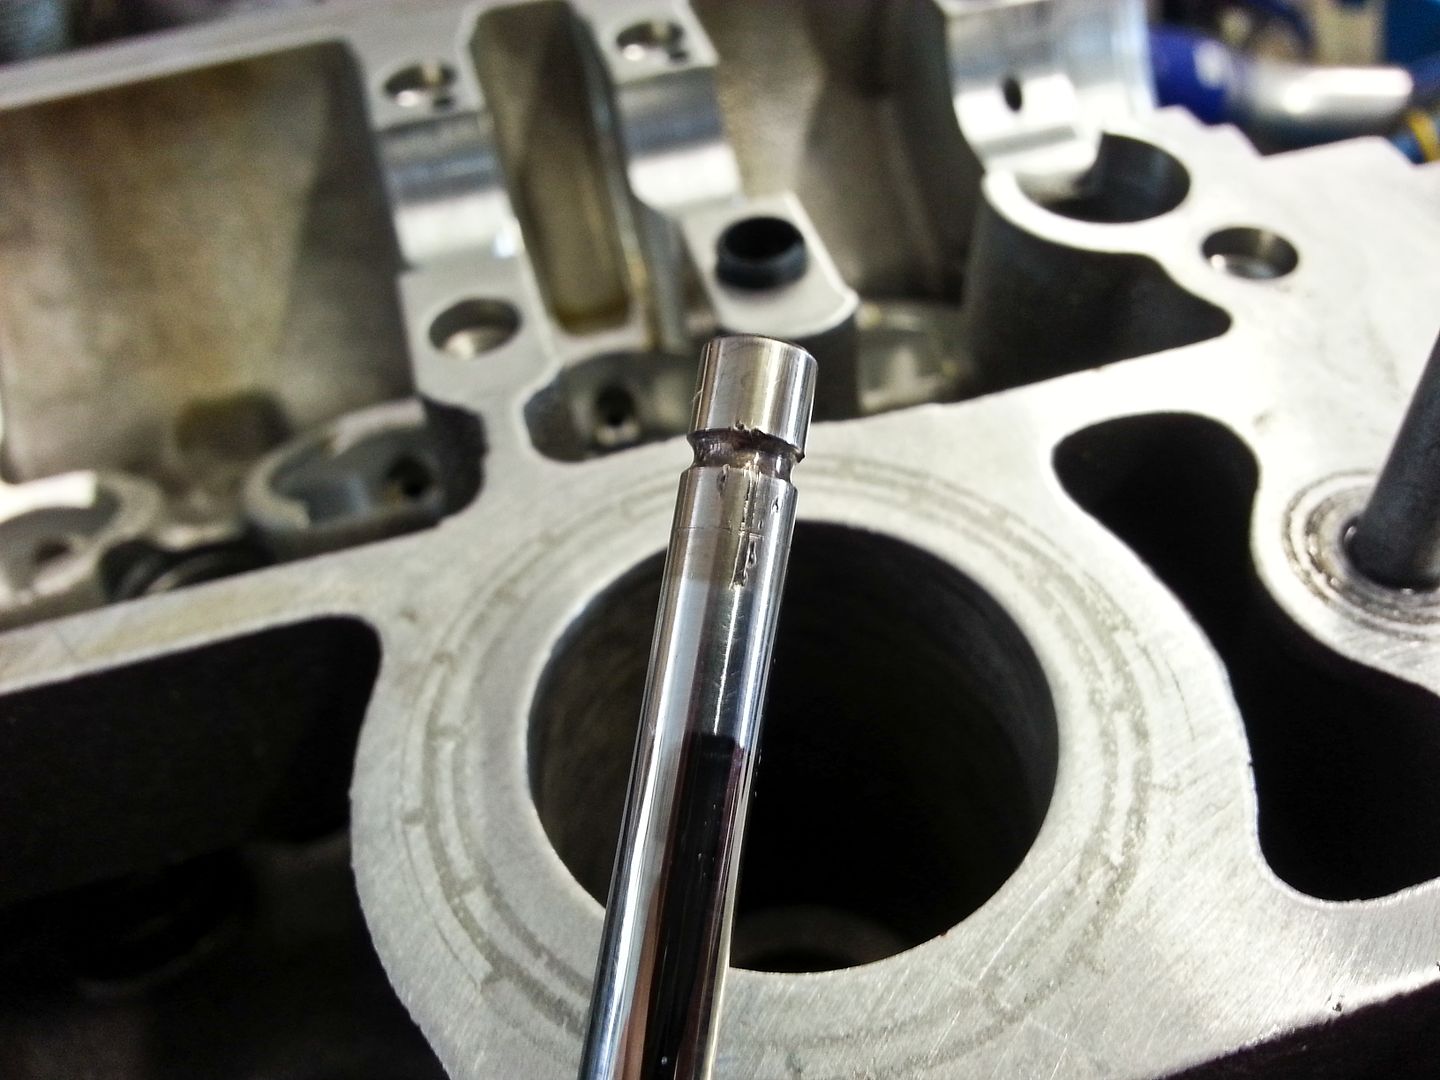
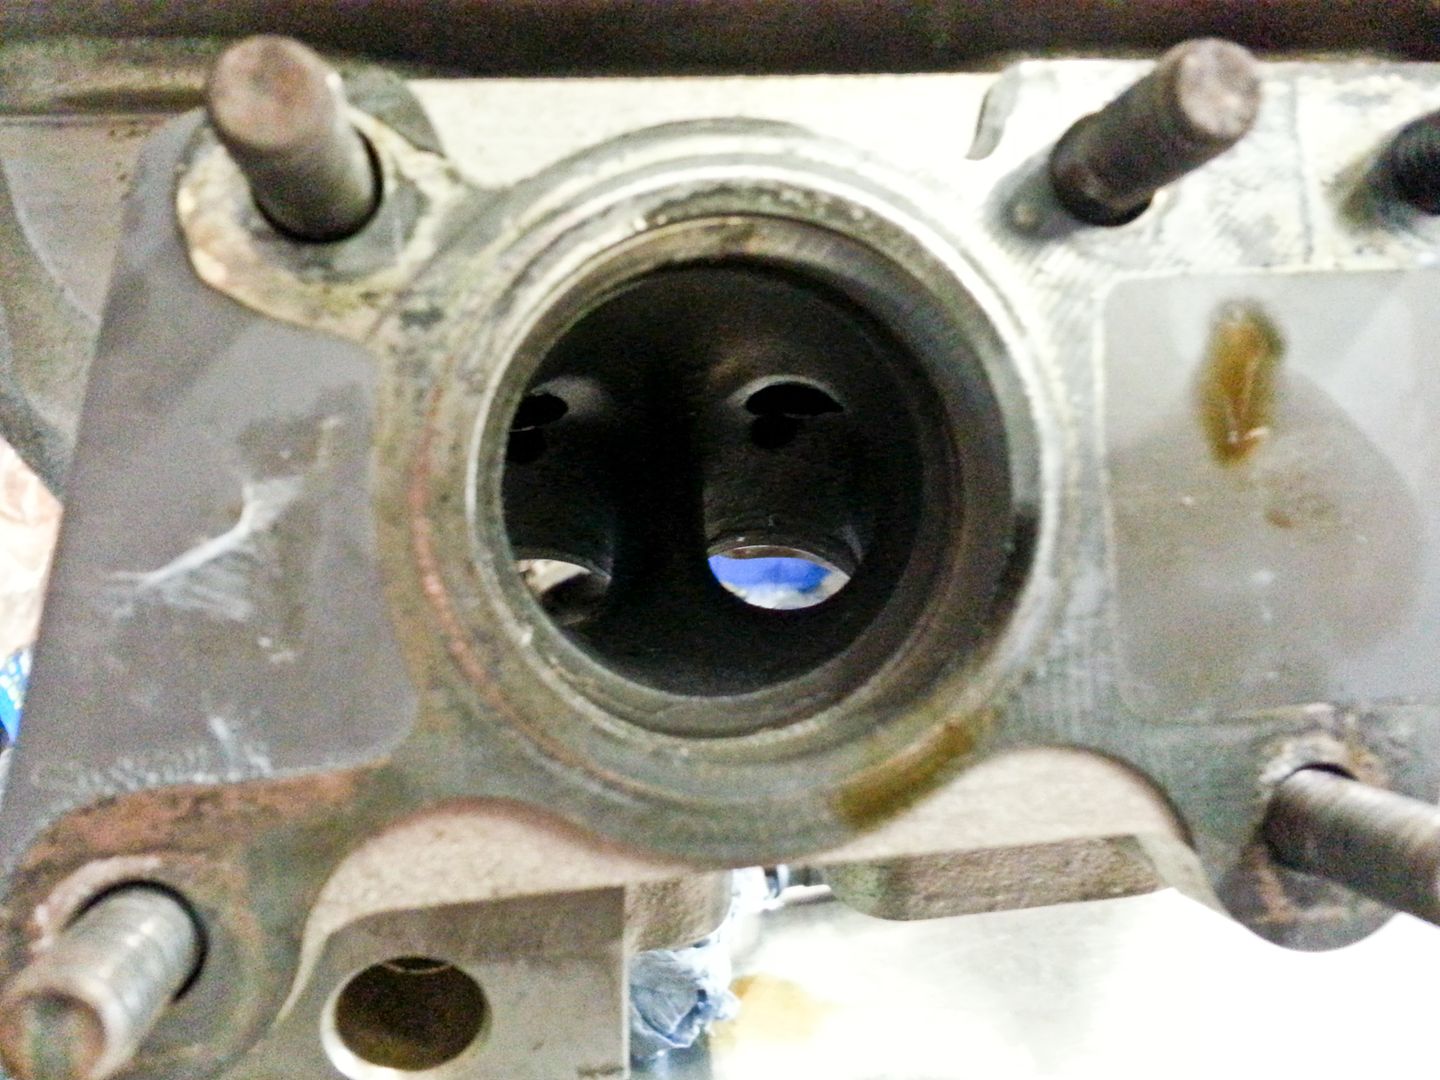
One last thing... had an update from my head guy... he has started work on my head... couple of teaser pics to start with..

<tuffty/>
So split the box from the engine and stripped off parts I need to transfer to the new block...
It was then I realised I hadn't covered all the bosses when I painted the block so I started cleaning off the paint... DOH!!... reason for this (in case you didn't know) is with heat the paint will soften slightly and 'give' a little... this can potentially loosen the bolt and of course stuff falls off... you can see how thick it was...
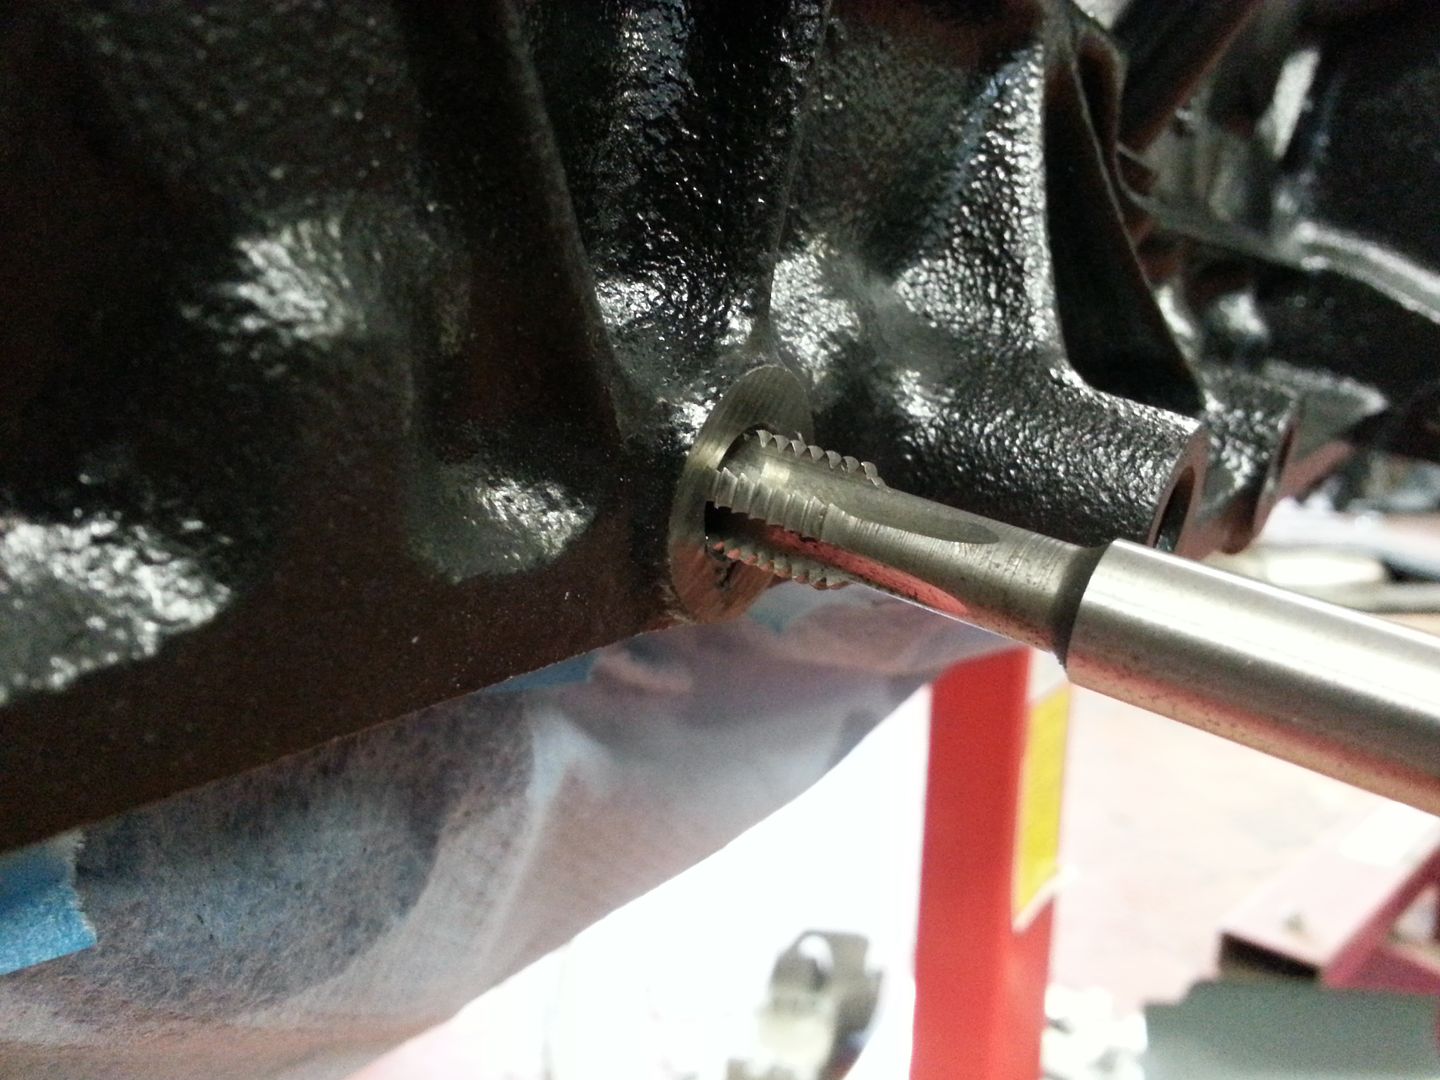
After a scrape and rub over with a wire brush wheel on the dremal...
...and chased the threads too...
...done...
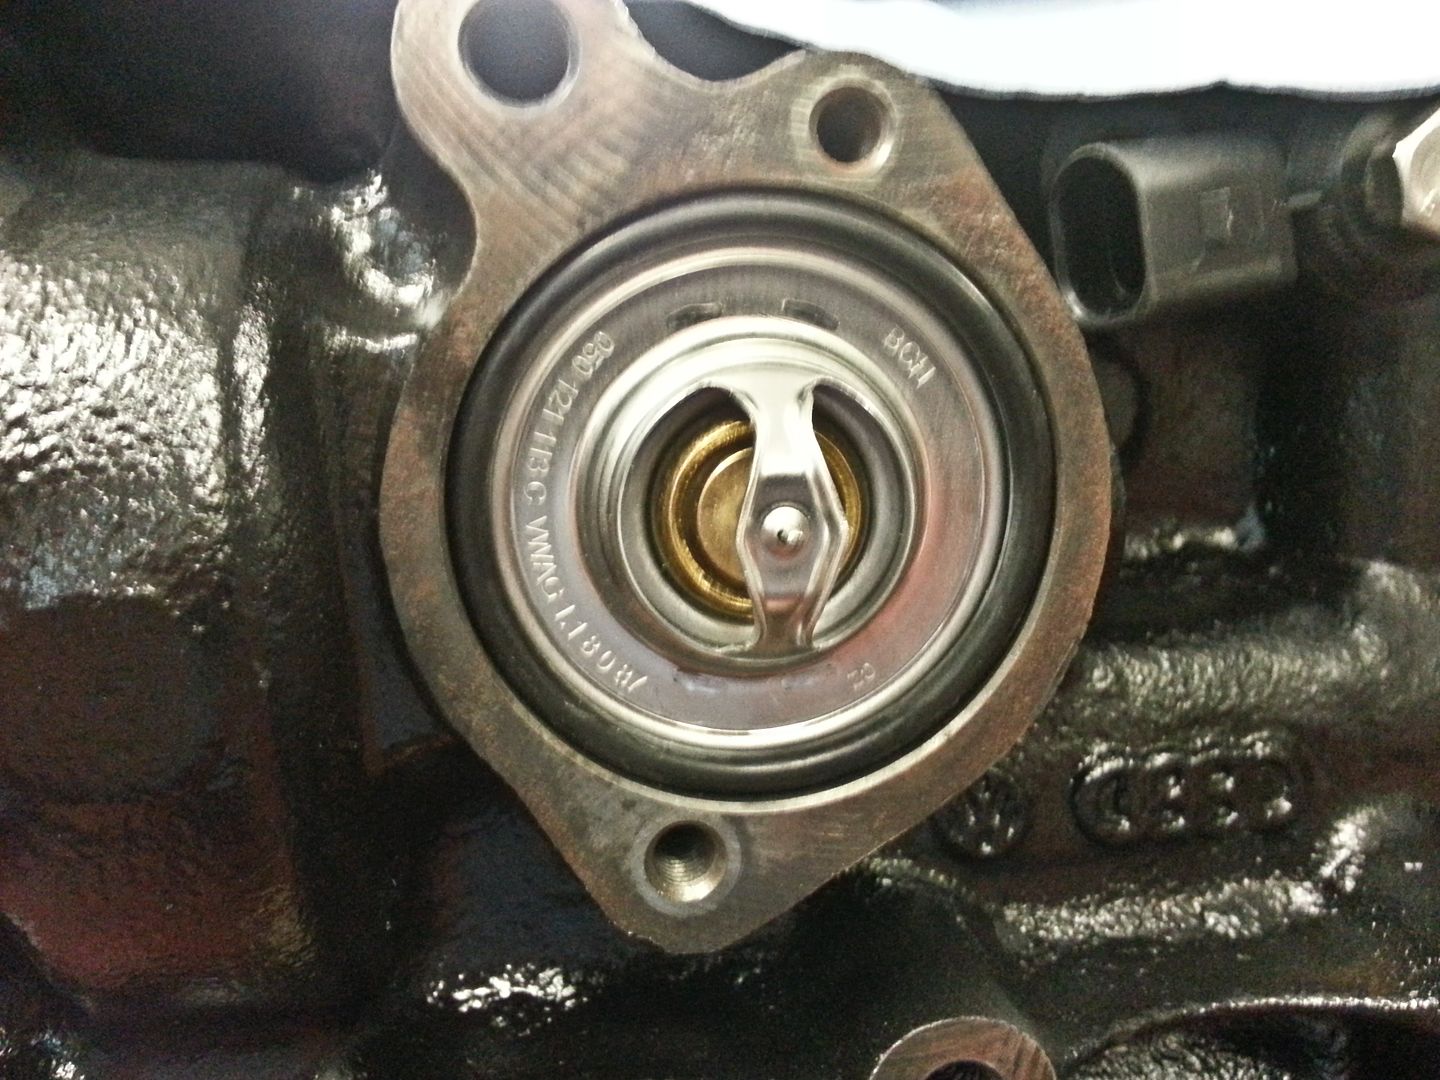
New stat (OE)...
Removed the clutch and flywheel from the old engine... pressure cover had no bluing or excessive wear...
...same with the DMF... no excessive play (although I do need to check the specs later to confirm) and again, same wear patterns as the cover...
...the plate however...
In fairness the clutch still felt good, no judder or slipping but obviously it was close to the rivets...
Std plate...
Ah well... the cover and DMF will go again but will need to get a new plate but its lasted well considering.. 20k miles, quite a few launches and a bit of NLS plus 18 months of hill starts on my way home from my old job...
To get over this I painted some more stuff...
Need to clean up the old engine a bit ready for its new home and sort out my old turbo and other parts as thats potentially sold too providing its not going to ave an issue with the earlier style transfer box as this is different to my later one... and anyone that has read this thread will know the interesting times I had trying to get clearance
One last thing... had an update from my head guy... he has started work on my head... couple of teaser pics to start with..
<tuffty/>
Not sure where the time went today...
Cleaned up the old bottom end ready for its new home...
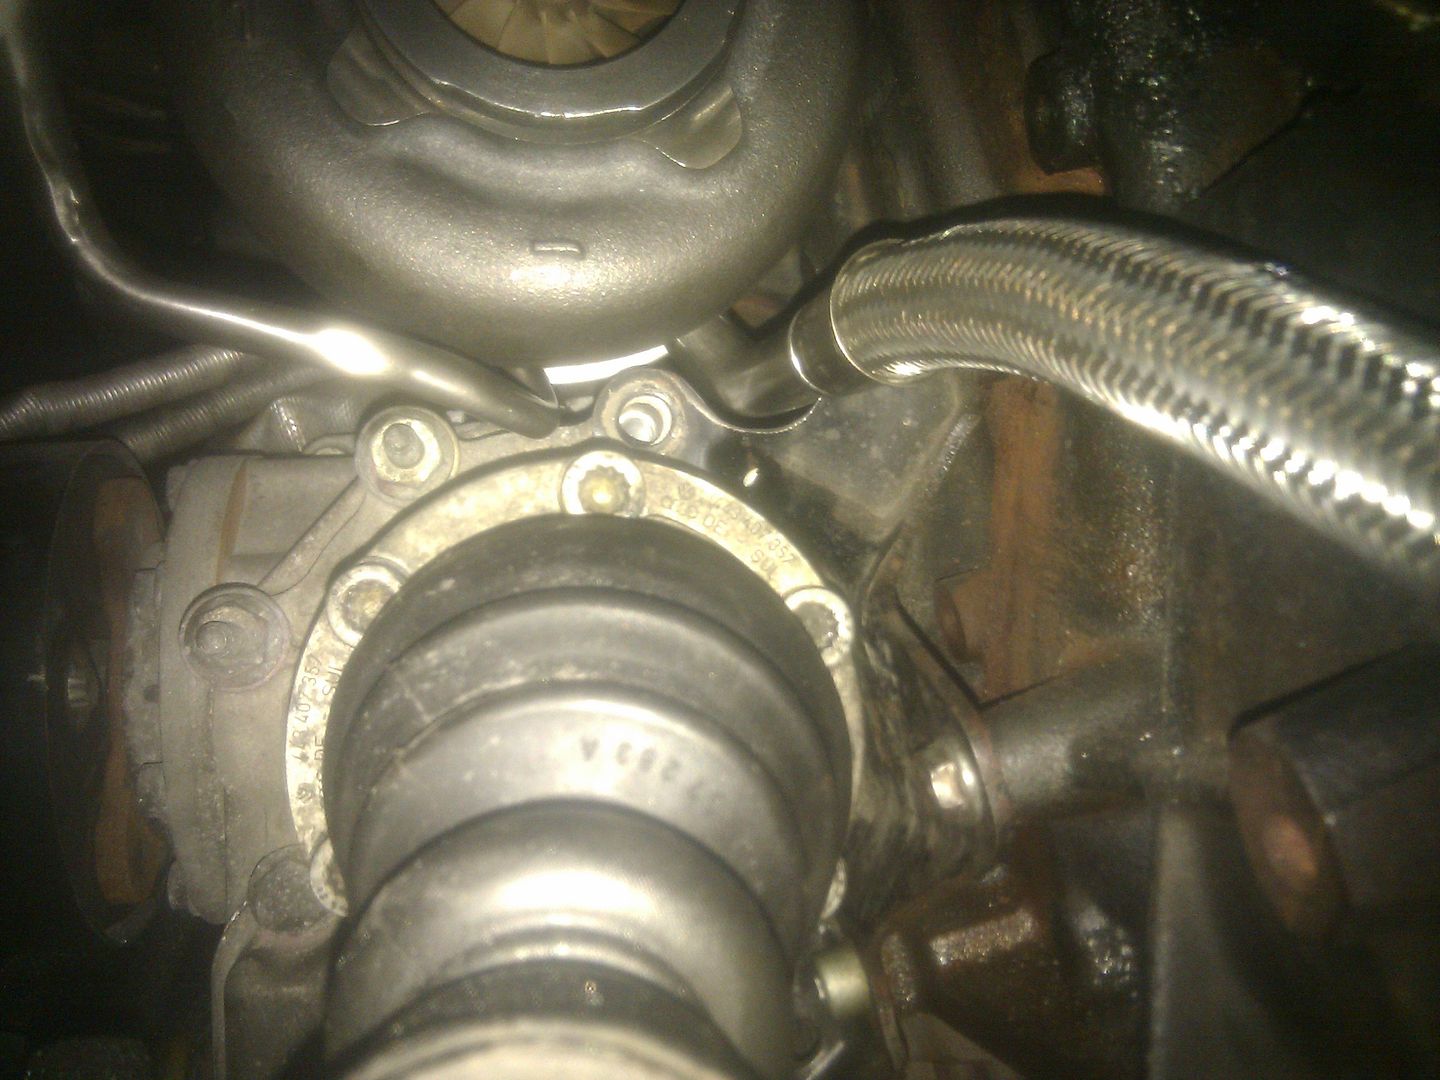
Mocked up my old turbo kit for a perspective buyer... needed to check what issues there may be fitting to a car with the earlier style transfer box...
Same lug that needs to be ground down...
Top of the transfer box requires a similar mod to mine for comp housing clearance...
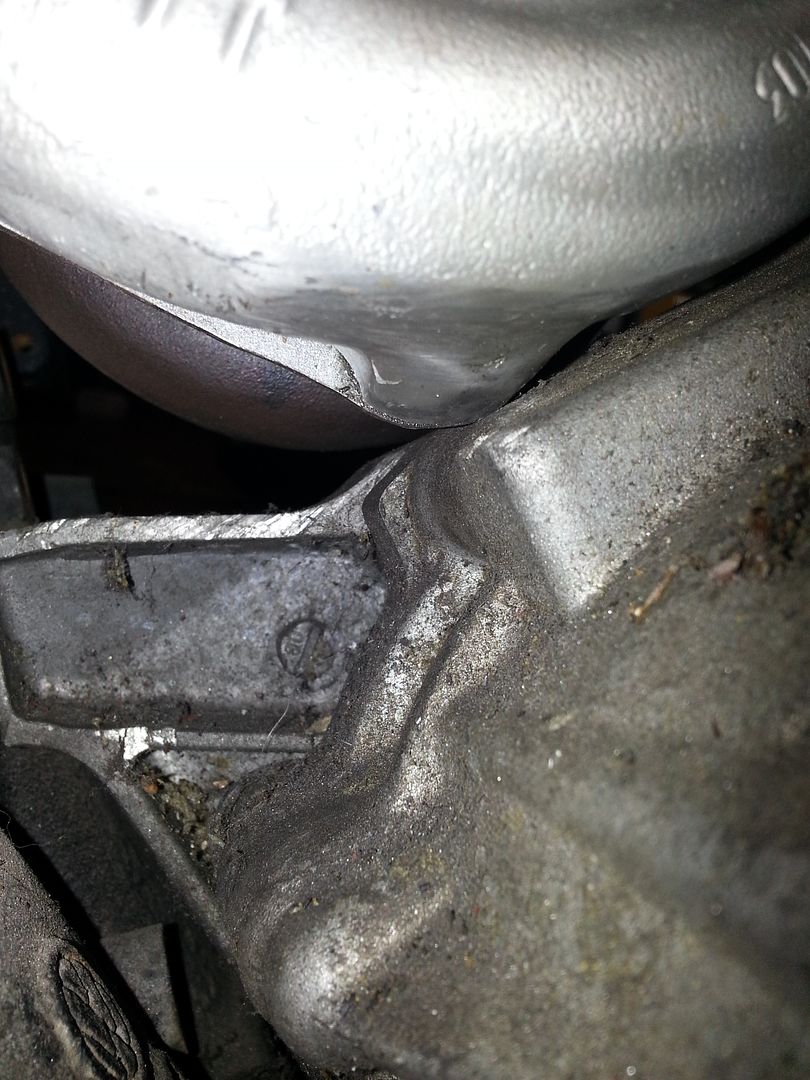
...and the main difference being the cast support bracket...
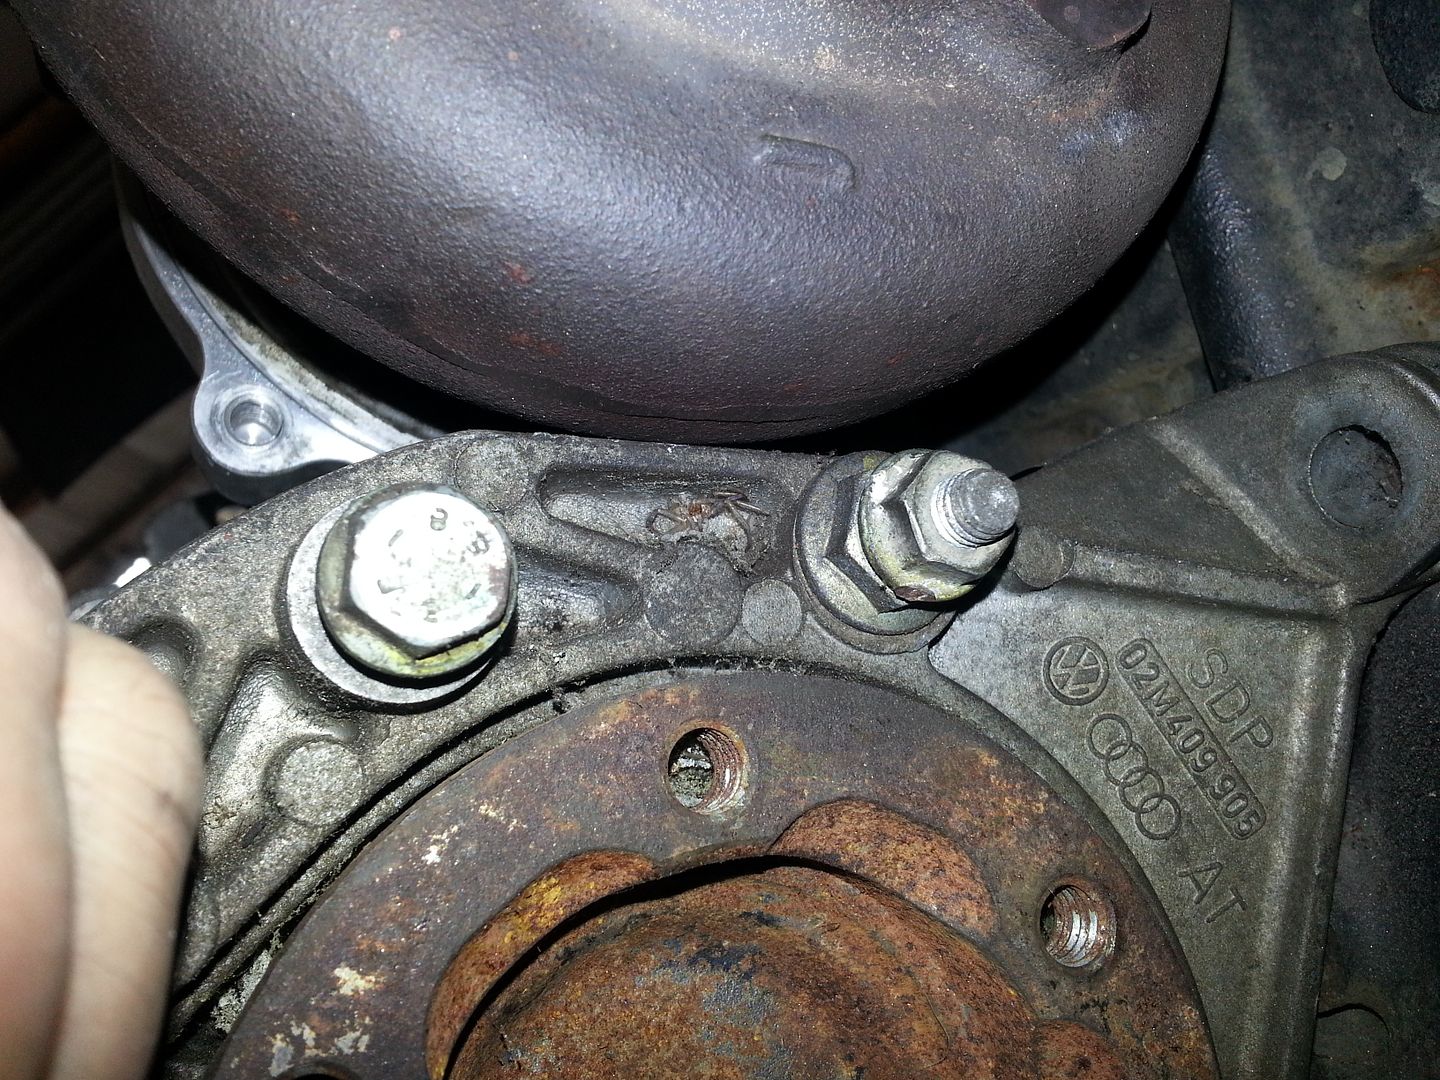
...vs my steel bracket...
After sorting that... I painted some more stuff
...need to sort the box out really as its filthy...
Tomorrow will be a little pamper day for the Golf as I have a couple of little jobs I need to do but after that the next job is to get the mock up block and gearbox back in the engine bay ready for working out where the turbo is going to go and for all the fabrication work that needs doing like the manifold and various coolant/oil lines...
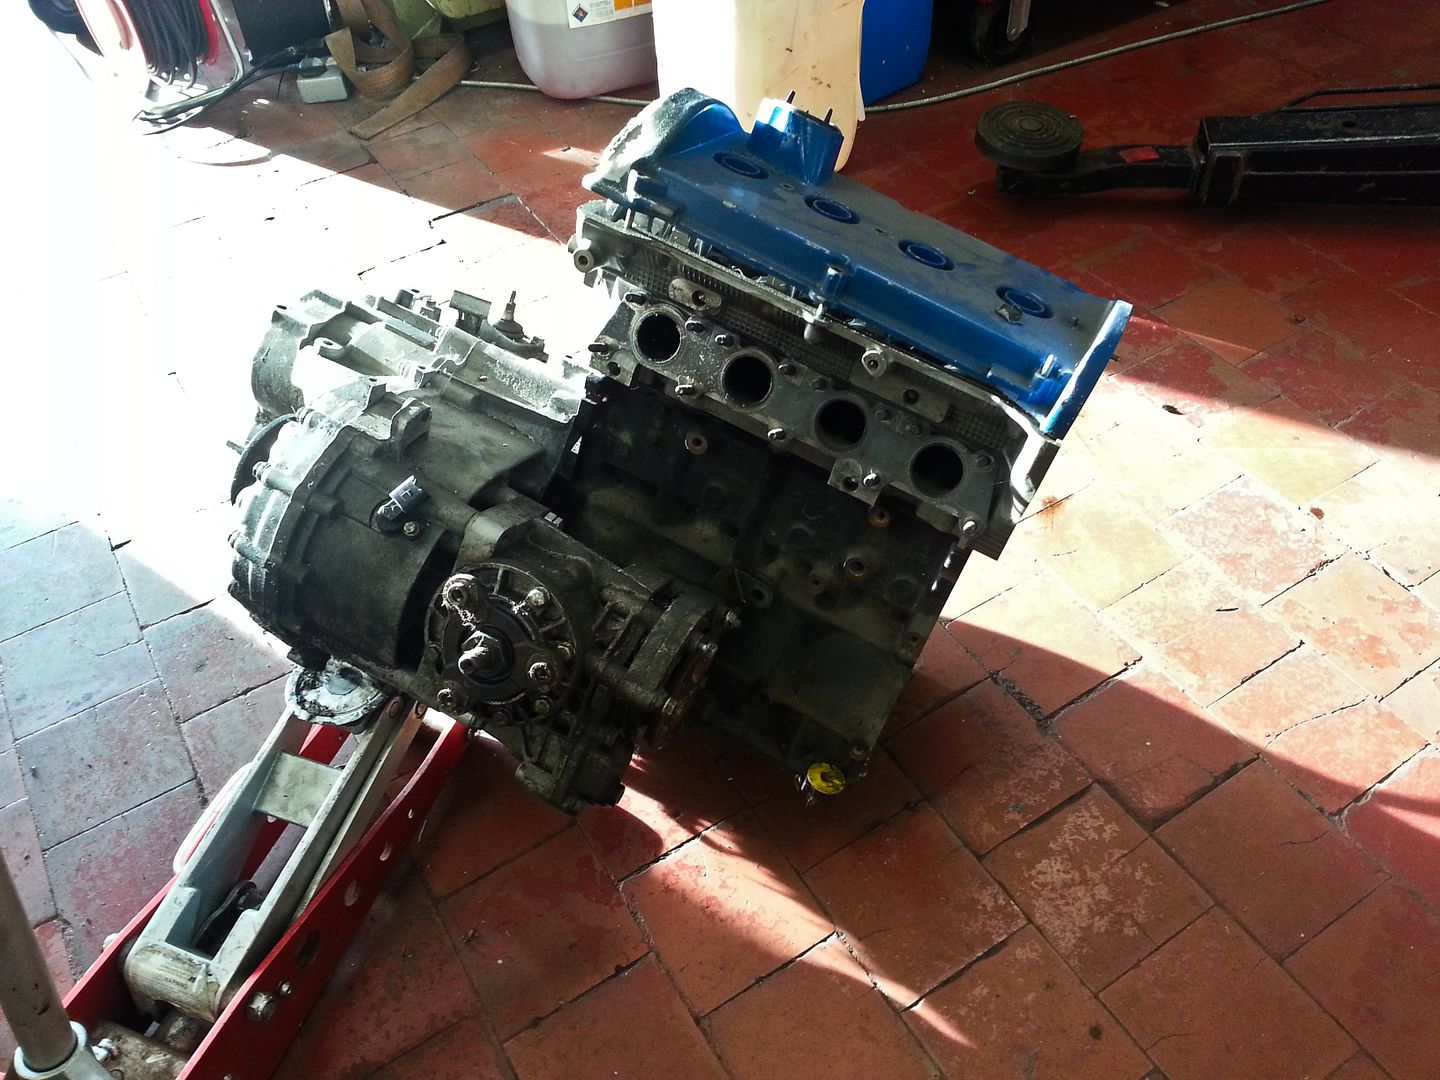
The head is bare so makes it very easy to take on and off the eleventy billion times that normally required when making stuff like this up... the block is bare too...
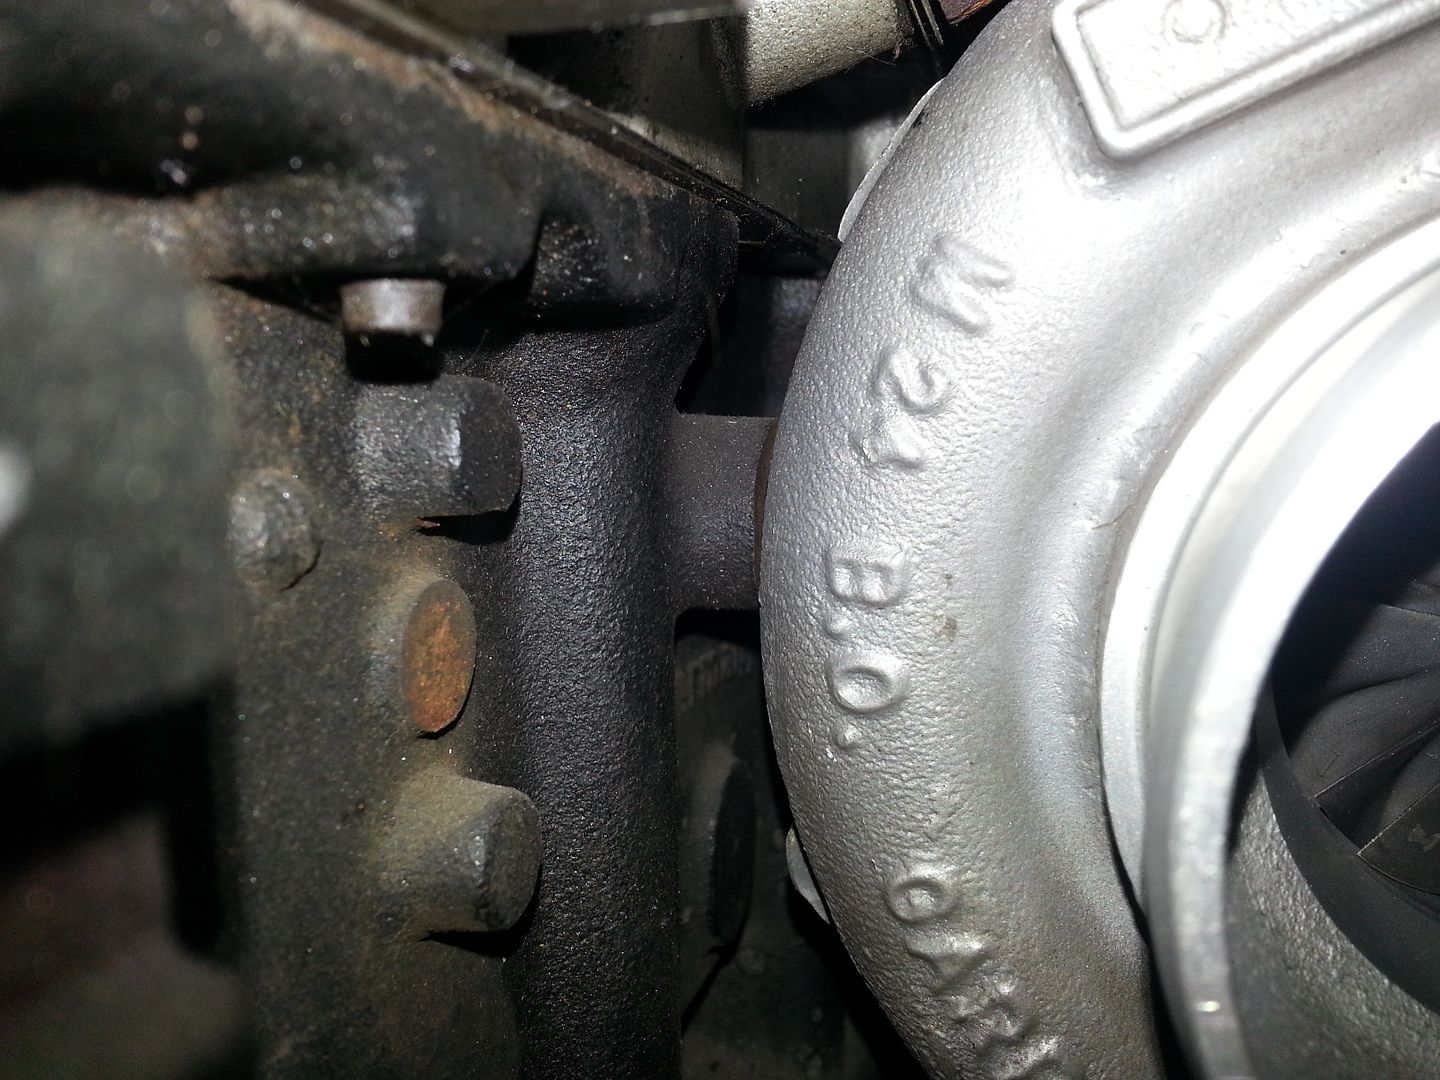
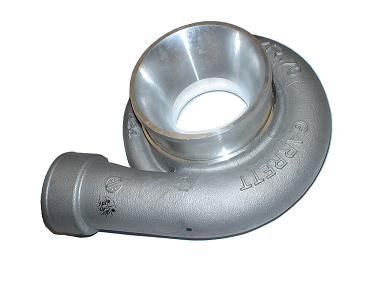
Just need to source a comp housing for the GT35 now... been looking at the GT3076 anti surge housing as this is a little smaller than the full fat GT35 one and can be machined to fit the GT35... gives the benefits of anti surge (not sure I'll need it be moving the surge line is always a good thing) and around 20mm extra room to play with... not much I hear you say but anything is a bonus considering the size of the damn thing...
GT3076 housing.. (2" outlet)
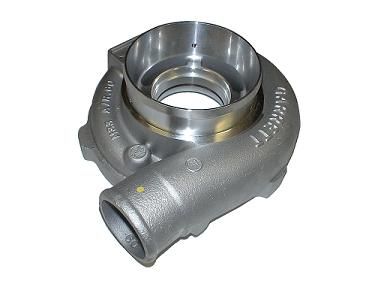
...and a GT35 housing... (2.5" outlet)
<tuffty/>
Cleaned up the old bottom end ready for its new home...
Mocked up my old turbo kit for a perspective buyer... needed to check what issues there may be fitting to a car with the earlier style transfer box...
Same lug that needs to be ground down...
Top of the transfer box requires a similar mod to mine for comp housing clearance...
...and the main difference being the cast support bracket...
...vs my steel bracket...
After sorting that... I painted some more stuff
...need to sort the box out really as its filthy...
Tomorrow will be a little pamper day for the Golf as I have a couple of little jobs I need to do but after that the next job is to get the mock up block and gearbox back in the engine bay ready for working out where the turbo is going to go and for all the fabrication work that needs doing like the manifold and various coolant/oil lines...
The head is bare so makes it very easy to take on and off the eleventy billion times that normally required when making stuff like this up... the block is bare too...
Just need to source a comp housing for the GT35 now... been looking at the GT3076 anti surge housing as this is a little smaller than the full fat GT35 one and can be machined to fit the GT35... gives the benefits of anti surge (not sure I'll need it be moving the surge line is always a good thing) and around 20mm extra room to play with... not much I hear you say but anything is a bonus considering the size of the damn thing...
GT3076 housing.. (2" outlet)
...and a GT35 housing... (2.5" outlet)
<tuffty/>
Nice to see a job done properly, good attitude and attention to detail. Do you fancy using the fast road clutch plate rather than the paddle youve been using. (around 385 ft/lb)
Nice to see a job done properly, good attitude and attention to detail. Do you fancy using the fast road clutch plate rather than the paddle youve been using. (around 385 ft/lb)
Thanks mate
Nope... the paddle is awesome... in fact if I hadn't removed it at this point I suspect I'd have got another 12 months/5k from it tbh...
Paddle clutches inherently wear faster but I nuked an OE one in 30k before and I had to be careful all the time with it as every quick gearchange or fast-ish get away seemed to take years off it... the paddle has been fantastic throughout and I have given it a little abuse too
Gonna just bung a new paddle plate in and be done
<tuffty/>
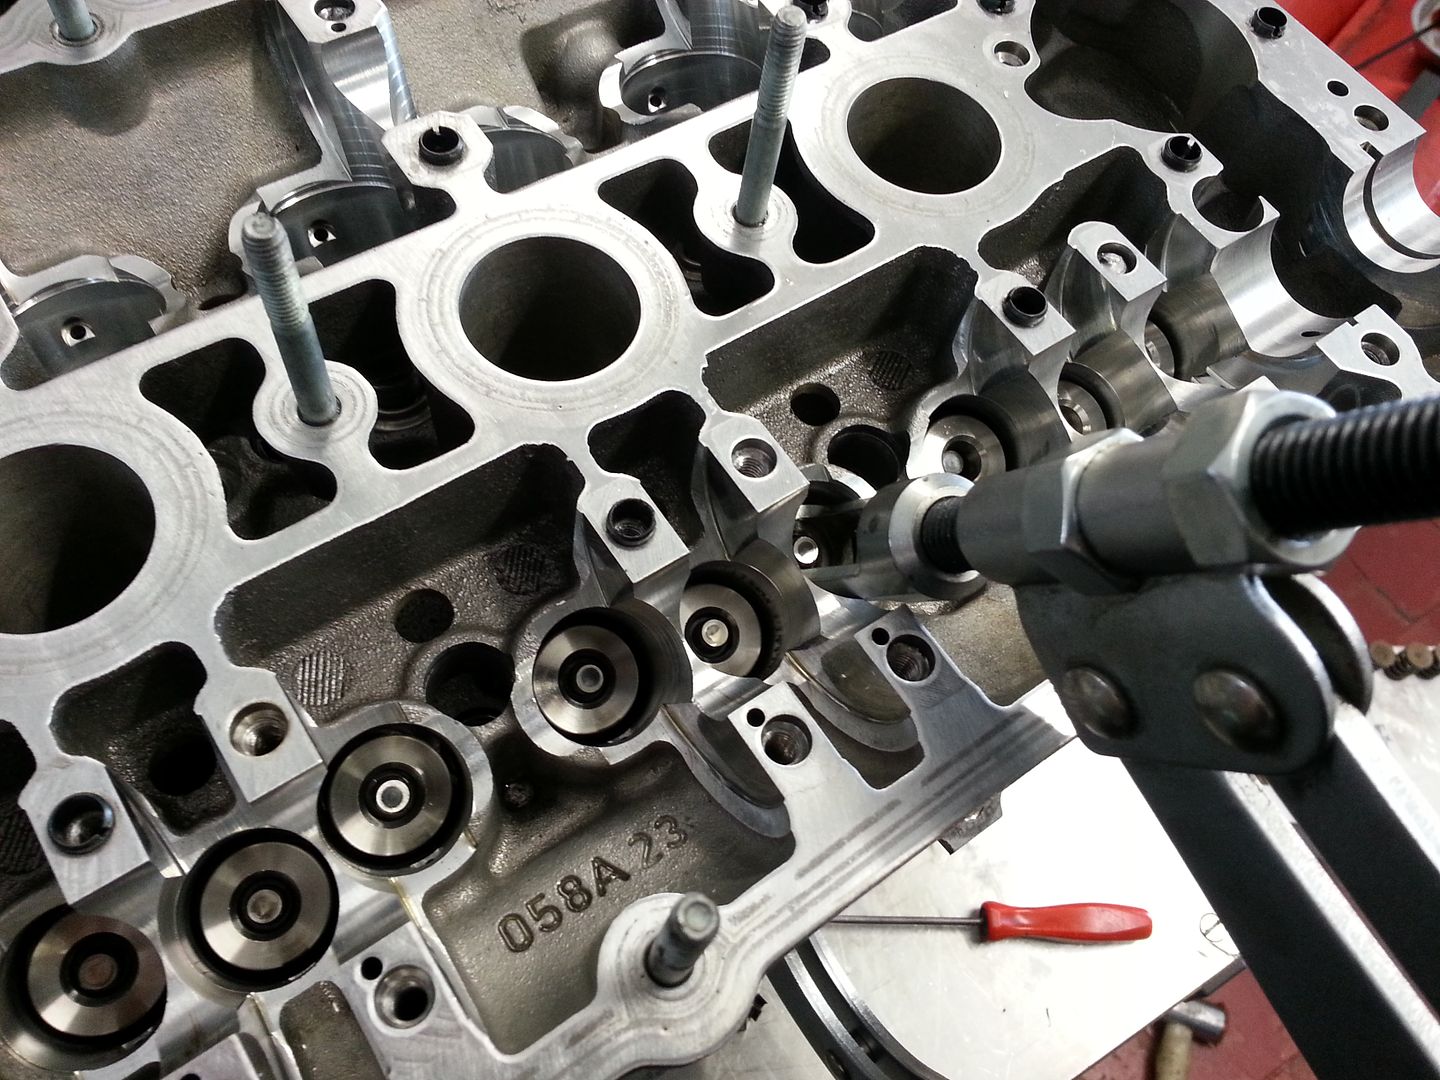
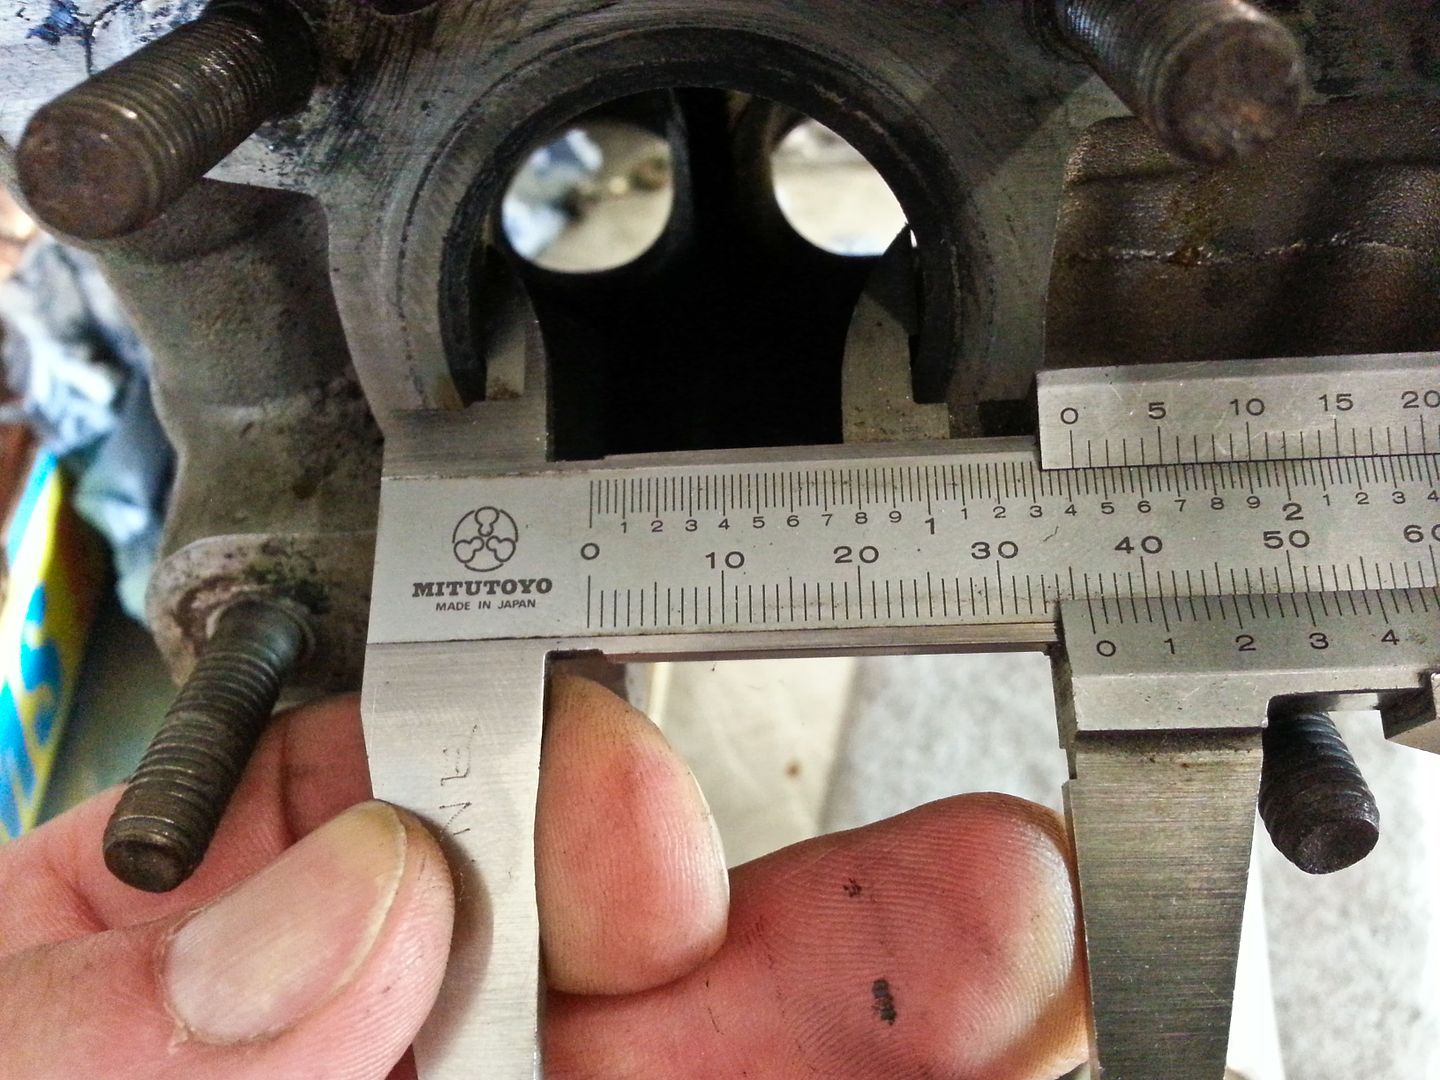
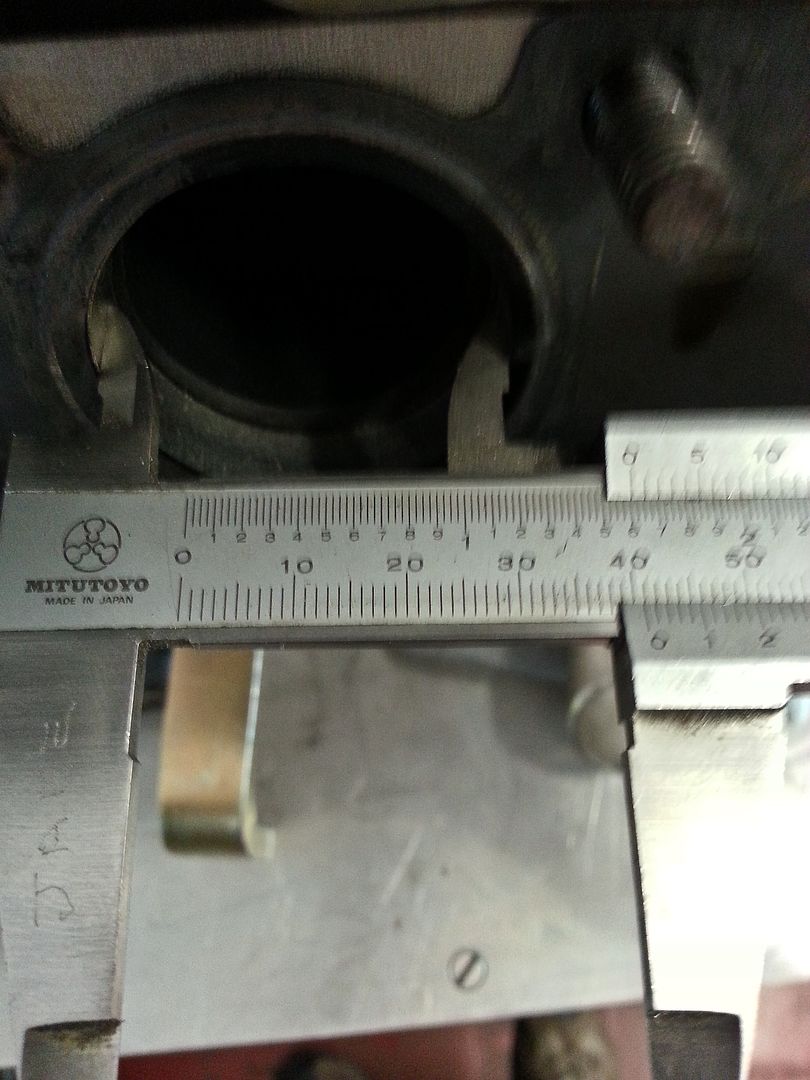
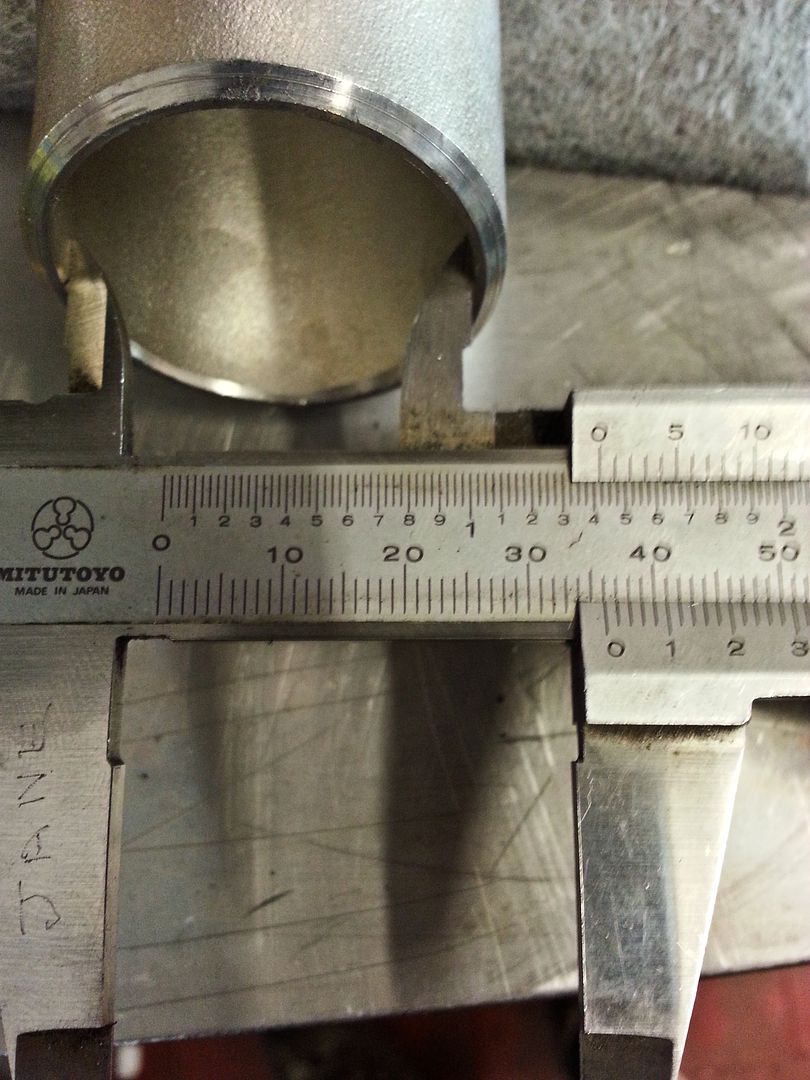
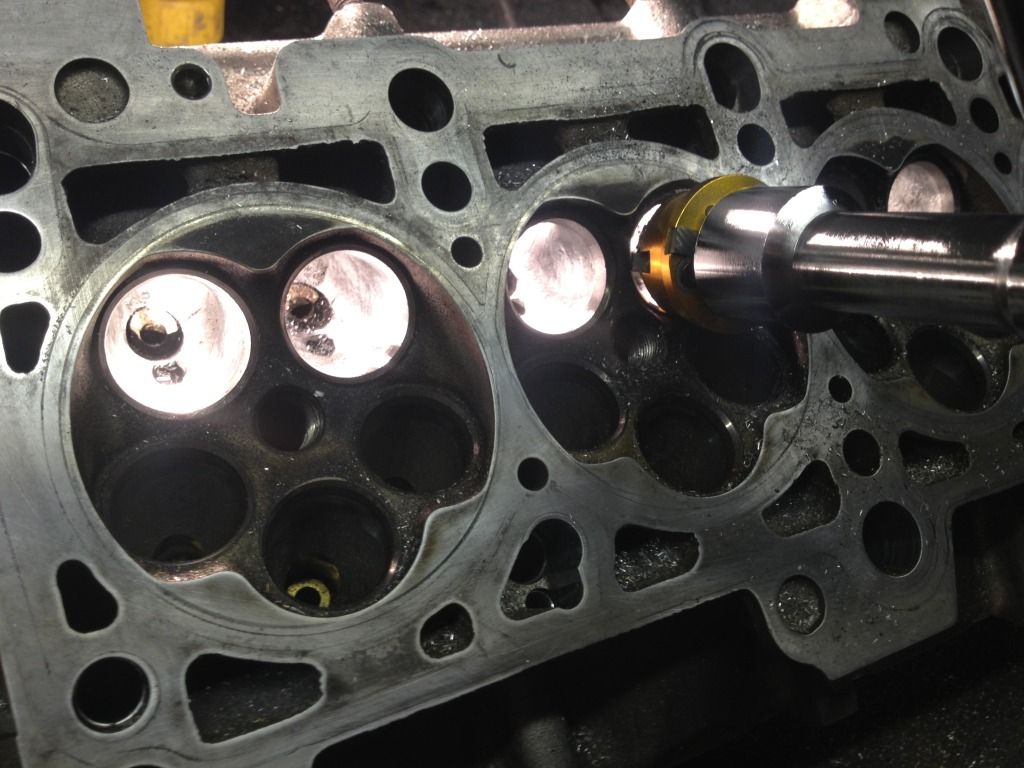
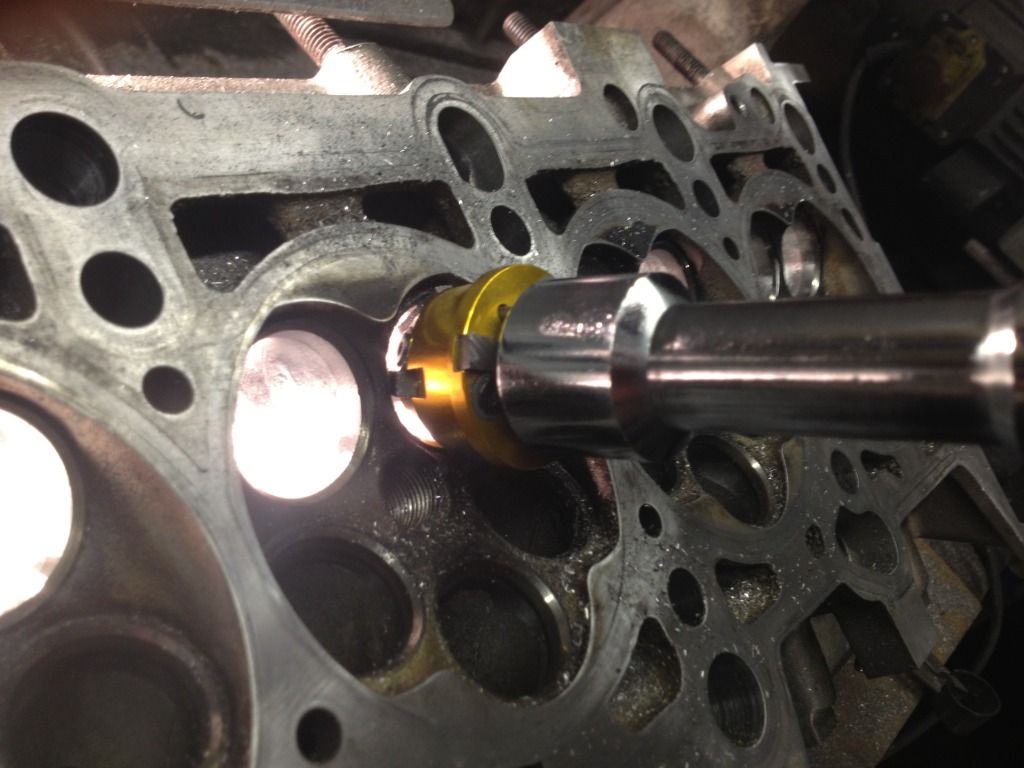
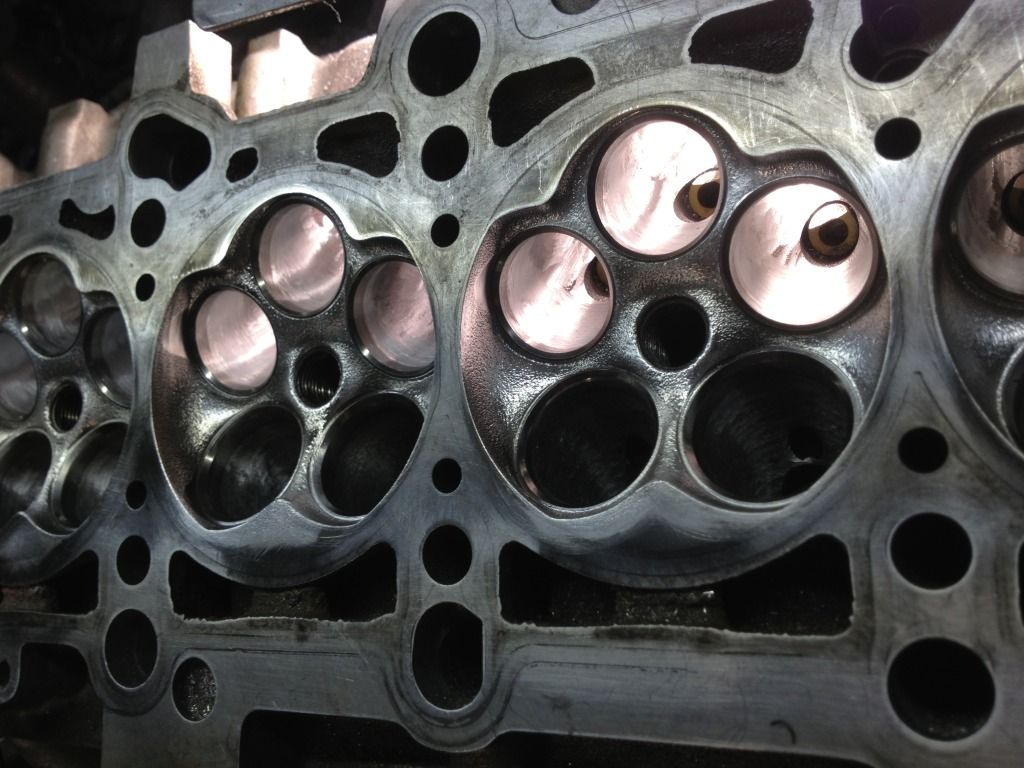
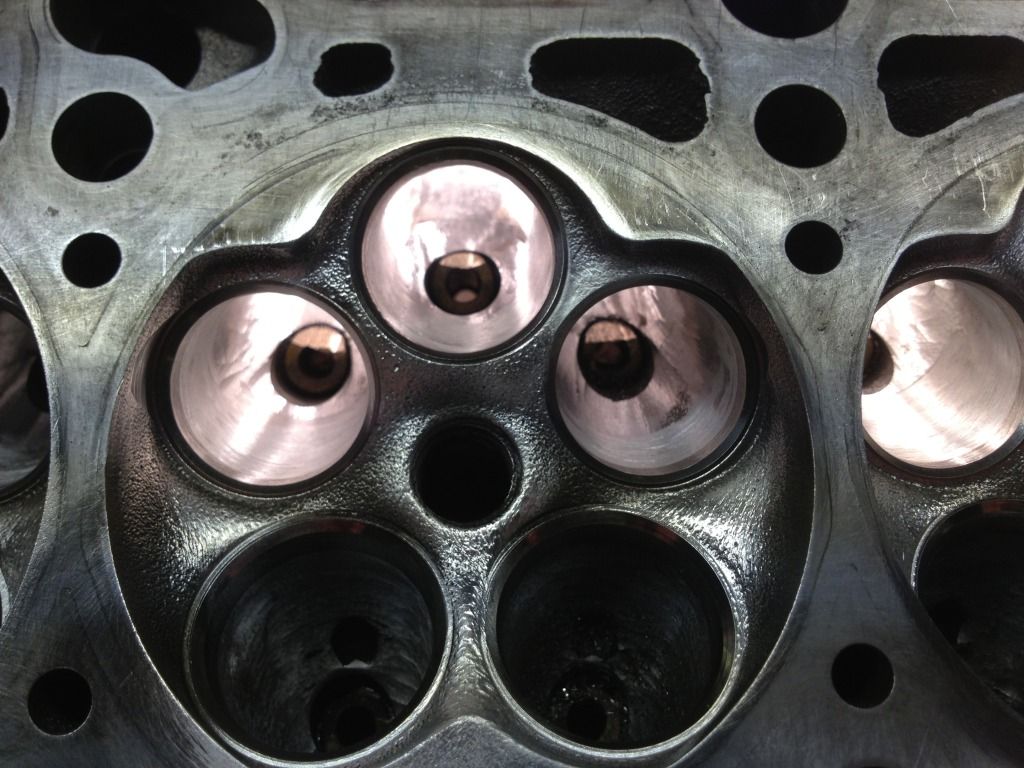
More pics from my head guy... (http://www.aldevelopments.com/)
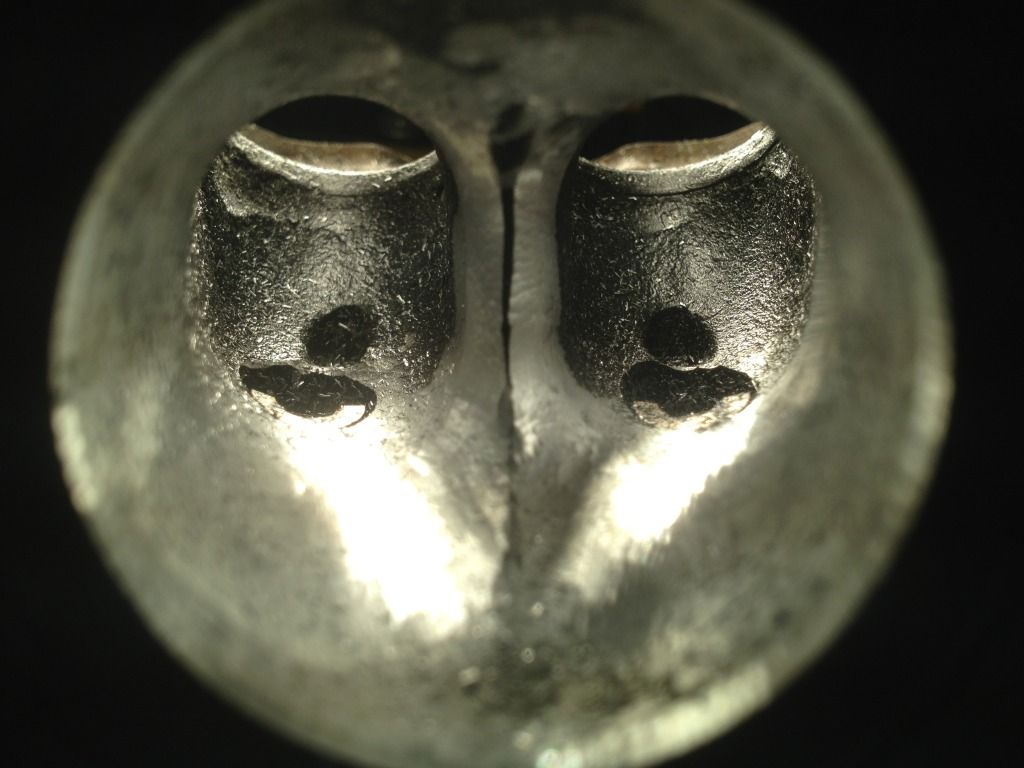
He has finished off the main cutting on the exhaust ports and checked the seat with a seat cutter. Seats are all mint with a nice 45 deg and will cut another angle when he has finished the ports off
<tuffty/>
He has finished off the main cutting on the exhaust ports and checked the seat with a seat cutter. Seats are all mint with a nice 45 deg and will cut another angle when he has finished the ports off
<tuffty/>

I take it thread lock isn't used inside the eingine as the heat would be too much for it? What wagon is the old engine destined for? I'm curious.
Last edited:
I take it thread lock isn't used inside the eingine as the heat would be too much for it? What wagon is the old engine destined for? I'm curious.
The old engine is going in an LCR ;-)
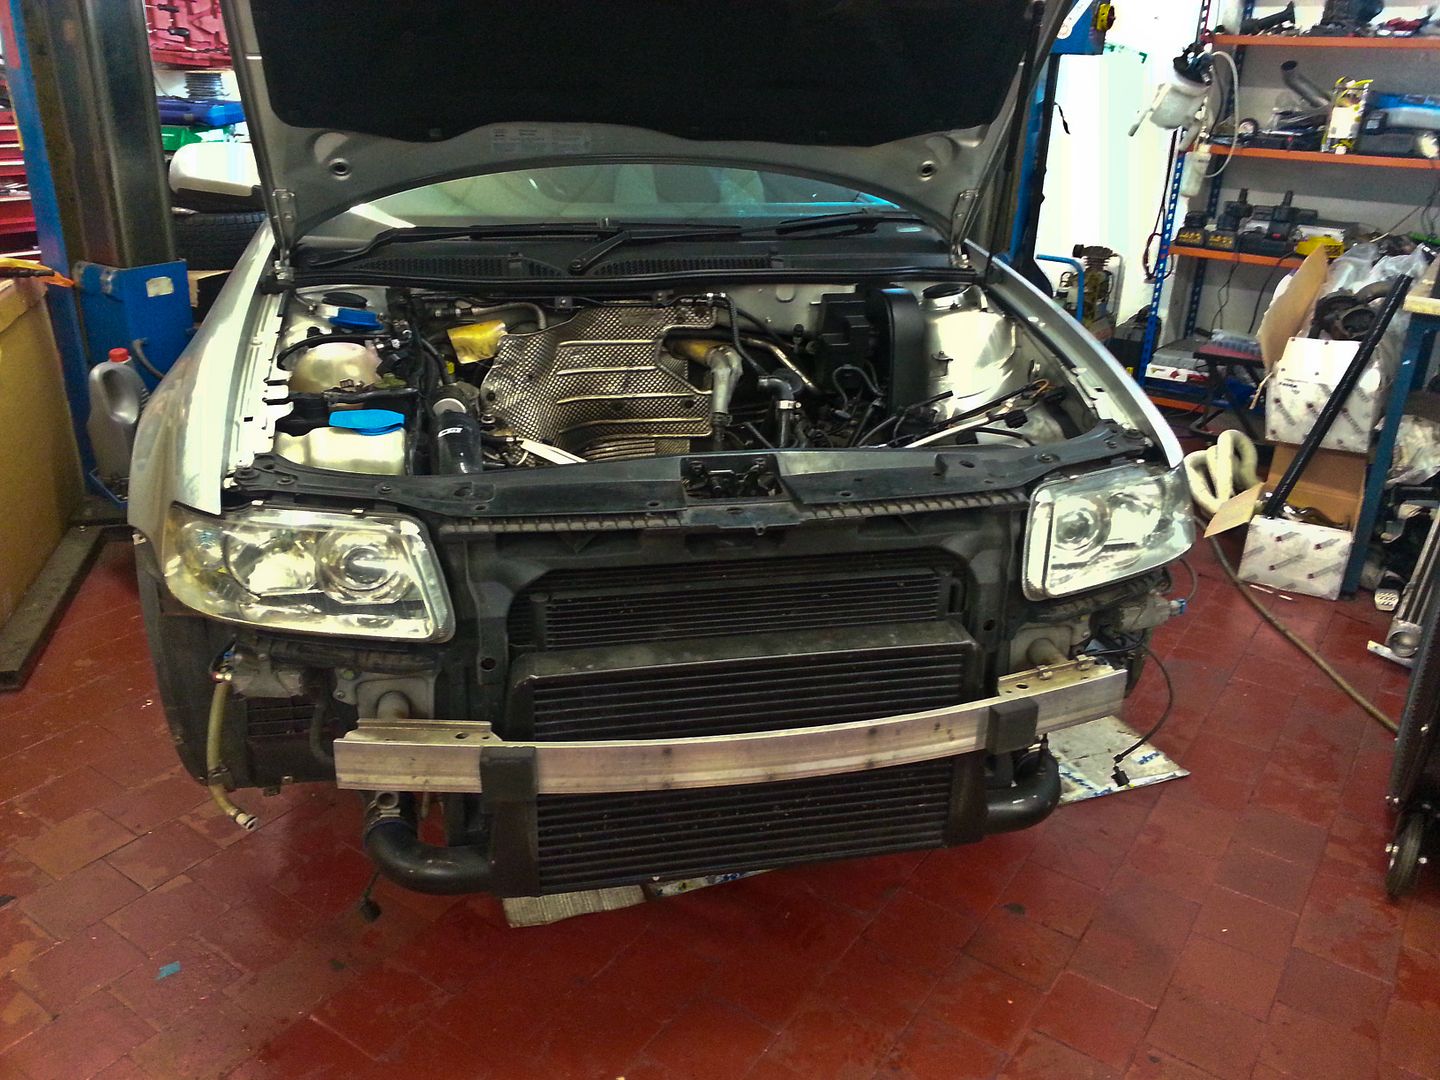
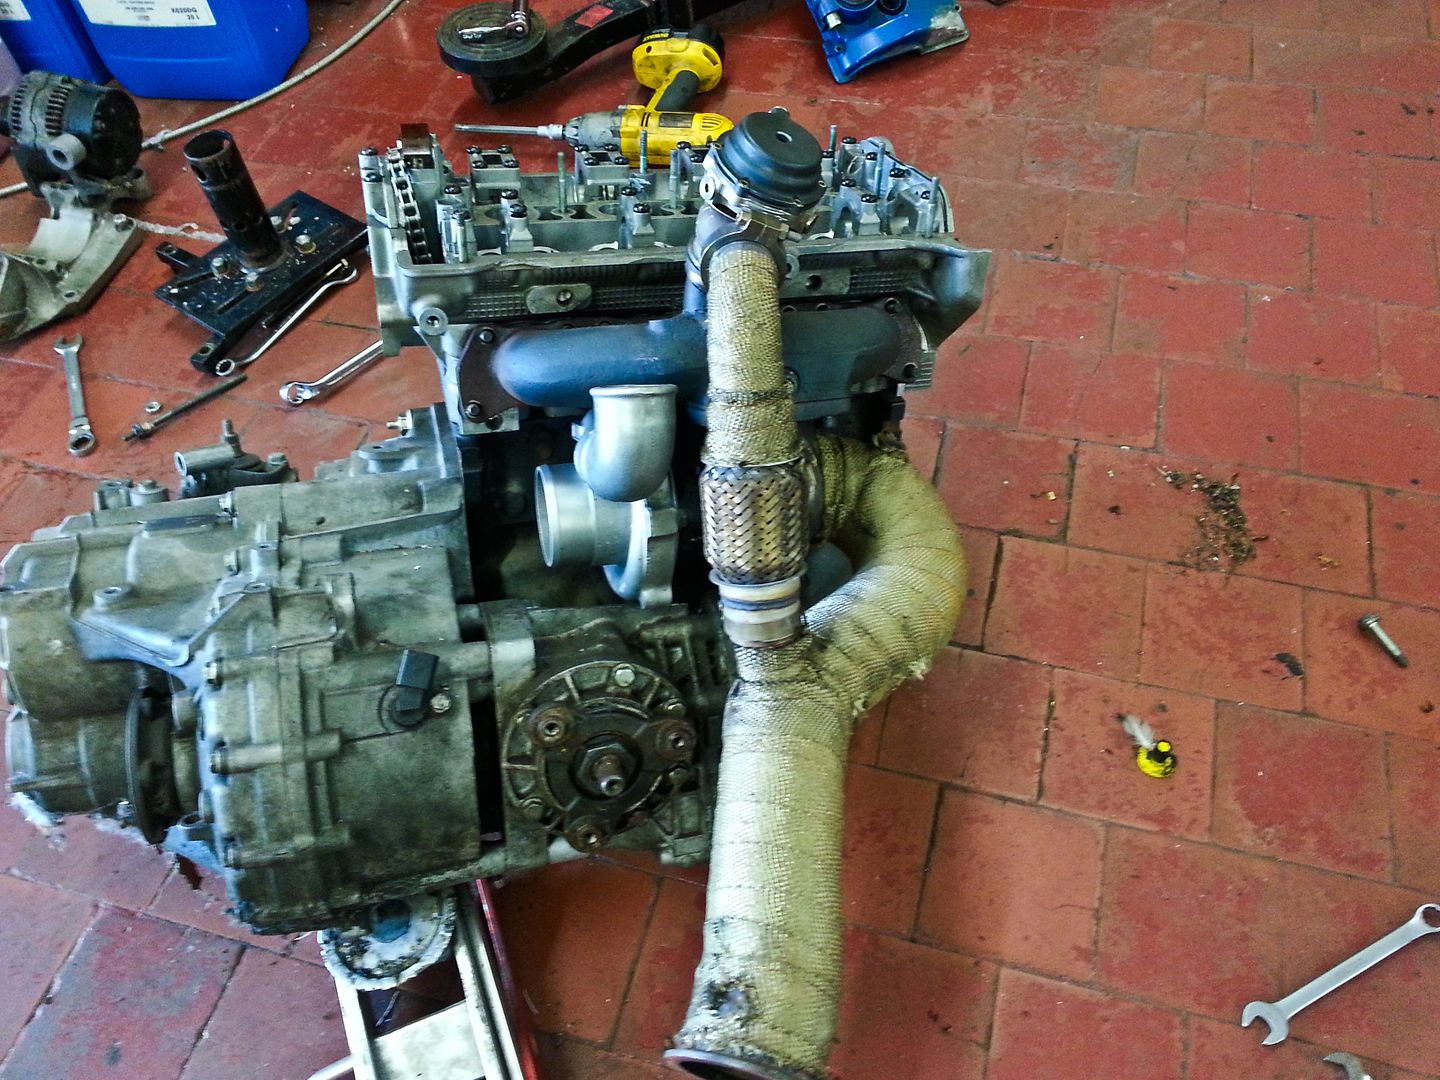
Got the 'build' engine into the bay today for making the exhaust mani and any other fabrication that may be needed like coolant hoses etc...

...quite a bit of room once stuff is out the way lol...
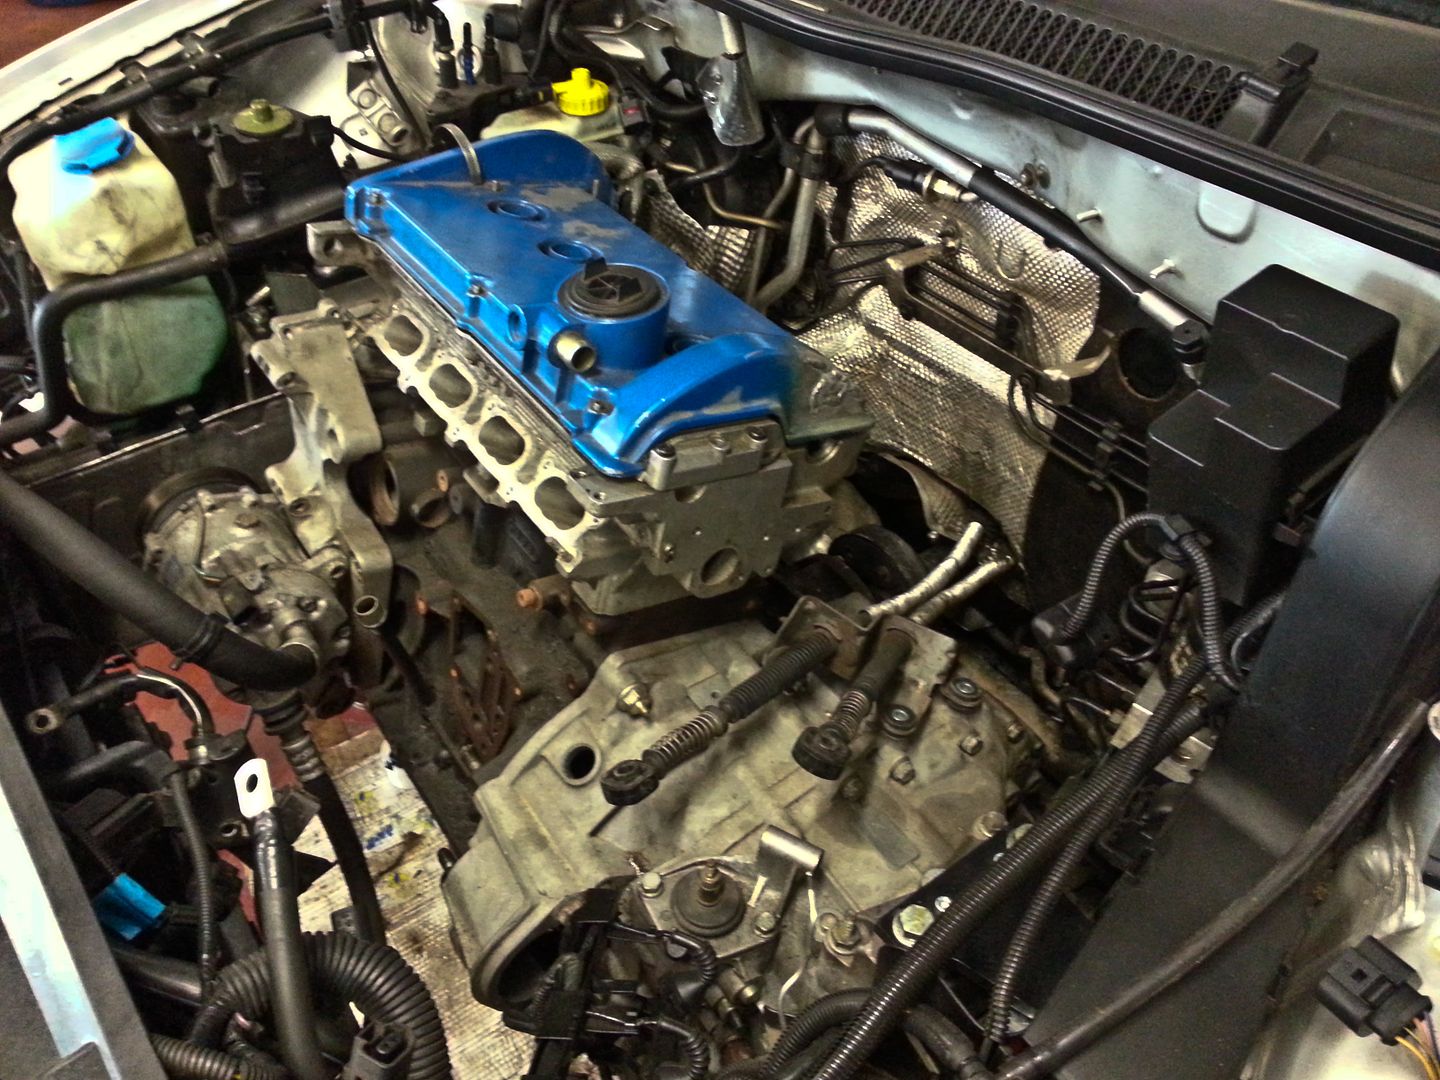
...although not enough it would seem for a sidewinder manifold Bill has 'laying around' lol...
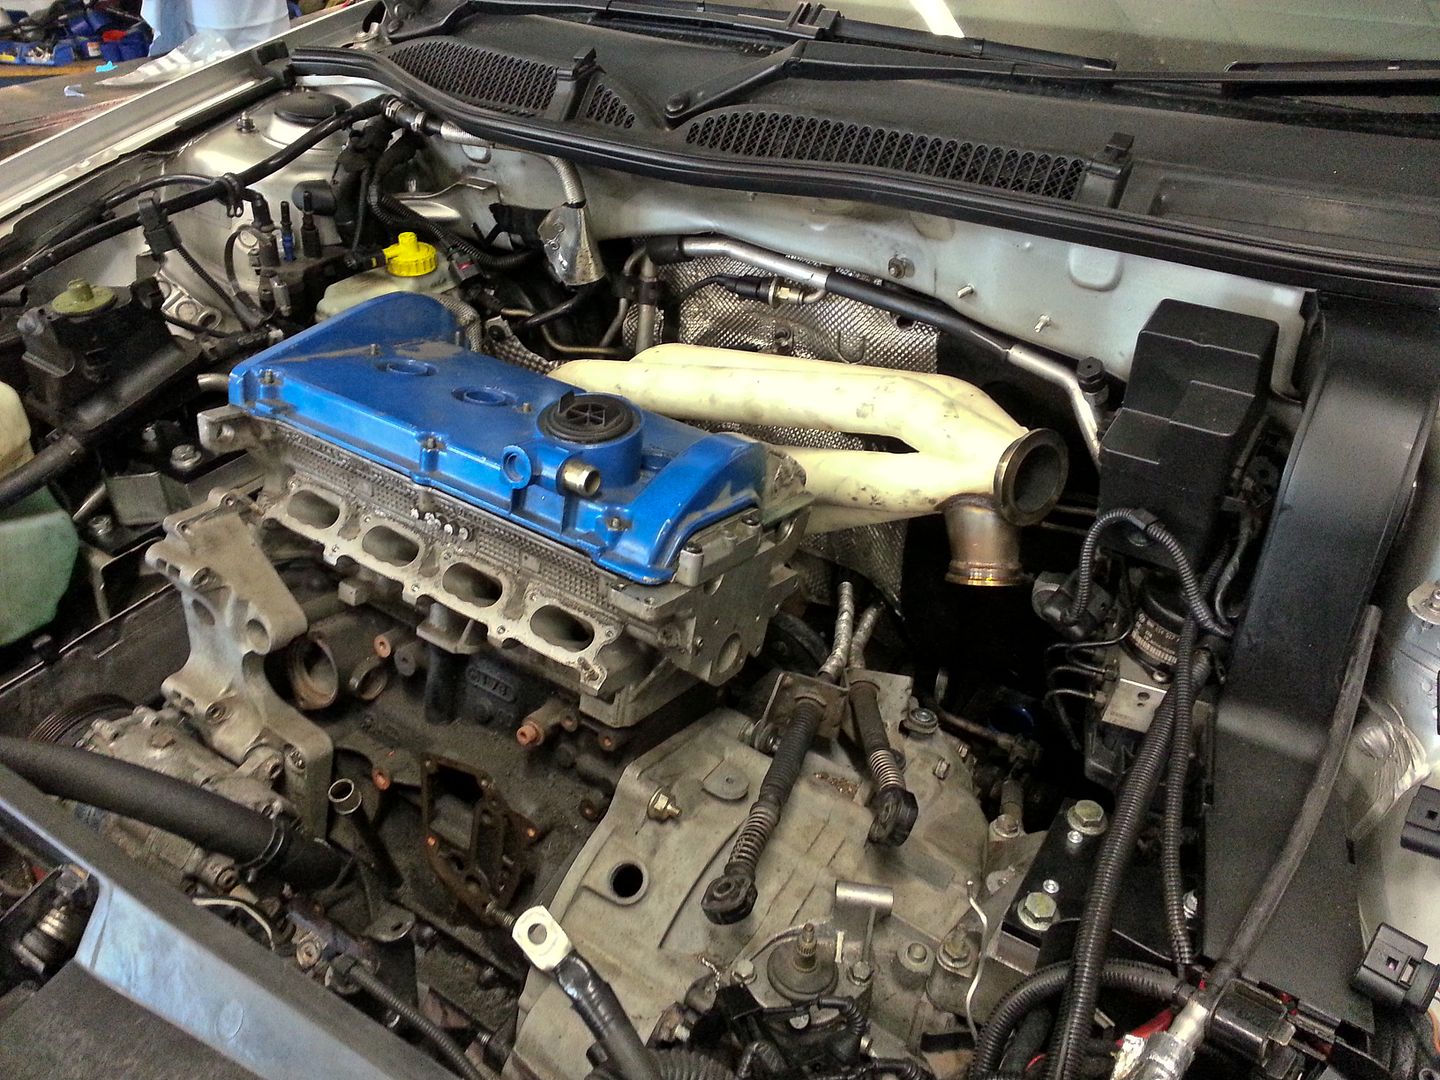
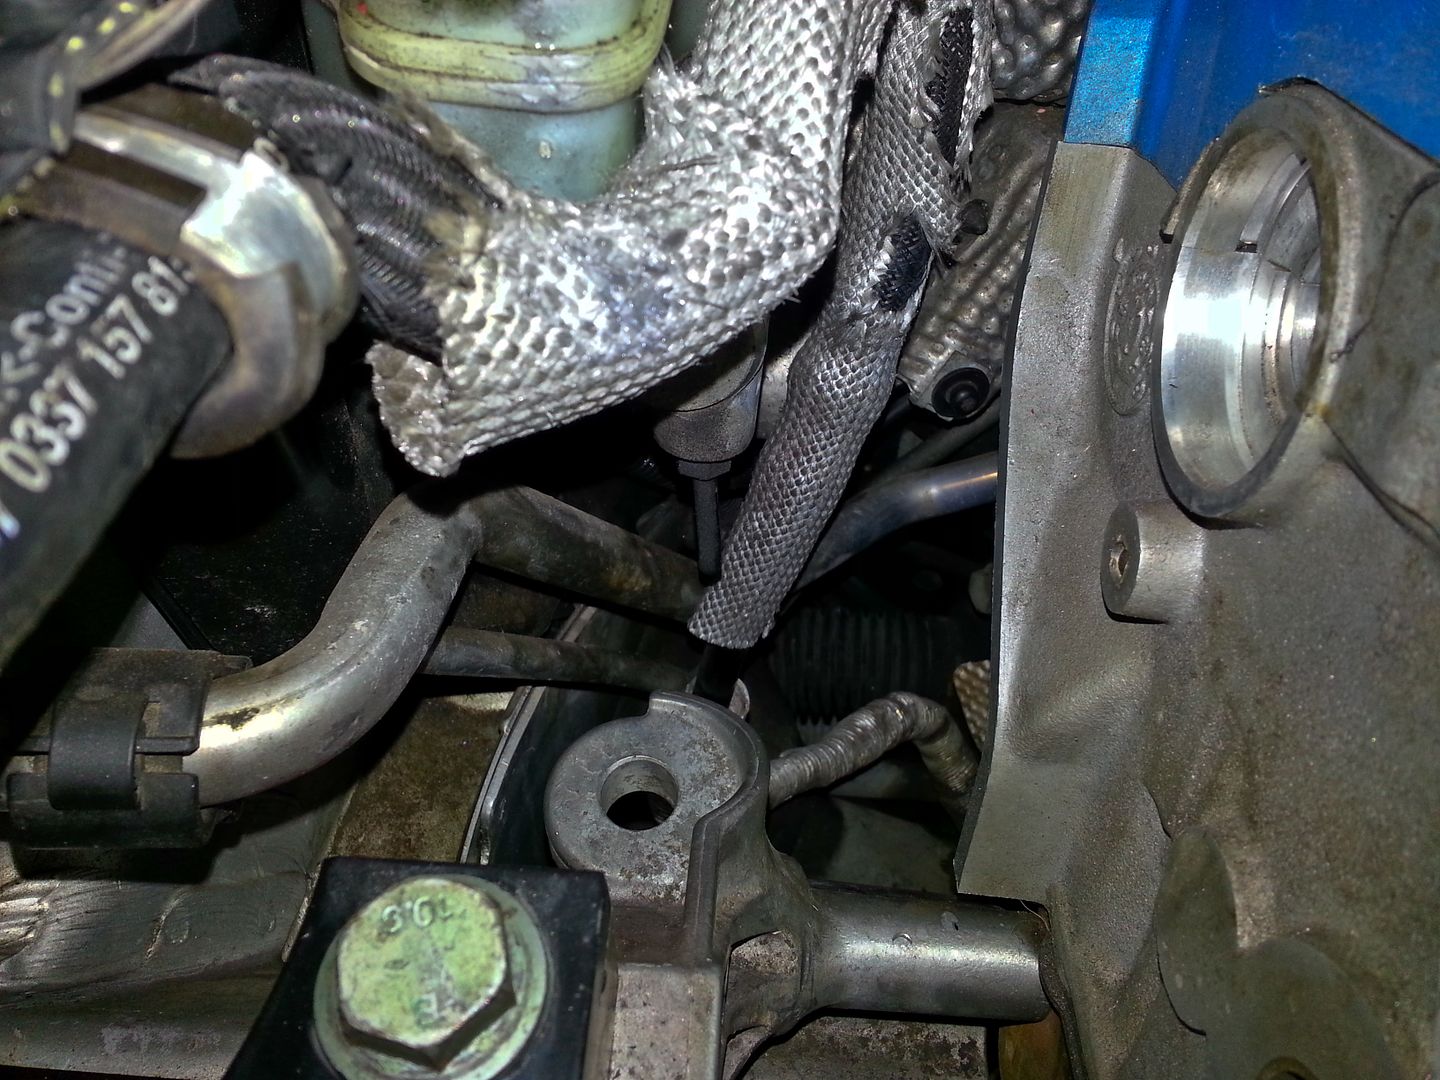
Could see that I should have no bother relocating the PAS return line as its a royal PITA where it is currently (especially when bleeding the master cylinder!)
My mate dropped off my wheels at lunch time after removing the tyres for me... refurb time ;P
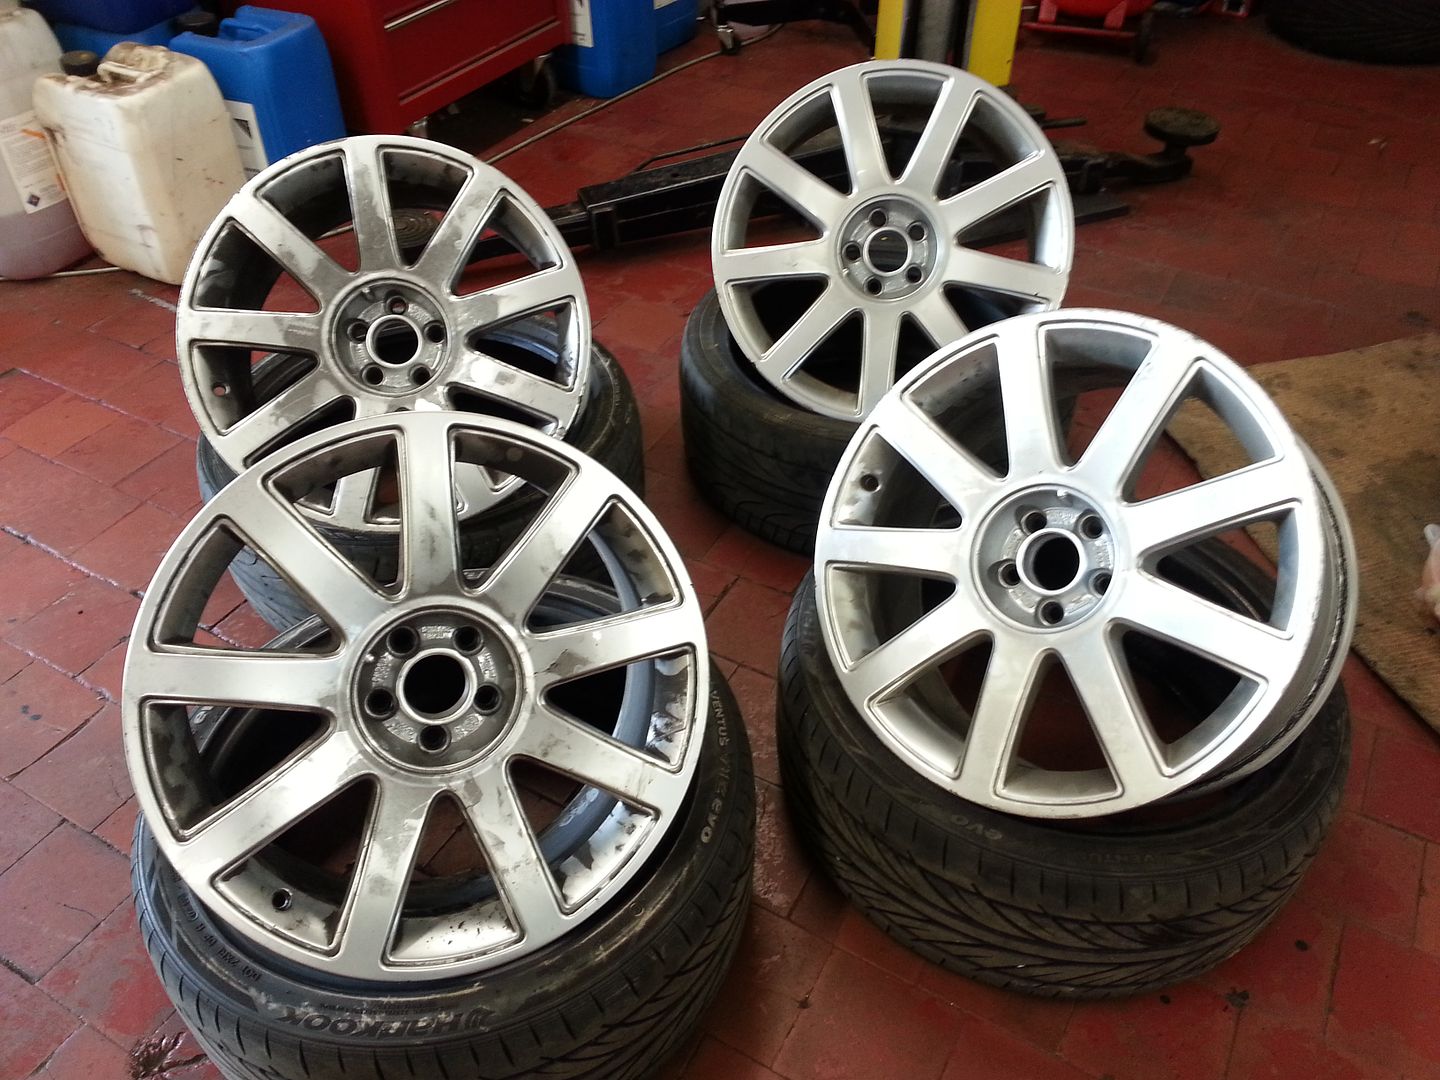
To be fair they are in a crap state so anything would help get them looking better lol...
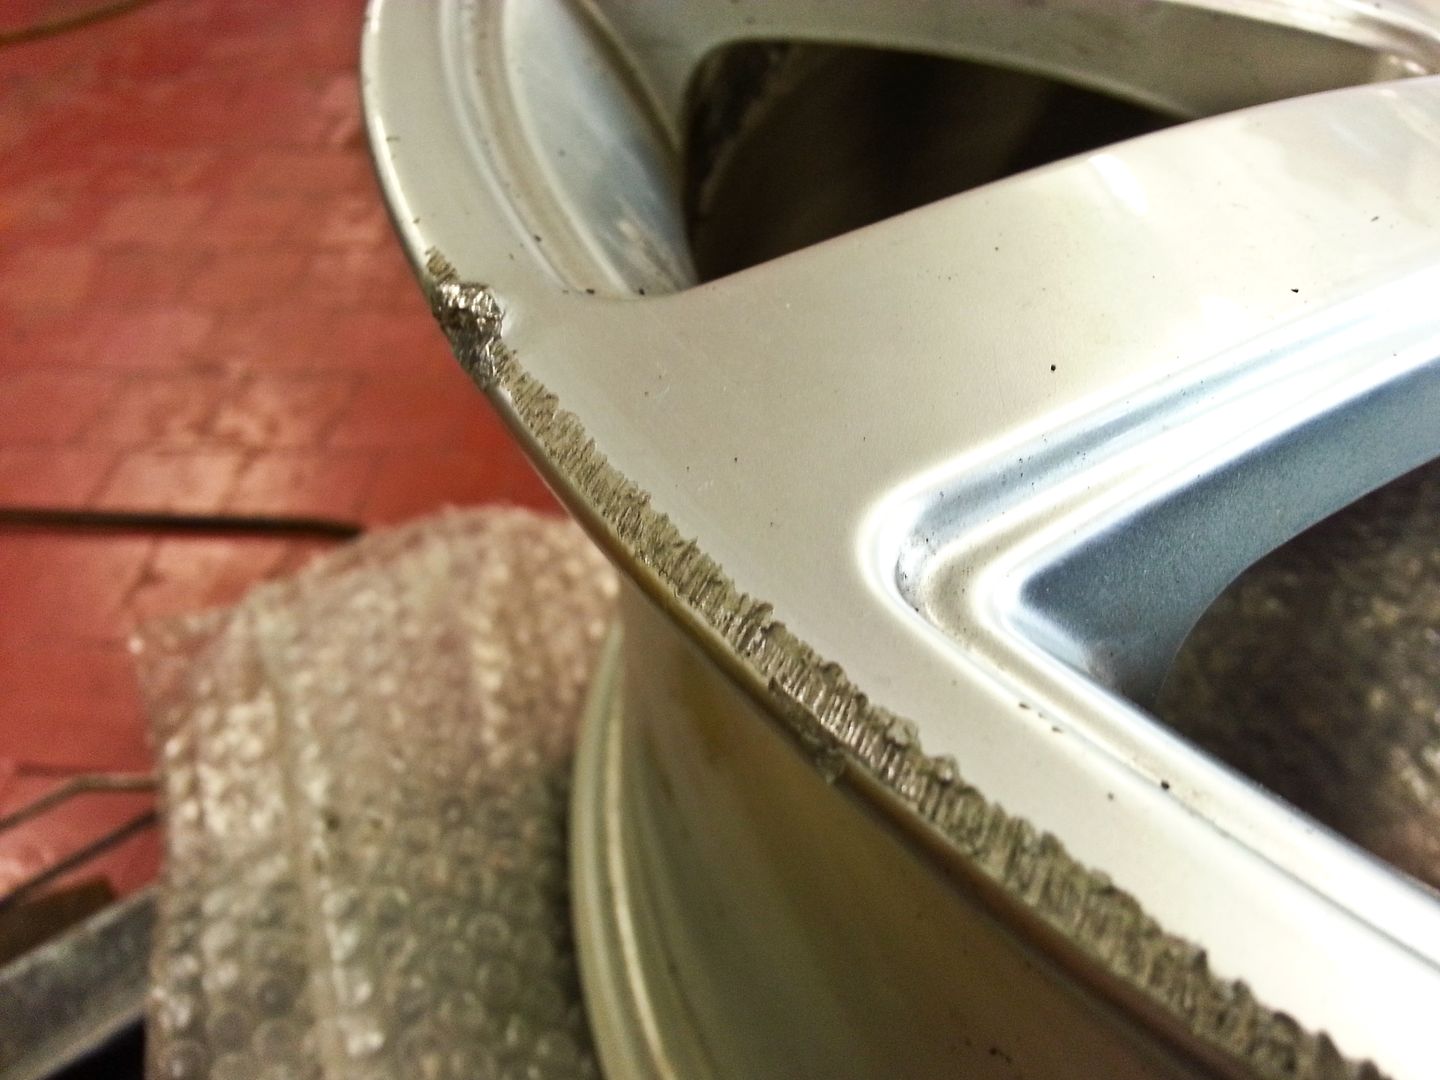
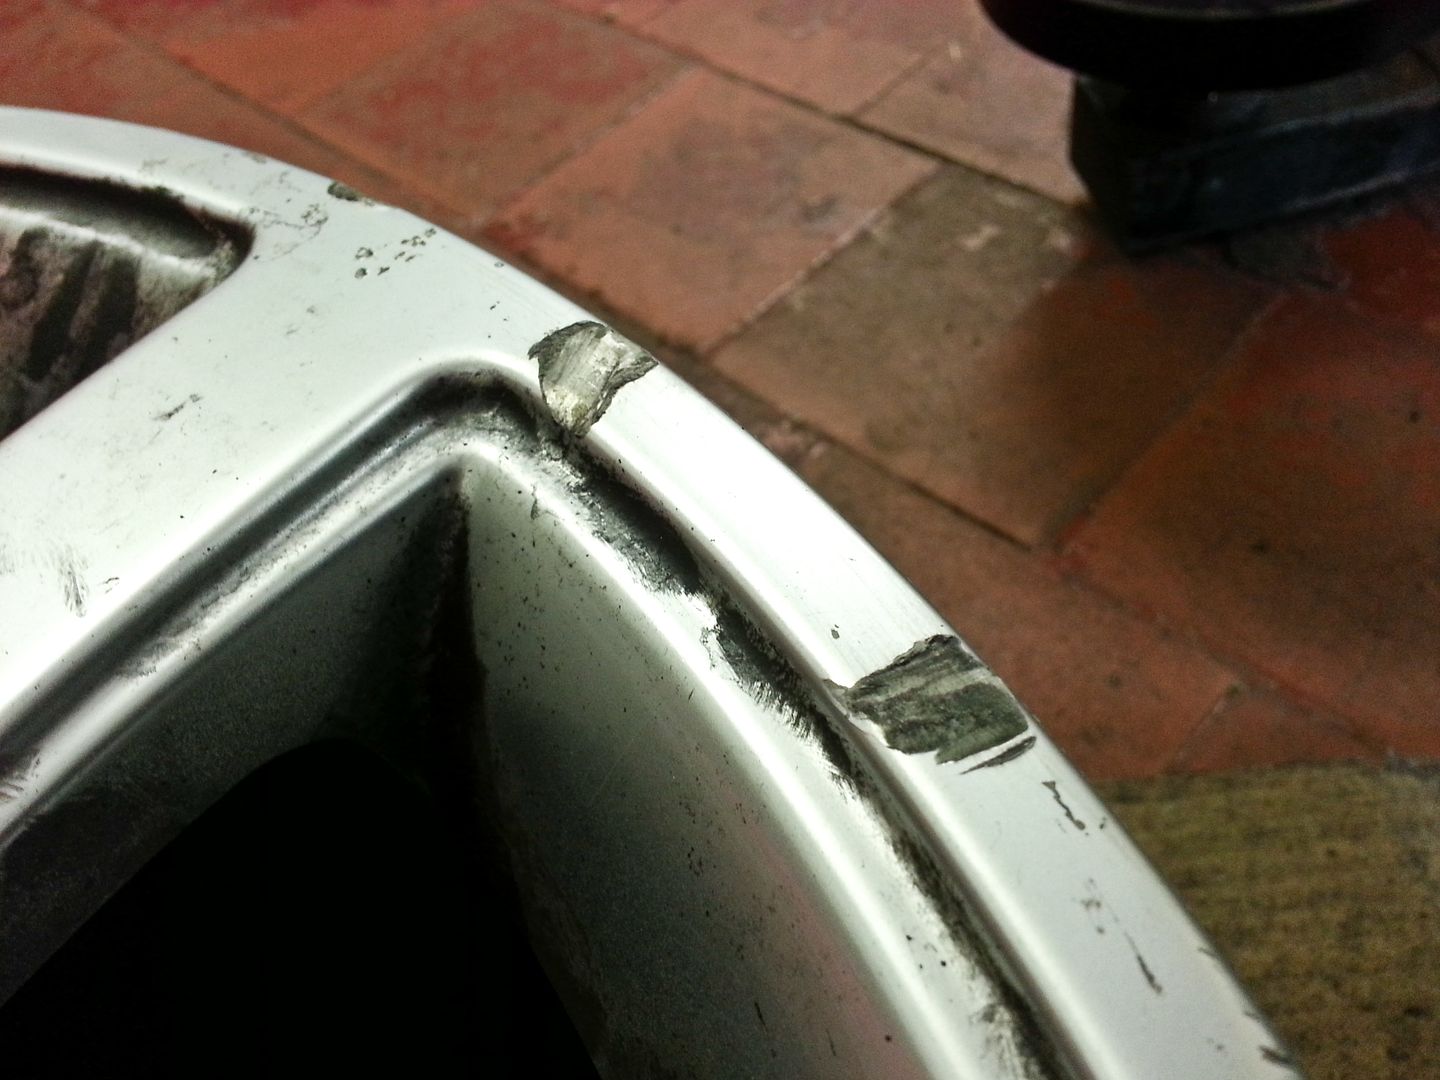
Started by removing all the rubber build up from the inside of the rim...
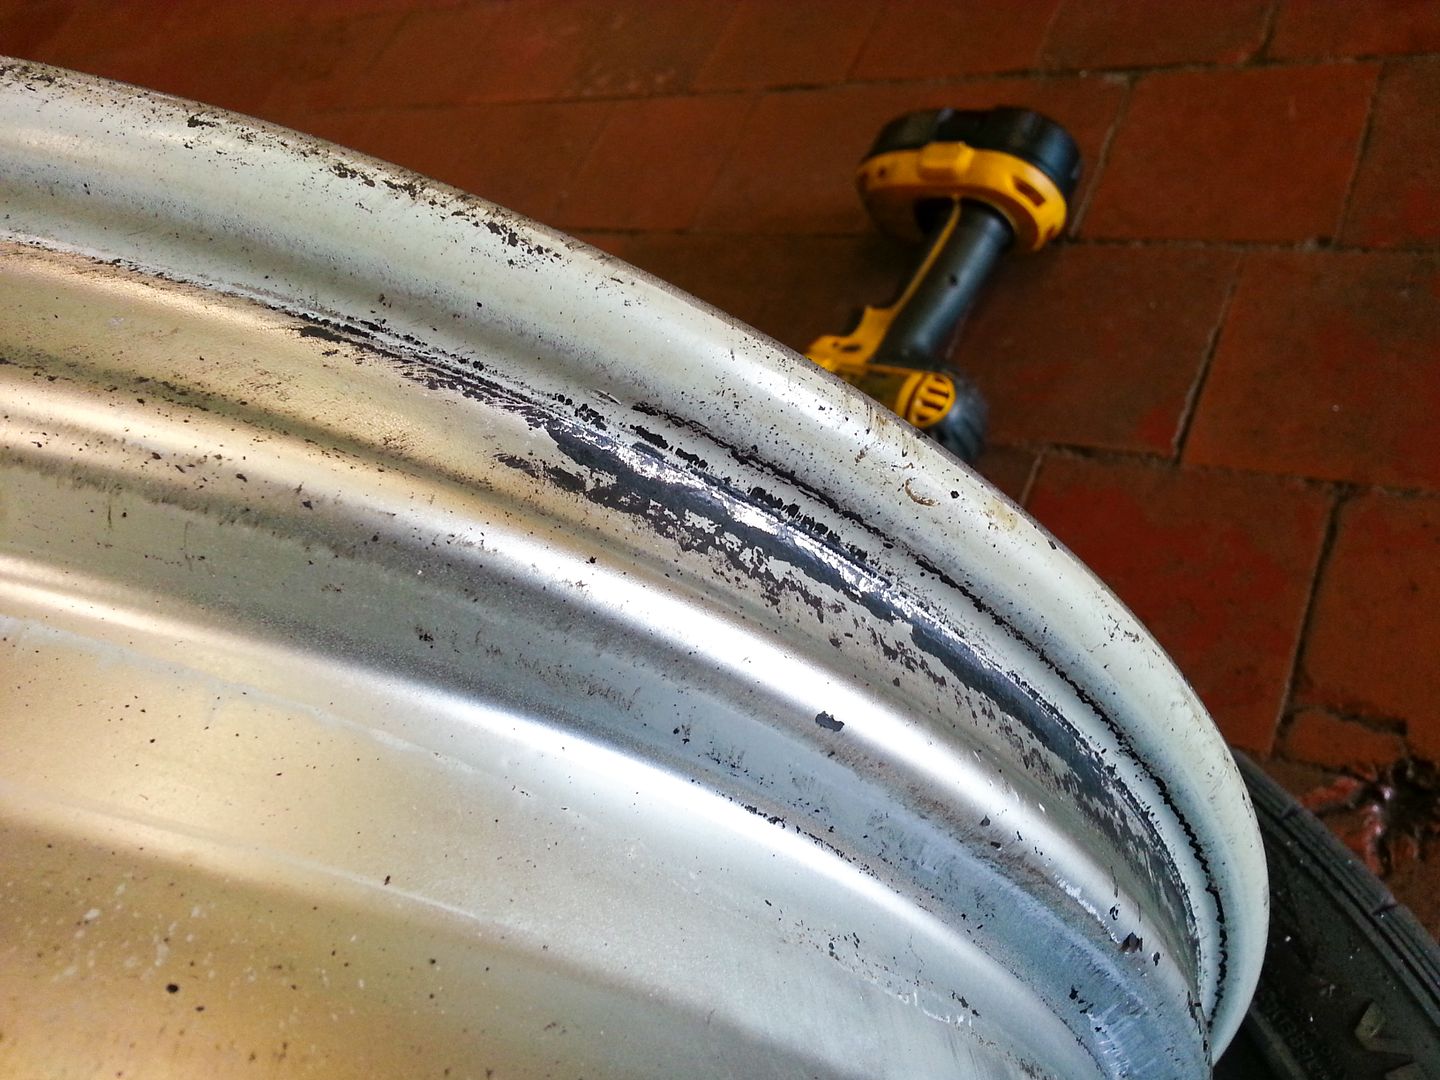
...then used a file to smooth out the worst of the damage...
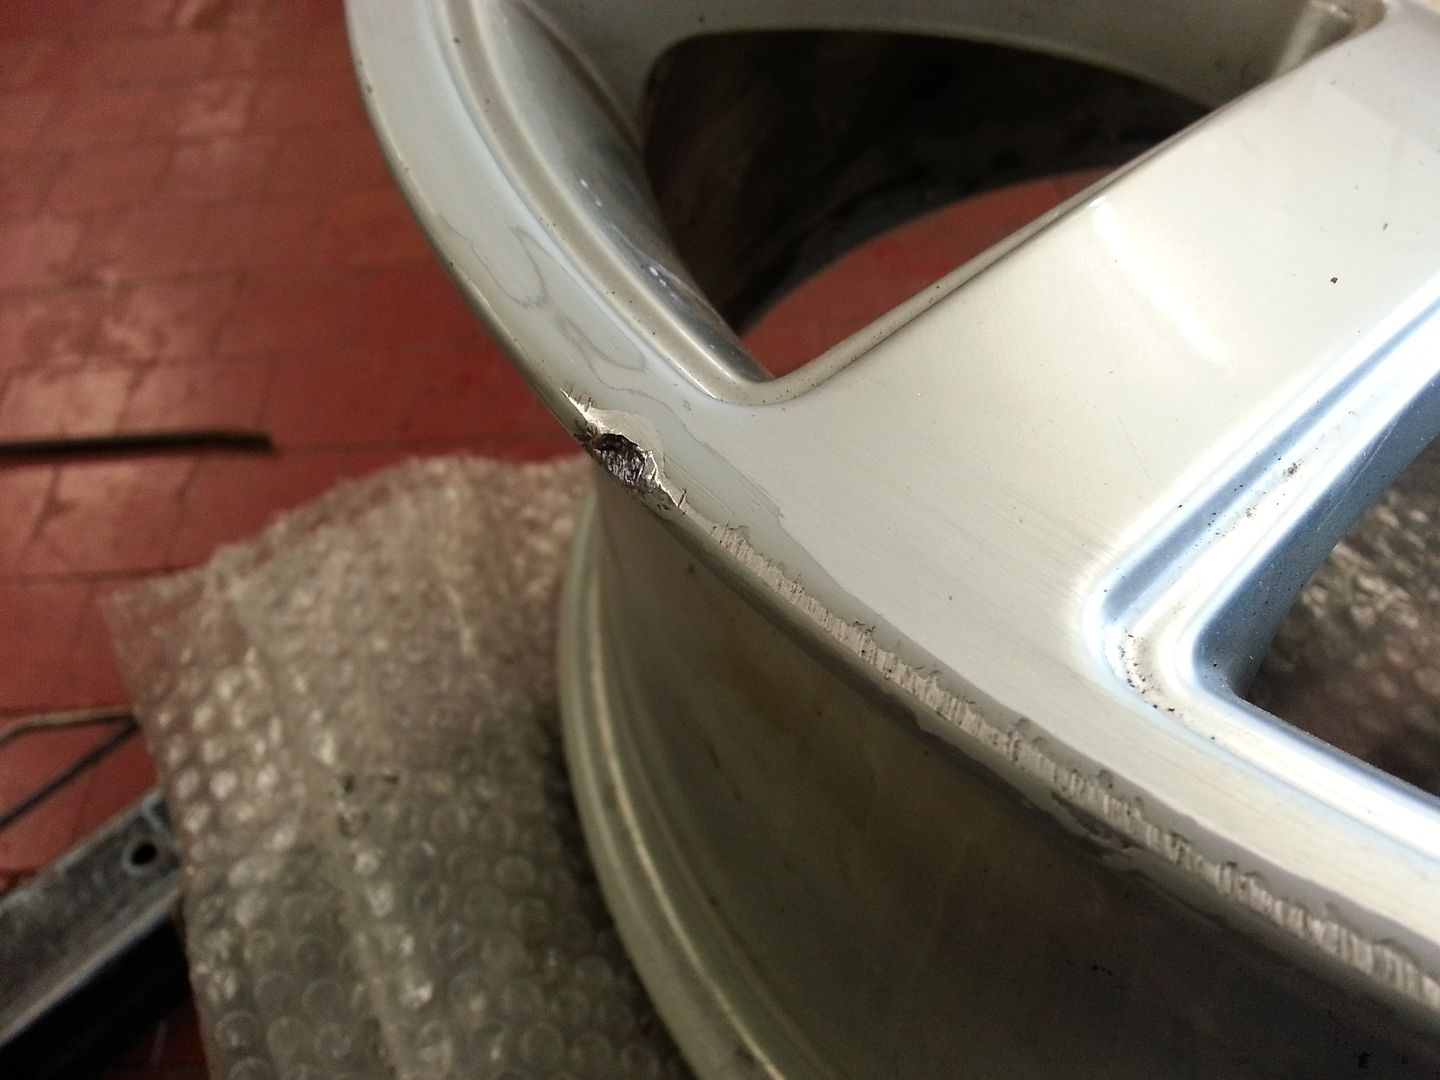
...will take my wheel cleaning stuff tomorrow and give them a proper clean and degrease before using a bit of chemical metal to fix the bad bits and hopefully have at least one wheel painted tomorrow...
Rest of the build is pretty much on hold now until I can get a comp housing and a few other bits so I can start getting the manifold built
<tuffty/>
...quite a bit of room once stuff is out the way lol...
...although not enough it would seem for a sidewinder manifold Bill has 'laying around' lol...
Could see that I should have no bother relocating the PAS return line as its a royal PITA where it is currently (especially when bleeding the master cylinder!)
My mate dropped off my wheels at lunch time after removing the tyres for me... refurb time ;P
To be fair they are in a crap state so anything would help get them looking better lol...
Started by removing all the rubber build up from the inside of the rim...
...then used a file to smooth out the worst of the damage...
...will take my wheel cleaning stuff tomorrow and give them a proper clean and degrease before using a bit of chemical metal to fix the bad bits and hopefully have at least one wheel painted tomorrow...
Rest of the build is pretty much on hold now until I can get a comp housing and a few other bits so I can start getting the manifold built
<tuffty/>
Similar threads
