
Hi. Today I installed the indication of the windshield washer fluid. The work is not difficult.
What we need:
1. Plug 1J0973202
2. Two 2-meter cables (or one double)
3. automotive cloth tape (for better look)
4. Two connectors for T46B plug
5. Something to coding (i have obd11)
6. Our tanks already have built-in fluid level electrodes.
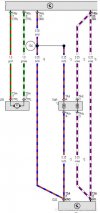
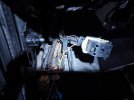
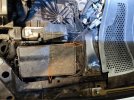
We have to disconnect the battery, remove the left wheel, unscrew the front part of the wheel arch, remove the battery (it interferes with pulling the cable), unscrew the plastic under the steering wheel and the left part from the lever to open the hood. We remove the middle plug (B) from the BCM (t46b), unplug it, connect the cable to pins 10 and 28, pull it through the bulkhead to the engine compartment, lead it somehow to the washer tank (I led it through the top and went down behind the lamp just like the original washer harness), connect the plug and we code:
1. 09 central electrics
2. adaptations
3. hw_verbau
4. change insufficient washer fluid from to installed
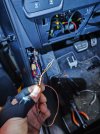
I'm still waiting for my plug, so don't laugh at the connectors on the tank")
What we need:
1. Plug 1J0973202
2. Two 2-meter cables (or one double)
3. automotive cloth tape (for better look)
4. Two connectors for T46B plug
5. Something to coding (i have obd11)
6. Our tanks already have built-in fluid level electrodes.
We have to disconnect the battery, remove the left wheel, unscrew the front part of the wheel arch, remove the battery (it interferes with pulling the cable), unscrew the plastic under the steering wheel and the left part from the lever to open the hood. We remove the middle plug (B) from the BCM (t46b), unplug it, connect the cable to pins 10 and 28, pull it through the bulkhead to the engine compartment, lead it somehow to the washer tank (I led it through the top and went down behind the lamp just like the original washer harness), connect the plug and we code:
1. 09 central electrics
2. adaptations
3. hw_verbau
4. change insufficient washer fluid from to installed
I'm still waiting for my plug, so don't laugh at the connectors on the tank
Attachments
-
 spryskiwacze.JPG40.9 KB · Views: 369
 -
 IMG_20240127_180022.jpg261.8 KB · Views: 334
 -
 IMG_20240127_181152.jpg309.3 KB · Views: 304
 -
 IMG_20240128_132705.jpg360.7 KB · Views: 299
 -
 IMG_20240128_134600.jpg317.1 KB · Views: 336
 -
 IMG_20240127_171548.jpg300 KB · Views: 359
Last edited:

 cost 5 euro