Written by Pabs
Probably one of the most useful modifications to the Cupra is the bonnet seal modification. Earlier cupras came with this already installed, so it is wise to check that’s yours hasn’t already got it before you go any further. It decreases the amount of dirt, water and rubbish that get into the engine bay.
|
Part Numbers Required
|
Description
|
Approximate Prices (exc VAT)
|
|
1M0-823-737-FB-41
|
Seal
|
£5.38
|
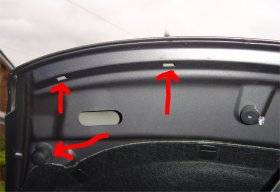
- Open your bonnet, and locate the holes on the underside of the bonnet. There should be several holes along the front edge. Two of these are shown with red arrows in the image, and the lower arrow shows one of the bonnet adjuster. (Used later)
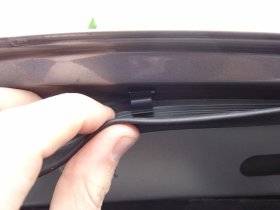
- With your seal in your hands, position it as shown in the photo, and, one at a time, push the lugs into the appropriate hole until it is firmly in place. Do this until all lugs are in, and the seal is attached.
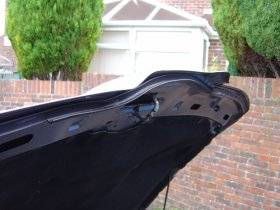
- The bonnet should now look like shown. If it doesn’t, you have probably put the seal on back to front. (It fits both ways, but one-way it is impossible to shut the bonnet.)
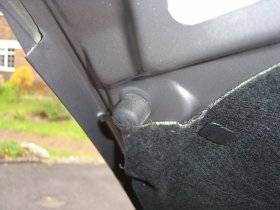
- Right, now attempt to close the bonnet. Lower it down, slowly, and then carefully push the bonnet down in the centre above the catch. It will be TIGHT, and may require some force. However, DO NOT FORCE IT TOO MUCH. You do not want to bend your bonnet. If it doesn’t close, open the bonnet again. On either side of the bonnet, there are two large rubber pads. These can be adjusted by twisting them clockwise, tightening them up and hence making the gap between the bonnet and engine bay less. Then try shutting the bonnet again. It should now shut.