
CupraTurbo81
Guest
I changed mine today on my Leon and thought I would right up a thread since we don't have one on SCN.
Quite an easy job to undertake, took me no more than an hour to complete.
You will need the gasket (OEM Part No. 058 198 217). Got mine from Audi Perth today as nor Seat or VW had one in stock. I am not using a new valve cover gasket but you are recommended to change it if its been disturbed. Also I am not using the special compression tool as I just used a long bolt instead.
Please note I am not a qualilified mechanic by any means and am pretty much self taught when it come to engines but had no issues when doing this.
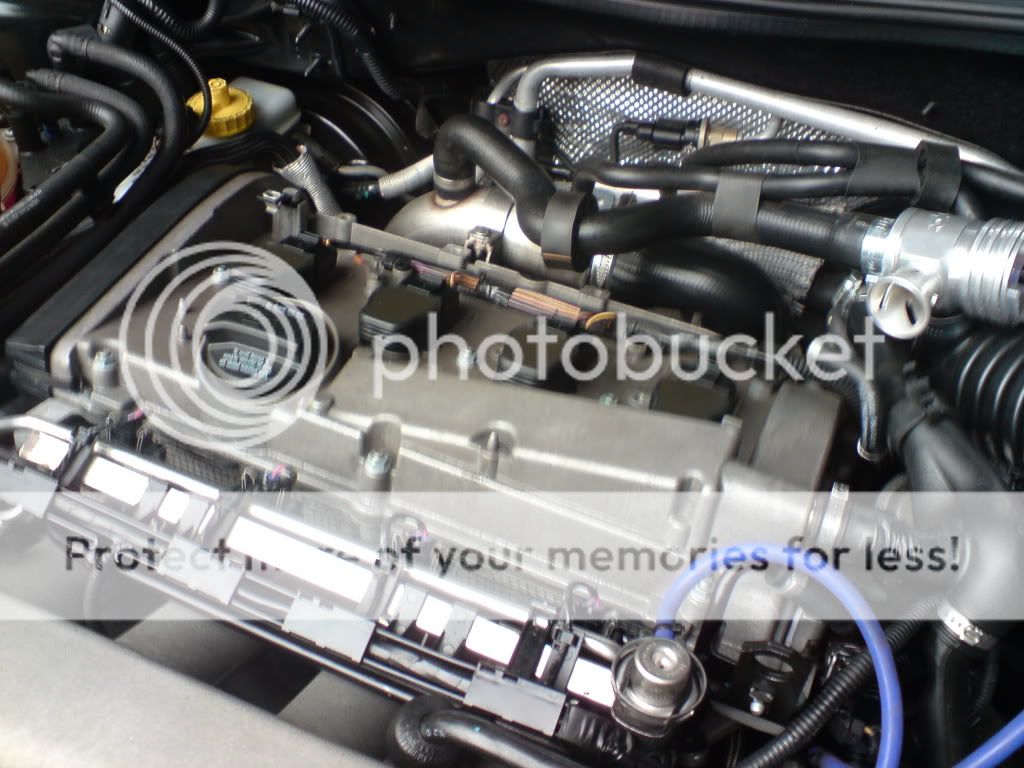
1) Firstly remove the top cover for the cam belt along with the coil packs and relevant wiring from the top of the cam cover so all the cam cover bolts are clearly visible. Remove spark plugs.
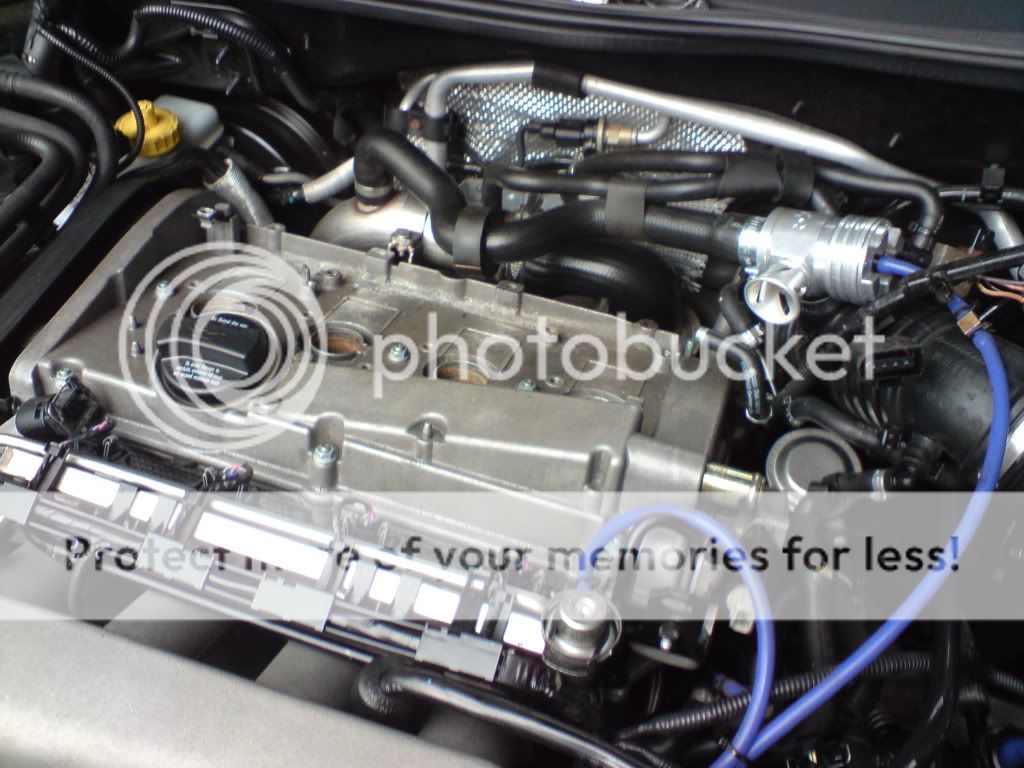
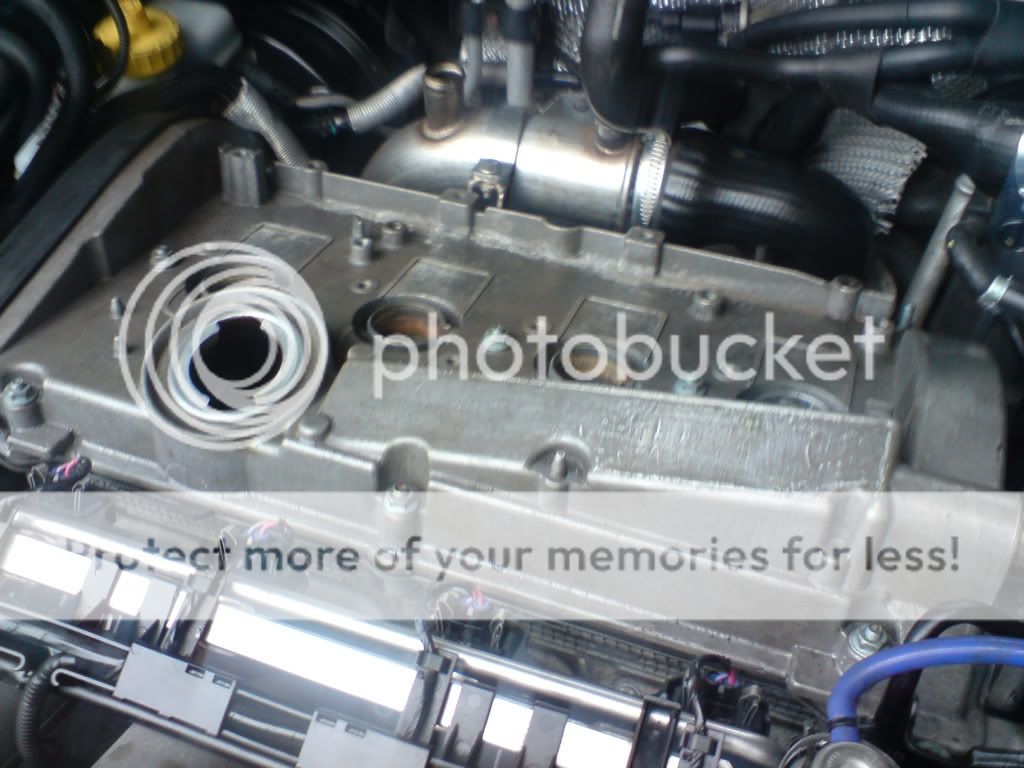
2) Remove cam cover by removing the 10mm bolts around its edge and the 3 on top of the cover itself. Remove cam cover gasket.
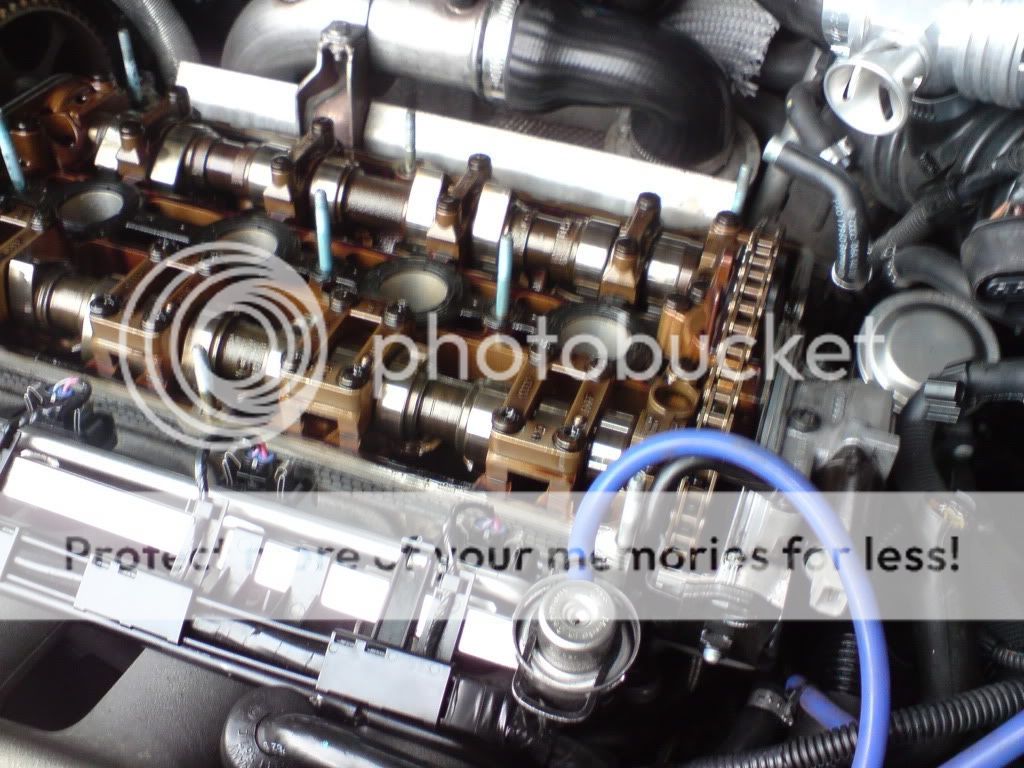
3) Stick a long screwdriver down the bore of piston number 1 (closest to drivers side) then using a 16mm spanner on the top cam shaft bolt turn the engine clockwise until the screwdriver comes up and reaches its highest point (This is top dead centre). At this point the cam chain tensioner should be fully extended. Now if you don't have the cam tensioner compressor tool instead use a suitable long bolt which which will screw into the hole. Screw it in until you feel it tighten then stop ( do not overtighten ).

4) Remove the 4 torx bolt holding the cam tensioner to the head.

It will now rise away form the head leaving adequate room to get to the gasket and half moon. I used a small screwdriver to manipulate them out of position.

Old gasket and half moon removed
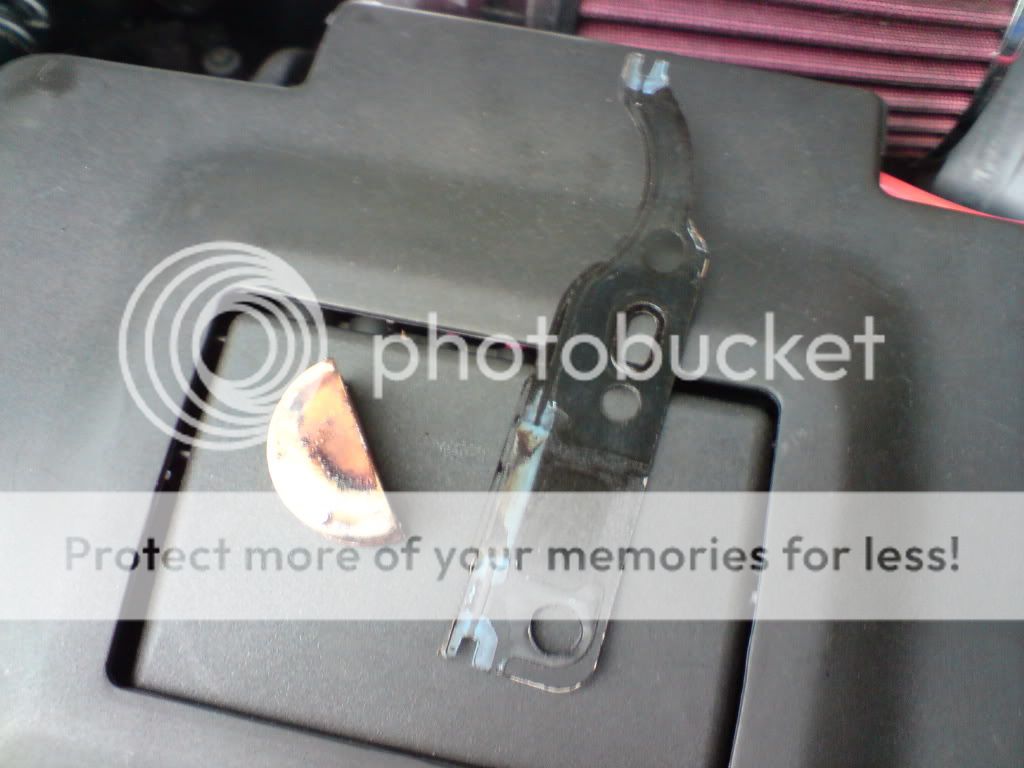
5) Make sure surfaces between where the new gasket is located are clean by using brake cleaner (or just a rag). Drop the half moon into position and make sure its located correctly then slide in the new gasket from the side also taking time to make sure its located correctly.
6) Replace the 4 torx screws making sure you tighten them down evenly as to spread the load then remove the compressor tool or long screw (don't forget about it). Replace cam cover gasket and then cam cover making sure you tighten the bolts in numerous stages begining from the centre outwards to achieve and good fit.
7) Replace the top timing belt cover along with spark plugs, wiring and coil packs and anything else that you took of at the beginning to gain access to the cam cover.

8) Start her up, make sure your cam chain tensioner is not rattling its head off but it will be a wee bit noisy for a second or two. Leave it on idle for a bit to allow for any leaks to appear if any.
If all is good then its job done
I took mine for a nice run and its all fine and no leaks from tensioner or cam cover gaskets. If your not replacing the cam cover gasket it is recommended you use sealent when refitting but I didn't simply because I didn't have any and i'm planning on painting my cam cover in near future so will replace it then.
Thanks guys!!
Quite an easy job to undertake, took me no more than an hour to complete.
You will need the gasket (OEM Part No. 058 198 217). Got mine from Audi Perth today as nor Seat or VW had one in stock. I am not using a new valve cover gasket but you are recommended to change it if its been disturbed. Also I am not using the special compression tool as I just used a long bolt instead.
Please note I am not a qualilified mechanic by any means and am pretty much self taught when it come to engines but had no issues when doing this.
1) Firstly remove the top cover for the cam belt along with the coil packs and relevant wiring from the top of the cam cover so all the cam cover bolts are clearly visible. Remove spark plugs.
2) Remove cam cover by removing the 10mm bolts around its edge and the 3 on top of the cover itself. Remove cam cover gasket.
3) Stick a long screwdriver down the bore of piston number 1 (closest to drivers side) then using a 16mm spanner on the top cam shaft bolt turn the engine clockwise until the screwdriver comes up and reaches its highest point (This is top dead centre). At this point the cam chain tensioner should be fully extended. Now if you don't have the cam tensioner compressor tool instead use a suitable long bolt which which will screw into the hole. Screw it in until you feel it tighten then stop ( do not overtighten ).
4) Remove the 4 torx bolt holding the cam tensioner to the head.
It will now rise away form the head leaving adequate room to get to the gasket and half moon. I used a small screwdriver to manipulate them out of position.
Old gasket and half moon removed
5) Make sure surfaces between where the new gasket is located are clean by using brake cleaner (or just a rag). Drop the half moon into position and make sure its located correctly then slide in the new gasket from the side also taking time to make sure its located correctly.
6) Replace the 4 torx screws making sure you tighten them down evenly as to spread the load then remove the compressor tool or long screw (don't forget about it). Replace cam cover gasket and then cam cover making sure you tighten the bolts in numerous stages begining from the centre outwards to achieve and good fit.
7) Replace the top timing belt cover along with spark plugs, wiring and coil packs and anything else that you took of at the beginning to gain access to the cam cover.
8) Start her up, make sure your cam chain tensioner is not rattling its head off but it will be a wee bit noisy for a second or two. Leave it on idle for a bit to allow for any leaks to appear if any.
If all is good then its job done
I took mine for a nice run and its all fine and no leaks from tensioner or cam cover gaskets. If your not replacing the cam cover gasket it is recommended you use sealent when refitting but I didn't simply because I didn't have any and i'm planning on painting my cam cover in near future so will replace it then.
Thanks guys!!
