In case someone has similar doubts I'll leave some more details on
how to remove the trim and hopefully
help someone else avoid cracking their trim has I ended up doing. Even with some minor cracks it still fits in place nicely though, it's just better to keep that from happening.
I searched to the best of my abilities for a proper walk-through but couldn't find any in-depth instructions. Even the well known programs were short on that.
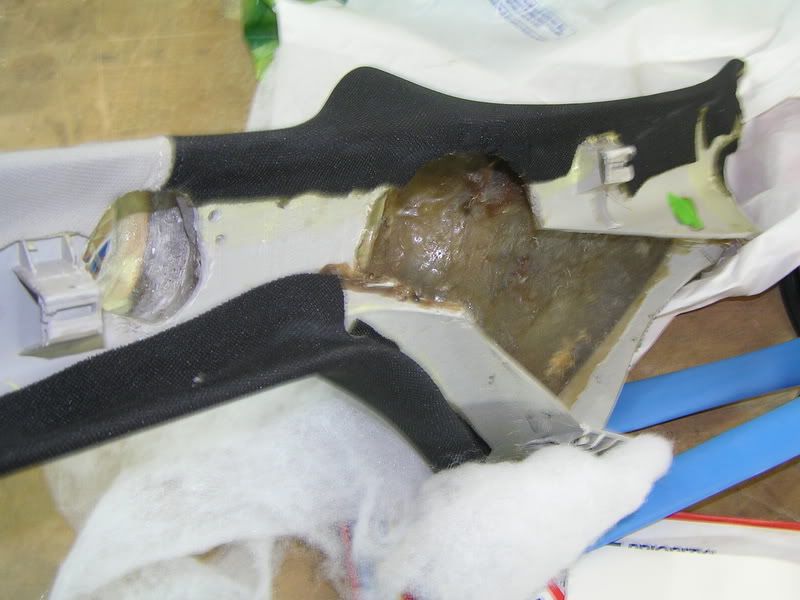
The trim, as n_olympios says, is held in place by three clips. You should know beforehand that the upholstered part and the downward plastic triangle are one single piece so if you bend the A pillar trim too much trying to remove it you risk breaking the (thermally glued) connections between the two.
You should start the removal from the top. Slid a finger (if you haven't got tools, and I can't imagine even trim removal tools would be very handy with this piece) under the door rubber just where the roof lining and the a pillar trim join. You'll see its edge. Wedge the fingers in there get some room and push it towards the center of the car. You'll need to do a considerable amount of force and even then I doubt you'll have removed the entire clip (the top clip is more like a two stage clip if this makes any sense).
Afterwards you'll have to remove the middle clip which sits maybe an inch beyond where the cloth and plastic from the lower triangle meet. I did it by repeating the steps above. However that precisely forces that joint. I ended up cracking it. Your best bet to avoid it would be using the gap created by the first clip being undone and trying to fit your fingers into the trim by the windscreen. Again push towards the center of the car. The third and last clip is at the bottom. Easier clip to get out.
Even if you don't get it out, mines didn't, when you slide the trim towards the back of the car the clip will also slide out of the trim. Said correctly, the clip will stay in place, the trim will slide out since its insert allows it to.
If these tips don't work, your only bet is to do things like for the first clip and in that case the joints have a big chance of ending up cracked. They'll fit back and you'll hardly notice anything since things are tightly packed but if you're a perfection freak that can end up rustling your jimmies.
The only major pain reinstalling it is with the lower part. It doesn't go in quite exactly the same way it came out. The lower triangle has a couple kind of teeth at the bottom. Those have to go into some groves that the dashboard has. If you try to fit those first you'll have to end up leveraging the triangle on the dash to make things fit and I'm afraid that may gauge the plastic. Since the dash is much more exposed that those parts which will fit under it, the best procedure would be to first fit the furthermost lower tip and then slowly and carefully wedge the remaining teeth back in. That's a very close fit with the dash and if done without proper care may end up leaving marks. I know cause I left an insanely light hairline scratch on the right side. I'm sure it will buff out with some heat nevertheless I'd love it hadn't happened.
Hope this helps someone in the near future!

")