
30/12/2015 update...
Finally managed to upload...
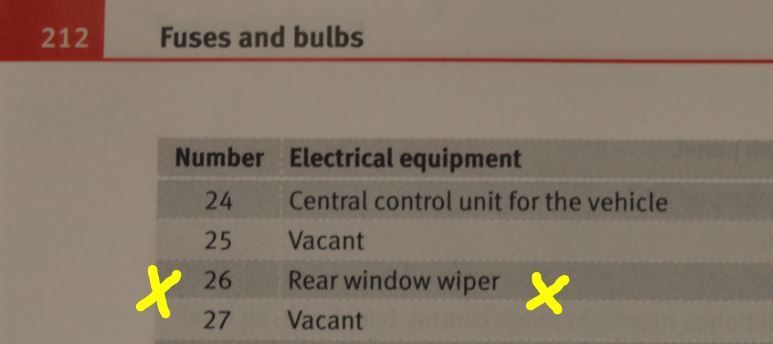
I have chosen to use the rear wash wipe fuse so only live when ignition is on.
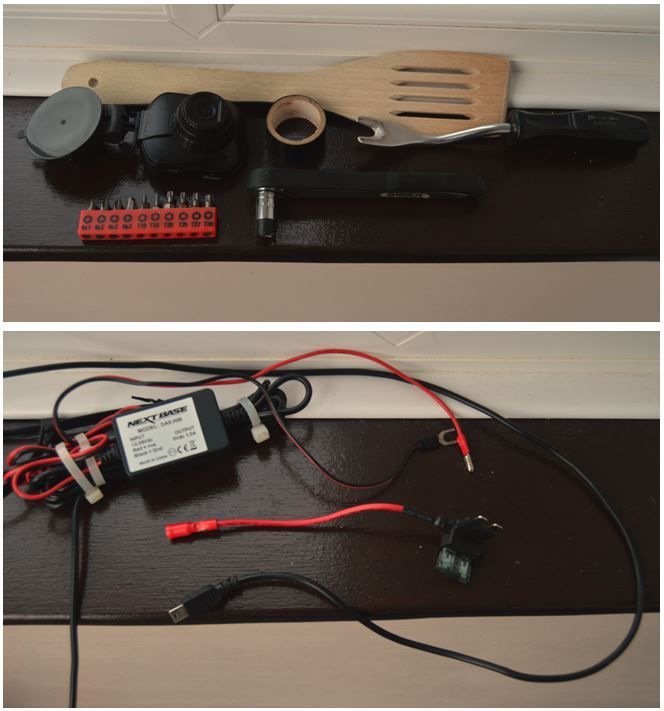
Using nextbase 101 and nextbase power adaptor kit from Halfords as a first attempt
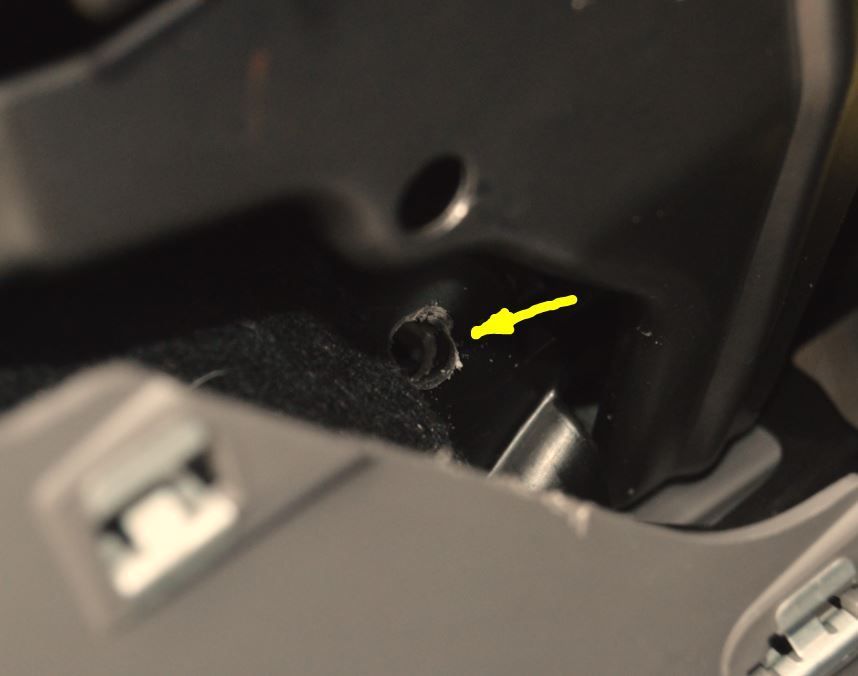
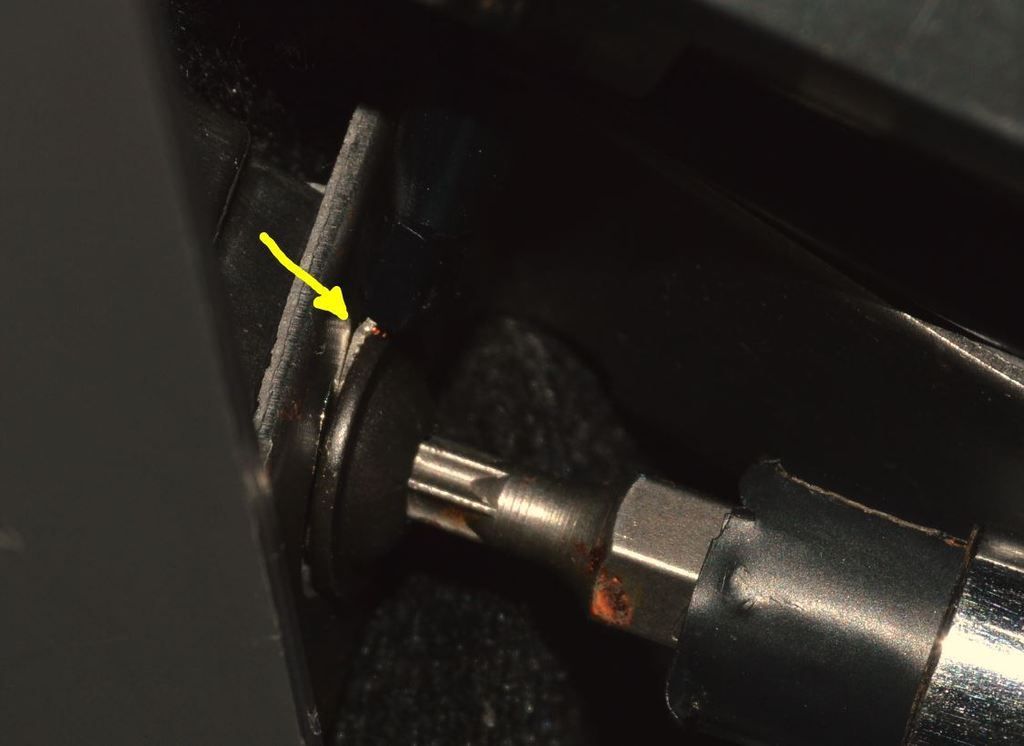
Remove the side panel and make small hole from the side of the fuze housing to the side opening, I used a No8 drill, slow and steady here, no rush used low power cordless. There are no wires here but I drilled from inside outwards and made a small pilot hole first to be sure. Can't stress enough to go slow and steady here.
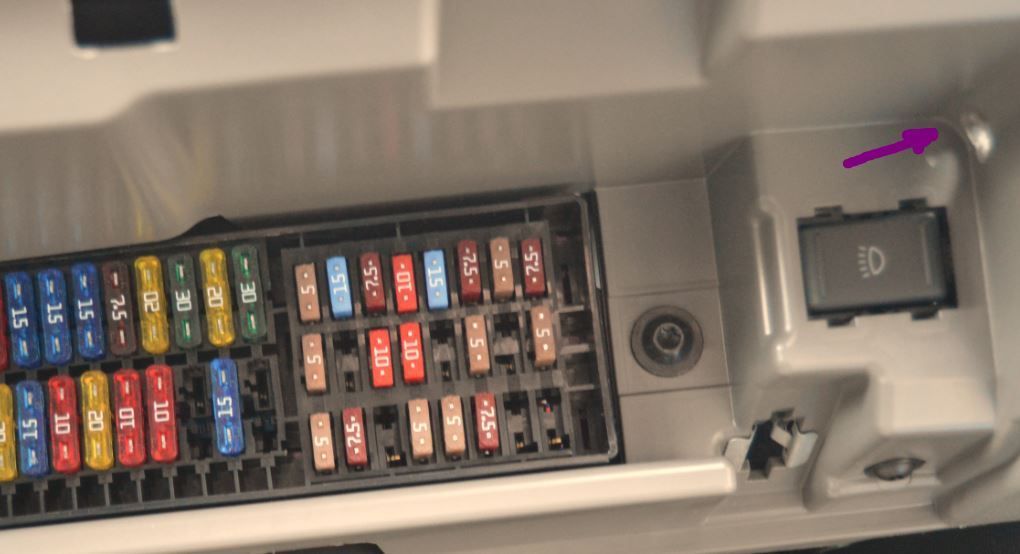
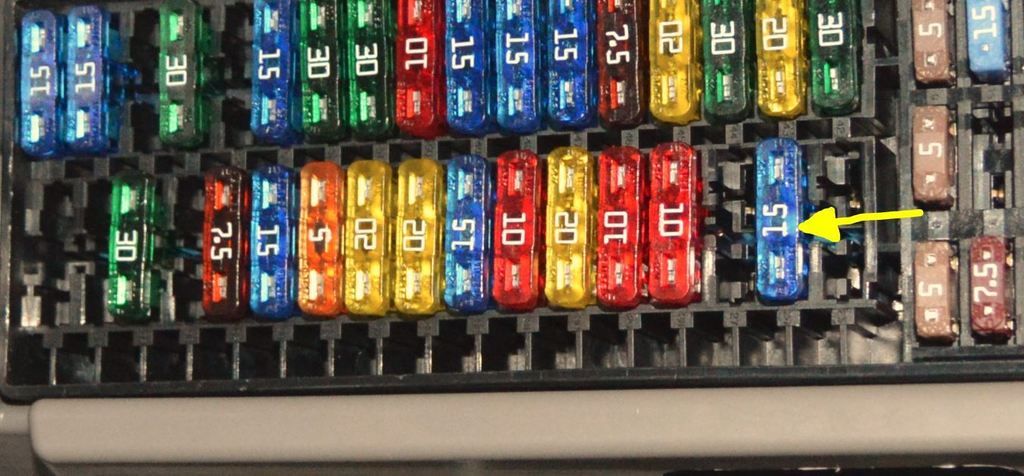
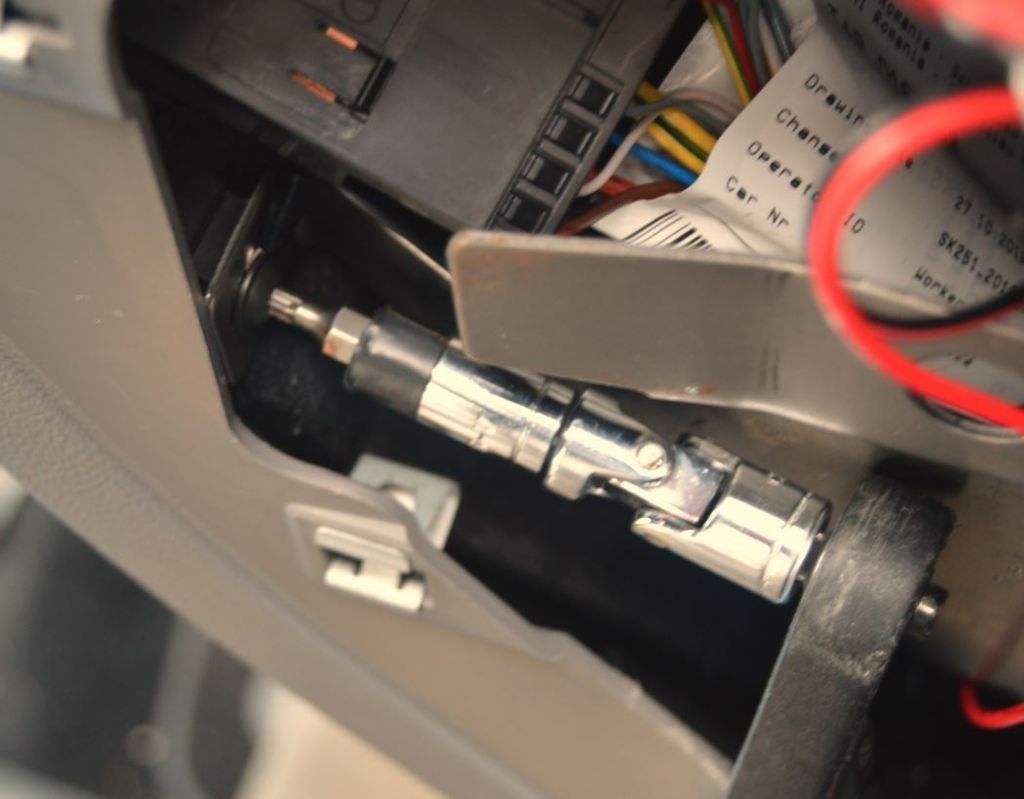
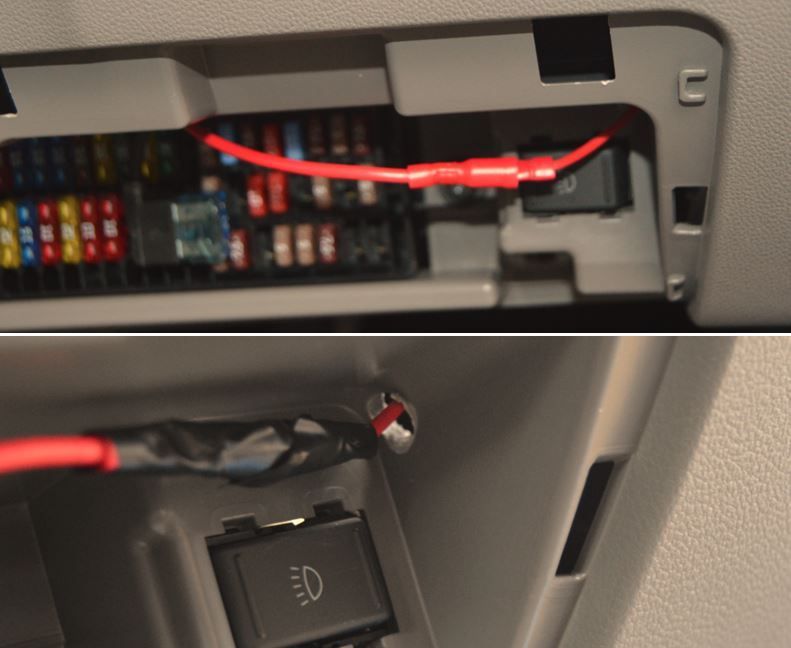
Fuse number26 and splitter fitting
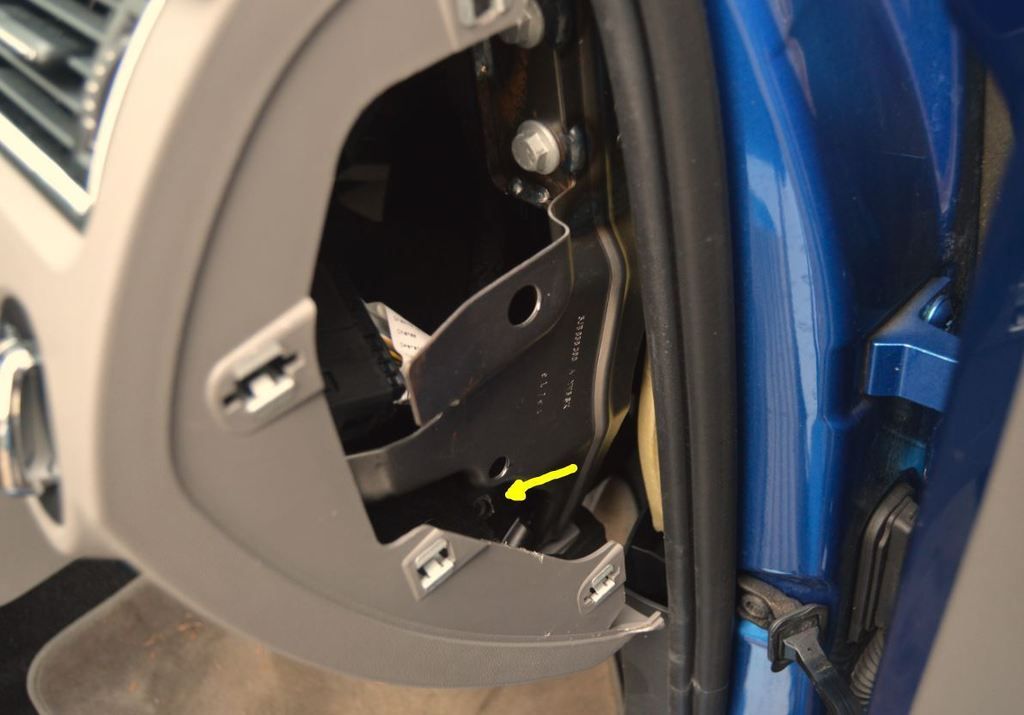
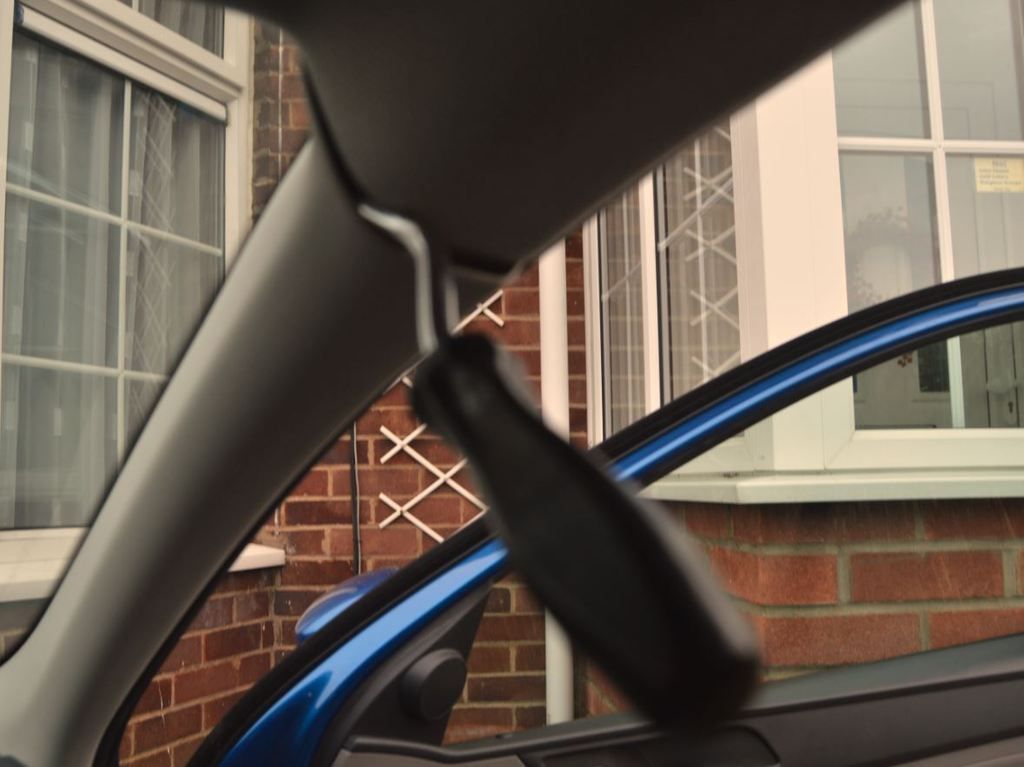
Trim panel removal
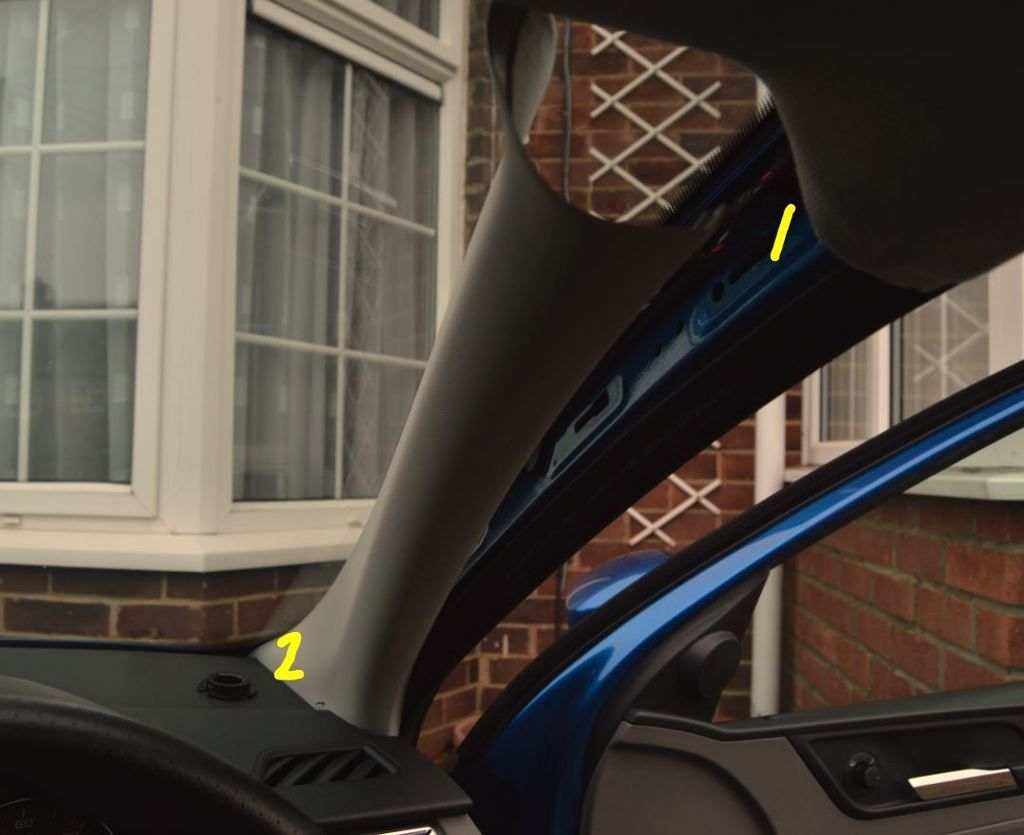
1 - Be careful here with the wiring behind, don’t crush it. Easy does it, there are three trim poppers here.
2 – Once you have gotten free of the fastening poppers you will need to slowly tease and wiggle the trim from the side of the dash, gently does it, it will come. Take a very close look as the trim comes free of the dash as there is a small groove where it fits. Its easy not to notice this on the tear down and then be e a bit unsure on reassembly.
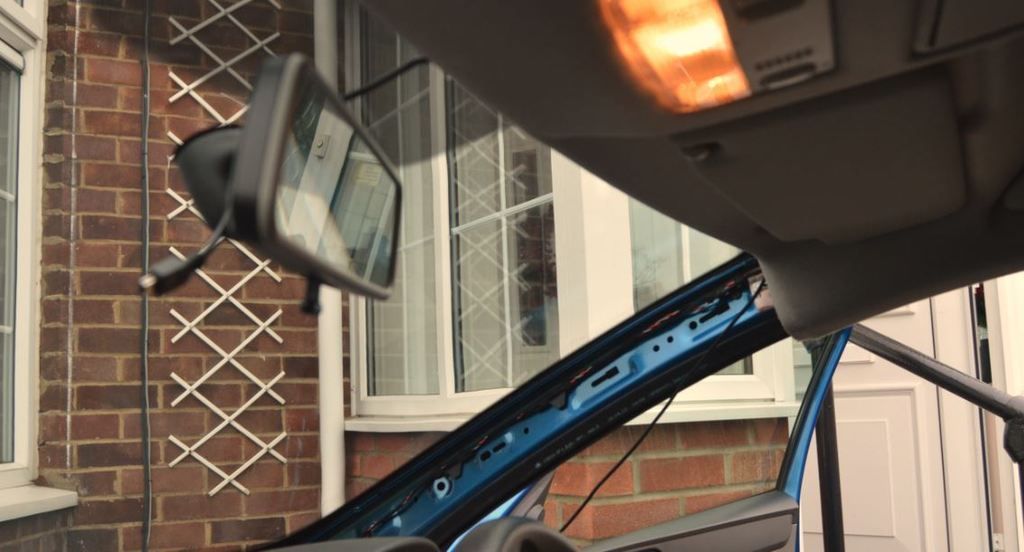
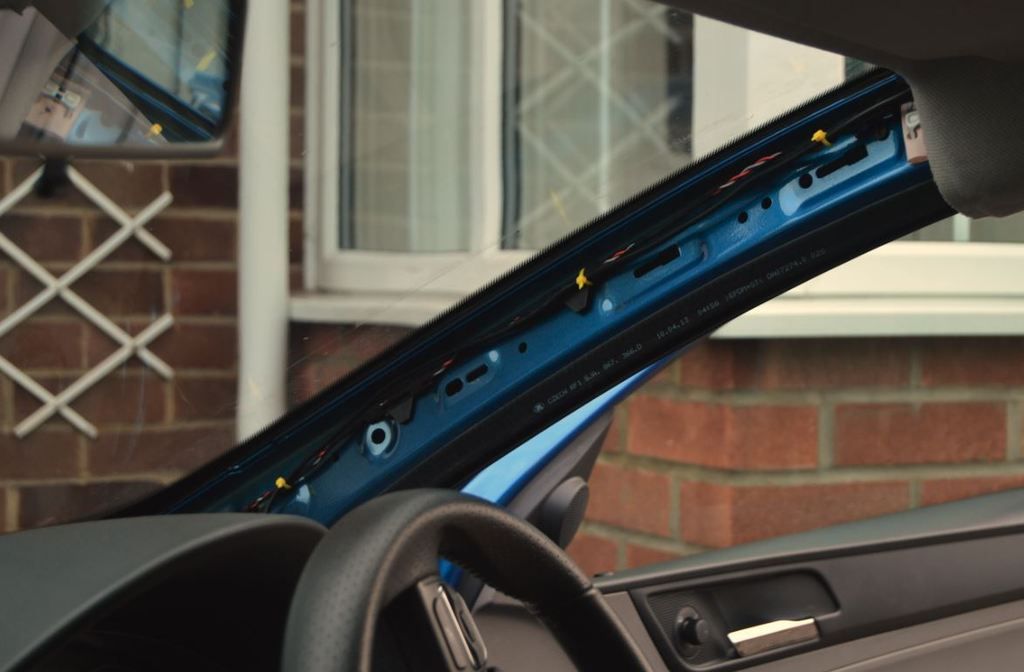
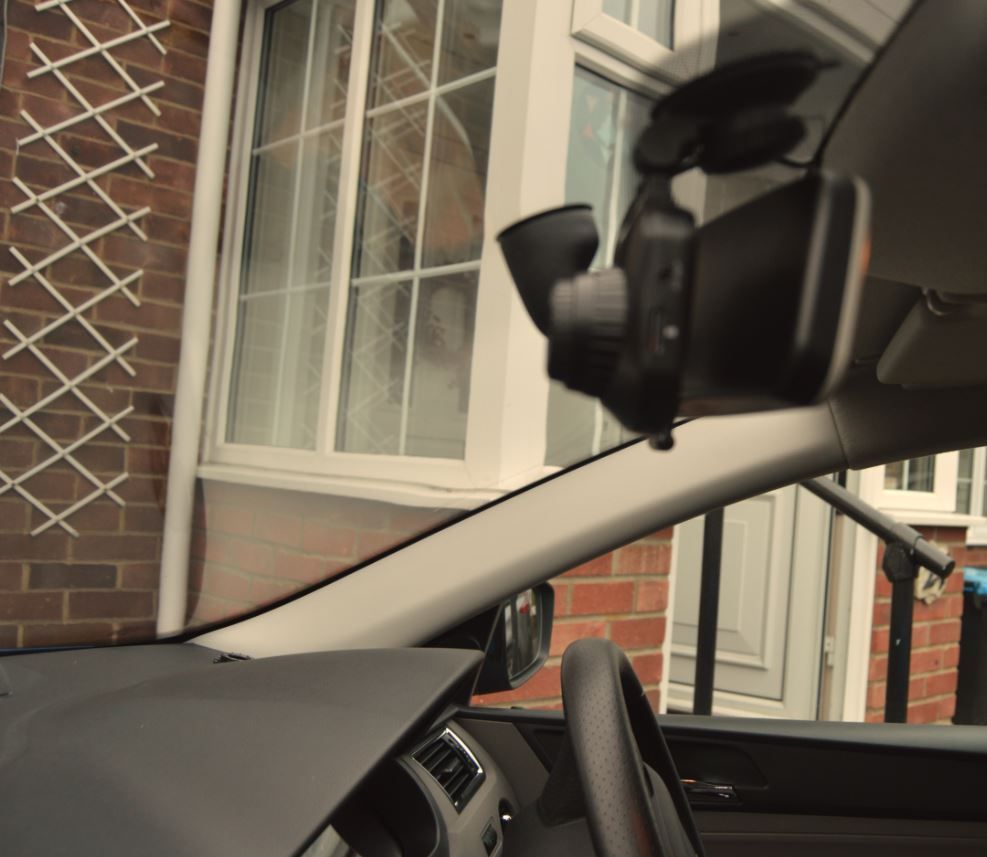
Trail and fit the power lead from where you are putting the camera along the roof lining and fasten to the existing wires with cable ties. I used bright yellow so I will know what to cut to remove in the future and avoid damaging the other wiring. The other reason for the cable ties is to ensure you do not crush your power cable when replacing the pillar trim.
Using torx undo screw to enable attaching earth connector you only need two turns to loosen. (be careful not to drop the adaptor or crew into the trim, its a bind to retrieve this - I used a bit of tape to ensure a tight connection with my ratchet)
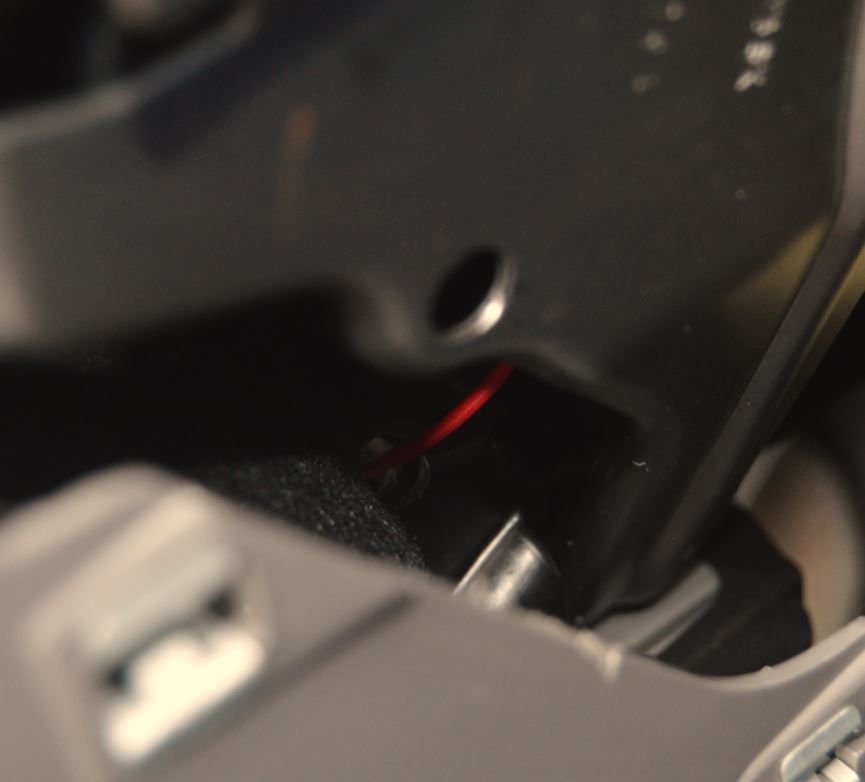
Now feed the red power cable through into the fuse area
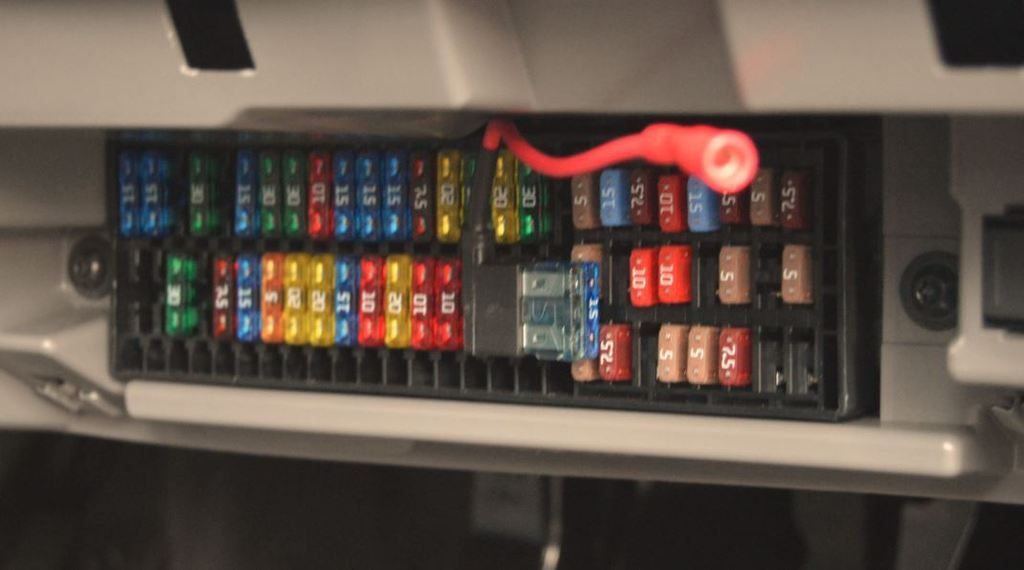
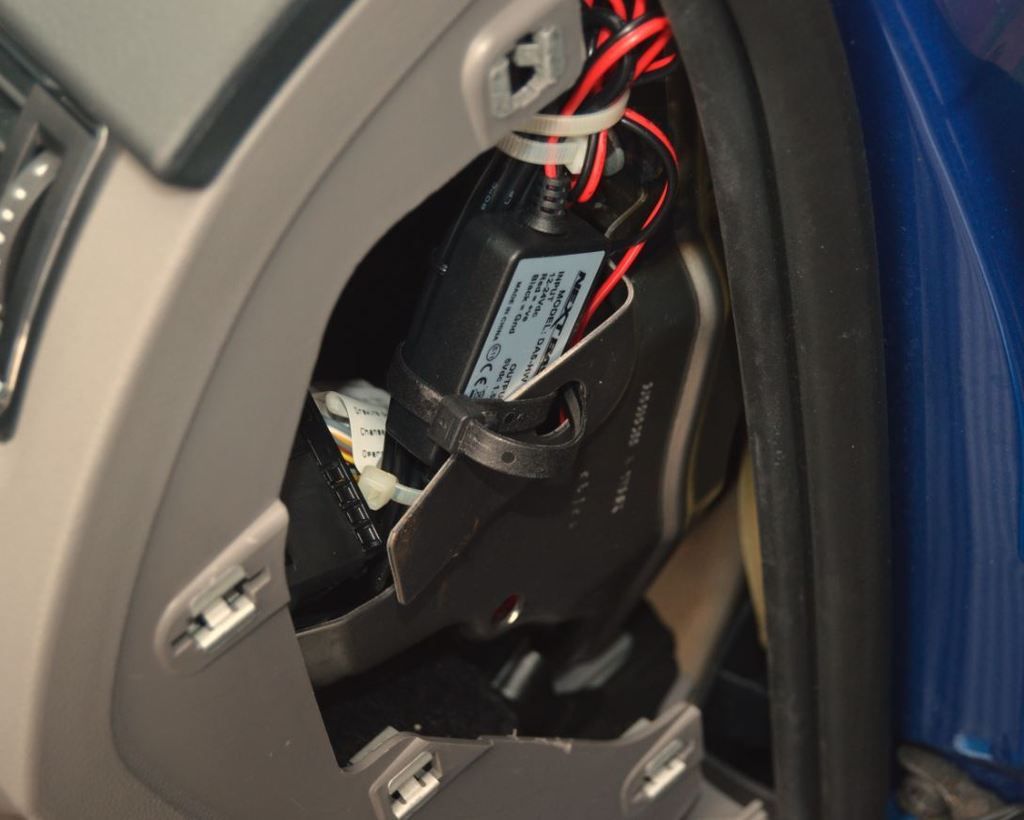
Tidy up and cable tie excess cabling and the nextbase adaptor
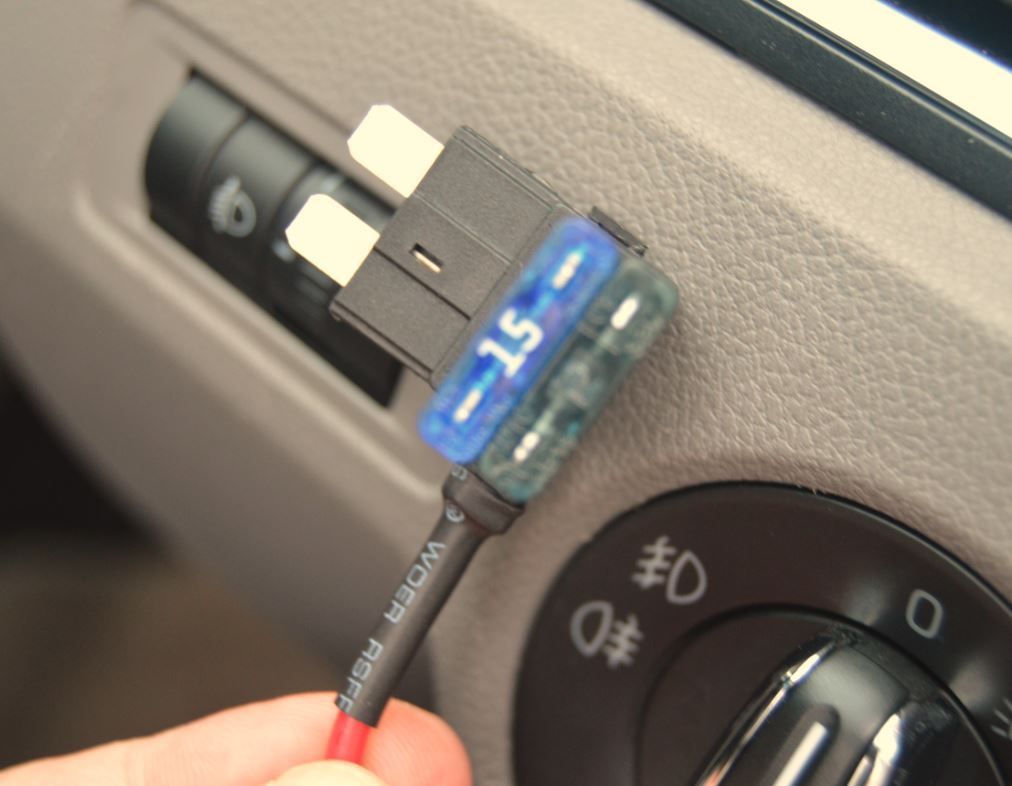
Connect power to fuse splitter and then tape together for added security (the light switch is for the day time running lights if you were wondering)
Refit your trim and connect your camera. Mine turns off a few seconds after the ignition is switched off. Be once more careful with the side pillar trim, take a close look inside the gap between the dash and tease it back into its slot and once in place slap the poppers back in place.
I am no elec tech nor an experienced fitter.
It took me about an hour to do but I took my time as well as taking pics. It worked for me but you may want to do as you see fit. If in doubt get help folks.
The advice I was given by the tech was to go slow and gentle at all times and also to be really patient around the roof lining and to use a soft plastic tool to tease the wire in place to avoid damage to the glass.
This particular camera is black and I've used a black marker to remove the branding white markings, positioned here its practically invisible from the outside unless you look really closely. SD card access is on the left so thats east to get to also.
Hope this helps
Cheers
Finally managed to upload...
I have chosen to use the rear wash wipe fuse so only live when ignition is on.

Using nextbase 101 and nextbase power adaptor kit from Halfords as a first attempt

Remove the side panel and make small hole from the side of the fuze housing to the side opening, I used a No8 drill, slow and steady here, no rush used low power cordless. There are no wires here but I drilled from inside outwards and made a small pilot hole first to be sure. Can't stress enough to go slow and steady here.


Fuse number26 and splitter fitting


Trim panel removal
1 - Be careful here with the wiring behind, don’t crush it. Easy does it, there are three trim poppers here.
2 – Once you have gotten free of the fastening poppers you will need to slowly tease and wiggle the trim from the side of the dash, gently does it, it will come. Take a very close look as the trim comes free of the dash as there is a small groove where it fits. Its easy not to notice this on the tear down and then be e a bit unsure on reassembly.


Trail and fit the power lead from where you are putting the camera along the roof lining and fasten to the existing wires with cable ties. I used bright yellow so I will know what to cut to remove in the future and avoid damaging the other wiring. The other reason for the cable ties is to ensure you do not crush your power cable when replacing the pillar trim.


Using torx undo screw to enable attaching earth connector you only need two turns to loosen. (be careful not to drop the adaptor or crew into the trim, its a bind to retrieve this - I used a bit of tape to ensure a tight connection with my ratchet)


Now feed the red power cable through into the fuse area

Tidy up and cable tie excess cabling and the nextbase adaptor

Connect power to fuse splitter and then tape together for added security (the light switch is for the day time running lights if you were wondering)

Refit your trim and connect your camera. Mine turns off a few seconds after the ignition is switched off. Be once more careful with the side pillar trim, take a close look inside the gap between the dash and tease it back into its slot and once in place slap the poppers back in place.

I am no elec tech nor an experienced fitter.
It took me about an hour to do but I took my time as well as taking pics. It worked for me but you may want to do as you see fit. If in doubt get help folks.
The advice I was given by the tech was to go slow and gentle at all times and also to be really patient around the roof lining and to use a soft plastic tool to tease the wire in place to avoid damage to the glass.
This particular camera is black and I've used a black marker to remove the branding white markings, positioned here its practically invisible from the outside unless you look really closely. SD card access is on the left so thats east to get to also.
Hope this helps
Cheers
Last edited:
