adzer's mk1 leon 4wd conversion & gtx2867r

adzer

Active Member
Dec 16, 2009
197
0
thought id post up a quick post about my leon, wont be anything too compex tho

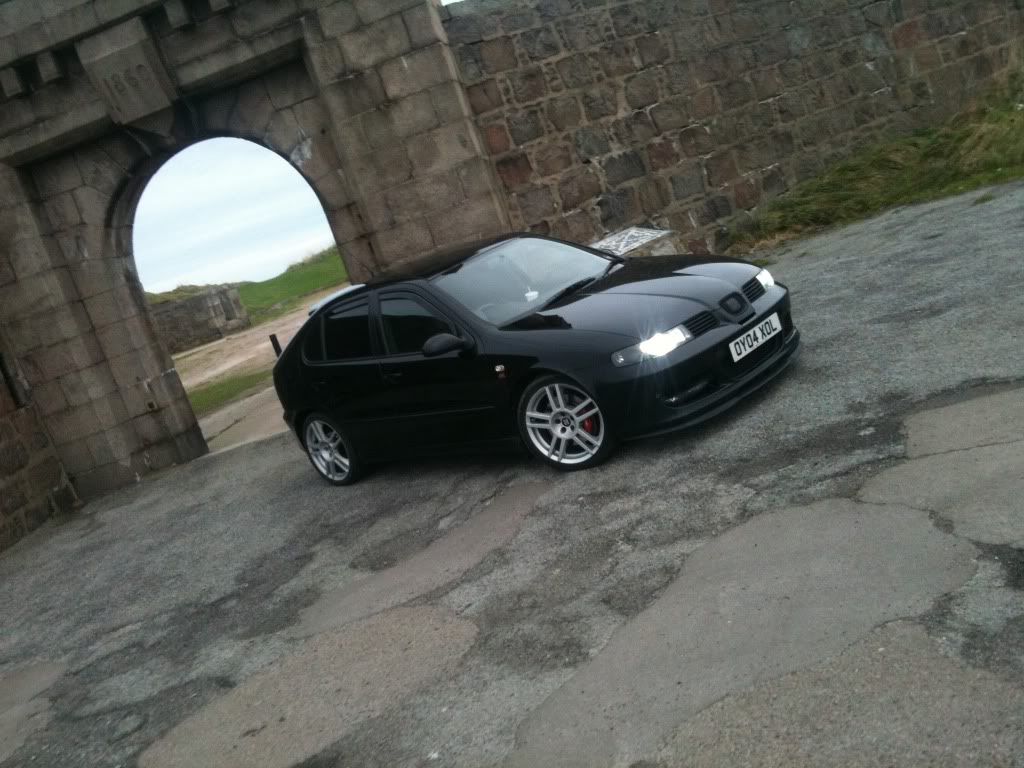
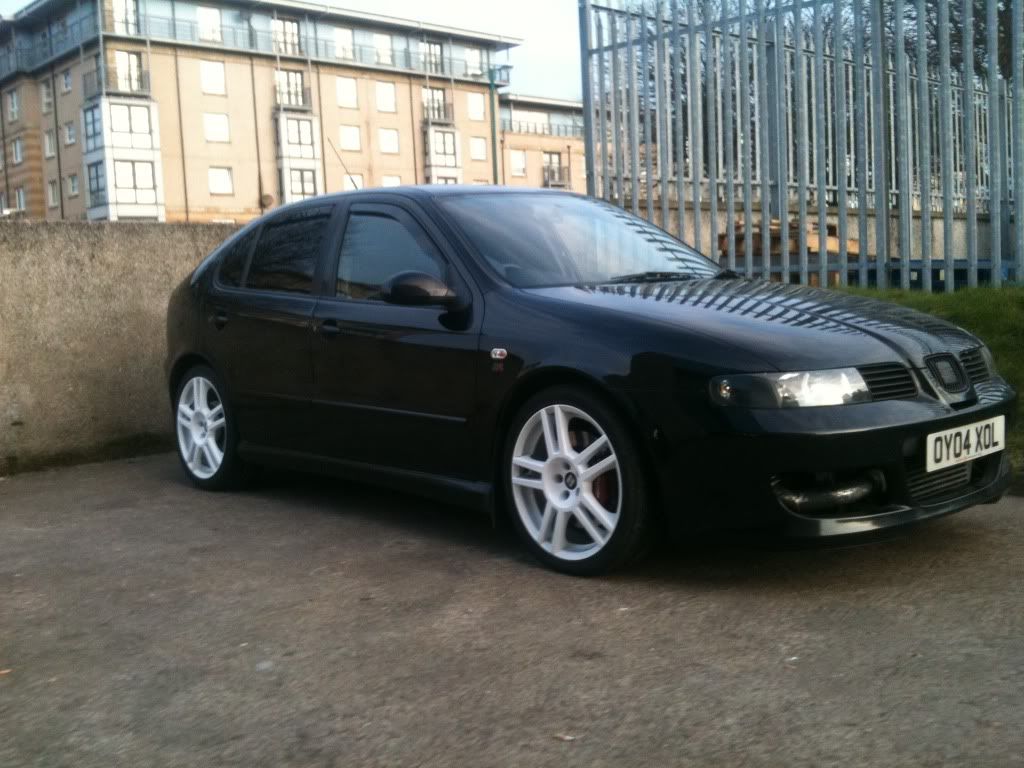
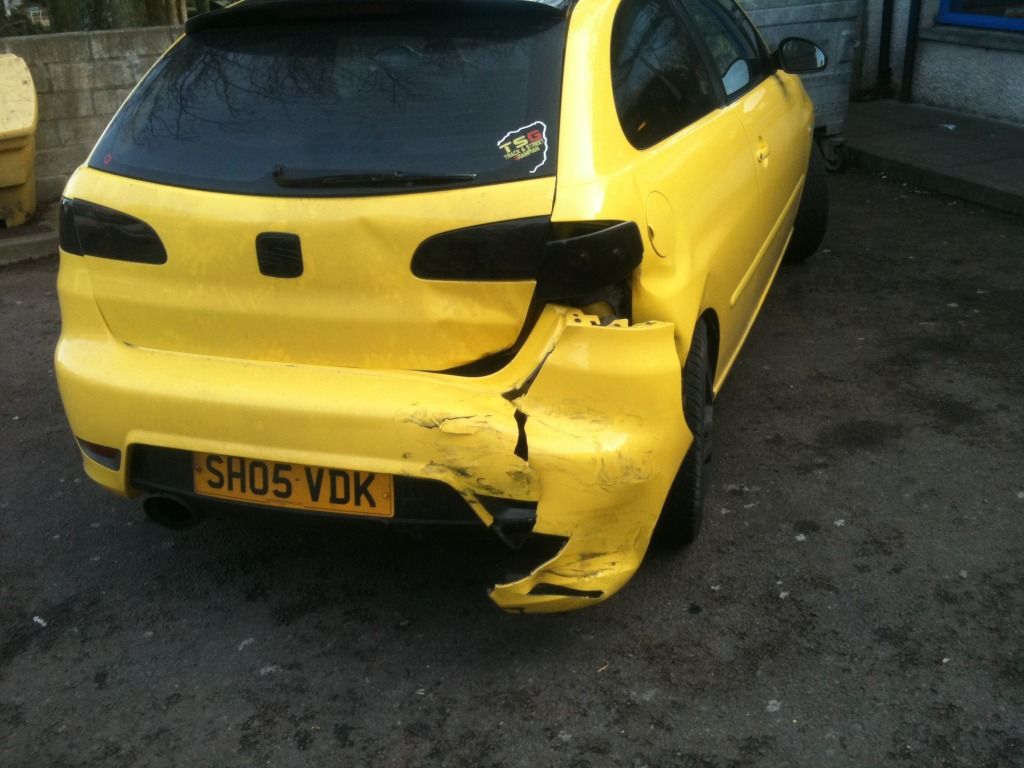
i bought the leon about 3 months ago now, traveled down to birmingham to look at a yellow one, turned out it was totally rafted so i had a look at a few others on the way home, ended up buying a black leon cupra r from carlisle.

when i went to look at the car the guy had cleaned it and she was gleaming inside and out, had a few mods but was mainly left unmolested. had a book full of paper work and service history, was serviced every 1000 miles by the previous owner and had a new clutch and flywheel the year b4.

only mods it had was a front mounted intercooler and an induction kit.

got the car at what i thought was a good price so ended up buying it.............and this is where it all went wrong lol
me and seats dont get on i should never of bought another but couldnt resist the power.

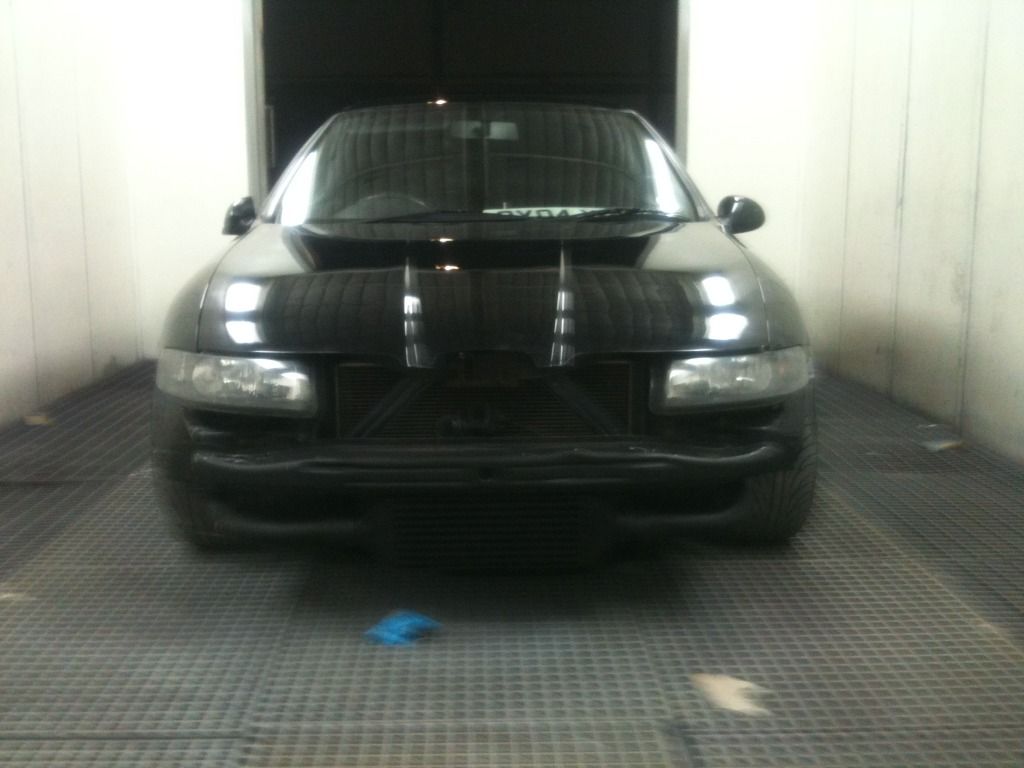
anyway got it home and everything was fine for a month or so, bought a liquid guage for it £200, fitted some hids, wrapped the chrome grill and badge black

few days later turbo was making a weird noise then bang no power and oil everywhere??? turbo shaft snapped and split the turbo pipe.

so £600 later for a turbo and luckily i had an uprated tip it was back on the road.
wol_error.gif
This image has been resized. Click this bar to view the full image. The original image is sized 759x569 and weights 82KB.
1f4b41dd-d092-9ac6.jpg


the gearbox had a whine since the day i bought it and its a common problem but it drove fine so i just dealt with it but a week after i fitted the turbo the gearbox started to feel tight and struggled to get first gear so i ordered a second hand box £380!!

after spending all that i decided id be aswell keep the car so went and ordered a full turbo back decat miltek system £745 (what an absolute **** to fit)
wol_error.gif
This image has been resized. Click this bar to view the full image. The original image is sized 759x569 and weights 84KB.
1f4b41dd-d034-4eb4.jpg


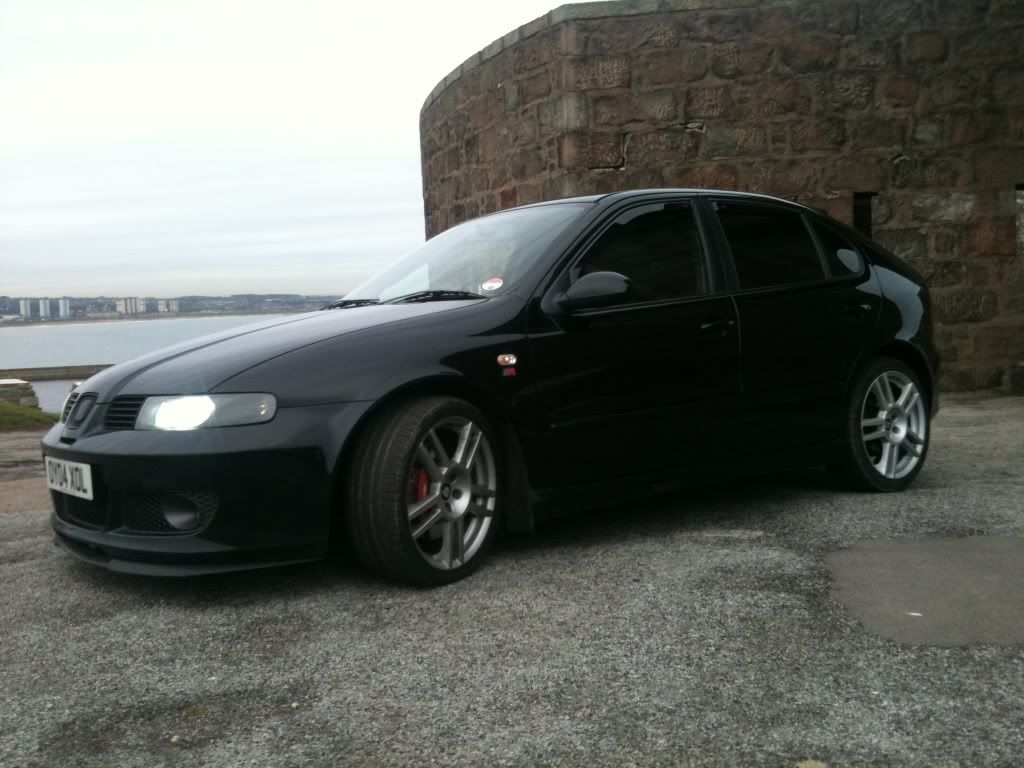
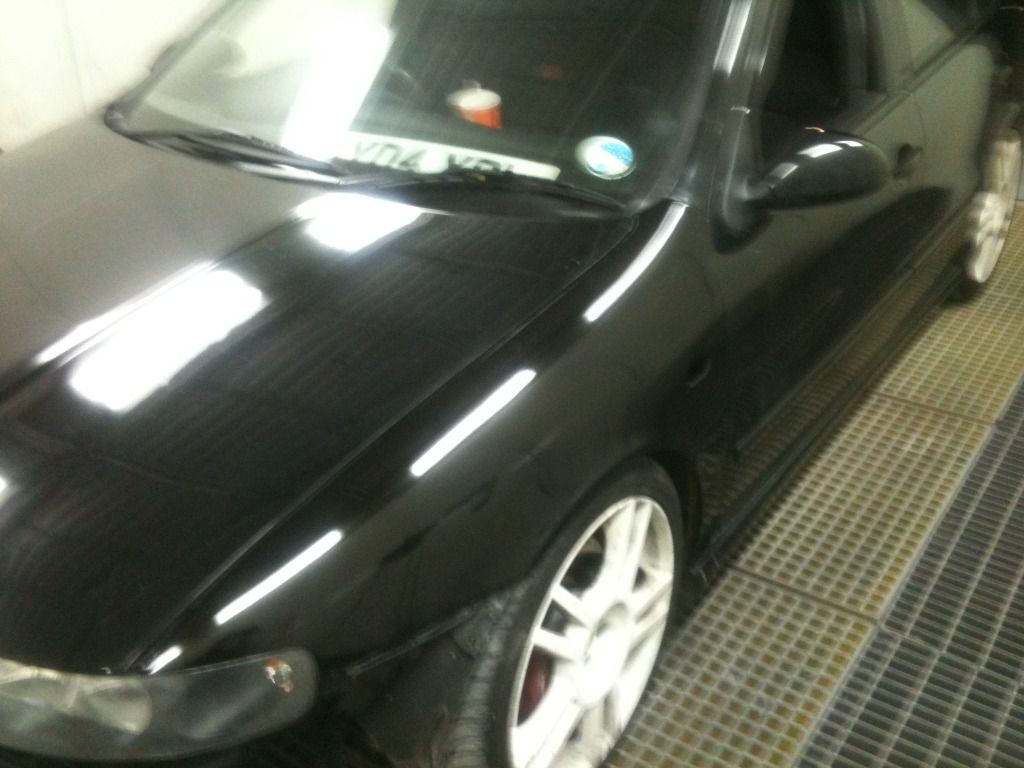
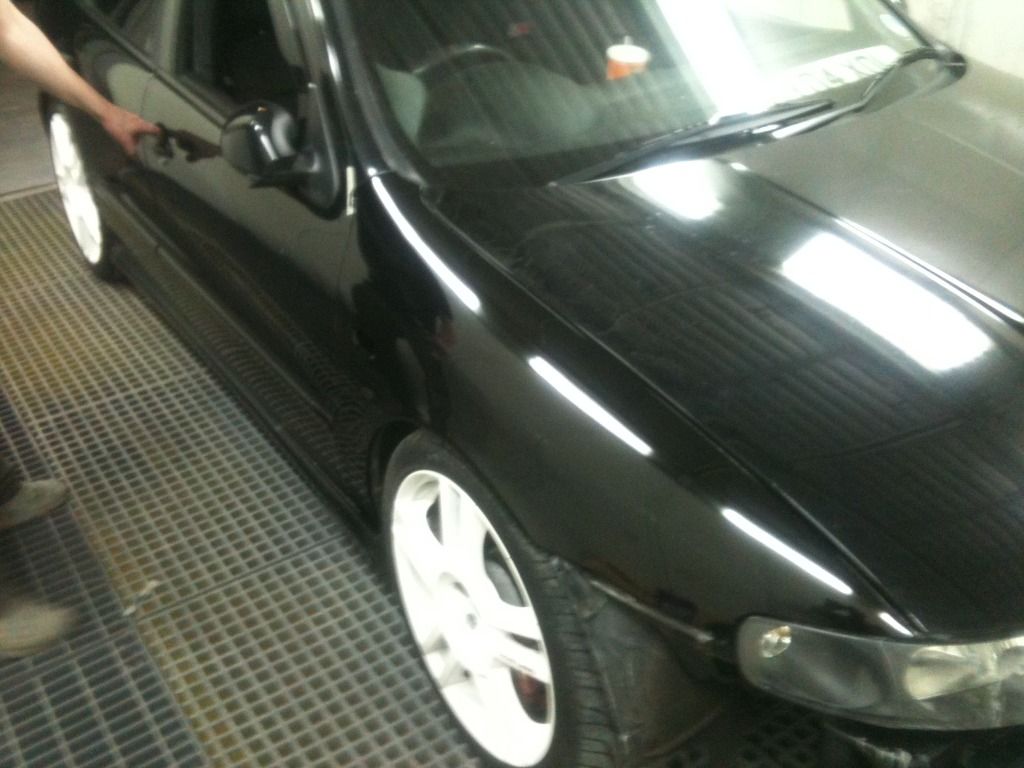
painted the wheels white this week and ordered a 3" turbo intake pipe, jetex air filter and heat sheild and forge 007p dump valve £350

once thats all on its ready to get a stage 2 remap then some coilovers to drop it.

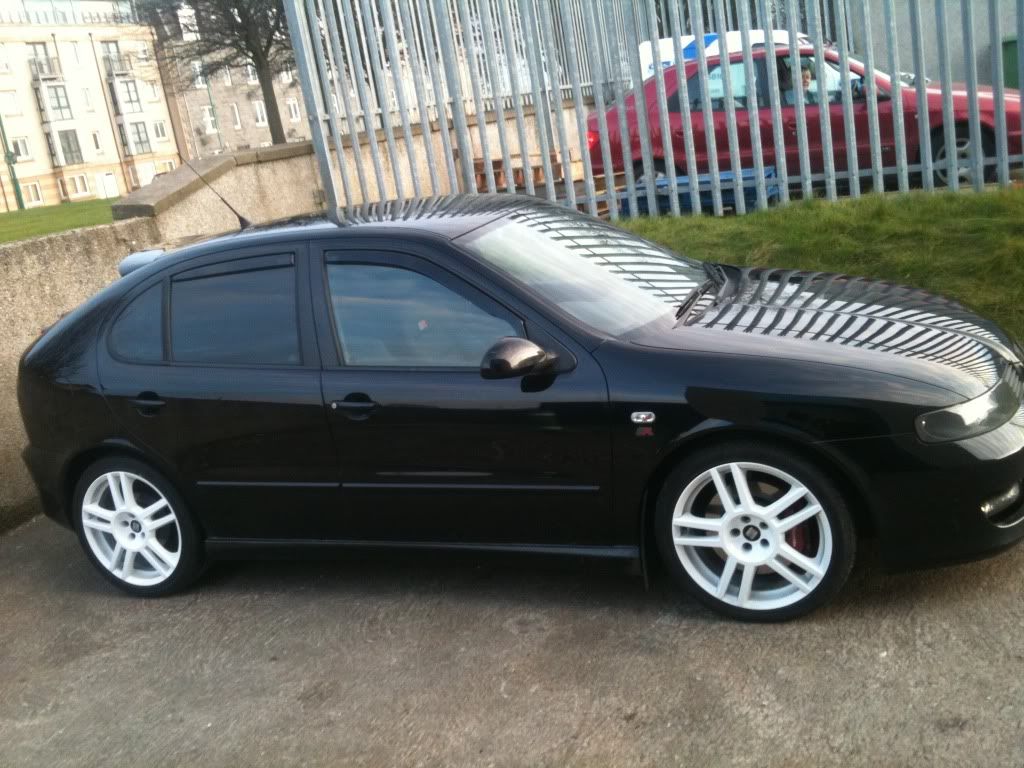
ill get some pics up with the white wheels soon
wol_error.gif
This image has been resized. Click this bar to view the full image. The original image is sized 759x569 and weights 131KB.
IMG_0306.jpg

wol_error.gif
This image has been resized. Click this bar to view the full image. The original image is sized 759x569 and weights 123KB.
IMG_0303.jpg

wol_error.gif
This image has been resized. Click this bar to view the full image. The original image is sized 759x569 and weights 135KB.
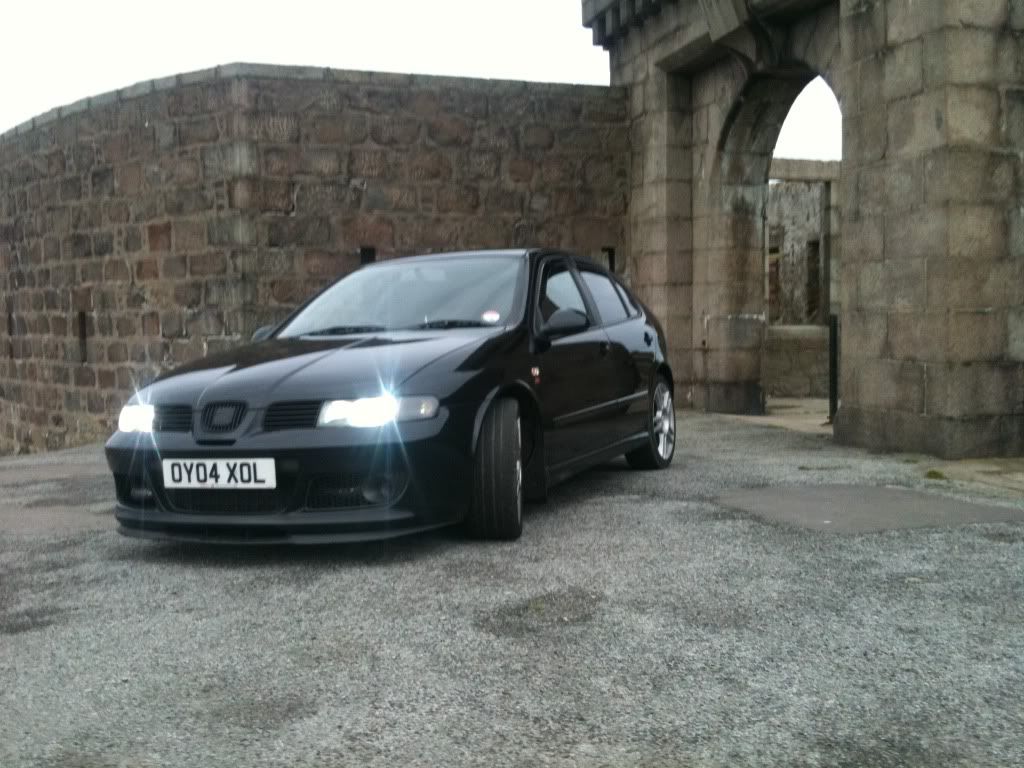
IMG_0302.jpg


some white wheels
wol_error.gif
This image has been resized. Click this bar to view the full image. The original image is sized 759x569 and weights 148KB.
video004.jpg

wol_error.gif
This image has been resized. Click this bar to view the full image. The original image is sized 759x569 and weights 124KB.
video003.jpg


Last of the toys before remap
video006.jpg


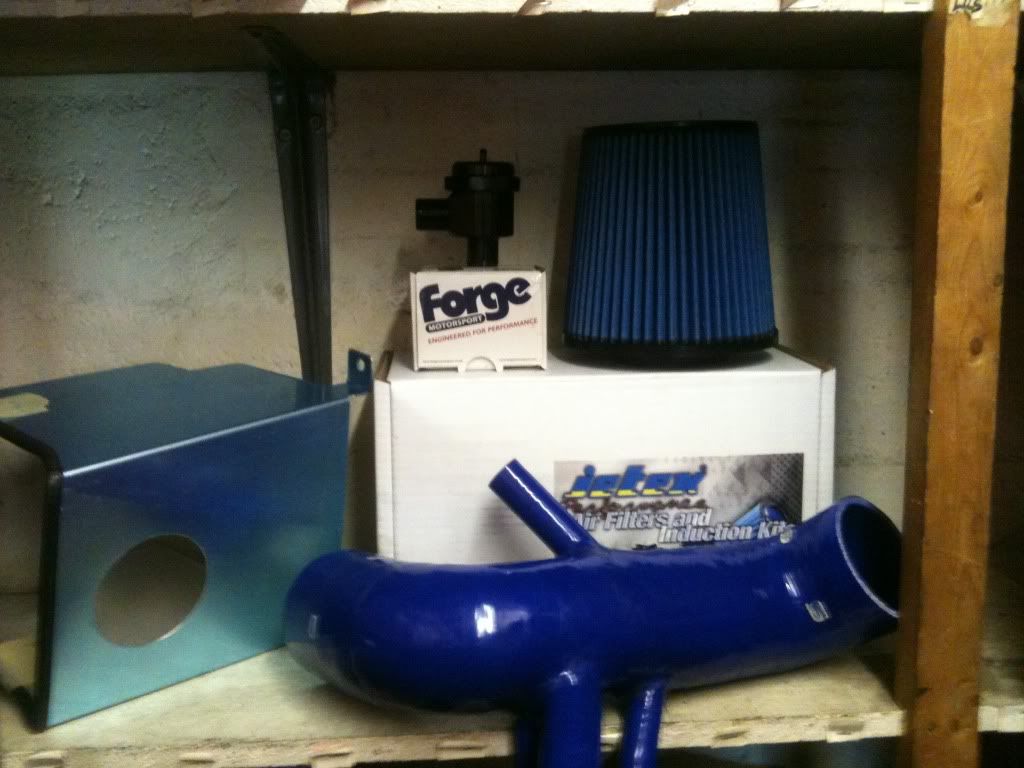
picture of the tip, heat sheild, jetex filter and forge 007p fitted, now just to clean up the engine bay which ill attept tonight
http://i306.photobucket.com/albums/nn262/adzer7886/video008.jpg[/IMG

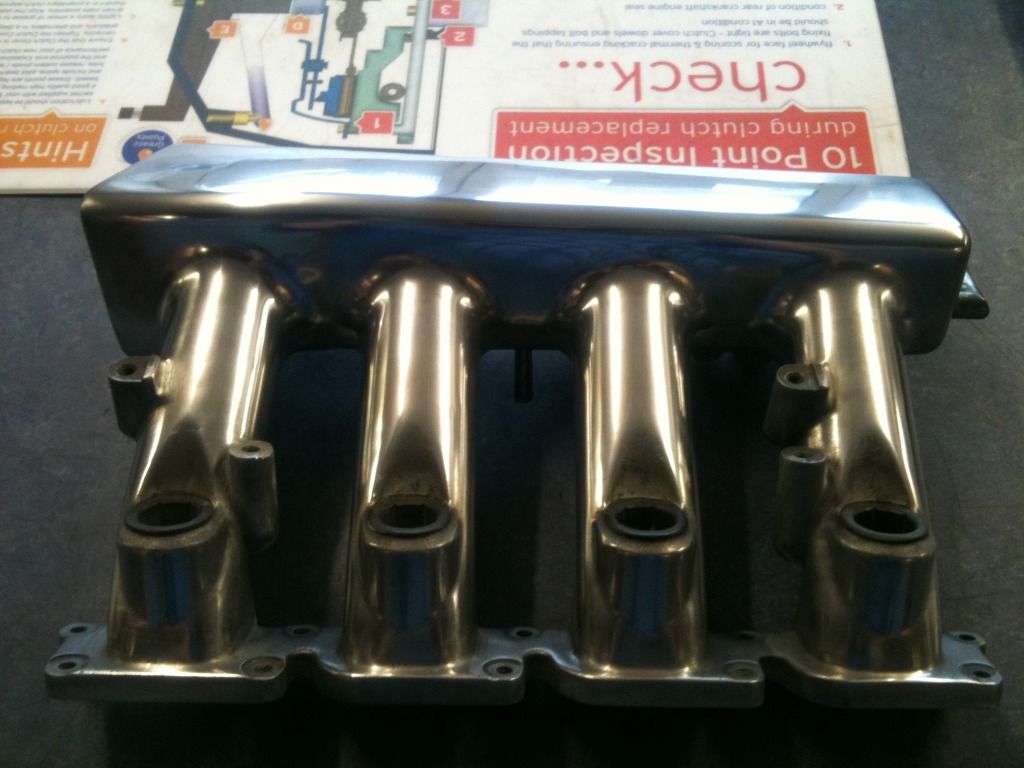
some more new parts for the leon and i have a rolling road session this sat to see if she runs ok b4 i remap
[img]http://img.tapatalk.com/d5cde134-df3f-d4dc.jpg
video016.jpg


safe to see this project has came to an end
IMG_0382.jpg

IMG_0383.jpg

IMG_0386.png

IMG_0387.jpg


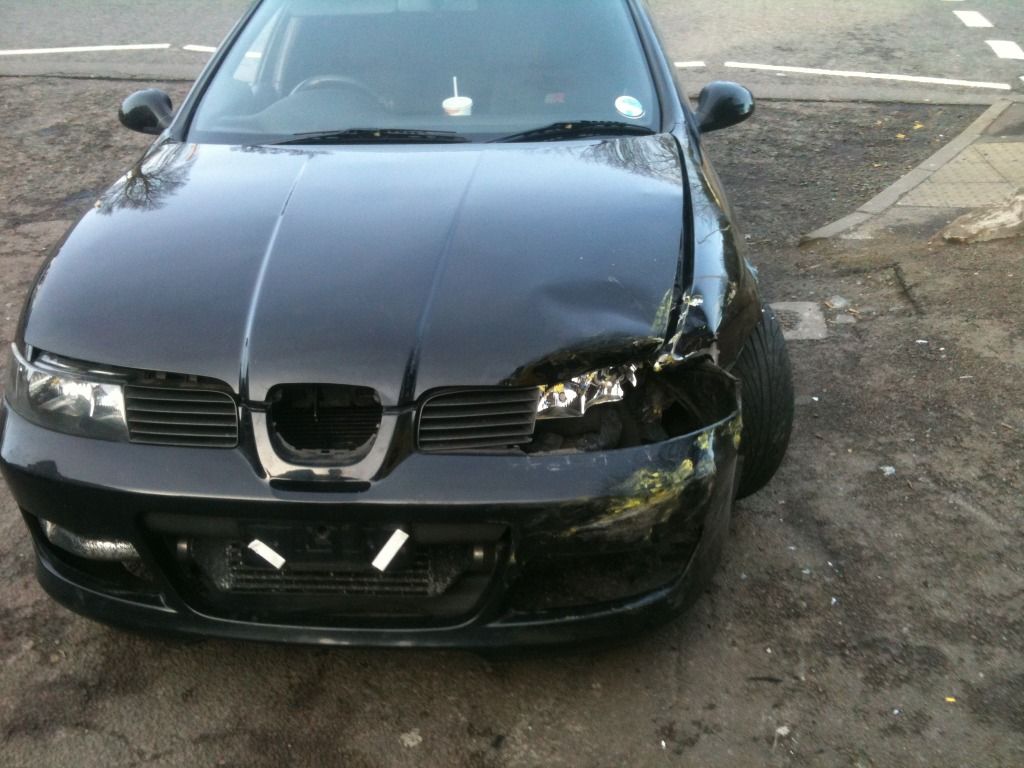
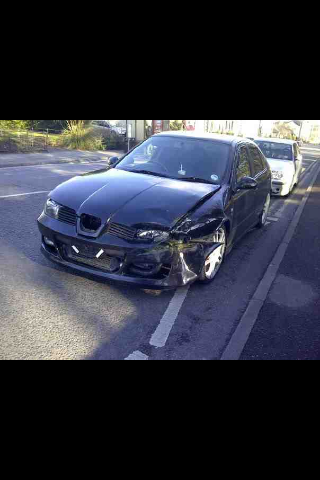
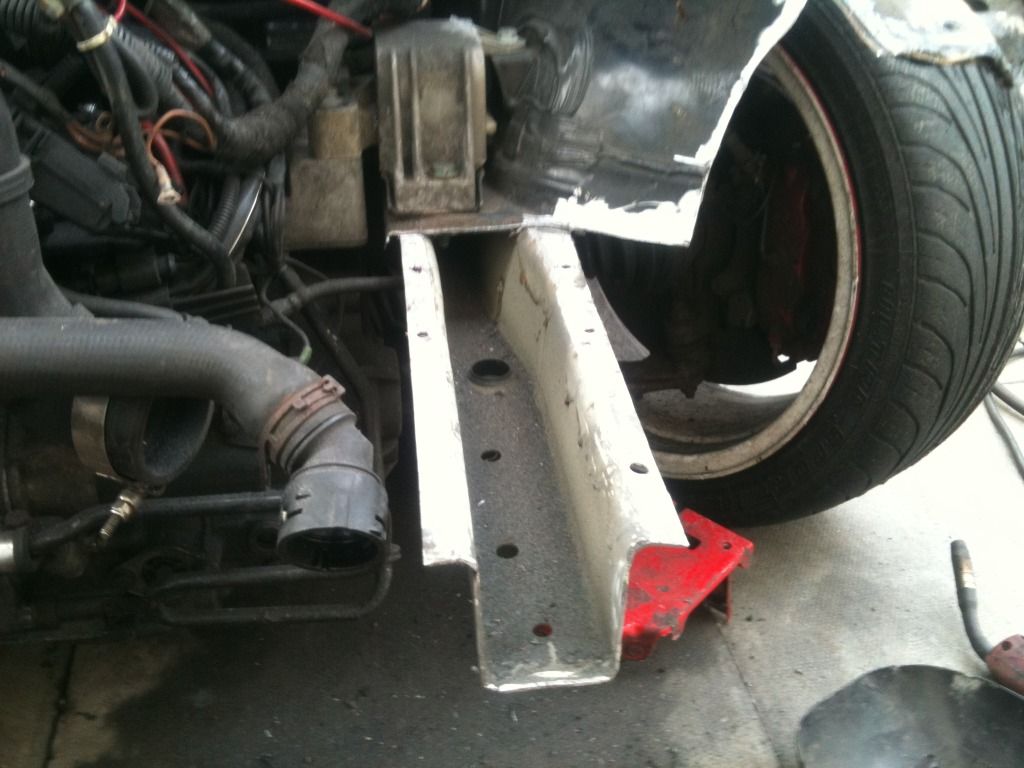
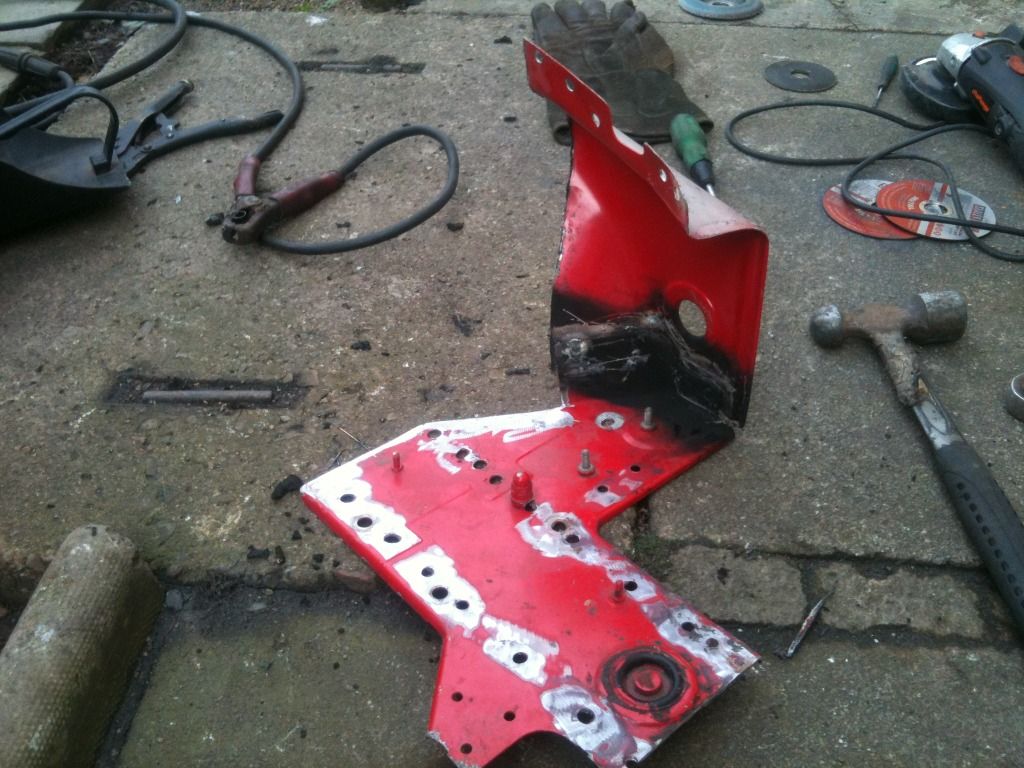
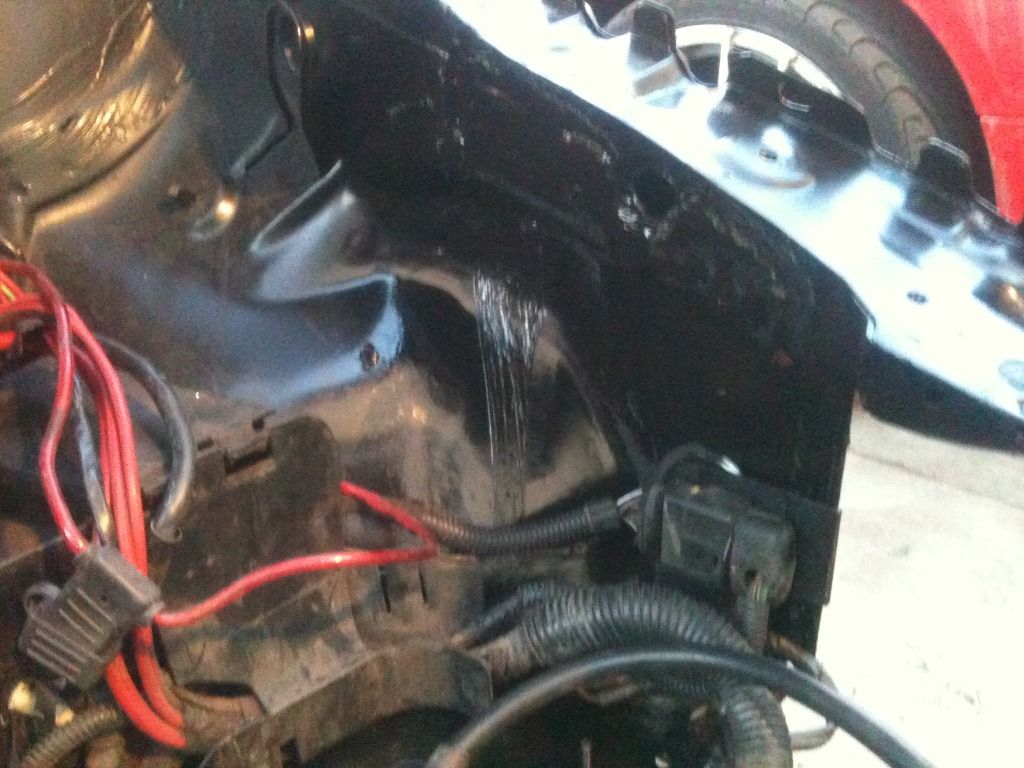
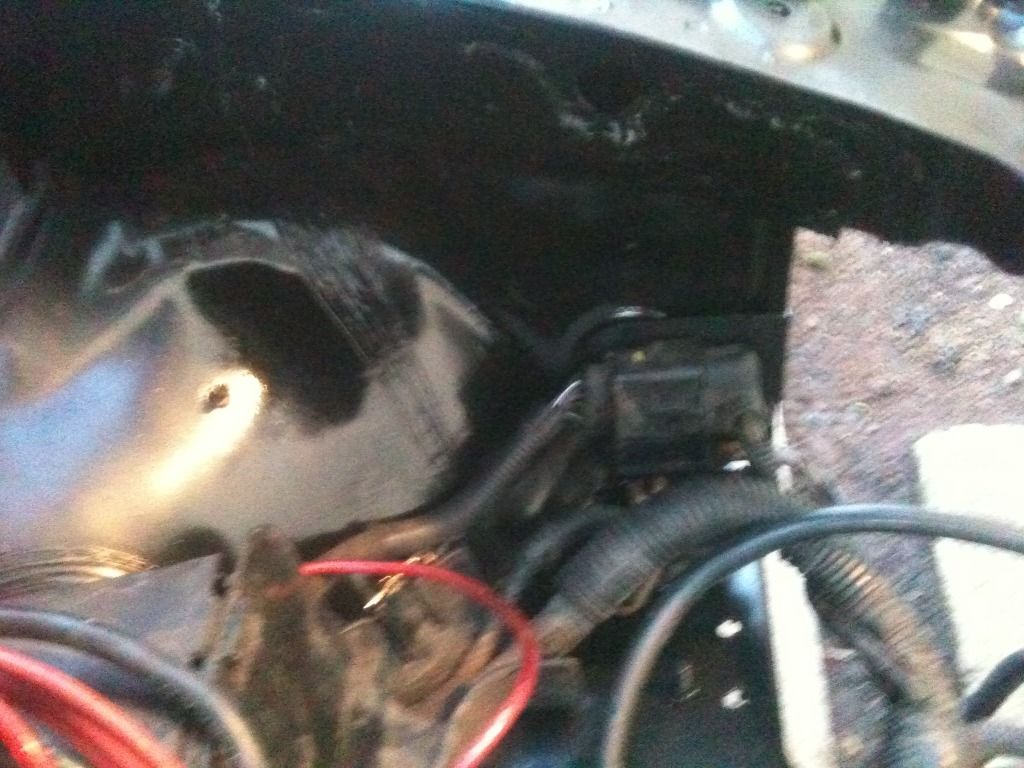
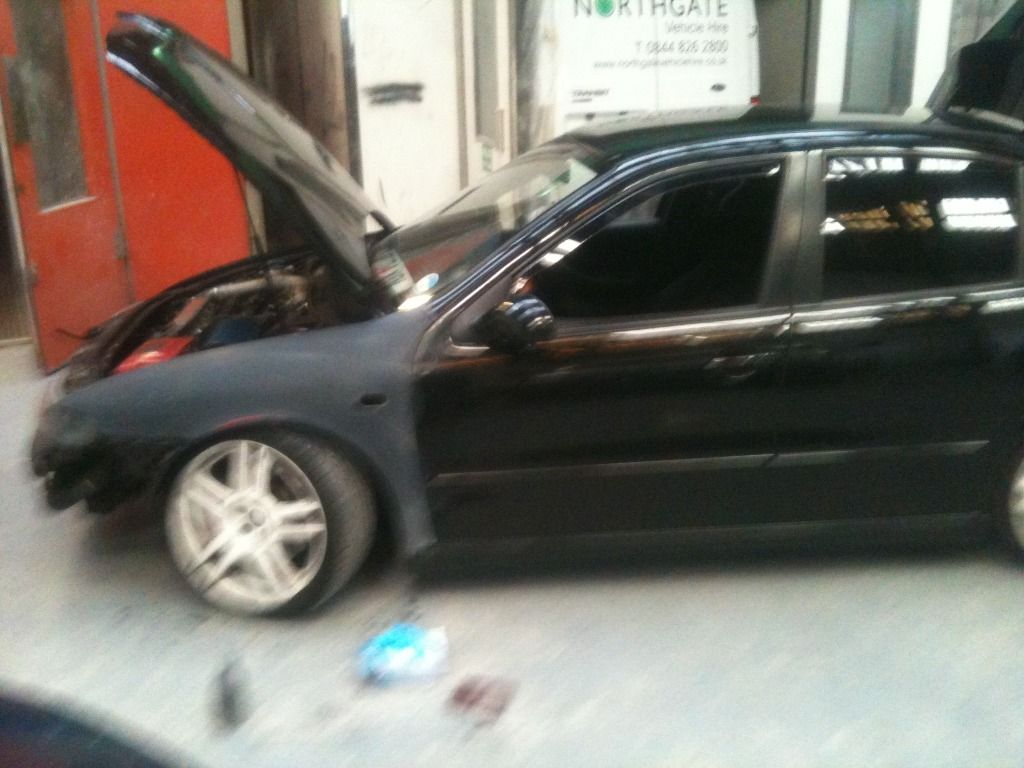
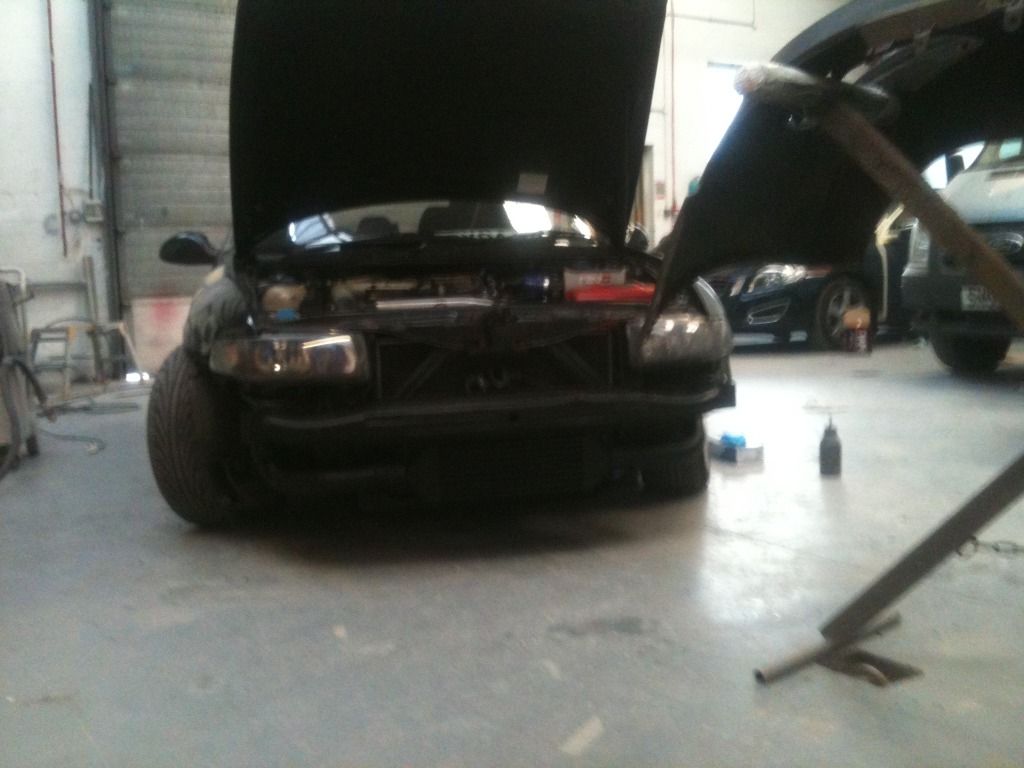
once i removed all the bolt on sections the damage to chassis isnt that bad, think im lucky i kinda tried to steer around richie otherwise my radiator, intercooler and whole front end of engine would of been smashed.

if only there wasnt a focus coming towards us i could of swerved around both of the cars in my way and none of this would happen

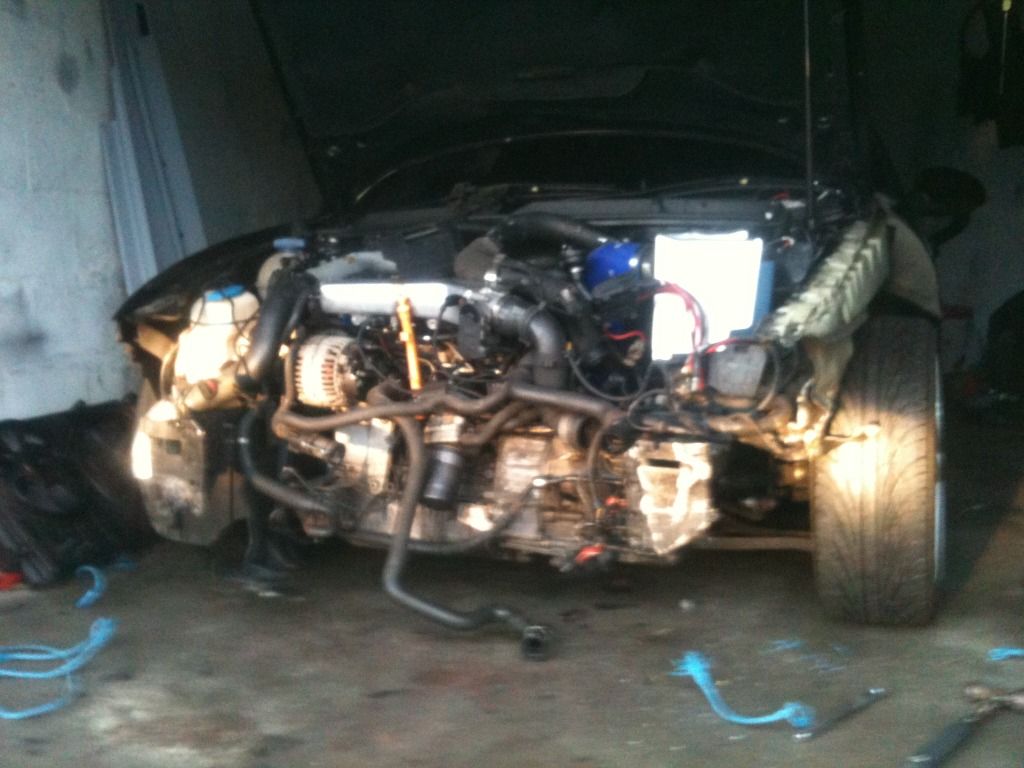
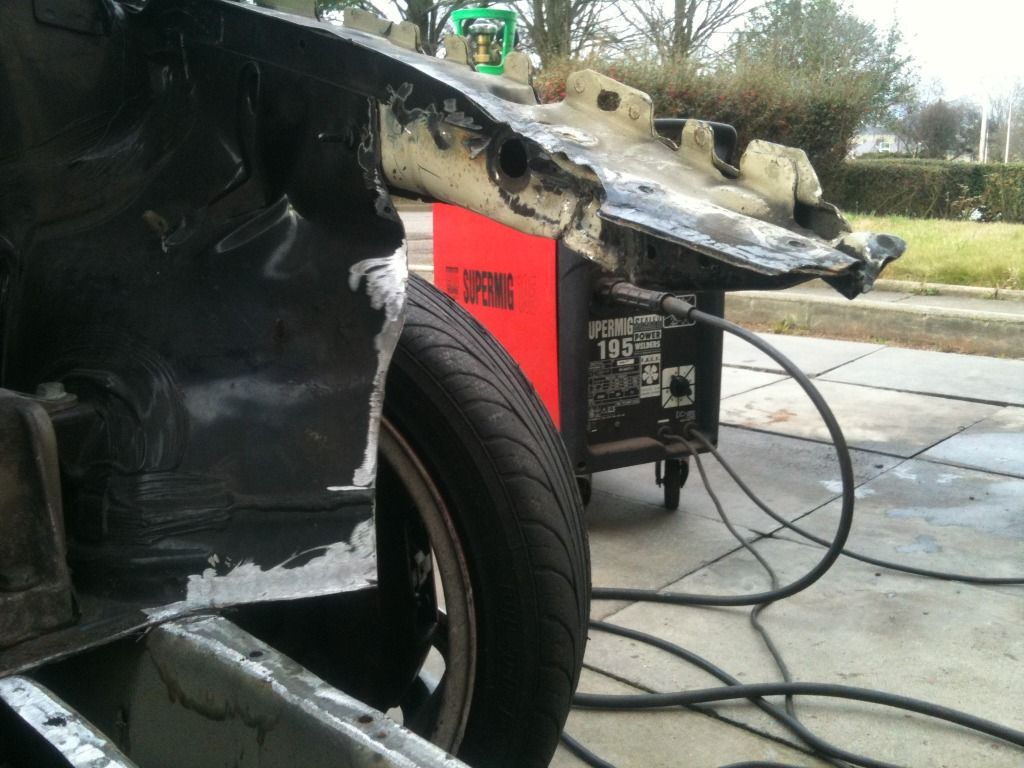
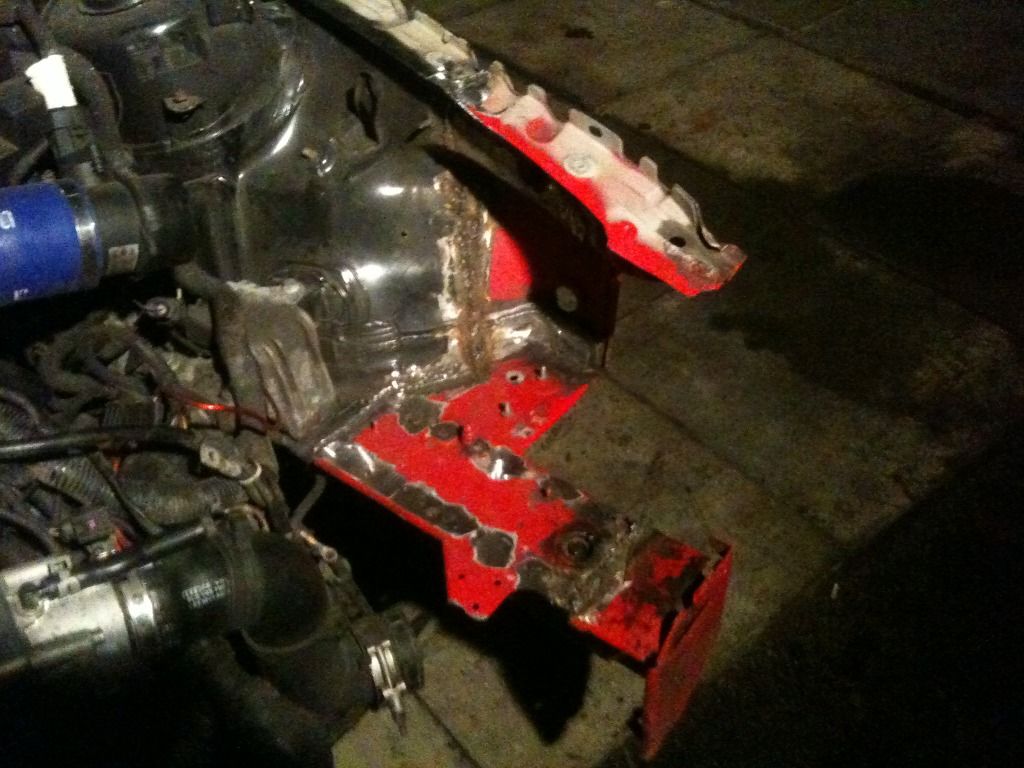
well i made a bit of progress today after getting my hands on a mig welder, hopefully ill get a new front section tomorrow and be able the get the engine bay put back together so the engine can run which will just leave body panels.

IMG_0390.jpg

IMG_0391.jpg

IMG_0392.jpg

IMG_0393.jpg

IMG_0394.jpg

IMG_0395.jpg


Well after getting the car fixed and ordered a new bumper my bottom
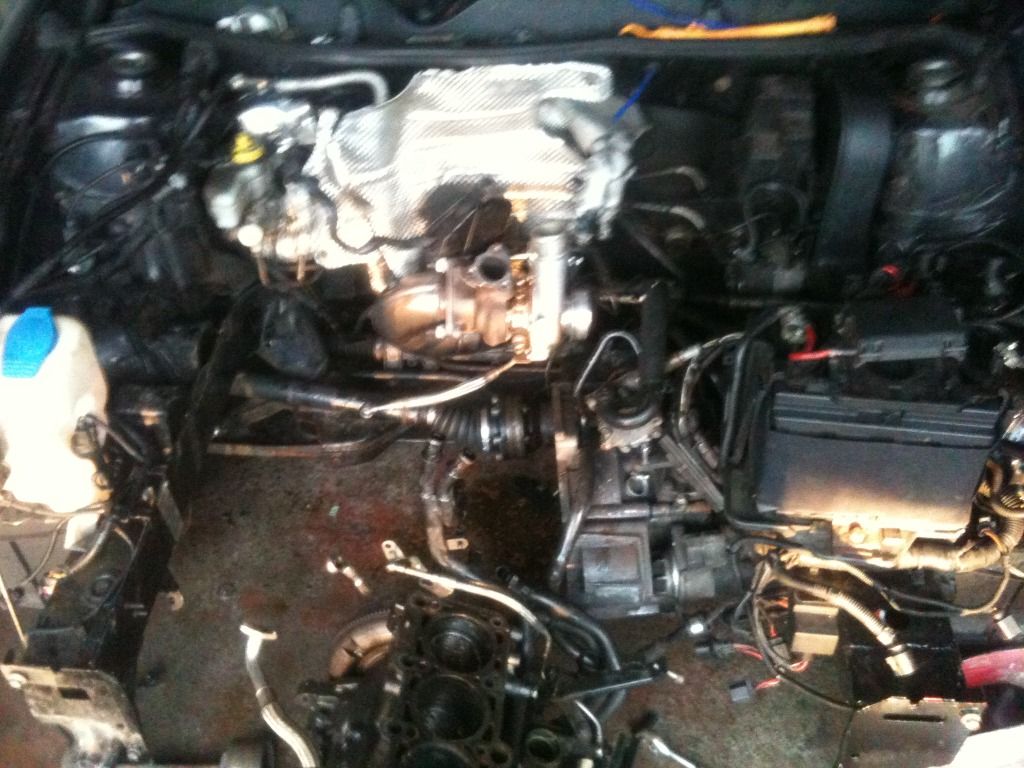
End has decided it's had enough at 108k :-(

So looks like im now into a new engine build. Gonna go down similar route as Cammy with forged rods as when I get it stage 2'd I will not need to cap the boost incase I bend rods :) might look into a hybrid turbo too ;-)

IMG_0398.jpg

IMG_0399.jpg

IMG_0400.jpg


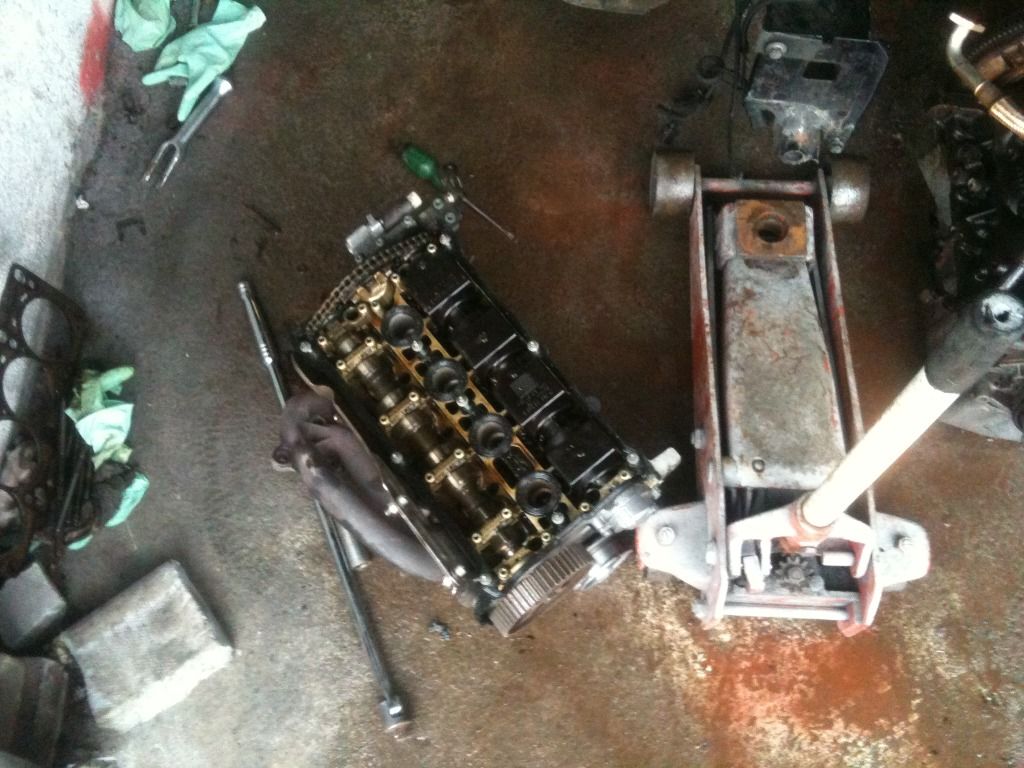
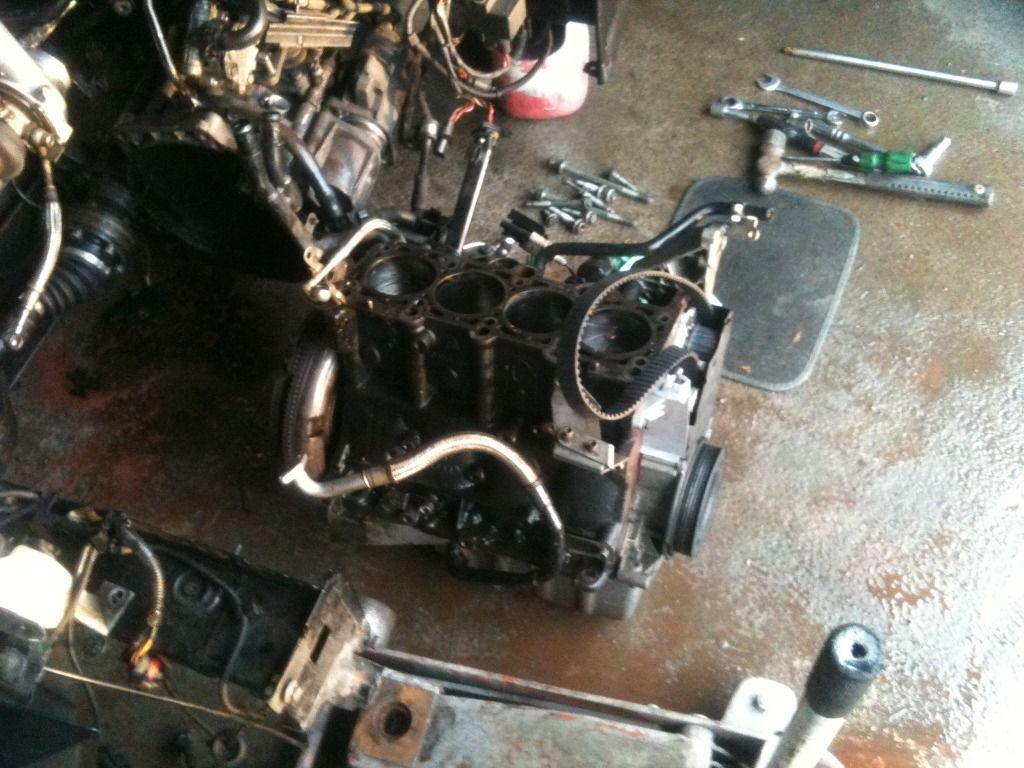
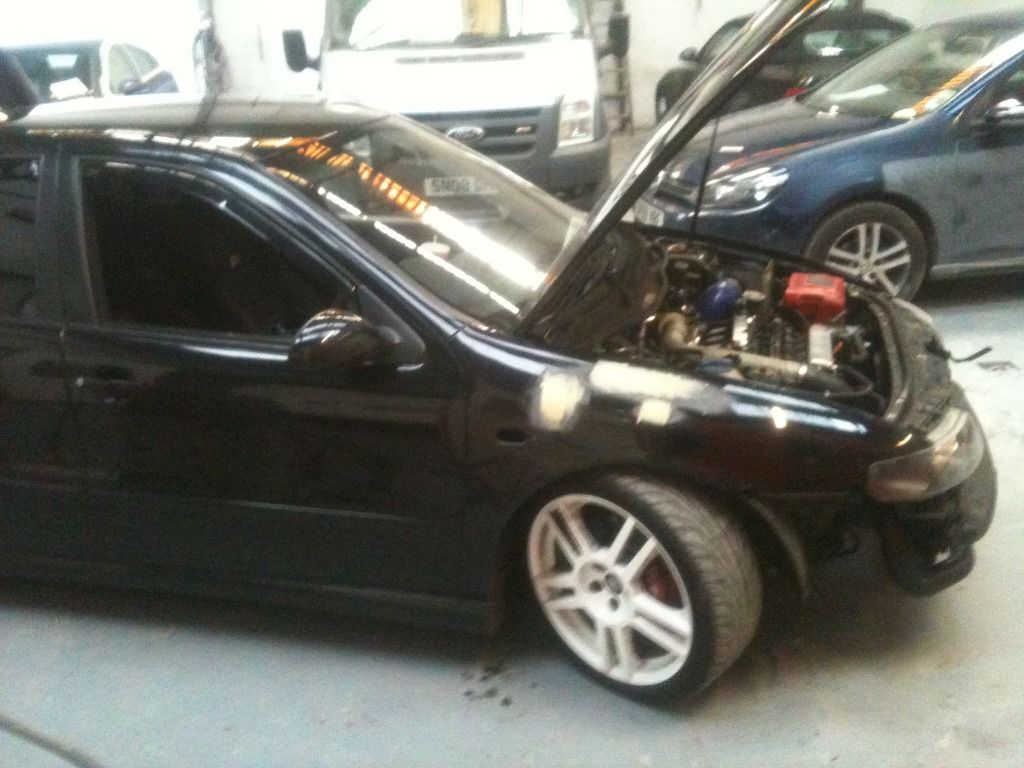
Well she lives again after a full engine rebuild.
On first start up it was running rough and sounded bad. Turned out the crank sensor wasn't connected properly coz I broke the conector once I plugged it in properly she idles sweet as a nut. So I'll fit a new sensor then get bumper back on :-D

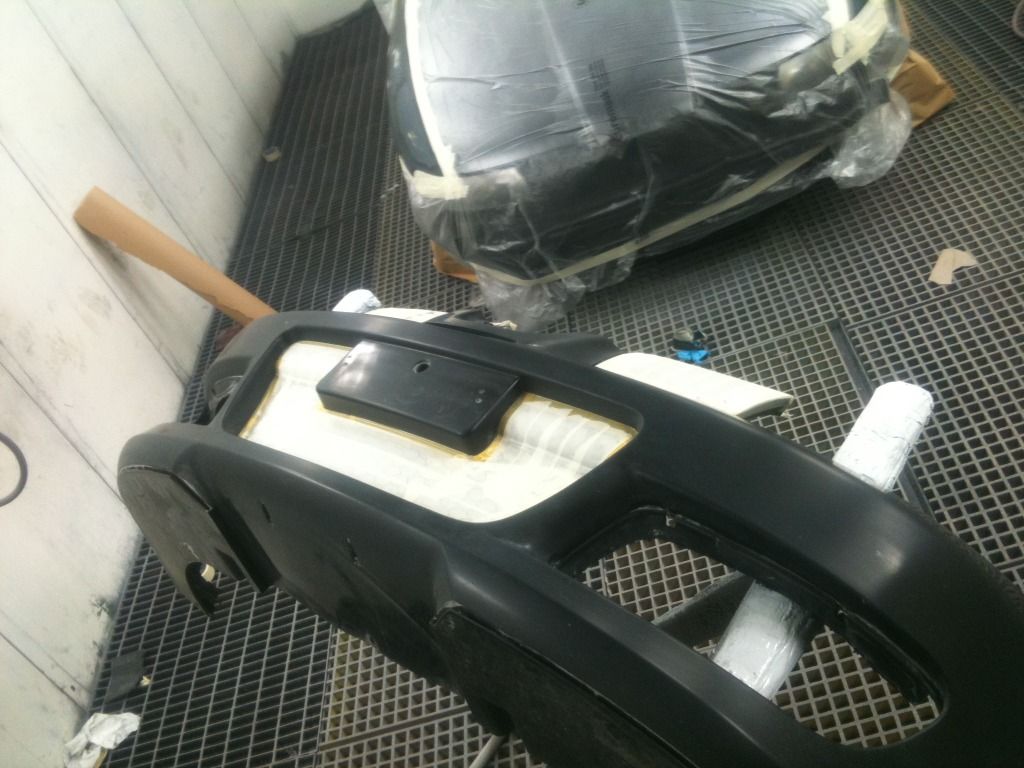
had a bit of progress today..........took my car to my mates work after hours to paint my wing............ended up doing a bit more than his boss thinks lol
prep up the panels before paint
IMG_0405.jpg

IMG_0406.jpg

IMG_0407.jpg

IMG_0408.jpg

IMG_0409.jpg

IMG_0410.jpg

IMG_0412.jpg

IMG_0413.jpg
 

adzer

Active Member
Dec 16, 2009
197
0
Right time for an update, your all gonna think I'm a crazy *******!!

Bought myself a 1.8t quattro a3, daryl1205 gave me and my mate a lift to pick it up from Kinross (cheers Daryl)

Car is remapped and had a few extras like induction, dump valve, boost gauge and 18" alloys. Guys original price was £1350 and I managed to drive it away for £600 which I think was a steal fir a running 1.8t, anyway this is where this whole thread gets interesting.......

Car as I bought it
1f53256a-0096-64af.jpg

1f53256a-00bf-dc5e.jpg

1f53256a-00dc-50b2.jpg

1f53256a-00ed-f2d4.jpg

1f53256a-0108-a74d.jpg

1f53256a-0126-4700.jpg

1f53256a-0139-e1c5.jpg


Petrol tank removed.....

1f53256a-017b-9b2b.jpg

1f53256a-0197-f66a.jpg


Next update will be removing the rear floor pan

I must be a crazy ******* :-s

Watch this space :p


Small update got home from work and removed the front seats and sold them to Jay for his polo so thats a boost, once Jay had gone I Thot I'd start on the removal of the rear floor, drilling out
150+ spot welds is a right pita!!

Think this conversion Is alot more complex than first Thot but I shall see
This thru.

Here's some pics of today's progress
1f53256a-a8e4-1dac.jpg

1f53256a-a8fc-6818.jpg

1f53256a-a920-5c07.jpg

1f53256a-a936-18e5.jpg

1f53256a-a946-cd32.jpg

1f53256a-a95b-f72c.jpg

1f53256a-a97f-f94d.jpg

1f53256a-a999-c610.jpg


Hopefully have the floor removed
Tomorrow just get around the
Seat base to drill out now

Well that's another night spent on the Audi, managed to get it out eventually after burning out my grinder and a helping hand from John Webster. Must admit now I've removed the floor from the a3 I'm having second thoughts :-s

Anyway here is some pics of tonights progress

1f53256a-f55a-7654.jpg

1f53256a-f56b-27c9.jpg

1f53256a-f584-3ca8.jpg

1f53256a-f59f-f034.jpg

1f53256a-f5c3-e528.jpg

1f53256a-f5db-e854.jpg

1f53256a-f5f0-9f47.jpg


Well guys this is where **** gets Nasty :-s

Audi went to scrap yard today freeing up some much needed space to start on the Leon, so first things first was moving the BMW out into the street and placing the Leon in it's final resting place for the next feck knows how long.

Take one last look guys coz you might never see it again lol

d5cde85f-4ba2-d1c9.jpg

d5cde85f-86bc-0084.jpg

d5cde85f-86ca-f418.jpg

d5cde85f-86f6-fa24.jpg

d5cde9df-8713-d4eb.jpg

d5cde85f-874e-ff5a.jpg

d5cde85f-8761-54c0.jpg

d5cde85f-877a-e8fe.jpg

d5cde85f-878b-a23c.jpg

d5cde85f-879f-f941.jpg


After Removing all The trims I have noticed a big difference in the rear wheel tubs as to how the rear seats bolt in. I'm still undecided if I want to go down the stripped out route or refit all my interior and keep it practical for my wee boy and just make it a fast road car.

At this point I actually stepped back and asked myself if it's actually worth the hassle.

Anyway I decided to start removing the
Brackets for the rear seats incase I need to weld them in

d5cde85f-894e-f2a3.jpg

d5cde85f-895f-2b16.jpg


Well I've been at it since 5 o'clock today bit in a half arsed mood but have got a fair bit done regardless

First up was removing the other seat mount
d5cde85f-c7db-fc77.jpg

d5cde85f-c7eb-750f.jpg

d5cde85f-c80e-154b.jpg

d5cde85f-c83e-c3bb.jpg

d5cde85f-c84e-9255.jpg

d5cde85f-c882-6acf.jpg

d5cde85f-c890-ba23.jpg

d5cde85f-c8a1-7db0.jpg

d5cde85f-c8b3-2c65.jpg

d5cde85f-c8c1-d656.jpg

d5cde85f-c8f5-551d.jpg

d5cde85f-c925-cbb6.jpg

d5cde85f-c935-b00b.jpg

d5cde85f-c95e-363b.jpg

d5cde85f-c96b-f4fb.jpg


Say hello to my new toy!!

1f574873-6dcf-734a.jpg


Cheers for comments guys, spent another 4 hours on the car tonight and
Managed to get 90% of the floor removed so tomorrow all I need
To do is clean up all the joins ready to weld and meassure up the side rails and chop them to mate with the new floor.

Not much in the way of pics today
1f574873-1dd6-8b85.jpg

1f574873-1de9-002a.jpg

1f574873-1df8-9587.jpg


Well didn't get much done due to weather but the shell is now all cut and ready for new floor, just need to chop the side rails on the new floor to butt with the shells side rails.

So if this rain fecks off tomorrow I should have my floor mounted and tacked welded into place

Pic of my friend helping me carry the new floor from the shed to my car ready to be offered up tomorrow
1f574873-b6ad-75c7.jpg

1f574873-b712-a8ae.jpg

1f574873-b72e-e3ea.jpg

1f574873-b769-3c89.jpg

1f574873-b78c-19e1.jpg


Well got a fair bit done tonight, managed to offer the floor up and get it into place, them just tack welded four corners into place, before I weld it fully
Into place I'll refit the rear diff setup and make sure everything lines up

1f499545-613a-46ca.jpg

1f499545-6156-cfae.jpg

1f499545-617e-f304.jpg


Didn't get much done on the car
This weekend due to having the
Wee man and having a night out on Saturday, but managed to mount the rear diff and Hubs to measure that the floors sitting straight before I fully weld it into place, got everything sitting pretty much bang on so I was happy enuf welding up the floor at that, started welding the side rails and seam welded passenger rear arch, well chuffed with my welds too, don't think they could get any better
1f5deac4-addd-958f.jpg


Small update, finally got The floor fully welded in, welded seat mounts in, fabricated a rear panel, painted in inside and undersealed the entire underside.
1f5fc9d1-c099-4ce3.jpg

1f5fc9d1-c0b3-f3c3.jpg

1f5fc9d1-c0e4-34d9.jpg

1f5fc9d1-c101-e3ce.jpg

1f5fc9d1-c389-5205.jpg


I then got the rear crash bar bolted back on followed by the rear bumper
1f5fc9d1-c14c-7992.jpg

1f5fc9d1-c16e-f3e8.jpg
 

adzer

Active Member
Dec 16, 2009
197
0
Rear end off the a3 was looking scabby so Jordk offered to bead blast the parts and give them a lick of paint at his work, then two days later my mate tells me his boss is away on holiday and says he can powdercoat all my parts cheap,since I have 2 rear ends I decided I'd just get them both done, so here is a before and after of the parts he has done so far#

1f5fc9d1-c2db-ef4d.jpg

1f5fc9d1-c307-30a5.jpg

1f5fc9d1-c316-f846.jpg


Some pics of the goodies for the rear end
1f5fc9d1-cd99-6736.jpg

1f5fc9d1-cdaa-6b4b.jpg

1f5fc9d1-cdbe-a4a5.jpg

1f5fc9d1-cdcd-d4c6.jpg


Before I could proceed any further with
The chassis I had to make up front to rear brake pipes which I couldn't be assed doing coz 1- the rain didn't fcuk off and didn't wanna lie in the wet and 2- I had no idea how long they had to be at the rear until I get the trailing arms back on so I just flared one end of
The pipe and shaped the pipes to the rear so I could refit the petrol tank. Once The trailing arms are
Fitted I'll cut the pipe shorter and flare them on the car.
1f5fc9d1-d05b-4b2b.jpg

1f5fc9d1-d06e-dbb6.jpg

1f5fc9d1-d080-5854.jpg


Now that the pipes was done I could start rebuilding the car. So cracked on with the petrol tank.
1f5fc9d1-d0bd-d567.jpg

1f5fc9d1-d0cb-f136.jpg

1f5fc9d1-d0dc-116d.jpg


This is pretty much the stage I am at right now, ordered my standalone diff controller last night from Germany £800!!!!!!! Last of the chassis parts will get powdercoated tomorrow hopefully and I've ordered new bushes and clips that I had to strip off the rear subframe to get powder coated which will also be Here tomorrow another £200!!!!!

Once I get all these bushes from seat tomorrow that's me pretty much ready to mount the diff onto the car :-D

All parts now powdercoated and cleaned
1f5fc9d1-e31f-29e5.jpg

1f5fc9d1-e332-eb17.jpg

1f5fc9d1-e373-2bb5.jpg


Some more parts
1f5fc9d1-503b-7f9d.jpg


Well 2 parts I ordered was wrong and two bushes was on back order so these was holding me up...........but the nice manny from seat came today and delivered them
d5cde101-677c-1bde.jpg


So all I need to do now Is press the bushes in, fit the disc shields, press the hubs into the bearings on the trailing arms and start building woop woop.

Might be on it's wheels this weekend if I push

So all I need to do now Is press the bushes in, fit the disc shields, press the hubs into the bearings on the trailing arms and start building woop woop.

Might be on it's wheels this weekend if I push

Small update, started bolting the running gear back on today, managed to get the rear Diff and cradle on, then the 4 control arms and rear shocks.

Just need to get the trailing arms on now
d5cde9a2-d8c4-b11d.jpg

d5cde922-d98e-21b1.jpg

d5cde922-d99d-e6b9.jpg

d5cde922-d9d5-9499.jpg

d5cde822-da00-f71a.jpg


Well progress has been slow lately.

Got the trailing arms on ready, then got the rear anti roll bar fitted too
1f4b41dd-1324-ec45.jpg

1f4b41dd-133d-05cf.jpg

1f4b41dd-134f-0b14.jpg


I then started to get the rear brakes back onto the trailing arms and have ran into a snag! The caliper carriers are different from my Leon! Callipers are same as the s3 but carriers on a 4wd are different so again im waiting on parts to arrive!!!

Picked my brakes hoses up from Wallace today, but the ends are slightly bigger so I'll need to bore out the hole in the mounts for them to slide thru.
1f4b41dd-14a3-6524.jpg

1f4b41dd-14de-937a.jpg


Some more progress made, finally managed to get the rear brake hoses to fit and flared the pipes to suit
1f4b41dd-6e29-8172.jpg

1f4b41dd-6e3a-0dd1.jpg

1f4b41dd-6e48-3f1f.jpg


I also got the last of the welding done and welded in the mounts for the propshaft and got the rear half of the prop mounted ready for the gearbox to be fitted.
1f4b41dd-6ea1-f815.jpg

1f4b41dd-6eb9-e84b.jpg


The rear arch liners off the Leon no longer fit so I had to use the ones from the a3 but they was slightly different as the Leon bumper sits wider so I had to chop up the Leon arch liner and do I bit of plastic welding to make 2 liners into one around the rear bumper. Nowt fancy buy it's functional
1f4b41dd-6ff5-7bd5.jpg

1f4b41dd-7019-655a.jpg


I also got the skirts back on today but are a bit scuffed up from storage grrrrrr
1f4b41dd-7044-1df0.jpg

1f4b41dd-7059-e6b4.jpg


Well after spending most of today on my arse staring at the rain I Thot I better go out and press on with the Leon regardless

Because I'm stuck waiting for parts for the rear end ive had to start work on the front end, first off I had to hack off my locking wheel nuts coz I Lost The key :-/

Anyway to fit the new gearbox with transfer box I Thot it would be easier if I removed the subframe and polybush everything at The same time.

Anyway subframe off
1f4b41dd-0037-7788.jpg

1f4b41dd-004b-b602.jpg

1f4b41dd-0061-fc5f.jpg

1f4b41dd-0082-b249.jpg

1f4b41dd-0092-9eeb.jpg


Well progress Is flying now that I'm onto the mechanical side of the build

Removed the old clutch and flywheel then fitted the lightened flywheel and fast road clutch
1f4b41dd-0c7c-b459.jpg

1f4b41dd-0c8c-3e8f.jpg

1f4b41dd-0c9c-04e5.jpg

1f4b41dd-0cbc-b2e5.jpg

1f4b41dd-0cdc-c4c3.jpg

1f4b41dd-0ceb-2ab8.jpg


Well about an hour later I got the box in place and bolted up
1f4b41dd-31f8-b353.jpg

1f4b41dd-3211-3008.jpg

1f4b41dd-3232-e287.jpg


Well as I refused to pay the price seat wanted for rear brake pipe/hose Assy and no companys seem to make them either I decided to ask if Wallace could custom make the hose with a normal female end so I could make up the pipe myself and screw it into the hose, where as the originals are a complete unit where the hose and pipe cannot be separated.

Whilst doing my clutch I noticed the feed pipe also has a rubber hose so I Thot fcuk it and dropped the original off at Wallace this morning and they made the 3 hoses for me.

Just back from picking them up so I'm away to make up the pipe to complete The rear brake lines whilst the suns out
1f4b41dd-80aa-d1f6.jpg


Simple and easy, fitted the clutch hose and made up rear pipes and fitted to the hoses, just need to wait for my new carriers and the rear end is finished woop woop

New rear pipes getting made
1f4b41dd-9af0-3e20.jpg

1f4b41dd-9b12-d523.jpg


Nowt worse than getting rudely awakened on a saturday morning! Unless of course it's the postman with presents
d5cde034-88ee-ec0b.jpg

d5cde034-88ff-25a9.jpg


If anyone can make any sense of
These fitting instructions come see me lol
d5cde134-c2c8-eb95.jpg


Bit more progress tonight, I thot I'd start installing the diff controller, plan was to wire it all up behind the stereo as thats where all the wire seem to be, plus I need to make a surround to hold the screen and the control switch, seeing as the wires between the module and the screen aint long I've decided to do away with my middle air vent and house everything behind it. Some pics of my progress.........
1f4940e4-99d8-4010.jpg

1f4940e4-99f0-a39c.jpg


Finally it comes to life
1f4940e4-9a1b-b9a4.jpg


Been at the car since 5 and looks like I've done next to nothing, finished up wiring the diff controller and tidyed up the loom behind the stereo as whoever installed the reverse camera and roof mounted tv just crammed all the wires behind the headunit and it annoyed me, once all the wiring was sorted I could start putting the interior back together.................all was well until I came to the rear trims and now the differences between the floors come apparent. The a3 floor is minus certain fixing points to screw the interior trim to.

So I've given up for the day as in still in pain after football last night

Ah ha the final piece of the jigsaw to finish up the rear end
1f4a875a-d835-4d18.jpg


Even better........more goodies arrived today
1f4a875a-028a-26c6.jpg


Well got the new carriers painted And went to fit the brakes to the rear, driver side went on no problem
1f4a875a-279c-d61e.jpg

1f4a875a-27b4-a59b.jpg

1f4a875a-27d6-489f.jpg


But for some reason the passenger side carrier fouls the disc :-/

I have a feeling that the bearing isn't pressed in 100% which is making the hub/disc sit just out of place
 

adzer

Active Member
Dec 16, 2009
197
0
Well finally managed to get the passenger rear caliper bolted on, turns out the fixing points on the trailing arm was slightly bent pullin the carrier too close to the disc, quick blow with a hammer and a hand from John (astrasxi) soon sorted it out, cheers John ;-)

As I was feeling a bit better yesterday I thought I should try get some progress made

So I jet washed and stripped the front subframe and suspension arms ready to Be painted and poly bushed.
2e11d509-50f0-d7ea.jpg

2e11d509-50fa-93f0.jpg

2e11d509-5105-e83e.jpg

2e11d509-5113-26e0.jpg

2e11d509-5126-f33e.jpg

2e11d509-5136-8d3a.jpg


Very good progress tonight, managed to
Get the Audi tt downpipe fitted so I can run a temp exhaust that won't hit the propshaft until I decide if I'm going big turbo or not.

Once downpipe was on I could finally get the front part of the prop shaft fitted, I had to fit both downpipe and prop before I could get the subframe back on.
5c03e2a9-883c-8e7e.jpg

5c03e2a9-8865-4a0c.jpg


Then I set about Bolting it back onto the car and bolt steering rack back onto the subframe
5c03e2a9-88a0-829d.jpg


Then I fitted the wishbones and fitted the drop links
5c03e2a9-88cb-8c3b.jpg


It's alive and launches well!! My old mother wasn't too pleased about the noise it was making
5c03e2a9-4e4d-85ba.jpg


I can't stop grinning, for all those ppl that said 4wd'in my car would make it heavier and slower I say balls to that this car is still mental quick in fwd and when I turn the diff controller on holy fcuk it flys, Richie and Muz got videos of the car launching but it doesn't look quick as it does in real life, Richie said it was off like a rocket and it felt it from the driver seat lol

Starting to look like a car again
5c03e2a9-6197-38f8.jpg

5c03e2a9-61a1-88d0.jpg


Well as im still undecided what turbo I'm going for I am still unsure what downpipe I'll be running so ive just mocked up a **** exhaust so the car can be run until such times the turbo gets swapped. As I didn't have an exhaust to fit straight on I butchered the old system of the a3
5c03e2a9-aaf8-fbf5.jpg

5c03e2a9-ab03-9d1b.jpg

5c03e2a9-ab11-2981.jpg

5c03e2a9-ab25-6ef3.jpg

5c03e2a9-ab31-d2e3.jpg


Well Chaps it's been a while since an update, not really had much time to touch it in the last 3 weeks as have been flat out doing homers from lowering numerous cars to doing a clutch on an rs4 :-D

Any way I had to fabricate my centre vent to house my diff controller and am very pleased with the end result, every one that's seen it thinks I cheated and bought this vent until I flip it round and they see the rear ;-) pics will do the talking lol
u3ajuvu7.jpg

nejy3abu.jpg

age6u8aj.jpg

e4y7ebus.jpg

yra3e6u9.jpg


The diff controller switch looks **** and I plan to make it look better and less out of place.

And if anyone is wondering why I've placed the switch to one side, all will become clear in due course when the second part of the project starts ;-)

Small update old turbo set up has been removed
e6emyza6.jpg


Plz note the big gapping hole where my turbo once sat
aha5usuv.jpg

pygudu6y.jpg


Well progress has been slow, ain't touched the car for weeks, just been gathering a few parts so I can blitz the next part of the project.

While doing the new turbo I plan to rip out as much shiz as possible to clean up the look of the engine bay, so I'll be removing most of the pcv system as half the hoses are split anyway and replace it with a simple catch can system, Also got an uprated inline fuel pump and exhaust pieces to build my own downpipe
y8utenaq.jpg


also eventually bought a headlight lol
4usyruvy.jpg


Well project can start moving again..........
su7aba8y.jpg

egety4yh.jpg

e6y6u5yh.jpg


This pic is for you Muz
qytajagy.jpg


a5ynejuz.jpg

nu3a4uve.jpg


Well I finally decided to start pulling my finger out and start doing odd jobs on the car while I wait for parts to arrive.

Last week I finally got round to fitting the exhaust heat shields that will separate the prop from the exhaust.

Finally fitted the new headlight after that twat smashed into my car
e6e4ezyv.jpg


And latey I've just been buying in parts really, bought myself a cylinder head off an early 1.8t which has larger ports on the inlet side of the head which will help flow air quicker.

Only problem with a large port head Is my inlet manifold is designed for small port heads which means I'd need a new inlet but all large port inlets the throttle body sits on the left where as my engine it sits on the right............so more money wasted on a sem high flow inlet manifold which suits large port heads and houses the tb on the right ;-)

Whilst ordering the manifold I got a deal from the company and got a larger tb at the same time so I'll now be running a 75mm tb.

With all this I thought I'd be as well get the head worked on, so it's going to be sent away to get ported and polished next week hopefully once I receive my inlet as they are going to port match the 2 manifolds to the heads.

Once all this was running threw my head I then somehow got it into my head I needed updated cams and decided to go fork out for some catcams lol.

Once all these parts arrive, hopefully next week I shall get some pics up ;-)

Well it's sat night I have the wee man and x factor ain't started yet! So I'll update this thread lol

Well my manifold eventually came along with the throttle body
qysadyna.jpg

yganutaj.jpg

7u2aseru.jpg

unymehyb.jpg

8ytu3u2e.jpg


And seeing as I've bought a few grand worth of goods from this guy he said he threw a surprise into the box..........
na5u9ate.jpg


A number plate surround for an American plate???? Nae much use to me pal but I may use It somehow

At long last my cams came ;-)
etujugy8.jpg


Now I can send the head away for some work :D

e2ypyjud.jpg


zequja4e.jpg


4 bar map sensor
ahesezaz.jpg


Well got my head back after about 2 months, at a quick glance I wasn't too pleased with the results if I'm honest and the new cams came back with rust on the lobes!!!!!

Anyway I managed to clean the cam up and on closer inspection the head work isn't as bad as first thought.

Some pics
ujuguhaj.jpg

majagydy.jpg

upetegeq.jpg

yheqapyq.jpg

4aduna5u.jpg

a8ejuvup.jpg

9ujydy2a.jpg

ba3egu3a.jpg

a3upubyj.jpg

ruse3uzy.jpg

u7a4edym.jpg

9anuheqa.jpg
 

adzer

Active Member
Dec 16, 2009
197
0
Real time updates ;)

Mmmmmm mould
3evage6a.jpg


Road trip
ytegazub.jpg

9a5e6yme.jpg


Best way to dry out a damp car ;)
e2evemat.jpg

7yba2uma.jpg


Demoulded seats
8u4are7y.jpg


jy4ahe8a.jpg


Cylinder head can now be built up

ypy9abev.jpg


Intake pipes
a6utujyq.jpg


So a special delivery came today.....
My Dta s60 ecu.........
But upon closer inspection it looks like they made a mistake and sent a s80 instead ;)
etasutas.jpg


Well had a sneaky wee trip to the unit tonight to make some progress on my own car for once!!!

Started to build up the head at long last!
4avybaty.jpg


New chain and tensioner
e9y4ejah.jpg


Exhaust manifold fitted
devyma4e.jpg

u8e6yme2.jpg


Head on engine ;-)
e6ezy9u4.jpg

evehezuq.jpg


Cheeky shot of top mount manifold ;)
gadynu8y.jpg


Well got some more hours on the car tonight but wasn't going to well!

Got the timing done and fitted the water housing to the side of head and fitted rocker cover.

Then when I tested fitted the turbo everything went tits up, was fouling the rocker and hitting heat shields on the bulkhead!!!!

So after some reshaping to my heat shield, rocker cover and turbo actuator I managed to get the turbo to sit in place

ge6y6aqu.jpg

rahehezu.jpg


Tonight's Job in hand.............remove all unwanted wiring from loom
e5y3yvy8.jpg


Loom devided into 2 sections All covering and electrical tape removed from one section
ytana8e3.jpg


Well after a couple nights of working on the engine loom I'd say its 75% complete, everything has been removed not required, I then needed to join some wires within the loom itself so I only have 1 wire at the ecu plug rather than 3 or 4 wires that all need to connect to 1 pin.

Can't really do much else with the loom until I fit it to the engine so I can cut wires to the correct lengths and figure out where I'm mounting certain items so I know where those wires will enter the loom :)

Anyway here's what has been removed
udaha8yh.jpg


And here is what's left of the loom
emyna9ed.jpg


Well it's been a rather eventful night, first job was to remove the old loom to make way for the one I've made
ny8edy7y.jpg


Once that was removed I set about building up the inlet manifold which turned out to be a right pita!!!! All the bolts supplied was too long so was a lot of fcuking about!

Tb adapter
udene8az.jpg


Tb eventually on
6yty6uza.jpg


Fixings screwed in
y5u3uzeg.jpg


Manifold fitted
adamyte5.jpg


630cc injectors fitted with fuel rail
avete5um.jpg


Oil catch can mounted
e9atutej.jpg


Called it a night at that

Uh oh
guvagure.jpg


Well it's been a Long ass day! Been at the unit since 9 this morning and just gave up for the night

First job was to mount my map sensor
pugu7yvy.jpg


Then I decided to start making up the crankcase breather system which I'm bypassing a few things it used to connect to, to ease this I decided to remove the inlet again..........1 step forwards 2 steps back

Anyway some pics of the Lower half done, will order a silicone 3 way piece where it joins to rocker cover
ude9a4um.jpg


Once that was done I thot I should pull my finger out and do the wiring loom.........the new ecu will need to be relocated inside the car for ease of hooking it up to a laptop and to keep it dry.

So I had to find somewhere I could run the wires thru the bulk head,had to remove a few items to gain access
ena5u4u8.jpg

epe9y8y2.jpg


What I was faced with in the bay
u8edy9uj.jpg

da3uhate.jpg


While I was doing the engine loom I decided to do a bit of wire tucking, nowt too special but just looks less cluttered, will get pics once its build up

Time for food, over and out

Another day of graft just doing the wiring for the ecu, got all the wires extended to the glovebox, wired in the relays for the ecu and put some of the dash back in

Some pics
umena8y4.jpg


Wire extensions
yqy4e6yp.jpg

a8u9uzeh.jpg

2upagude.jpg


Dash in
5ehaveje.jpg


Oh **** I forget to put these back in ;)
du3ynabe.jpg


Ecu relays hidden away in the wire trunking ;)
e5u9a5yp.jpg


Well went down tonight to remove the snapped brass fitting, fitted my oil filter, oil pressure sensor and oil temp sensor.
yny2ere8.jpg


Measured up for a few hoses I need to order.

Ordered a few parts today and I've ordered the wrong shiz lol

Anyway while I was down I done a few things,

Got more dash in
9e6e8ure.jpg


Then this happened......
3azy5uzy.jpg

More switches for more bitches.....coz bitches love switches
 

adzer

Active Member
Dec 16, 2009
197
0
Happy birthday to me
ezetejez.jpg


8atybeqa.jpg


It's not birthday again ;)
7upu7equ.jpg


Majority of parts here now woop woop

3emeta6y.jpg

y4e3e5e3.jpg

7ary5y5u.jpg

7ade2ybe.jpg

u7esamyz.jpg

renagu8u.jpg

9y8u5u6e.jpg

7yqu4ave.jpg

ynureqen.jpg


Starting to make some good progress at last, wiring loom under the bonnet is finally finished and I hope it's all done right :-/

Managed to get my turbo intake built up, and my Intercooler to throttle body pipe made :-D

Time for da pics bitches
8e7yqymy.jpg

mydanu4y.jpg

u6yjybat.jpg

ge3asudu.jpg

sy5asumy.jpg

2eba7u6a.jpg

4yja8uze.jpg


Well 2 nights of trying to make a downpipe out of 3" pipe and its done!

Took some pics of the clearances I had to deal with!! Also had to remove the driveshaft to get the pipe in and out

Basically what a ****

Some pics
aze2ujev.jpg

y2avajem.jpg

8eza9a4a.jpg

y6eta7es.jpg

de5aqeta.jpg

7edudusy.jpg

4y2y9e8e.jpg

yqyje6aj.jpg

8ebejy4u.jpg

eguqesu4.jpg

9e5udy9a.jpg

nanenuhy.jpg

egasu2y5.jpg


What it looks like on the car
a2e6uhy7.jpg


Tig welding for the win
naguvydu.jpg

ymehyget.jpg

aza5aga3.jpg

nu3yvane.jpg

y5y4enuj.jpg

4y2ajyna.jpg

maguvuny.jpg


Well it's been a pretty good day,

Got the downpipe completed
ja2y9evu.jpg

apatu2ep.jpg


Got all the turbo feeds and returns on :)
umuzarum.jpg

vujygage.jpg

uhu9eqas.jpg

ujydy2ej.jpg


Got vacuum hoses hooked up
yra9e8u9.jpg

pepe4evy.jpg


Catch can feed
ny7u4eba.jpg


Exhaust heat wrap arrived today
2e4e6aze.jpg

dezepaze.jpg

a5ygatyv.jpg

eteve2as.jpg


Ooooo my battery arrived too
zy5u4yvu.jpg


Lately I cba with the fcuking thing and been doing jobs have hearted as I keep getting distracted with other cars.

But tonight I got my battery relocation done finally
e4e8adyz.jpg

yhe2yqyd.jpg

eny8aha8.jpg


Been a while
uda8esaj.jpg


Well another half hearted attempt at the car tonight and got some bits done

Exhaust system is finally fully fabricated, will get it tig welded tomorrow and bring that to a wrap
9ery5eza.jpg

eve7eteb.jpg


Fuel filter
yqemy9ej.jpg

y5e9yqav.jpg


Charge pipe fabricated
a9u8y8ub.jpg


Another night of hard graft
5y3ebu9a.jpg

y7ubusut.jpg

9u6unaty.jpg

yjytyga9.jpg

pasasa4u.jpg


Some more graft
esusy9y9.jpg

ruba8esa.jpg

tavu4a8a.jpg

pahy2ete.jpg


****......
naqabe5a.jpg


y5e3e2a5.jpg


All ready for today
gysyry2y.jpg

re5yzugu.jpg


Quick pic of my adztek exhaust lol
3ysu2y6y.jpg
 

adzer

Active Member
Dec 16, 2009
197
0
mysamune.jpg

asuvugy3.jpg

apyje4ag.jpg

4yhyzu3a.jpg

yvuzugus.jpg

jyra9u7e.jpg

uhe8a9eg.jpg


All primed up
quve2e8a.jpg

7asuzavu.jpg


Well it's been a long ass 48 hours and to say I'm shattered is an understatement

So anyway 2.30am this morning the car came out of the booth
yqu6y2ud.jpg

ageva9a7.jpg


So I then had to start building it back up to get transported back to the unit
bedequte.jpg

udedy9ys.jpg


By which point it was 3.30am and Daryl came and to transport it back to unit, called it a night at that and got home at 4.30

Went down to the unit today about 11am and started to offload the car from the transporter.................this is where things got rather interesting, we pushed the car off while using the winch to stop the car from rolling away.........or at Least that was the idea!!!!! As soon as the rear wheels touched the ramp boom winch let go and we was left standing looking at my car rolling away towards the wall :'( luckily I managed to jump thru the window hazards of duke stylee and pull the handbrake......all I can say Is thank fcuk it's a gd handbrake as this is where it came to rest
hy6e3yzu.jpg


Needless to say my heart was pounding by this point. Luckily it didn't hit the wall but I have dented the door jumping in and manged to cut my eye lid somehow :-/

Anyway after my heart stopped racing I began to build the car back up
u3a8yzeb.jpg

jusepysy.jpg


Before shot of the side
eqadahy8.jpg


Then I stick the bump strips on and me and Muz vinyl wrapped the doors between the windows black
bypu3yvu.jpg


Door rubbers back on
mebaqesu.jpg


I then took a pic of the compo's on but I've miscalculated how wide they are so not sure if I can use them lol
pateqy2a.jpg


ra9y7era.jpg

4yhesu2e.jpg

u2e8abur.jpg
 

Ronin225

Active Member
Jan 17, 2008
4,652
22
Worcester
Nice build, been doing the same thing myself with 4wd conversion (albeit not much has been done since i started last year)
 

Pete.

Active Member
May 1, 2010
325
0
Aberdeen
Impressive work :clap:

you'll need to bring this along to a meet some time.
any plans to take it round knockhill?
 
SEATCUPRA.NET Forum merchandise