
I have knocked up a quick guide here, sorry for the poor pics and its basic look but should help you out should you want to remove the door trim. Before you start be aware this is quite tricky so take your time and think things through, last thing you want is a broken door glass or a locked door you cant open.
Tools required
T20 Torx driver
T30 Torx driver
Trim removal tools
Step 1.
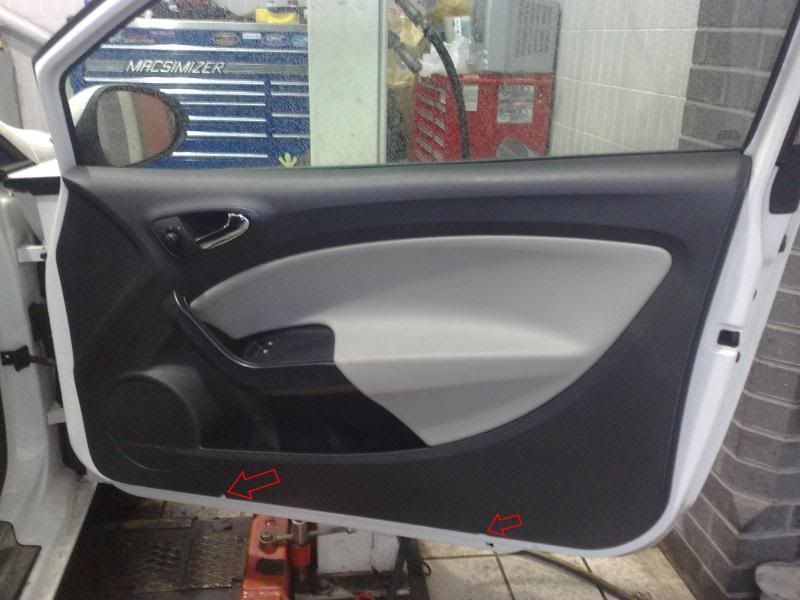
Slacken the two T30 screws at the bottom of the door card, don't remove them though, they are quite a long bolt so wind them out about 15mm or so.
Step 2.
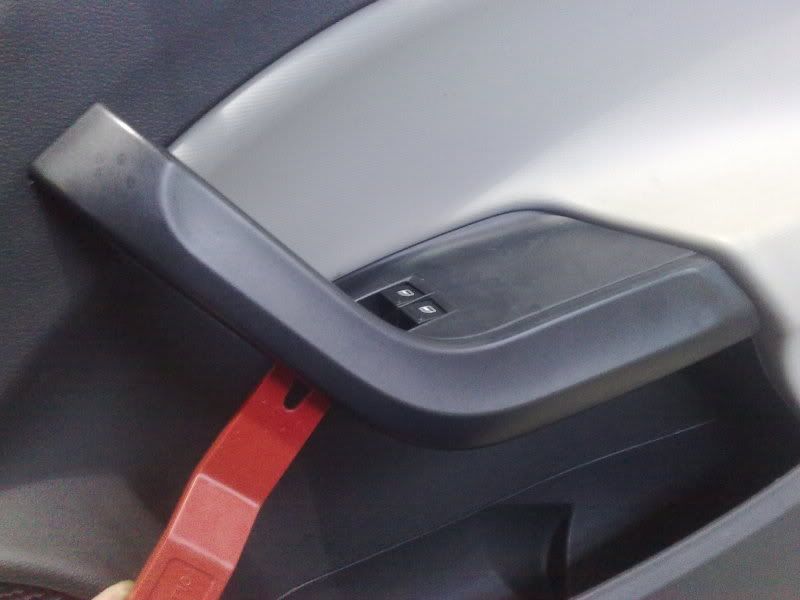
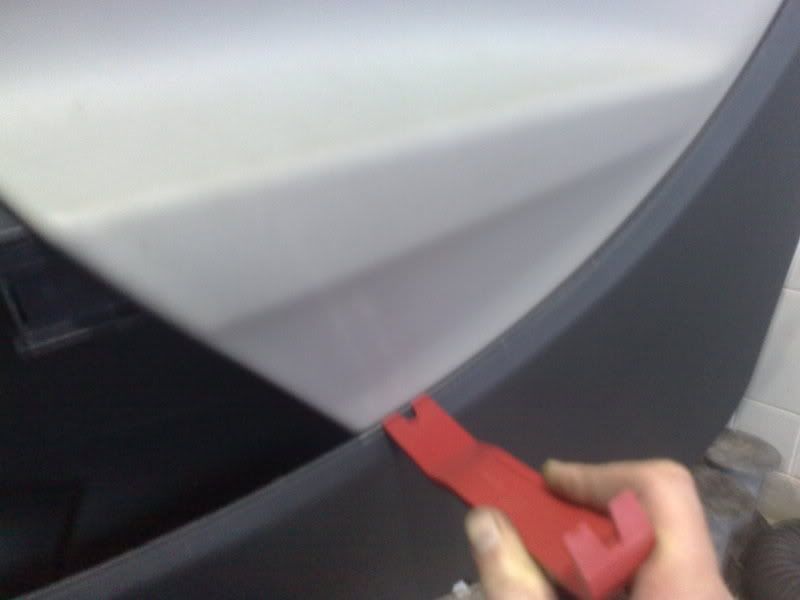
Now you have to remove the front covering to the door handle, using a plastic trim tool lever out from underneath.
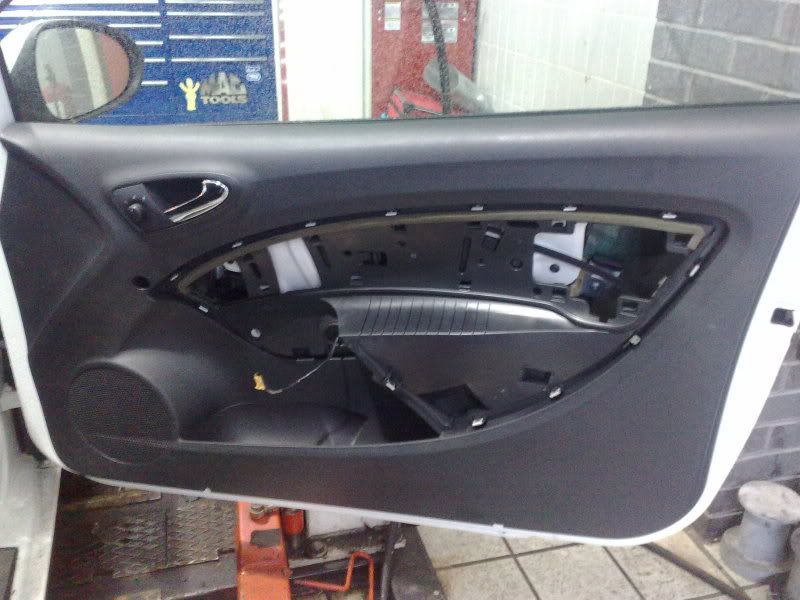
Step 3.
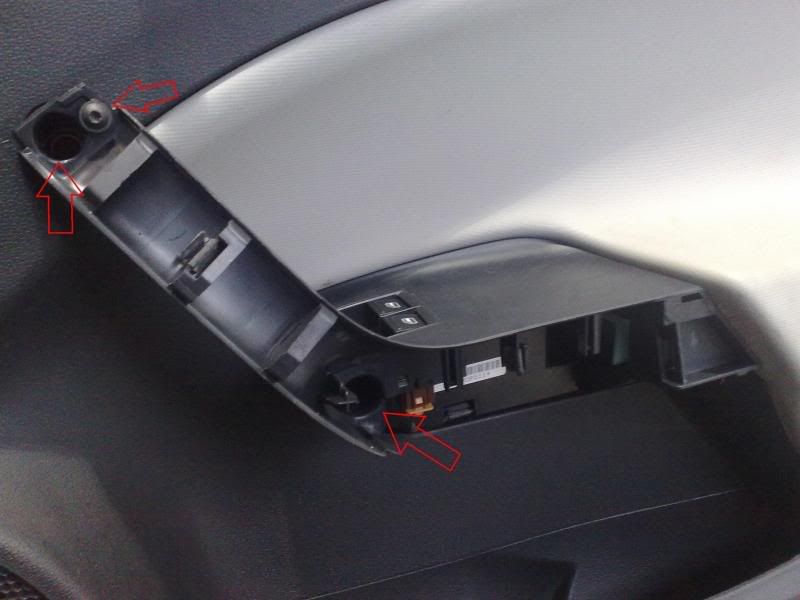
With that out of the way you can get to the two main T30 Torx screws that screw through the door trim into the door itself and the smaller T20 screw that holds the handle to the door trim.
Step 4.
With them out you can now take out the centre trim section, start at the bottom and work around and remove the trim, dont unplug the window switch just yet.
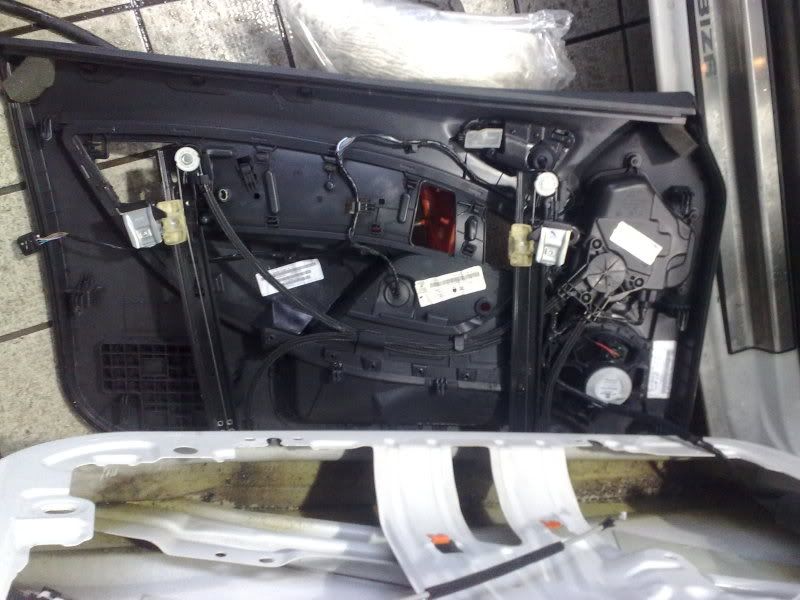
Step 5.
Now the centre trim section is removed you can now see the innards of the door, before we can take this off we need to undo the window glass. Slacken off the two silver T30 screws on the clamps on the glass and slide the window up, secure or remove the glass.
Step 6.
At the back of the door trim there is a plastic bracket that joins the lock unit to the trim, do yourself a favour and cut it off, its only there for assembley and means you don't have to remove all the door handle etc. Also unplug the door catch while your here.
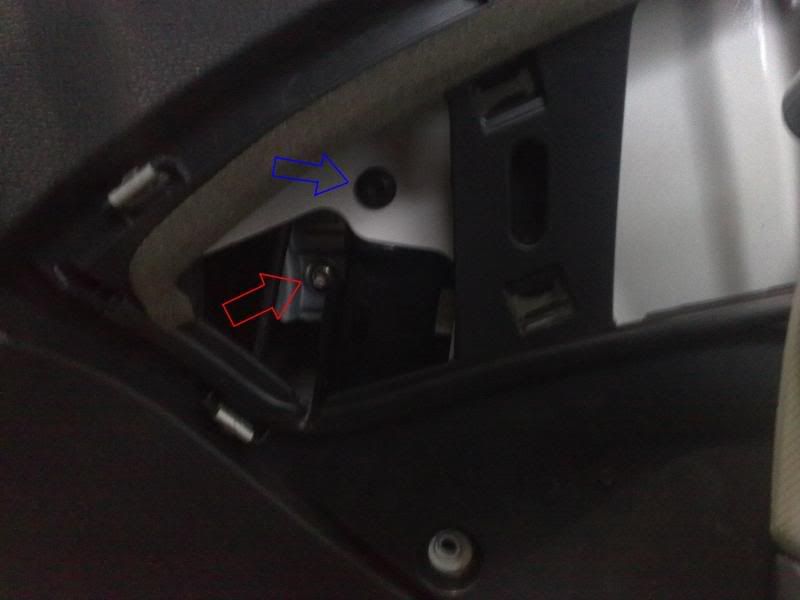
Step 7.
The top of the window regulator needs to be undone now, again two short T30 screws
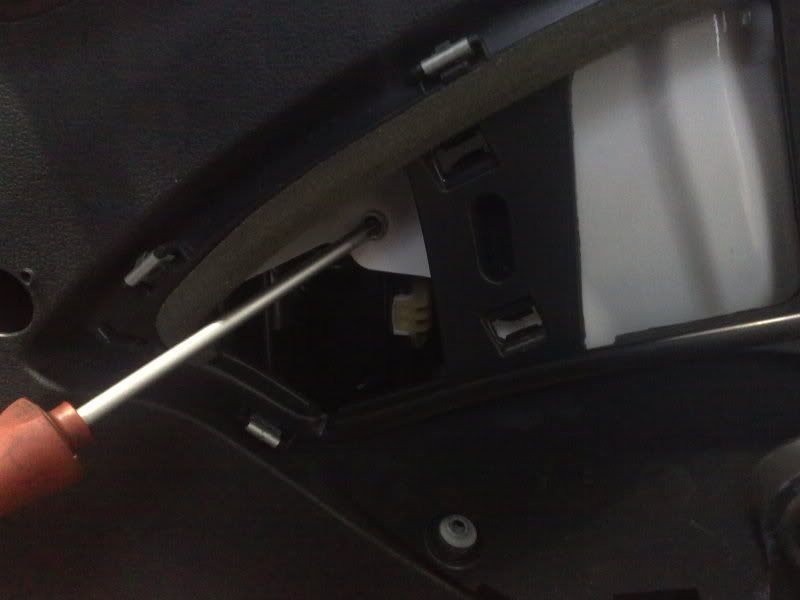
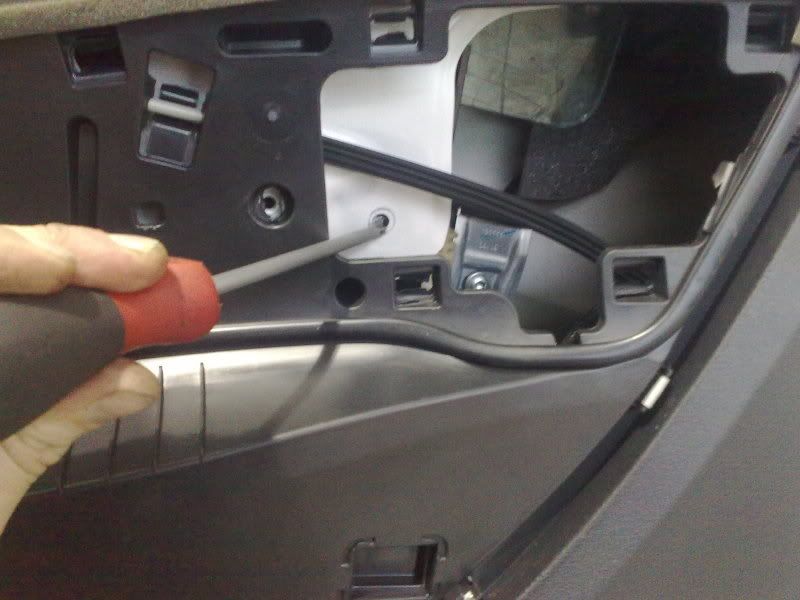
There is also a black T30 screw just to the left of back regulator screw, its removed in the second picture, pop that out. The front counterpart to that one was in the door handle so already out.
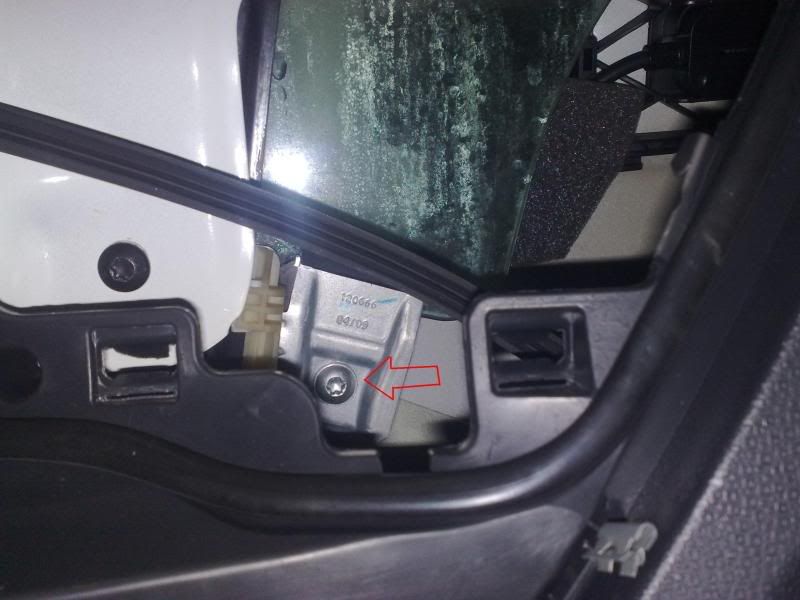
Step 8.
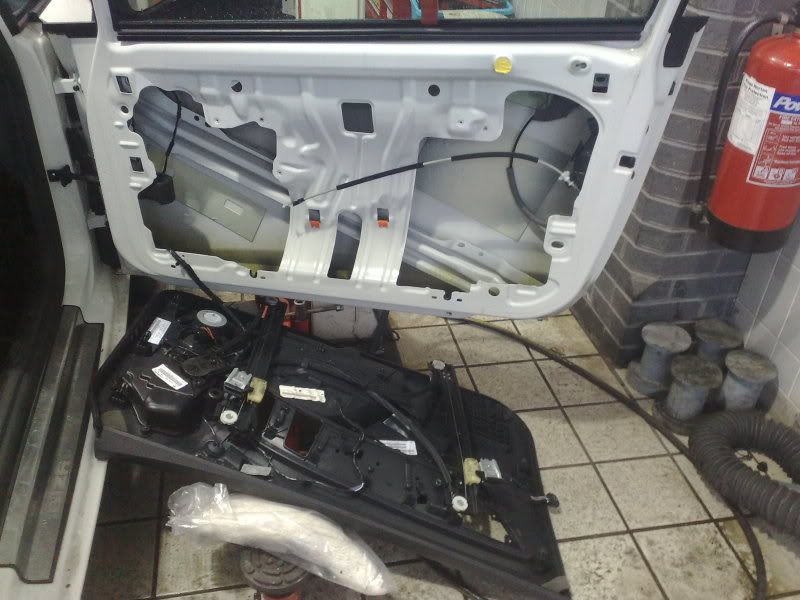
Now the door trim is ready for removal, the whole lot lifts upwards, get it as far as you can and then pull the bottom outwards to clear the power part of the regulator runners and slide downwards. You will have to disconnect the interior handle cable.
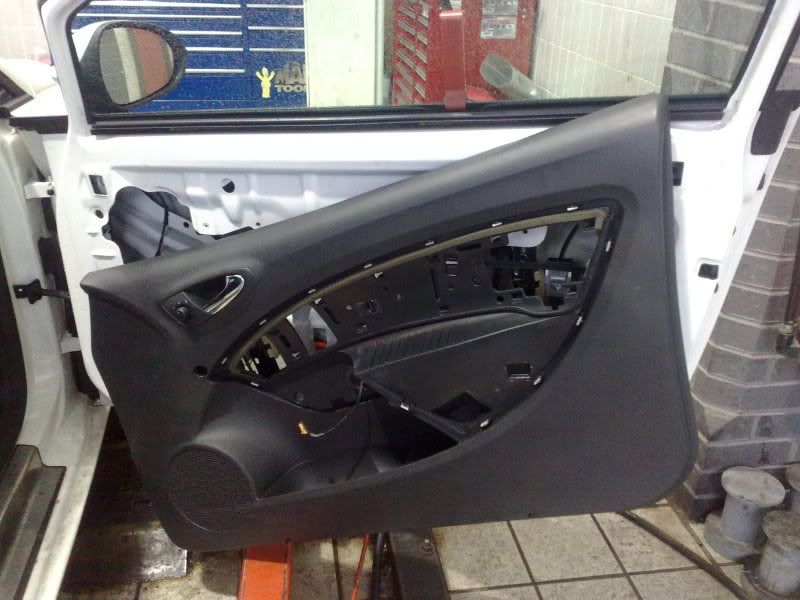
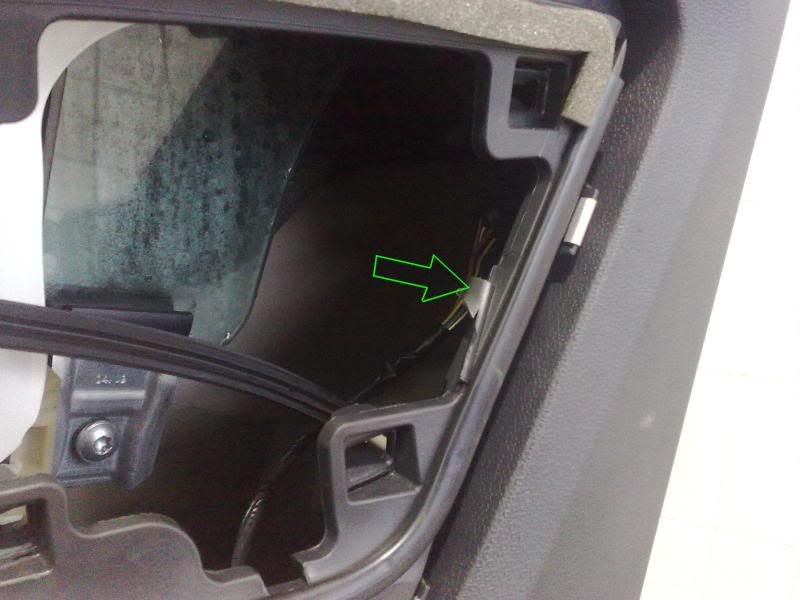
Now unless you disconnect all the wiring from the door card just find something soft to support the door card on and lay it down.

To refit its the reverse basically just be carefull that everything is in place before sliding the door trim down. If the top rubber seal stays on the car fit it to the door trim, makes it easier. Dont drop the regulator screws into the door, and remember to connect the catch back up. Also make sure the cable for the interior handle is routed the right side of the regulator and also the regulator goes the correct side of the drop glass.
Thats about it really, take your time and you should be fine. However this is just a guide, so if you attempt it its on your back. I also not gurantee everything above is correct or as SEAT would want you to do.
Tools required
T20 Torx driver
T30 Torx driver
Trim removal tools
Step 1.
Slacken the two T30 screws at the bottom of the door card, don't remove them though, they are quite a long bolt so wind them out about 15mm or so.
Step 2.
Now you have to remove the front covering to the door handle, using a plastic trim tool lever out from underneath.
Step 3.
With that out of the way you can get to the two main T30 Torx screws that screw through the door trim into the door itself and the smaller T20 screw that holds the handle to the door trim.
Step 4.
With them out you can now take out the centre trim section, start at the bottom and work around and remove the trim, dont unplug the window switch just yet.
Step 5.
Now the centre trim section is removed you can now see the innards of the door, before we can take this off we need to undo the window glass. Slacken off the two silver T30 screws on the clamps on the glass and slide the window up, secure or remove the glass.
Step 6.
At the back of the door trim there is a plastic bracket that joins the lock unit to the trim, do yourself a favour and cut it off, its only there for assembley and means you don't have to remove all the door handle etc. Also unplug the door catch while your here.
Step 7.
The top of the window regulator needs to be undone now, again two short T30 screws
There is also a black T30 screw just to the left of back regulator screw, its removed in the second picture, pop that out. The front counterpart to that one was in the door handle so already out.
Step 8.
Now the door trim is ready for removal, the whole lot lifts upwards, get it as far as you can and then pull the bottom outwards to clear the power part of the regulator runners and slide downwards. You will have to disconnect the interior handle cable.
Now unless you disconnect all the wiring from the door card just find something soft to support the door card on and lay it down.
To refit its the reverse basically just be carefull that everything is in place before sliding the door trim down. If the top rubber seal stays on the car fit it to the door trim, makes it easier. Dont drop the regulator screws into the door, and remember to connect the catch back up. Also make sure the cable for the interior handle is routed the right side of the regulator and also the regulator goes the correct side of the drop glass.
Thats about it really, take your time and you should be fine. However this is just a guide, so if you attempt it its on your back. I also not gurantee everything above is correct or as SEAT would want you to do.

