
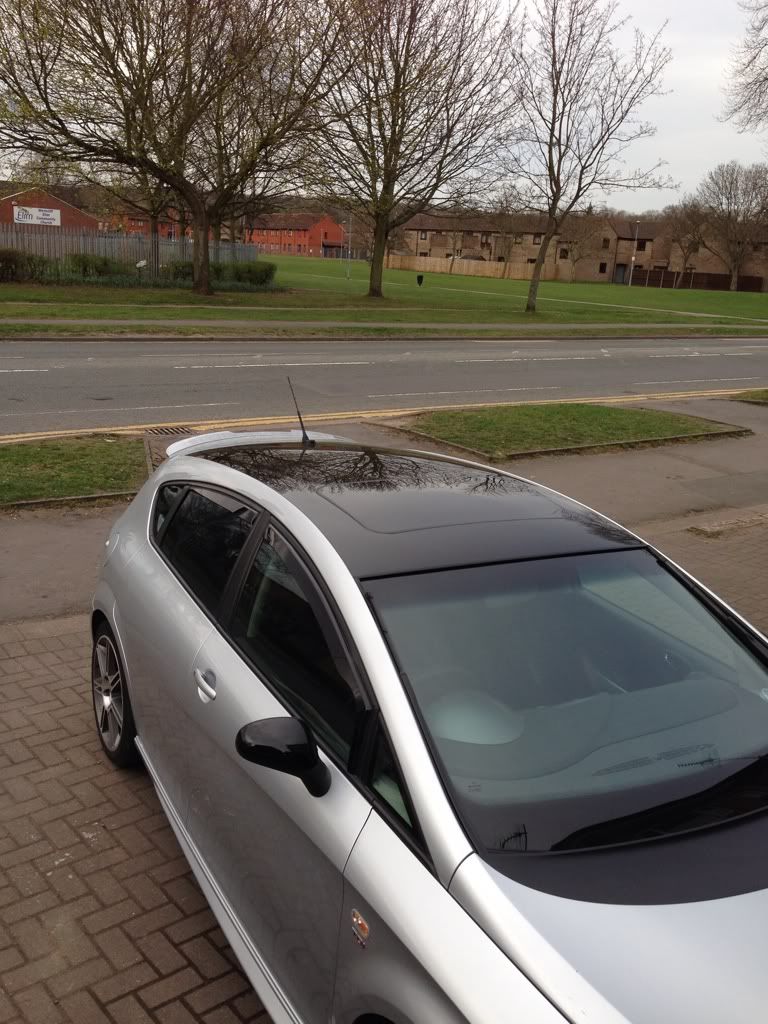
My new ride the day I bought it
- Thread starter p11lkw
- Start date
You are using an out of date browser. It may not display this or other websites correctly.
You should upgrade or use an alternative browser.
You should upgrade or use an alternative browser.
")
How I installed a start button
How I fitted an s2000 start button.
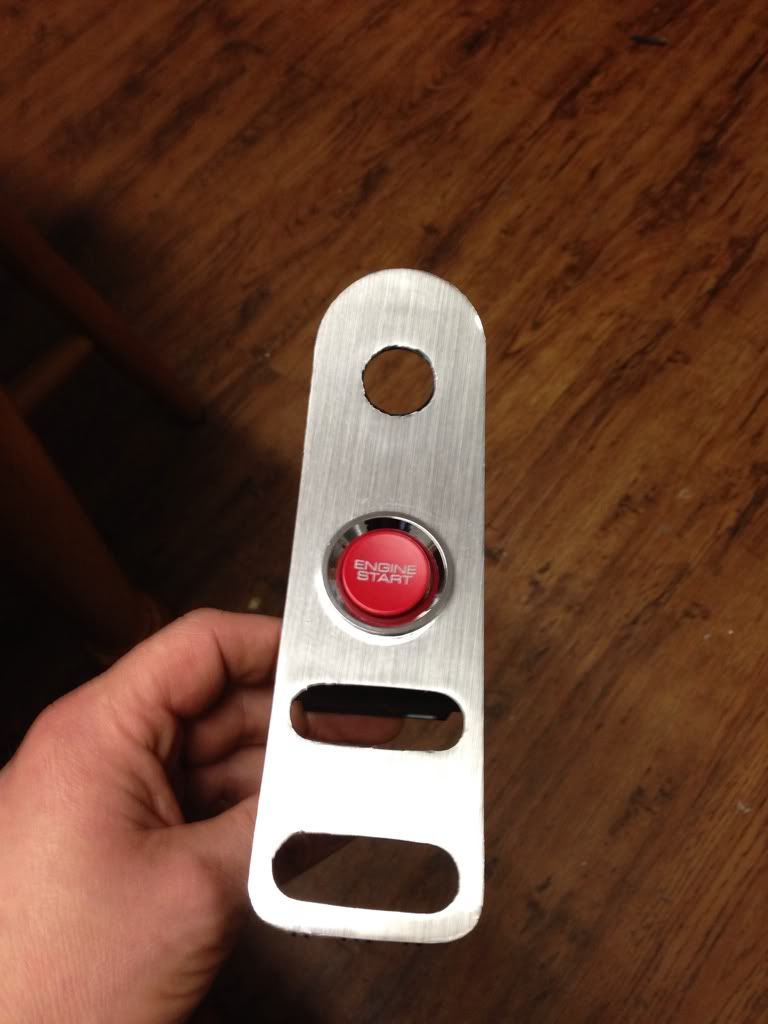
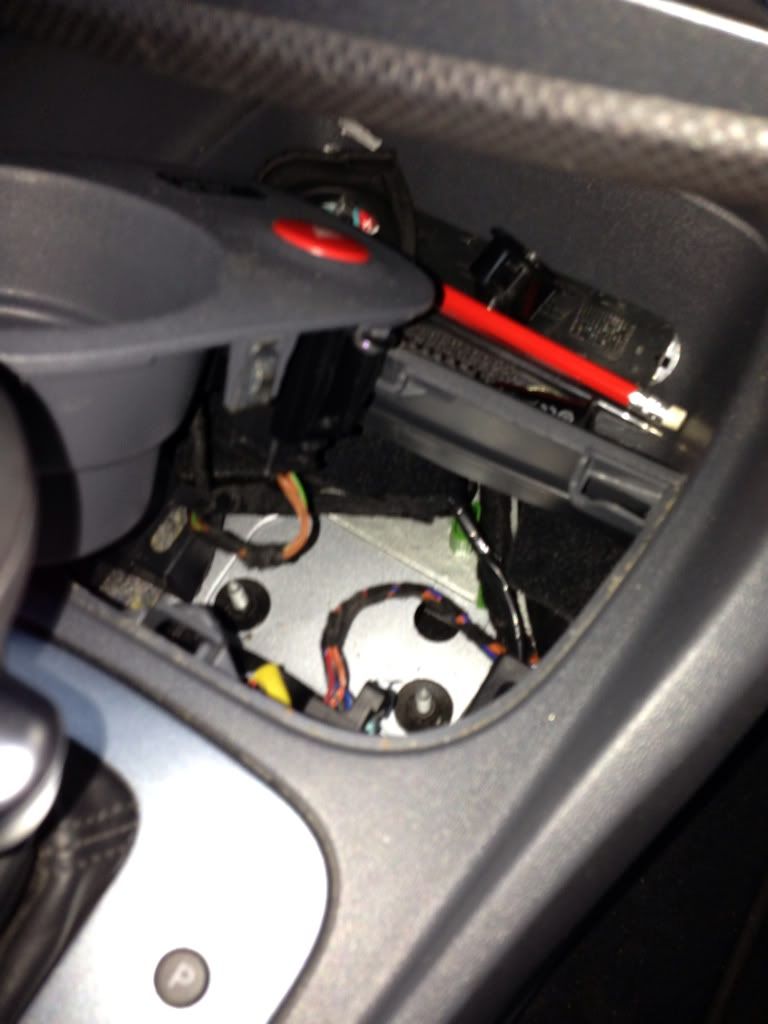
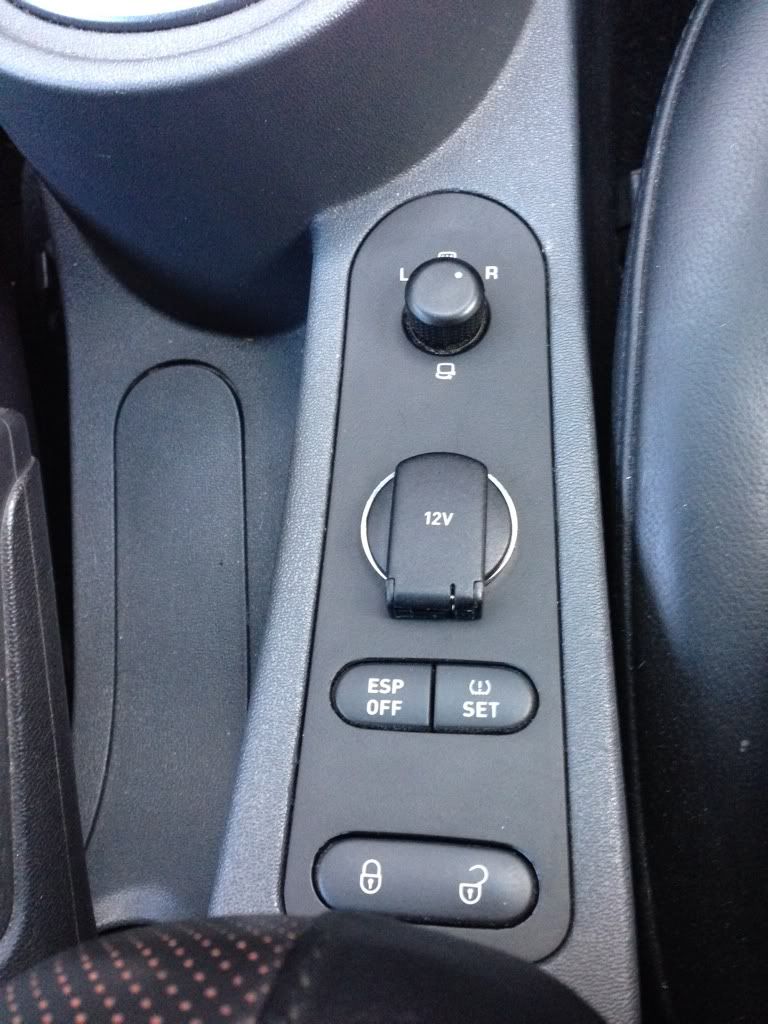
The hardest part for me was deciding where to actually fit the start button, eventually I decided to replace my 12v power socket.
Tools required:
Plastic trim tool, wire cutters and strippers, multimeter or test probe, soldering iron, torx drive, electricians tape or loom tape, 2m twin core 5-6 amp (what I used ) , wiring connectors, file, knife and cable ties.
Firstly using a plastic trim tool on the front edge of the 12v socket/switch panel insert trim tool and then slide round one side about 2-3 inch then prise up repeat on opposite side releasing clips. Should now pull out moving forwards and up.
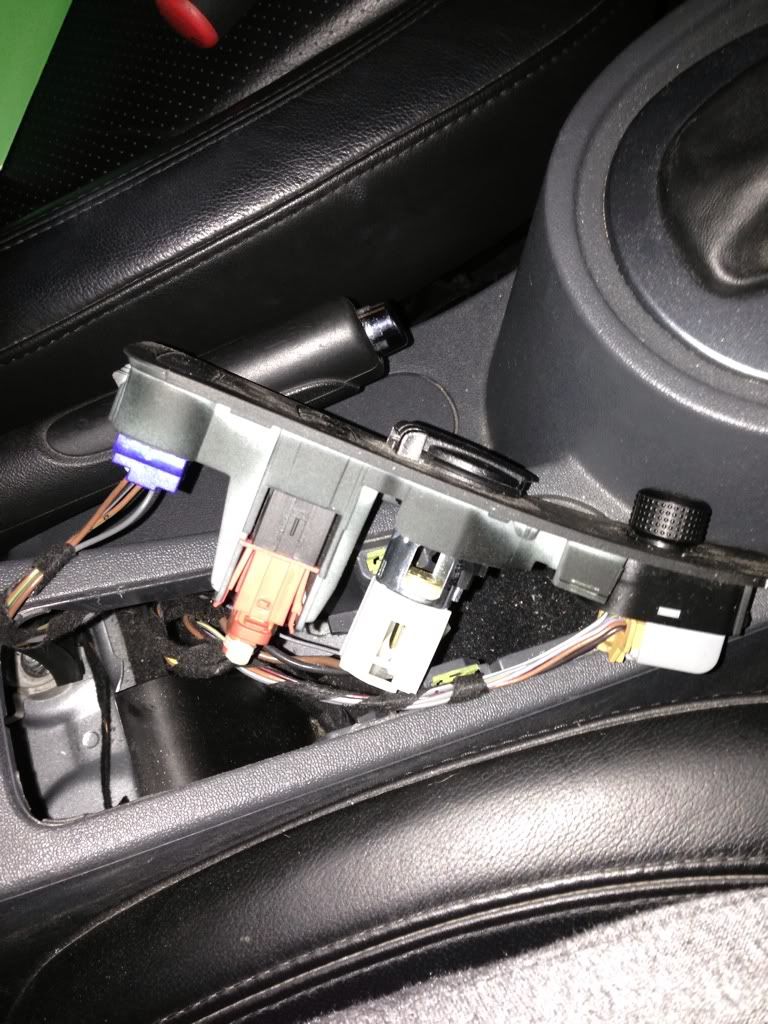
Remove all switches to make it easier to fit the start button.
Like this
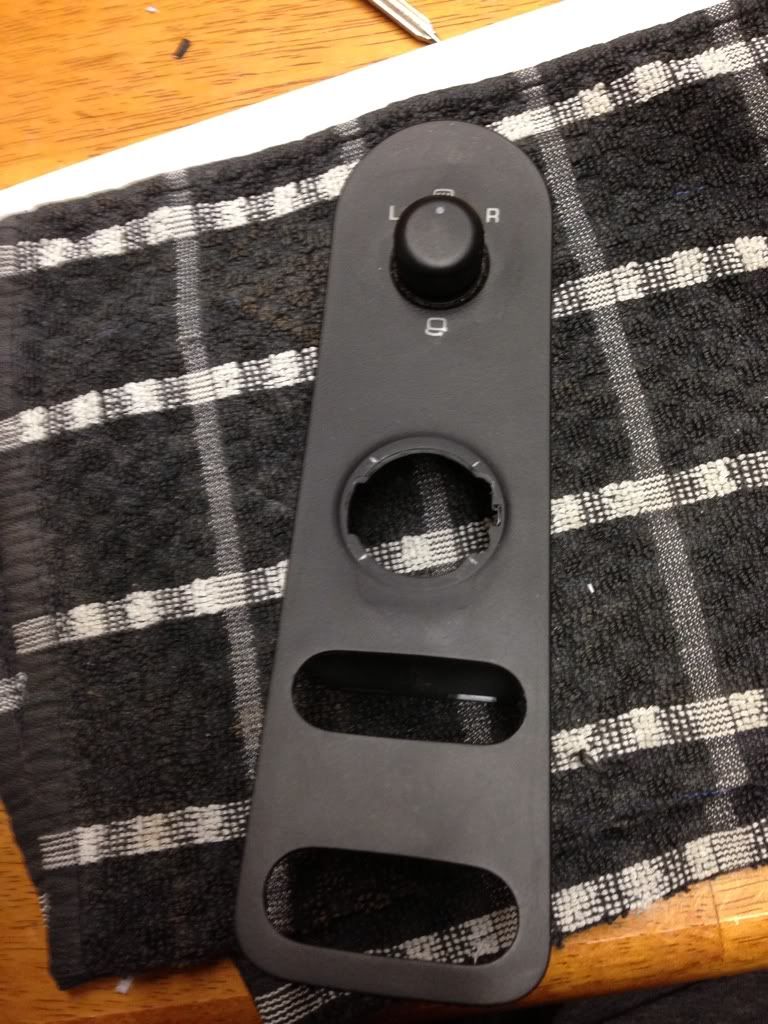
So I used a small file to trim the hole so the start button was a nice tight fit. Not much filing was required to be honest. Once start button is fitted you could wrapp it if you wish as I did then decided I didn't like it. I used the 12v socket lid to cover the start button as I wanted it to be hidden.

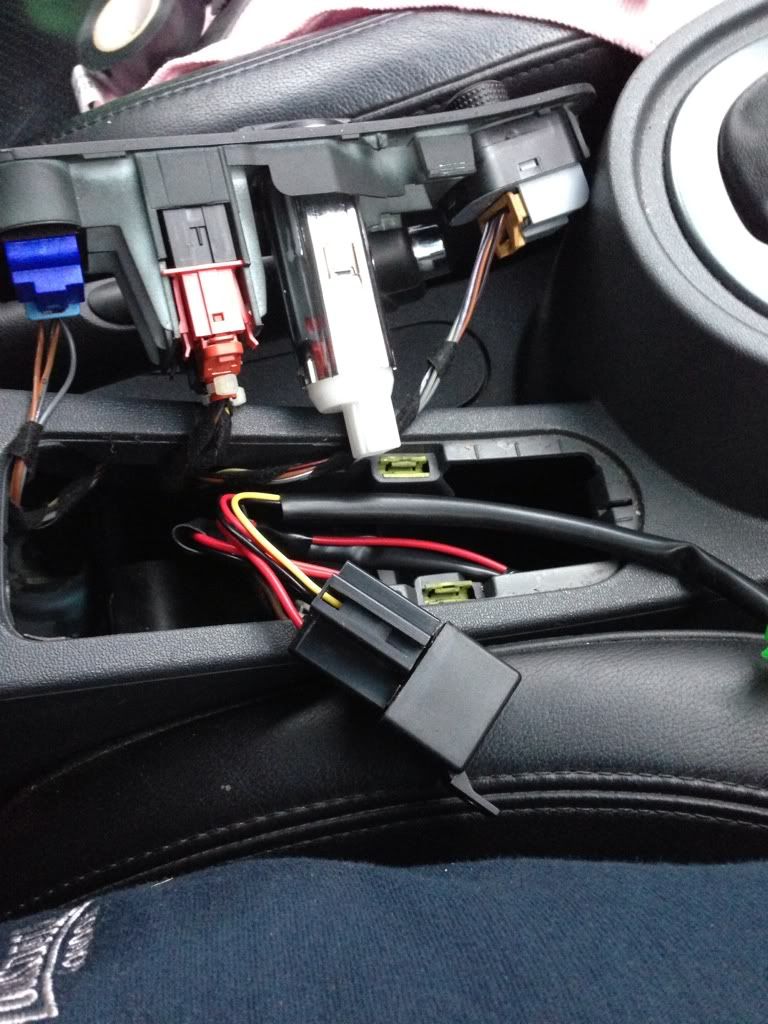
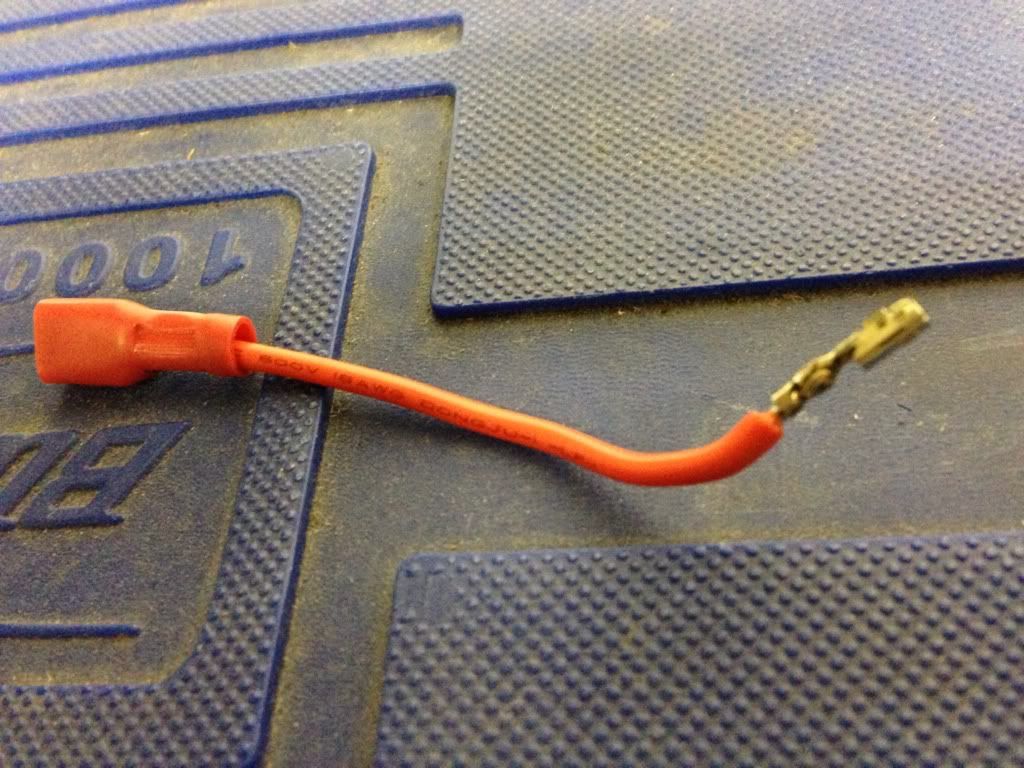
So switch is fitted now the wiring. Only 3 wires to connect and they are marked (s2000 button) black wire to an earth point extend wire if you have to which I did. Using the twin core wire I connected the red wire to the red starter wire on the start button, the black twin core wire connect to the other red wire which is for ignition power/on. Now run the twin core and earth wire (only if extending) to the ignition barrel.
Cup holder removed for ease of running wires, put hand in cup holder grip tight and pull upwards or use trim tool.
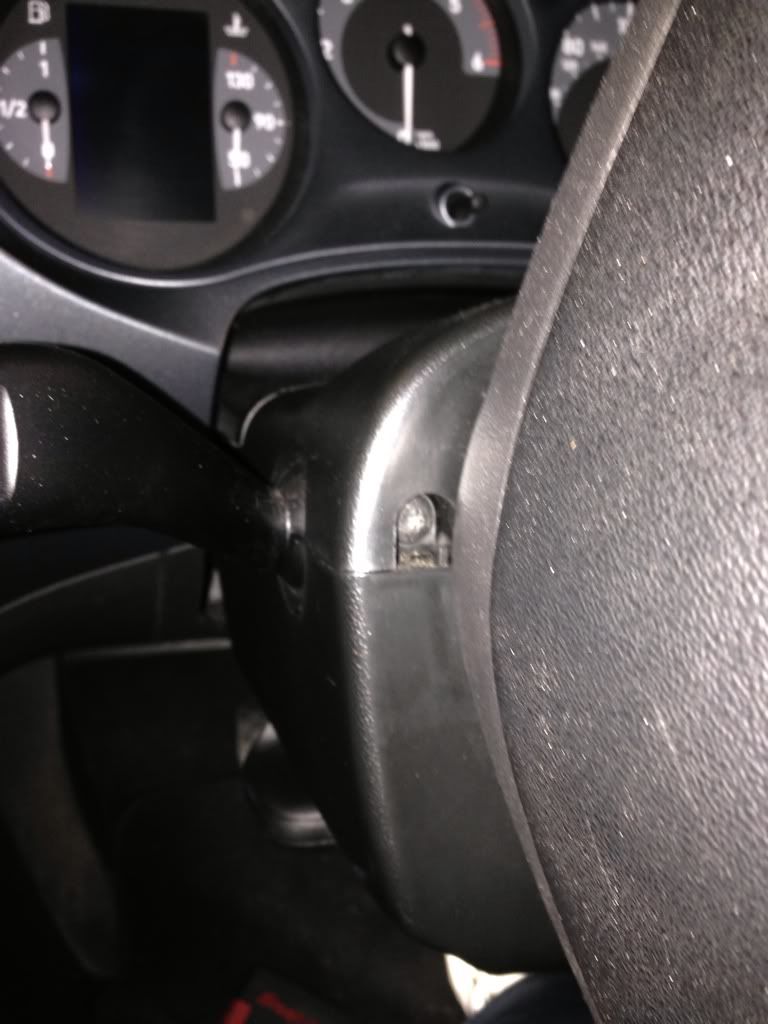
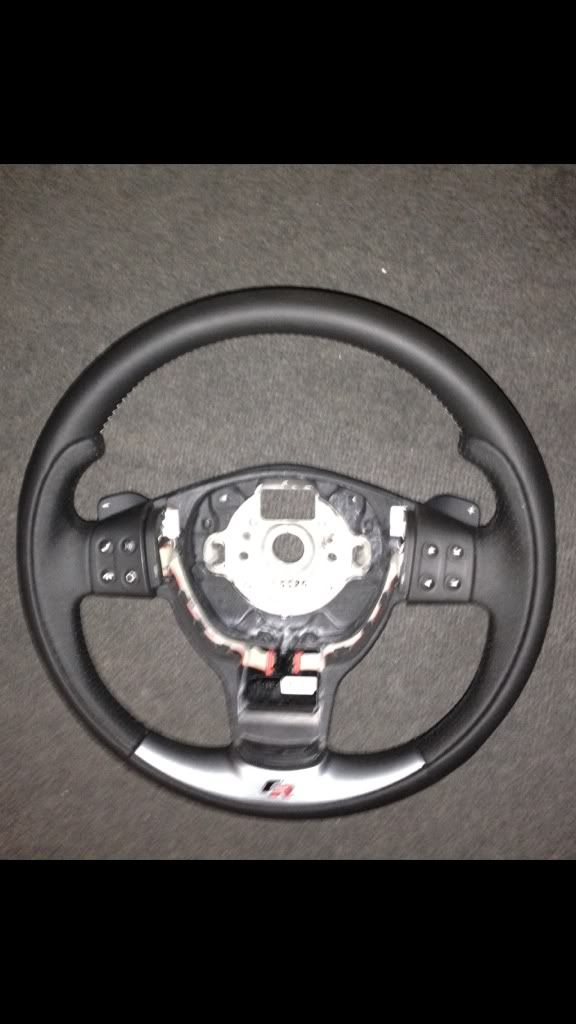
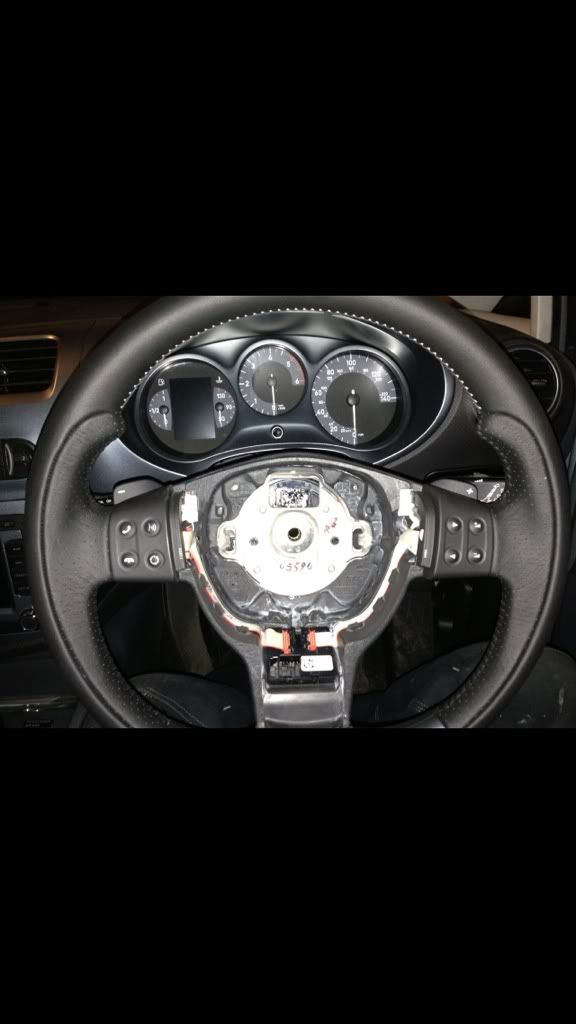
Ignition/steering wheel cowling remove. 3 torx screws :- 1 underneath and two near the steering wheel, 1 of these is a little awkward and requires a firm hard.
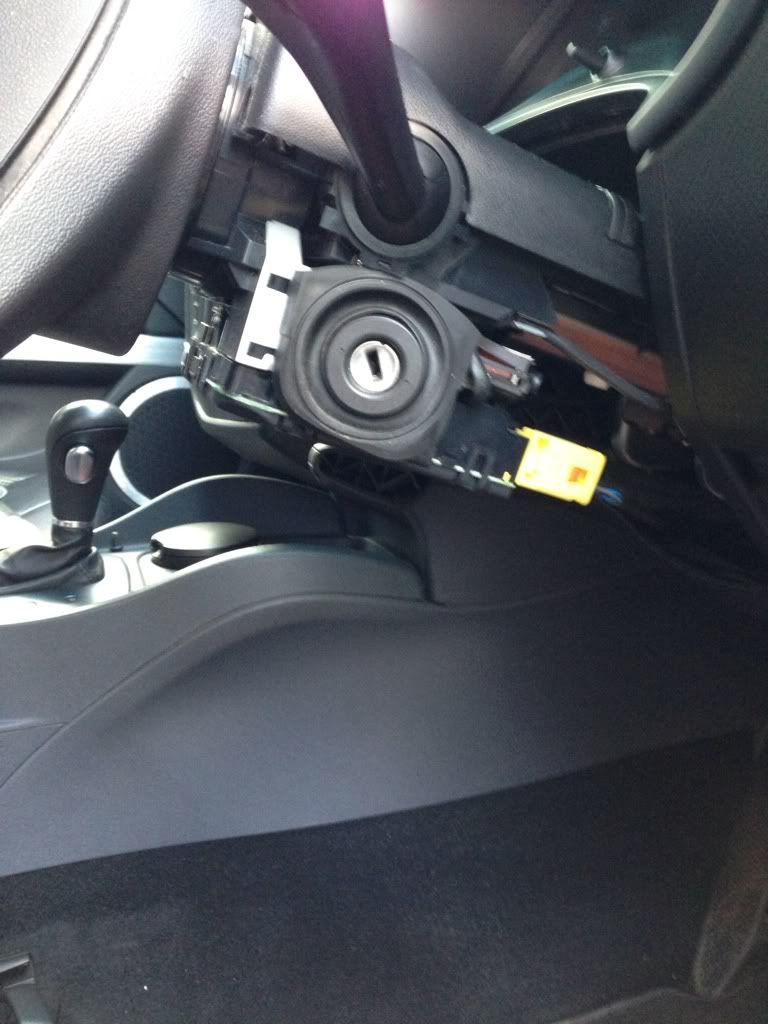
Ignition barrel with the 6pin wire plug, you can see the yellow and blue wires remove plug making sure ignition is off (disconnect battery if you want)
There is not much wire to play with and it's awkward but possible. There are only 4 wires in total (6 pin plug) the wire I used are pin 1 - red (starter wire) pin 6- yellow (ignition wire)
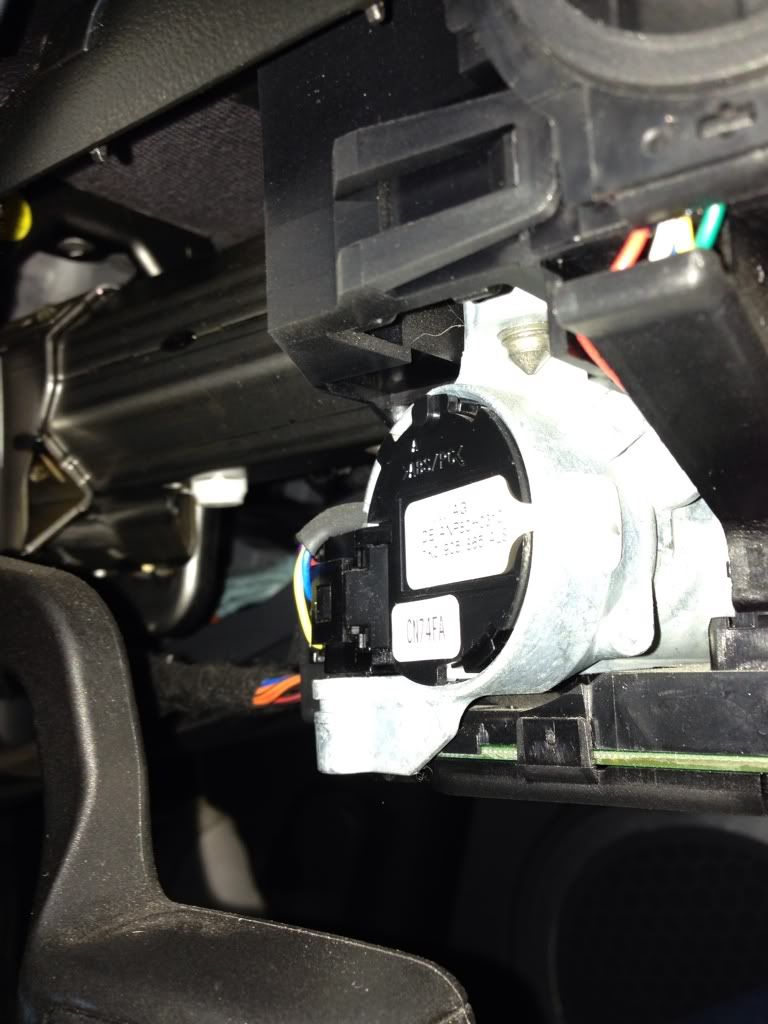
Trim back the black sheath to expose more of the wires being careful not to pull on them too much. Now using the twin core connect the red wire to pin 1 red and the black to pin 6 yellow. To do so trim wires to expose the wire and solder both wires and tape once finished to avoid any shorts. Wiring like this will mean you can use either the key or the start button to start, if you want it so the key doesn't work then cut the red wire (before you solder it) and connect the red twin core wire to the red ignition wire which is running away from the ignition barrel (6 pin plug). I chose to remove the pin 1 red wire from the plug so I could solder another wire to it and refit, this was just incase the button ever failed to work I could connect the red wires back together so the key would be fully functional again.
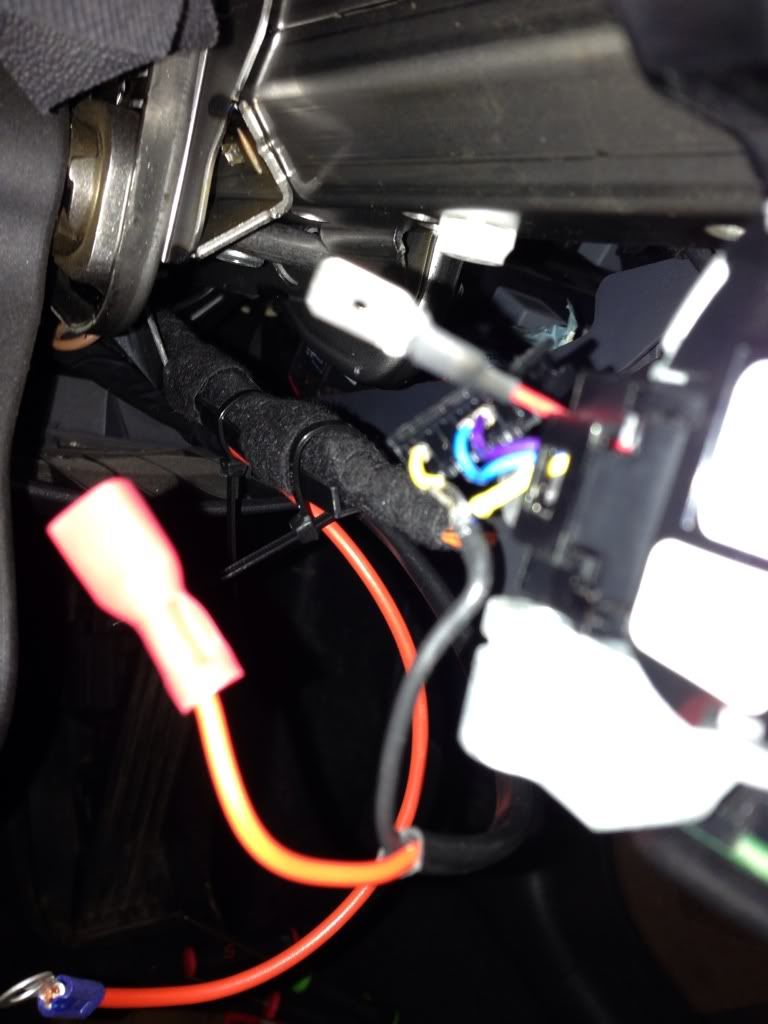
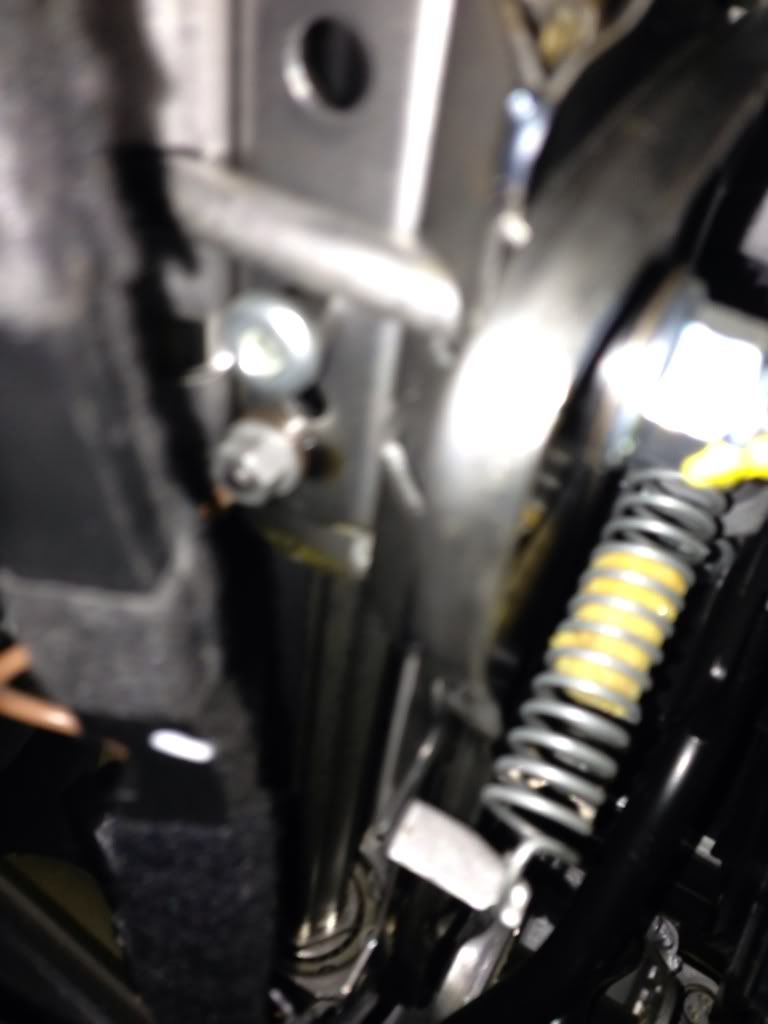
Just the earth to connect, crimp a ring terminal onto your earth wire. Under the collum there is an earth wire there undo the 8mm nut and add you wire and replace the 8mm nut.
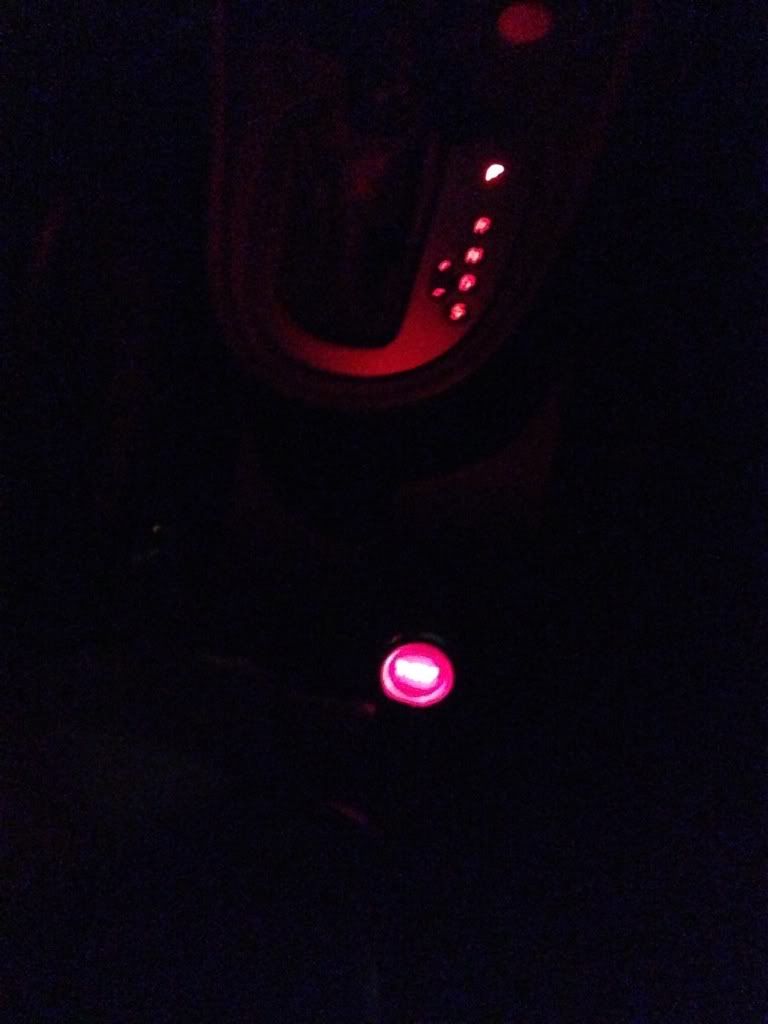
Once all connection are good and taped before you put everything back together it's time to test. Turn ignition on and try to start using the start button. Once engine starts by pressing the button I then pressed the button again to make sure that it didn't engage the starter again which it didn't as the start button comes with a relay. Also my start button has a light built in.
If you're sure everything is working, taped up and cable tied then you can refit all panels, trims that had been removed.
Finished, I hope I've covered everything for you people who are interested if your unsure about anything I will try and help.
Just one more thing I no some others have done this and they removed the electronics from under the steering wheel. I chose not to do this as I don't have vagcom (yet) incase any faults or lights came on the dash i.e airbag etc. the way I did mine no faults or lights came on the dash.
How I fitted an s2000 start button.
The hardest part for me was deciding where to actually fit the start button, eventually I decided to replace my 12v power socket.
Tools required:
Plastic trim tool, wire cutters and strippers, multimeter or test probe, soldering iron, torx drive, electricians tape or loom tape, 2m twin core 5-6 amp (what I used ) , wiring connectors, file, knife and cable ties.
Firstly using a plastic trim tool on the front edge of the 12v socket/switch panel insert trim tool and then slide round one side about 2-3 inch then prise up repeat on opposite side releasing clips. Should now pull out moving forwards and up.
Remove all switches to make it easier to fit the start button.
Like this
So I used a small file to trim the hole so the start button was a nice tight fit. Not much filing was required to be honest. Once start button is fitted you could wrapp it if you wish as I did then decided I didn't like it. I used the 12v socket lid to cover the start button as I wanted it to be hidden.
So switch is fitted now the wiring. Only 3 wires to connect and they are marked (s2000 button) black wire to an earth point extend wire if you have to which I did. Using the twin core wire I connected the red wire to the red starter wire on the start button, the black twin core wire connect to the other red wire which is for ignition power/on. Now run the twin core and earth wire (only if extending) to the ignition barrel.
Cup holder removed for ease of running wires, put hand in cup holder grip tight and pull upwards or use trim tool.
Ignition/steering wheel cowling remove. 3 torx screws :- 1 underneath and two near the steering wheel, 1 of these is a little awkward and requires a firm hard.
Ignition barrel with the 6pin wire plug, you can see the yellow and blue wires remove plug making sure ignition is off (disconnect battery if you want)
There is not much wire to play with and it's awkward but possible. There are only 4 wires in total (6 pin plug) the wire I used are pin 1 - red (starter wire) pin 6- yellow (ignition wire)
Trim back the black sheath to expose more of the wires being careful not to pull on them too much. Now using the twin core connect the red wire to pin 1 red and the black to pin 6 yellow. To do so trim wires to expose the wire and solder both wires and tape once finished to avoid any shorts. Wiring like this will mean you can use either the key or the start button to start, if you want it so the key doesn't work then cut the red wire (before you solder it) and connect the red twin core wire to the red ignition wire which is running away from the ignition barrel (6 pin plug). I chose to remove the pin 1 red wire from the plug so I could solder another wire to it and refit, this was just incase the button ever failed to work I could connect the red wires back together so the key would be fully functional again.
Just the earth to connect, crimp a ring terminal onto your earth wire. Under the collum there is an earth wire there undo the 8mm nut and add you wire and replace the 8mm nut.
Once all connection are good and taped before you put everything back together it's time to test. Turn ignition on and try to start using the start button. Once engine starts by pressing the button I then pressed the button again to make sure that it didn't engage the starter again which it didn't as the start button comes with a relay. Also my start button has a light built in.
If you're sure everything is working, taped up and cable tied then you can refit all panels, trims that had been removed.
Finished, I hope I've covered everything for you people who are interested if your unsure about anything I will try and help.
Just one more thing I no some others have done this and they removed the electronics from under the steering wheel. I chose not to do this as I don't have vagcom (yet) incase any faults or lights came on the dash i.e airbag etc. the way I did mine no faults or lights came on the dash.
Will definetly be interested in the guide mate. Have you thought of where to relocate the 12v
Sent from my LG-P920 using Tapatalk 2
I've not got round to relocating the 12v yet but I've decided to relocate it just behind the arm rest which will be accessible front the front and will benefit the kids in the rear as well.
That's what i was thinking. Great guide mate I'm sure it will be used by a lot of people.
Sent from my LG-P920 using Tapatalk 2
Thanks, you fitting one to yours ?
Ill buy the button but ill probly get a auto electrition ti fit it lol.
Sent from my LG-P920 using Tapatalk 2
Sent from my LG-P920 using Tapatalk 2
I bought alloy bends some straight alloy tube and silicone hoses from a company in Wakefield. I then cut the pipes to fit how I wanted them fit and then my good brother alloy welded them for me. The maf sensor boss I originally made one then had a fabrication company make a better one. Cost wise it wasn't really much cheaper than buying one just different. It goes all the way to the turbo.

Similar threads
