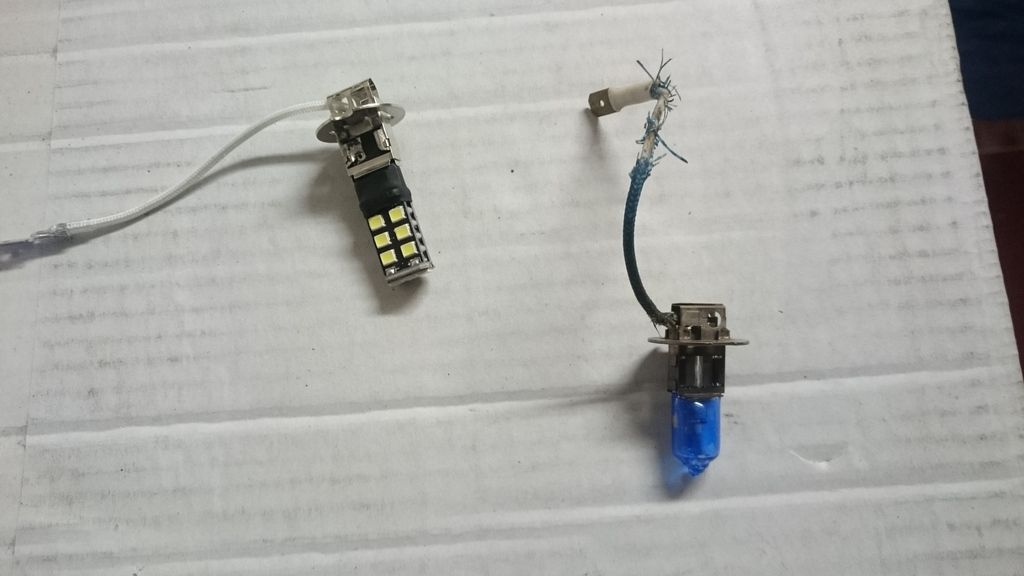
Ordered some H3 LED bulbs from china
They arrived in the last two weeks


I decided to fit them on tuesday

Needed to cut part of the fog insert in order to make the LED bulbs fit as they were longer than the halogen ones


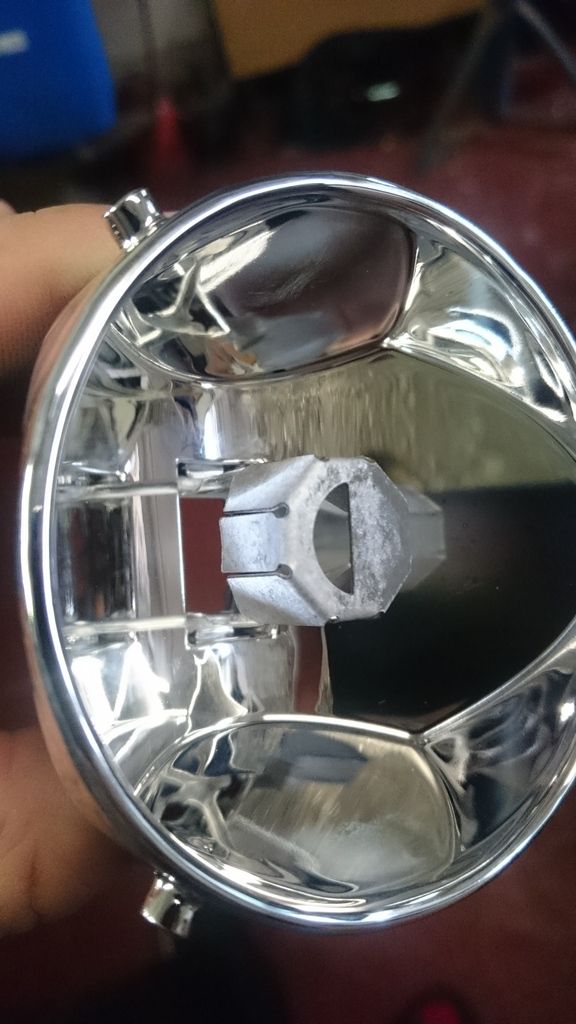
Other than the small cut, no issues fitting and setting up.
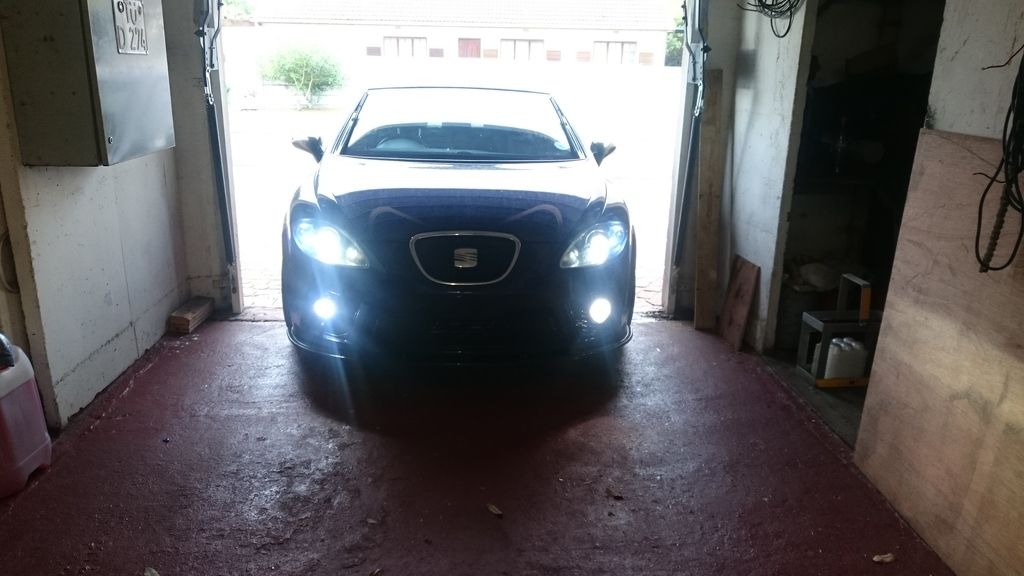
Here's the look when done


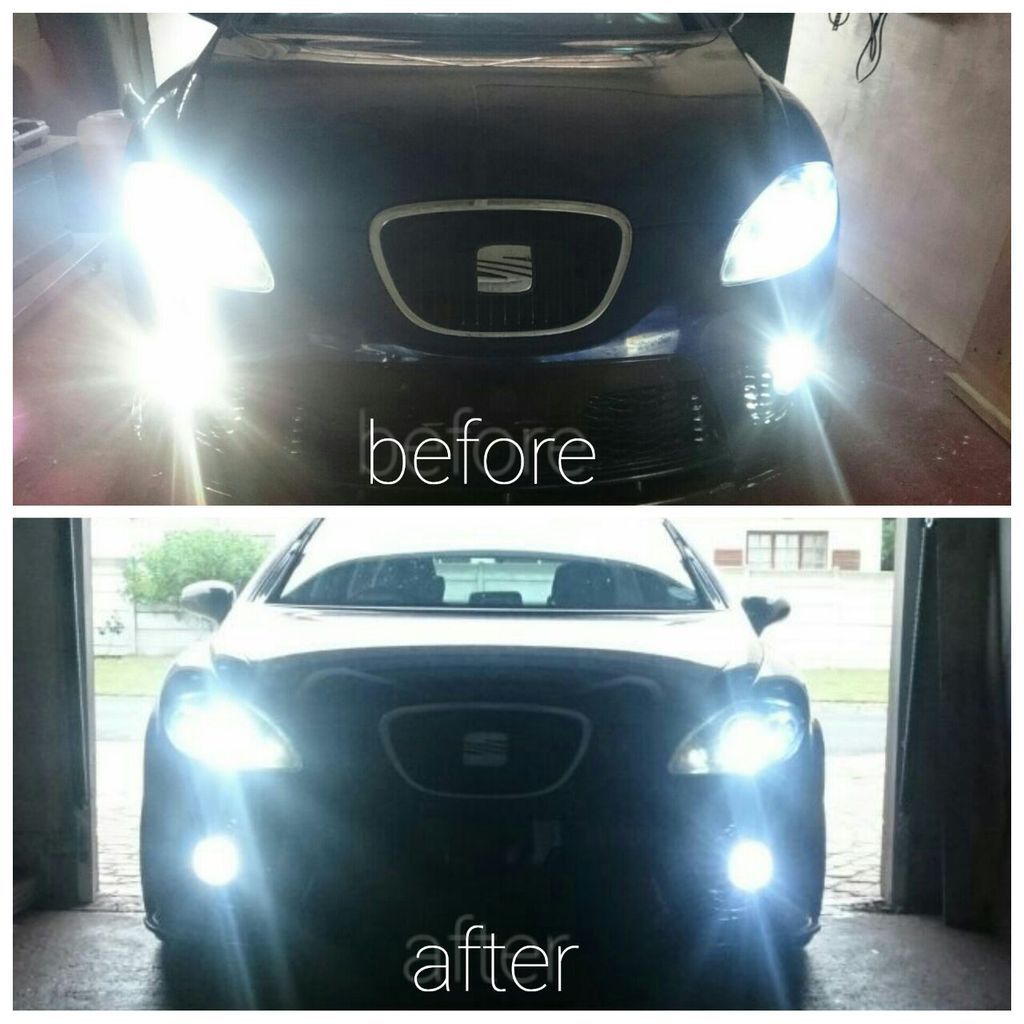
And a comparison view


They were ordered as CANBUS LED bulbs, when fitted no errors came up and working hundred percent.
Drove to the shop an hour later, threw up errors for both, however still working. After about 5 minutes they start to flicker and strobe.

Going to remove them and replace with something else, considering diamond vision bulbs or something.
 
Next install was some braided brake hoses.

Ordered some the hoses with transparent red covers, from Hel Performance.


Had them fitted with Motul RBF660 brake fluid.


Excuse all the dirt in that area.
Braking feels good, and very happy.
 
So as previously posted, I put in LED fogs, that I wasnt entirely happy with.
I decided that I wanted projector fogs to match the xenon projector headlight.
If anyone has searched, you will have found that they dont make projector fogs for the polo 9n (same fog as Leon). After some more digging, I managed to find a projector fog for a golf 5. I decided to test with it.

Stripped it down, and pulled out the projector bits. Then I stripped down my fog, and pulled out its guts. I then put them in a top secret laboratory to have relations. The baby was a projector fog for the Leon.

I added in philips diamondvision bulbs to finish them off.
Excuse the bad pics, car is dirty, and lenses on fog are a bit sandblasted from time.


I started out, always with some big plans, just taking my time getting there.

The shopping list:

1x set Alpine SPR60 CoAxial
2x set Alpine SPR60C splits
1x Alpine MRX-F65 4ch Amp
2x Alpine SWR-12D2 Subs
2x Alpine MRX-M110 Mono Amps
1x Stinger OFC 0G install Kit
1x PAC-200 Battery Isolator
1x AudioControl EQS
And a whole load of sound deadening


Alot of these parts were not easy to come by, and I ended up doing alot of my own importing.

I then started off by fitting the Splits (1set front, 1 set back), the 4ch (hideaway in passenger footwell), the EQS, the wiring kit, laying the wiring for later stages when did subs, as well as sound deadening in the doors.

Splits


4ch peeking out


The wiring kit


The EQS, still some of the yellow paintwork peeking out there as this was before the respray.


I then let demons rest for a while, and my battery decided to die. So, I decided that I would do a battery upgrade with the future plans in mind. Fitted a Stinger SPV70 battery, along with Lightning Audio gold plated dual battery terminals.


Next up on the list was to complete the sound deadening, so this was done from the firewall right through to the boot, basically just the roof is not done.
Not so great for weight saving, but awesome for reducing vibrations, as well as unwanted road noise.
I also did a big 3 electrical upgrade. This involves replacing the battery ground to chassis wire, the chassis to engine block wire, and the alternator plus to battery plus wire. This was all done with 0G cabling.

And once again, demons were left to rest.
During this, demons came to haunt, and lovely people who believe they can take things which dont belong to them, decided to reposess one sub and one monoblock.


The monoblock was discontinued, so I replaced with an Alpine MRX-M240 monoblock, which is more than capable of driving both subs. The second sub has landed in SA, just waiting on its arrival in Cape Town.

In the meantime, work is underway in the boot


The 4ch is being relocated to the boot, and a second battery is also being included in the install.


The spare wheel will still remain in the boot, with all panels being liftable and sliding towards the back seat (when dropped) to be able to access. Not the easiest access, but access none the less.

Future plans are still to fit the coaxials, as well as fit a decent head unit, and maybe a few other tweaks, but time will tell.

Will update again as build takes more shape.
 
Last edited:
The install is well on its way

This the false floor panel over the spare wheel, with the second battery.
This serves as the base for everything.
Covered in carpet, as it will be hidden.


A ridge built around three sides of the battery, to prevent it from sliding around, the fourth side will be stabilised by the box.
The battery isolator also mounted to the steel battery box.


The box in position, with some frames that will be going in, uncovered, with amps and side panel, as a test fit.


The box covered in vinyl and carpet, another test fit.
Still more to be done.


The back end of the box, behind the seat.
Will make a large panel to dress it up a bit at some point.


Amps being wired up and mounted to the false floor/ amp rack.
The amp rack is movable to get to the spare wheel if needed.


Just a shot of the 0G OFC Stinger power cable, with the floor sound deadening in the background.

 
Havent updated for a bit.

So the install was mostly completed before the Cars&Coffee meet, but with one big problem.
I was waiting on a second subwoofer from the supplier, there was a few delays with customs.


For the night of the meet, we fitted another subwoofer, to fill the gap, but we did not wire up the subs.
Was quite impressed with the look.


And then finally my second sub arrived, and we set it up to be played in for a week on a test bench.
I was supposed to have it fitted monday, and all the final touches fixed up, but I ran into a mechanical issue with no oil pressure. Decided slightly more important than finishing the system, so sent that off to Mario at Cteq on monday.

So we fitted the second sub, and wired it up to play.


The lack of oil pressure seems to be the oil pickup, that has been replaced, and engine will be fired up today, hoping no damage to top end.

As soon as mechanical issues are happy, will be tuning the system to play properly, and also to touch up a few things.
Still need to do a few decals, and make sure things line up properly etc...
 
Just a small detail update.

I didnt quite like the carpet look at the back of the box, behind the seats.

So I had a panel fitted just to neaten it up, and hide the wiring around second battery etc...


There was also some unused space above the second battery, so made a small compartment. A white LED light, voltmeter, and 2x USB charge ports (never know when want to charge something, and if have a long cable on a roadtrip passangers can charge a phone or something).
The compartment is handy for stashing a few microfibre clothes and small odds and ends.
Also fitted a quick connect point for my Ctek charger, if need to charge up the battery.


Ran a small volt test today, idles well at 14.2V, and when playing some tunes floats around 13.8-14V, on the heavy bassnotes the lowest reading was 13.2V
 
Had a few stickers made up, and put in.


Also popped down to a local sound off, didn't do any tuning or setting up for SPL, ran something with bass of my ipod on aux cable, and did 139.2DBs. Not a huge number in terms of SPL, but not bad for a SQ car that hadn't been tuned.
 
Bought a forge DV and did a DV relocate


Managed to get a K03 blank plate from Yosh at DarkArtz


The complete kit (Intake bend, Relocate pipe with holder, Forge DV, S3 throttle pipe, CTS boost tap, CTS K03 blank)


Forge DV fitted


Wow, you've done an amazing job. Some brilliant original ideas too. Love the FR logo behind the grill. I'm now going to be googling "hydrographics" to see where I can get it done!
 
Wow, you've done an amazing job. Some brilliant original ideas too. Love the FR logo behind the grill. I'm now going to be googling "hydrographics" to see where I can get it done!
Thanks man
Doing things bit by bit as I go.
Really love the car.

Hydrographics is quite sick. It's done by water transfer, and anything can be done as long as the tank fits the part.
Guys do anything from guns, helmets, car parts, etc...
I haven't seen a custom design done yet. Its all pre-made patterns.
Basically the sheet of pattern gets laid on water, sprayed with a solvent to loosen it up, and the part is then dipped in. Then it's done.
It's just as durable as a spray job, but alot less hassle than airbrush work. But again, limited to the designs carried by whoever doing application.
Really should check it out, loads of sick patterns available.
 
A while back I had the car resprayed.
the overall job was done well, however there were a bunch of small things that I was never happy with. Everytime I sent it back to sort, they would manage to make another issue.
I eventually just stopped fighting with them, cut my losses, and searched for a new spay shop.

Took some time, but found someone I trusted eventually.
Dropped the car with Euginio at Titan customs.
http://www.titancustoms.co.za/index.asp
We went through the issues that needed sorting, as well as getting rid of stonechips, fixing up the splitter and some other TLC.

Heres some snaps.


Work done:
Stone chips removed
Splitter fixed
Under bonnet sprayed black
Rear wing was smoothed and resprayed
Diffuser had a few scratches underneath
Some issues that previous spray/ panel beater never sorted
As well as a full blowover

They dont have a heating room, so paint still has to cure.

Will be going back in a bit to flat, buff polish and sort a few things that we expecting to pop up.
Stoked with the result so far


Last edited:
Had the rear door inserts also done in the alcantara with red double diamond stitch, however they were never fitted.


So I had them fitted


Front door locks were giving issues, so had to pull panels to replace them. Figured would just complete the set whilst busy.
 
Had an extra set of A-Pillars around that I had collected, with the idea of doing an A-pillar speaker mount.

Bought myself a set of Focal Performance PC100 4" co-axials and had these fitted.


The A-Pillar was then covered in a black suede.


Stoked on the results
Built by the guys down at Loud&Clear in Table View

For now the Focals are running off the head unit