Gbbeesls

Active Member
Feb 11, 2022
85
75
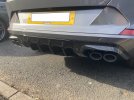
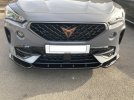
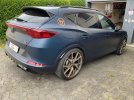
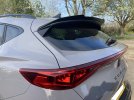
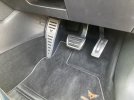
I decided to carry out some additional styling to my Formentor. I have a new front splitter, rear diffuser, rear spoiler extension and a metal Cupra driver's footrest. All the exterior parts used are in gloss black, although matt (textured) and carbon fibre finishes are available. The front splitter is the V1 design and there are two other designs available. The rear diffuser is removeable, so if you have a tow bar fitted you can still use it and the virtual pedal sill works just fine. The Cupra metal footrest was purchased from eBay and I think it just finishes off the driver footwell nicely. The only issue I had was with the rear diffuser as this came with no fitting instructions and has plastic pop clips to mount it. I had to work out that the drill size required was a 7.5mm. Apart from that it was all very quick and easy to fit. Also, if you don't have a tow bar the rear diffuser covers the rather large gapping hole under the rear of the car. The exterior styling parts were from Maxton Designs.
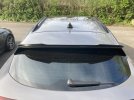
Spoiler Extension2.jpg Spoiler Extension1.jpg Cupra Foot Rest.jpg Rear Diffuser.jpg Front Splitter2.jpg Front splitter1.jpg
 

Ninjakebab

Active Member
Apr 12, 2022
176
91
Very nice!
The rear diffuser, can you cut out a hole for the towbar without compromising any of the mounting points? Would hate having to pull it off completely every time.

Also, the footrest is a different shape than my Hybrid Formentor o_O mine is completely square
 

Gbbeesls

Active Member
Feb 11, 2022
85
75
Very nice!
The rear diffuser, can you cut out a hole for the towbar without compromising any of the mounting points? Would hate having to pull it off completely every time.

Also, the footrest is a different shape than my Hybrid Formentor o_O mine is completely square
Hi, if you have fixed towbar then I would say yes, but if you have the towbar that swings out then I would not be able to comment. Sorry. To be honest it only takes seconds to remove.
 

FormentorVZ3

Active Member
May 22, 2022
29
11
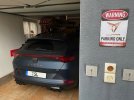
As "pure" styling I have the Cupra sticker on the outside on the left and right rear.
The Cupra lettering at the rear in copper colours. Everything that was grey/silver was wrapped in moonlight blue. The VZ4 sign.

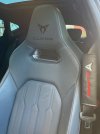
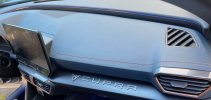
Inside I changed the seats, the footwell light in blue, the Cupra crotch on the passenger side. Blue leather floor mats to match the blue leather inside and probably a few more little things I can't think of ;-)

IMG_1347.jpeg IMG_1348.jpeg IMG_1431.jpeg
 

Attachments

  • Cupra only parking.jpeg
    Cupra only parking.jpeg
    818.3 KB · Views: 562
  • IMG_0768.jpeg
    IMG_0768.jpeg
    499.6 KB · Views: 540

Ninjakebab

Active Member
Apr 12, 2022
176
91
As "pure" styling I have the Cupra sticker on the outside on the left and right rear.
The Cupra lettering at the rear in copper colours. Everything that was grey/silver was wrapped in moonlight blue. The VZ4 sign.

Inside I changed the seats, the footwell light in blue, the Cupra crotch on the passenger side. Blue leather floor mats to match the blue leather inside and probably a few more little things I can't think of ;-)

View attachment 31837 View attachment 31838 View attachment 31839
Those seatbelt pillow cover thingys! I want!
 

Bear

Active Member
Jun 15, 2021
293
268
I'm sure I'm gonna sound like a proper Wally but what's a VZ4?
 

Ninjakebab

Active Member
Apr 12, 2022
176
91
I decided to carry out some additional styling to my Formentor. I have a new front splitter, rear diffuser, rear spoiler extension and a metal Cupra driver's footrest. All the exterior parts used are in gloss black, although matt (textured) and carbon fibre finishes are available. The front splitter is the V1 design and there are two other designs available. The rear diffuser is removeable, so if you have a tow bar fitted you can still use it and the virtual pedal sill works just fine. The Cupra metal footrest was purchased from eBay and I think it just finishes off the driver footwell nicely. The only issue I had was with the rear diffuser as this came with no fitting instructions and has plastic pop clips to mount it. I had to work out that the drill size required was a 7.5mm. Apart from that it was all very quick and easy to fit. Also, if you don't have a tow bar the rear diffuser covers the rather large gapping hole under the rear of the car. The exterior styling parts were from Maxton Designs.
Can you elaborate on the installation process of the front diffuser? I've seen some videoes that point in different directions of complexity.
 

Gbbeesls

Active Member
Feb 11, 2022
85
75
Can you elaborate on the installation process of the front diffuser? I've seen some videoes that point in different directions of complexity.
Hi Ninjakebab, The installation process was pretty simple. The actual splitter fits well and once it is lined up either side the holes were drilled, left and right furthest most points and the bolts put through etc. Once that was done then it was simply a task of drilling a hole in the centre position to hold the splitter in place. Then with the splitter in place I continue to put the remaining bolts in place. If you are capable with a drill and some spanners that you should not really have any issue. The one important point is to have some help to get the splitter into position to start with. They can hold it while you drill the initial holes. Once that it done then it is very easy. I hope this helps?
 
Aug 2, 2022
3
0
Hi Ninjakebab, The installation process was pretty simple. The actual splitter fits well and once it is lined up either side the holes were drilled, left and right furthest most points and the bolts put through etc. Once that was done then it was simply a task of drilling a hole in the centre position to hold the splitter in place. Then with the splitter in place I continue to put the remaining bolts in place. If you are capable with a drill and some spanners that you should not really have any issue. The one important point is to have some help to get the splitter into position to start with. They can hold it while you drill the initial holes. Once that it done then it is very easy. I hope this helps?
Did you remove the front bumper or were you able to drill and fit the nut and bolts with the bumper in situ?
 
Aug 2, 2022
3
0
We carried out the fitting with the bumper in situ.
How did you manage this? Did you just use self tappers and sealant? My front bumper doesn't allow access to fit the supplied nuts and bolts?

Any pictures or videos of the installation process would be appreciate
 

Gbbeesls

Active Member
Feb 11, 2022
85
75
How did you manage this? Did you just use self tappers and sealant? My front bumper doesn't allow access to fit the supplied nuts and bolts?

Any pictures or videos of the installation process would be appreciate
Hi, I will ask my son as he carried out the drilling and fixing under the car. I do know that we didn't take the bumper off or anything. Please allow me to get you an answer.
 
Aug 2, 2022
3
0
Hi, I will ask my son as he carried out the drilling and fixing under the car. I do know that we didn't take the bumper off or anything. Please allow me to get you an answer.
Hi Gbbeesls,
Did you ask your son? Hoping he maybe able to provide some answers / solutions.

Thanks Simon
 
SEATCUPRA.NET Forum merchandise