
Haven't seen a decent guide on here for this so thought I'd make one.
What you'll need:
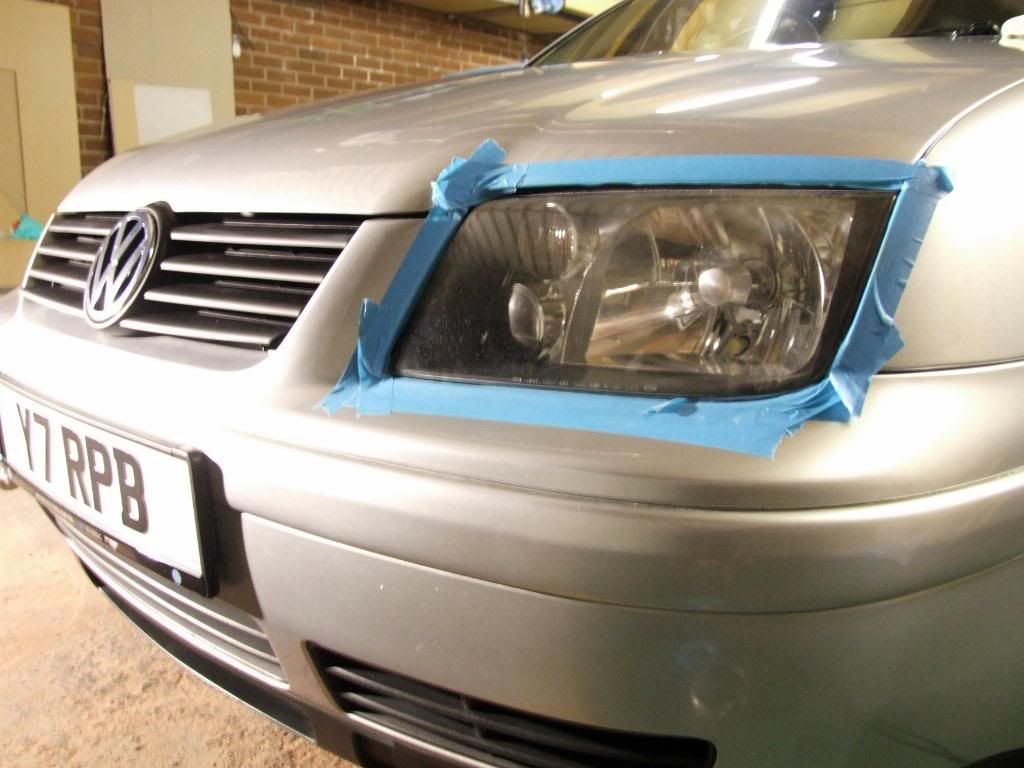
First thing I did, make sure the surface is clean. Then tape up, make sure you use plenty of tape to cover up any paint, you can never use enough tape! Last thing you want to do is scratch your paint work.
Please don't try sanding if you don't feel confident or have not done it before, give it some practise first, don't want to be hearing "oh I followed your guide and ended up with even worse headlights than before!" lol.
Also beware, if you are sanding, it will remove the UV protection from your headlights!
What I started with
A couple of passes with the wool pad and plastX gave me this:

Better but still not that clear, riddled with tiny stone chips and quite scratched (hard to pick up with the camera), so I got onto the sanding. The grades I used ranged from 400 to 2500. I would recommend going higher to 3000 but I didn't have any lol. Made sure to soak all the sand paper I was to use in the bucket of water for about half an hour or so.
As my headlights weren't in the greatest condition I jumped straight in with the 400, dry to remove imperfections possible bringing it back to a flat smooth surface, making sure I worked in straight strokes from side to side.

Then moved onto 800 dry, this time working from bottom to top and vice versa. Make sure to change the direction every time you move up or down a grade of paper to get the smoothest surface possible.

Now that most the imperfections had been sanded away, it was time for the wet sandpaper to get a smooth finish, I started again at 400 and worked my way up, working with 800, 1200, 1500, 2000 and finishing with 2500. Remember, whenever changing grades or paper, work in a different direction, keeping it in straight strokes. Never work in circles!
Here's a few pictures from the process. Make sure to clean the headlight after each grade to ensure the surface is clean and keep the paper wet and lubricated at all times!


Now the sanding is done, I cleaned the headlight, then hit it was the polisher and wool pad again. Gave it 2 passes and the headlight was looking better already, still slightly misty:

So then applied some PlastX by hand

Kept rubbing it in till it had cleared up, then buffed down with a clean microfibre cloth.
Then repeated for the other headlight. Here's what I ended up with:

What you'll need:
- A headlight
- 3m detailing tape, or masking tape
- DA polisher or rotary
- Heavy cut wool pad
- Meguiars PlastX
- A wide range of wet and dry sandpaper
- Bucket of water with a little soap added
- A couple of microfibre cloths
First thing I did, make sure the surface is clean. Then tape up, make sure you use plenty of tape to cover up any paint, you can never use enough tape! Last thing you want to do is scratch your paint work.
Please don't try sanding if you don't feel confident or have not done it before, give it some practise first, don't want to be hearing "oh I followed your guide and ended up with even worse headlights than before!" lol.
Also beware, if you are sanding, it will remove the UV protection from your headlights!
What I started with
A couple of passes with the wool pad and plastX gave me this:
Better but still not that clear, riddled with tiny stone chips and quite scratched (hard to pick up with the camera), so I got onto the sanding. The grades I used ranged from 400 to 2500. I would recommend going higher to 3000 but I didn't have any lol. Made sure to soak all the sand paper I was to use in the bucket of water for about half an hour or so.
As my headlights weren't in the greatest condition I jumped straight in with the 400, dry to remove imperfections possible bringing it back to a flat smooth surface, making sure I worked in straight strokes from side to side.
Then moved onto 800 dry, this time working from bottom to top and vice versa. Make sure to change the direction every time you move up or down a grade of paper to get the smoothest surface possible.
Now that most the imperfections had been sanded away, it was time for the wet sandpaper to get a smooth finish, I started again at 400 and worked my way up, working with 800, 1200, 1500, 2000 and finishing with 2500. Remember, whenever changing grades or paper, work in a different direction, keeping it in straight strokes. Never work in circles!
Here's a few pictures from the process. Make sure to clean the headlight after each grade to ensure the surface is clean and keep the paper wet and lubricated at all times!
Now the sanding is done, I cleaned the headlight, then hit it was the polisher and wool pad again. Gave it 2 passes and the headlight was looking better already, still slightly misty:
So then applied some PlastX by hand
Kept rubbing it in till it had cleared up, then buffed down with a clean microfibre cloth.
Then repeated for the other headlight. Here's what I ended up with:


")


