Nice!!I just got the tints done - ended up with light smoke on all side windows and it looks perfect.

-
Hey Guest👍👎 We're looking for reviews of your local CUPRA or SEAT Dealership - it's quick and easy to do: Leave a review now
Mods You’ve Done - Big or Small?
- Thread starter Swansway Motor Group (SEAT & CUPRA)
- Start date
You are using an out of date browser. It may not display this or other websites correctly.
You should upgrade or use an alternative browser.
You should upgrade or use an alternative browser.
Those mirror covers look absolutely perfectDone a few mods, nothing too difficult but just fitted these carbon fibre door mirror backs. Not cheap but very good quality. Some interior upgrades around the centre console next, thanks to Serdar for help with part numbers.

Worth a photo? I appreciate that tints may not show up well on photos.Nice!!
Cheers. Supplied from Italy and they are amazing quality.Those mirror covers look absolutely perfect
Of course, we always like to see CUPRA mods!Worth a photo? I appreciate that tints may not show up well on photos.
Well, I've already posted this pic in the Formentor forum (and explained that the glass isn't quite as dark as it appears to be), but if you want one here too...Worth a photo? I appreciate that tints may not show up well on photos.
Looks great on whiteWell, I've already posted this pic in the Formentor forum (and explained that the glass isn't quite as dark as it appears to be), but if you want one here too...
View attachment 51365

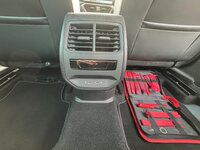
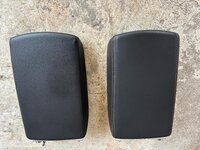
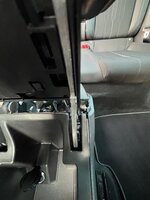
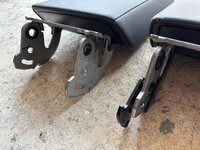
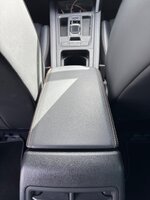
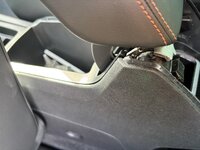
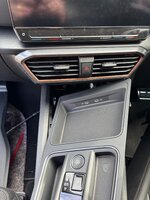
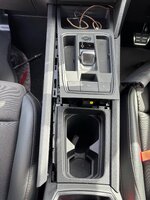
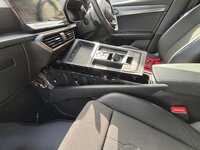
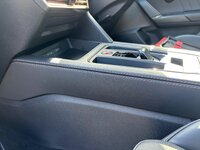
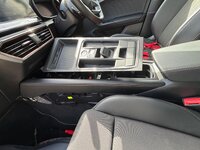
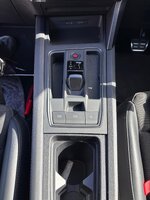
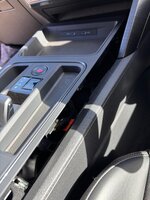
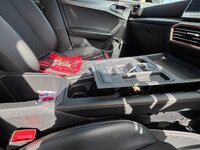
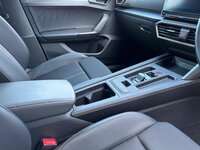
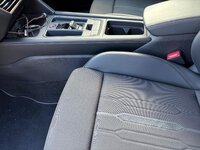
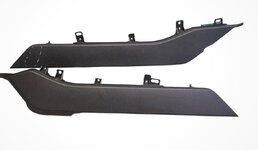
Finally got round to upgrading the centre console area from Mk4 to Mk4.5. One of the side trims was on back order for ages but Cox’s direct parts persevered and I’m grateful to them and of course serdar_18fr for help with part numbers. Additionally I noted that my VZ2 armrest top looked very basic without the copper stitching. I guessed that the Formentor version is identical and gambled on an as new one for £50 on eBay.Looks great on white
Lots of photos to follow!
Firstly a photo of the replacement parts. Two brand new console side trims and the used ebay armrest top.
Attachments
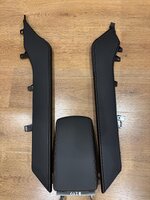
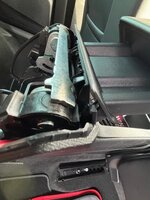
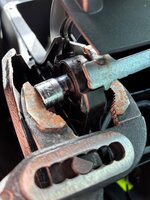
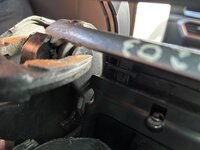
I tackled the armrest top first. Pretty simple job provided you have a plastic trim removal set to avoid damage to the trim. The only tricky bit was pushing a new set of starlock clips over the large retaining pins. A wrench and socket did the job. Three hands would have been great, but the job took around 90 minutes in total.Finally got round to upgrading the centre console area from Mk4 to Mk4.5. One of the side trims was on back order for ages but Cox’s direct parts persevered and I’m grateful to them and of course serdar_18fr for help with part numbers. Additionally I noted that my VZ2 armrest top looked very basic without the copper stitching. I guessed that the Formentor version is identical and gambled on an as new one for £50 on eBay.
Lots of photos to follow!
Firstly a photo of the replacement parts. Two brand new console side trims and the used ebay armrest top.
Attachments
-
 6480d78c-a412-499a-9b36-f2d156f601a6.jpeg262.2 KB · Views: 58
 -
 c959b66f-780f-43fb-9035-c0b00794aee6.jpeg286 KB · Views: 70
 -
 686a5234-bf8b-43f0-97da-8c6fd43492ab.jpeg200.7 KB · Views: 75
 -
 c74a430c-9d91-464a-ae9e-c7367cd5f722.jpeg218.3 KB · Views: 60
 -
 b04649d9-13e2-4664-8e2c-8beae838f067.jpeg205.1 KB · Views: 70
 -
 e2fd08ab-7b3e-480a-a298-dd43c8b5b0da.jpeg217.2 KB · Views: 65
 -
 8d276ef6-2956-43fb-b491-910b5dc73f0b.jpeg268.9 KB · Views: 65
 -
 cbb60c6b-c584-4405-bd32-2bc54c43e7d1.jpeg289.8 KB · Views: 55
 -
 b6f7b623-769c-4879-8d91-06ada2b47e4f.jpeg222 KB · Views: 63
 -
 5596c72a-eeee-4174-baaf-88a9136a7f98.jpeg242 KB · Views: 73
 -
 6093992c-c7a8-47e6-a529-f1a9bf5f3965.jpeg220.4 KB · Views: 59
 -
 363c2bd9-8d26-4860-b7f4-0f69c601d1a2.jpeg303.9 KB · Views: 73
 -
 37f820b7-a326-4367-b804-7bab581cb32f.jpeg204.8 KB · Views: 69
 -
 5622644f-db01-4c20-95ee-158e7f1c76cb.jpeg209.2 KB · Views: 61
 -
 7dd7aaf5-8d13-4bfb-9322-5d6e7f96bfd1.jpeg399 KB · Views: 65
 -
 5e24c922-8a39-4d14-b364-71d3011c9d28.jpeg213.7 KB · Views: 53
 -
 6d8794dd-cb56-4c8e-ba33-3fd9e7c824fd.jpeg227.7 KB · Views: 49
 -
 a2bcdfde-b2e0-4860-99a1-21a92fe3f59e.jpeg186.7 KB · Views: 62
 -
 e1896caf-758b-4b8f-9bd5-d4c0d9227546.jpeg193.1 KB · Views: 65
 -
 40fd7004-7f86-4a87-8c76-801c6e12088c.jpeg265.7 KB · Views: 60
 -
 fb78648d-08fd-4354-a14e-5e6439a8e7eb.jpeg434.8 KB · Views: 82
 -
 08b1e147-5626-4d8c-a462-72941d43ba41.jpeg196.3 KB · Views: 60
 -
 5d77190e-217f-466a-90aa-11dbef71da90.jpeg134.5 KB · Views: 64
 -
 92c8590f-c4f2-4453-9de9-f864ede1b011.jpeg281 KB · Views: 69
 -
 32ab8a73-d44e-4055-8399-11d2bca2575c.jpeg255.1 KB · Views: 72
 -
 ead96fc9-27f7-4f56-8051-2a311c26dc06.jpeg194.7 KB · Views: 65
I’ve been called away for as my son in law needs some help with DIY and will add the next instalment later.
I prefer the original one.I tackled the armrest top first. Pretty simple job provided you have a plastic trim removal set to avoid damage to the trim. The only tricky bit was pushing a new set of starlock clips over the large retaining pins. A wrench and socket did the job. Three hands would have been great, but the job took around 90 minutes in total.
JOKE
I prefer the original one.
JOKE
 It is available for a small fee…….
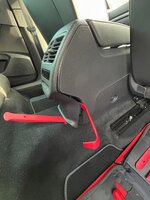
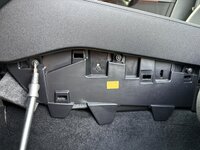
Feeling pretty chuffed with myself I decided to tackle the centre console side trims. There is a post on here from last year on the same topic and it’s thanks to them for the idea. It was a left hand drive, but the fittings are no different.
Attachments
-
 2b0239d3-124a-4cb9-a254-aa0f3e69d1ce.jpeg282.5 KB · Views: 48
 -
 5e5198f3-c470-467b-8629-fde201b2b6fe.jpeg441.7 KB · Views: 66
 -
 d14a6b6e-ca90-42e3-8a85-0bf587855644.jpeg451.1 KB · Views: 55
 -
 8d1d765c-6c3d-44dc-8d03-a7aab8fbc3f5.jpeg296.1 KB · Views: 57
 -
 d9e9f515-c11f-42a0-9b44-52d4a0887fba.jpeg272.8 KB · Views: 77
 -
 515fbcc5-5d0f-4064-92b1-19b19ffd4b07.jpeg268.4 KB · Views: 71
 -
 78d22714-39a3-4269-8d7b-31883e768920.jpeg328.2 KB · Views: 67
 -
 4e38c1aa-a4be-4483-8056-68885c00a41d.jpeg413.2 KB · Views: 74
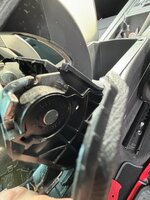
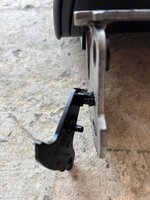
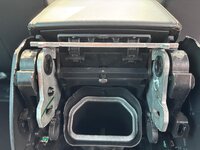
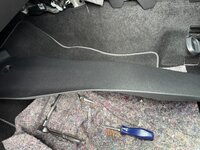
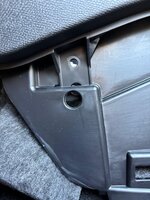
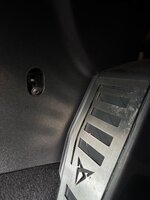
The last of this batch of photos shows the only tricky lug to remove. It’s slotted in and you just have to use pull it upwards and out. It’s very pliable and bends easily. The lower trim in the first photos just pulls off once you remove the screw behind the plastic lug/cover. It’s that easy.Feeling pretty chuffed with myself I decided to tackle the centre console side trims. There is a post on here from last year on the same topic and it’s thanks to them for the idea. It was a left hand drive, but the fittings are no different.
The last of this batch of photos shows the only tricky lug to remove. It’s slotted in and you just have to use pull it upwards and out. It’s very pliable and bends easily. The lower trim in the first photos just pulls off once you remove the screw behind the plastic lug/cover. It’s that easy.
Attachments
-
 77541d9d-1b3c-42a2-8cb3-e2cce20e6388.jpeg297.7 KB · Views: 61
 -
 c311f7ba-54d2-4577-9500-6abb97823ad9.jpeg328 KB · Views: 71
 -
 cb15fb5e-f645-4934-8333-405d6d35ac31.jpeg242.9 KB · Views: 69
 -
 73128fc0-e09d-4246-9296-d2c8f2865b8b.jpeg312 KB · Views: 58
 -
 9709171e-8b8b-4c16-9e29-60d6a06a5464.jpeg296.6 KB · Views: 63
 -
 29ea9fec-e8d2-4428-af84-ec147c878099.jpeg317.6 KB · Views: 52
 -
 8bfe1b91-a2f6-4cc0-a0f3-3da29c329a47.jpeg258.2 KB · Views: 50
 -
 486f6f6c-4df0-4b2f-a005-05bfcc36c6aa.jpeg253.3 KB · Views: 63
 -
 2076cffa-a357-4407-bf2e-44de732cb1ce.jpeg232.5 KB · Views: 65
 -
 46221e0f-6e27-47d0-b9d9-3ca5954191e8.jpeg189.2 KB · Views: 59
 -
 9909e943-346e-4ca8-93b1-9ac6f2940760.jpeg295 KB · Views: 75
 -
 7636d924-c8e8-44a7-8a64-502f00254fb4.jpeg291.5 KB · Views: 58
 -
 982494b6-fd17-4d6e-8869-2dcca169b8c6.jpeg366.5 KB · Views: 71
 -
 36bb8ca6-6388-41b6-8e79-2bab2b1e1162.jpeg383.7 KB · Views: 69
 -
 56c909e7-c37e-4122-adbc-a1f8fb6dd385.jpeg293 KB · Views: 75
 -
 59c18eae-80b9-4b6d-9d14-df4454f91342.jpeg278.6 KB · Views: 72
 -
 c80fa12b-14a0-4459-a4b8-6f6b237564a0.jpeg231.8 KB · Views: 47
 -
 d957ef54-bc30-48c8-ab69-b906228af7fe.jpeg391.9 KB · Views: 80
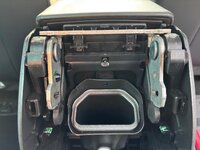
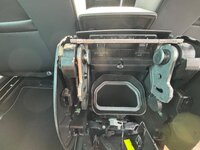
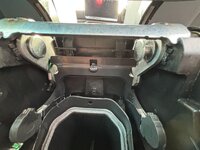
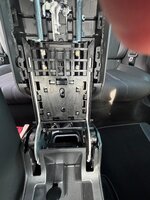
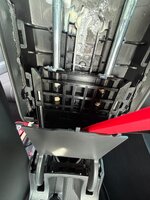
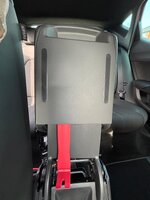
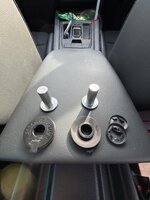
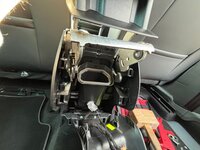
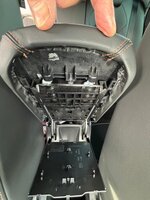
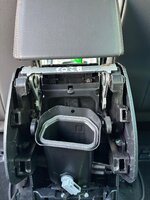
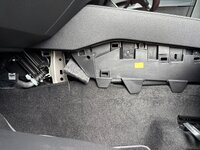
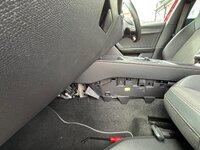
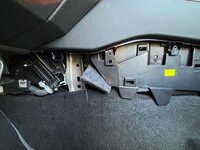
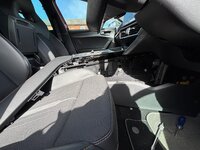
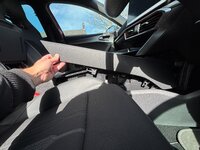
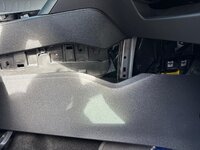
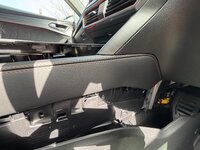
No tricky lugs on the drivers side, just the same three screws and lift from the back. It just more or less just fell off. You do have to take the plunge and remove the actual console as shown in the photos. It is just clipped in and lifts out easily with the red plastic trim tools. Be careful though as there are lots of wires under there! All attached to solid plugs. The trims themselves are only attached by the three screws shown in the photos and once the centre console is lifted, just lift off. Please feel free to ask any questions as it really is worth the upgrade if you’re keeping the car rather than handling it back/trading it in etc.
Just one fairly basic question... As someone who is relatively new to Formentors, what exactly is the 'upgrade' from the earlier side trim panels to the newer ones? I can see that the stitching on the pad makes a difference, but what about the side trims?No tricky lugs on the drivers side, just the same three screws and lift from the back. It just more or less just fell off. You do have to take the plunge and remove the actual console as shown in the photos. It is just clipped in and lifts out easily with the red plastic trim tools. Be careful though as there are lots of wires under there! All attached to solid plugs. The trims themselves are only attached by the three screws shown in the photos and once the centre console is lifted, just lift off. Please feel free to ask any questions as it really is worth the upgrade if you’re keeping the car rather than handling it back/trading it in etc.
Similar threads
- Replies
- 12
- Views
- 3K
- Replies
- 15
- Views
- 2K
- Replies
- 11
- Views
- 3K
- Replies
- 0
- Views
- 668
