PD Engine on 2001 & Water Pump Replacement

IHateCars

Guest
Hi All.:cry:


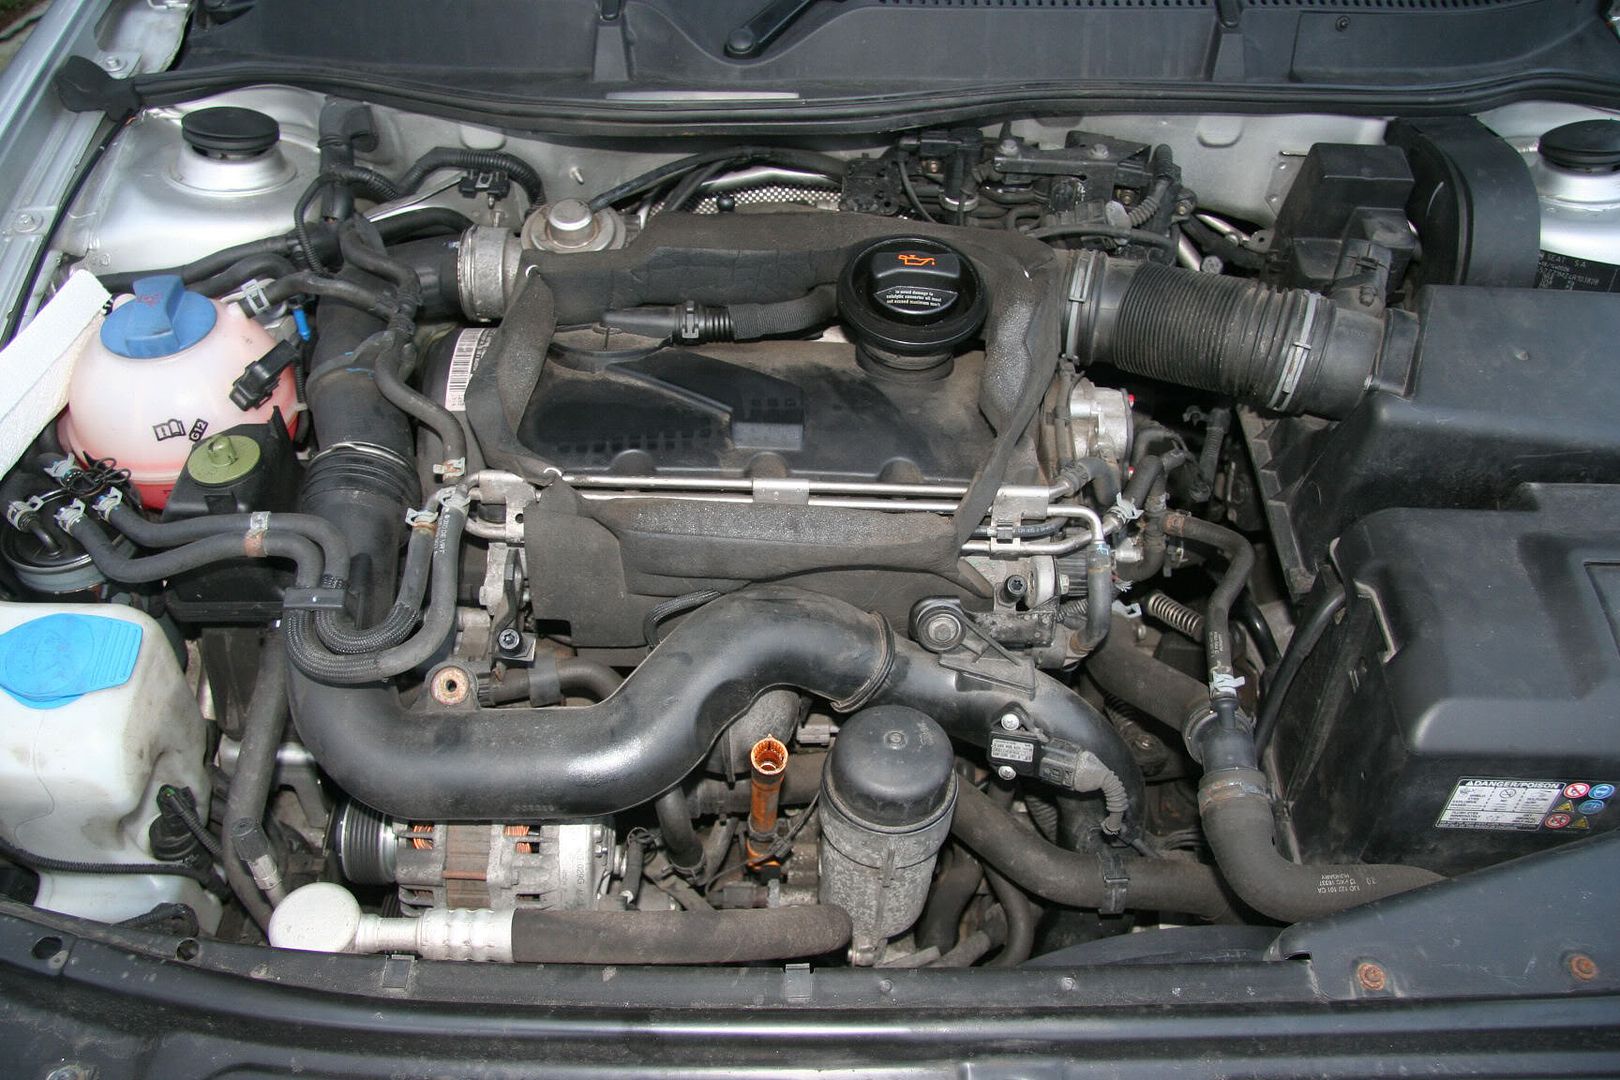
How can I tell if I have a PD engine or not.. I have a 1.9tdi Auto, 2001 Alhambra with an engine code of AUY, so I can get the correct parts.


My personal ramble :::
Please ignore my most novice of question, if I had a choice I would be taking my car to a man who knows and just paying the bill, But I don’t. I need to do as much of this as possible myself. I have never done as much work as this on a car before, however I have replaced the alternator, brakes and discs etc.. (yes i know they are easy jobs) and do feel that I can do this.

I have been reading about all that is involved in replacing the water pump and it seems sensible to be doing the cambelt at the same time.

I rang my local parts people looking to purchase a cambelt kit and new water pump. When I rang the parts company in my village, they asked me for my Reg...... then asked me if it was the PD engine or not, as they have two possibles for my car.

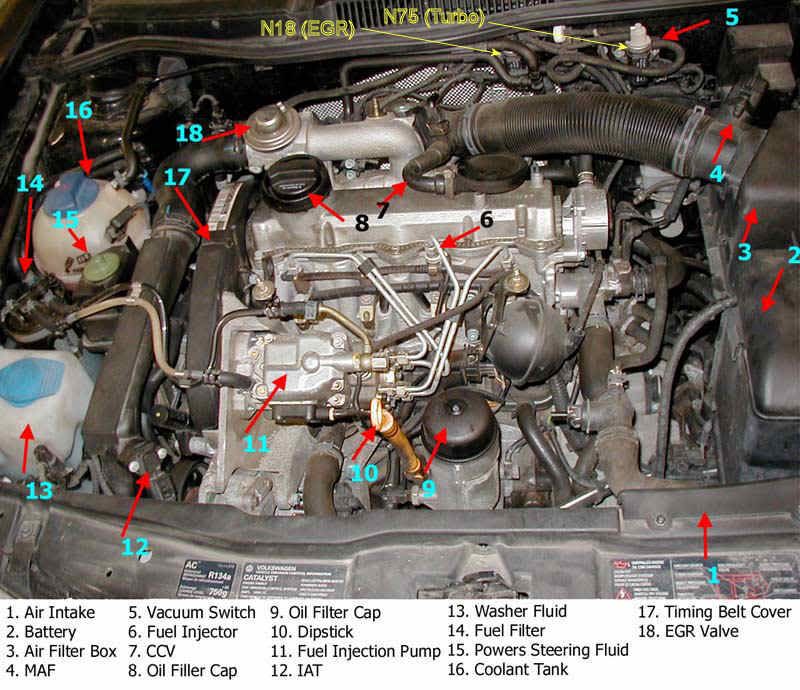
To summarise the work I think needed to be done:-
Remove the air filter boxes etc
support the engine then remove the left engine mount
Remove the plastic cambelt covers
Align then lock up all the cogs with a purchased locking kit.
Remove the belt
Remove old pump and fit new water pump
Remove old tensioners and fit new tensioners
Fit new belt
Replace cover
Replace engine mount
Replace Air filters and boxes

Done....
 

Muttley

Catch that diesel!
Mar 17, 2006
4,987
31
North Kent
On the PD vs not PD front, here's a cut-and-paste from a post I made in another section today:

AUY is a PD engine. It should look mostly like this if you take the engine cover off (this is my ARL engine, a PD 150)

ARLengine.jpg


All the fuel lines are soft plastic or neoprene rubber and there is no high-pressure distributor pump driven off the cambelt. Injection pressure is developed by the unit injector on top of each cylinder.

PD 130 engines should look similar, but without the boost pipe going across in front of the engine - the PD 130 has a side-mounted intercooler.

The older, non-PD engines look like this (this is an ASV)

enginebay-vac-sol.jpg


The distributor pump is at the front left of the picture and has steel tubes leading from it to the injectors.


Your summary of the tasks agrees with what I've read: I've never done this job myself so can't offer more than that. Being a PD engine you have to lock crank and camshaft - there's no separate distributor pump to worry about.

And yes, since the water pump is driven by the cambelt, and the cambelt is difficult to get to, replace both at the same time. You have to replace the cambelt at 60,000 mile/4 year intervals anyway. The water pump only needs replacing if you have a failure, or if you don't know if it has a plastic impeller or not. The plastic impellers have a record of failing.
 

IHateCars

Guest
Thank You Muttley for your reply, I wasn’t expecting one to be honest.

Well on Saturday I took myself off to Parkers to get the parts I would need for the job.. New water pump, locking kit and belt.

Here is my story for anyone else who is going to attempt this for the first and is not a mechanic. So this is a DIY’ers guide, not a mechanics guide.
Early afternoon I set about my car with my box of rusty spanners.
• Off came the air filters and hoses.
• Jacked up my car so the driver’s side front wheel was just about off the floor. This maxed out the suspension so that when I unbolted the engine mount it didn’t jump up.
• I recommend you remove the driver’s side wheel to give you that extra bit of space to work in but I found full right hand steering lock to be enough space in the end.
• I borrowed a trolley jack from my neighbour and slid that under the engine to take its weight. NOT RECOMMENDED DUE TO WEAK SUMP!
• Before you remove the mount – take off the pipe that is mounted on it ( have to be done via the wheel arch.
• I then unbolted the engine mount from the body and continued to remove the massive black lug of metal from the side of the engine.
• I recommend that the black mount is NOT removed from the engine bay. I spent ages getting it out completely. Getting it back in and in the right position took me even longer!!
Just push it to the back and tie it up in with some cable ties instead of removing it.
• Then removed the alternator tensioner. Opened it up with a spanner and wedged it open with a small chisel.
• Removed alternator belt
• Removed the 4 bolts on the bottom crank pulley. I had to give the pulley a few taps with a hammer to jiggle it off. DO NOT REMOVE THE 19mm centre bolt. I nearly did.
• Removed the top plastic cam belt cover with the two clips either side.
• Then removed the other two sections of the black metal cover.

You can now see the entire cam belt, cam, tensioner, water pump and crank.

• Time to put on the locking kit. I manually rolled the engine over till the cam pully was at top centre. Put in the locking pin ( it was very tight so I think the pin I had was a fraction too big) and locked the bottom crank off with the other piece from the kit.
• Just to test it I tried to turn the engine by hand again to make sure it didn’t move.
• Then I partially undid the bolt on the tensioner and rolled the backing clip anti clockwise. This gave me enough slack to knock the belt off.
• I then undid the 3 bolts on the water pump and wiggled it out. At this point I realised I hadn’t drained the water… it all came rushing out. 
• Yes – The plastic impellor had came away from the spindle and was wobbling all over the place.
• I put in the new one, and bolted it back in
• On went the new cam belt… with much swearing and pushing and shoving.

Without the proper tools for the tensioner, I took it off and had to put it on at the same time as I pushed the belt on. In the end it worked.
• Now it was a case of putting all the bits back where they came from which apart from the fact I had removed the engine mount was straight forward.
• Once all back I filled it with water and antifreeze. (left the cap off)
• Started it up and it all sounded lovely!!
• Checked and topped up the water after a few minutes of leaving it running
• Put the cap back on and then took it for a quick trip round the block… checked and topped up the water again.

Done.
On Sunday I took it with the mrs shopping,
NO signs of overheating and the Heaters all working. Result!!!!!!!
 
Last edited by a moderator:

IHateCars

Guest
DAM P**S and S&*(T!!!

My car is running great, but the bas**** is still losing water somewhere. I can’t see it leaking anywhere and I really don’t want it to be the head.
There are no signs of smoke, no oil in the water and no water in the oil. Also there is no huge pressure in the water system when it’s hot. When I take the cap off when it is stone cold, there is a gurgle and a rush of water but I assume that is pressure left in the tank.
The heaters are still working fine too.
Has anyone got any suggestions on what to try next? New expansion tank and cap maybe???
 

Muttley

Catch that diesel!
Mar 17, 2006
4,987
31
North Kent
Excellent summary of what you had to do to get the job done for real. All it needs is some pictures and you could put Mr. Haynes to shame.

I'd have been worried about supporting the engine with a trolley jack, as the aluminium sump is not suitable for load-bearing and apparently can easily get distorted , leak or even break.

For your water leak, have you checked the radiator? I had a small leak in one corner - the coolant drops into the undertray to start with so may not be visible as a puddle.
 

IHateCars

Guest
I do have a couple of photos but I didnt think of uploading them... I only took them just incase I could not remember where somthing went! :)

ahhh well I didnt know about the weakness of the sump. So glad I didnt break it!! thanks for the heads up! I shall put a disclamer above.

I have taken that annoying try off the car to see if I could locate it.. but no, I cant see one yet, the floor seems dry too.
 
Adrian Flux insurance services - discount for forum members.