Just wondering any1 ever see or know of the front splitter on a standard facelifted leon. I love the mod but curious to kno if it will be wide enough etc... Thanks and sorry if this has already been discussed

-
Hey Guest👍👎 We're looking for reviews of your local CUPRA or SEAT Dealership - it's quick and easy to do: Leave a review now
standard fl leon front splitter???
- Thread starter bigbadjay
- Start date
You are using an out of date browser. It may not display this or other websites correctly.
You should upgrade or use an alternative browser.
You should upgrade or use an alternative browser.
A few have done it on here. Needs to be cut and stretched a bit to fit.
www.seatcupra.net/forums/showthread.php?t=329094
Pics in post 19.
www.seatcupra.net/forums/showthread.php?t=329094
Pics in post 19.
Thanks alot mate but i ment the standard facelift one not fr or cupra. I kno some mite say get the fr bumper off ebay im just looking at options. Plus there are ALOT of fr's out there. I think the splitter might complement it nice because the profile of the bumper lifts slightly towards the end. Ill post a pic showing what um trying to describe when i can

Cool liking the grill also! Were getting there now.... The more you look at them the more different they are . How was it to fit on fella?
Last edited:
Are these from the MK1 1M Cupra R Leon? How can I fit one of this? i found one in my country, do you think it would fit my 2007 Leon FR?
here's the link:
http://racing-bazar.hu/alkatresz/kasztni/seat_leon_cupra_r_koptato
here's the link:
http://racing-bazar.hu/alkatresz/kasztni/seat_leon_cupra_r_koptato
Yes itll fit with persuading. But IMO it doesnt suit the fr one but there are other splitters that do!
I think the Cupra R spoiler is the best, but at £196 its very expensive, only if there was someone in the UK fabricating them
Yes itll fit with persuading. But IMO it doesnt suit the fr one but there are other splitters that do!
Do u have any pics of the FR splitter? Eibachs will be under my car, so a splitter can protect my bumper as well.
Do u have any pics of the FR splitter? Eibachs will be under my car, so a splitter can protect my bumper as well.
or some ebay link?
")
Old thread i know.....
I dont think the cupra r splitter is wide enough standard. I think making a wider one but extending the center section would look better. Pushing the 'lipped edges' further round the bumper. Prob need to fabricate it using 2 splitters. Could be a nice cheap custom mod tho.....
I dont think the cupra r splitter is wide enough standard. I think making a wider one but extending the center section would look better. Pushing the 'lipped edges' further round the bumper. Prob need to fabricate it using 2 splitters. Could be a nice cheap custom mod tho.....
Already done it. Looks good but i took back the heat gun before i spotted aa tiny bit of light on corner! Just needs pulling up about 2mm screws wont do it. Ill sort it soon! I had to bend it in in the middle (not center just as it starts to bend) then out at the ends. And the only things i cut are the lugs and spacer things!
Last edited:
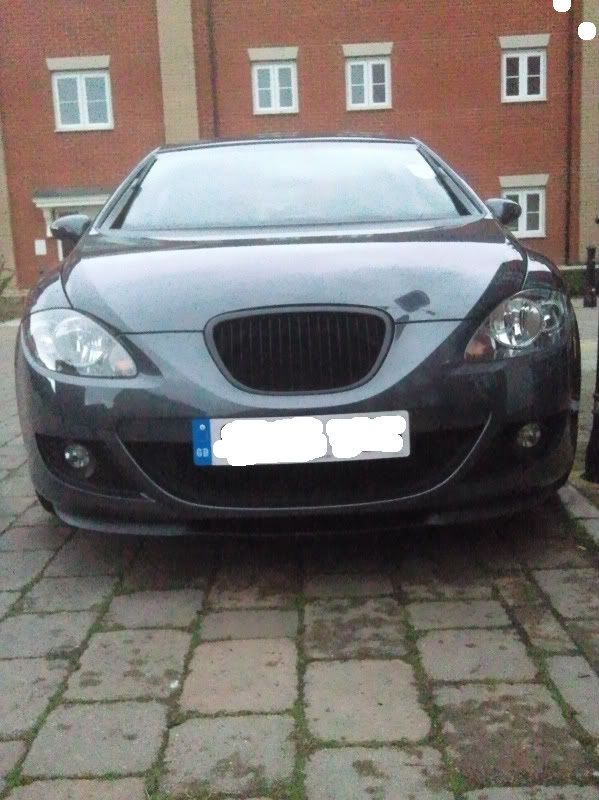
Not the best pics because theyv been resized! Well worth it for 30 odd quid and a bit of hard work. plus can be easily removed!


Last edited:
And avatar pic (my fav) its slapped evrywhere lol

Again the origional pics are crisp on my phone bt poo quality coz there uploaded from my albums on this site!
Again the origional pics are crisp on my phone bt poo quality coz there uploaded from my albums on this site!
Last edited:
For those who it may help...... Guide for NON FR facelift. Basically new standard bumper. Though may help on other applications
Splitter, jack, stubby self tappers (non corrosive), small drill, heat gun a defo! A spare pair of hands a defo! Flat work surface, wall or similar to gauge if symetrical. Stanley knife, hacksaw. Maskin tape or similar
Cut the spacers off with a stanley (all the way round so it will be flush) cut the center lug things just above the plastic line (shaped like a V) you can always cut more later. Roll your car onto a kerb then jack up the other side. Then weigh up what a mess youve got yourself into! Lol
I used an old ikea table to work on and hold the splitter up to the car while i checkd the shape.
Now you have to bend "out" the start of the curve (from the middle but not the thin bit.) with heat gun. Best do this over several spots so its a nice curve. Keep checking and always keep it heated on the underside/back. When happy with symmetry the outer part needs to come back in. Again do it over a couple of spots. Try and offer it up in the same place each time.
When your about right and feeling confident start thinking how far back/forward you want it. The further back the easier if i remember. The standard fl bumper lifts slightly in the middle which i or you ever noticed before now. This makes it look gappy when about to screw in. You can heat/bend the splitter in a very slight arch shape or do this when its screwed in where the thin bit meets the bulk of it(bend the bulky bit). I chose a bit of both. To get it centered, count the number of hexagons on the front grill and match it up to the V shaped lugs.
Bang two screws in each side of the bulky bit, pick a reference point from the origional bumper join at the belly board kind of thing, so you get it BANG on. Put several in at this point ensuring it wont move. Take your time now get each screw in 100 opposite its identical partner! Again using the joint you will see. Put in as many screws as you feel neccassary.
When halfway round, look at the front of the car again. (Do this alot btw) predict any problems at this point. The most extreme corner should be tucked well into the bumper with very little/no light visible. You can still bend and mould at this point especially if you need to close the gaps up.
Nearly done now. Move to the end screwing in. You can use washers if the screw head is driving too far into the splitter. If you did it right there will be exactly equal amounts of splitter left at the ends. I didnt end up cutting any off but depending on the angle you bend it at overall, you may need to cut. If i remember right i cut a small recess to accomodate the bit of plastic in front of the tyre. I didnt screw in the center Vs. It naturally held itself up also wouldnt snap anything if i hit sumthin.
Stand back and admire. Also apollogise to your helper!
Sorry if its abit vague/spelling/****. Also no pics it was too stressfull at the time! Hope it gives some confidence to anybody wanting to attempt it. Though it mite just have been me![[B)]](/forums/styles/seatcupra/oldforumsmileys/shades.gif "Cool [B)]")
Splitter, jack, stubby self tappers (non corrosive), small drill, heat gun a defo! A spare pair of hands a defo! Flat work surface, wall or similar to gauge if symetrical. Stanley knife, hacksaw. Maskin tape or similar
Cut the spacers off with a stanley (all the way round so it will be flush) cut the center lug things just above the plastic line (shaped like a V) you can always cut more later. Roll your car onto a kerb then jack up the other side. Then weigh up what a mess youve got yourself into! Lol
I used an old ikea table to work on and hold the splitter up to the car while i checkd the shape.
Now you have to bend "out" the start of the curve (from the middle but not the thin bit.) with heat gun. Best do this over several spots so its a nice curve. Keep checking and always keep it heated on the underside/back. When happy with symmetry the outer part needs to come back in. Again do it over a couple of spots. Try and offer it up in the same place each time.
When your about right and feeling confident start thinking how far back/forward you want it. The further back the easier if i remember. The standard fl bumper lifts slightly in the middle which i or you ever noticed before now. This makes it look gappy when about to screw in. You can heat/bend the splitter in a very slight arch shape or do this when its screwed in where the thin bit meets the bulk of it(bend the bulky bit). I chose a bit of both. To get it centered, count the number of hexagons on the front grill and match it up to the V shaped lugs.
Bang two screws in each side of the bulky bit, pick a reference point from the origional bumper join at the belly board kind of thing, so you get it BANG on. Put several in at this point ensuring it wont move. Take your time now get each screw in 100 opposite its identical partner! Again using the joint you will see. Put in as many screws as you feel neccassary.
When halfway round, look at the front of the car again. (Do this alot btw) predict any problems at this point. The most extreme corner should be tucked well into the bumper with very little/no light visible. You can still bend and mould at this point especially if you need to close the gaps up.
Nearly done now. Move to the end screwing in. You can use washers if the screw head is driving too far into the splitter. If you did it right there will be exactly equal amounts of splitter left at the ends. I didnt end up cutting any off but depending on the angle you bend it at overall, you may need to cut. If i remember right i cut a small recess to accomodate the bit of plastic in front of the tyre. I didnt screw in the center Vs. It naturally held itself up also wouldnt snap anything if i hit sumthin.
Stand back and admire. Also apollogise to your helper!
Sorry if its abit vague/spelling/****. Also no pics it was too stressfull at the time! Hope it gives some confidence to anybody wanting to attempt it. Though it mite just have been me
Last edited:
Similar threads
- Replies
- 1
- Views
- 844
