
Rebecca
Guest
Mukkyman, my hubby seems to think that you would be able to fit it using the current guide, just as Muttly did...
 lol
lolRebecca
Mukkyman, my hubby seems to think that you would be able to fit it using the current guide, just as Muttly did...
Mukkyman, my hubby seems to think that you would be able to fit it using the current guide, just as Muttly did...
Rebecca
Hi thereSweet, i will make a order tomorrow when i get some funds sorted. Am i right in saying you guys accept paypal?
Thanks again.
I will definately be ordering one when i get paid on the 23rdIm all paranoid now, dont wanna use the air con!
TOP GUY!!
Gold star and top of the class for Mutley
I did try to get you a discount but obviously not happening
Hi guys, have been reading this post with must interest. When I pop my aircon on, the car feels sluggish to drive and will even stutter when I take off in first gear. As previously mentioned by some of you the car dash lights will dim too. I myself thought this was normal but it seems this is not the case. I have just noe called my local dealer and the service manager seems to think the low speed fan is shot and the high speed fan is trying to compensate for this??
Does that sound like what is going on?
It sounds viable to me, but he has agreed to have the car in for more checks, luckily under warranty.....just....
Will update you all when I get the findings next Tuesday.
Jay
OK chaps, got the car back and they changed the rads under warranty. I did explain that this seems a little odd for a car which is barely 3 years old but the service manager said he had done a few of these and none had come back. I just wonder if an improvement had been made on the replacement parts. Anyway, the aircon is sound and that terrible surge of power being chewed by the fans, Now gone!!.
However, if this happens again which is bound to be outside my warranty, I say we ALL turn up on a Monday morning at the SEAT UK offices and make it know a recall is on order. Anyone with me..... Lets see.
What dealer is this btw? May come in handy if mine claim it's standard behaviour again...
Mine is all sorted now under warranty. Low speed fans are back!
Muttly
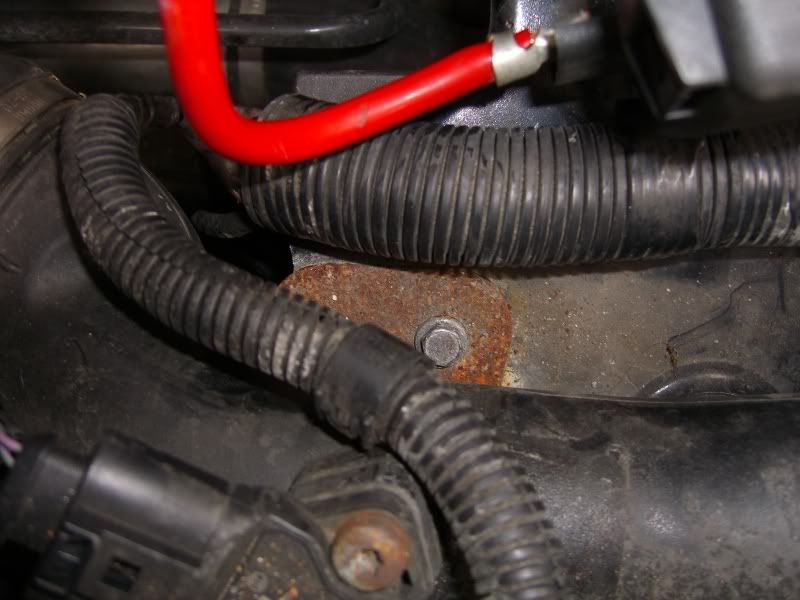
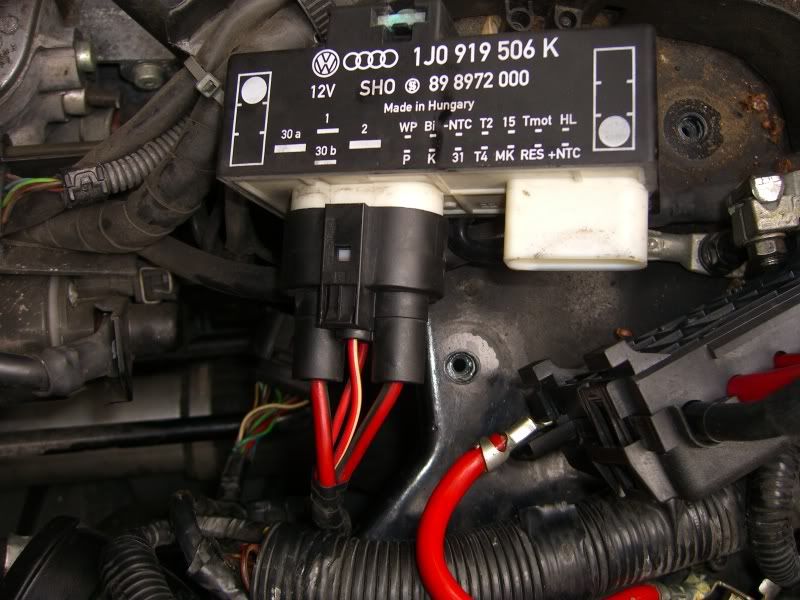
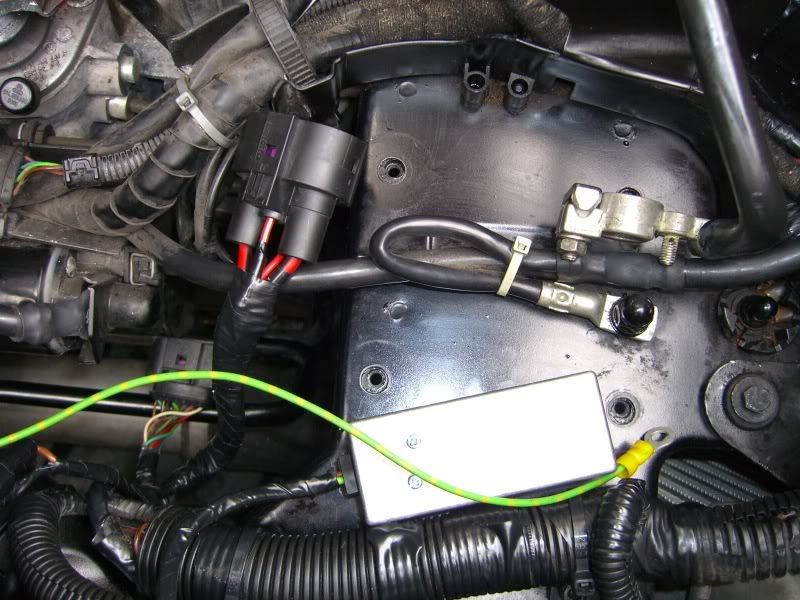
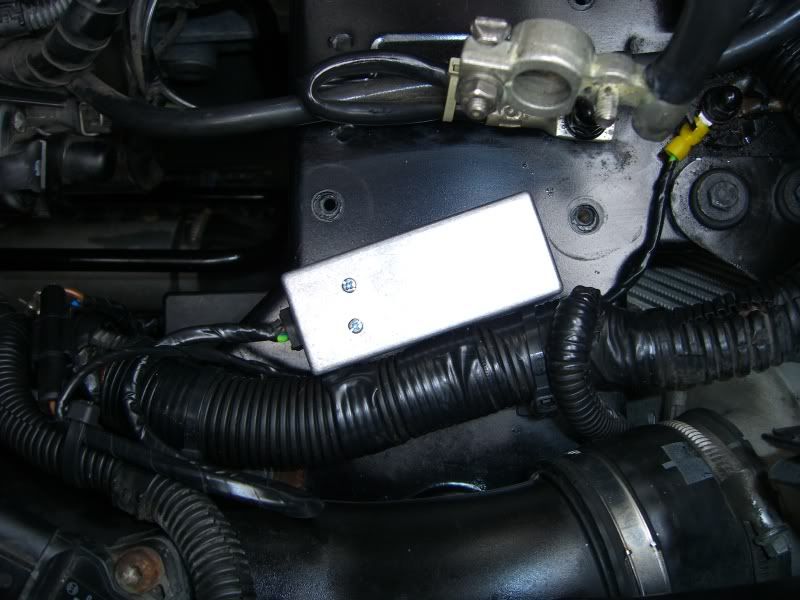
Where abouts did you fasten the earth to? is not that clear on you pics.
Top guide by the way, might have to give it a go as i dont have the £400 its going to cost to replace the fans.
Cool, same here, but what if they go again? Bearing in mind my car's warranty ends at the end of this month. So, lets talk preventative measures, any ideas guys?? Heatinks perhaps??
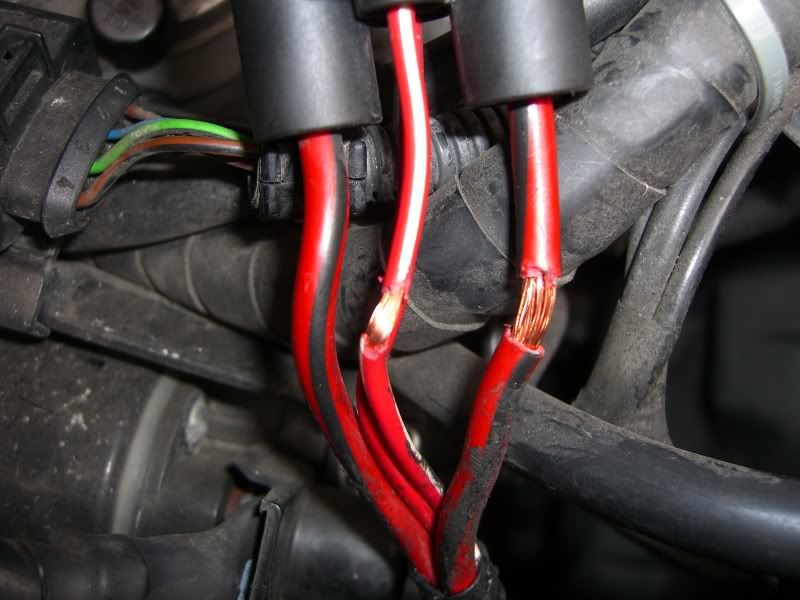
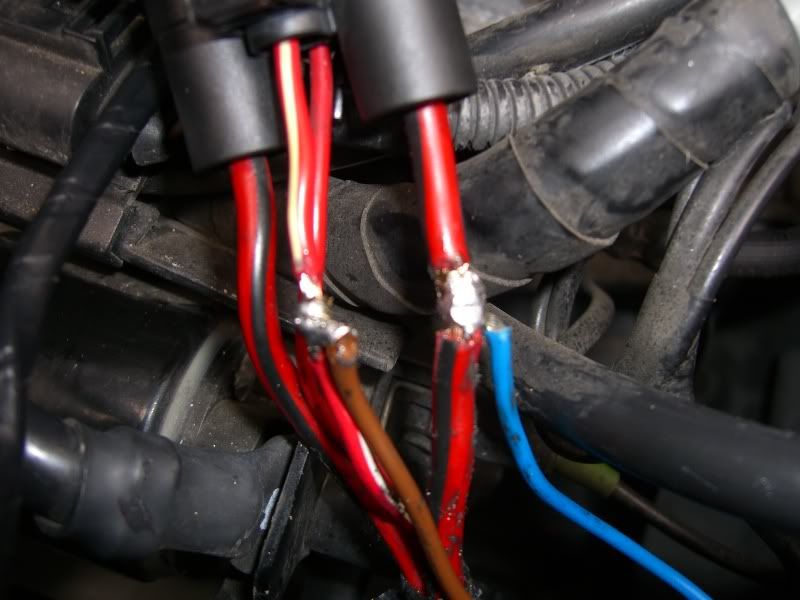
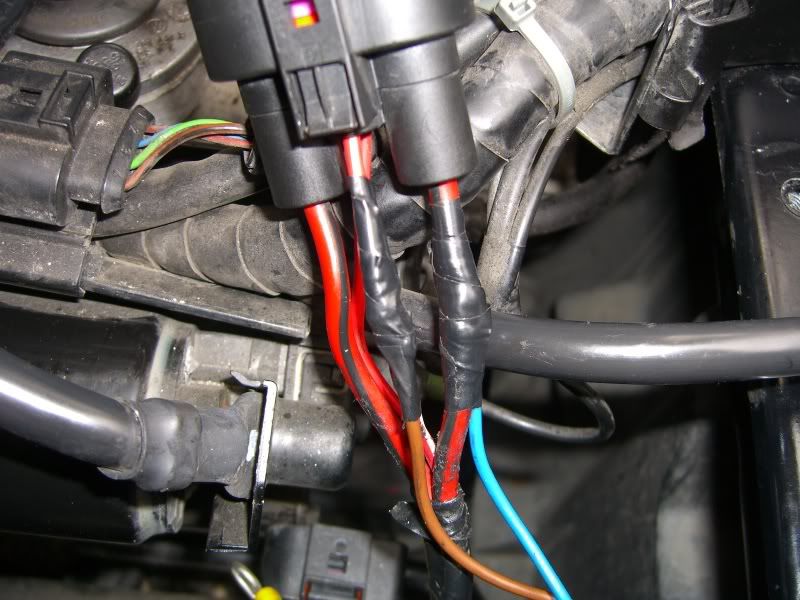
if you look at the last 2 pics(which happen to be the same pic..OOPs lol) you can see on the right of the pic the yellow ring crimp where it is bolted to the right earthing point .. you simply have to undo the black nut thats there and slip the ring crimp over the and re tighten
