
What is it?
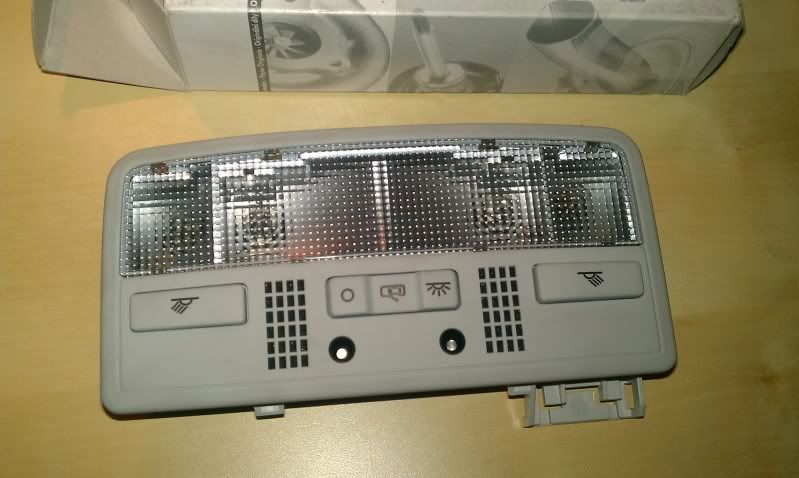
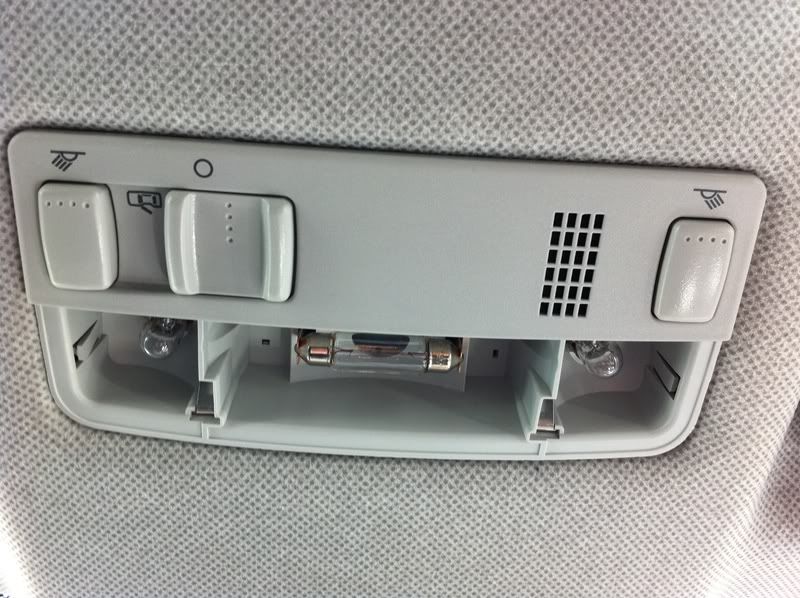
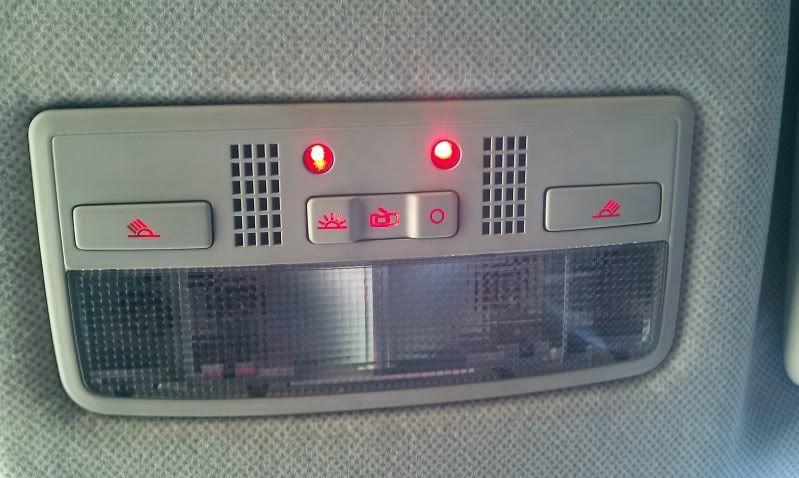
The W8 light is an interior dome light that was fitted to the Passat W8 and some other VAG models. The main advantage it offers is backlit buttons, and ambient red LEDs that shine on the centre console, nice for adding a bit of class to the Ibiza. The W8 light contains 4 W5W bulbs, 2 for map reading lights and 2 for the centre light so, if you’ve got a base model Ibiza this is another advantage.
What do I need?
At the very least you need the W8 light itself:
3B7 947 105 F 2EN - W8 Light Grey
The rest is optional, and only required if you want to make a plug and play wiring loom, this makes the light a little easier to install and a lot easier to remove if you ever decided to sell the car with the original light.
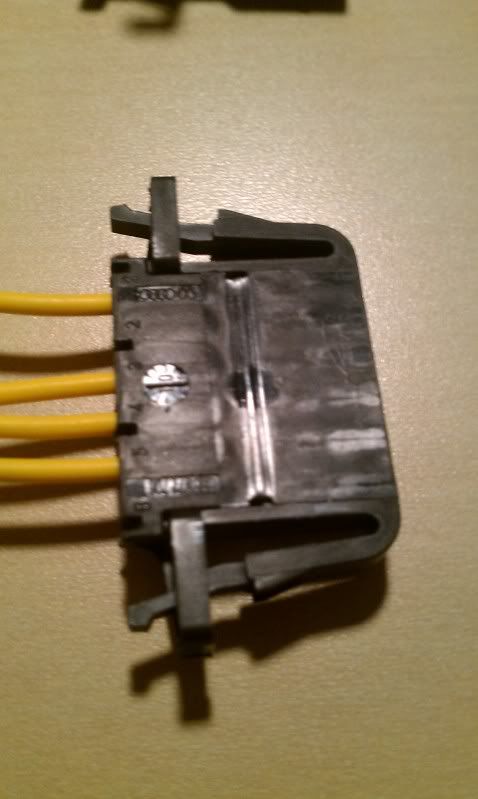
3B0 972 706 - Flat Contact Housing
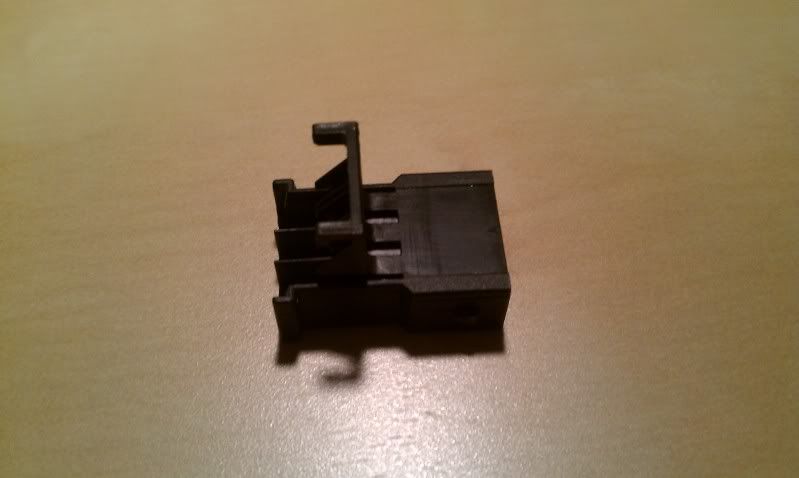
893 971 993 – Housing
2x 000 979 131 EA – Wires
2x 000 979 103 E – Wire Set
You can also buy pre made looms from eBay, they cost a fortune so don’t bother, these parts cost next to nothing from any good VW or SEAT dealer. I personally recommend David at SERE Motors (see dealer section of the forum)
Creating the loom
You can skip these steps if you’ve bought a loom of eBay.
Take the 6 pin W8 plug (3B0 972 706) and insert the 4 ends of your two wires (000 979 131 EA) into pins 1, 3, 4 and 5 of the W8 plug, like so:
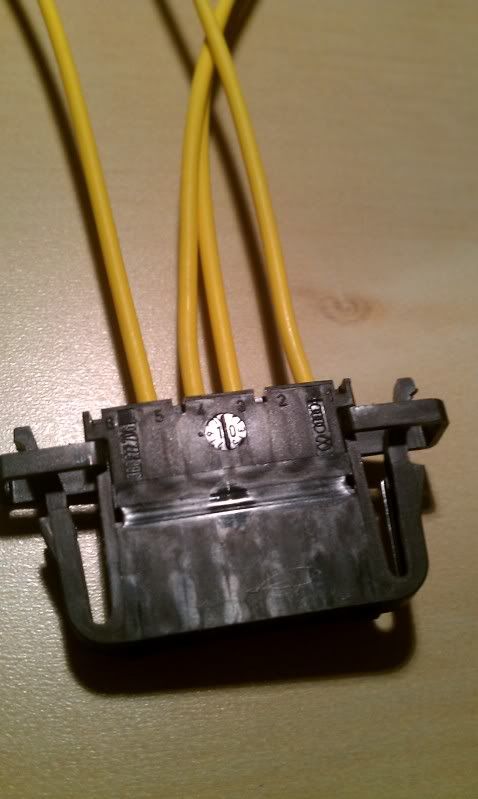
Take the 3 pin female plug (893 971 993) and insert the wires (000 979 103 E)
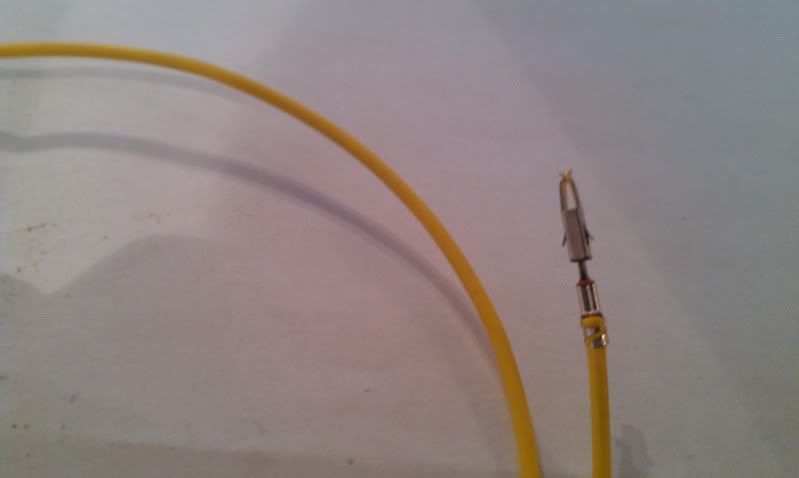
Cut the loops on the wires so you have 4 individual wires coming from the male plug and 3 from the female plug.
Wire them like so:
W8 6pin plug ------------------------------3 pin female plug
4--------------------------------------------------------------3
5--------------------------------------------------------------2
3--------------------------------------------------------------1
1------------------------------------------------------------------------------------------(this wire runs down to headlight switch and connects to blue/grey dimmer wire at the back of the main light switch, so you will need to make it longer)
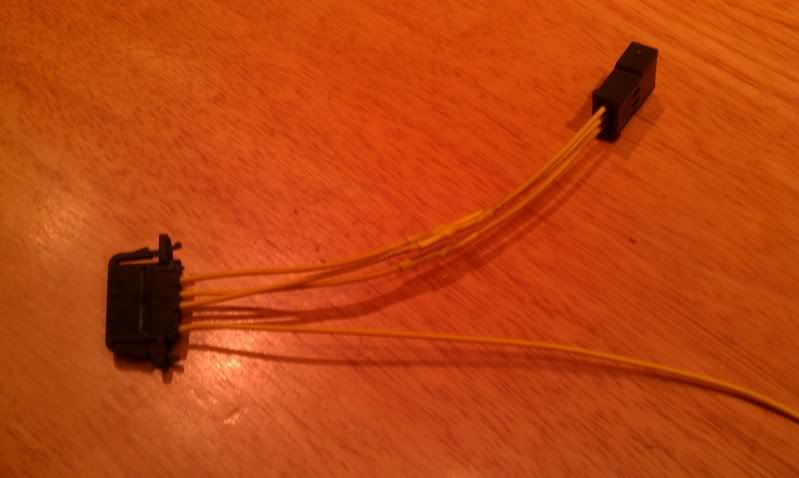
Your loom should look like the following when completed:
Removeing the existing light and fitting the new one
Pull off the plastic cover
Undo the two torx screws and remove the light with a bit of force, be careful not to remove the metal surround between the light and the roof lining.
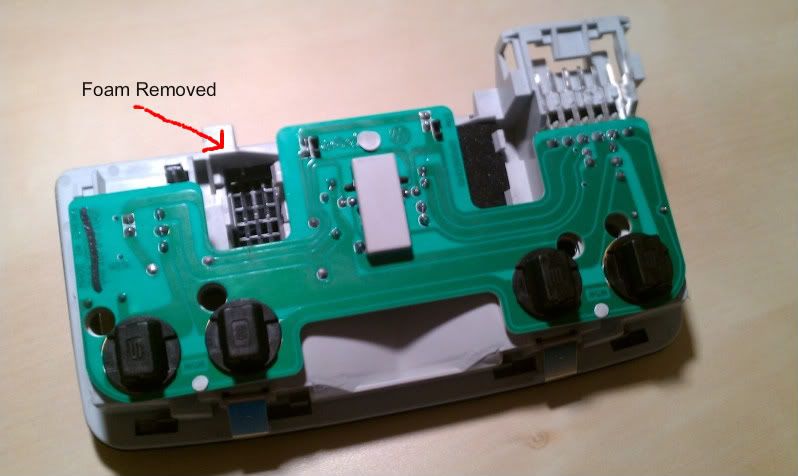
Disconnect the wiring plug from the light, and if you have Bluetooth you will need to remove the Bluetooth mic from the light as well. This takes a little bit of force, so be careful not to damage the mic. It will fit into the same position on the W8 light, but you will need to remove the foam as shown below.
Connect the W8 light to the cars existing loom with the loom adaptor.
All being well the W8 light should be working correctly, but the buttons will not be backlit, nor will the ambient LED’s be working because we need to connect them to a 12v feed coming from the light switch.
Wiring up the backlit buttons and ambient LEDs
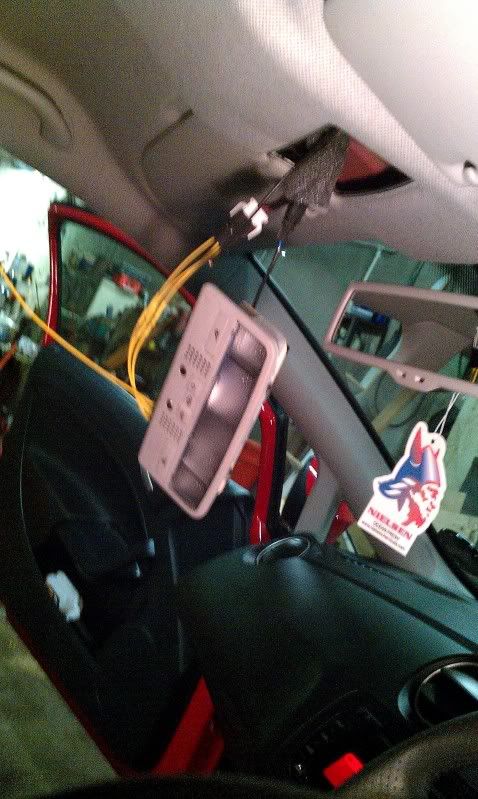
Feed the long wire from pin 1 across the roof lining over towards the driver’s door, the roof lining is pretty flexible so this isn’t as hard as it sounds, then run the cable down the A pillar, again all you need to do is pull back the rubber door seal a bit and you can see where to run the wire down towards the dash.
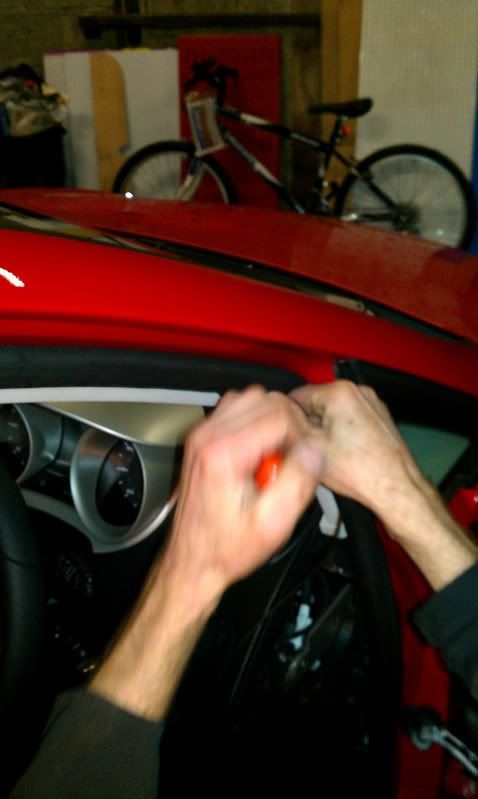
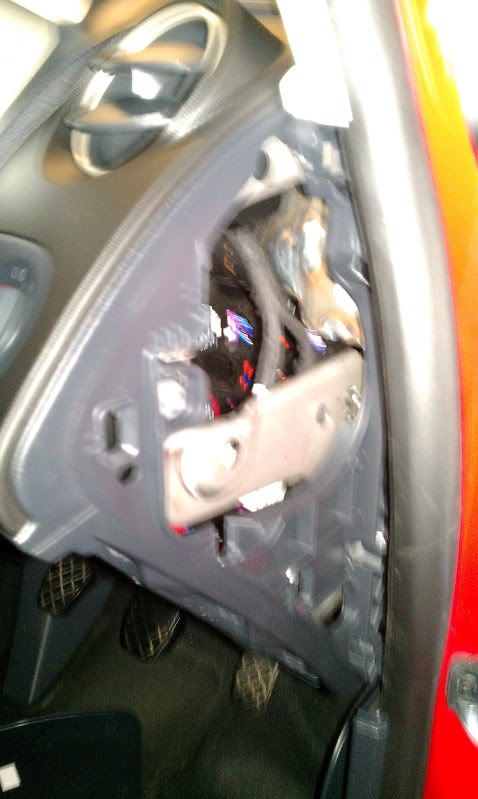
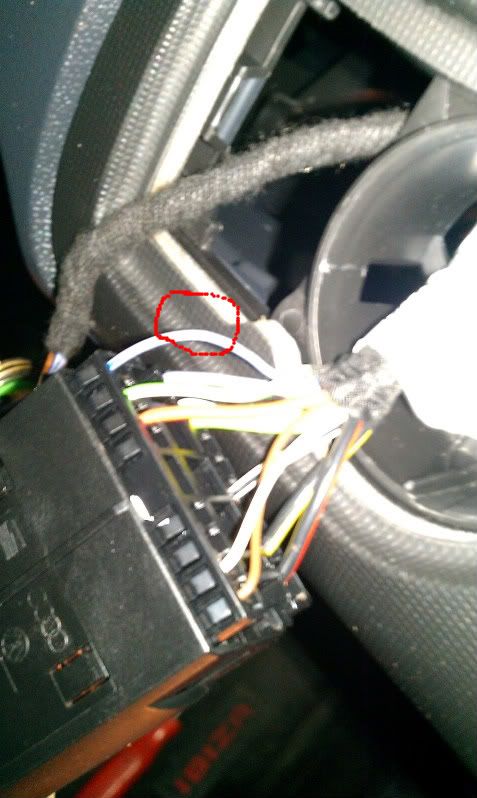
The tricky bit is at the bottom of the A pillar, I removed the panel at the side of the dash and was able to run the cable behind the dashboard and up towards the light switch.
The pictures should explain what I’m talking about.
Remove the light switch by pushing the switch in and turning it to the sidelight position, then pull it out.
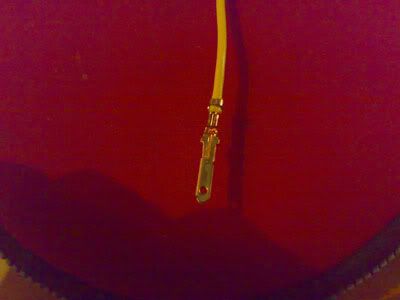
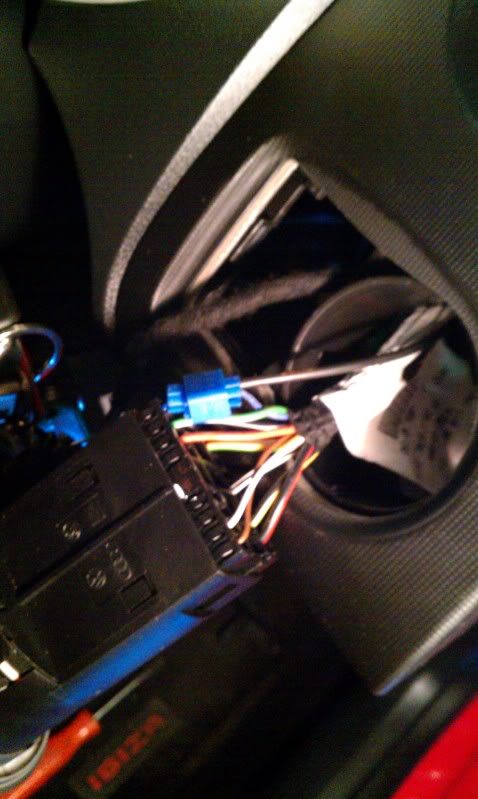
Find the 12v dimmable cable at the rear of the light switch, in my car is was the blue/grey wire circled in the photo below and I’d imaging all Ibizas are the same.
Connect the wire from the W8 light to the blue grey wire, either by soldering directly to it, or by using a scotch lock. We could have a long debate on which method is better but it's entirely you’re choice I'd say soldering is the better option but I’ve temporarily used a scotch lock.
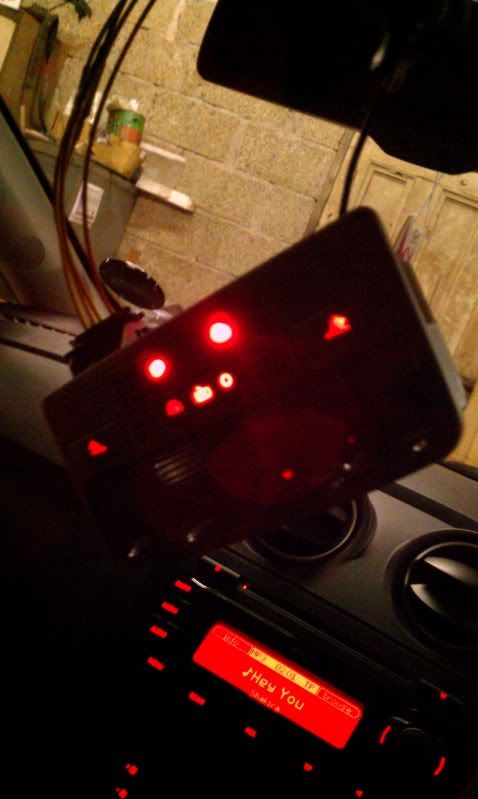
Turn the sidelights on and check that your buttons have lit up.
Refitting the W8 light
Push the light back up into the roof lining until it clicks into place, no need for the Torx screws from the existing light, the mounting points in the roof don’t line up with the W8 light anyway. It’s a snug fit and there’s no chance of it going anywhere!
Job Done!
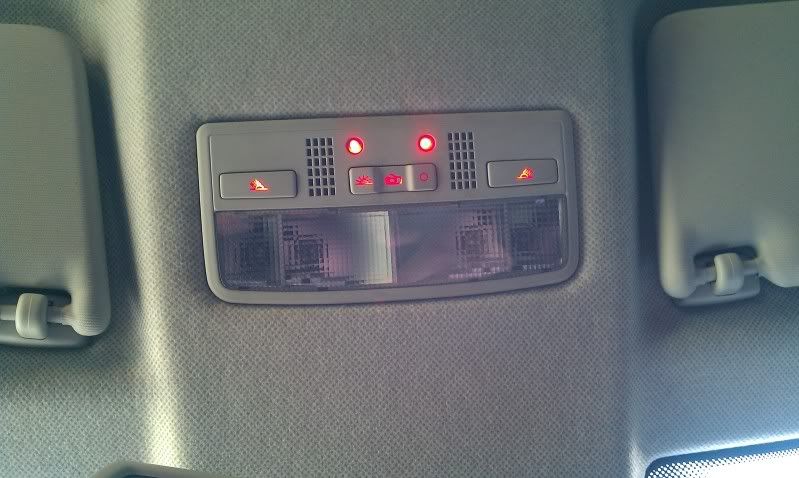
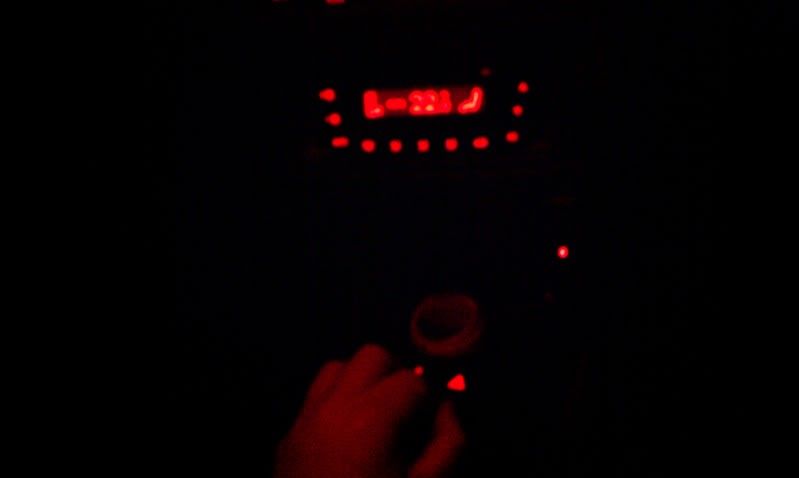
Ambient lighting at nite:
Hope this guide was useful. I’ve probably made it sound awfully complicated, but trust me, it’s pretty straight forward. Any problems send me a PM and I’ll do my best to help.
The W8 light is an interior dome light that was fitted to the Passat W8 and some other VAG models. The main advantage it offers is backlit buttons, and ambient red LEDs that shine on the centre console, nice for adding a bit of class to the Ibiza. The W8 light contains 4 W5W bulbs, 2 for map reading lights and 2 for the centre light so, if you’ve got a base model Ibiza this is another advantage.
What do I need?
At the very least you need the W8 light itself:
3B7 947 105 F 2EN - W8 Light Grey
The rest is optional, and only required if you want to make a plug and play wiring loom, this makes the light a little easier to install and a lot easier to remove if you ever decided to sell the car with the original light.
3B0 972 706 - Flat Contact Housing
893 971 993 – Housing
2x 000 979 131 EA – Wires
2x 000 979 103 E – Wire Set
You can also buy pre made looms from eBay, they cost a fortune so don’t bother, these parts cost next to nothing from any good VW or SEAT dealer. I personally recommend David at SERE Motors (see dealer section of the forum)
Creating the loom
You can skip these steps if you’ve bought a loom of eBay.
Take the 6 pin W8 plug (3B0 972 706) and insert the 4 ends of your two wires (000 979 131 EA) into pins 1, 3, 4 and 5 of the W8 plug, like so:
Take the 3 pin female plug (893 971 993) and insert the wires (000 979 103 E)
Cut the loops on the wires so you have 4 individual wires coming from the male plug and 3 from the female plug.
Wire them like so:
W8 6pin plug ------------------------------3 pin female plug
4--------------------------------------------------------------3
5--------------------------------------------------------------2
3--------------------------------------------------------------1
1------------------------------------------------------------------------------------------(this wire runs down to headlight switch and connects to blue/grey dimmer wire at the back of the main light switch, so you will need to make it longer)
Your loom should look like the following when completed:
Removeing the existing light and fitting the new one
Pull off the plastic cover
Undo the two torx screws and remove the light with a bit of force, be careful not to remove the metal surround between the light and the roof lining.
Disconnect the wiring plug from the light, and if you have Bluetooth you will need to remove the Bluetooth mic from the light as well. This takes a little bit of force, so be careful not to damage the mic. It will fit into the same position on the W8 light, but you will need to remove the foam as shown below.
Connect the W8 light to the cars existing loom with the loom adaptor.
All being well the W8 light should be working correctly, but the buttons will not be backlit, nor will the ambient LED’s be working because we need to connect them to a 12v feed coming from the light switch.
Wiring up the backlit buttons and ambient LEDs
Feed the long wire from pin 1 across the roof lining over towards the driver’s door, the roof lining is pretty flexible so this isn’t as hard as it sounds, then run the cable down the A pillar, again all you need to do is pull back the rubber door seal a bit and you can see where to run the wire down towards the dash.
The tricky bit is at the bottom of the A pillar, I removed the panel at the side of the dash and was able to run the cable behind the dashboard and up towards the light switch.
The pictures should explain what I’m talking about.
Remove the light switch by pushing the switch in and turning it to the sidelight position, then pull it out.
Find the 12v dimmable cable at the rear of the light switch, in my car is was the blue/grey wire circled in the photo below and I’d imaging all Ibizas are the same.
Connect the wire from the W8 light to the blue grey wire, either by soldering directly to it, or by using a scotch lock. We could have a long debate on which method is better but it's entirely you’re choice I'd say soldering is the better option but I’ve temporarily used a scotch lock.
Turn the sidelights on and check that your buttons have lit up.
Refitting the W8 light
Push the light back up into the roof lining until it clicks into place, no need for the Torx screws from the existing light, the mounting points in the roof don’t line up with the W8 light anyway. It’s a snug fit and there’s no chance of it going anywhere!
Job Done!
Ambient lighting at nite:
Hope this guide was useful. I’ve probably made it sound awfully complicated, but trust me, it’s pretty straight forward. Any problems send me a PM and I’ll do my best to help.
