
A number of people have asked how i fit my door handle lights so im making a guide here for everyone to use:
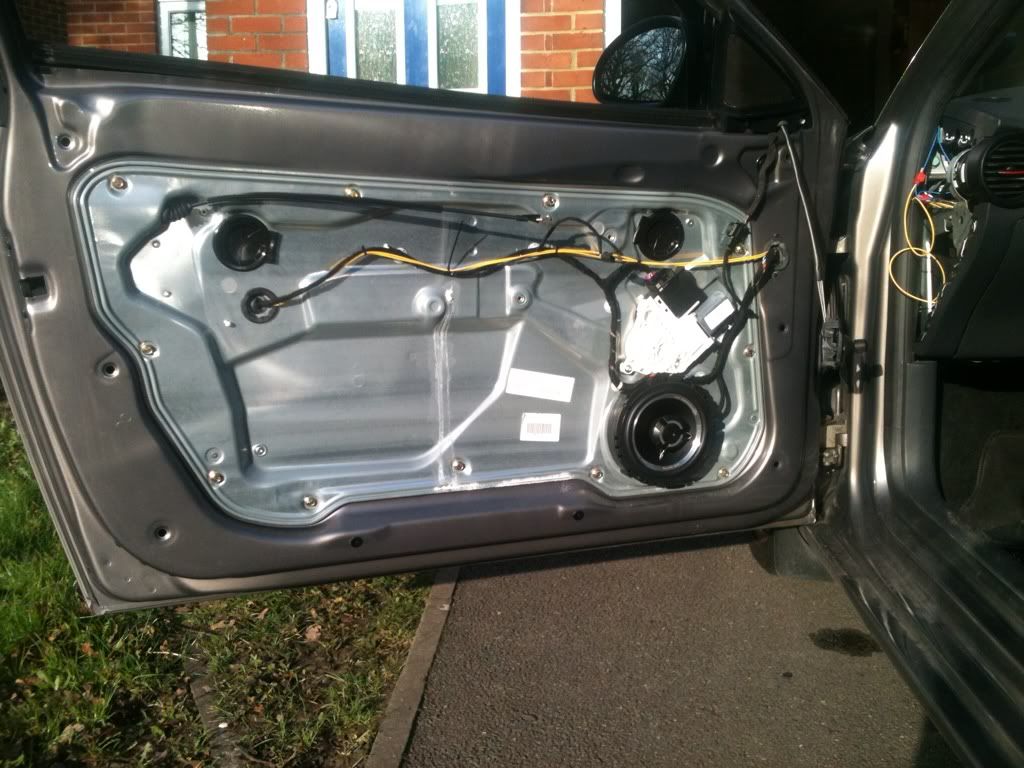
1) Remove door card to reveal this:
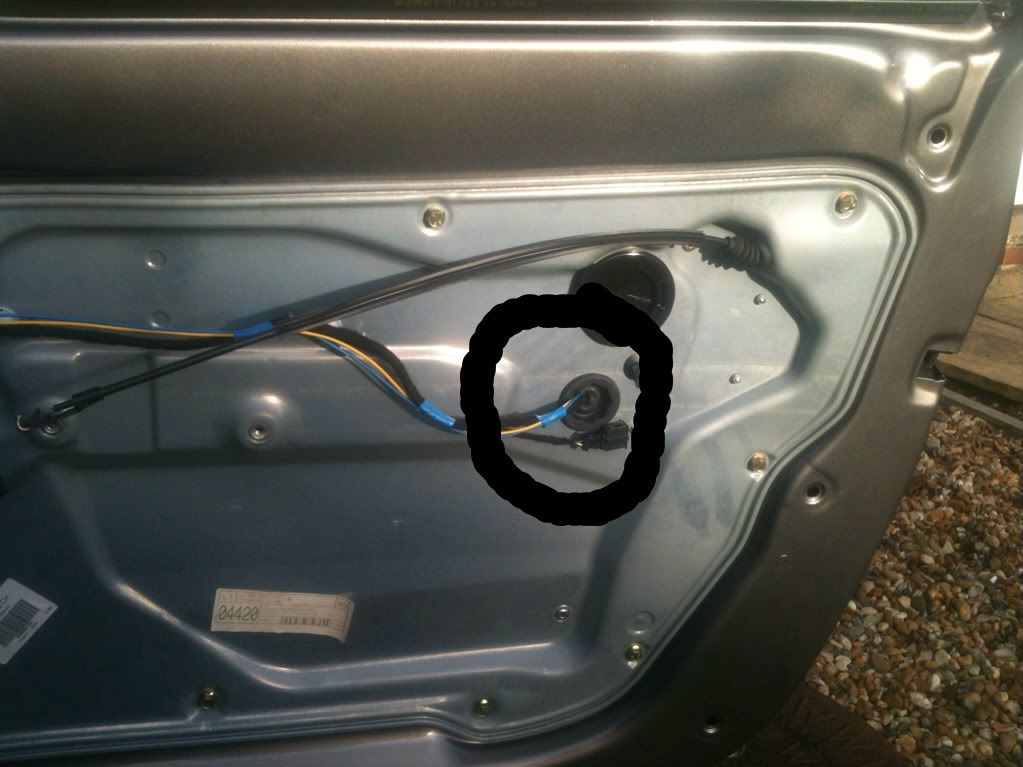
2) Remove the circled bung:
3) Remove door lock barrel (next to the handle): SORRY NO PHOTO BUT ALL YOU HAVE TO DO IS LOOSEN THE T25 TORX SCREW ON THE SIDE OF THE DOOR BEHIND THE LITTLE PLASTIC CAP AND WIGGLE IT OUT WHILST PULLING ON THE DOOR HANDLE.
4) Now push something which is flexible yet keeps its shape into the hole where you remover the grommit earlier (i used the last piece of a fishing rod) and out through where the lock barrel used to be.
5) Now attatch your cables to the end of the thing you pushed through the door using insulation tape and pull the cables back into the door panel.
6) Make a small slit into the rubber grommit and thread the cables through and push grommit back into place.
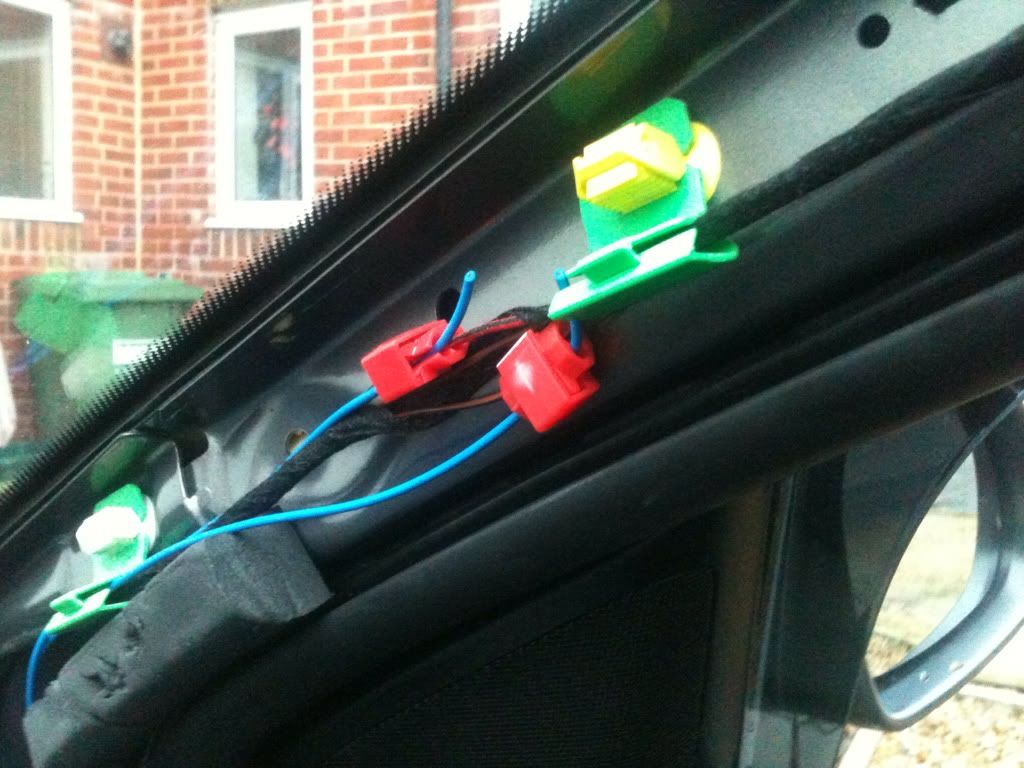
7) Route your cables like so across the door panel and fasten to the original wiring looms:
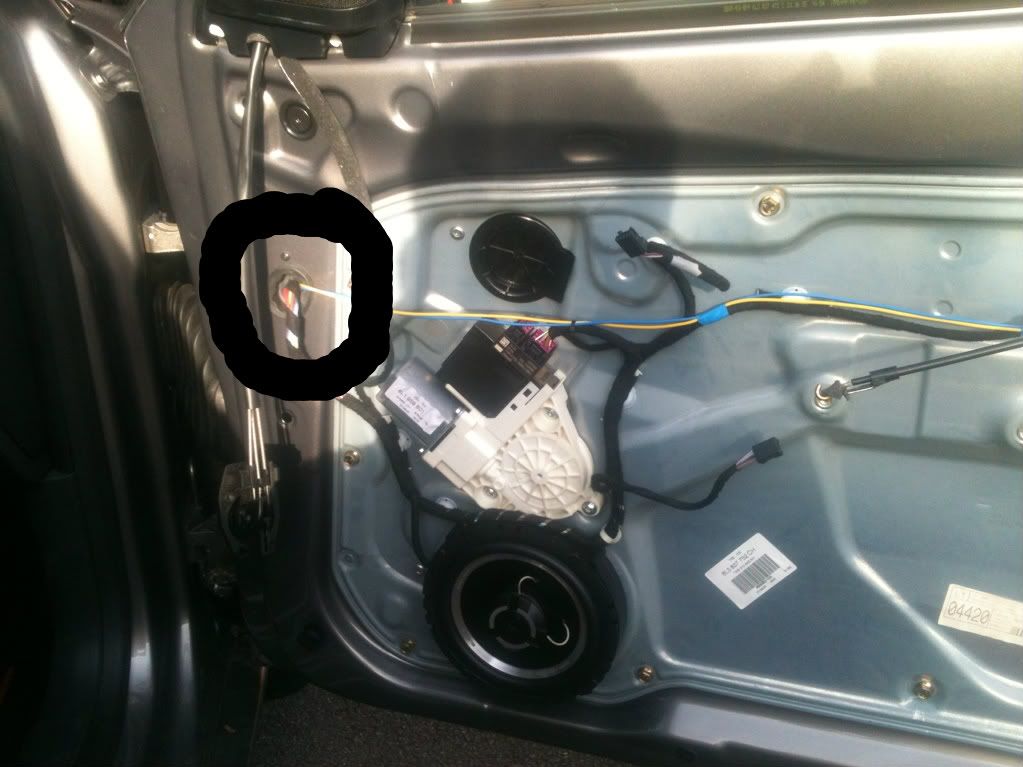
8) Remove the circled bung and again, make a small slit into it and thread your cables through it:
NOW THE TRICKY BIT!
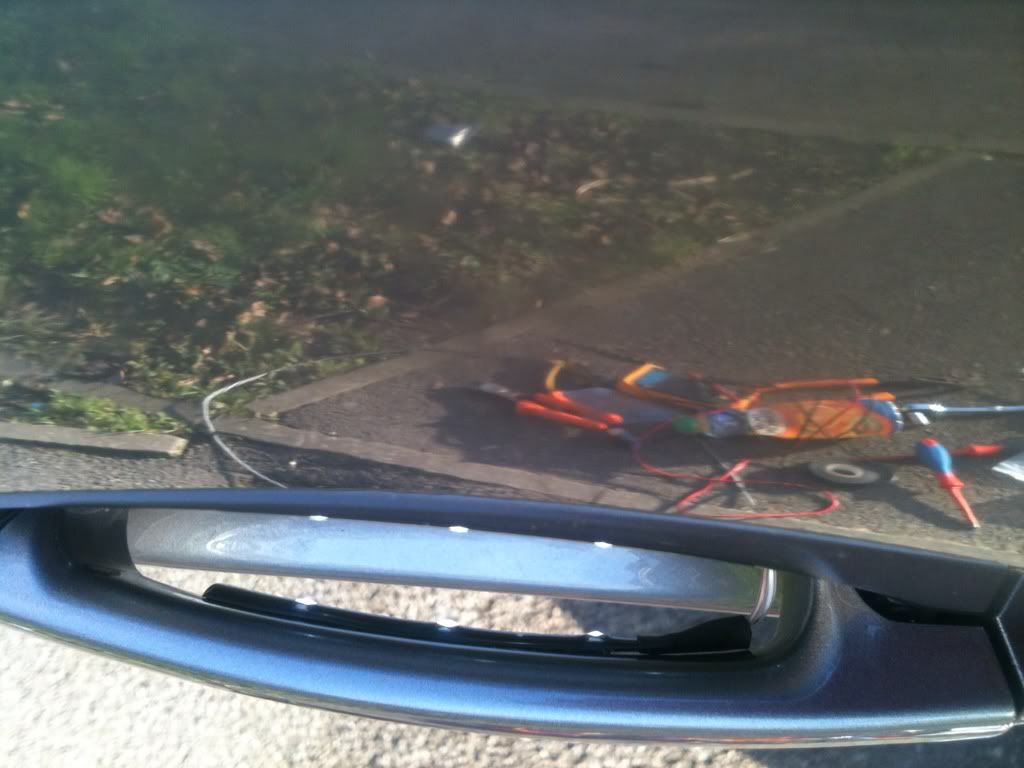
9) Remove the Rubber thing that protects the cables that joins the door to the car (just pull on each side and it comes away)
10) Using something flexible but sturdy is needed (i used a metal cable from a multi-gym). Tape your cables to this and push them downwards and put your fingers inside the part where the joiner goes to and when you feel the cables just pull them through.
11) Now re-tape the cables to your routing device and thread it through the rubber joiner thing.
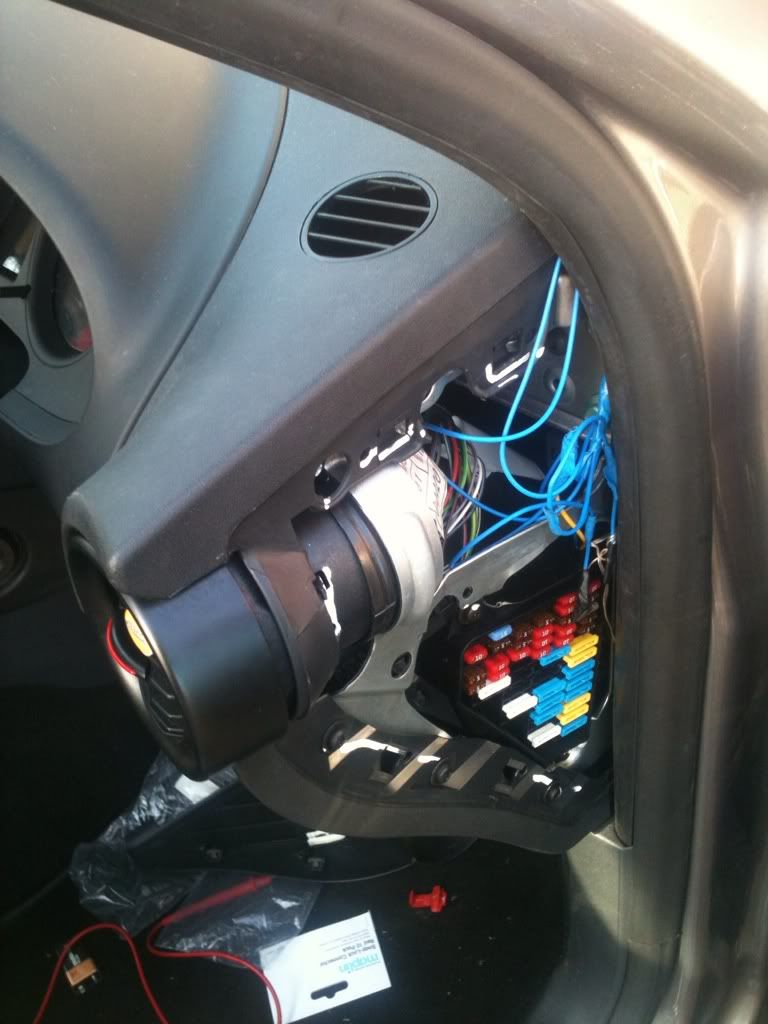
12) Once its passed through the rubber, remove the cover on the side of the dash like so:
13) Keep the cables taped to the routing device this time and push it through the hole where the original cables go through (there is a blank hole in the connetor above where the cables go into the body, youll understand when you see it).
14) Now put your hand under the dash and poke the routing device around until you feel it. Once you can feel it pull it through and disconnect the cables from it.
Now, if you havnt already fitted footwell lights (i have hence the mass amount of cables) then this is what your going to have to do.
15) Remove the A-pillar trim on the drivers side to reveal the cables that run to the interior light:
16) your going to have to splice into the RED/BLACK cable and the BROWN/BLACK cable. RED/BLACK IS LIVE, BROWN/BLACK IS NEUTURAL
17) Now just attatch your strip like so:
18) Now replace everything and start on the other side. ITS THE EXACT SAME APART FROM YOU WILL NEED MORE WIRE FOR THE PASSENGER SIDE AS YOU NEED TO GET BACK TO THE DRIVERS A-PILLAR FOR THE POWER SOURCE.
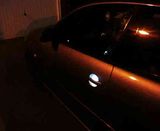
19) Hey presto you have a door light that comes on/off when doors open and close and when you unlock/lock.
Two quick videos that show what it looks like:
1) Remove door card to reveal this:
2) Remove the circled bung:
3) Remove door lock barrel (next to the handle): SORRY NO PHOTO BUT ALL YOU HAVE TO DO IS LOOSEN THE T25 TORX SCREW ON THE SIDE OF THE DOOR BEHIND THE LITTLE PLASTIC CAP AND WIGGLE IT OUT WHILST PULLING ON THE DOOR HANDLE.
4) Now push something which is flexible yet keeps its shape into the hole where you remover the grommit earlier (i used the last piece of a fishing rod) and out through where the lock barrel used to be.
5) Now attatch your cables to the end of the thing you pushed through the door using insulation tape and pull the cables back into the door panel.
6) Make a small slit into the rubber grommit and thread the cables through and push grommit back into place.
7) Route your cables like so across the door panel and fasten to the original wiring looms:
8) Remove the circled bung and again, make a small slit into it and thread your cables through it:
NOW THE TRICKY BIT!
9) Remove the Rubber thing that protects the cables that joins the door to the car (just pull on each side and it comes away)
10) Using something flexible but sturdy is needed (i used a metal cable from a multi-gym). Tape your cables to this and push them downwards and put your fingers inside the part where the joiner goes to and when you feel the cables just pull them through.
11) Now re-tape the cables to your routing device and thread it through the rubber joiner thing.
12) Once its passed through the rubber, remove the cover on the side of the dash like so:
13) Keep the cables taped to the routing device this time and push it through the hole where the original cables go through (there is a blank hole in the connetor above where the cables go into the body, youll understand when you see it).
14) Now put your hand under the dash and poke the routing device around until you feel it. Once you can feel it pull it through and disconnect the cables from it.
Now, if you havnt already fitted footwell lights (i have hence the mass amount of cables) then this is what your going to have to do.
15) Remove the A-pillar trim on the drivers side to reveal the cables that run to the interior light:
16) your going to have to splice into the RED/BLACK cable and the BROWN/BLACK cable. RED/BLACK IS LIVE, BROWN/BLACK IS NEUTURAL
17) Now just attatch your strip like so:
18) Now replace everything and start on the other side. ITS THE EXACT SAME APART FROM YOU WILL NEED MORE WIRE FOR THE PASSENGER SIDE AS YOU NEED TO GET BACK TO THE DRIVERS A-PILLAR FOR THE POWER SOURCE.
19) Hey presto you have a door light that comes on/off when doors open and close and when you unlock/lock.
Two quick videos that show what it looks like:
Last edited:


