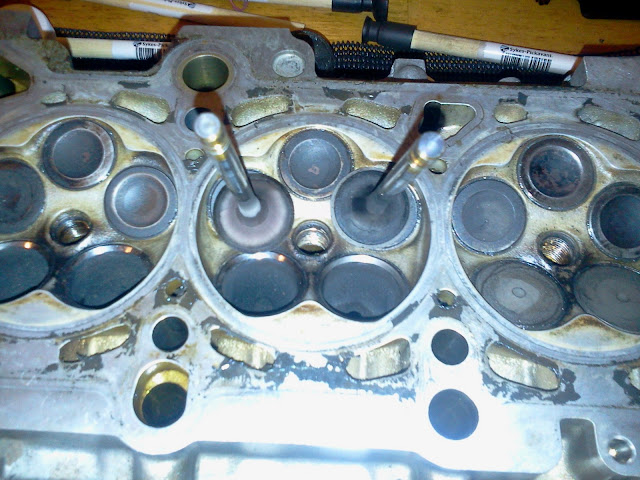
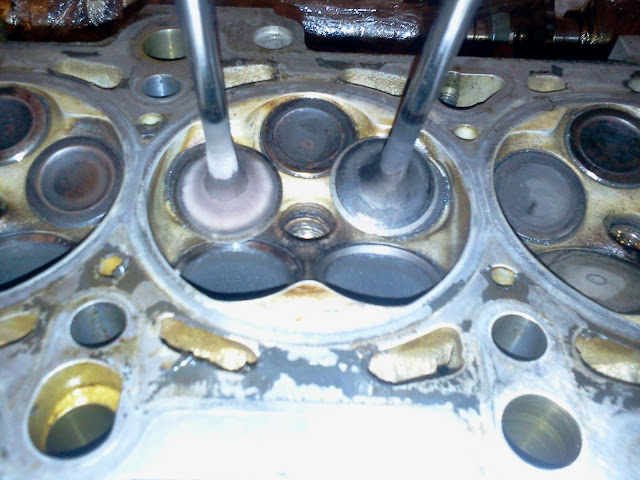
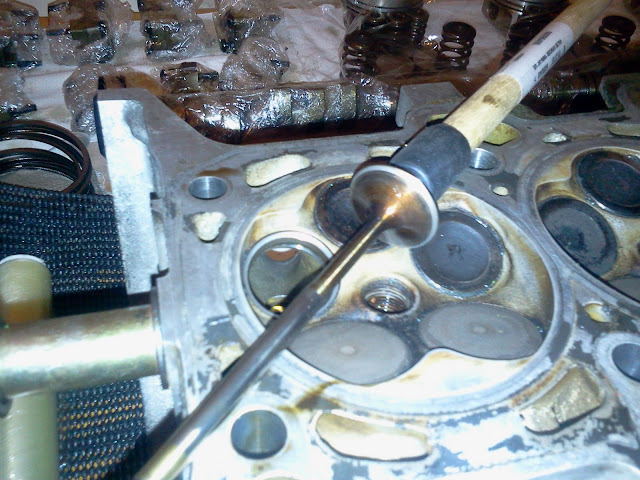
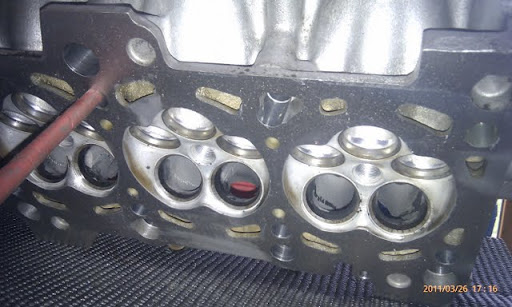
Thanks for the comments. Yeah joe. Contemplated doing a 3 stage cut on the intake valves and a mild port but will not bother tbh. If the intake isnt ported correctly it can cause disproportionate flows and turbulane on the intake. Which is bad ive been told :) . Thinken lap in the standard valves with coarse and fine past anda very mild exhaust port and polish. No need for valves with the power im aiming for.
 
So you went with the nothing option from the all or nothing choice haha. What kind of powers are you looking for? The valves should be changed primarily for revs as they can drop so I guess it depends on the limit set. I will be getting my head all ported up with Supe***** valves, springs and retainers. Probs lapping them all in too, that's why I asked about how long you do it for, only rebuilt a head once before.
 
anything under 8k is fine for the std valves, Plus they have been known to drop for more reasons than simply being standards valves.

http://badger-5.com/bin/5v-installation-note-supe*****.pdf

its a bad move to port the intake is what im getting from the "knowledge base" that is the internet and from the experts that have being building this engine for years. however if you can explain otherwise please do! It doesnt take long to port a head but it takes a long time to figure out if it is going to pay off. That is why I am currently leaving them be and only porting the exhaust, so really a do half rather than nothing.

only aiming at 360-380 mark anyway as its only a daily driver. have a 500kg kitcar for the weekend stuff to keep me going.
 
Yeah 8k was what I heard... I haven't researched enough on the porting inlet side of things, someone who does port heads (IbizaAlex) would be able to clarify this for me as to why and what you should port.

What other car do you have :D?
 
Neglecting this a bit recently,

so in the last few ive managed to paint the block, 4 layers of high temp 2 pack paint for the back (around the turbo area)
3 layers of black enamel for the front followed with a blue pearl and 4 layers of High temp fuel resistant clear coat.
2011-02-17%2023.39.46.jpg

2011-02-16%2019.10.40.jpg

2011-02-16%2019.11.04.jpg

2011-02-22%2022.04.30.jpg


I have converted one of the guys in the house here aswell!

so we have an engine builder in the making.
2011-02-16%2019.14.37.jpg

2011-02-16%2019.14.22.jpg


Got to work on lapping in the valves. Job finally done, a single course cut followed with a fine paste. The seats where pretty good to start with. there was a build up of carbon at the closest part of the exhaust valves on all cylinders. so a before (left) and after (right) shot.
2011-02-22%2022.33.07.jpg

2011-02-22%2022.33.26.jpg


and a finished inlet valve.
2011-02-22%2022.49.37.jpg


So from here Its off to get the head acid dipped and "de coked", skimmed and get the valves ultrasonically cleaned,

Ordering up a hone as I type ere so thats going to be next weeks work. All parts for the rebuild are finally being ordered on Monday.

What are peoples thoughts on polished mani's? I have one but am thinking about painting it...
 
thanks all.
delays as per usual...

was away last week so arrived into work this morning to see 4 lovely cat cams forged rods and calico coated bearings on my desk (thanks to badger5). have every possible gasket and seal arriving tomorrow from David at Seres so its gonna be building into the early hours of the morning next week!

head is being collected on Friday and I managed to hone the block last night,

pics to follow.

anyone know where to get plastigage?
 
thanks all,

getting ready for dubshed this week so no real engine progress. Next week all systems are go...
 
So today turned into an engine rebuild day!

got a nice bit done.

Got all my parts from seres.
IMAG0234.jpg


reassembled the head

IMAG0235.jpg

IMAG0236.jpg


fitted valve seals

IMAG0237.jpg

IMAG0238.jpg


fitted valves, springs, retainers and collets
IMAG0239.jpg

IMAG0241.jpg

IMAG0243.jpg

now all clean
IMAG0244.jpg

IMAG0245.jpg
 
followers and cams fitted and torqued up
IMAG0246.jpg

IMAG0247.jpg


coffee break :)
IMAG0248.jpg


now for the bottom end

new piston ring set
IMAG0249.jpg


the first ring (silver), second ring (black) and the oil seal ring,
IMAG0251.jpg


new CatCam rods, rings, pistons and calico coated race bearings
IMAG0252.jpg


IMAG0254.jpg


rings ground in and gapped.
IMAG0255.jpg

IMAG0257.jpg
 
two
IMAG0258.jpg


gapping the rings for cylinder 3, went for 16 thou on 1st and 18 thou on the second 20 thou on oil ring
IMAG0259.jpg

IMAG0260.jpg


three
IMAG0261.jpg


plastigauge on cylinder 4
IMAG0265.jpg


all big end bolts where torqued to 20 then 35 then 50 ft lbs for plastigauge test then to 50, loosened and retightened to 50 afterwards.

then fitted the new all pump and pick up
IMAG0267.jpg


have base coat on the head now, needs lacquer later in the week.
 
hi mate im changing my chain tensioner, but going to change tappets well doing work as a bit noisy, is there a specific link link that you split the chain on and is it a easy job, also what torque cams up too?

thanks

if you have the new tensioner there is a clamp on it to loosen the chain, no need to split the chain, torque to 10NM