
So a few days ago my boot latch started making some rather funky noises and then suddenly wouldn't lock the boot. The noise sounded exactly like this (not my video)
So I ordered a new part from eBay with the part number 1P0827505A9B9 but always best to use the number from your old latch to make sure it's the correct one.
To fit the new part is very easy even for me and will save you an hours of labour at your garage I'd assume.
First you will need the following tools
- plastic trim removal tool
- XZN M8 (8 mm) I think...
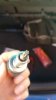
- my screwdriver came with this and didn't say what it was lol so here's a picture
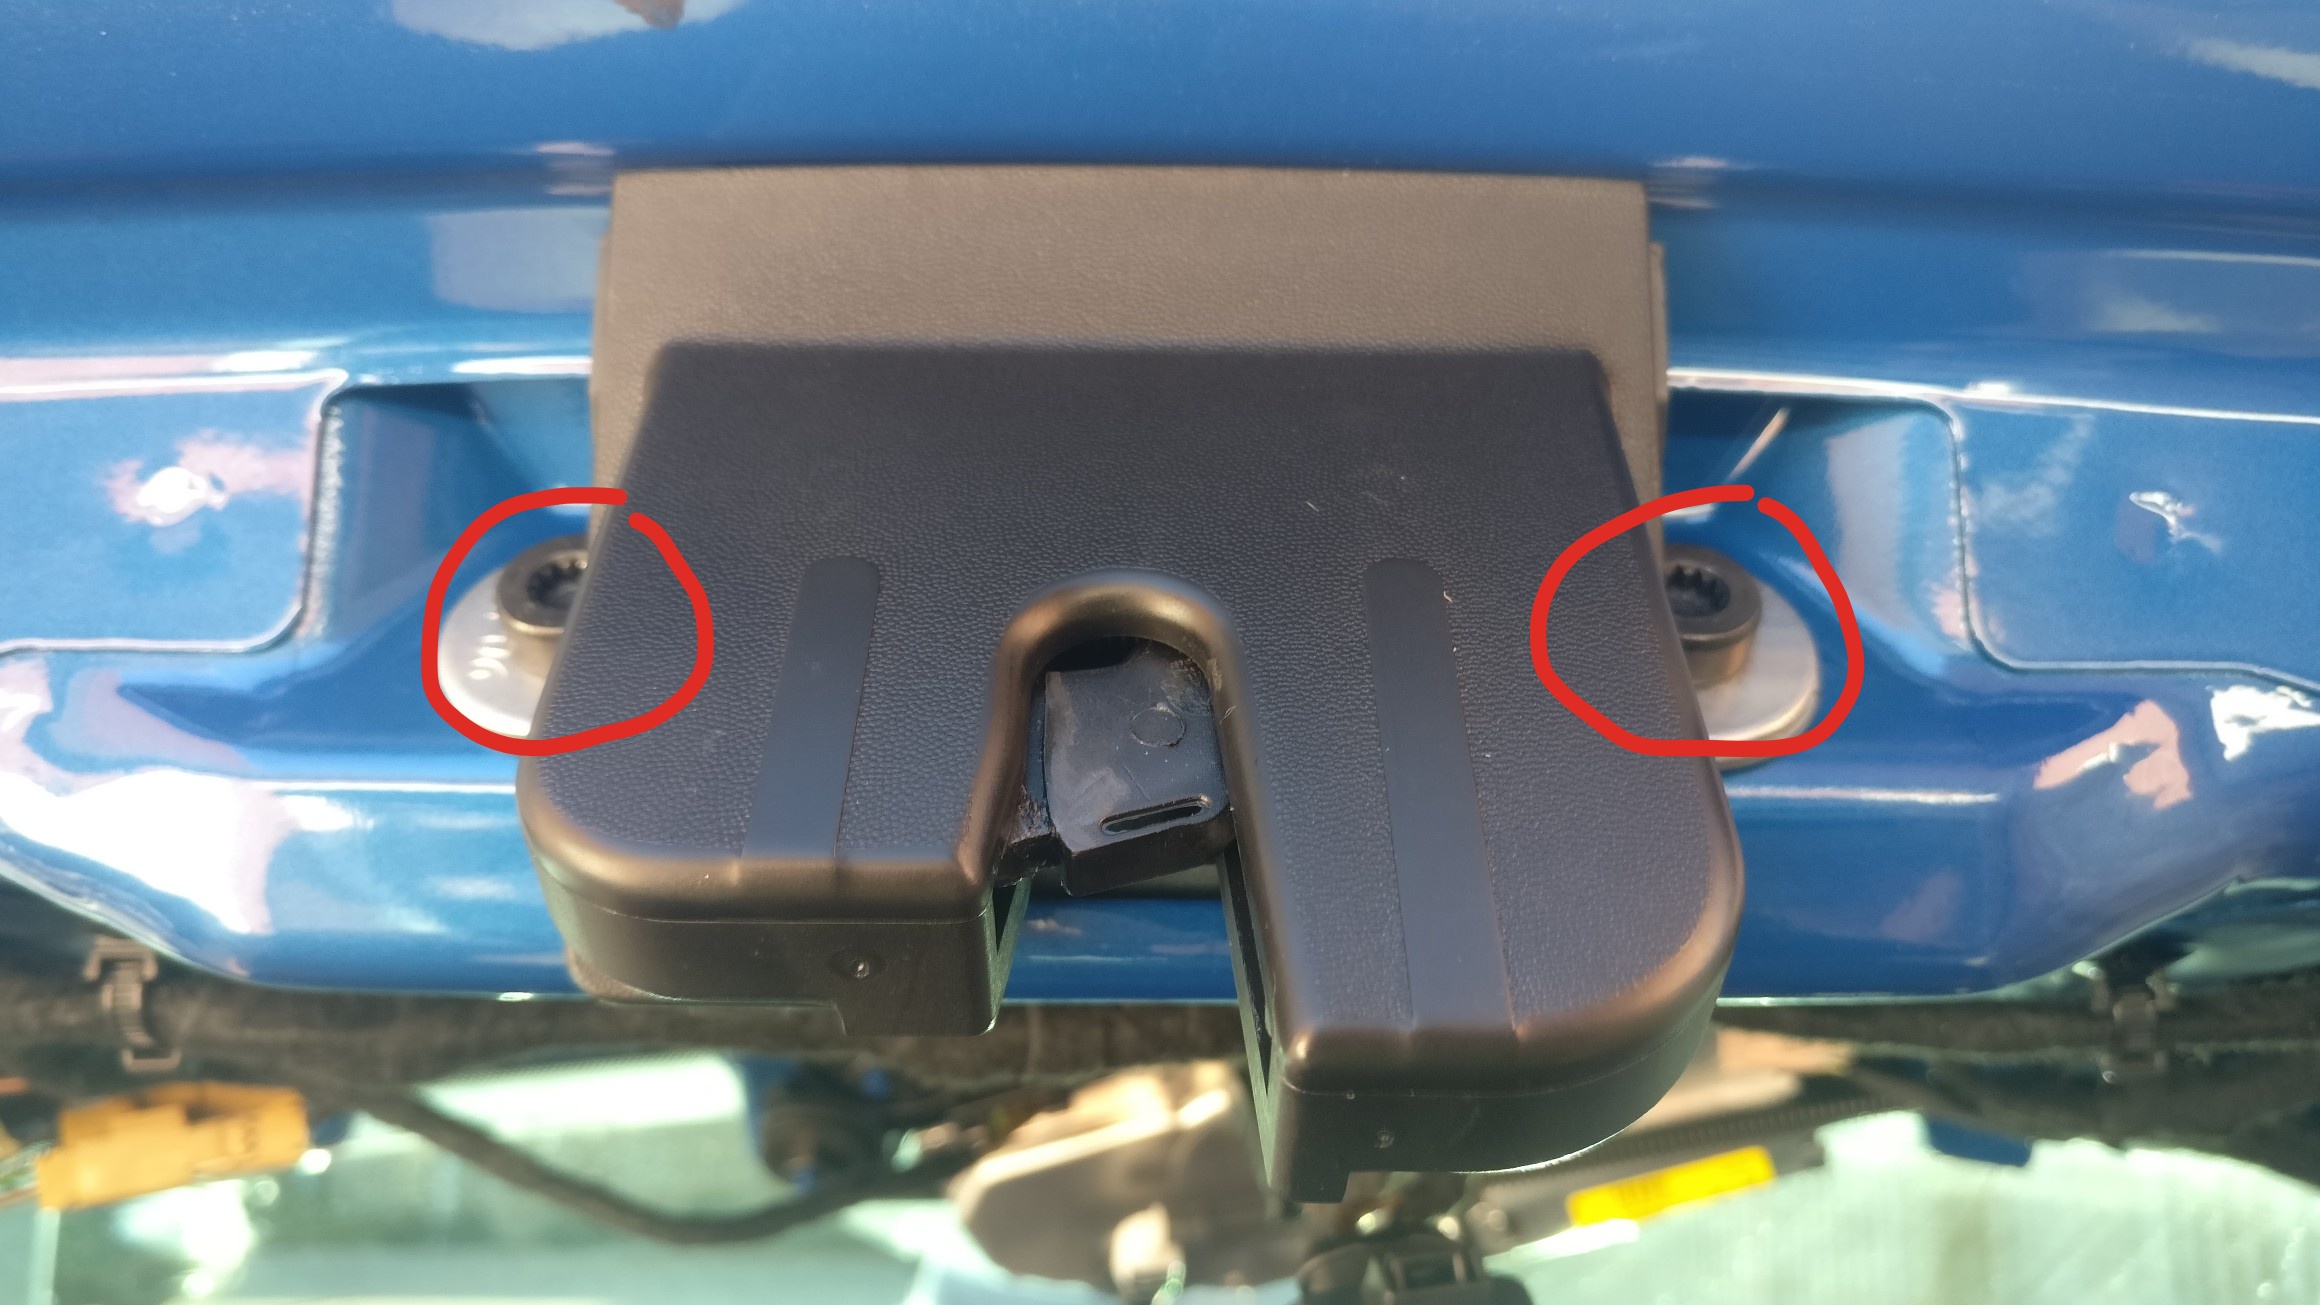
OK so now to undo the first 2 screws holding the trim onto the tailgate. You'll find them by sticking your head into the boot and looking up at the latch you'll see 2 screws (one on either side of the latch)
Once both screws are taken out you need to take off the plastic trim, for this you'll need the trim remover at the ready.
Looking at the rear of the car I started by inserting the trim removal tool in about 30cm to the left of the latch, once the tool is in a few inches twist it as this helps release the clips.
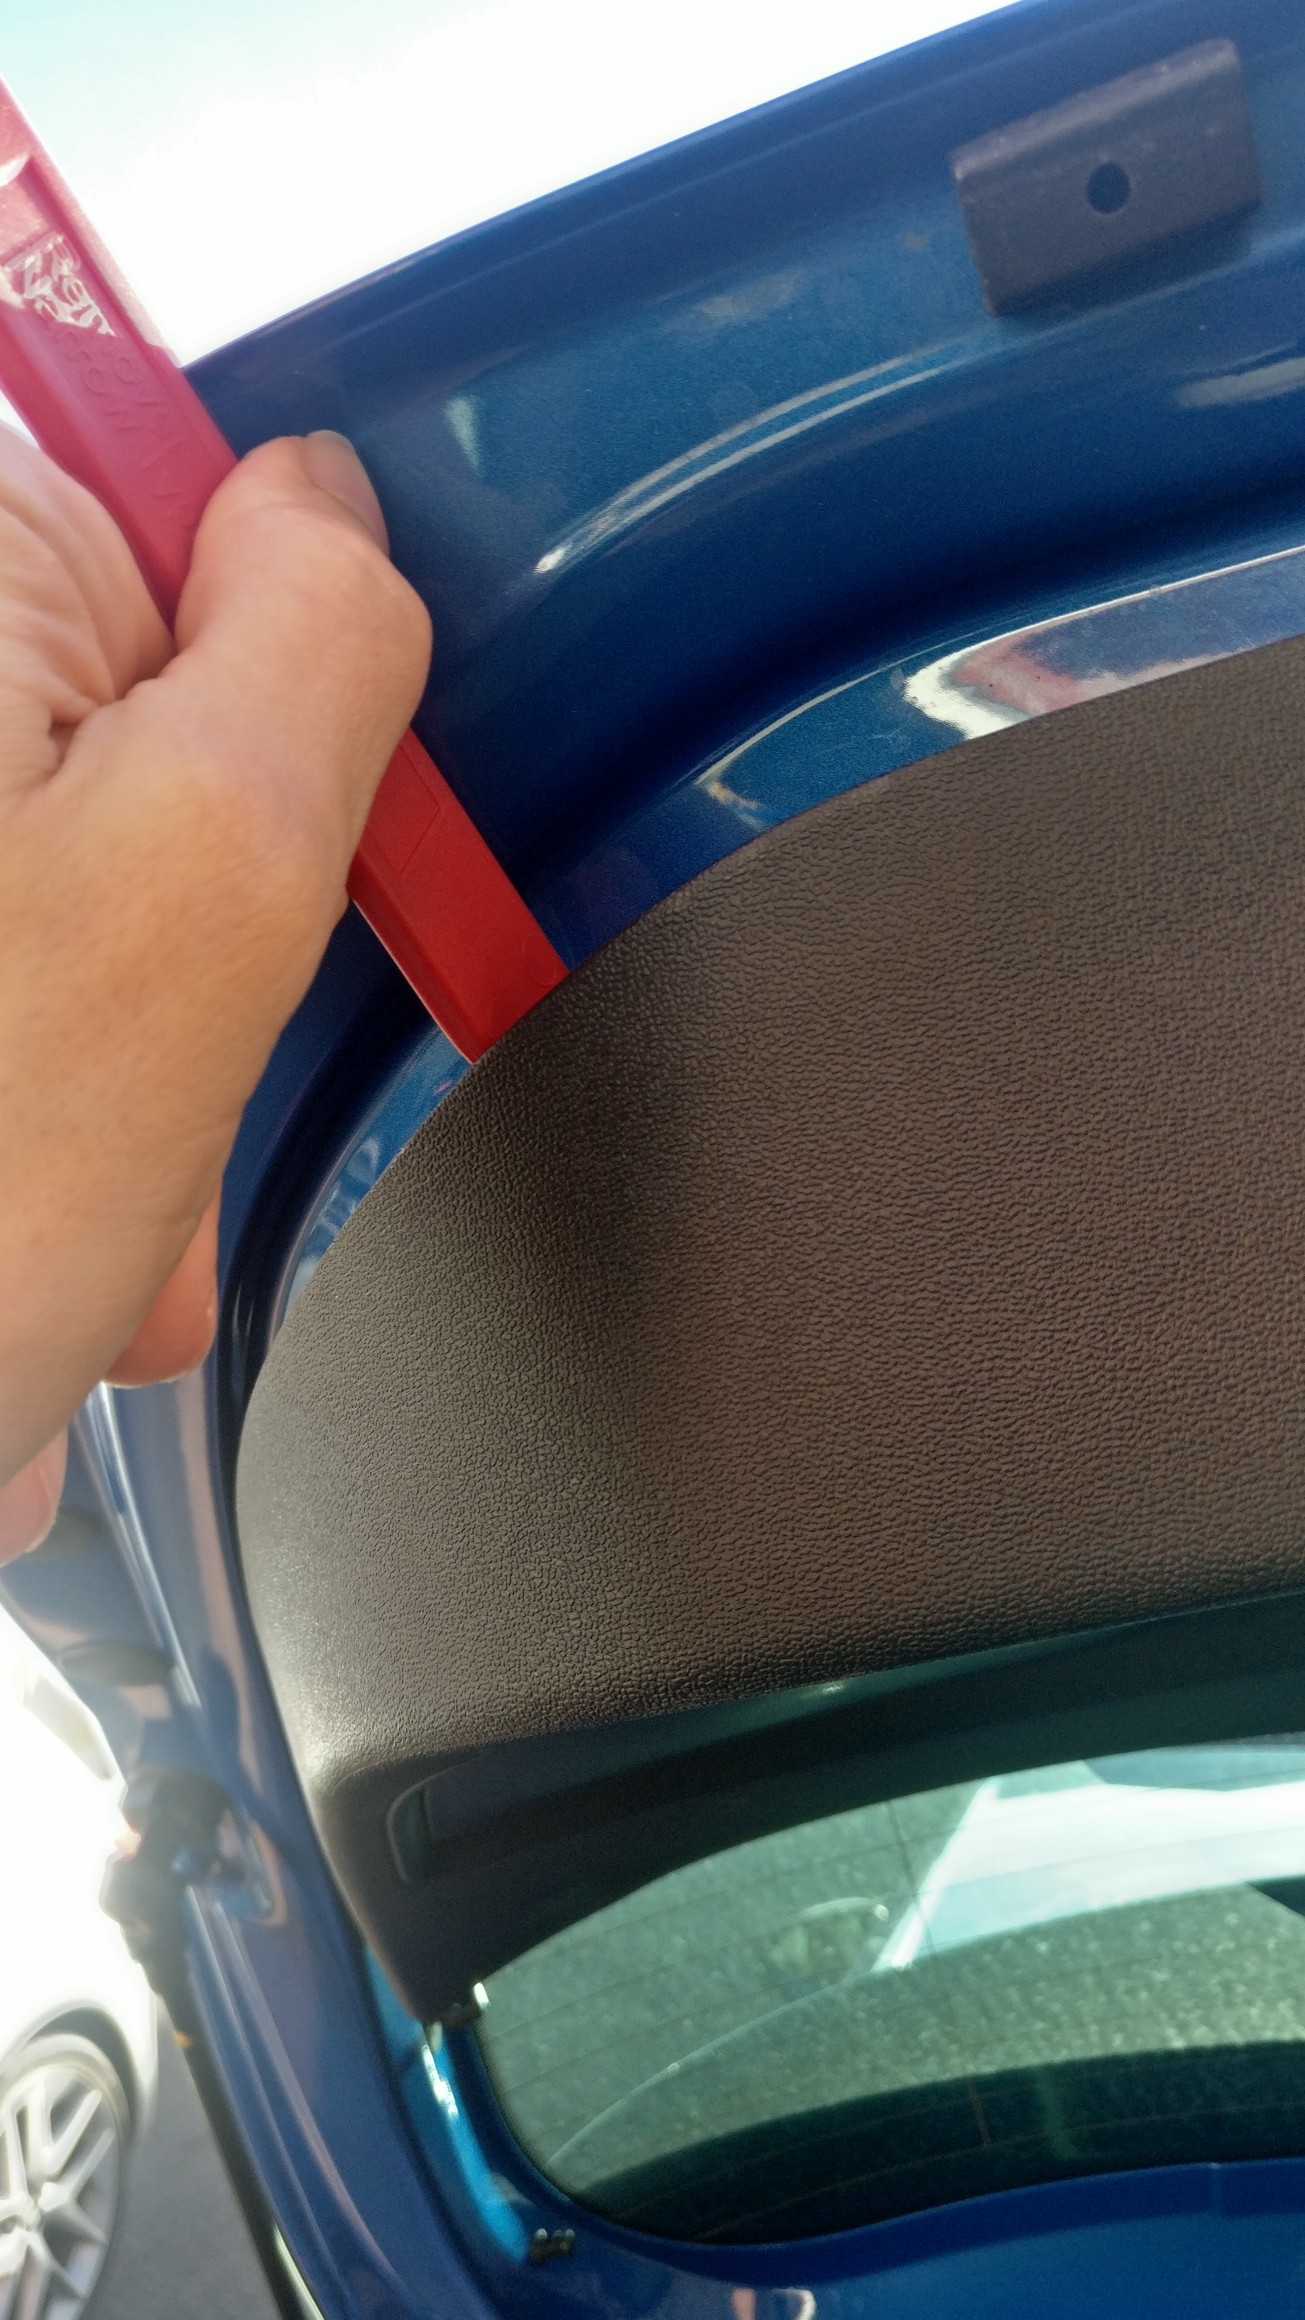
You'll know when the clip is released as its quite a loud pop noise. Now do the same thing going round the left of the trim near the bottom.
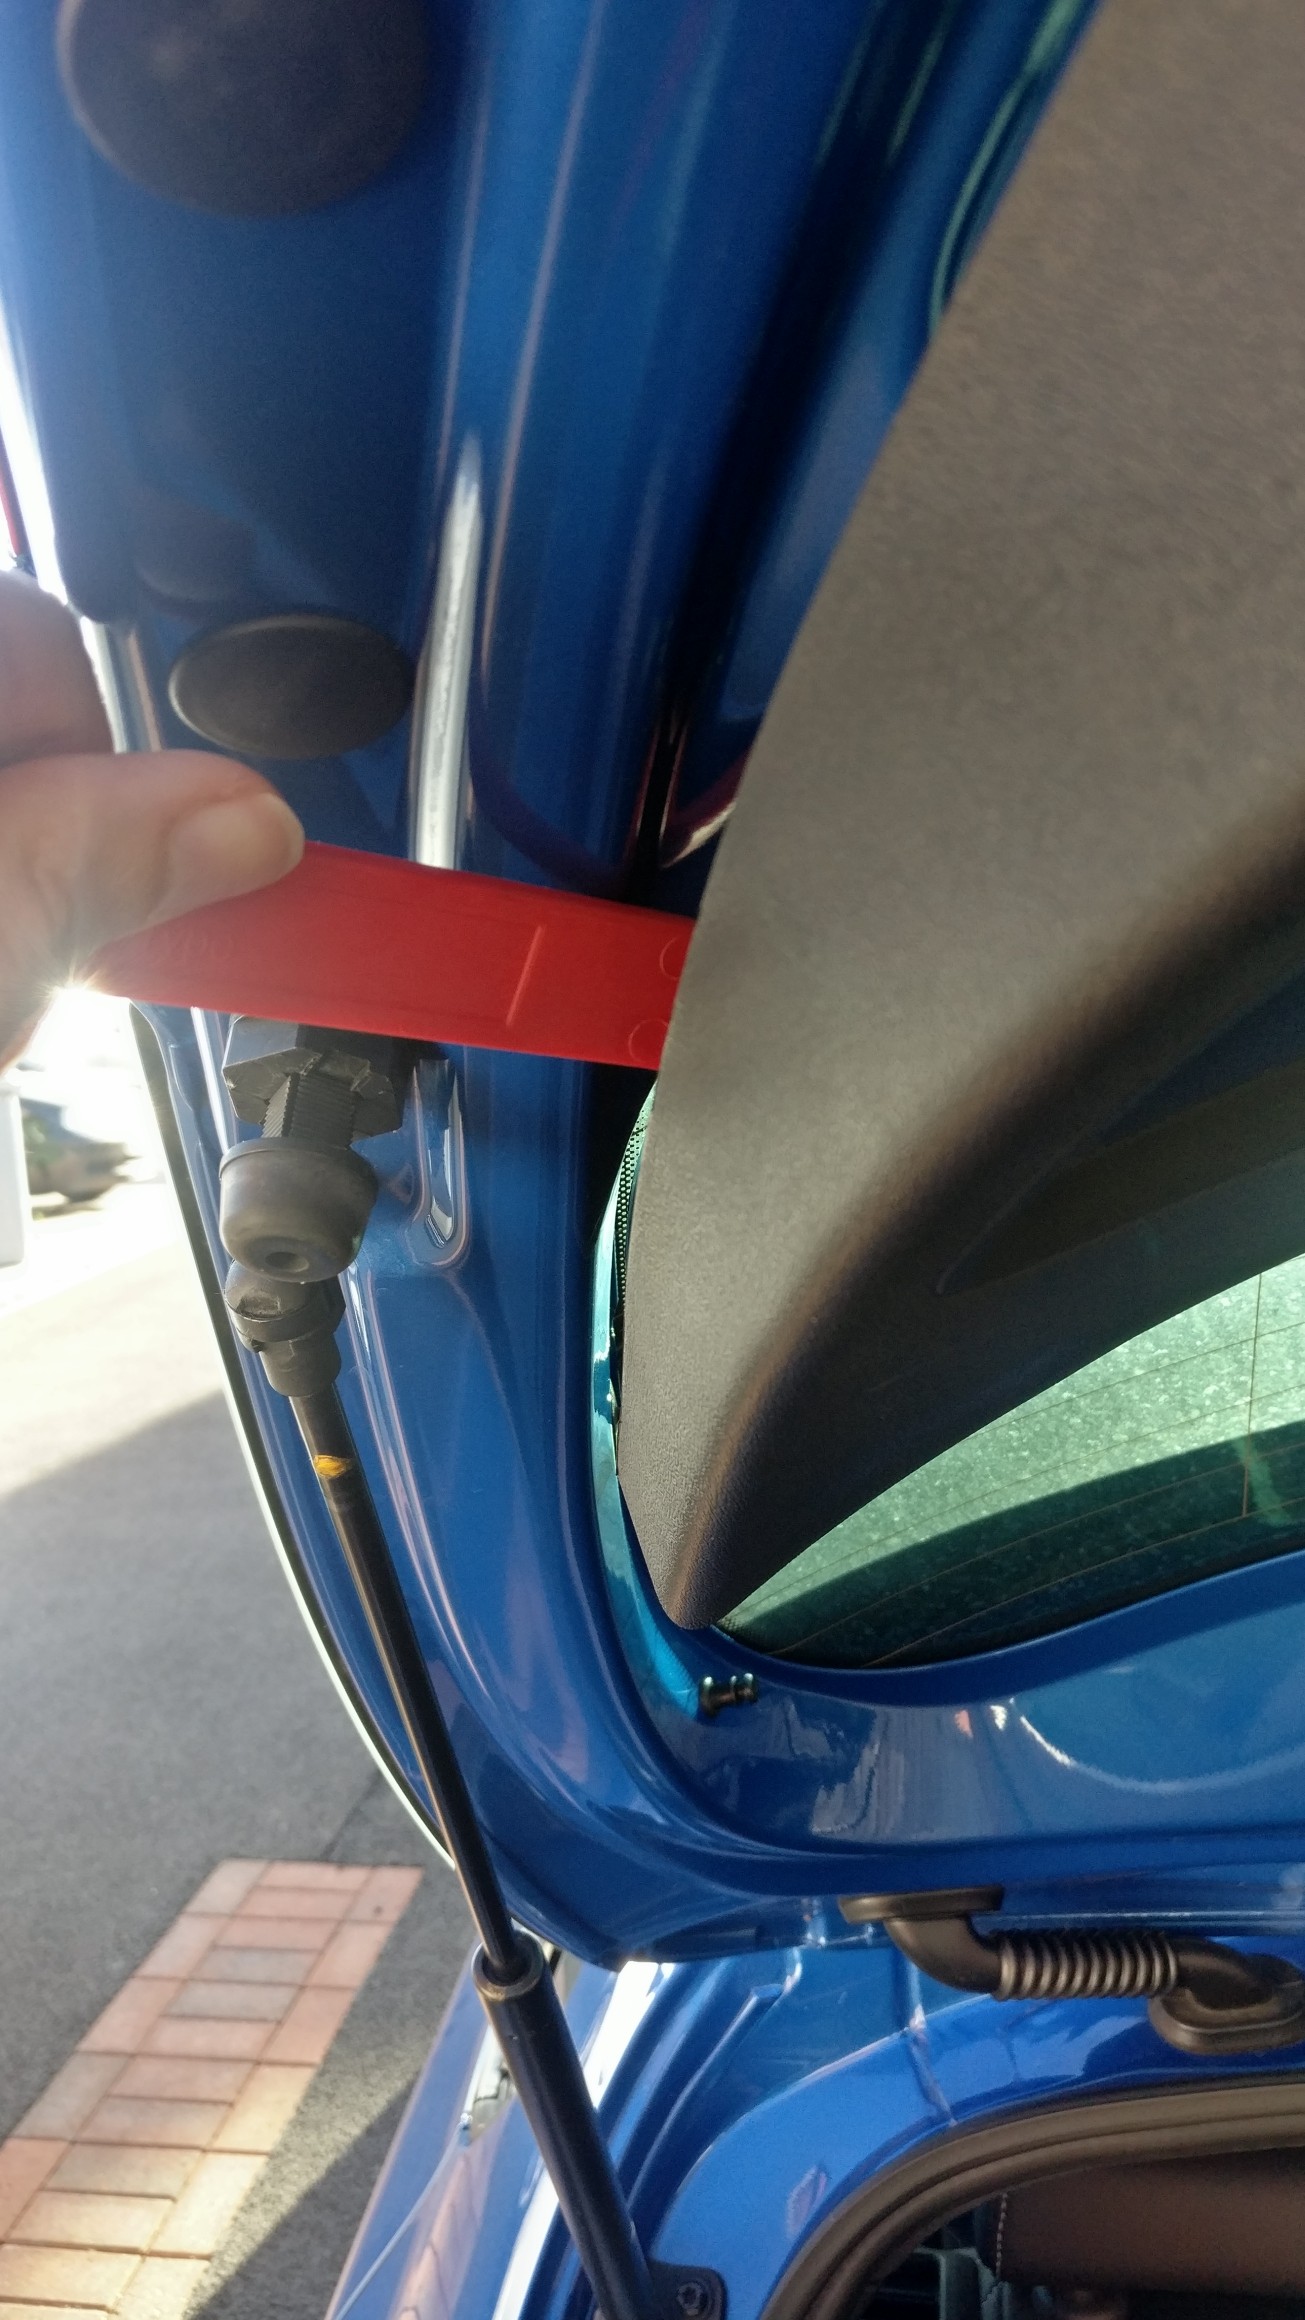
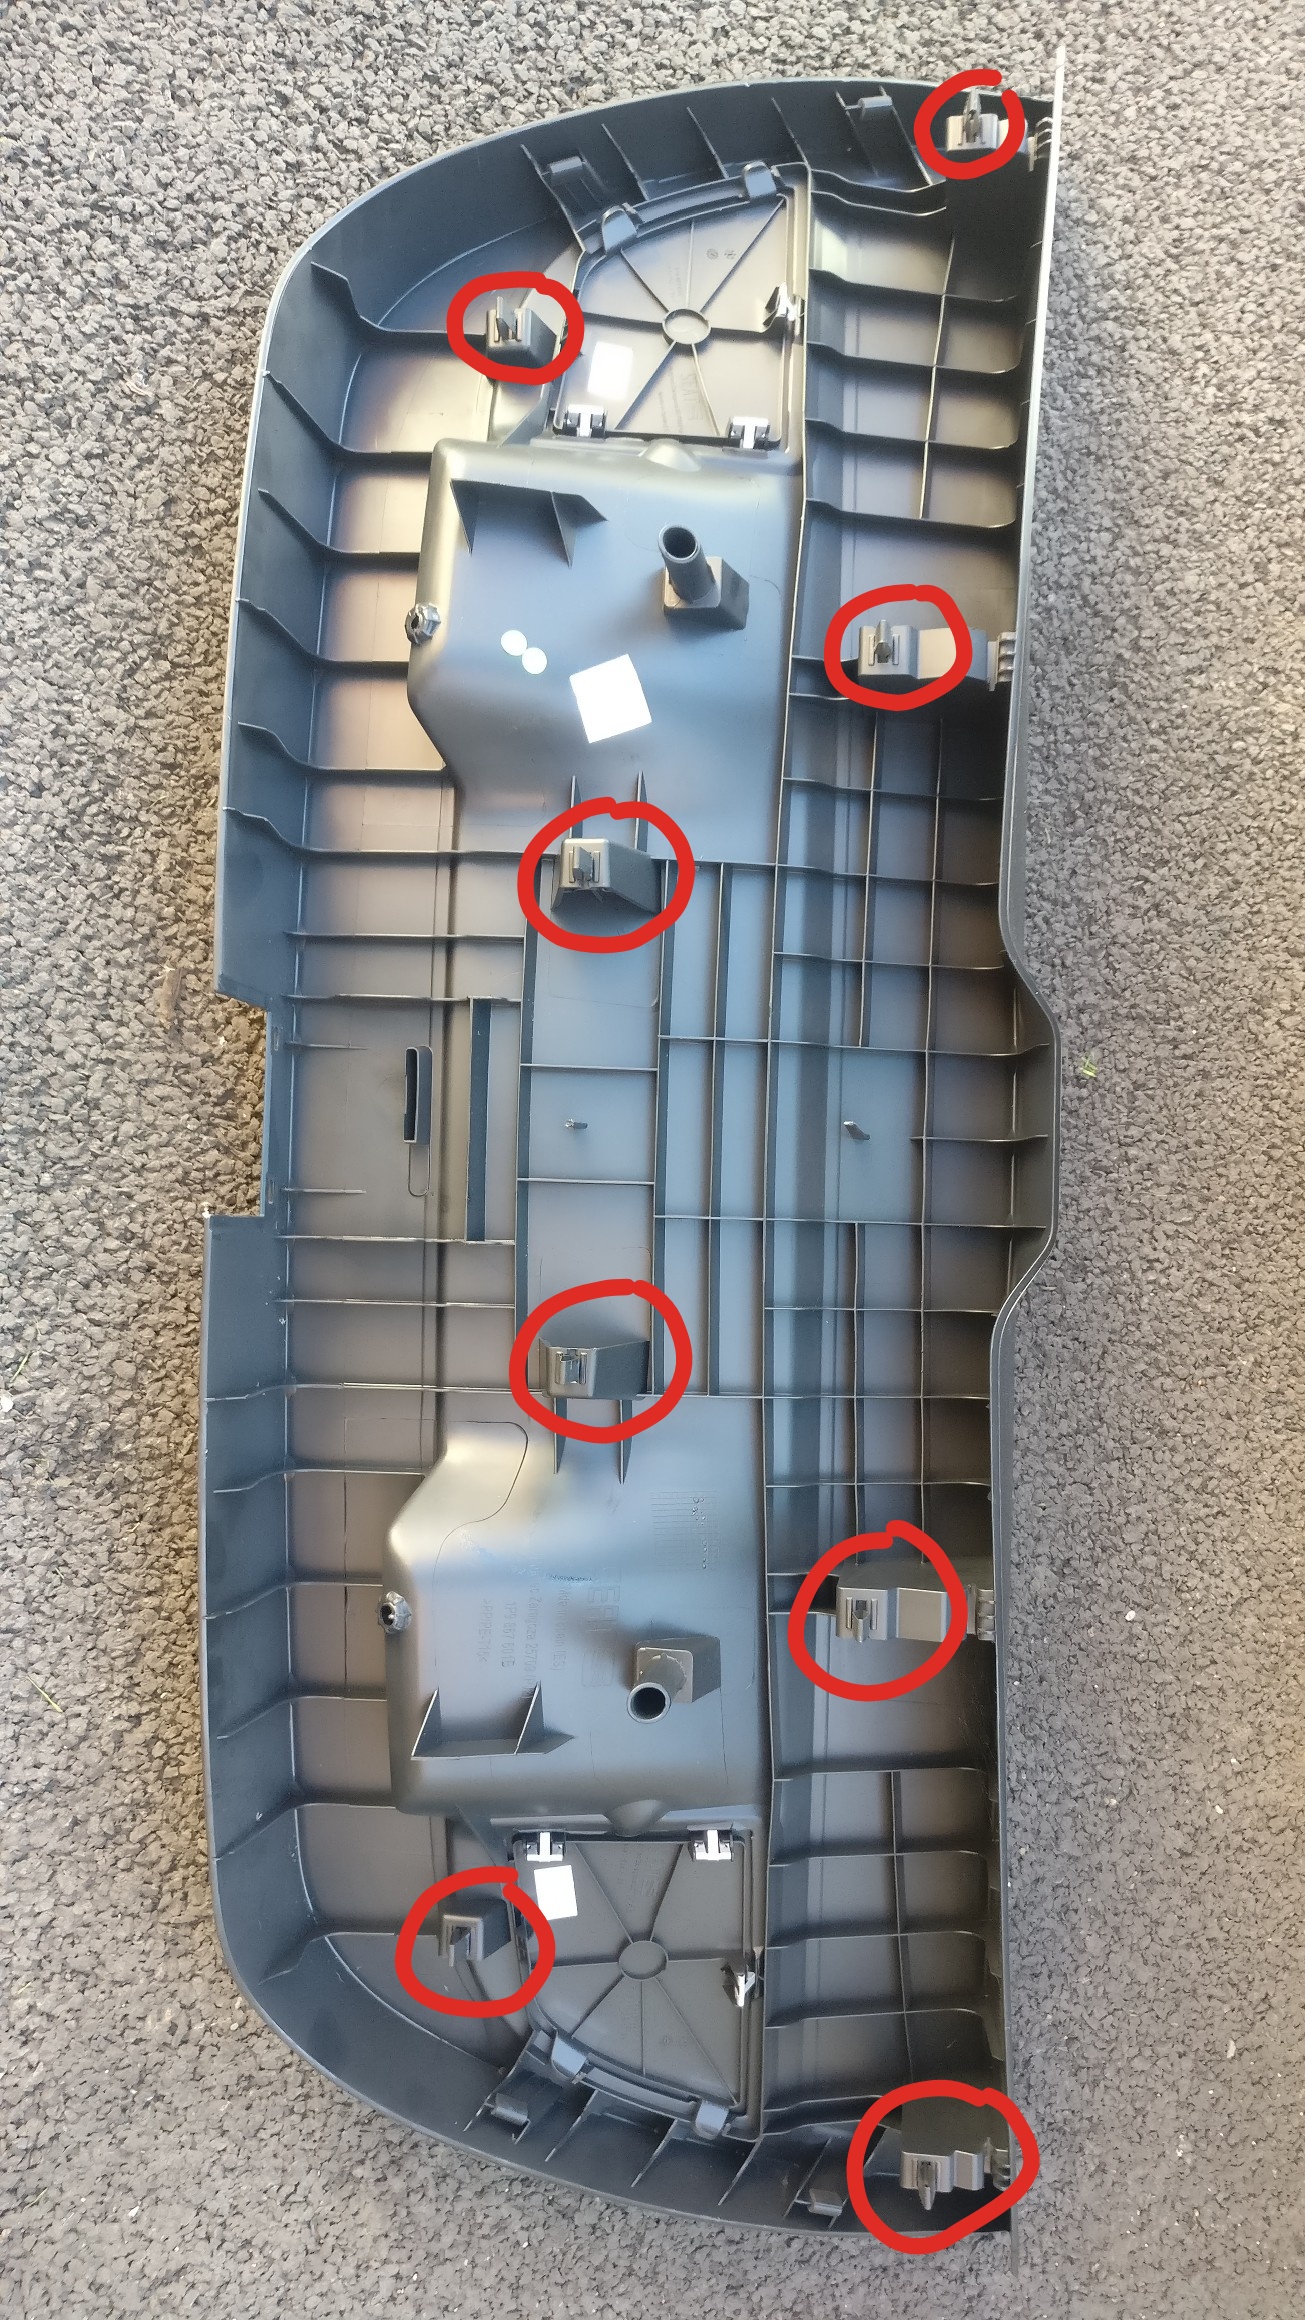
Now do the same on the other side of the trim, once done please see the picture below for the clips locations so you know where to pull for the ones you cannot use the removal tool for.
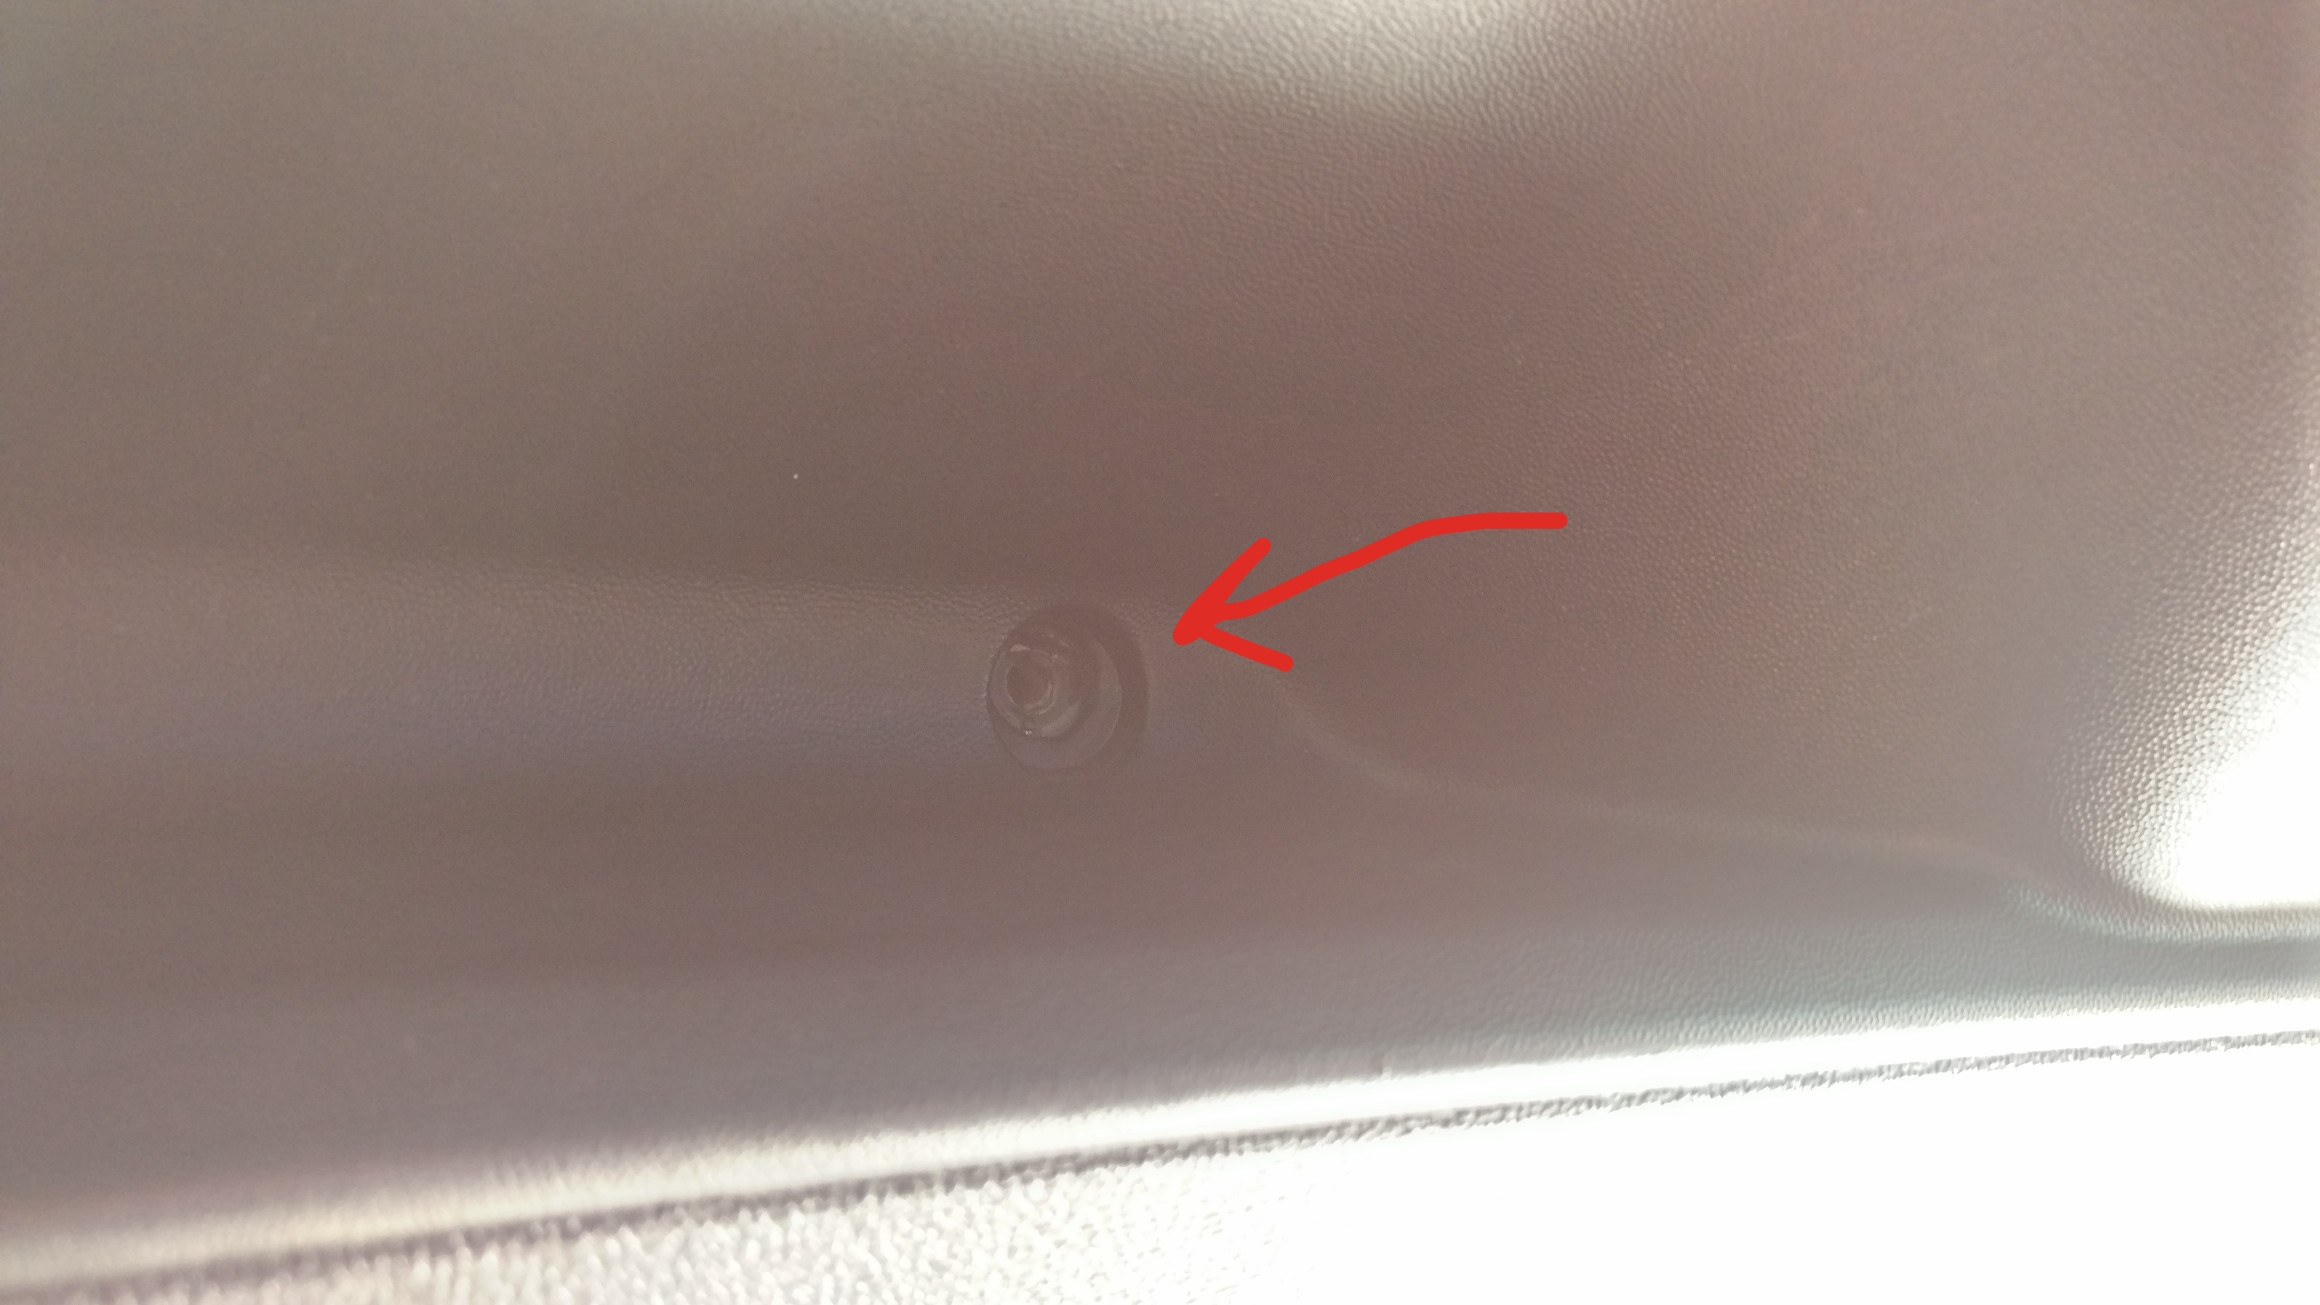
Once the trim is loose it should just drop down, just lay it to one side. You should now be able to see the barebones of the boot workings. You need to unplug two connectors before swapping out the latch both items are circled below.
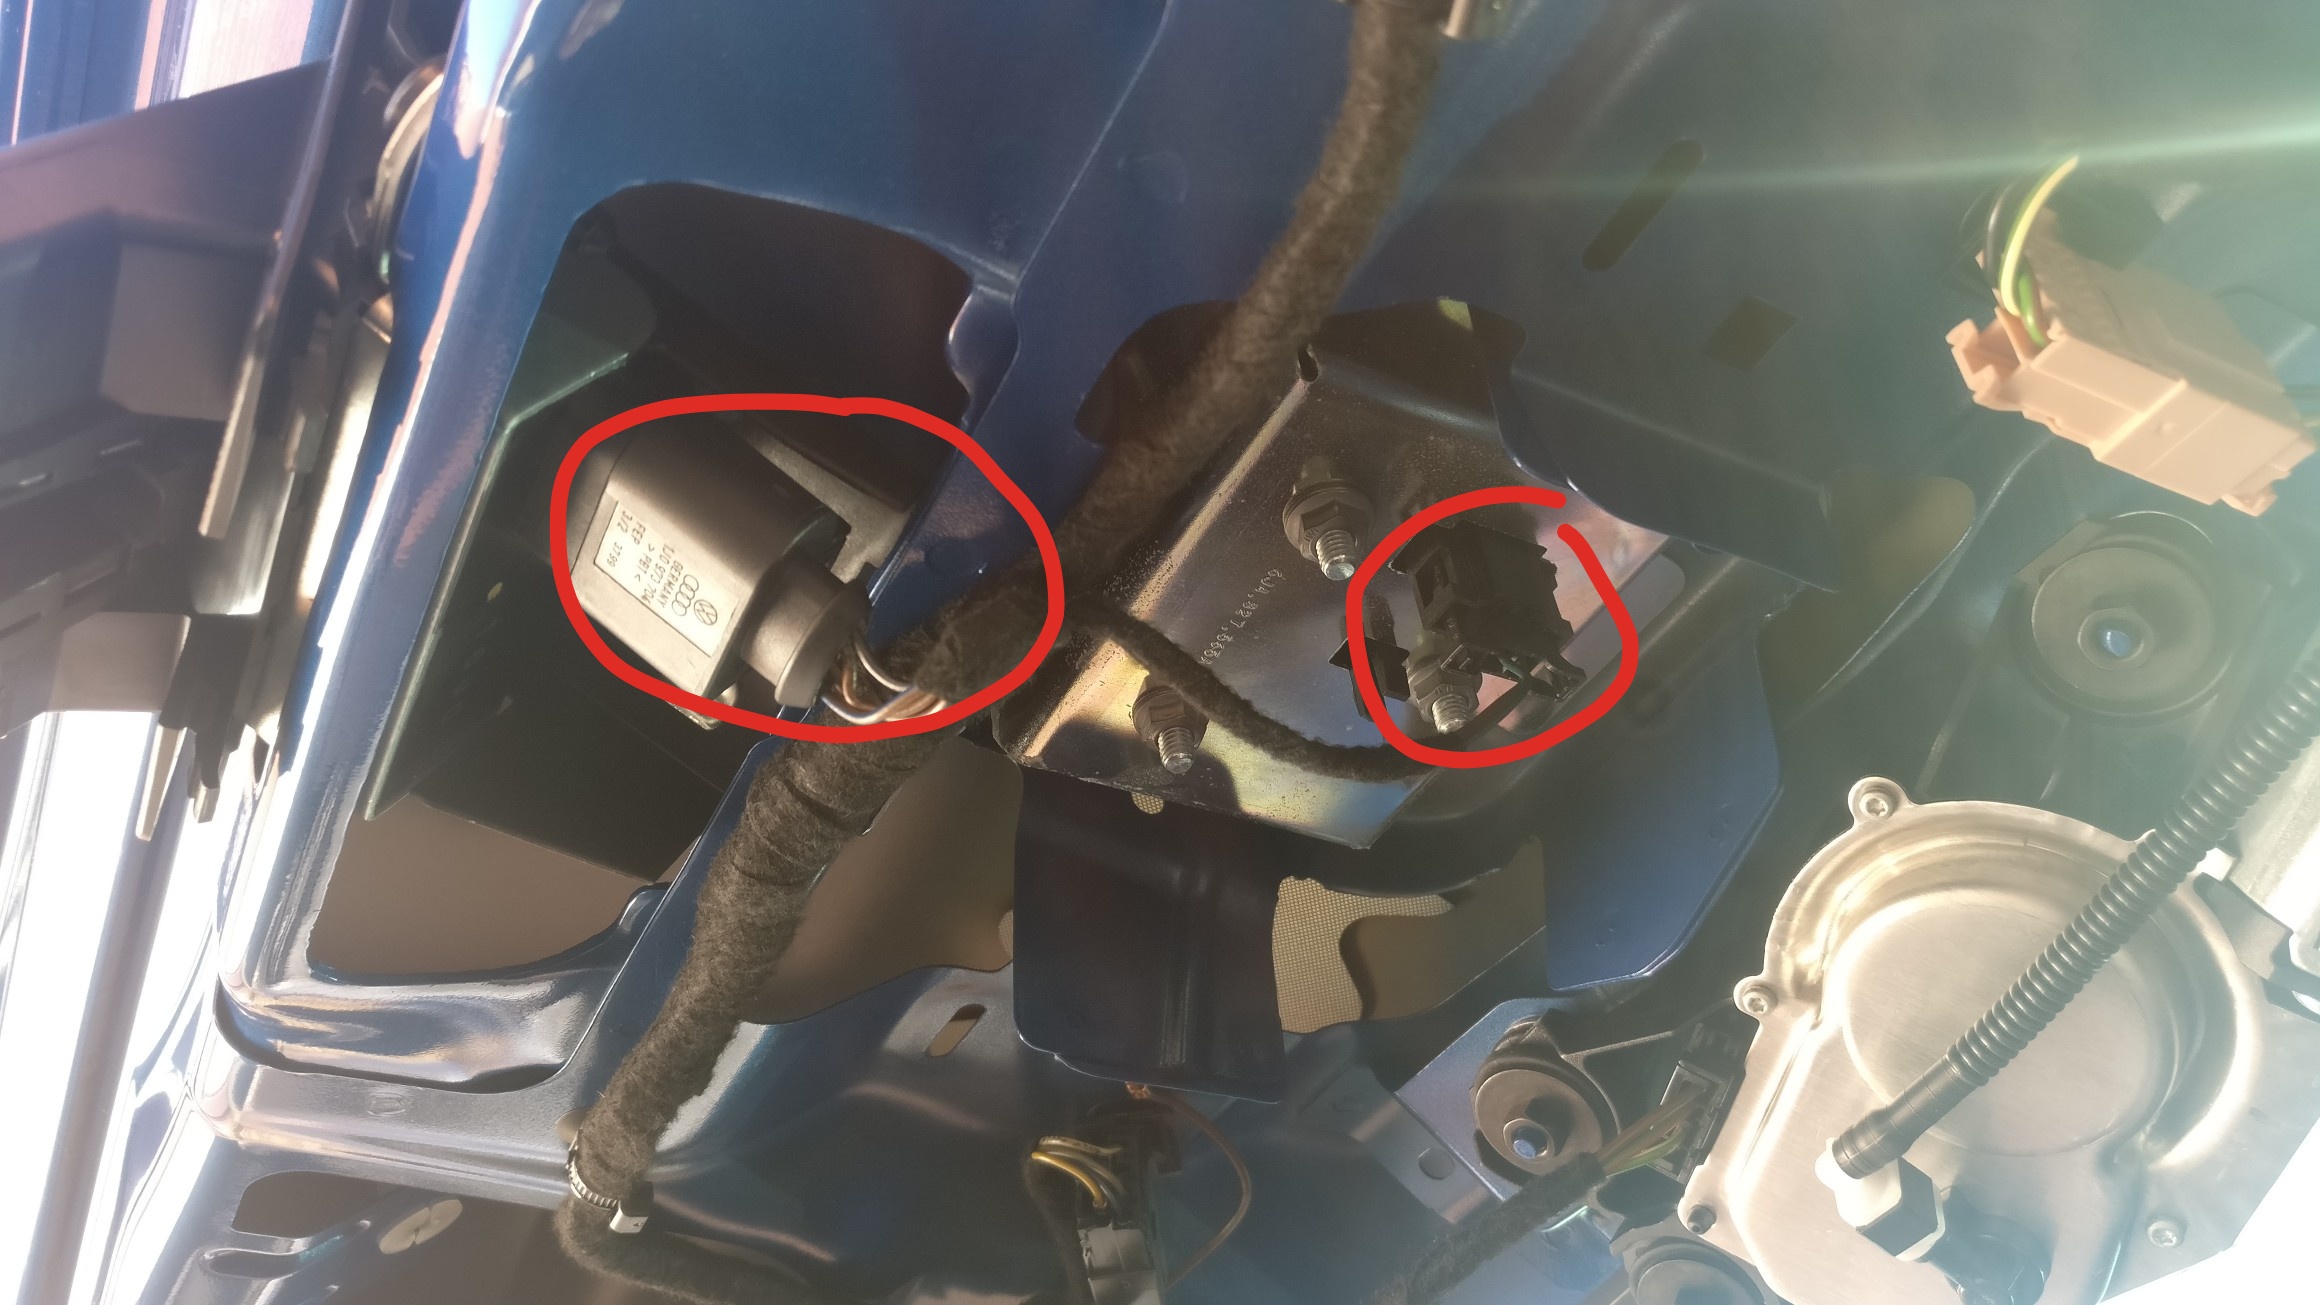
The one in the middle of the boot disconnects the latch from the boot handle and the one on the left of the pic above is the connector for the latch. The boot handle cable is a pinch connector from the side and pulls down, the latch cable is a pain as you need to insert a long thin bit of metal (I used a smaller long flat head screwdriver) into the hole at the top of the connector shown below.
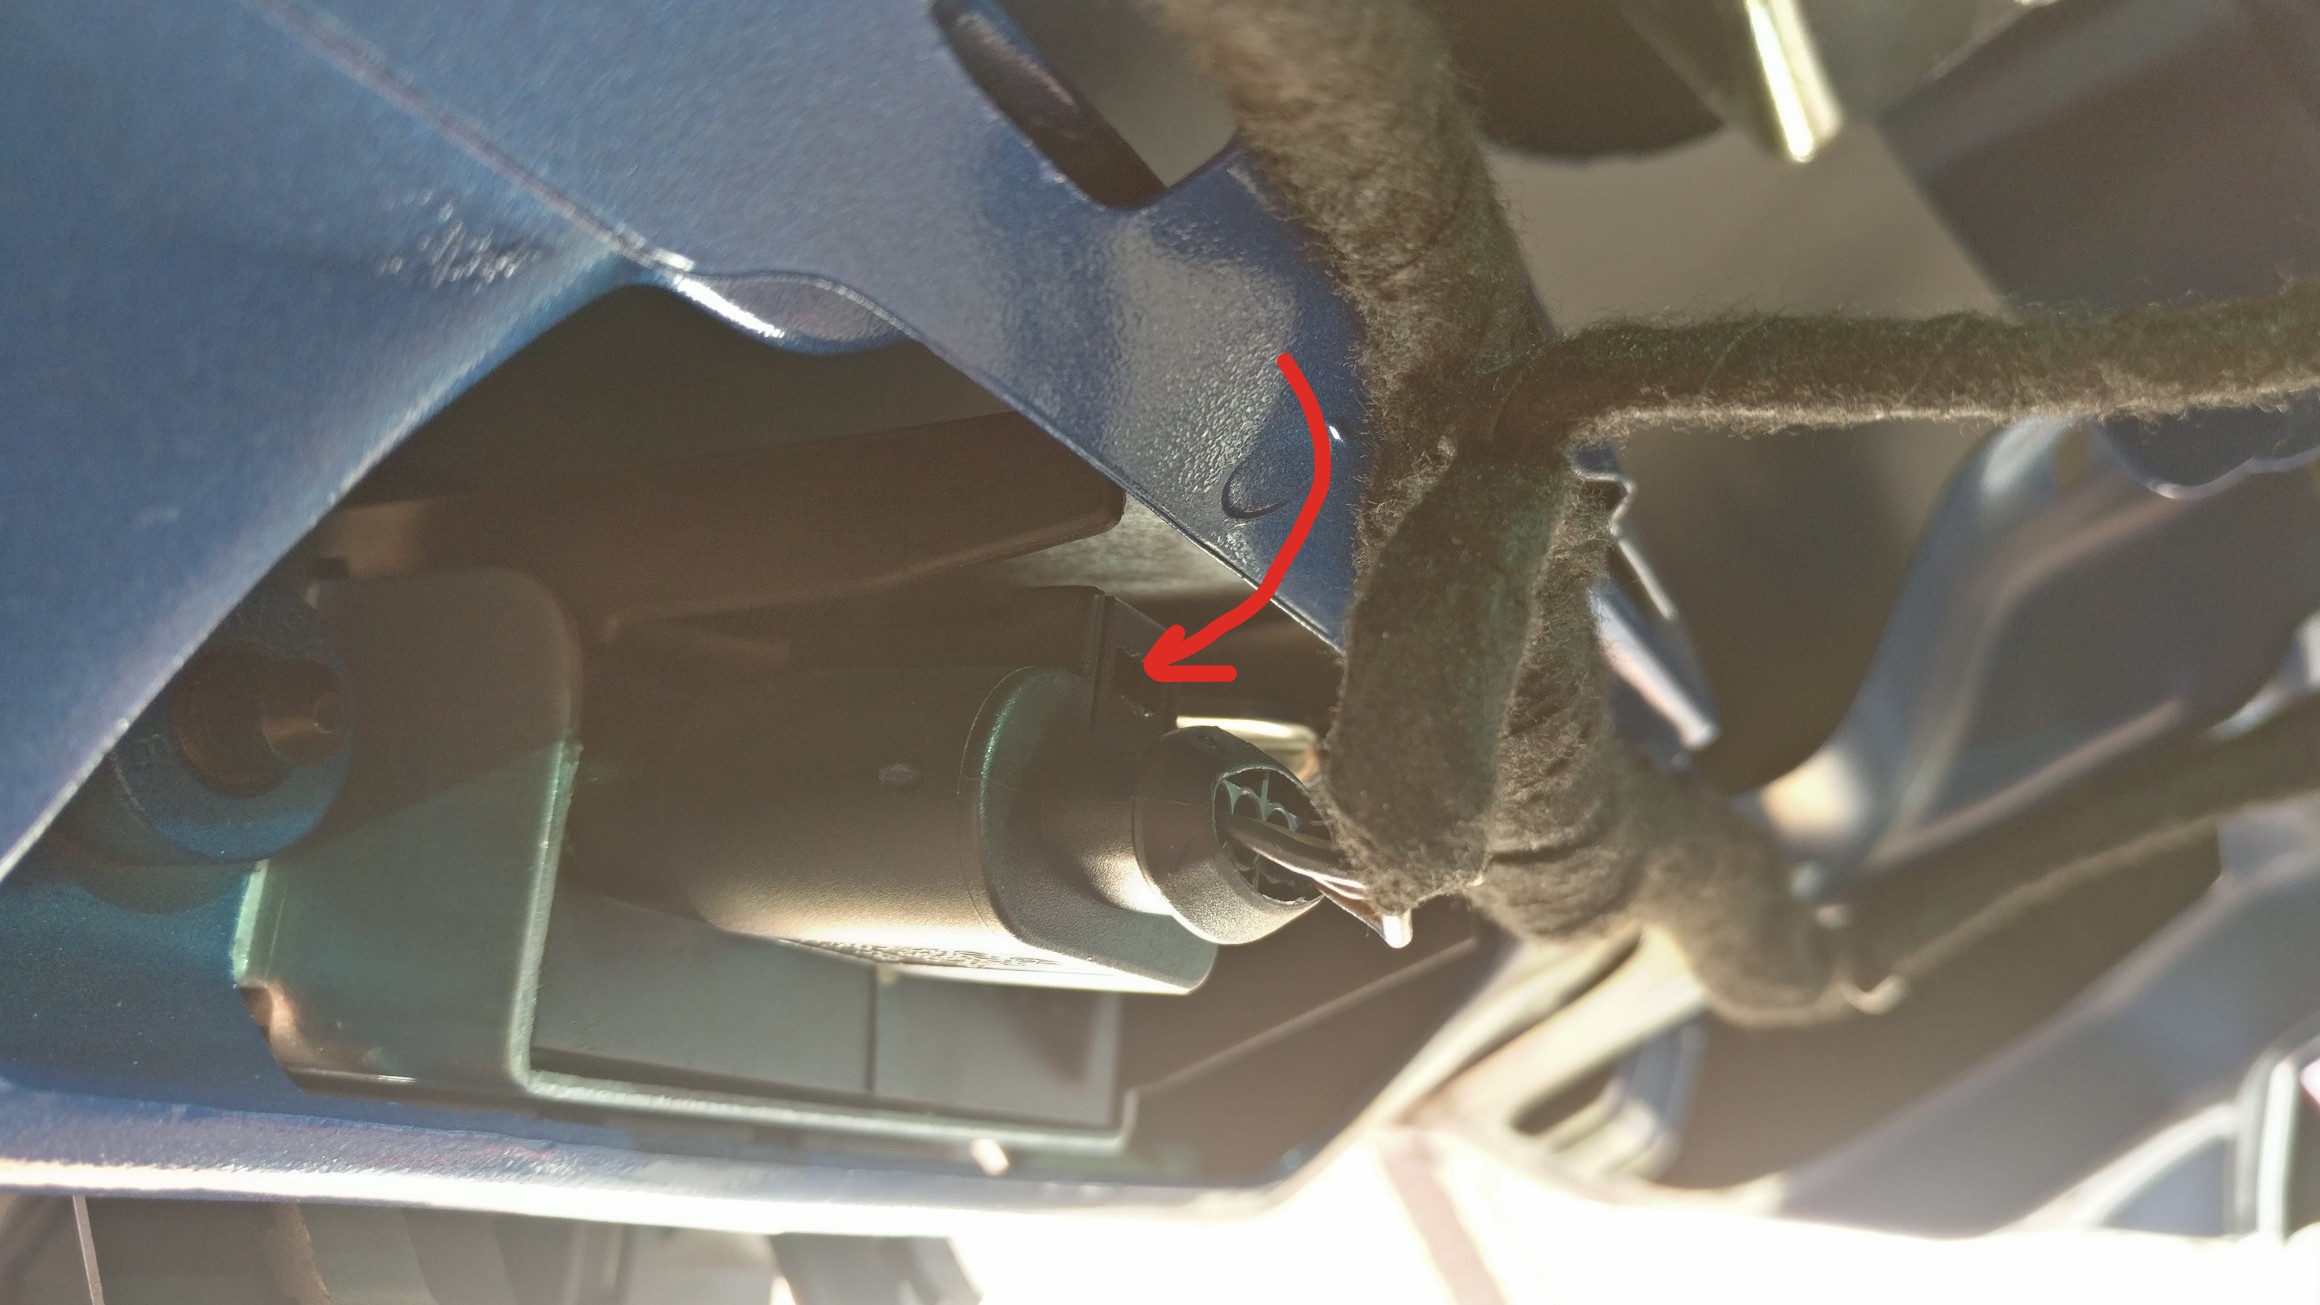
Once inserted you need to pull the item down so it can release the catch, you should hear a little pop and the connector just pulls away (please note I did use a little bit of force before the pop noise).
With both connectors released you now need to take off the latch by using your m8 screwdriver head, undo both bolts and lift the latch off.
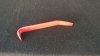
Once the latch is off please note you need the plastic hood on the top of it to transfer to the new one (I did anyway), to take it off you need to squeeze it to get the little spikes out from the main latch body, this is what it should look like once removed.

To attach this to the new latch just slide it on but note that the groove needs to match the raised bit of plastic on the hood so it sits flush.
Now put the new latch back in position and tighten the screws up (m8). Now plug in the 2 connectors you unplugged earlier then I would suggest testing the boot before adding the trim back on.
If everything works as it should then place the trim back on, I found the easiest way was to slide the trim up and in the grooves on the latch then everything else lines up.

Now make sure all the clips are in securely using the picture from the beginning of this guide for locations. Now screw in the 2 screws to secure the trim to the body and you're done.
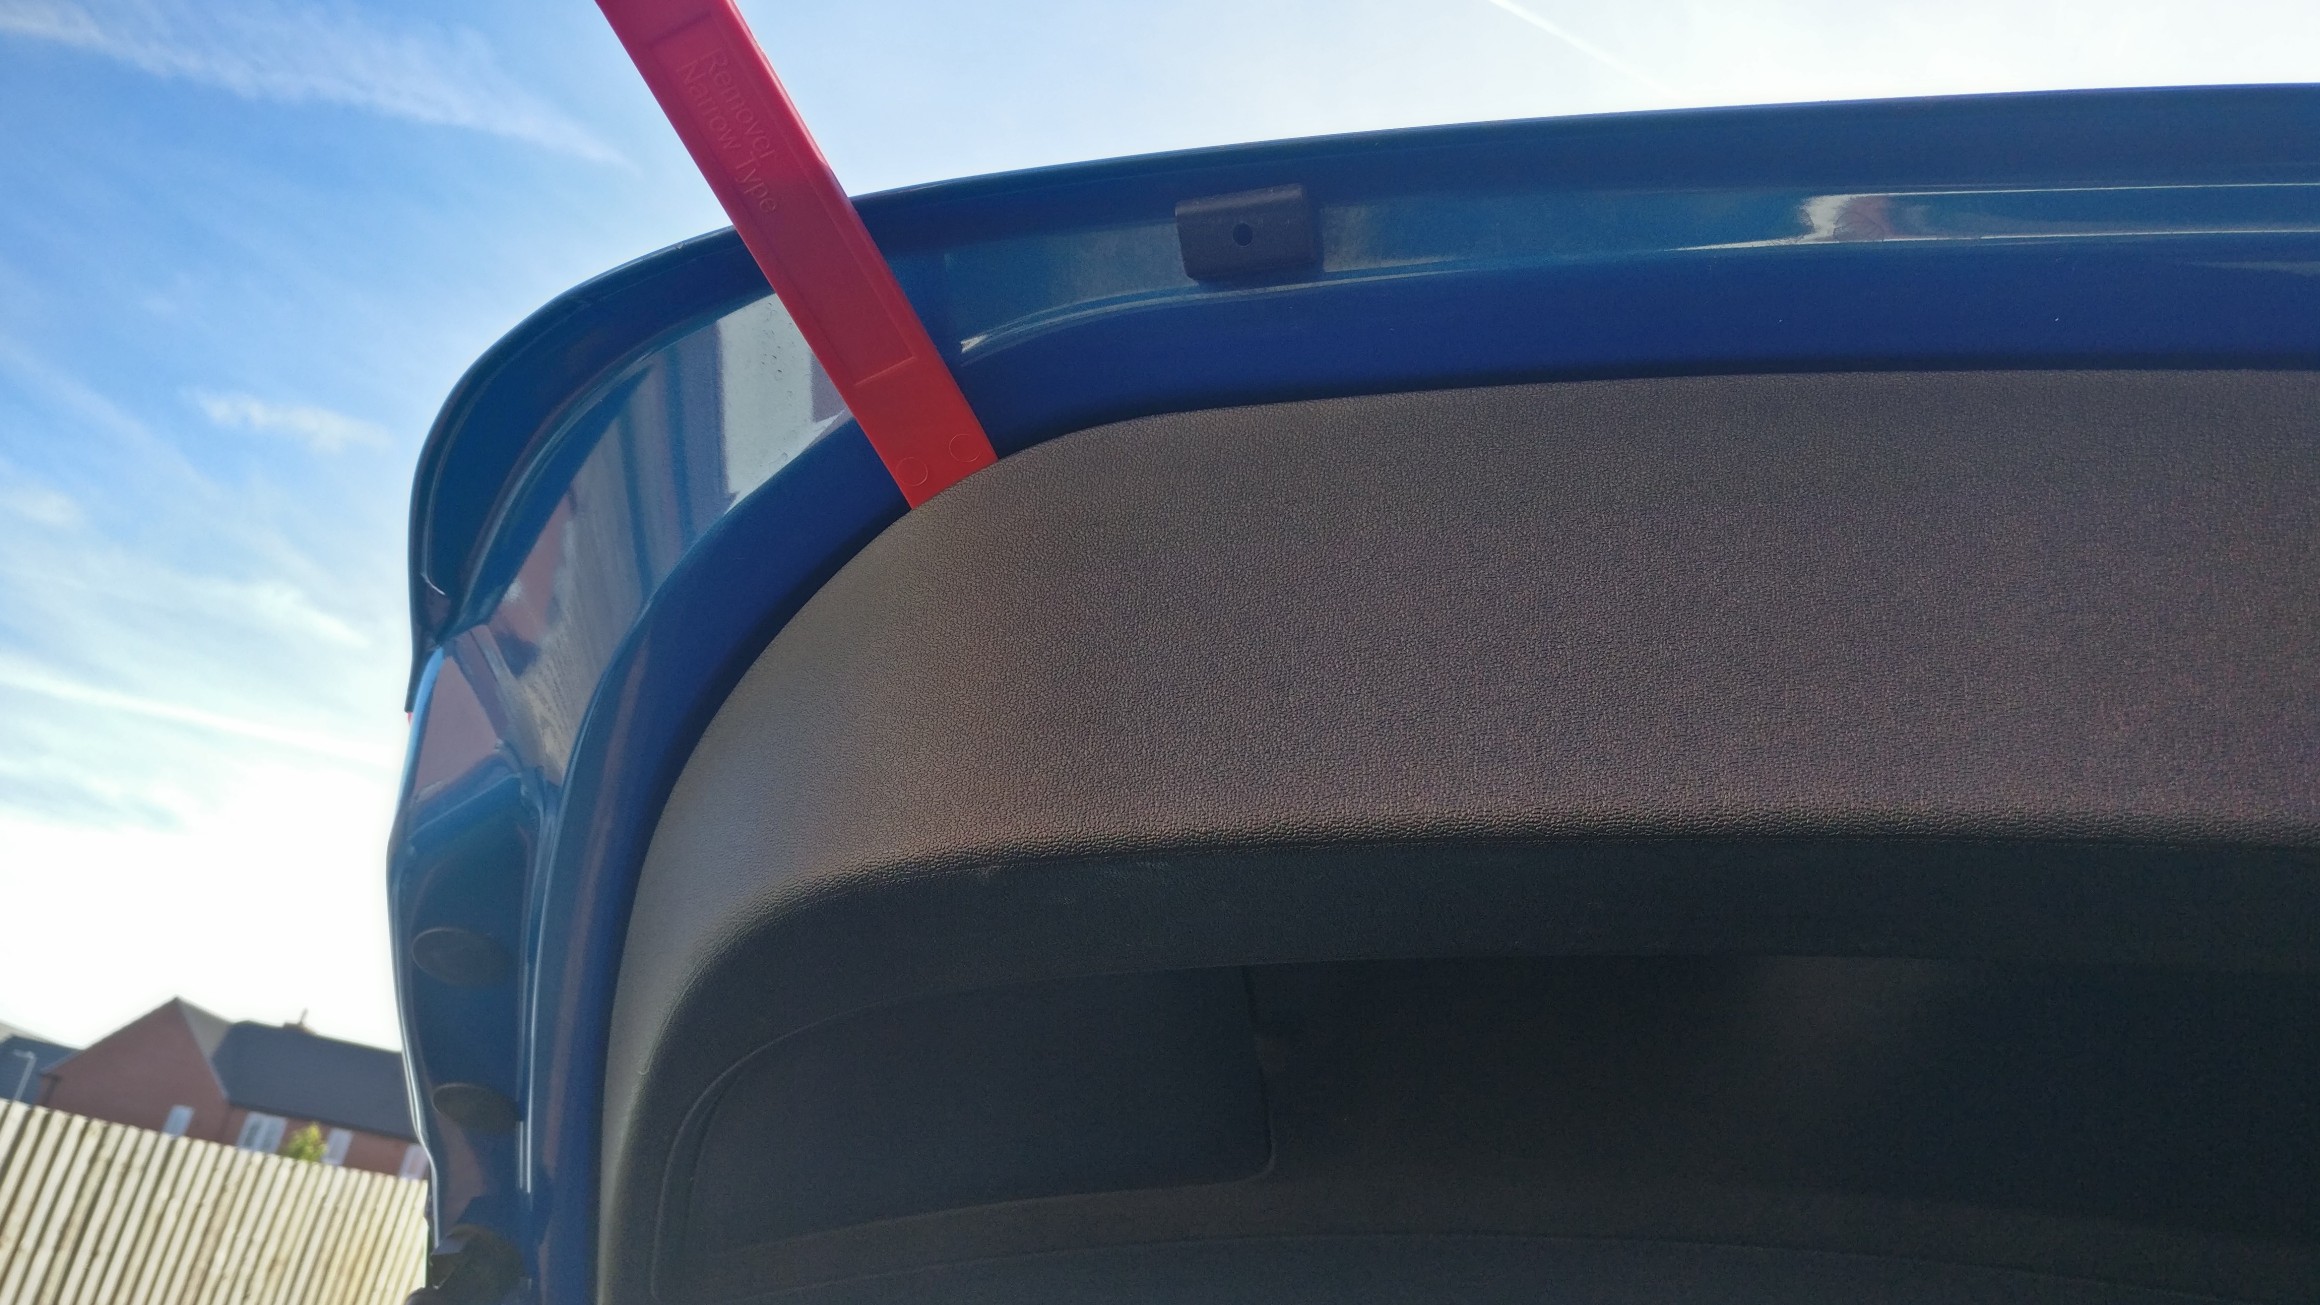
Also worth noting that if your boot is locked and stuck you can manually open it from inside the boot using your key and this little slot.

To fit the new part is very easy even for me and will save you an hours of labour at your garage I'd assume.
First you will need the following tools
- plastic trim removal tool
- XZN M8 (8 mm) I think...
- my screwdriver came with this and didn't say what it was lol so here's a picture
OK so now to undo the first 2 screws holding the trim onto the tailgate. You'll find them by sticking your head into the boot and looking up at the latch you'll see 2 screws (one on either side of the latch)
Once both screws are taken out you need to take off the plastic trim, for this you'll need the trim remover at the ready.
Looking at the rear of the car I started by inserting the trim removal tool in about 30cm to the left of the latch, once the tool is in a few inches twist it as this helps release the clips.
You'll know when the clip is released as its quite a loud pop noise. Now do the same thing going round the left of the trim near the bottom.
Now do the same on the other side of the trim, once done please see the picture below for the clips locations so you know where to pull for the ones you cannot use the removal tool for.
Once the trim is loose it should just drop down, just lay it to one side. You should now be able to see the barebones of the boot workings. You need to unplug two connectors before swapping out the latch both items are circled below.
The one in the middle of the boot disconnects the latch from the boot handle and the one on the left of the pic above is the connector for the latch. The boot handle cable is a pinch connector from the side and pulls down, the latch cable is a pain as you need to insert a long thin bit of metal (I used a smaller long flat head screwdriver) into the hole at the top of the connector shown below.
Once inserted you need to pull the item down so it can release the catch, you should hear a little pop and the connector just pulls away (please note I did use a little bit of force before the pop noise).
With both connectors released you now need to take off the latch by using your m8 screwdriver head, undo both bolts and lift the latch off.
Once the latch is off please note you need the plastic hood on the top of it to transfer to the new one (I did anyway), to take it off you need to squeeze it to get the little spikes out from the main latch body, this is what it should look like once removed.
To attach this to the new latch just slide it on but note that the groove needs to match the raised bit of plastic on the hood so it sits flush.
Now put the new latch back in position and tighten the screws up (m8). Now plug in the 2 connectors you unplugged earlier then I would suggest testing the boot before adding the trim back on.
If everything works as it should then place the trim back on, I found the easiest way was to slide the trim up and in the grooves on the latch then everything else lines up.
Now make sure all the clips are in securely using the picture from the beginning of this guide for locations. Now screw in the 2 screws to secure the trim to the body and you're done.
Also worth noting that if your boot is locked and stuck you can manually open it from inside the boot using your key and this little slot.
