BTCC LED running lights

Jun 24, 2011
1,137
0
Sheffield
I started mine today but not happy with the 10mm glass discs, they are slightly smaller than the SMD bulb faces so I have now ordered some 12mm ones (along with 12mm drill bit :) ) these will fit the bulb faces better, just means I need to wait a little longer now :-(

Yours looks great Rob, loving the 50% dimming. I have my control unit here ready too. Is that wiring loom inside the headlight itself? not had time to look in this weather.
 

robthebubble

LED & Headlight Master
Feb 22, 2011
1,442
6
Solihull, West Midlands
I started mine today but not happy with the 10mm glass discs, they are slightly smaller than the SMD bulb faces so I have now ordered some 12mm ones (along with 12mm drill bit :) ) these will fit the bulb faces better, just means I need to wait a little longer now :-(

Yours looks great Rob, loving the 50% dimming. I have my control unit here ready too. Is that wiring loom inside the headlight itself? not had time to look in this weather.

The 12mm might be too big to fit in the vent gap. The actual SMDs sit behind the vent and attached to the back on the DVD case. The one to chec is the one nearest the top fin as this is the smallest gap....you might be okay with the 12mm but when I measured it using the digital calipers it's was smaller. Remember, the 10mm discs are only 0.5mm smaller around the edge of the SMD.

The loom is on the back of the headlight. It's a pain to remove but I it a small flat headed screwdriver and poked it in the clip part on the side (you'll see what I mean) and gave it a push/ wiggle to loosen it, I thin pulled the loom connector off. It's right up close to the metal of the car so it's a bit tight to get bak on!...can take some photos if you want?

Just took some photos!

You can see where I have attached the control unit and also the loom connector.
2aaa99ed.jpg


Small screwdriver which you wiggle until there is a small click, you can then pull it out by hand.
027ed8c2.jpg


Pulling it out it becomes a bit tight next to the bodywork.
b386436e.jpg


Any queries just let me know!
 
Last edited:
Jun 24, 2011
1,137
0
Sheffield
Thanks mate, so the brown wire I can see coming out from the black tape connects to wire 6 in the loom and then goes to a block and connected to the grey drlr2 unit wire? and connect the white and orange together?
 

robthebubble

LED & Headlight Master
Feb 22, 2011
1,442
6
Solihull, West Midlands
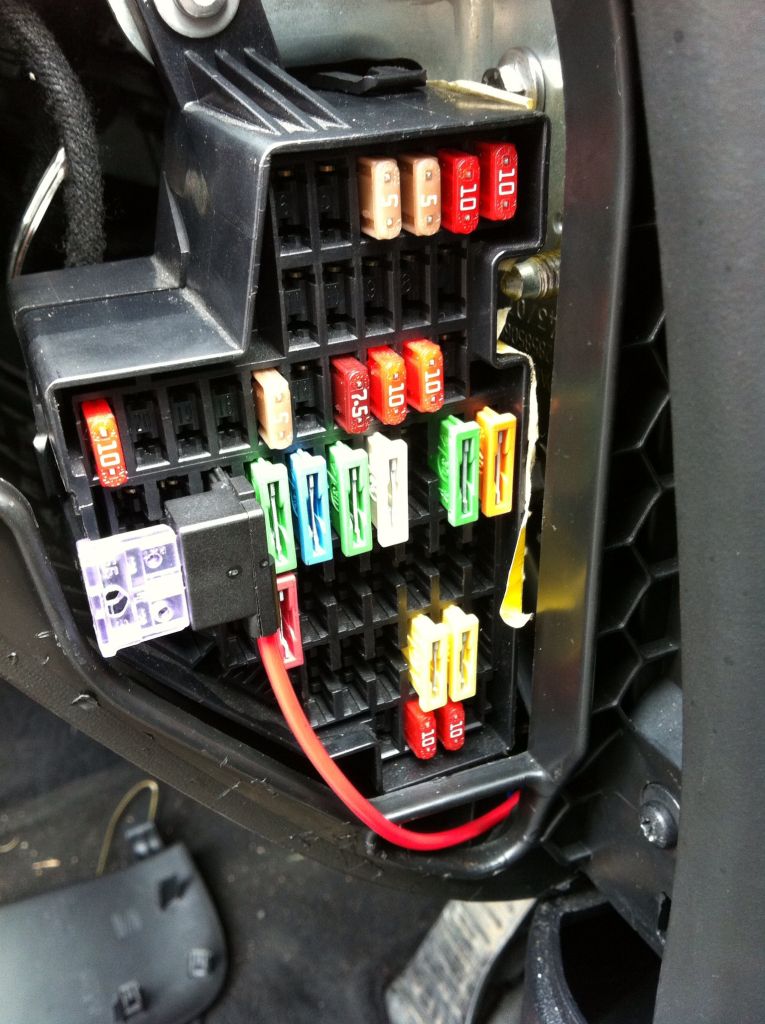
I've now changed e location of the power cable and taken it to the fuse at the side of the dash. It now works as it should do, I.e. only when the ignition is on. The fuse location I plugged it into is the third blank one othe left just below the smaller fuses. There are three spare spaces and they can all be used as I checked with a multimeter. I also used the fuse spur I had but I'm sure an inline fuse and spade connector would work.
 
Jun 24, 2011
1,137
0
Sheffield
Great, really appreciate the help and pics Rob. Just can't wait for all my bits to arrive now so I can start. Just out of interest, in total how much wire you reckon you used? I only have around 2.5 metres at mo.
 

robthebubble

LED & Headlight Master
Feb 22, 2011
1,442
6
Solihull, West Midlands
Great, really appreciate the help and pics Rob. Just can't wait for all my bits to arrive now so I can start. Just out of interest, in total how much wire you reckon you used? I only have around 2.5 metres at mo.

You might need a bit more than that. You basically need two lengths to reach both vents and a length to go from the DRL control (around the passenger headlight) to the fuse board. You also need the other bits for the smd's themselves. I think ou will need double that amount....that's why I used normal 3 core flex as I had it lying around in the garage.
 

shnazzle

Glass-Half-Full Member
Sep 9, 2011
3,480
6
Northumberland
Almost got all the bits and bobs.
Just waiting for DRL2 and soldering gear.

I got 20m of speaker cable, 0.2mm. Recon that will be ok or have I got crap wiring?

This is for the pre-FL standard bumper so I'll have a good play around to see how it looks best. :)


Sent from my iPhone using Tapatalk
 

robthebubble

LED & Headlight Master
Feb 22, 2011
1,442
6
Solihull, West Midlands
Almost got all the bits and bobs.
Just waiting for DRL2 and soldering gear.

I got 20m of speaker cable, 0.2mm. Recon that will be ok or have I got crap wiring?

This is for the pre-FL standard bumper so I'll have a good play around to see how it looks best. :)


Sent from my iPhone using Tapatalk

Should be ok with the cable. Speaker cable should be suitable for 12v without any issues....once done get some pictures up.
 

shnazzle

Glass-Half-Full Member
Sep 9, 2011
3,480
6
Northumberland
Should be ok with the cable. Speaker cable should be suitable for 12v without any issues....once done get some pictures up.

Will post as I get on. Might start another thread more dedicated to the standard bumper, start to finish.
Might be another week or so before I have all the parts I want.

Wonder what the best way will be to get it into the standard fog grilles


Sent from my iPhone using Tapatalk
 

robthebubble

LED & Headlight Master
Feb 22, 2011
1,442
6
Solihull, West Midlands
Will post as I get on. Might start another thread more dedicated to the standard bumper, start to finish.
Might be another week or so before I have all the parts I want.

Wonder what the best way will be to get it into the standard fog grilles


Sent from my iPhone using Tapatalk

I'm not sure what they are like close up so i can't really help you on that one. Are they solid or have holes in like the BTCC? If they are solid (which I think they are) just drill through the plastic but do a small pilot hole first and mak sure it's in the middle! Also make sure the glass lenses fit in the gaps too!
 

shnazzle

Glass-Half-Full Member
Sep 9, 2011
3,480
6
Northumberland
I'm not sure what they are like close up so i can't really help you on that one. Are they solid or have holes in like the BTCC? If they are solid (which I think they are) just drill through the plastic but do a small pilot hole first and mak sure it's in the middle! Also make sure the glass lenses fit in the gaps too!

Nope. Open holes. Bit of both really but the solid bit is on the sides. So it's going to take some DVD case fidgeting. Makes it all the more fun :)
 
SEATCUPRA.NET Forum merchandise