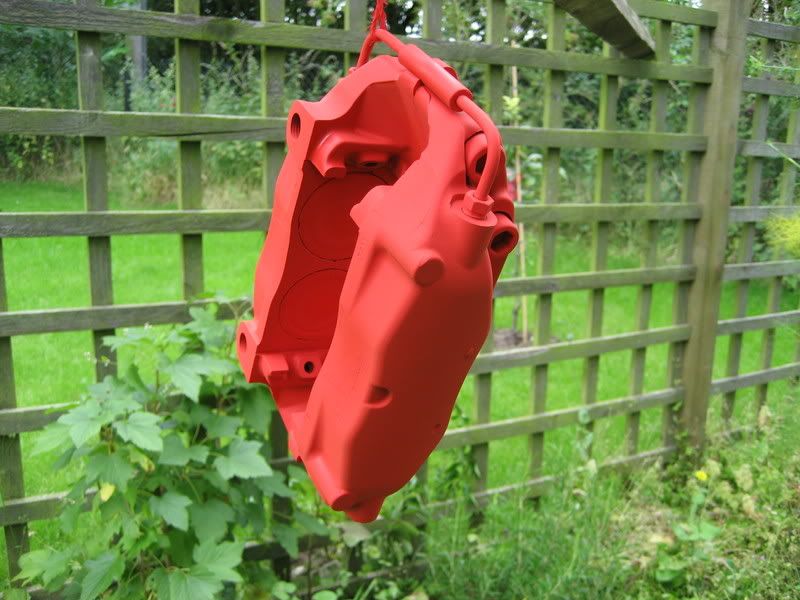
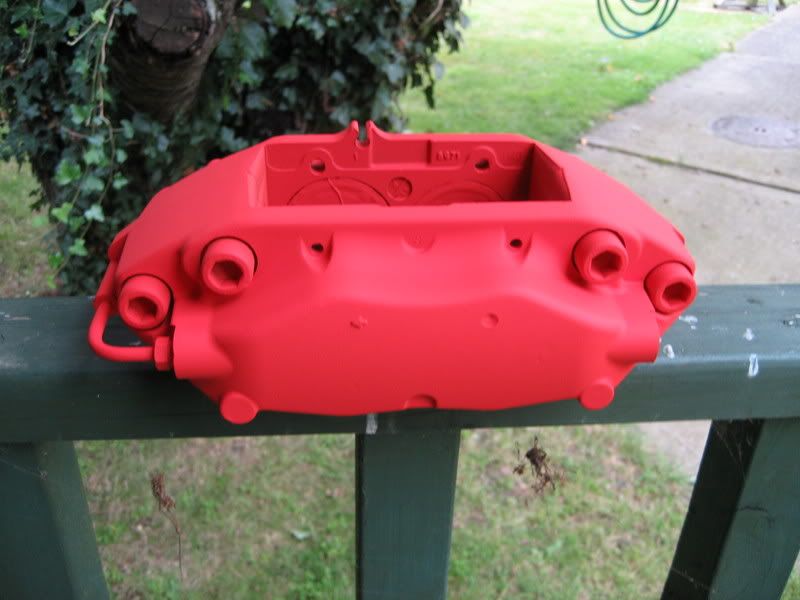
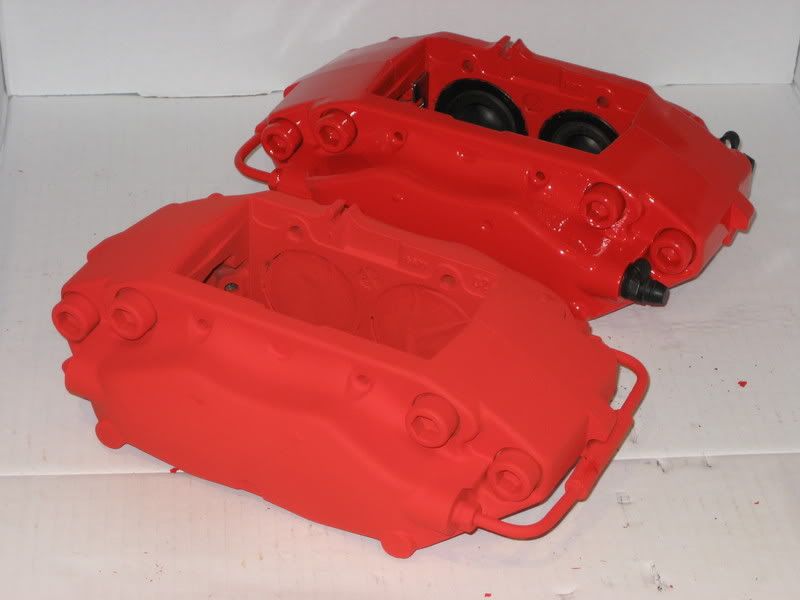
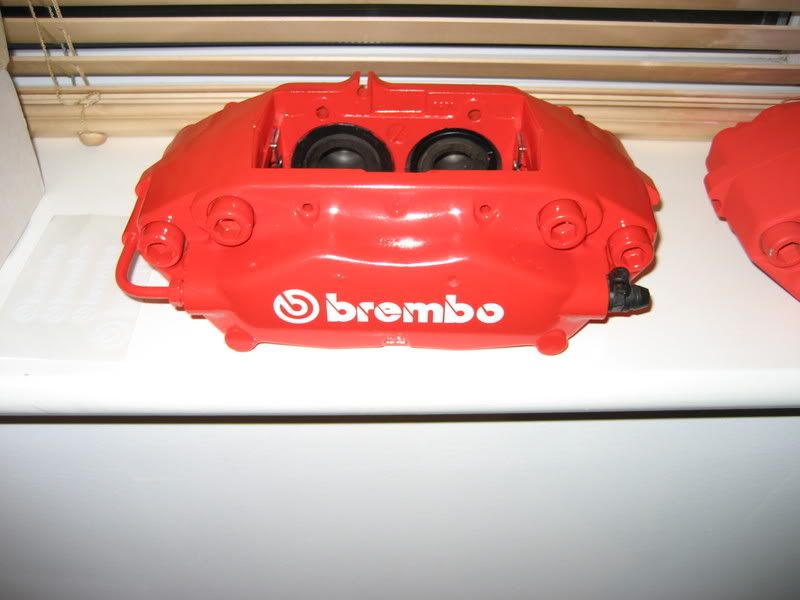
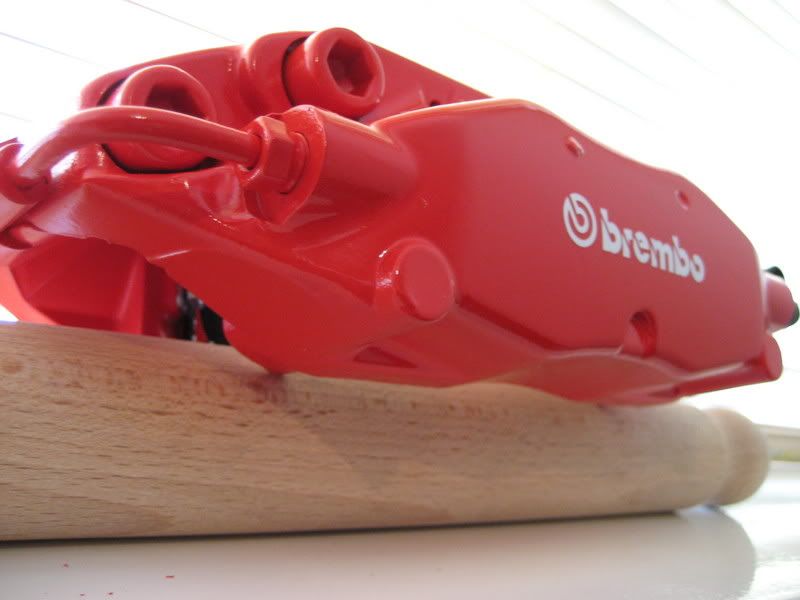
Strip Bembos down to bare metal..

Dennis

Polisher
May 11, 2005
297
0
They do look good but he could have taken the pads out first LOL

Might be tempted to do our lases if SEAT won't replace the one that has flaked a little
 

JAY DE

Work in progress....
Apr 4, 2007
106
0
Sunny Essex
Sanded out nicks and scratches and now ready for a wet and dry, coat of filler primer then high temp red spray paint and seals all round :D 
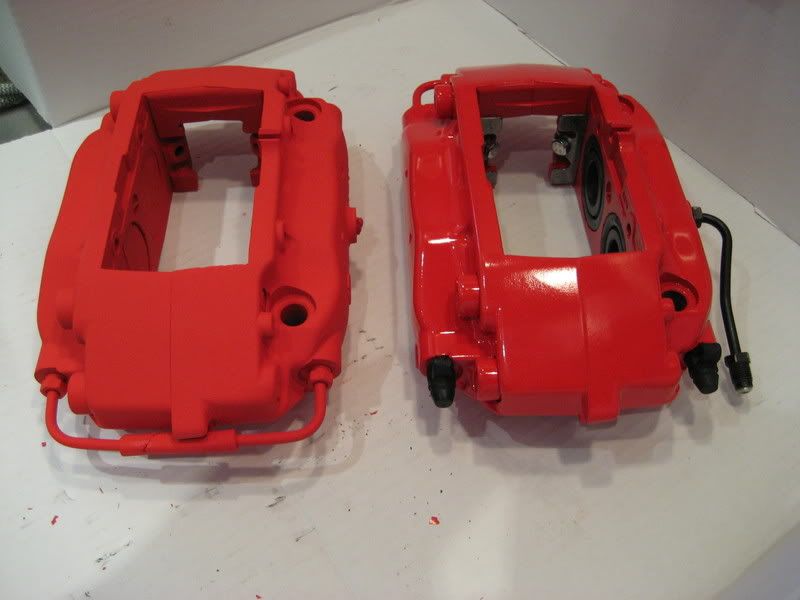
btw where is a good place to get the seals :))

IMG_0018.jpg

IMG_0021.jpg
 

JAY DE

Work in progress....
Apr 4, 2007
106
0
Sunny Essex
Update..

One caliper is only being done at the moment due to the fact that my buddy with an air commpressor is pissing about :censored: 
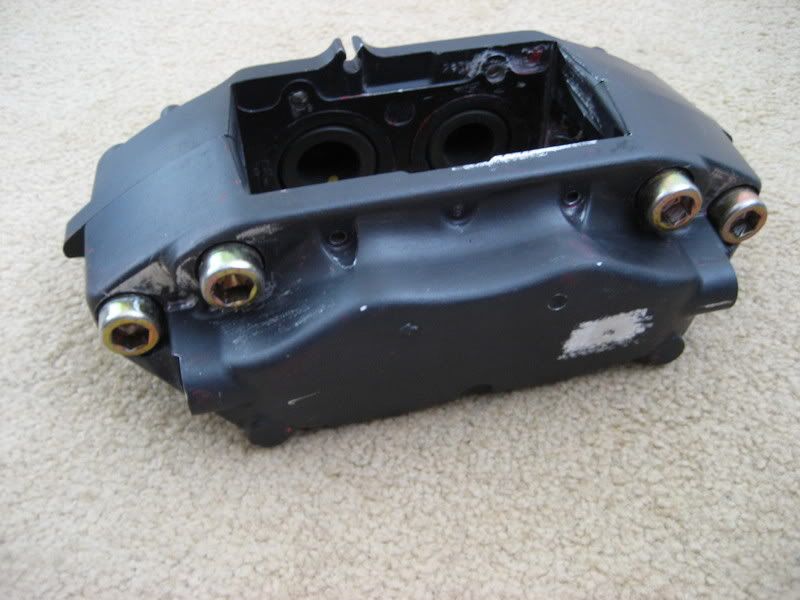
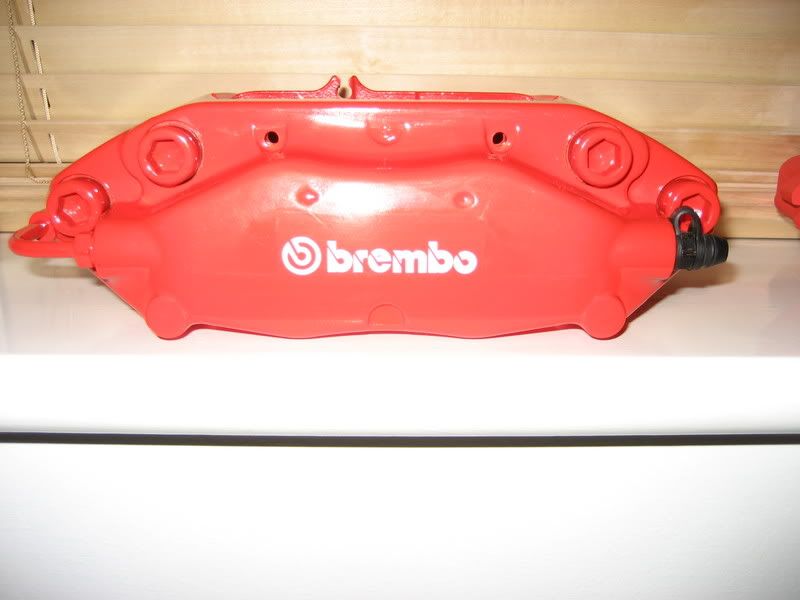
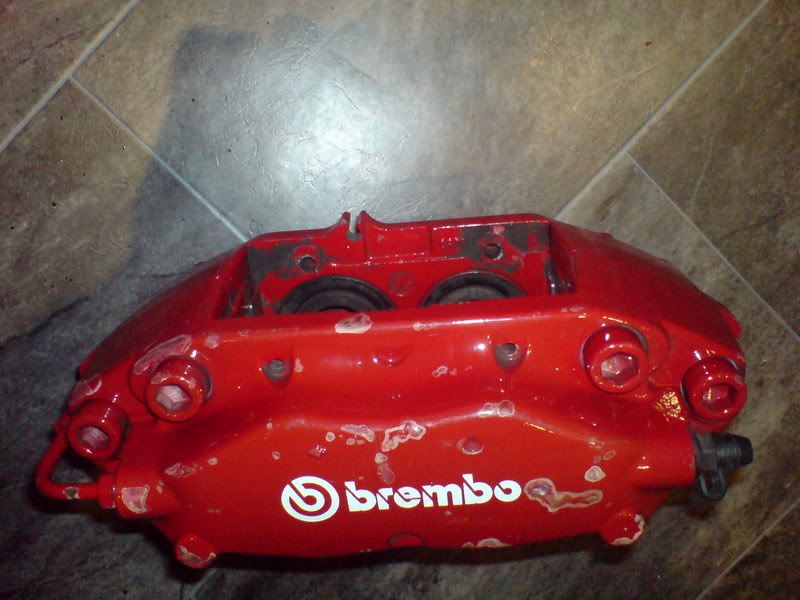
so i can't replace the seals in the other which i wanted to do before painting. I decided to just push forward with one so i don't keep you guys waiting..

I managed to get 4 coats off high temperature paint on today before it started to rain :( so lacquer will have to wait a few days. the caliper looks new though :D


IMG_0038.jpg

IMG_0035.jpg

IMG_0041.jpg

IMG_0042.jpg

IMG_0043.jpg

IMG_0057.jpg

Decided to do the carriers and bolts aswel
IMG_0047.jpg
 

UncleFester

Grumpier by the day!
Apr 30, 2006
4,764
2
Milton Keynes
www.facebook.com
is it just me or does the red VHT paint suffer from the same 'issue' that the black VHT suffers from, it's a very matt finish and not as deep a colour as you'd like? Mine said it was black yet it dried more like charcoal, those look to be dried pinkish?

I see you're going to lacquer them, will you try a test coating on something first to see if it has the desired effect and turns the pinkish colour back to gloss red?
 

RobM

Back from the dead...
Sep 27, 2006
4,982
3
Southampton
Lacquer usually makes the colour appear darker and fuller, so hopefully the same will apply here.

I may have missed something obvious here though.... but I have to say if I was going to the trouble of a full bare-metal respray I'd go for a different colour at least. If staying the same colour, you could have just used the methods already tried by others.
 

Ninja

Cupra now gone :(
Oct 1, 2005
1,182
0
Reading
www.peugeot-gti.net
fair play for the effort but as said if doing that id probably go for a different colour.. would still have to stand out though!!

Would be interested to see the pics with the lacquer on.. see if it makes them a nicer red and nice and shiny :)
 

m.r.davies

God's Property
Jun 13, 2006
608
0
Cardiff
looks good mate, a more detailed approach compared with my guide

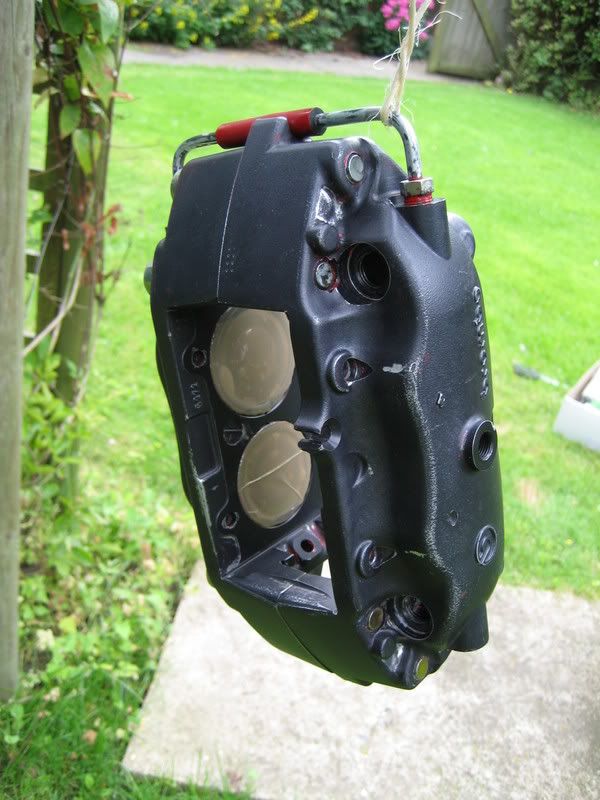
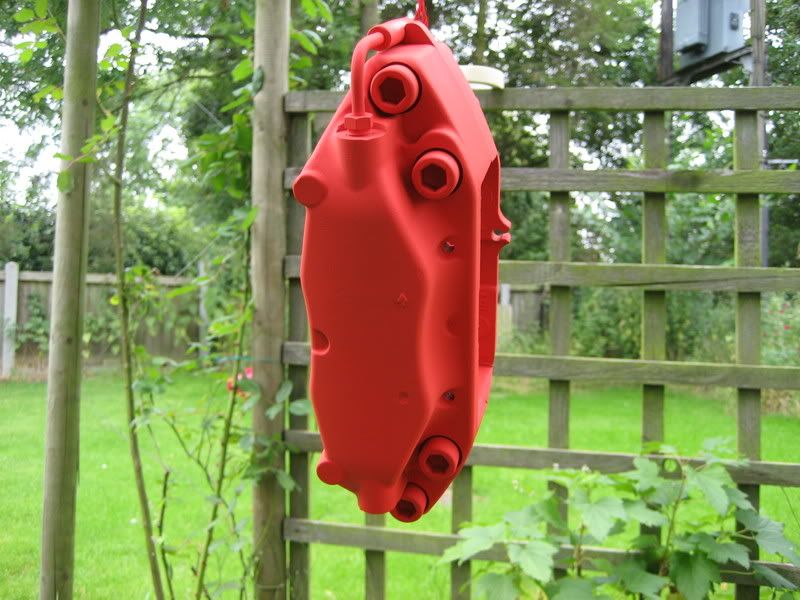
The thing about spraying them a different colour, is that the insurance company needs to be notified.
 

JAY DE

Work in progress....
Apr 4, 2007
106
0
Sunny Essex
richbigman - Thanks pal ;)

UncleFester
- they do have a bit more of a fluorescent look rather than deep red but i was told after laquer that it will look fuller..

RobM - TBH mate i toyed with the idea of going yellow on black or white but red just does it for me.. The calipers where in a bad state when i got them, thats why i went down to bare metal and didn't just want to do half the job, plus they will be as new when i have finish and soon i will be going for the porsche cayenne 6 pots so this is more of a project than a have to job.

Ninja - i've had to order the high temp lacquer as the spray shop round my why doesn't stock any..:blink:

m.r.davies - Thanks pal.. ;)

Finally managed to get hold of my mate (air compressor) but i forgot to take the camera:doh: 
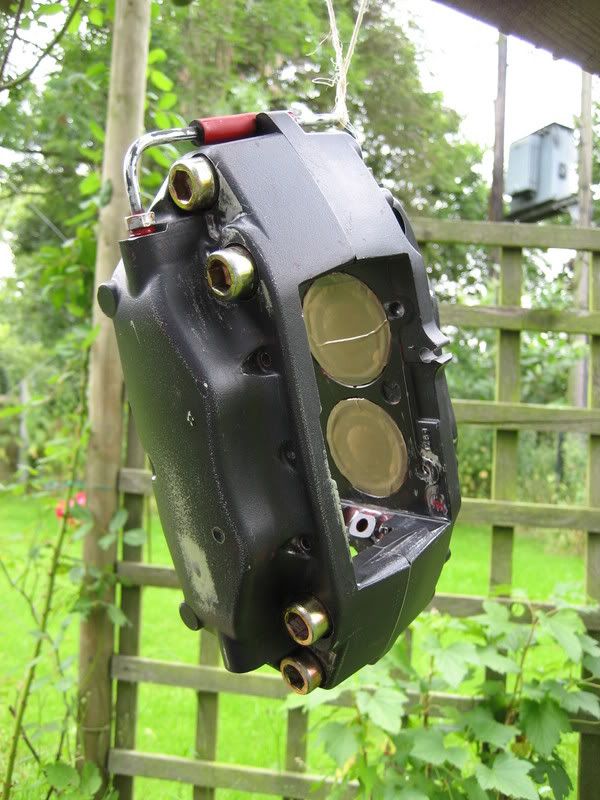
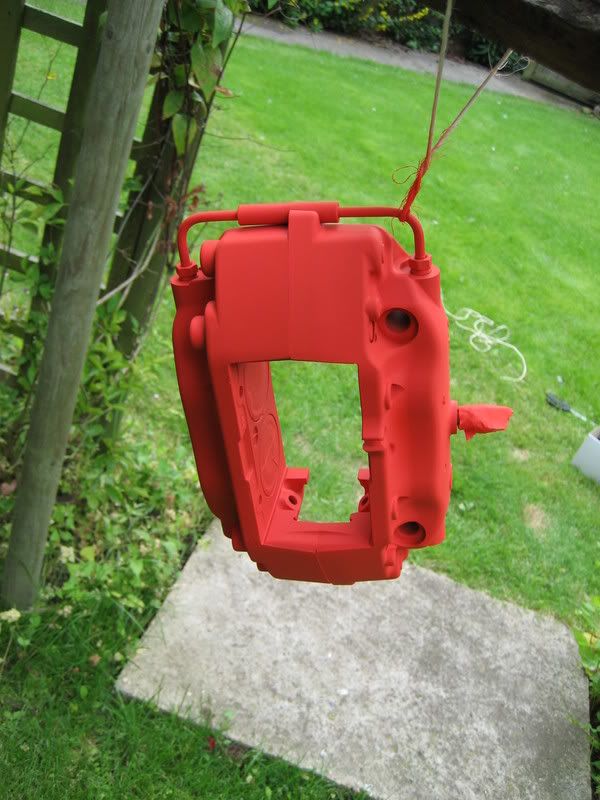
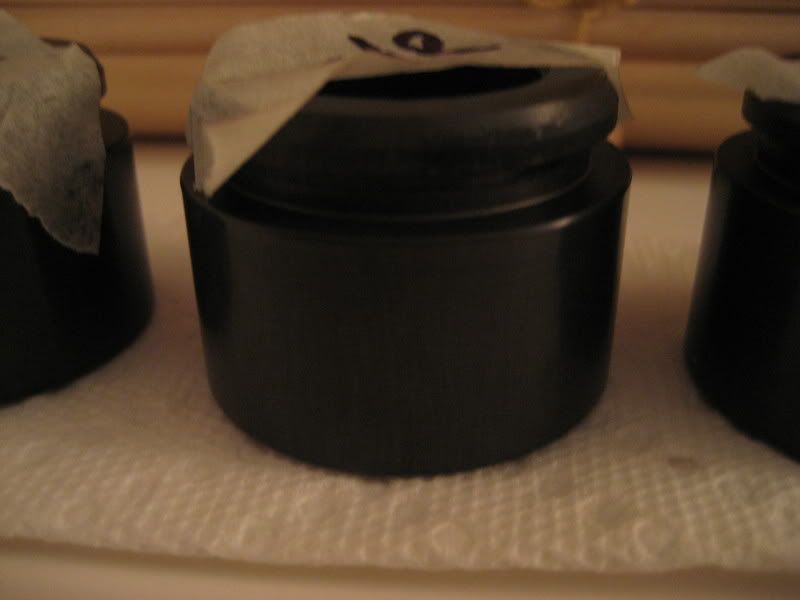
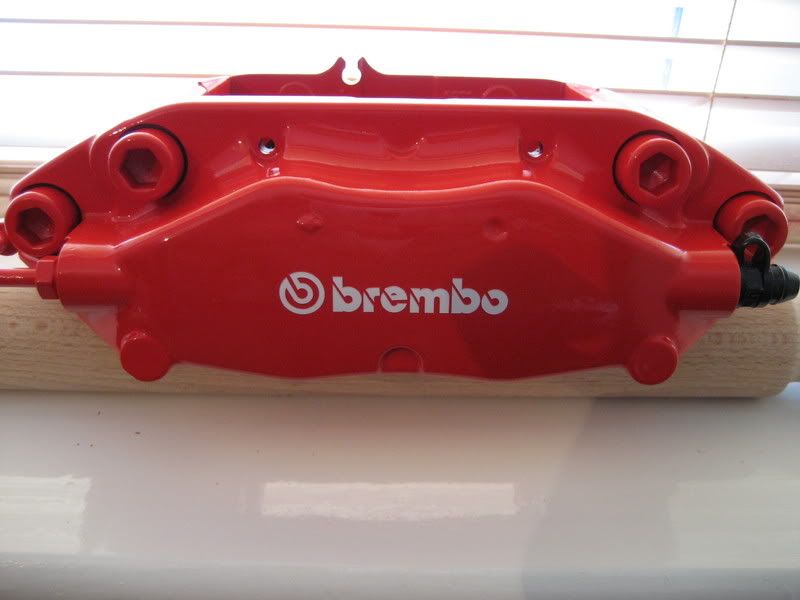
the pistons came out with ease just need to get new seal and spray this caliper.. almost there now..
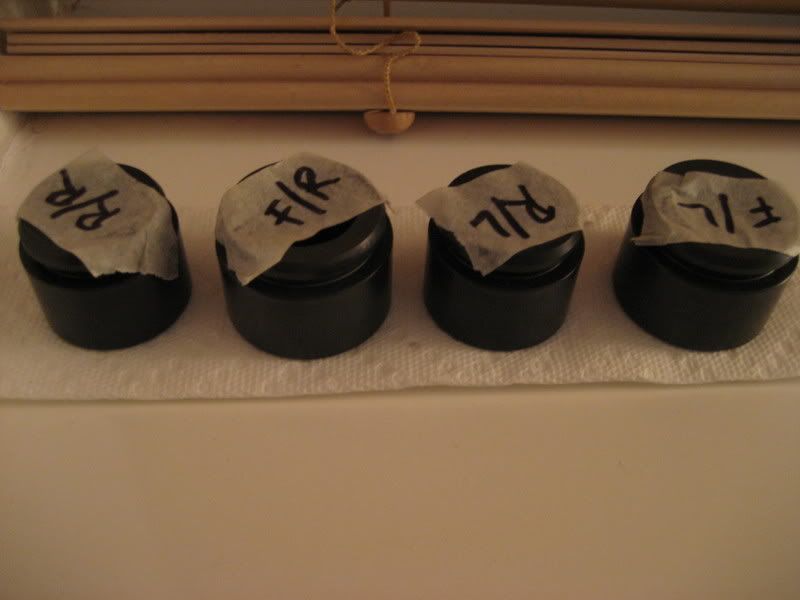
IMG_0080.jpg

IMG_0082.jpg
 

JAY DE

Work in progress....
Apr 4, 2007
106
0
Sunny Essex
Just waiting on the Brembo decal no before a final 2 coats of laquer..

just a few shots (not the best) comparing a caliper with clear high temp laquer and one with the base coat alone..

The red appears much deeper and fuller looking but the red is still a bit brighter than the original one..

IMG_0118.jpg

IMG_0117.jpg

IMG_0116.jpg
 

JAY DE

Work in progress....
Apr 4, 2007
106
0
Sunny Essex
Finally got there :whistle:

The other caliper is awaiting seals in the post but is in the same state.

The decal i got was not the correct size but i could wait any longer so i tried the large one

IMG_0263.jpg


The the smaller one

IMG_0266.jpg


I decied that the small one looked better. (no going back after the 3 coats of laquer)

The finshed article with 3 coats of laquer over the decal to seal it in.. :)

IMG_0275.jpg

IMG_0277.jpg

IMG_0279.jpg


Before and after shot ...

Before

DSC00352.jpg


after

IMG_0278.jpg


I am please that i did it myself, it was not fun but there was a sense of achievement at the end :D..
 
Adrian Flux insurance services - discount for forum members.