
-
Hey Guest👍👎 We're looking for reviews of your local CUPRA or SEAT Dealership - it's quick and easy to do: Leave a review now
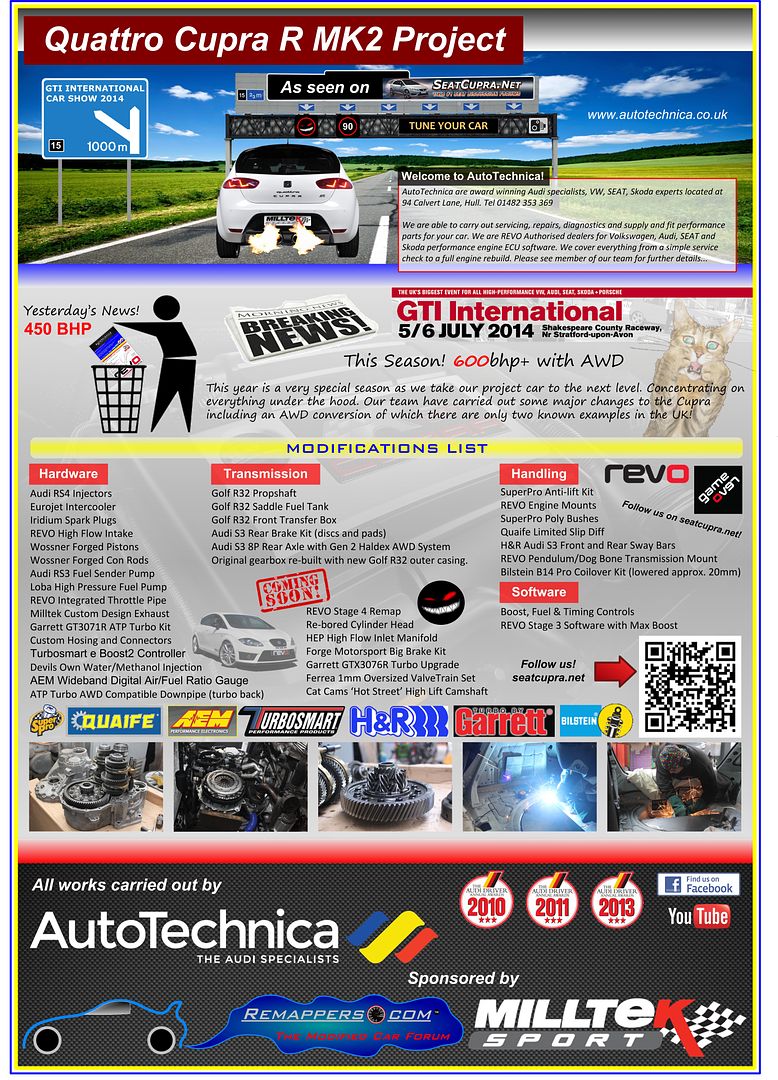
Quattro Cupra R Mk2 Project
- Thread starter Gagwithgaffer
- Start date
You are using an out of date browser. It may not display this or other websites correctly.
You should upgrade or use an alternative browser.
You should upgrade or use an alternative browser.
Im glad the wiring instructions etc i gave you worked for you too. =)
And nice progress on the car")
And nice progress on the car
GTI International 2014


Hi Everyone... We're Back!
Well it's been a busy few months since our last update with lots of new wiring, gauges and goodies being installed. We have an epic build coming up for Kung Fu within the next few weeks, so keep your eyes peeled for the next project update!
We now have all the kit we need for the next round of treats under the hood including a water meth system, REVO Stage 4 engine rebuild and an even bigger GTX Garrett Turbo!
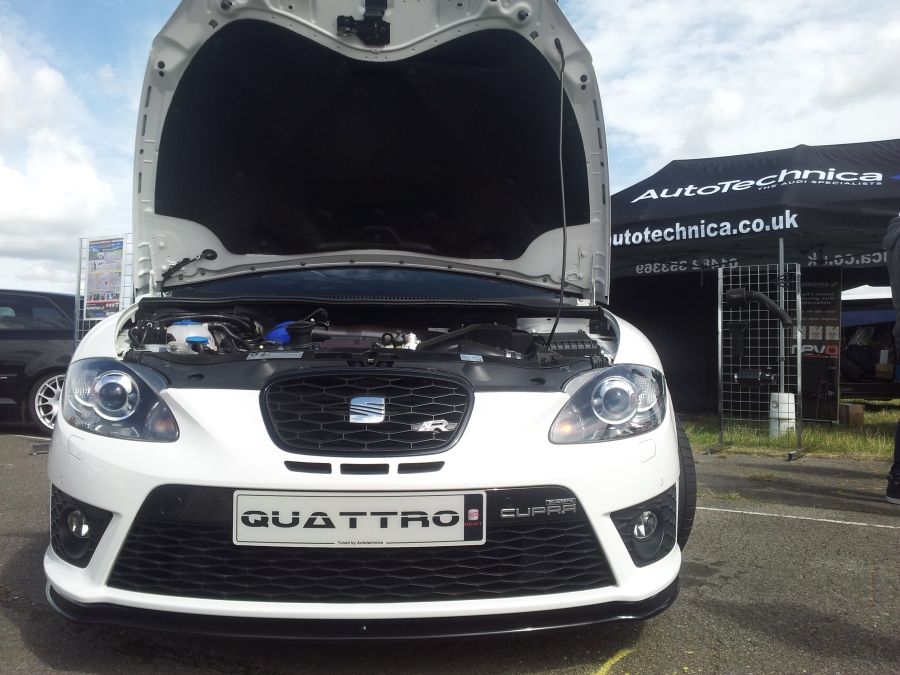
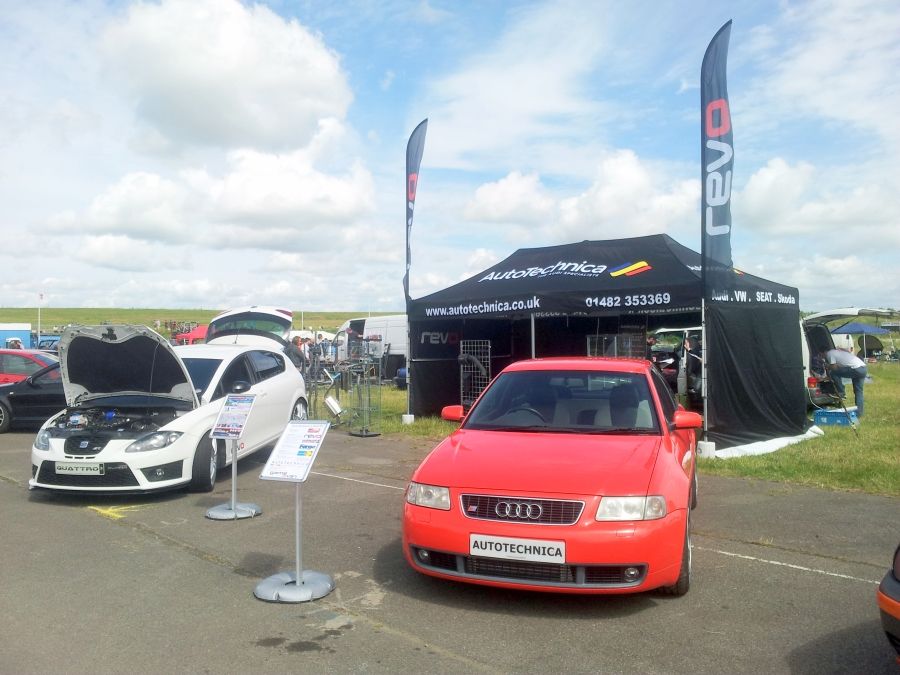
In the mean time we hope to see you all at the GTI International 2014 Show. You will find us at the Autotechnica Trade Stand where our project Cupra will be on display.
Looking forward to meeting you all
Hi Everyone... We're Back!
Well it's been a busy few months since our last update with lots of new wiring, gauges and goodies being installed. We have an epic build coming up for Kung Fu within the next few weeks, so keep your eyes peeled for the next project update!
We now have all the kit we need for the next round of treats under the hood including a water meth system, REVO Stage 4 engine rebuild and an even bigger GTX Garrett Turbo!
In the mean time we hope to see you all at the GTI International 2014 Show. You will find us at the Autotechnica Trade Stand where our project Cupra will be on display.
Looking forward to meeting you all
GTI International Show
Hi Folks
In this episode we draw your attention to the weekend’s activities down at the GTI International Show 2014. Now in its 27th year, GTI Inters has become one of the biggest events in the summer calendar, an exclusive event for owners of high performance Volkswagen Group models, including VW, Audi, SEAT, Skoda and Porsche, attracting thousands of VAG Group fans from across the UK and Overseas.
Originally founded in 1988 at Knebworth Park, when the Mk2 GTI 16V was the hottest item in the VW line up, GTI International has since grown to become one of the UK’s biggest shows Europe wide and brought together some of the best examples of custom and high-performance Volkswagen Group models from far and wide, enough eye candy to feed everyone’s appetite!
The show was formerly held at Bruntingthorpe Proving Ground for eight years before moving to Shakespeare Country Raceway, for what is now in its second year running. Centre stage was the Quarter Mile Sprint and the Show 'n’ Shine, as well as a huge selection of trade stands, club displays and competitions, car sales area, autojumble, mobile rolling road dyno, plus children’s entertainments, on site camping with a DJ and bar and much more.
The show’s calendar was up against it this year with a clash of entertainment across the UK, including the Formula 1 at Silverstone and the Tour De France Stages 1 and 2 held in Yorkshire. Although likely that most fans of pedal power were not that attuned to petrol guzzling exhaust popping motors, there was still a high number of people who were no doubt faced with the dilemma of which event to attend. Along with the shaky British forecast of cloud and rain, we really were battling in popularity for the numbers, however our dedicated VAG Group fans did not let us down and the show pressed on to become another year of great success!
This year’s main sponsors included Milltek Sport, Shark Performance and Dialynx Performance who all did an excellent job in providing a safe and fun environment for our modded car fans to thrash their rides up the quarter mile strip. Watched by a crowd of a 3,000 seater grandstand, this really was the place to get your heart racing, and experience the thrill of being watched by hundreds of spectators as you pushed your car to the very limit! All eager to snatch the class wins for a moment of fame and ultimate respect!
Some of the biggest names in the performance car scene were also present, including Revo Technik, APR Motorsport, Forge Motorsport, Volkswagen Racing and many more.
For the full list of traders and exhibitors, see below:
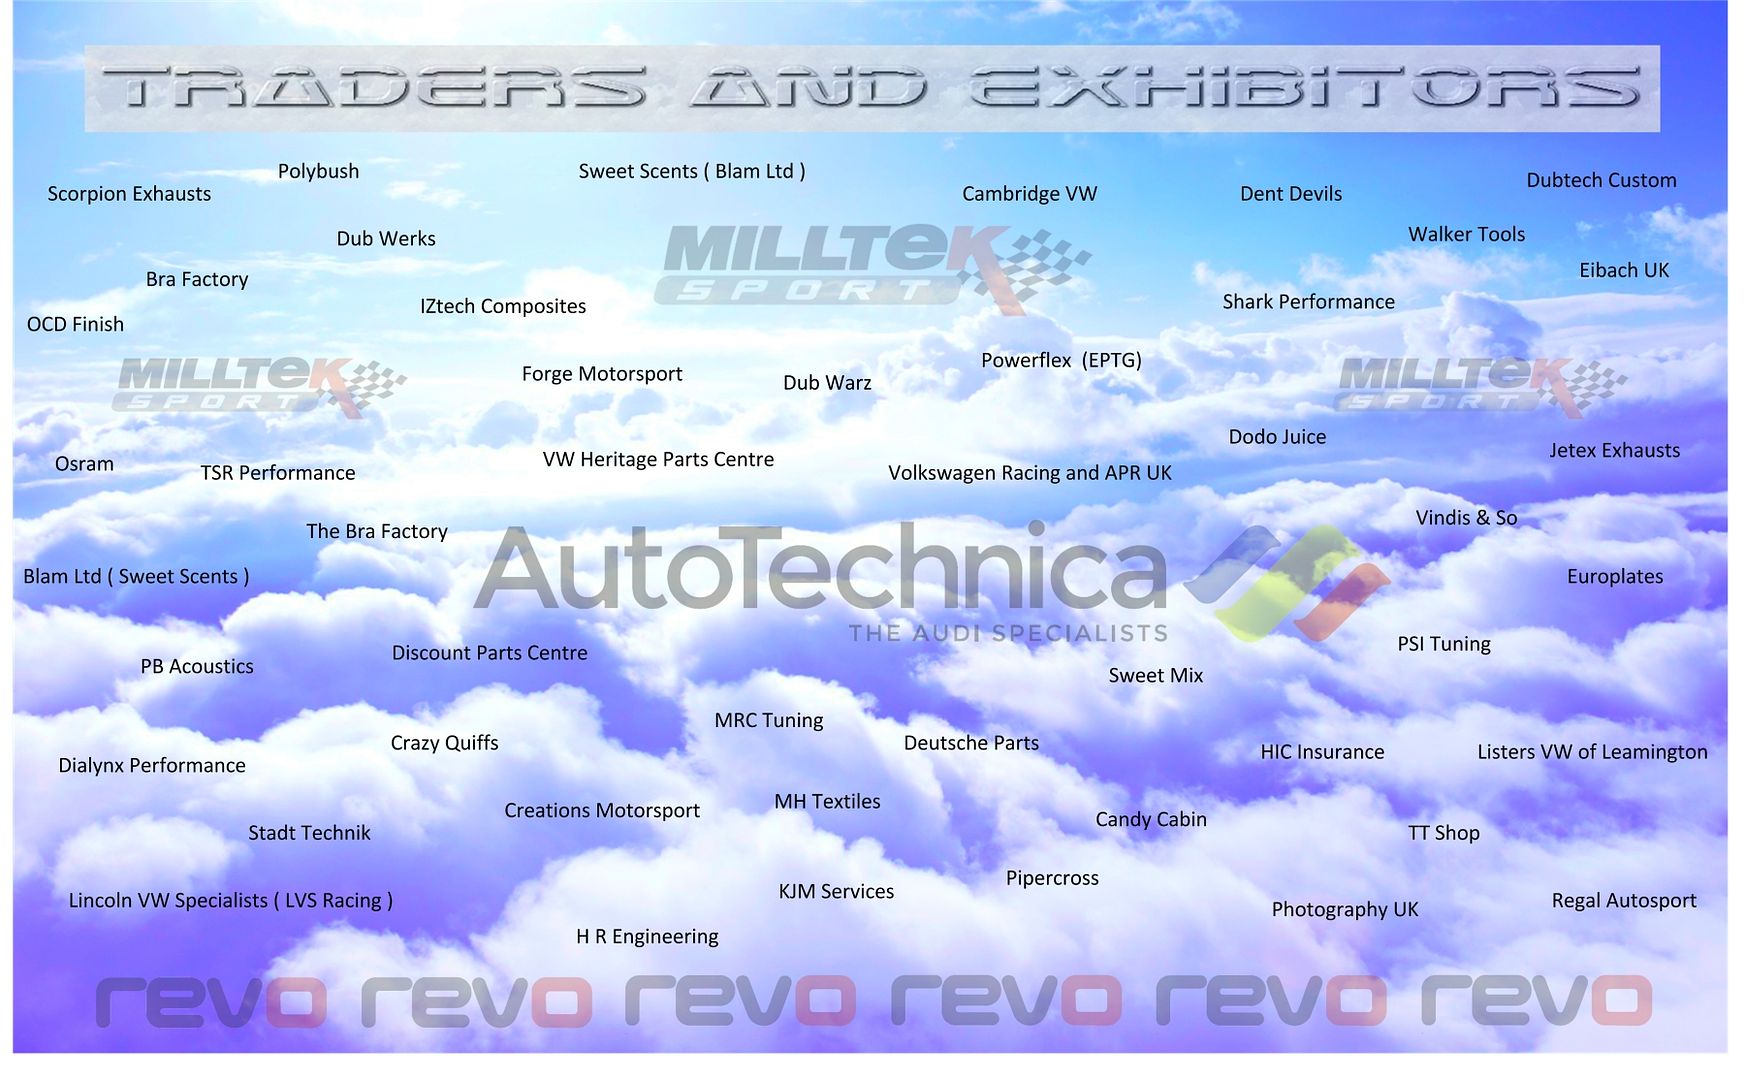
There were a number of options for plot sizes and locations for all the traders and exhibitors, giving everyone a chance to display their range of professional services. Nearly all the top tuning companies had a remap bay and were busy pumping stage 1s into people’s cars, pepping them all up for the drag strip and the summer season ahead. Hundreds of products were also on display up for sale, spoiling the crowds for choice with their next upgrade.
The main point of focus was the dual lane quarter mile drag strip, which gave people of all experience levels a chance to race their car to the absolute limit. With a professional team of safety marshals, commentators, a timing system and a big display board at the end of the run, the show gave an intensive atmosphere as hundreds of people watched these insane cars roll their way to the finish line. There was a range of pricing options for as little as five smackers for just a single run! A full days racing was as little as £20 so gave everyone a chance to compete. The drag heats were split into various classes of model and manufacturer with some awesome prizes for the fastest cars in their class.
In addition to the quarter mile, there were lots of other attractions taking place including a large show and shine area. Club displays were also prominent along with plenty of trade stands, car sales, auto jumbles, children’s amusements and enough ice cream vans to put Jen & Berry’s out of business!
Camping facilities were also available, which gave people from far and wide the chance to crash out and relax for the weekend. Visitors were turning up to pitch their tents from as early as Friday afternoon, when most of the traders and exhibiters were arriving in convoys to come and make good their displays for the weekend’s coming events.
BBQs soon got underway, filling the atmosphere with tasty niffs as the campers and traders lured the crowds towards their own displays, keeping the community well-nourished for the weekend ahead. Eating facilities were also in good supply with a food village at the centre of the show, with lots of burger vans, Thai dishes, spicy and oriental delights! No one went hungry!
A weekend in the life of Autotechnica…
Well for us, this was to be one of the biggest and most important events of our show calendar. We’ve had a very busy season with myself, Andy and his team putting many hours of labour into our project Cupra.
We had recently ordered a load of parts from Belgium, Germany and America, to carry out the next stage of upgrades including a REVO Stage 4 conversion with a monster sized turbo! Despite making our orders back in April, the parts didn’t arrive until only a few weeks ago, so really we ran out time to pull Kung Fu to pieces before the show. We ordered a new cylinder head with an oversized Ferrea valve train, along with a set of custom forged pistons from JE, in order to allow the necessary clearances for a high lift cam. These type of works required specialist machining to be carried out, so we decided it would be best to wait until after the show until we start the works, just in case anyone had made a bollux up with their figures! (namely me!)
We had plenty of works to do during the recent weeks anyway, with the installation of a TurboSmart E Boost controller, an AEM Air/Fuel Gauge and a Devil’s Own water meth install, there were lot’s of electrics and wiring to installed and make good. We got the new boost controller setup with only one day to go before the show due to our tight schedule, so it was for this reason that we decided not to race the car on this occasion… sorry folks!
But fear not, we will be back later on this season in full force!
So busy as we were in the last week with only days to go until the show, we packed the van up the day before back at our HQ in Hull, cramming it full of bottles of water, hardware, laptops, chairs, tables, products and hardware filled up to the ceiling like a jack in the box! Ready to explode when we opened the back doors on arrival! We headed down to the show in a convoy along with Andy and Lee’s Audis, and of course our project Cupra Kung Fu all polished up ready for some action.
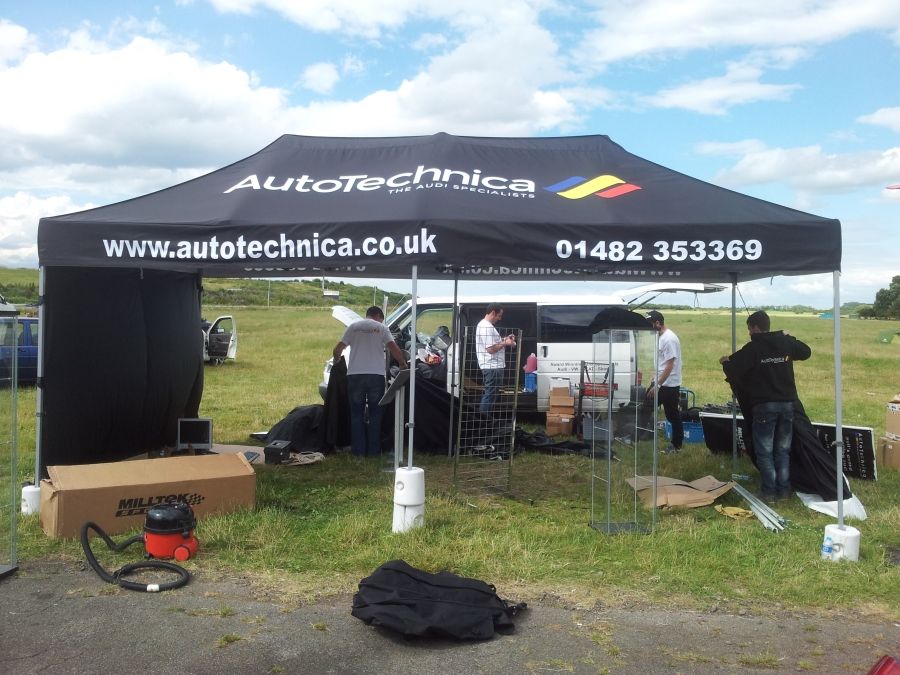
The British weather was doing its usual thing upon our arrival, with gusty winds that made life a little difficult to put up the trade tent! It took us over two hours to erect the damn thing, whilst Ben held onto it with his life until we managed to smash enough pegs in the ground to stop it blowing away!
A little word of advice, take a small sledge hammer with you next time you go! we discovered that the old runway tarmac stretched around two metres further underneath the long grass, we kept finding the pegs would only get down around four inches, wish I’d taken my SDS drill now!
Eventually we got everything setup and was time for a long awaited beer! So we headed back to Stratford Upon Avon to our hotel and went out for some dinner.
The following morning we woke up in our hotel rooms, with a dim light poking through the linen of our tatty curtains, only to find it was pissing it down with rain! Rats!
So we packed our things, ate our breakfast and headed down to the show to get everything setup. It must have rained for the first three hours, so I had a bit of a job getting the Cupra washed and polished up, hence the disgruntled expression on my face!
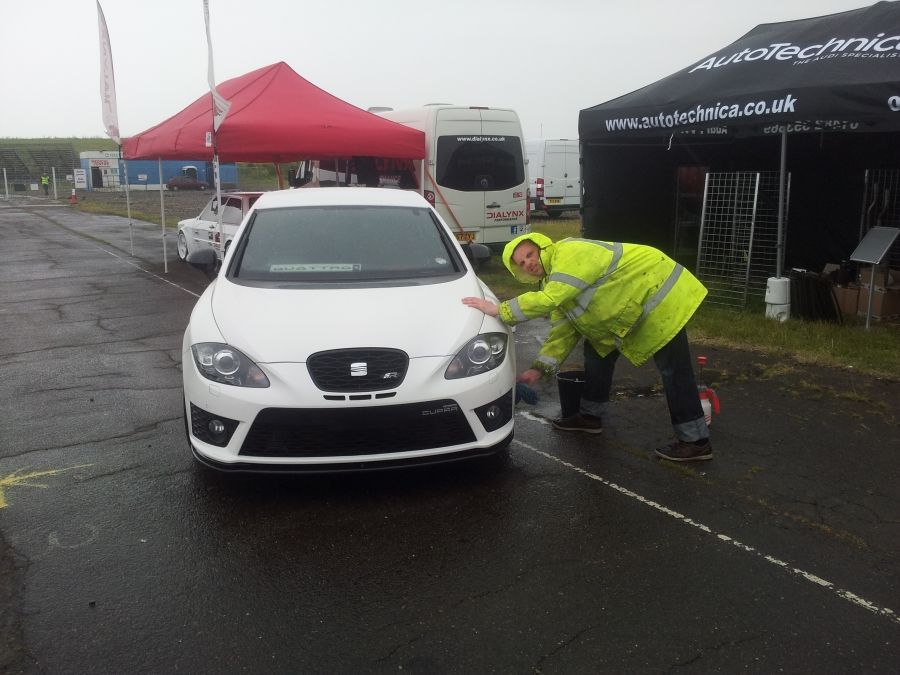
The lads soon told me to cheer up and stop moaning, so I did!
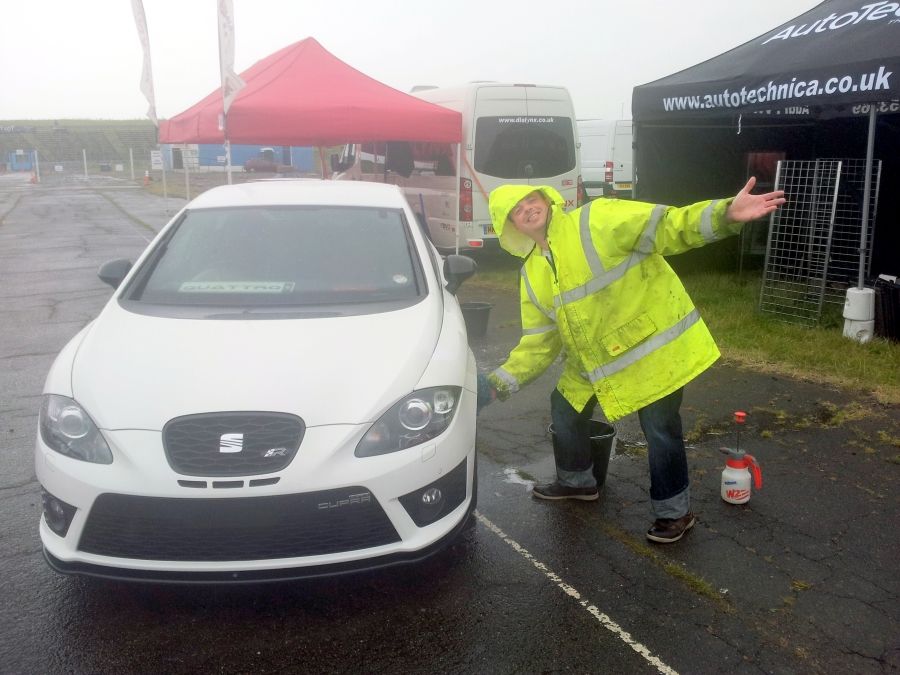
Washing the car without wellies was not the best idea! My jeans were soaked up to my knees! All for a good cause though
Right! That little job done, then Henry came out for a bit of hoovering, followed by a final polish, whacked on the show plates and I was done. Meanwhile Andy’s technical team were scratching their heads over the new glass display cabinets we’d bought from IKEA, of course they all thought they were far too clever to read the *** manual!
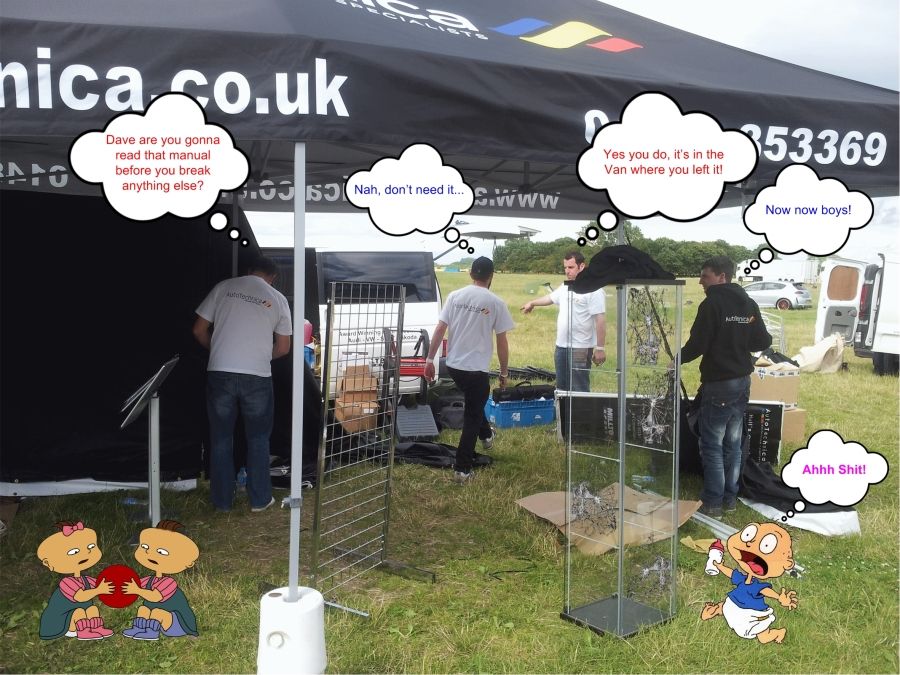
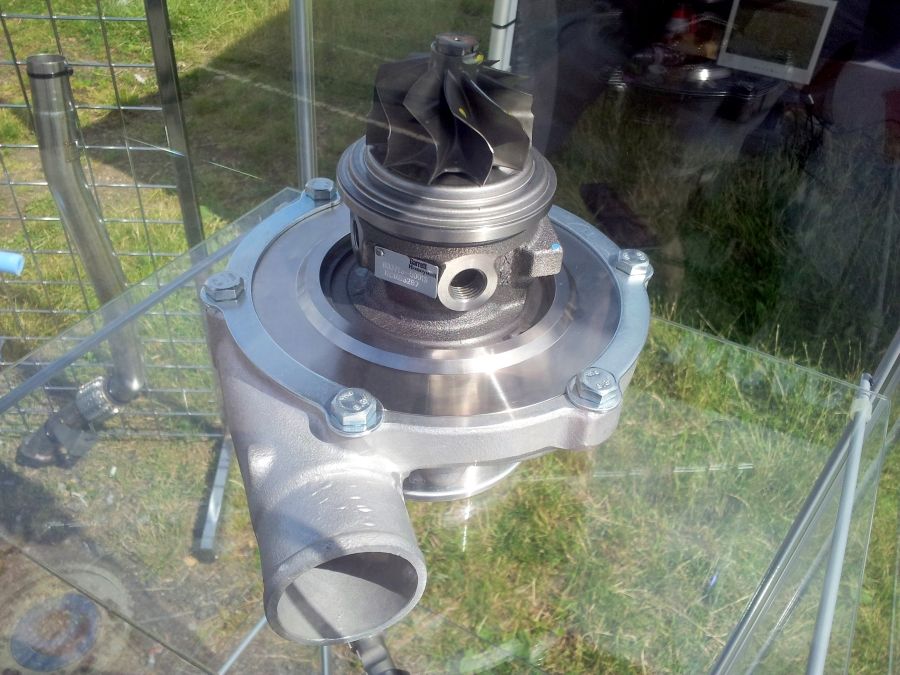
And after a few repairs to the cabinets we finally got underway and started filling them with some goodies for the show. On display we had the Garrett GTX3076R turbo which is soon to be strapped into our project Cupra:
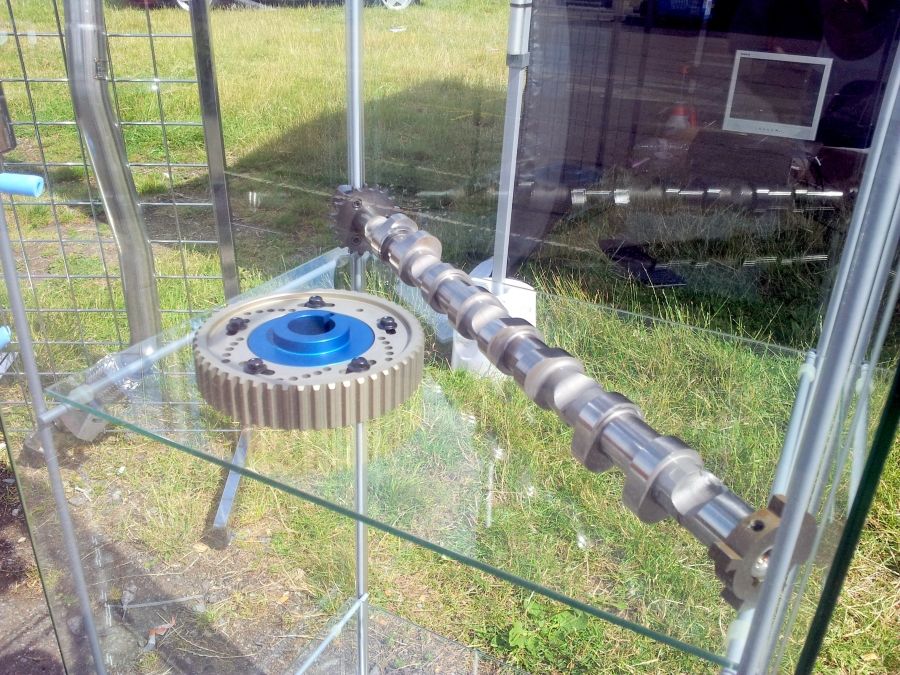
Followed by the CatCams and pulley (which will also look a lot better fitted! Trust you’ll agree the cams and pulley look awesome! A shame we’ll no longer see them once they’re tucked away inside the head!
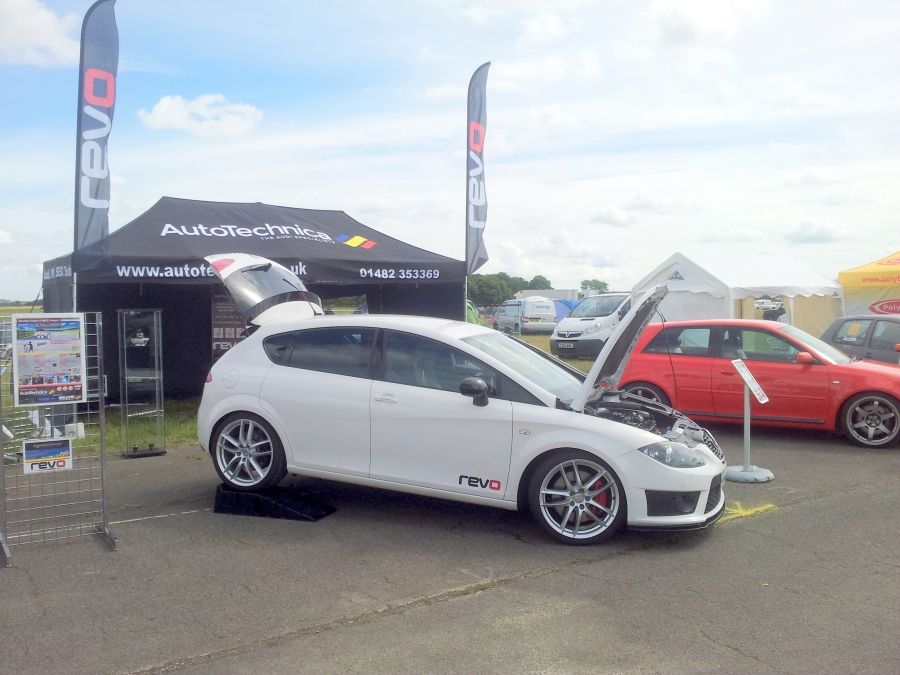
So finally after an hour of polishing the exterior and removing all the soot from the boot door which had been spat out from the mighty 3” tailpipes from our Milltek Exhaust! We were finally ready for the show to commence:
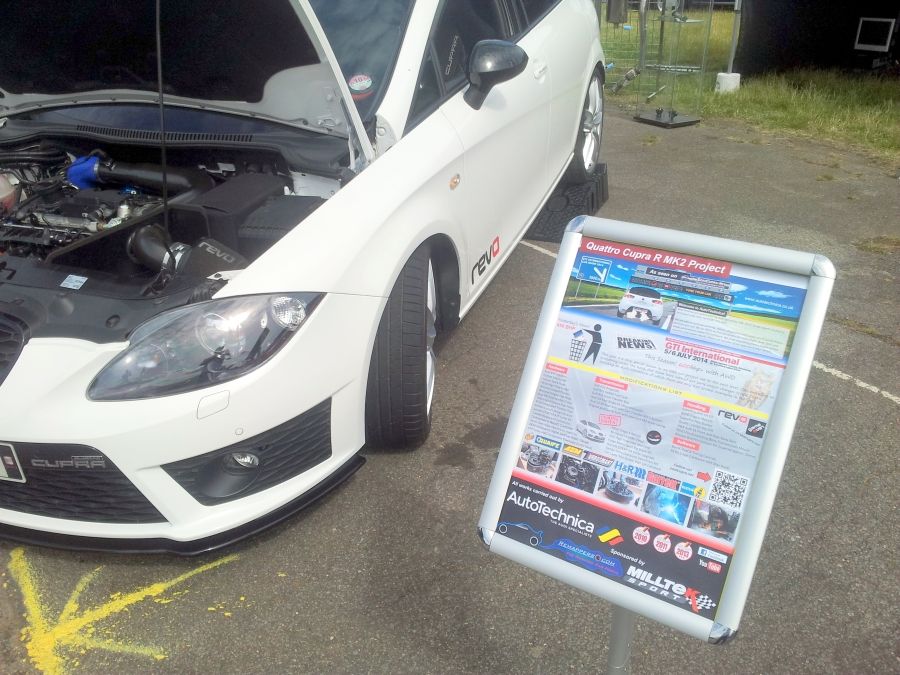
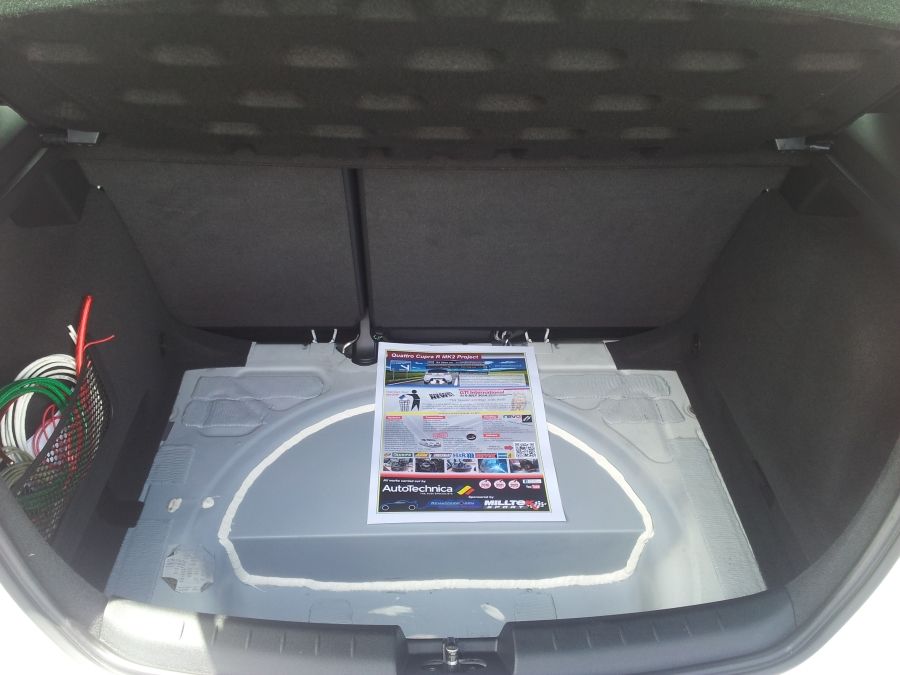
The poster we made especially for the show:
It wasn’t long before we sparked some interest in our Cupra which was really awesome, we had a number of people somewhat bemused by the AWD conversion, but nevertheless very impressed with all the works that had taken place:
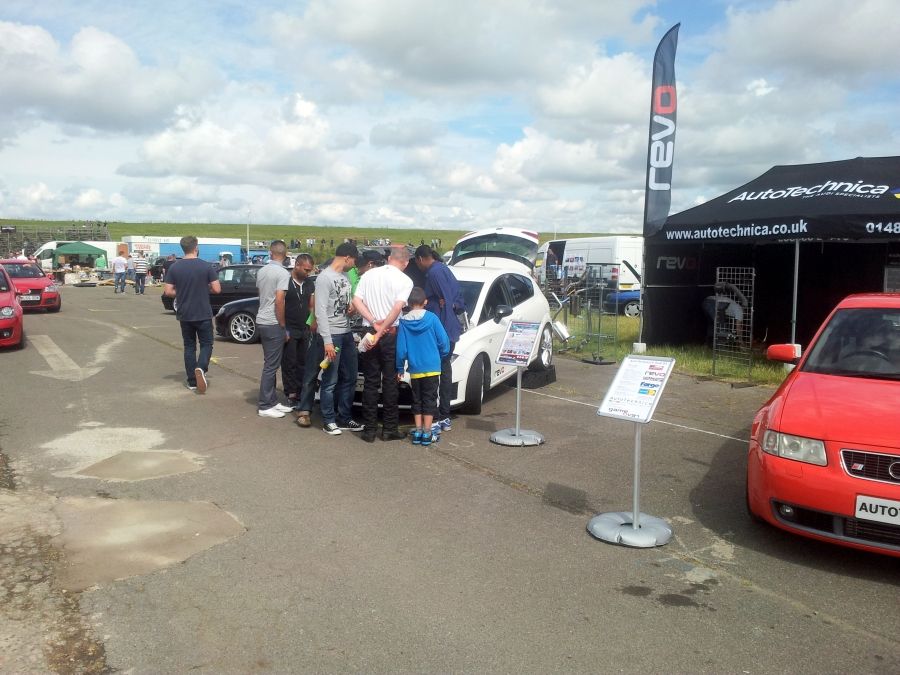
Some of the of the lads didn’t really believe us until they took a look under the car themselves, hence one of the reasons we got Kung Fu up on the ramps so everyone could have a good peek!

I got some plates made up a few days before the show to help attract more visitors, during the last events in Pickering we didn’t notice as many people approaching the car, with it’s sleeper stealth looks (currently!) I guess no one could really tell what we’d been up to until they got closer to the car and had a read of the spec sheet. This was one school boy error we would not take any chances on again!
Link for the site I used to design the plates if anyone’s interested:
http://www.myshowplates.com/number-plate-designer.asp
I ordered them for next delivery and without fail they arrived on time, the build quality is really good. Well worth a visit if you’re thinking of making some up.
As a side line detail, another product worth mentioning is the CarPlan Original Black bumper spray which suits the Leon’s hard plastic interior and especially brings out the Triple R Composites front bumper splitter very nicely.
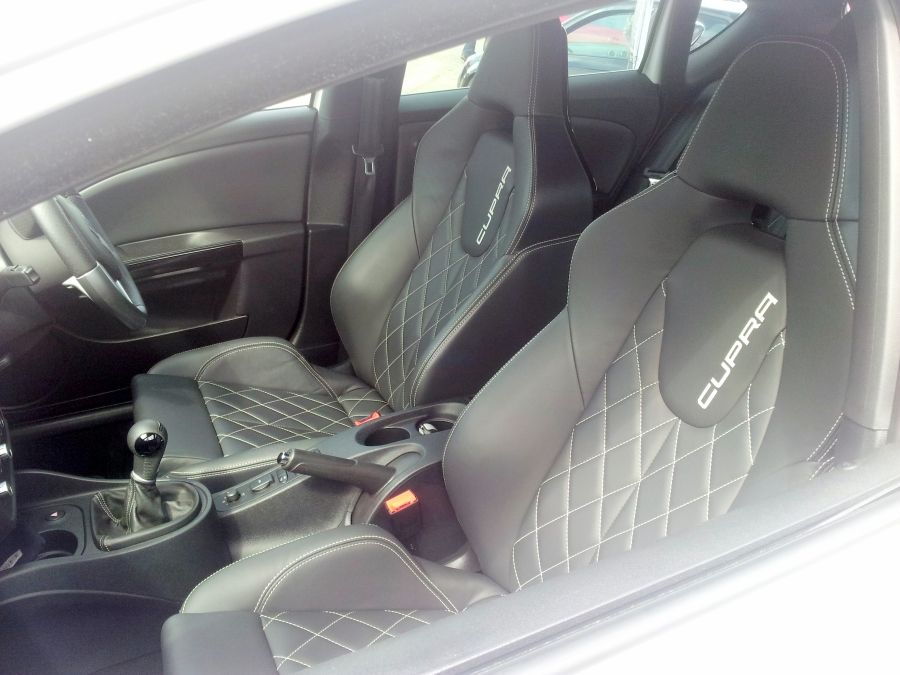
The inside of the car was also cleaned up nicely for the show, about three hours of cleaning the day before!
OK back to the show!
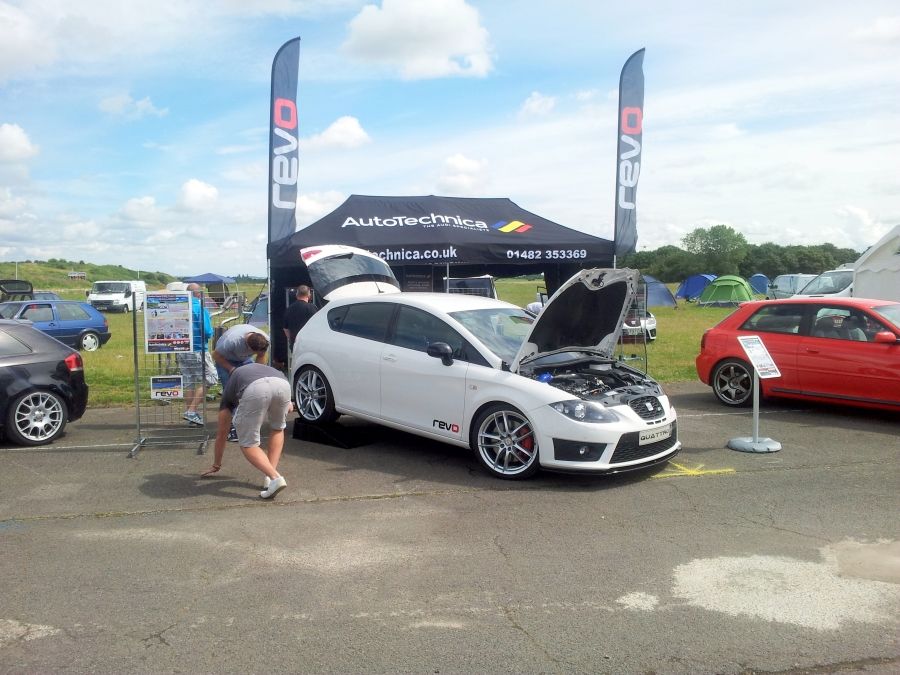
Overall we were pleased with the outlay of our trade stand, we were lucky to get a good position near to the front trade area nearby the entrance to the quarter mile strip, a big improvement on last years spot anyway!
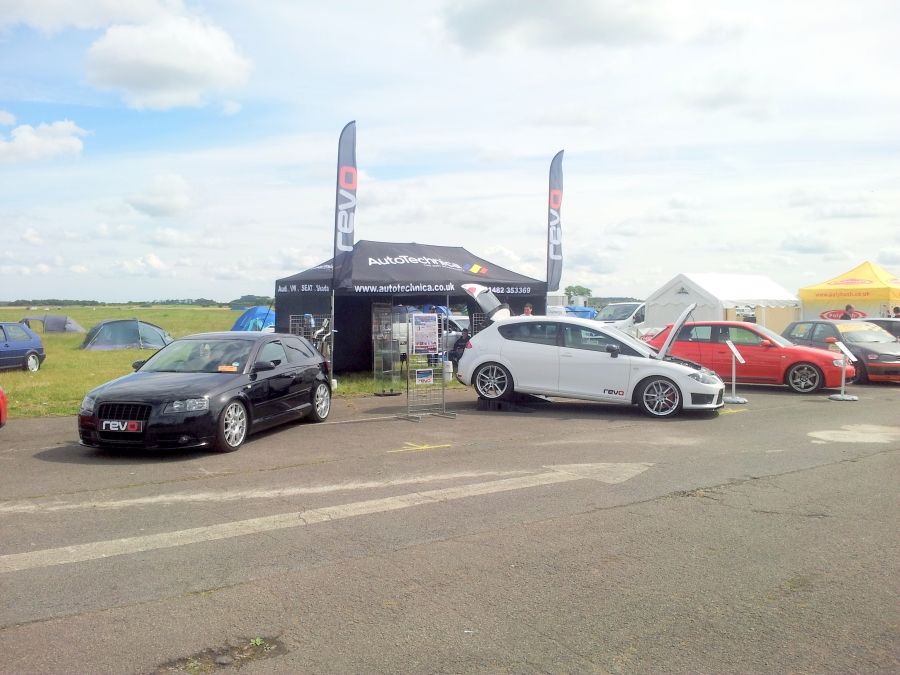
We were also positioned close by to our friends at REVO Technik, so I paid them frequent visits to there stand throughout the day to have a chat with the team about our up and coming plans for Kung Fu

To be continued...
Hi Folks
In this episode we draw your attention to the weekend’s activities down at the GTI International Show 2014. Now in its 27th year, GTI Inters has become one of the biggest events in the summer calendar, an exclusive event for owners of high performance Volkswagen Group models, including VW, Audi, SEAT, Skoda and Porsche, attracting thousands of VAG Group fans from across the UK and Overseas.
Originally founded in 1988 at Knebworth Park, when the Mk2 GTI 16V was the hottest item in the VW line up, GTI International has since grown to become one of the UK’s biggest shows Europe wide and brought together some of the best examples of custom and high-performance Volkswagen Group models from far and wide, enough eye candy to feed everyone’s appetite!
The show was formerly held at Bruntingthorpe Proving Ground for eight years before moving to Shakespeare Country Raceway, for what is now in its second year running. Centre stage was the Quarter Mile Sprint and the Show 'n’ Shine, as well as a huge selection of trade stands, club displays and competitions, car sales area, autojumble, mobile rolling road dyno, plus children’s entertainments, on site camping with a DJ and bar and much more.
The show’s calendar was up against it this year with a clash of entertainment across the UK, including the Formula 1 at Silverstone and the Tour De France Stages 1 and 2 held in Yorkshire. Although likely that most fans of pedal power were not that attuned to petrol guzzling exhaust popping motors, there was still a high number of people who were no doubt faced with the dilemma of which event to attend. Along with the shaky British forecast of cloud and rain, we really were battling in popularity for the numbers, however our dedicated VAG Group fans did not let us down and the show pressed on to become another year of great success!
This year’s main sponsors included Milltek Sport, Shark Performance and Dialynx Performance who all did an excellent job in providing a safe and fun environment for our modded car fans to thrash their rides up the quarter mile strip. Watched by a crowd of a 3,000 seater grandstand, this really was the place to get your heart racing, and experience the thrill of being watched by hundreds of spectators as you pushed your car to the very limit! All eager to snatch the class wins for a moment of fame and ultimate respect!
Some of the biggest names in the performance car scene were also present, including Revo Technik, APR Motorsport, Forge Motorsport, Volkswagen Racing and many more.
For the full list of traders and exhibitors, see below:
There were a number of options for plot sizes and locations for all the traders and exhibitors, giving everyone a chance to display their range of professional services. Nearly all the top tuning companies had a remap bay and were busy pumping stage 1s into people’s cars, pepping them all up for the drag strip and the summer season ahead. Hundreds of products were also on display up for sale, spoiling the crowds for choice with their next upgrade.
The main point of focus was the dual lane quarter mile drag strip, which gave people of all experience levels a chance to race their car to the absolute limit. With a professional team of safety marshals, commentators, a timing system and a big display board at the end of the run, the show gave an intensive atmosphere as hundreds of people watched these insane cars roll their way to the finish line. There was a range of pricing options for as little as five smackers for just a single run! A full days racing was as little as £20 so gave everyone a chance to compete. The drag heats were split into various classes of model and manufacturer with some awesome prizes for the fastest cars in their class.
In addition to the quarter mile, there were lots of other attractions taking place including a large show and shine area. Club displays were also prominent along with plenty of trade stands, car sales, auto jumbles, children’s amusements and enough ice cream vans to put Jen & Berry’s out of business!
Camping facilities were also available, which gave people from far and wide the chance to crash out and relax for the weekend. Visitors were turning up to pitch their tents from as early as Friday afternoon, when most of the traders and exhibiters were arriving in convoys to come and make good their displays for the weekend’s coming events.
BBQs soon got underway, filling the atmosphere with tasty niffs as the campers and traders lured the crowds towards their own displays, keeping the community well-nourished for the weekend ahead. Eating facilities were also in good supply with a food village at the centre of the show, with lots of burger vans, Thai dishes, spicy and oriental delights! No one went hungry!
A weekend in the life of Autotechnica…
Well for us, this was to be one of the biggest and most important events of our show calendar. We’ve had a very busy season with myself, Andy and his team putting many hours of labour into our project Cupra.
We had recently ordered a load of parts from Belgium, Germany and America, to carry out the next stage of upgrades including a REVO Stage 4 conversion with a monster sized turbo! Despite making our orders back in April, the parts didn’t arrive until only a few weeks ago, so really we ran out time to pull Kung Fu to pieces before the show. We ordered a new cylinder head with an oversized Ferrea valve train, along with a set of custom forged pistons from JE, in order to allow the necessary clearances for a high lift cam. These type of works required specialist machining to be carried out, so we decided it would be best to wait until after the show until we start the works, just in case anyone had made a bollux up with their figures! (namely me!)
We had plenty of works to do during the recent weeks anyway, with the installation of a TurboSmart E Boost controller, an AEM Air/Fuel Gauge and a Devil’s Own water meth install, there were lot’s of electrics and wiring to installed and make good. We got the new boost controller setup with only one day to go before the show due to our tight schedule, so it was for this reason that we decided not to race the car on this occasion… sorry folks!
But fear not, we will be back later on this season in full force!
So busy as we were in the last week with only days to go until the show, we packed the van up the day before back at our HQ in Hull, cramming it full of bottles of water, hardware, laptops, chairs, tables, products and hardware filled up to the ceiling like a jack in the box! Ready to explode when we opened the back doors on arrival! We headed down to the show in a convoy along with Andy and Lee’s Audis, and of course our project Cupra Kung Fu all polished up ready for some action.
The British weather was doing its usual thing upon our arrival, with gusty winds that made life a little difficult to put up the trade tent! It took us over two hours to erect the damn thing, whilst Ben held onto it with his life until we managed to smash enough pegs in the ground to stop it blowing away!
A little word of advice, take a small sledge hammer with you next time you go! we discovered that the old runway tarmac stretched around two metres further underneath the long grass, we kept finding the pegs would only get down around four inches, wish I’d taken my SDS drill now!
Eventually we got everything setup and was time for a long awaited beer! So we headed back to Stratford Upon Avon to our hotel and went out for some dinner.
The following morning we woke up in our hotel rooms, with a dim light poking through the linen of our tatty curtains, only to find it was pissing it down with rain! Rats!
So we packed our things, ate our breakfast and headed down to the show to get everything setup. It must have rained for the first three hours, so I had a bit of a job getting the Cupra washed and polished up, hence the disgruntled expression on my face!
The lads soon told me to cheer up and stop moaning, so I did!
Washing the car without wellies was not the best idea! My jeans were soaked up to my knees! All for a good cause though
Right! That little job done, then Henry came out for a bit of hoovering, followed by a final polish, whacked on the show plates and I was done. Meanwhile Andy’s technical team were scratching their heads over the new glass display cabinets we’d bought from IKEA, of course they all thought they were far too clever to read the *** manual!
And after a few repairs to the cabinets we finally got underway and started filling them with some goodies for the show. On display we had the Garrett GTX3076R turbo which is soon to be strapped into our project Cupra:
Followed by the CatCams and pulley (which will also look a lot better fitted!
Trust you’ll agree the cams and pulley look awesome! A shame we’ll no longer see them once they’re tucked away inside the head!So finally after an hour of polishing the exterior and removing all the soot from the boot door which had been spat out from the mighty 3” tailpipes from our Milltek Exhaust! We were finally ready for the show to commence:
The poster we made especially for the show:
It wasn’t long before we sparked some interest in our Cupra which was really awesome, we had a number of people somewhat bemused by the AWD conversion, but nevertheless very impressed with all the works that had taken place:
Some of the of the lads didn’t really believe us until they took a look under the car themselves, hence one of the reasons we got Kung Fu up on the ramps so everyone could have a good peek!
I got some plates made up a few days before the show to help attract more visitors, during the last events in Pickering we didn’t notice as many people approaching the car, with it’s sleeper stealth looks (currently!) I guess no one could really tell what we’d been up to until they got closer to the car and had a read of the spec sheet. This was one school boy error we would not take any chances on again!
Link for the site I used to design the plates if anyone’s interested:
http://www.myshowplates.com/number-plate-designer.asp
I ordered them for next delivery and without fail they arrived on time, the build quality is really good. Well worth a visit if you’re thinking of making some up.
As a side line detail, another product worth mentioning is the CarPlan Original Black bumper spray which suits the Leon’s hard plastic interior and especially brings out the Triple R Composites front bumper splitter very nicely.
The inside of the car was also cleaned up nicely for the show, about three hours of cleaning the day before!
OK back to the show!
Overall we were pleased with the outlay of our trade stand, we were lucky to get a good position near to the front trade area nearby the entrance to the quarter mile strip, a big improvement on last years spot anyway!
We were also positioned close by to our friends at REVO Technik, so I paid them frequent visits to there stand throughout the day to have a chat with the team about our up and coming plans for Kung Fu
To be continued...
GTI International Show - Part 2
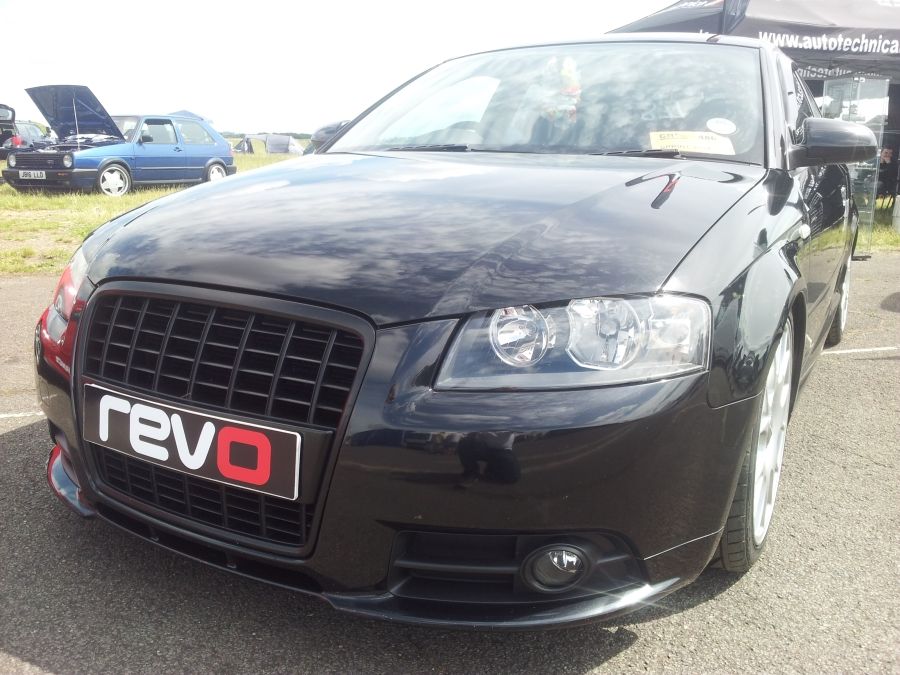
The other cars on our display were the two Audis, Andy has the red S3 which was looking good with his new alloys, this car is a fast little bugger!
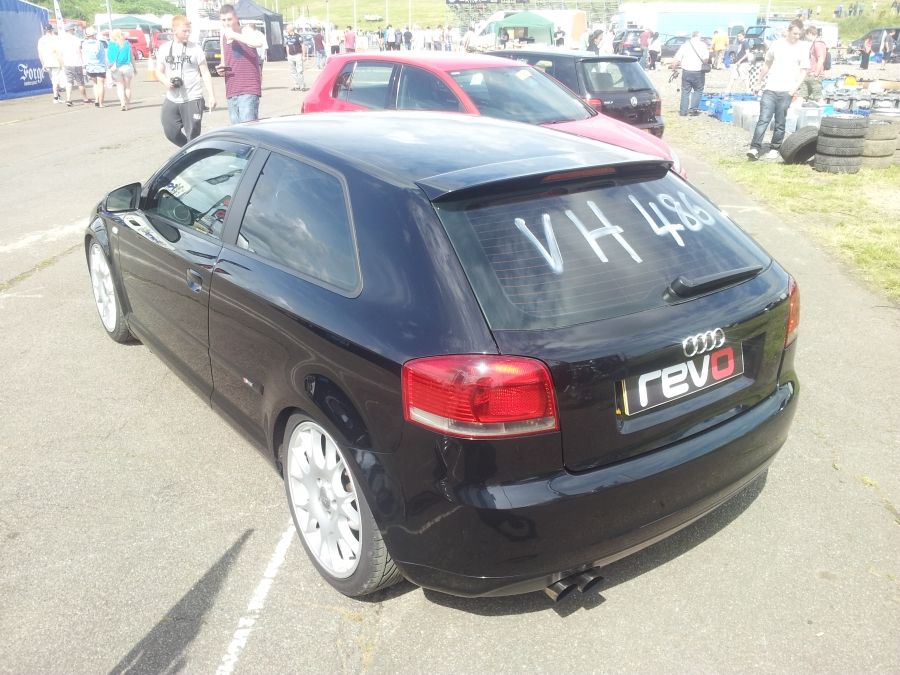
And then we have Lee’s Audi S Line Diesel. He got some good times on the quarter mile strip and probably used half the amount of fuel than the rest of us put toegther!
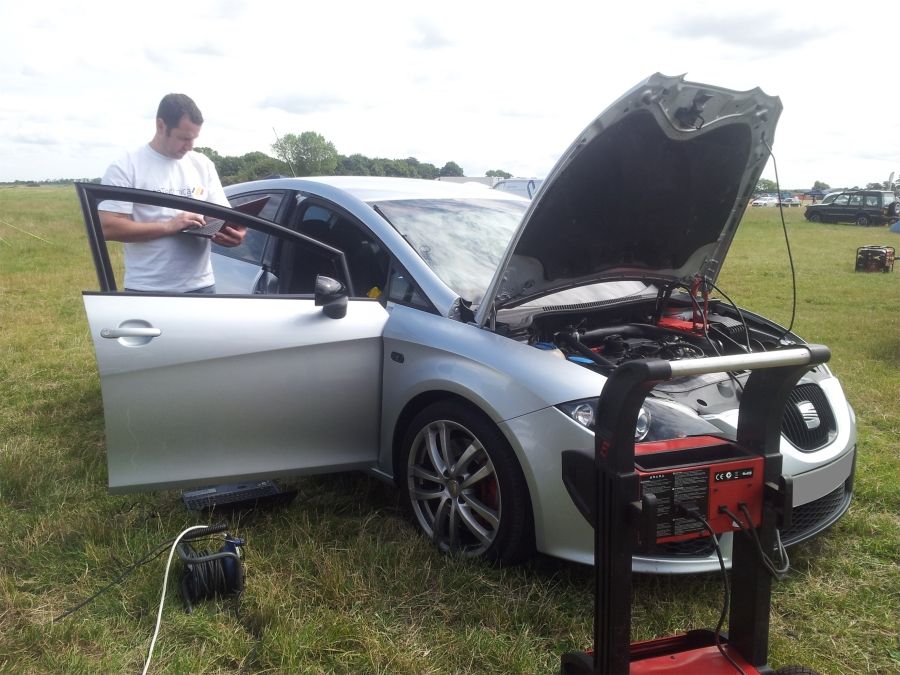
After a short while the business picked up nicely with some more cars coming to the stand for a REVO remap, the first customer was a Leon Cupra owned by one of the visitors at the show. Always a nice surprise for people who own the standard Cupra with the 240bhp TFSI, once mapped with a stage 1, like with the R edition they both get an increase to 300BHP! So an excellent upgrade for software alone…
Ben setting up the software prior to loading it into the ECU port:
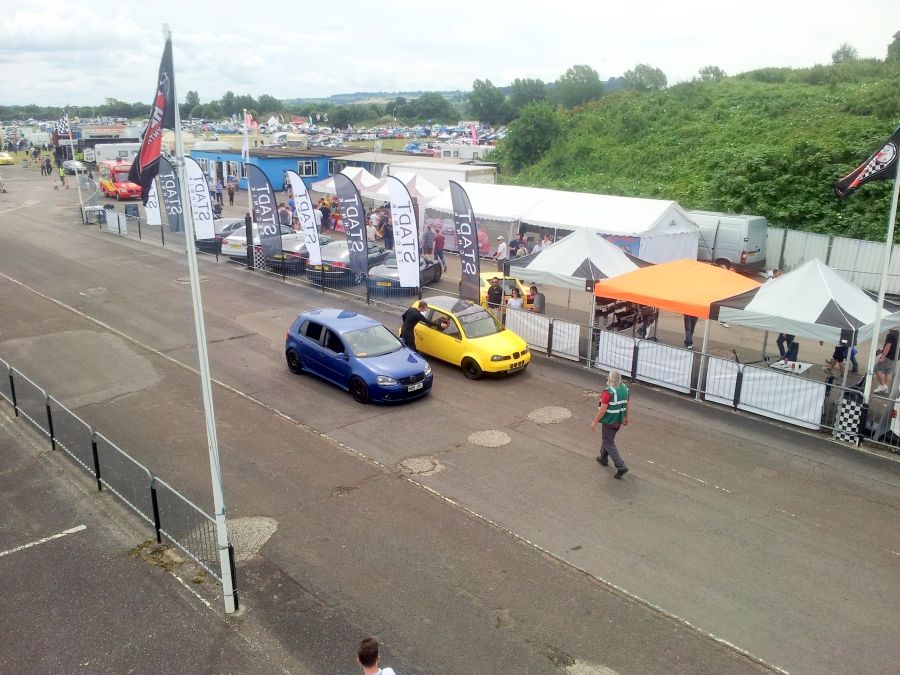
Across the two days of the show, we took it in turns to cover the stand so the others could go and play. One of the attractions was a monster truck doing rides for the public for £8.50 a go. I’d never see one of these before so was all very entertaining!
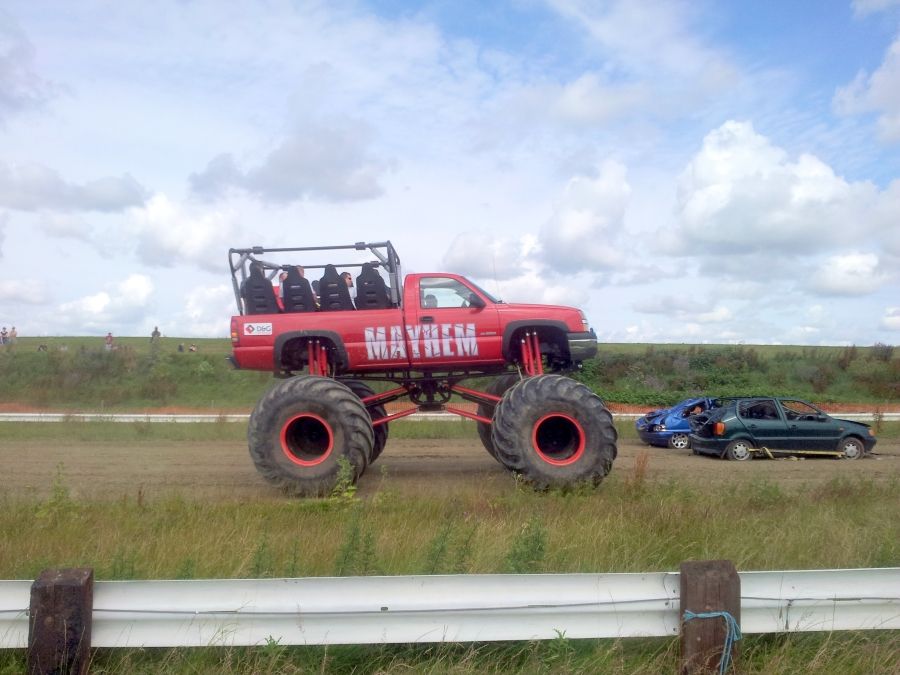
The truck would go round in a loop a couple of times and then drive over the top of the two cars shown in the background:
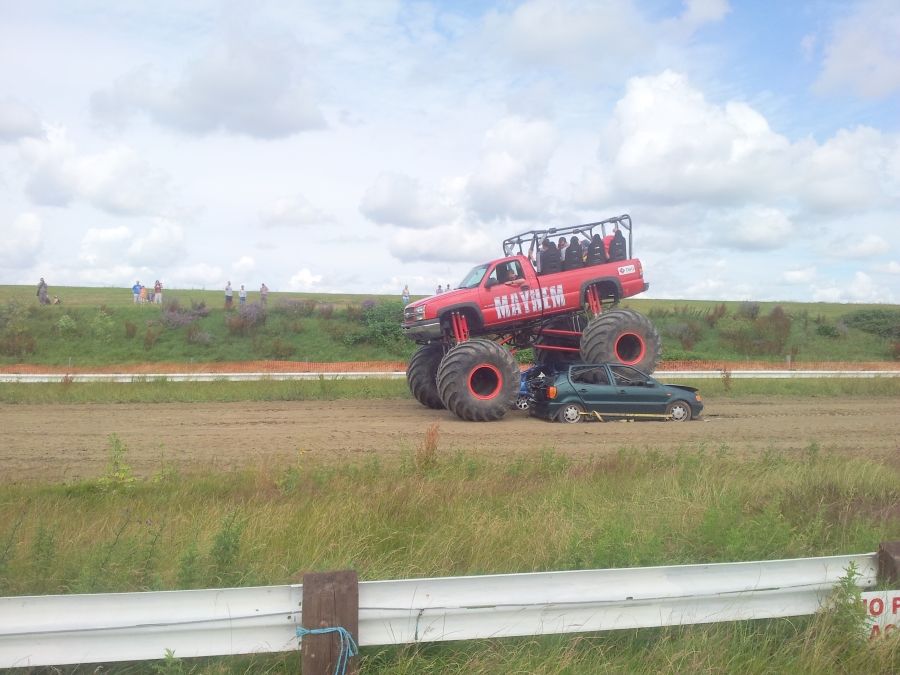
I quite fancied a go but to be honest, once they squashed the two cars the first time round, there wasn’t much more of a thrill to be had! Lol It would have been better if they’d had more cars on tap. I volunteered the lad’s cars at the stand but I soon got a stare of death! dropped that idea very quickly before they offered up Kung Fu!
Walk Around the Show
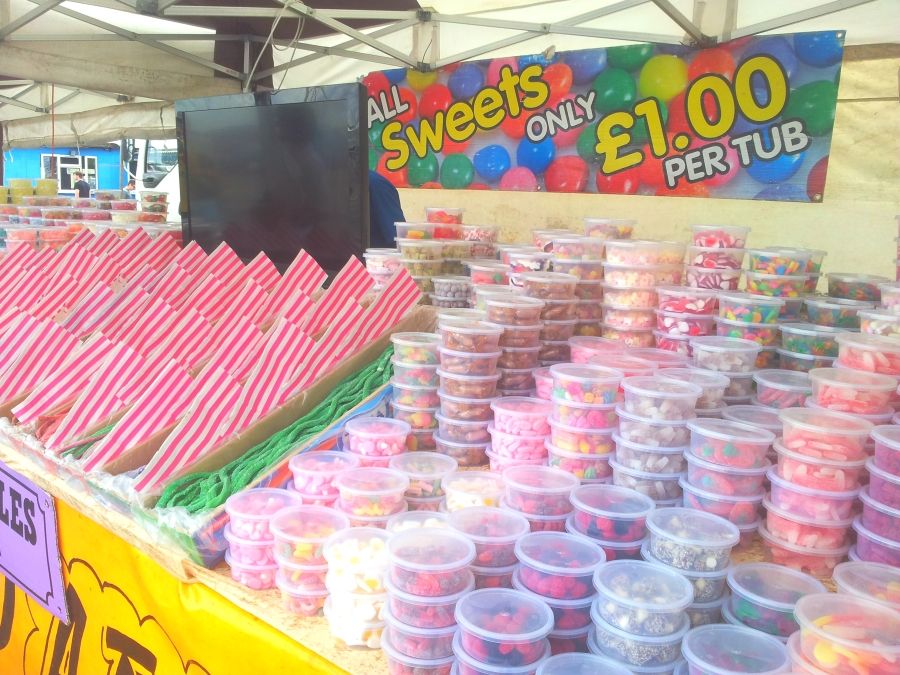
There were plenty of stalls for food and beverages along route, sweets and candy were quite common throughout the show. Not sure if it was to keep the little ones and the wife quiet, or was simply to help daddy keep up his sugar levels with all the excitement for racing up the strip! Ha
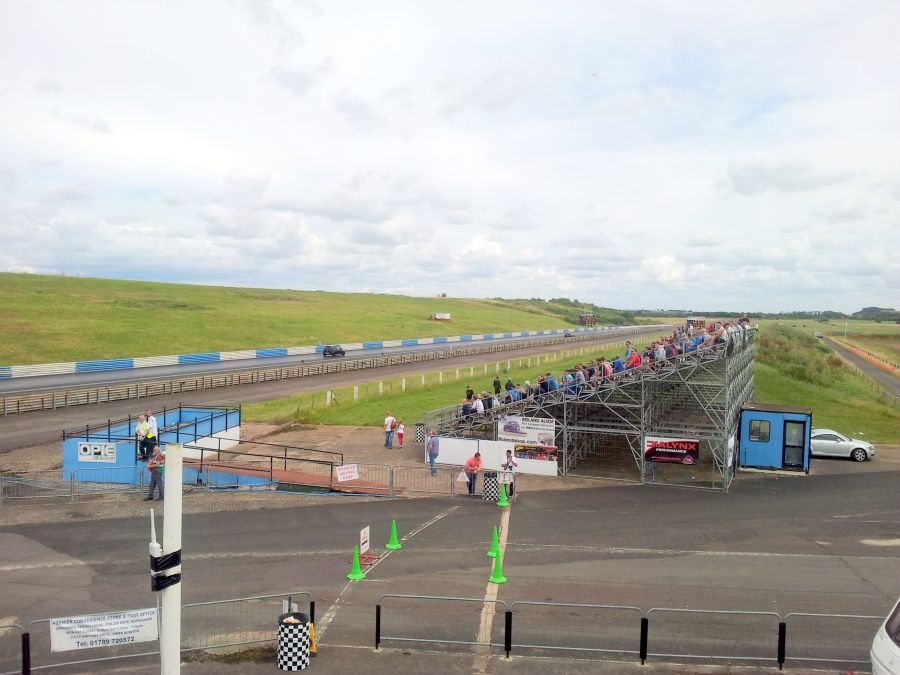
The sound of screeching wheels and popping exhausts soon lured us to the quarter mile. There were two main grandstands for people to sit and watch all the action. Apparently the seating area is over 50 years old, with wobbly planks of wood that flex like the shatterproof rulers you used to whack you best mate with at school until they did actually shatter! Lol All still very safe I’m sure!
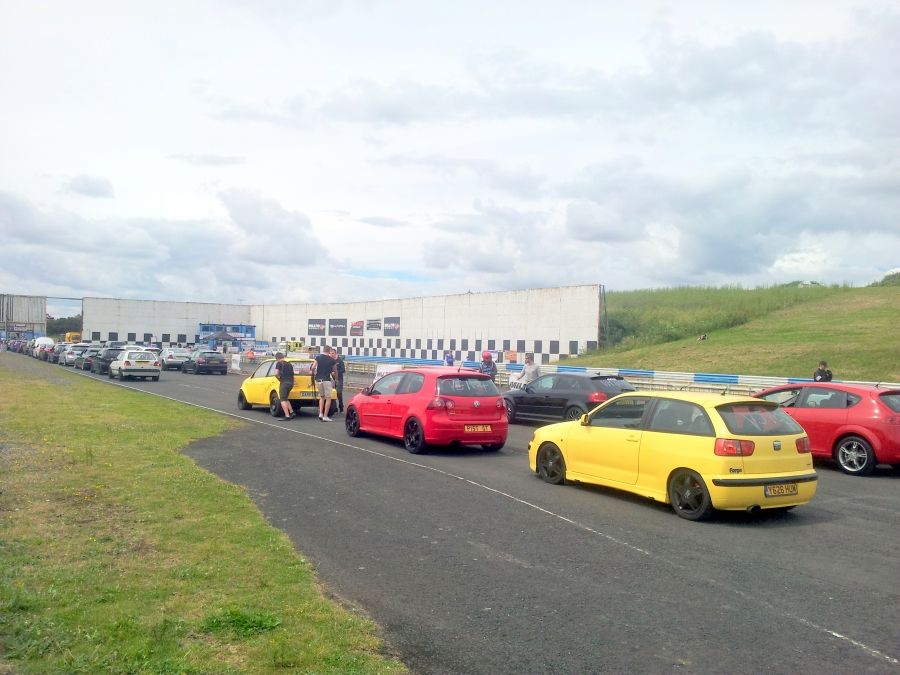
In the photo below you can see where the start of the quarter mile race begins, with an abundance of safety marshals all checking the drivers are wearing their safety helmets. (you’ll need to handover your driving licence as well if you wish to participate) you get it back at the end of the day though. The blue cabin in the far corner is where all the commentating is done, and is blasted through a PA system that spreads across the grounds for everyone to hear the action. I was told if you speak with the race organisers at the booking in office, you can give them a brief description of the works you’ve done to your ride and an idea of its performance. Thought this is quite a cool feature for anyone who likes to impress. Just be sure you live up to your claims on the track though, otherwise it’ll end with some embarrassment!
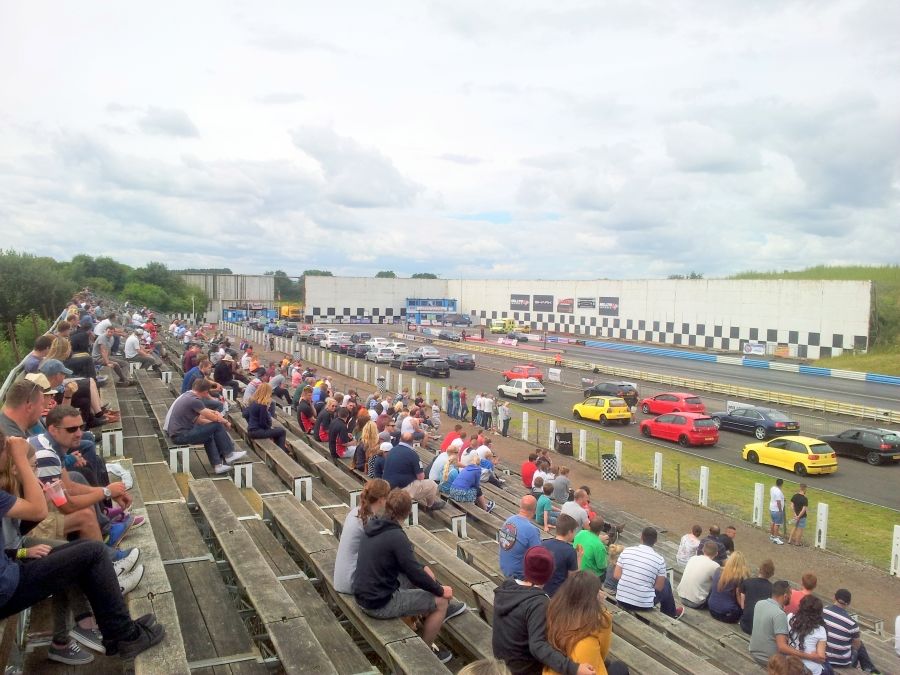
These pics were taken on Saturday when there was a lot less people at the show, this has always been the case considering more and more people now work Saturdays, other events across the UK were also taking place that weekend. On Sunday we had well over double the amount of people though which was good.
Photo below shows the second stand that is situated a little further along the strip. Some spectators prefer to see the action at the start line, but a good mix in numbers also like to see the cars as they race there way further up the line building up some speed. At the far end of the photo you can just see the finish line with the timing display boards. Gives you an idea of the distance a quarter mile run (photo below was taken from the same position as the one above)
Some of the spectators preferred to sit on the grass bank beyond the second grandstand:
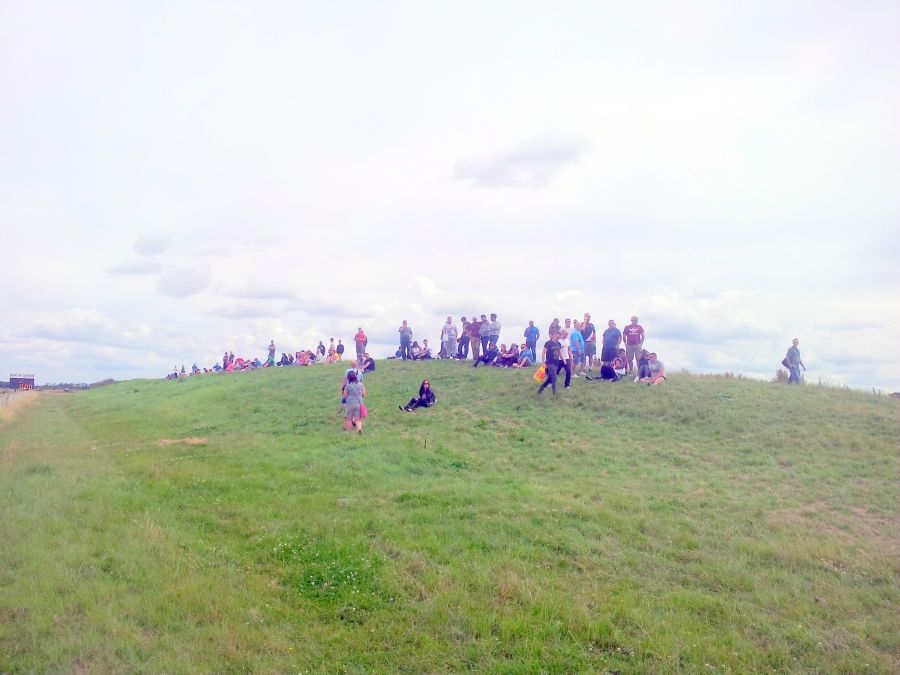
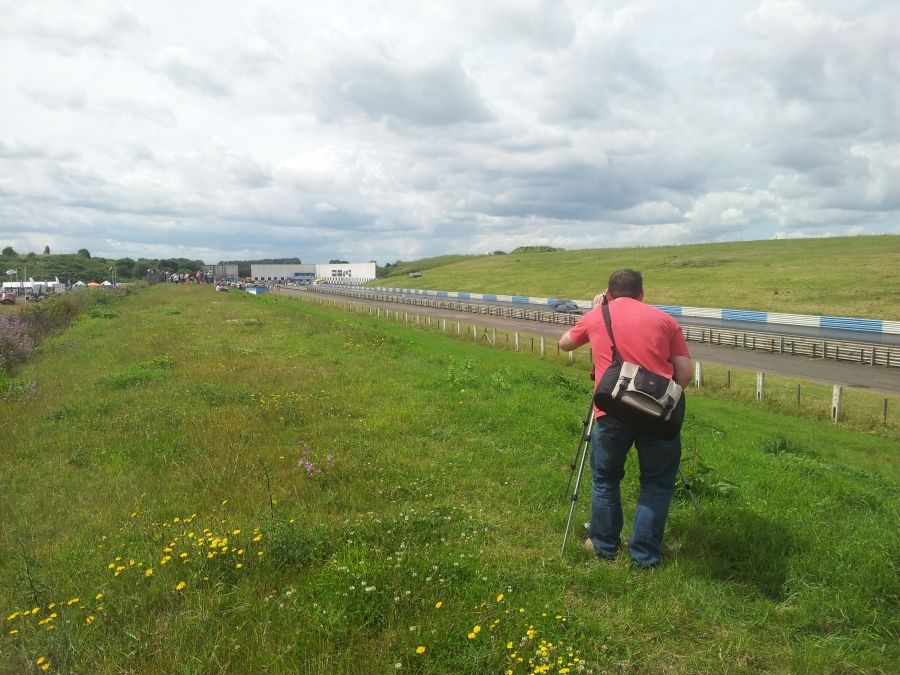
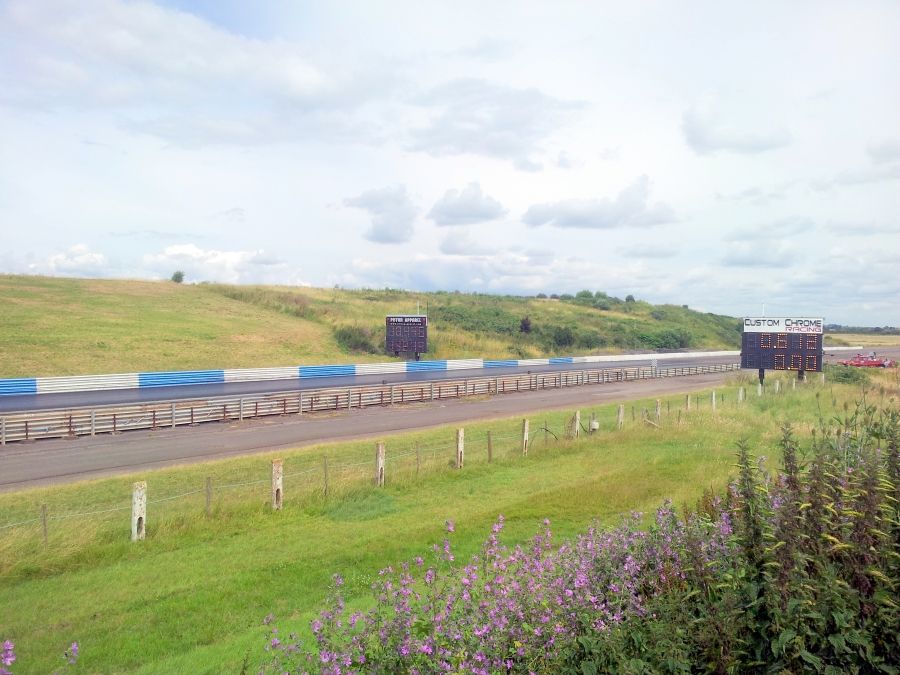
Photo below shows the area towards the end of the strip. It felt pretty isolated back there away from the crowds, but someone else came to join me in my quest to take some shots! Felt a bit like bumping into someone whilst crossing the Amazon Jungle! Think we were both quite pleased to see each other! Lol
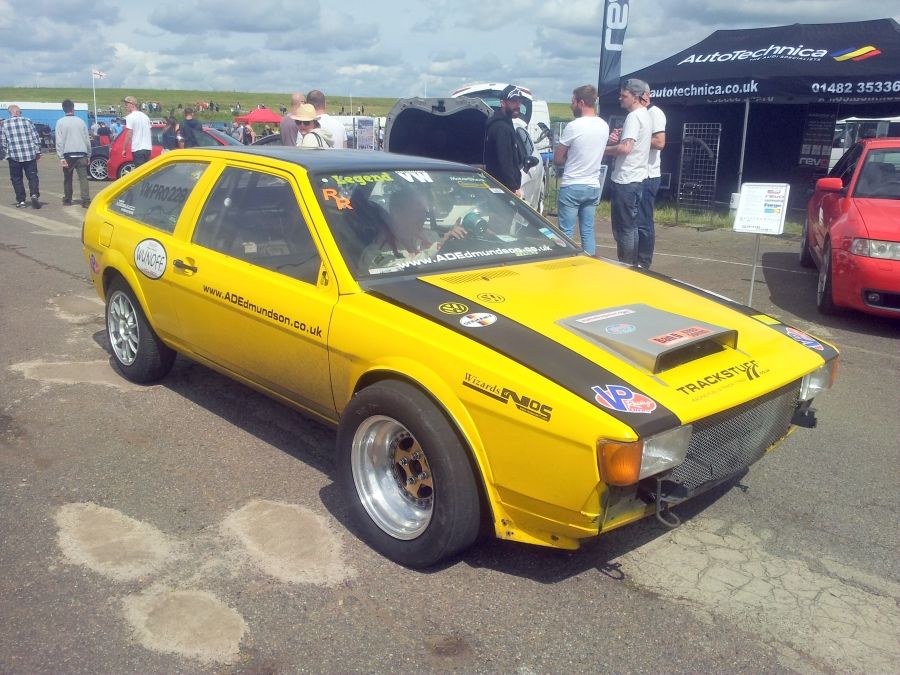
The races carried on throughout the day with some of the drivers getting the most out of their daily passes, with repeated visits down the strip trying to better their time than the previous run. A little later we heard an enormous roar of an engine pulling up towards the signing in bay, everyone’s heads turned round with a bemused look on their face to see this little yellow SEAT Arosa joining the que for next run:

The little SEAT settled down in the que waiting for its turn, no one really took much notice of it until it set off from the start line…. Then OMG this car was damn fast! (and highly entertaining!) Everyone watched with amazement as it screamed if knackers down the strip towards the finish line like a rocket! You wouldn’t fancy lending this beast to your Grandma for a trip to the shops!
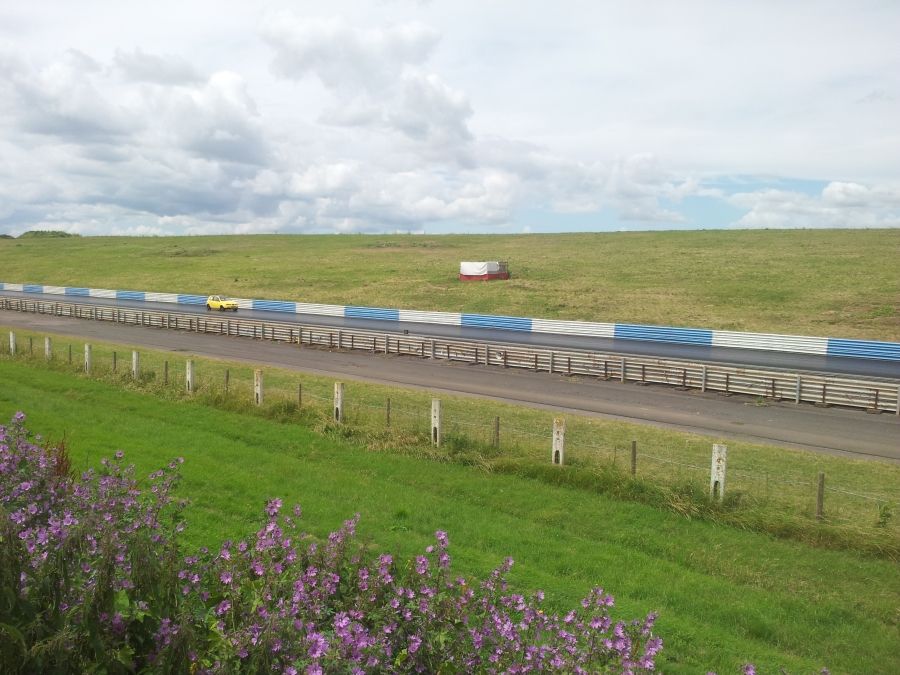
Photo below was taken towards the end of the run where the timing boards were located. We sat and watched quite a few of the races up there as it was good to see it from all four locations, gave us a better feel for the whole event.
With a 10.4 second time, this Arosa gave an impressive result, especially for a diesel!
I rushed down the embankment to the far side to greet the driver of this little SEAT as he came round after the run, I rewarded him with a quick pic for the forums. He whizzed past me so fast it was actually quite difficult to take a snap of him (perhaps he was a little bit camera shy or was simply showing off!) I’d tend to opt for the latter…
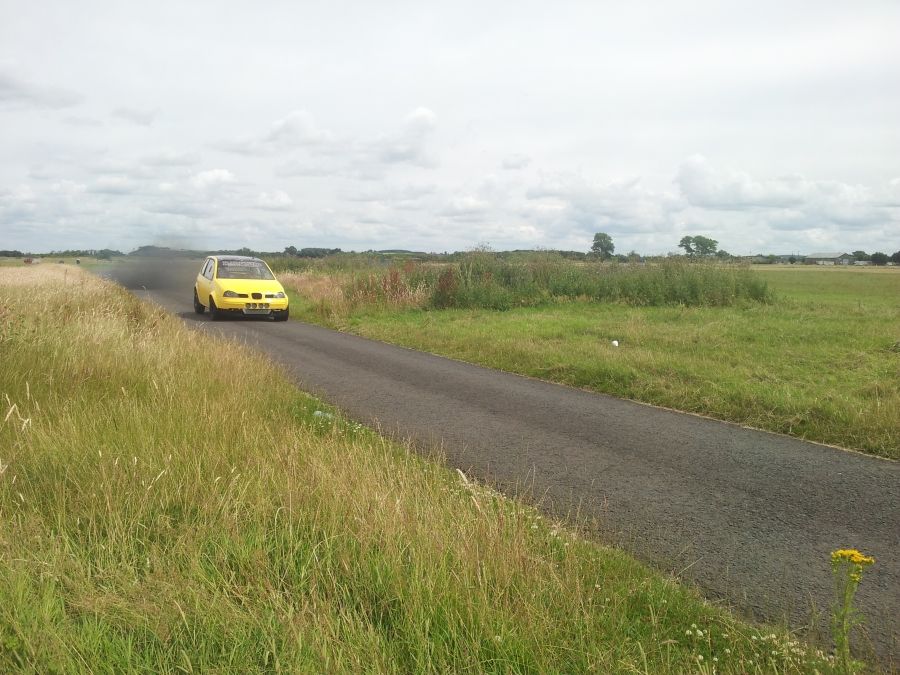
The Arosa is owned by Darkside Developments as one of their project cars. These guys are specialists in diesel power and only work with TDIs, they’ve certainly made their mark in the modded car scene for the diesel enthusiasts, and well worth a visit if your car drives on the smokey stuff!
The Arosa has a 2.0 16v BKD PD140 Engine Conversion with a 0 to tasty time of 3.01 seconds! If you missed them I’m sure they’ll return next year for some more action!
Photo below of the show from a bird’s eye view:

After many hours of fun watching the races, we went on around the rest of the show to meet and greet some of the traders and see their project cars on display.
The Scirocco Mk1in the photo below definitely deserved first prize for the loudest bugger! It was one of the fastest cars there too with a sub 10 second time. Front wheel drive on this one is it?!
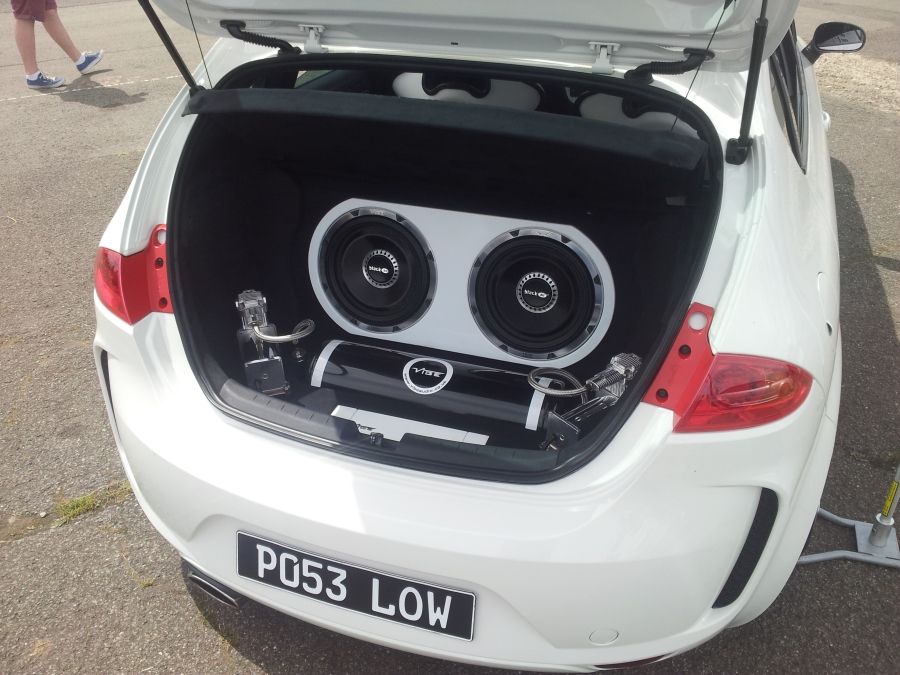
Kris Butler had his slammed Leon on display at the Forge Motorsport stand. He’s fitted some Bentley wheels to his ride and no expense had been spared at all here! Nick name ‘Low’ riding on air!
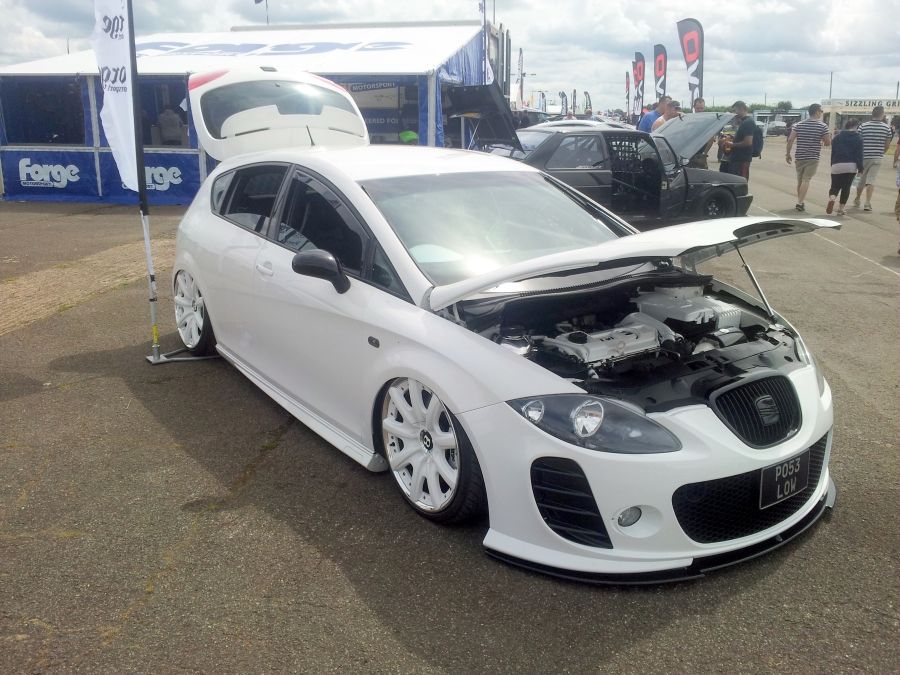
The whole interior has been revamped by Cobra with an awesome covering of all the seats, door cards and trim. It looks awesome inside:
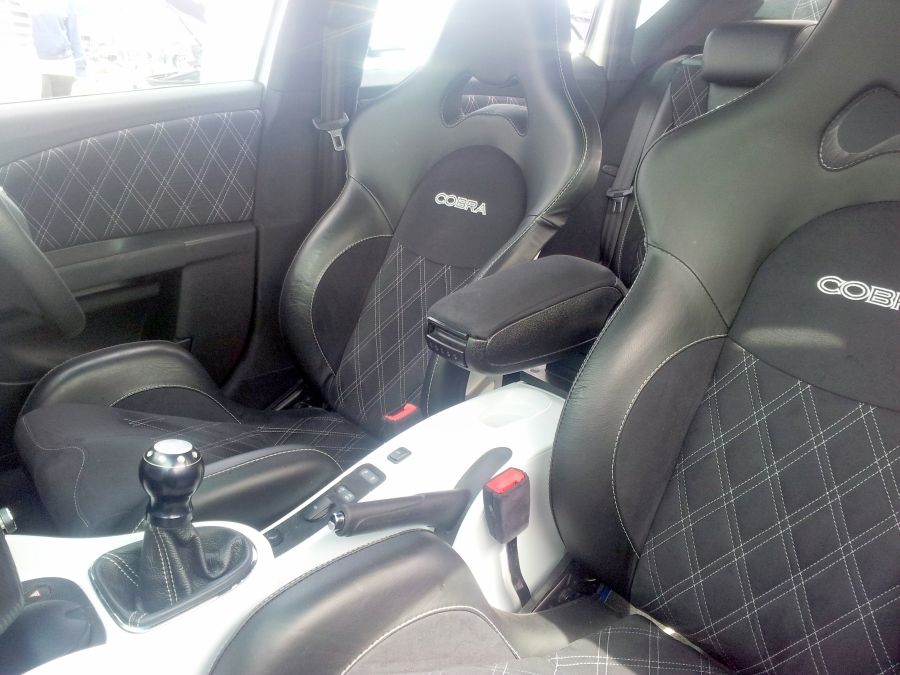
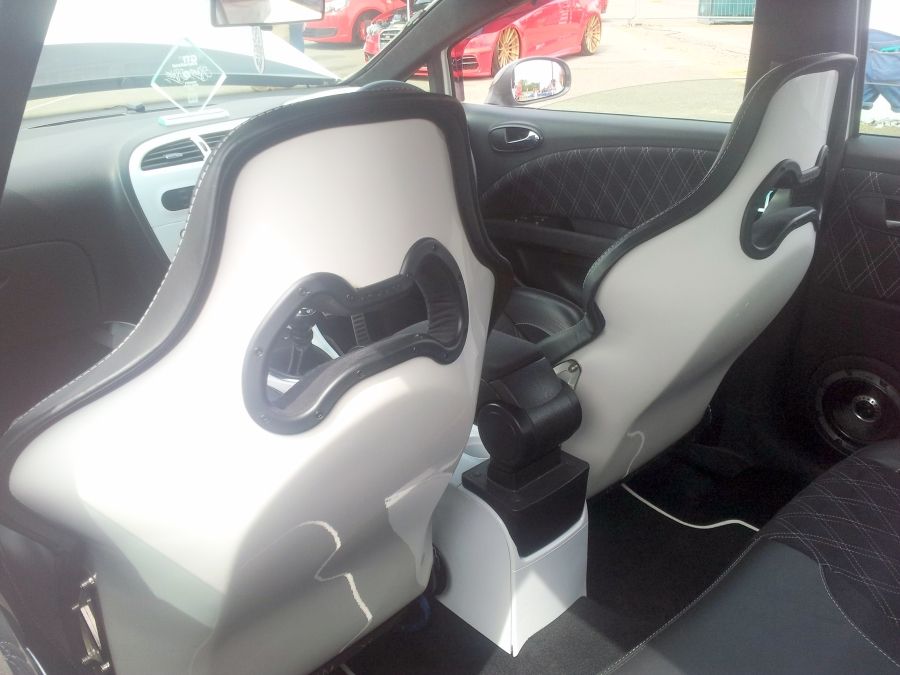
Kris has also done a lot of work in the boot with a new ICE system and a big tank for the air suspension. A real high quality fit out!
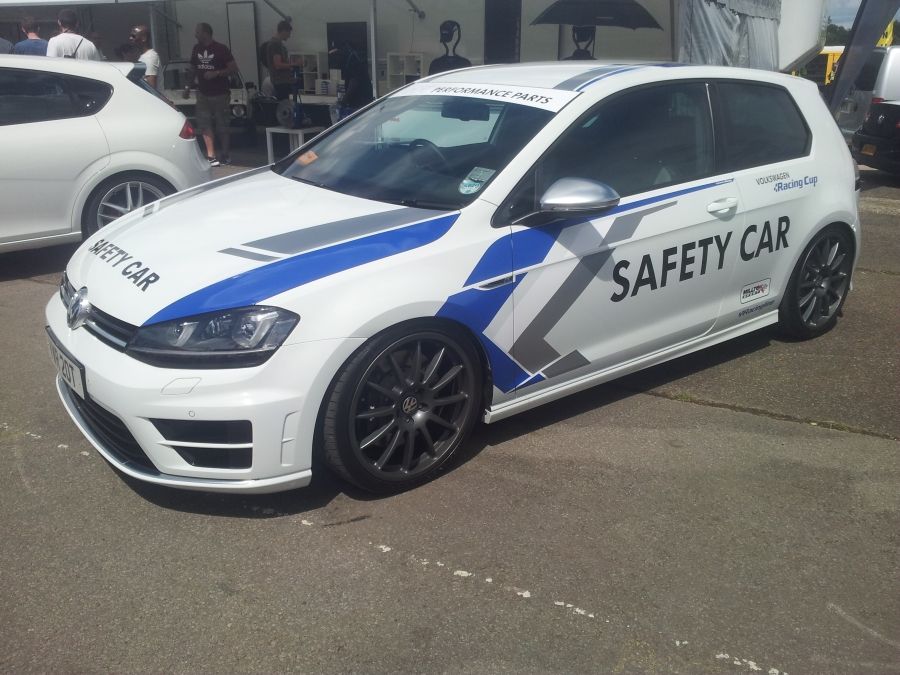
Milltek Sport’s safety car was on display and later did some runs down the strip with it yellow lights flashing:
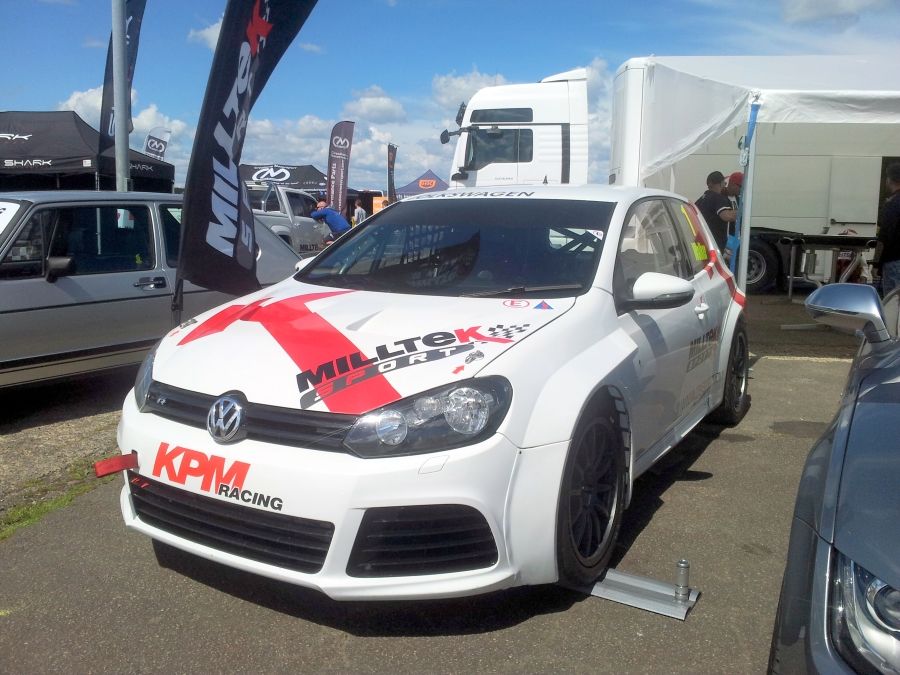
The Milltek track car also on display at their stand. Liking the vinyls on the bonnet! Kung Fu wants those for his birthday! Hint hint…
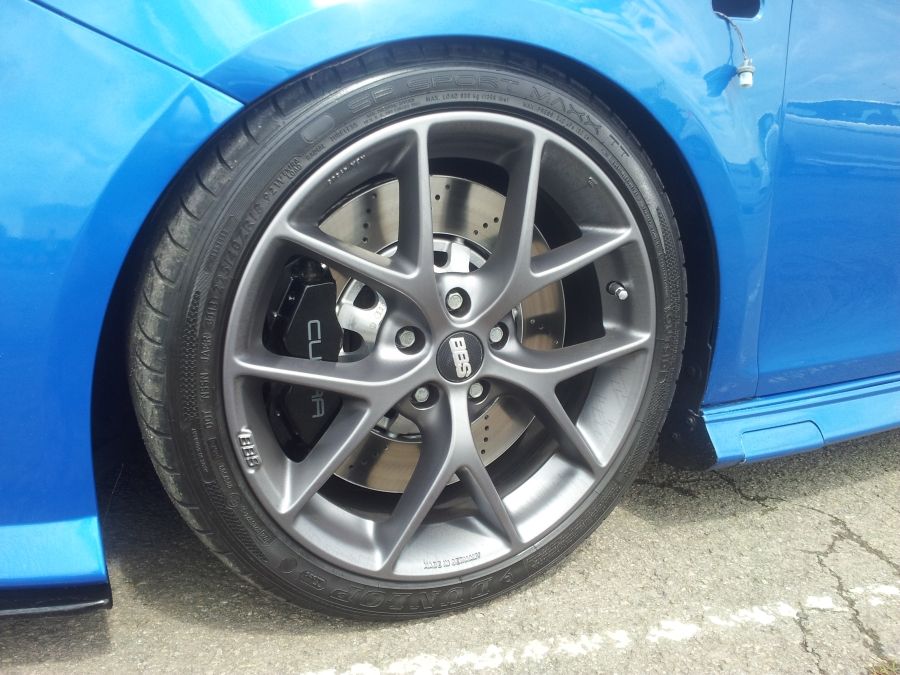
Another Cupra to feast your eyes on here, Jamie Riegan’s K1 in Racing Blue which was on display at the Shark Performance display stand:
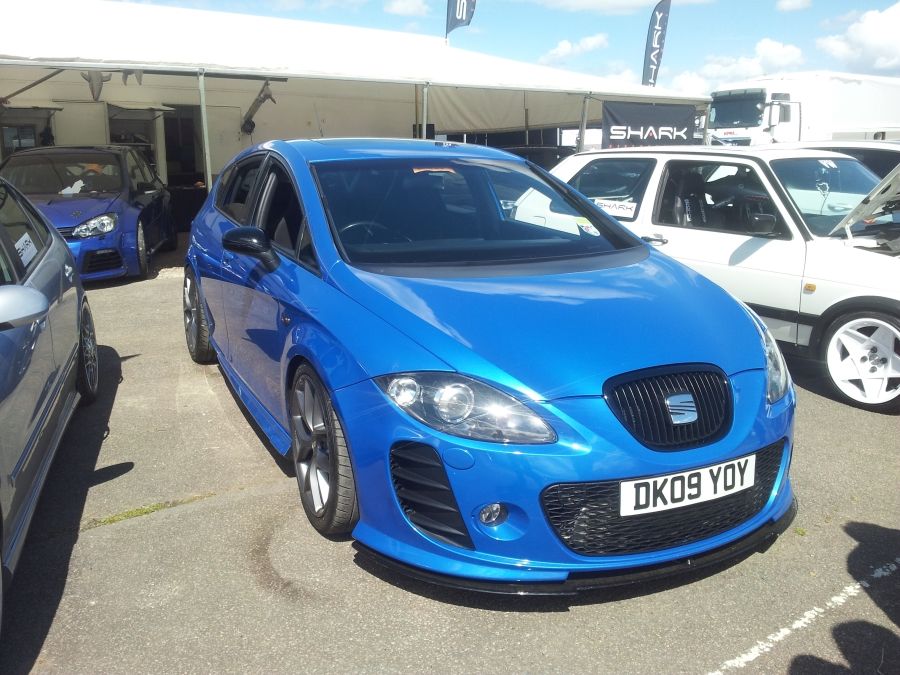
Have to say Jamie’s choice of wheels look awesome, better get those locking wheel nuts tightened up before we slip them on our own car! Ha Ha
REVO had their latest test weapon on display, their new MK7 Golf R which is currently undergoing some new development for their Stage1 software. Unfortunately we’re unable to disclose BHP figures at this time, but the team at REVO are cooking up some inane results for what is in essence, just a software map without any additional hardware bolted on:
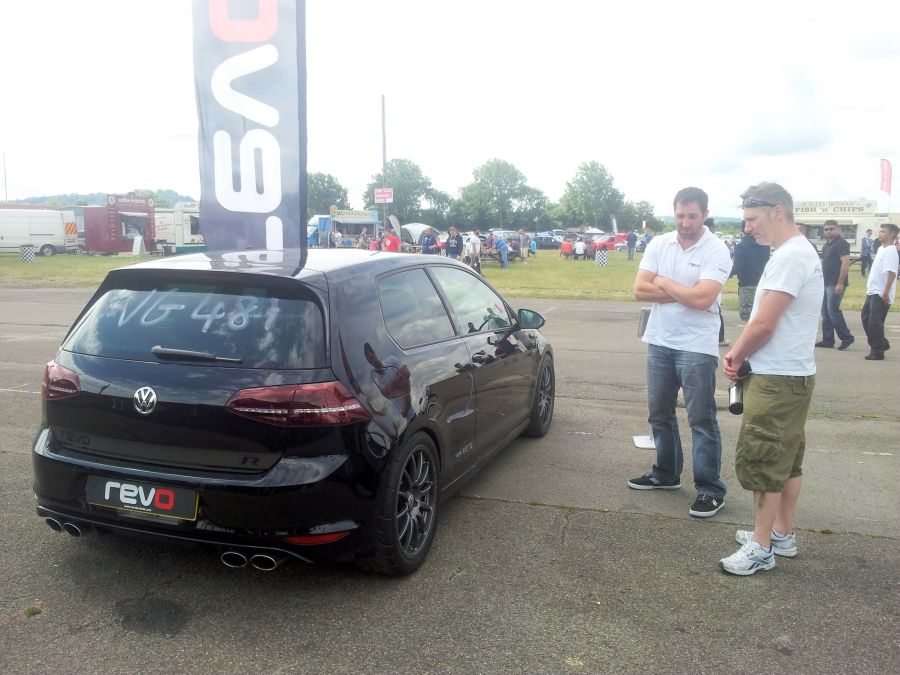
We have REVO Kev in the background giving one the show visitors a low down of the car and the current works in progress. Kev was often seen racing this beast up down the strip, pushing the Rrrr to its limits with a quarter mile time of 12.1 seconds. You just now that he won’t stop until he gets a sub 12, which is all very possible!
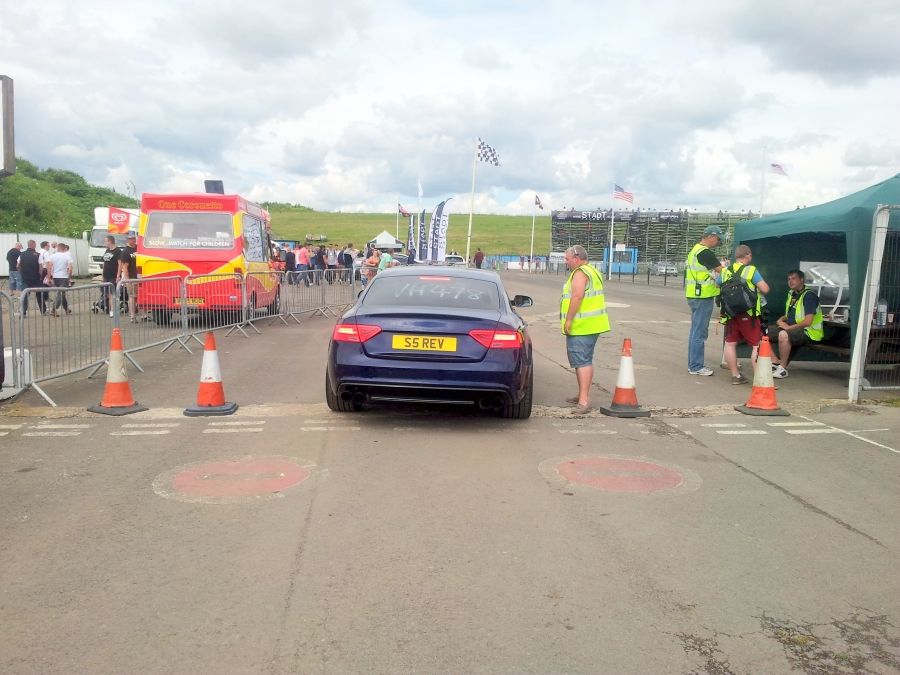
0 to tasty in 3.7 seconds!
The famous REVO supercharged S5, a familiar site from our last show in Pickering, Kev makes his way towards the drag strip for some more action!
Next we have a GT30 Golf MK5 GTI project car from Garage Midnight, which is currently pushing out 580BHP @ 2bar
A nice engine build on a MK1, all looking very tidy!
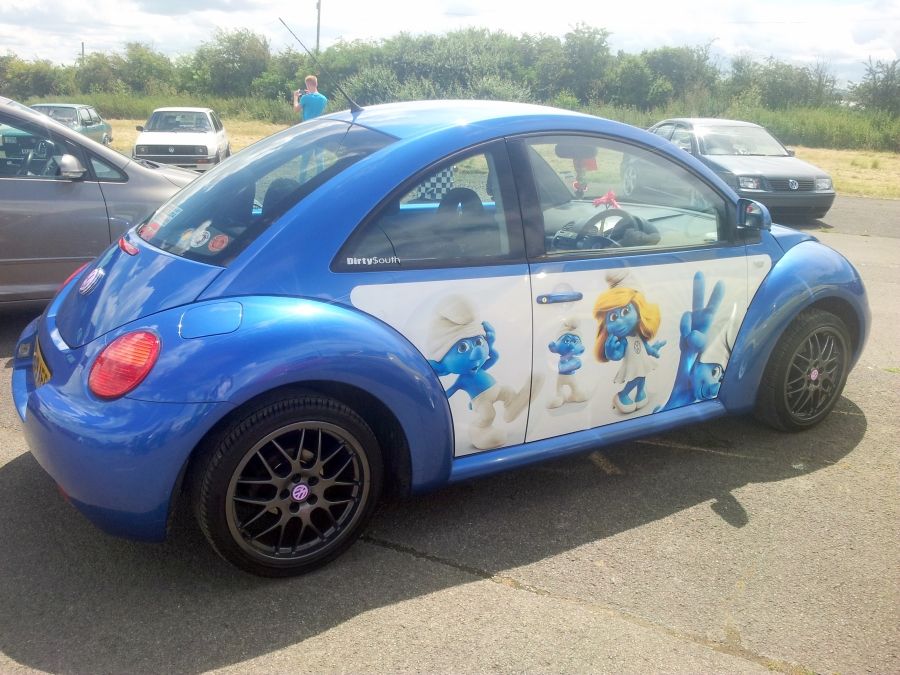
And then for quick tour through the show and shine section, a VW Beetle attracting some attention:
To be continued...
The other cars on our display were the two Audis, Andy has the red S3 which was looking good with his new alloys, this car is a fast little bugger!
And then we have Lee’s Audi S Line Diesel. He got some good times on the quarter mile strip and probably used half the amount of fuel than the rest of us put toegther!
After a short while the business picked up nicely with some more cars coming to the stand for a REVO remap, the first customer was a Leon Cupra owned by one of the visitors at the show. Always a nice surprise for people who own the standard Cupra with the 240bhp TFSI, once mapped with a stage 1, like with the R edition they both get an increase to 300BHP! So an excellent upgrade for software alone…
Ben setting up the software prior to loading it into the ECU port:
Across the two days of the show, we took it in turns to cover the stand so the others could go and play. One of the attractions was a monster truck doing rides for the public for £8.50 a go. I’d never see one of these before so was all very entertaining!
The truck would go round in a loop a couple of times and then drive over the top of the two cars shown in the background:
I quite fancied a go but to be honest, once they squashed the two cars the first time round, there wasn’t much more of a thrill to be had! Lol It would have been better if they’d had more cars on tap. I volunteered the lad’s cars at the stand but I soon got a stare of death! dropped that idea very quickly before they offered up Kung Fu!
Walk Around the Show
There were plenty of stalls for food and beverages along route, sweets and candy were quite common throughout the show. Not sure if it was to keep the little ones and the wife quiet, or was simply to help daddy keep up his sugar levels with all the excitement for racing up the strip! Ha
The sound of screeching wheels and popping exhausts soon lured us to the quarter mile. There were two main grandstands for people to sit and watch all the action. Apparently the seating area is over 50 years old, with wobbly planks of wood that flex like the shatterproof rulers you used to whack you best mate with at school until they did actually shatter! Lol All still very safe I’m sure!
In the photo below you can see where the start of the quarter mile race begins, with an abundance of safety marshals all checking the drivers are wearing their safety helmets. (you’ll need to handover your driving licence as well if you wish to participate) you get it back at the end of the day though. The blue cabin in the far corner is where all the commentating is done, and is blasted through a PA system that spreads across the grounds for everyone to hear the action. I was told if you speak with the race organisers at the booking in office, you can give them a brief description of the works you’ve done to your ride and an idea of its performance. Thought this is quite a cool feature for anyone who likes to impress. Just be sure you live up to your claims on the track though, otherwise it’ll end with some embarrassment!
These pics were taken on Saturday when there was a lot less people at the show, this has always been the case considering more and more people now work Saturdays, other events across the UK were also taking place that weekend. On Sunday we had well over double the amount of people though which was good.
Photo below shows the second stand that is situated a little further along the strip. Some spectators prefer to see the action at the start line, but a good mix in numbers also like to see the cars as they race there way further up the line building up some speed. At the far end of the photo you can just see the finish line with the timing display boards. Gives you an idea of the distance a quarter mile run (photo below was taken from the same position as the one above)
Some of the spectators preferred to sit on the grass bank beyond the second grandstand:
Photo below shows the area towards the end of the strip. It felt pretty isolated back there away from the crowds, but someone else came to join me in my quest to take some shots! Felt a bit like bumping into someone whilst crossing the Amazon Jungle! Think we were both quite pleased to see each other! Lol
The races carried on throughout the day with some of the drivers getting the most out of their daily passes, with repeated visits down the strip trying to better their time than the previous run. A little later we heard an enormous roar of an engine pulling up towards the signing in bay, everyone’s heads turned round with a bemused look on their face to see this little yellow SEAT Arosa joining the que for next run:
The little SEAT settled down in the que waiting for its turn, no one really took much notice of it until it set off from the start line…. Then OMG this car was damn fast! (and highly entertaining!) Everyone watched with amazement as it screamed if knackers down the strip towards the finish line like a rocket! You wouldn’t fancy lending this beast to your Grandma for a trip to the shops!
Photo below was taken towards the end of the run where the timing boards were located. We sat and watched quite a few of the races up there as it was good to see it from all four locations, gave us a better feel for the whole event.
With a 10.4 second time, this Arosa gave an impressive result, especially for a diesel!
I rushed down the embankment to the far side to greet the driver of this little SEAT as he came round after the run, I rewarded him with a quick pic for the forums. He whizzed past me so fast it was actually quite difficult to take a snap of him (perhaps he was a little bit camera shy or was simply showing off!) I’d tend to opt for the latter…
The Arosa is owned by Darkside Developments as one of their project cars. These guys are specialists in diesel power and only work with TDIs, they’ve certainly made their mark in the modded car scene for the diesel enthusiasts, and well worth a visit if your car drives on the smokey stuff!
The Arosa has a 2.0 16v BKD PD140 Engine Conversion with a 0 to tasty time of 3.01 seconds! If you missed them I’m sure they’ll return next year for some more action!
Photo below of the show from a bird’s eye view:
After many hours of fun watching the races, we went on around the rest of the show to meet and greet some of the traders and see their project cars on display.
The Scirocco Mk1in the photo below definitely deserved first prize for the loudest bugger! It was one of the fastest cars there too with a sub 10 second time. Front wheel drive on this one is it?!
Kris Butler had his slammed Leon on display at the Forge Motorsport stand. He’s fitted some Bentley wheels to his ride and no expense had been spared at all here! Nick name ‘Low’ riding on air!
The whole interior has been revamped by Cobra with an awesome covering of all the seats, door cards and trim. It looks awesome inside:
Kris has also done a lot of work in the boot with a new ICE system and a big tank for the air suspension. A real high quality fit out!
Milltek Sport’s safety car was on display and later did some runs down the strip with it yellow lights flashing:
The Milltek track car also on display at their stand. Liking the vinyls on the bonnet! Kung Fu wants those for his birthday! Hint hint…
Another Cupra to feast your eyes on here, Jamie Riegan’s K1 in Racing Blue which was on display at the Shark Performance display stand:
Have to say Jamie’s choice of wheels look awesome, better get those locking wheel nuts tightened up before we slip them on our own car! Ha Ha
REVO had their latest test weapon on display, their new MK7 Golf R which is currently undergoing some new development for their Stage1 software. Unfortunately we’re unable to disclose BHP figures at this time, but the team at REVO are cooking up some inane results for what is in essence, just a software map without any additional hardware bolted on:
We have REVO Kev in the background giving one the show visitors a low down of the car and the current works in progress. Kev was often seen racing this beast up down the strip, pushing the Rrrr to its limits with a quarter mile time of 12.1 seconds. You just now that he won’t stop until he gets a sub 12, which is all very possible!
0 to tasty in 3.7 seconds!
The famous REVO supercharged S5, a familiar site from our last show in Pickering, Kev makes his way towards the drag strip for some more action!
Next we have a GT30 Golf MK5 GTI project car from Garage Midnight, which is currently pushing out 580BHP @ 2bar
A nice engine build on a MK1, all looking very tidy!
And then for quick tour through the show and shine section, a VW Beetle attracting some attention:
To be continued...
Last edited:
GTI International Show - Part 3
Another Mk1 Golf, a real beast of an engine in this one!
Oh, mmm maybe not!
And back to SEATs…
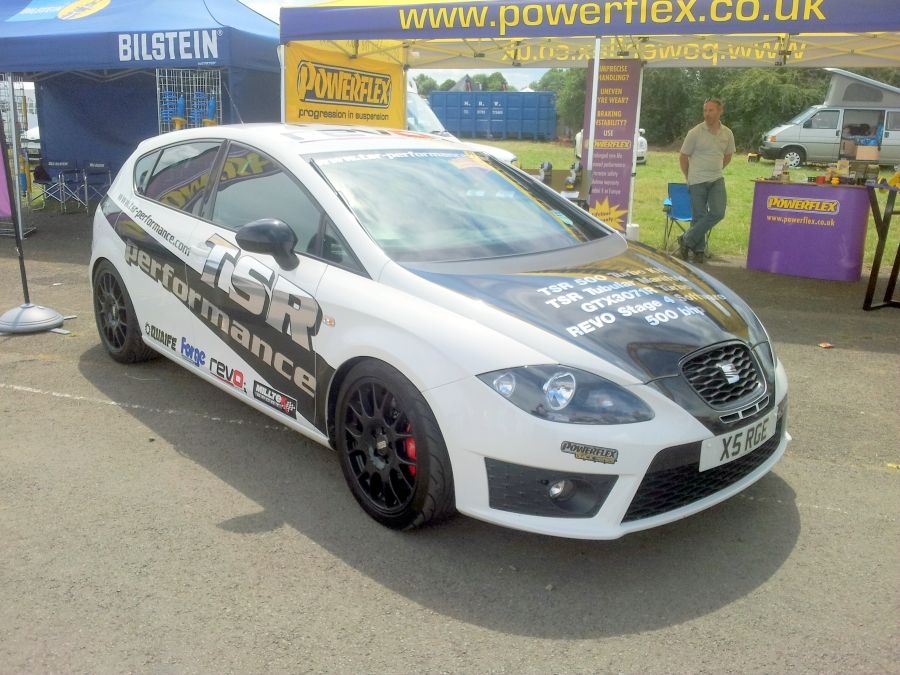
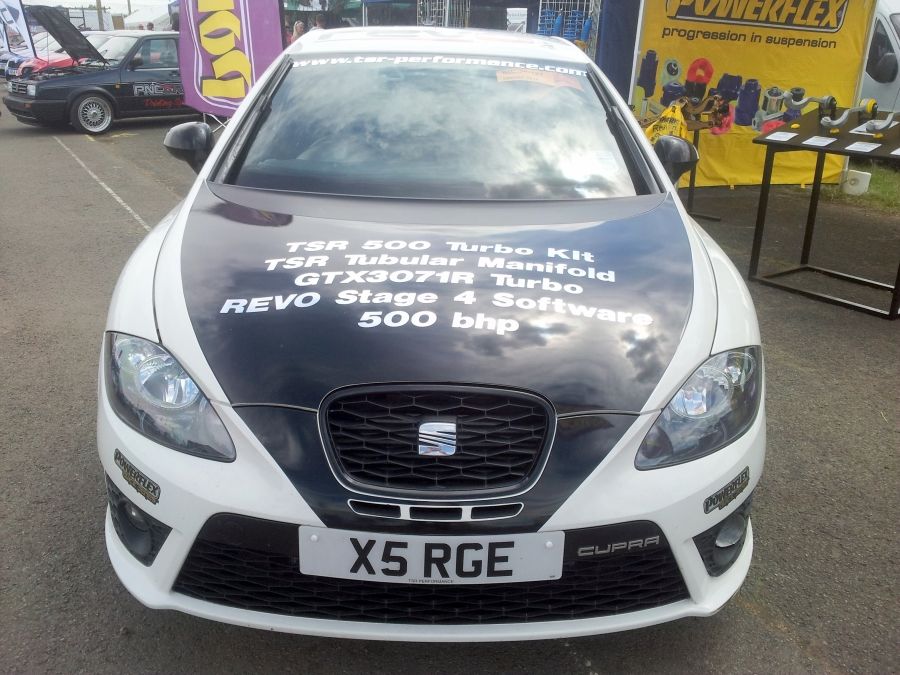
Now here’s as a Cupra to keep a look out for, TSR Performance’s project car with a Stage 4 map and 500BHP+
I feel a race coming on here at the next show
And now for our cupra.net members rides…
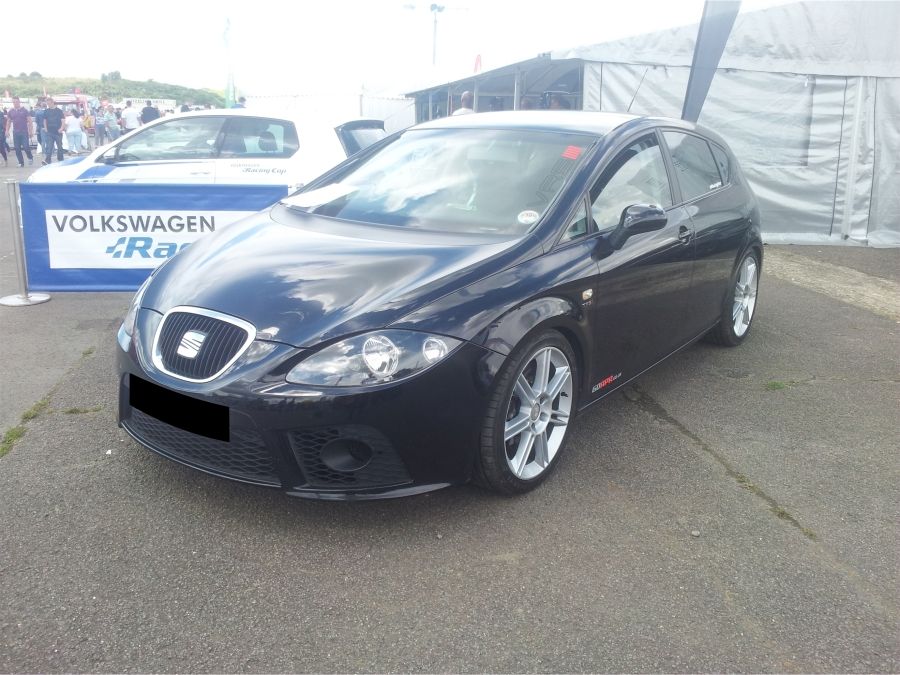
Here’s a Leon you’ll know only too well!
Dan Sewell (aka DanGB)’s famous AWD converted beast!
He was the first person in the UK to embark on the conversion, so hats off to the chap for raising the standard. The works were carried out by APR and AKS Tuning. Dan Dan bought his car from new and has since added more and more goodies to his ride over the years. He was seen many times down the drag strip over the weekend and got some impressive results; he also picked up a prize which sat gleaming away on his dashboard throughout the show. Well done mate
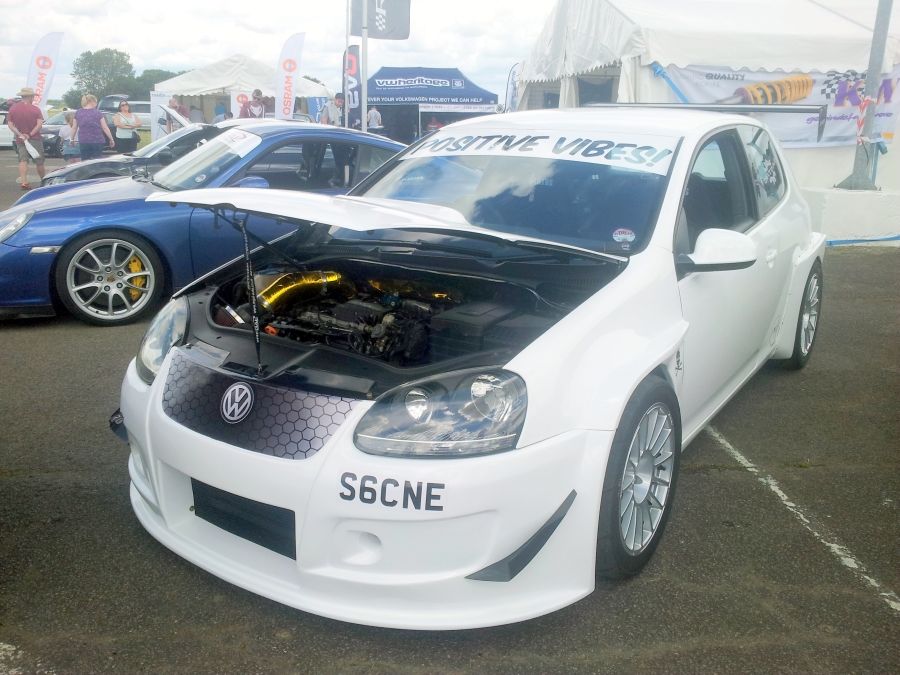
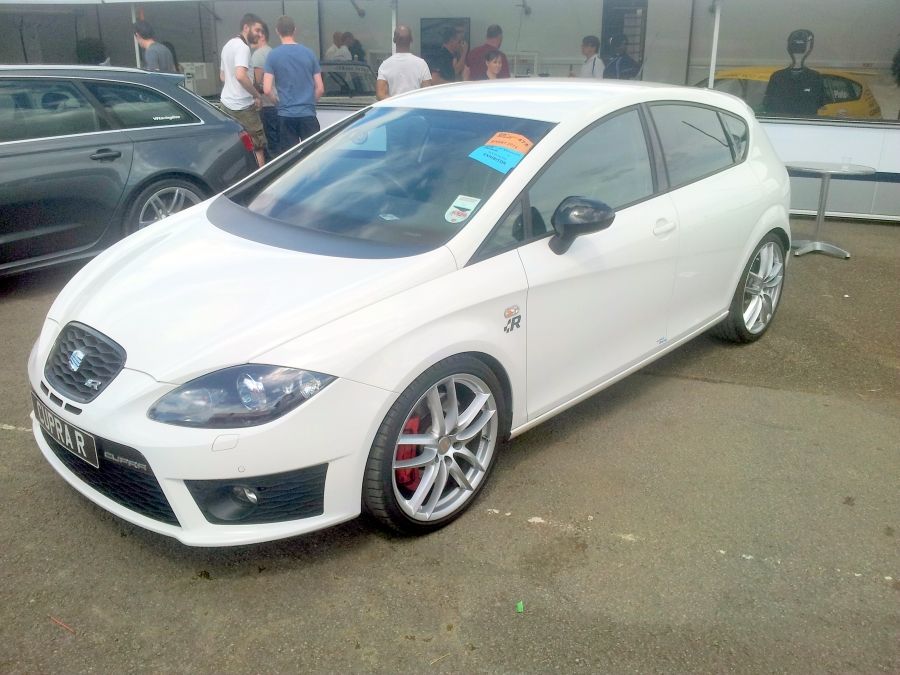
Next on the list we have Irfan Mohamed’s white Cupra R, for a moment I thought someone had picked up the keys and drove Kung Fu round to their stand and parked up!
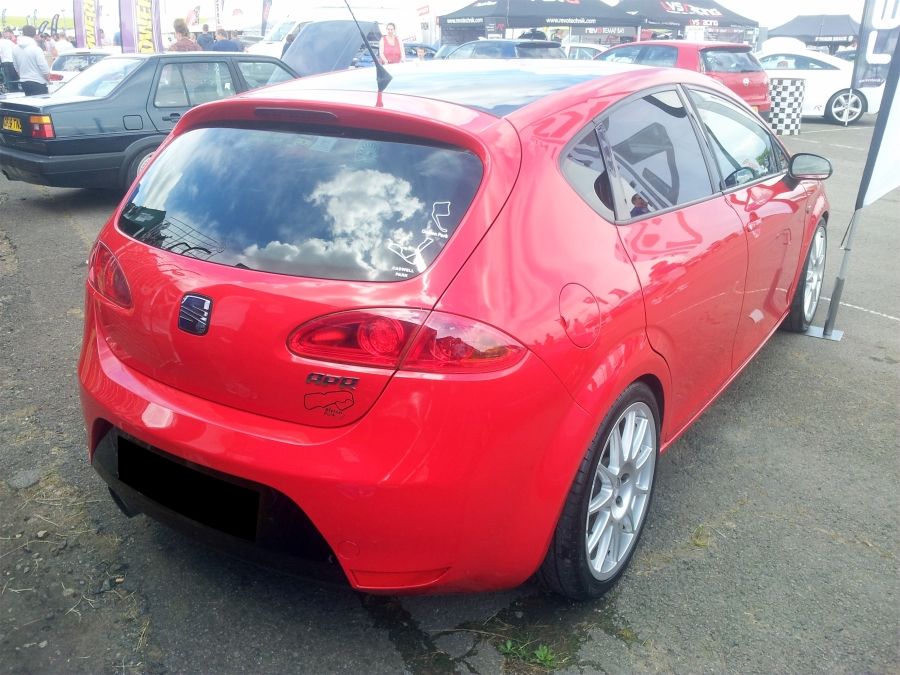
Here we have Michael Christou (aka TFSi Mike)’s Red Cupra sparkling in the sun at the AKS Tuning display stand looking very tidy! Liking the blackout on the roof, Michael had it properly painted for a professional finish, something we’re looking at doing for Kung Fu in due course once we start the next phase of tarting him up a bit:
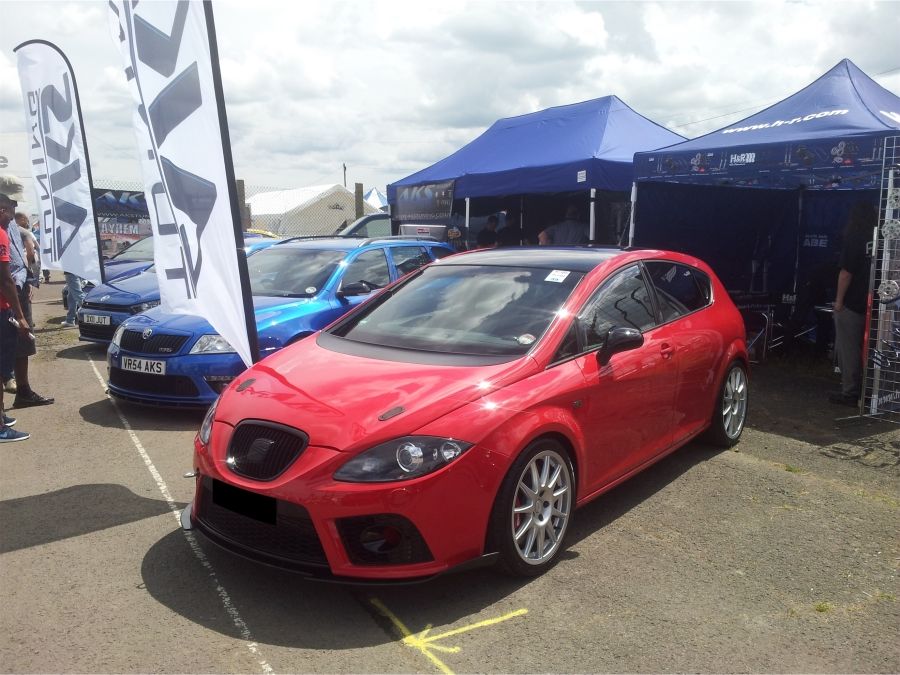
Michael de-badged the Cupra emblems and replaced it with an APR badge, nice little touch…
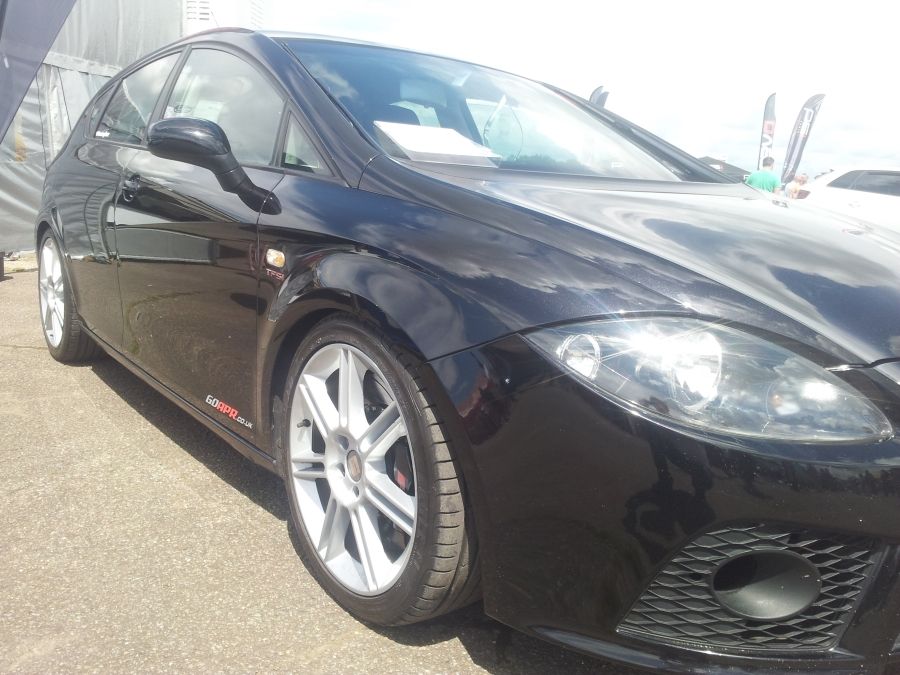
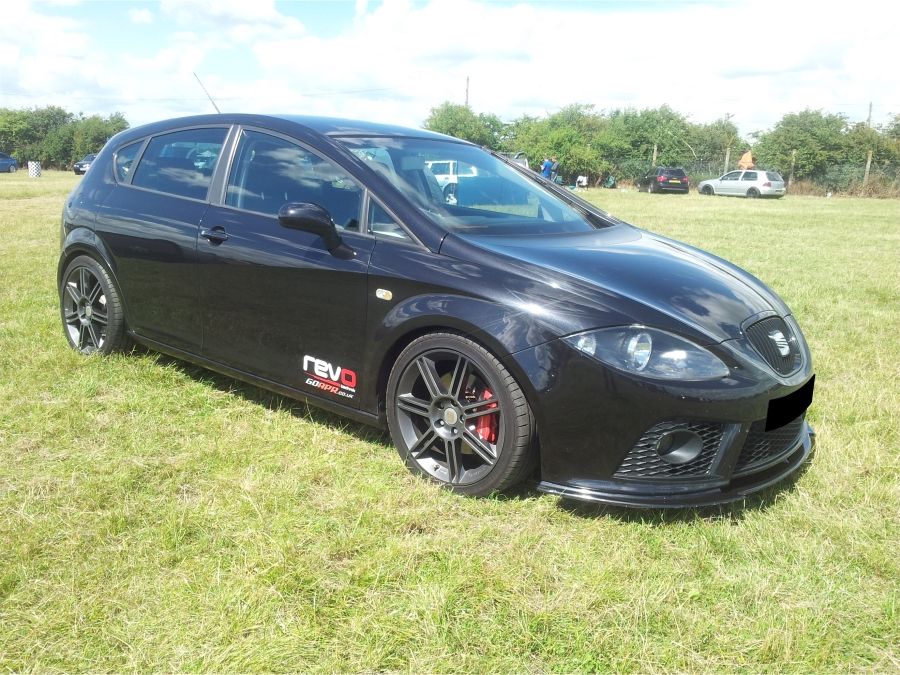
Here we have David Cheung (aka Cheungy)’s black Cupra parked up on the long grass. David recently had a meth kit professionally installed by Devils Own (same manufacturer as what we’re installing on Kung Fu) he has a separate tank installed in the boot adjacent to the spare wheel and it all looks very neat and tidy!
David really has thought outside the box with this one and went for both REVO and APR maps, makes his car go twice as fast!!!
We met up with Dan Dan, David, Michael and his wife, along with their little boy who had his face completely caked in ice cream! Think it was your turn to tidy up on that occasion Mike! Ha
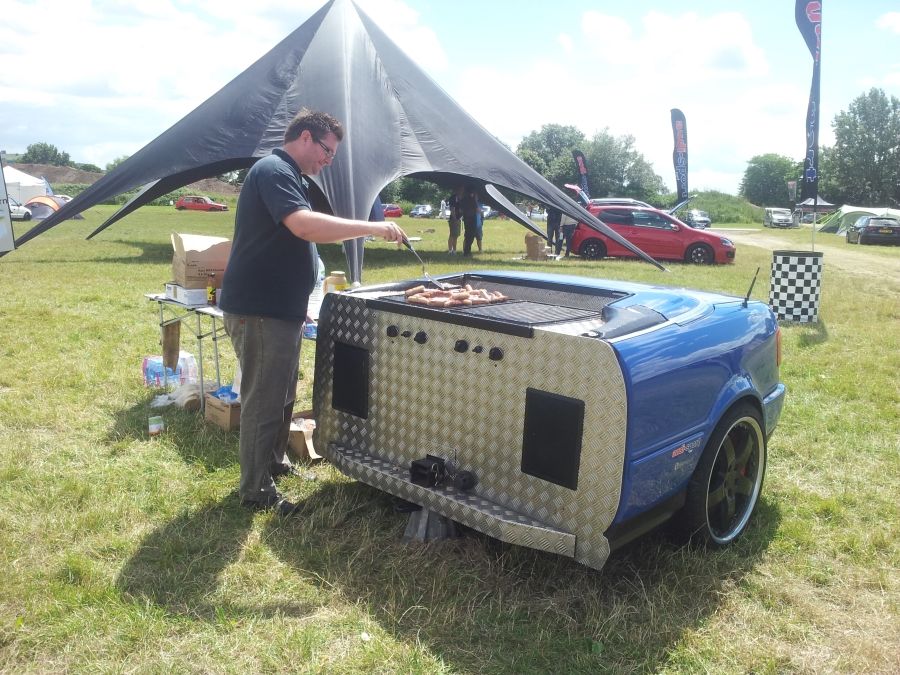
It was really great to meet some our fellow cupra.net members and have a good natter about our cars. It wasn’t long before the smell of burgers and sausages drifted through the air so we decided to go and continue our natters around the audi-sport.net BBQ for a free snack.
Thanks for the burger dude!
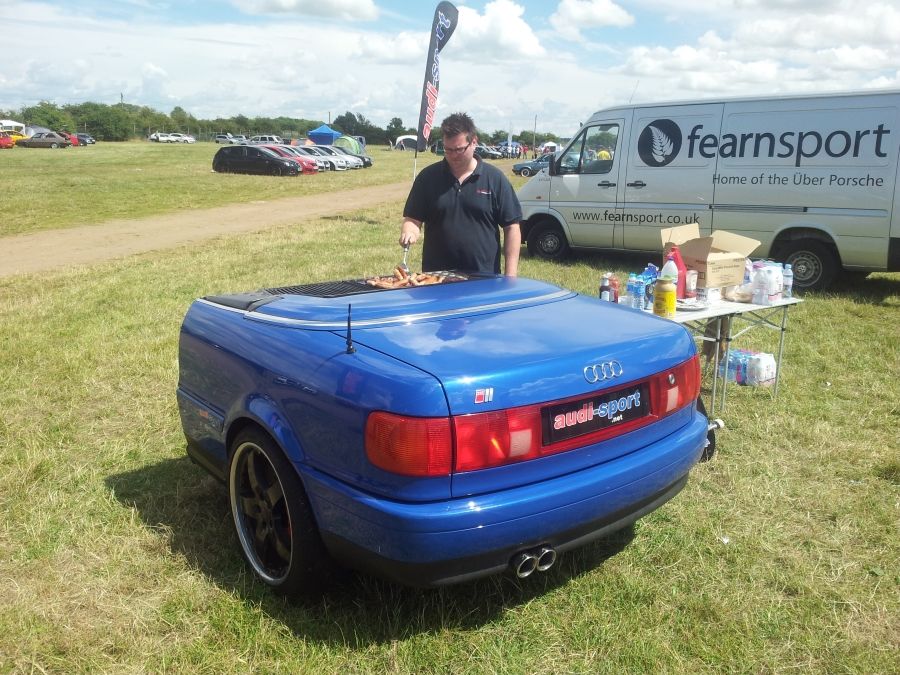
This Audi, although static at the time even had a big brake kit which we found highly entertaining! We asked the chef to pose for a photo shoot and he just laughed! Lol
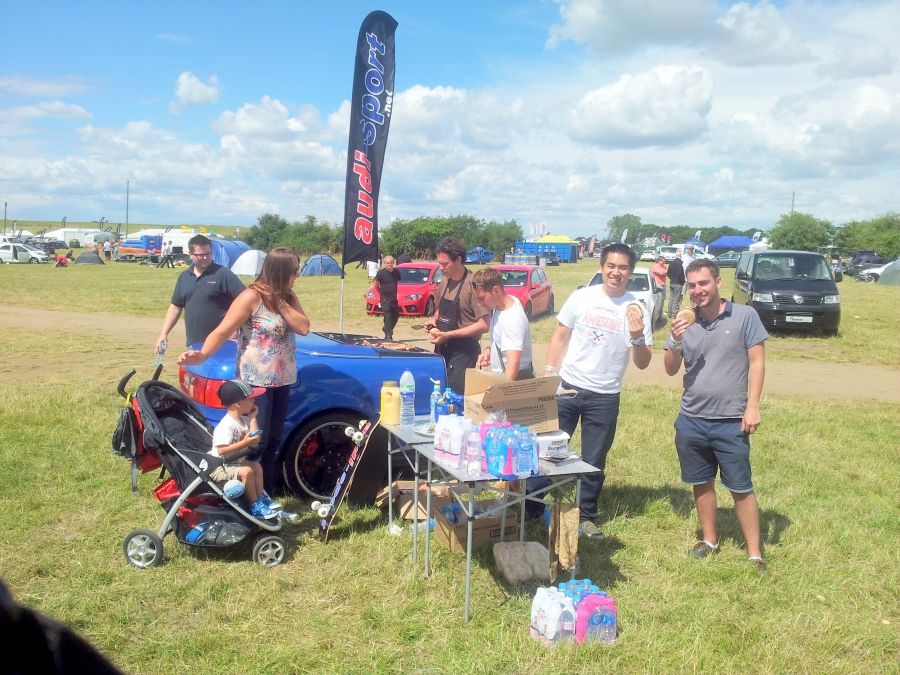
So here we have a long awaited seatcupra.net meat up!
With Dan Dan on the far right, followed by David to his left, and then Michael stood next to the BBQ pushing his luck for another free bap!
The proudest moment for me was to haul everyone together at the end of the show for some exclusive photo shoots.
We managed to round up nearly all the Cupras and their owners bar one chap, Jamie who was nowhere to be seen at the time, we’ll search harder for you next time matey
We drove up into the Show & Shine area, which by this time most people had gone home. We collared some poor innocent man to stand around with all the cameras whilst we got our SEATs into position. It was like organised chaos for the first ten minutes, but we eventually got sorted and managed to dump our rides in a straight-ish line and had them all colour coded nicely! Couldn’t cope with them mixed up, my OCD would have gone overdrive!
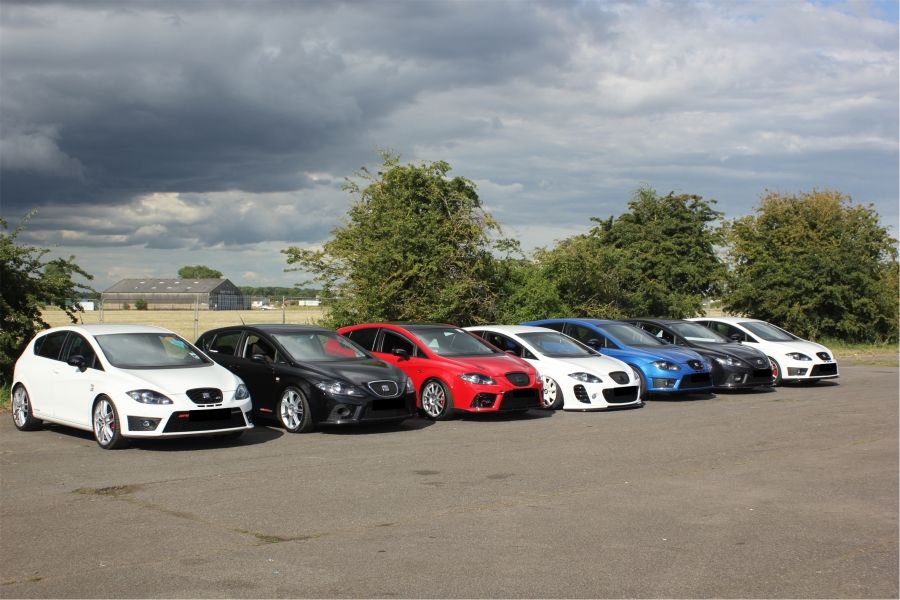
Leon Owners Team Photo!
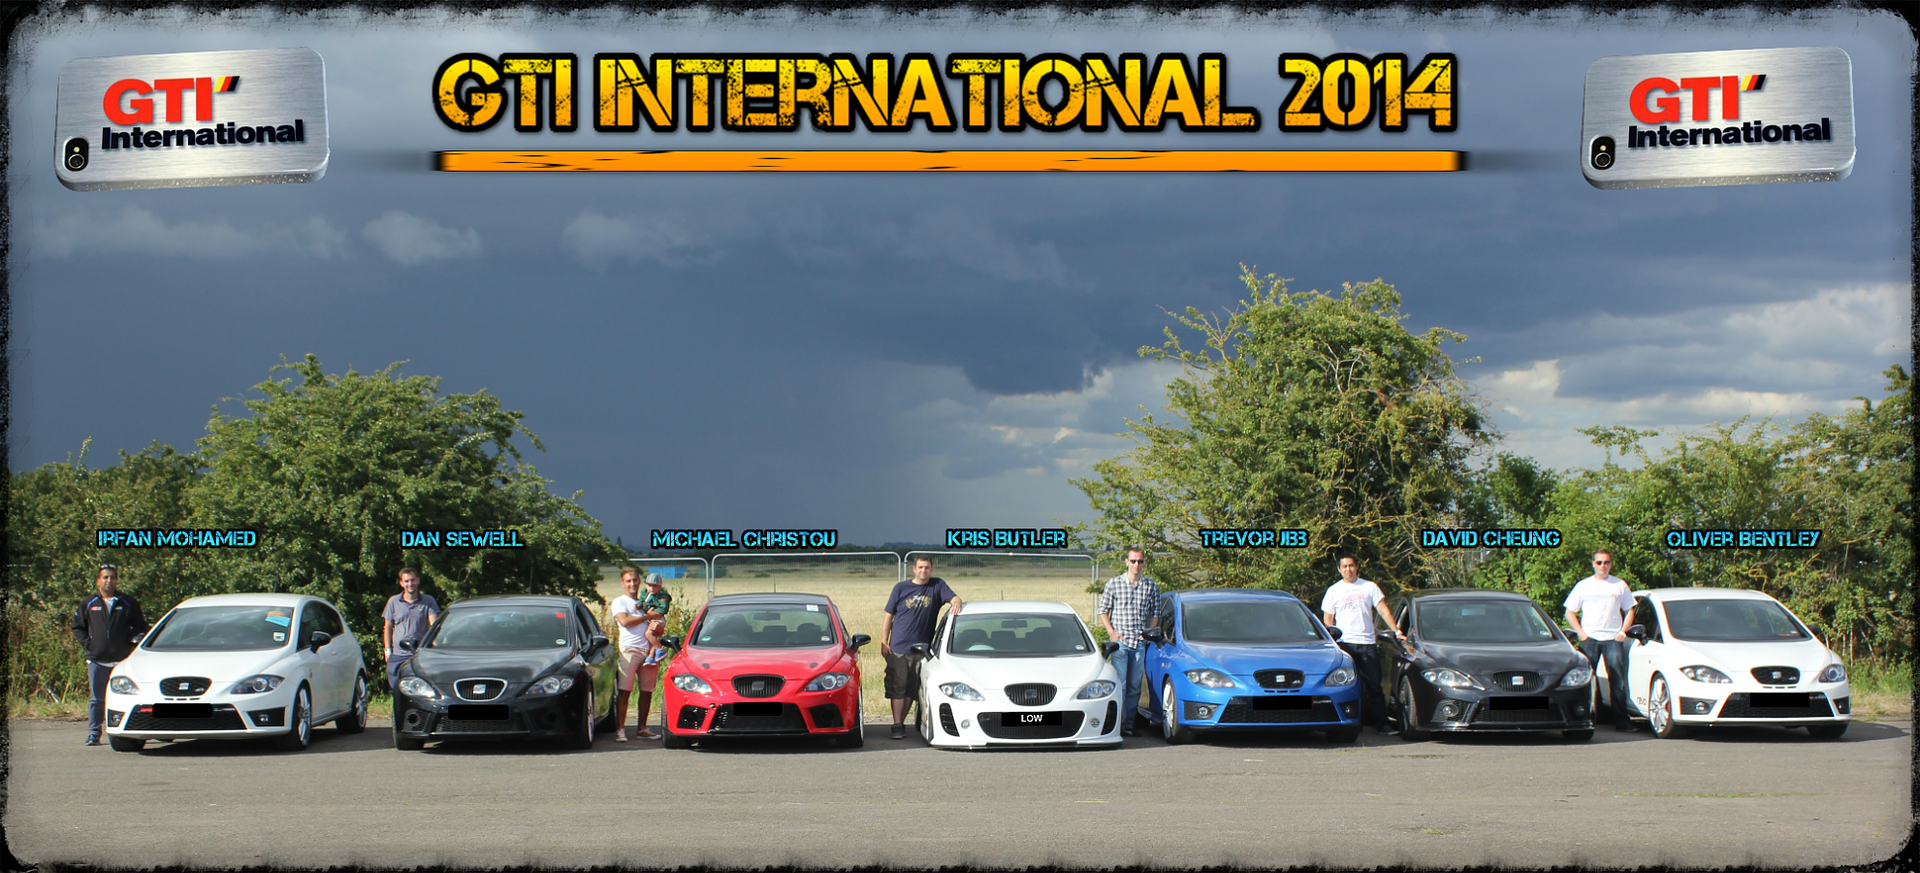
So the weekend had finally come to an end, a real anti-climax for everyone I’m sure. We all headed home in different directions spreading ourselves back across the UK until the next time we all re-unite again…
It was a great end to the show to have everyone together, and memories that for all of us who attended will last forever…
I’m sure we’ll all be back again next year and very much look forward to seeing everyone again soon!
Credits
Big thanks to everyone who took part in this year’s GTI International 2014… the sponsors, show staff, volunteers, safety marshals, show organisers, traders, exhibitors, club members, the campers and all the visitors who spared their time to come and support us all.
Without you all it wouldn’t have been the same! Thank you
The next show for us will be the VW Festival at Harewood in Leeds from the 15th to 17th August. Hope to see you there! we also have some other events coming up in the near future so will keep you posted...
In the next episode we will be covering our latest works on Kung Fu with the REVO Stage 4 conversion, so stayed tuned and we’ll be back soon.
All the best
Another Mk1 Golf, a real beast of an engine in this one!
Oh, mmm maybe not!
And back to SEATs…
Now here’s as a Cupra to keep a look out for, TSR Performance’s project car with a Stage 4 map and 500BHP+
I feel a race coming on here at the next show
And now for our cupra.net members rides…
Here’s a Leon you’ll know only too well!
Dan Sewell (aka DanGB)’s famous AWD converted beast!
He was the first person in the UK to embark on the conversion, so hats off to the chap for raising the standard. The works were carried out by APR and AKS Tuning. Dan Dan bought his car from new and has since added more and more goodies to his ride over the years. He was seen many times down the drag strip over the weekend and got some impressive results; he also picked up a prize which sat gleaming away on his dashboard throughout the show. Well done mate
Next on the list we have Irfan Mohamed’s white Cupra R, for a moment I thought someone had picked up the keys and drove Kung Fu round to their stand and parked up!
Here we have Michael Christou (aka TFSi Mike)’s Red Cupra sparkling in the sun at the AKS Tuning display stand looking very tidy! Liking the blackout on the roof, Michael had it properly painted for a professional finish, something we’re looking at doing for Kung Fu in due course once we start the next phase of tarting him up a bit:
Michael de-badged the Cupra emblems and replaced it with an APR badge, nice little touch…
Here we have David Cheung (aka Cheungy)’s black Cupra parked up on the long grass. David recently had a meth kit professionally installed by Devils Own (same manufacturer as what we’re installing on Kung Fu) he has a separate tank installed in the boot adjacent to the spare wheel and it all looks very neat and tidy!
David really has thought outside the box with this one and went for both REVO and APR maps, makes his car go twice as fast!!!
We met up with Dan Dan, David, Michael and his wife, along with their little boy who had his face completely caked in ice cream! Think it was your turn to tidy up on that occasion Mike! Ha
It was really great to meet some our fellow cupra.net members and have a good natter about our cars. It wasn’t long before the smell of burgers and sausages drifted through the air so we decided to go and continue our natters around the audi-sport.net BBQ for a free snack.
Thanks for the burger dude!
This Audi, although static at the time even had a big brake kit which we found highly entertaining! We asked the chef to pose for a photo shoot and he just laughed! Lol
So here we have a long awaited seatcupra.net meat up!
With Dan Dan on the far right, followed by David to his left, and then Michael stood next to the BBQ pushing his luck for another free bap!
The proudest moment for me was to haul everyone together at the end of the show for some exclusive photo shoots.
We managed to round up nearly all the Cupras and their owners bar one chap, Jamie who was nowhere to be seen at the time, we’ll search harder for you next time matey
We drove up into the Show & Shine area, which by this time most people had gone home. We collared some poor innocent man to stand around with all the cameras whilst we got our SEATs into position. It was like organised chaos for the first ten minutes, but we eventually got sorted and managed to dump our rides in a straight-ish line and had them all colour coded nicely! Couldn’t cope with them mixed up, my OCD would have gone overdrive!
Leon Owners Team Photo!
So the weekend had finally come to an end, a real anti-climax for everyone I’m sure. We all headed home in different directions spreading ourselves back across the UK until the next time we all re-unite again…
It was a great end to the show to have everyone together, and memories that for all of us who attended will last forever…
I’m sure we’ll all be back again next year and very much look forward to seeing everyone again soon!
Credits
Big thanks to everyone who took part in this year’s GTI International 2014… the sponsors, show staff, volunteers, safety marshals, show organisers, traders, exhibitors, club members, the campers and all the visitors who spared their time to come and support us all.
Without you all it wouldn’t have been the same! Thank you
The next show for us will be the VW Festival at Harewood in Leeds from the 15th to 17th August. Hope to see you there! we also have some other events coming up in the near future so will keep you posted...
In the next episode we will be covering our latest works on Kung Fu with the REVO Stage 4 conversion, so stayed tuned and we’ll be back soon.
All the best
The next show for us will be the VW Festival at Harewood in Leeds from the 15th to 17th August. Hope to see you there!
Answered my question, I will see you there
How come you never brought the Leon to VW fest. Was there yesterday with SCN would of been nice to see it.
Sent from my iPhone using Tapatalk
Sent from my iPhone using Tapatalk
How come you never brought the Leon to VW fest. Was there yesterday with SCN would of been nice to see it.
Sent from my iPhone using Tapatalk
Hi Everyone, yes sorry we didn't have the Cupra on show, we're still re-building the engine at the mo, we were all a bit gutted that it wasn't ready in time for the VW fest but we should have it back on the road fairly soon. We have to get the piston valve pockets machined for the high lift cams and then we can put the engine back together again.
I hope to have an update for you all soon.
Regards
REVO Stage 4... The BIG BUILD!

Hi Everyone… We’re back!!!!
You can follow our progress on our Facebook Project Page... see https://www.facebook.com/QuattroCupra
Well it’s been a long while since our last update, some of you may have developed grey hairs in the time we’ve been offline so apologies to keep you all waiting!!!
Firstly we have some great news to share with you all in that we have now secured another sponsor for the project. After many discussions and planning behind the scenes, we are very proud to announce our new partnership with REVO Technik!
Yes you’re reading this correctly… we’ve teamed up with the professors in Red to help transform Kung Fu into a thoroughbred racing machine!
This is a fantastic opportunity for us and a real privilege to be joining forces with them.
REVO are fast becoming one of the biggest and most reputable names in tuning and remapping software, with dealer networks all around the world, these guys are certainly making their mark in the world of motorsport.
Our project Cupra will soon be making its way down to REVO’s development centre, where REVO Kev (head of technical) and his men in white coats will put the car through its paces, getting everything finely tuned and setup for a jaw dropping result in performance and great drivability.
We`ll cover our plans in some more detail a bit later on…
Since our last update, the boys at Autotechnica have been very busy working behind the scenes, stripping Kung Fu down to the bare nuts and bolts, then building him back together again with all the toys one could only dream of!
List below shows all the hardware installed to date:
Engine Mods
REVO High Flow Air Filter Intake System
REVO Engine and Transmission Mount Kit
REVO PCV Revamp Kit
REVO Integrated Throttle Pipe
REVO Stage 4 Software (coming soon)
Eurojet Front Mount Intercooler
Devils Own Progressive Water Methanol Injection System (with twin nozzle injector upgrade)
ATP Turbo 3” Downpipe (with custom fabrication to Milltek System)
Milltek Custom Design 3” Full Exhaust System with Twin Tailpipes
HEP Stage 1 Inlet Manifold
Garrett GTX3076R Dual Bearing Turbo with 0.82 AR Housing
RS4 Injectors
NGK Iridium Spark Plugs
Wossner Forged Pistons (with custom machined valve pockets by Lee X!)
Integrated Engineering Forged Con Rods
New Cylinder Head with 1mm Oversized Bored Valves
Ferrea Valve Train Set
Camshaft Girdle Bolt Kit
ARP Head Stud Kit
Cat Cams Hot Street Stage 3 Cams
Cat Cams uprated Cam Pulley
New Cambelt
Loba 2.0 TFSi high pressure Fuel Pump
Audi RS3 Sender Fuel Pump
Customs Silicone Hoses (throughout)
Handling Upgrades
Bilstein B14 Pro Coilover Kit
H&R Anti-Roll Bars Front and Rear (rear using kit for Audi S3)
SuperPro Poly Bushings
Suprepro Anti-lift Kit
AWD Conversion & Transmission
Loba Stage 2 Clutch and Flywheel
Quaife Limited Slip Differential
Custom Welding and Fabrication Works to Rear Boot Floor Plan
Audi S3 8P 2007 Salvage Rear Axle Assembly
Front Transfer Box (Audi S3 8P) with new bearings
R32 Propshaft
R32 Saddle Tank and Sender
R32 Tank Sender fuel level meter for Saddle Tank
Modified Wiring Loom from the Golf R32
New AWD Gearbox Outer Casing
Electrics
AEM Wideband Air/Fuel Ratio Gauge
Turbosmart Eboost2 Gauge & Controller
Custom Electrical Cabling and Wiring Accessories
Scientific Grade Poly Tubing for Gauges, Copex and Fitting accessories
Planned Future Upgrades
Haldex Sport Controller for Rear Diff
REVO Big Brake Kit (front and rear)
An experienced driver with NO FEAR… REVO Kev?
Performance
BHP??? Not sure yet… you’ll have to wait and see! Ha

Our last update back in July was following one our biggest shows of the season, the GTI International Show at Shakespeare Country Raceway. The AWD conversion had just been completed on our Cupra, but with only days to go before this big event. This was exciting times for everyone involved and we received a lot of interest and support over that weekend.
We faced a hectic period getting everything ready for the show, but we were also busy planning our next phase of the project, the transformation to Stage 4 along with a big bag of tricks up our sleeves!
If we ever said the project was soon near to a graceful end… we lied!!!!!
We got the ball rolling back as early as April, carrying out some research along with discussions with our key partners and contacts, to evaluate the best direction for the project.
Ultimately two options came to the drawing board:
Option 1: Chase the fillies, rule the roost with the rollers, and lead the pack with the best pub talk around! But then we would run the risk of turning our Cupra into something somewhat un-drivable! Pushing everything to the absolute extreme until either, the engine explodes or the turbo flies off the car and takes someone’s head off! possibly not the best idea…
Option 2: Take a marginally less aggressive approach and focus our attentions on building something that will last more than a single season!!! But develop a machine that would still give most supercars a good run for its money! and provide great performance for both the track and the road.
Decisions decisions…
Well since the start of the project, we were soon to be on REVO radar, taking much interest in our plans for Kung Fu. It was important for us to build an example using readily available parts off the shelf i.e. show the world what is possible when following a strict list of hardware and software configurations, designed to get the best and most reliable results from the TFSi engine.
Naturally we did steer off the track a little when it came to the additional list of goodies we’ve now installed! But ultimately we have respected the advice and guidelines given to us by the REVO Team, and steered for Option 2! Our TFSi is running well and now performs more towards its natural power curve! he says…
REVO put a huge amount of time and investment into the research of tuning cars, along with many months of testing their products and software before launching to market. It’s an honour for us to demonstrate what really is possible with the REVO product portfolio, these guys are the King of Motorsport when it comes to giving reliable and spine tingling results!
We look forward to showing you all the up and coming results of the build in due course!
Stage 4… The Big Build – Meth & Gauges
So back in the summer, we were busy behind the scenes getting things ready for the next phase of the works i.e procurement of all the necessary parts required for Stage 4 and the next engine re-build. Whilst we were waiting for the main kit to arrive, we cracked on with some of the additional electrics and installation of the water methanol kit.
Two items that were going to be key for the correct setup of stage 4 were:
Using a wideband air/fuel controller during the tuning process allows you to monitor the AFR, and adjust the tuning parameters to optimize them for maximum power and efficiency.
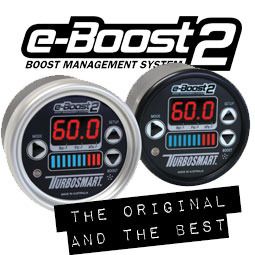
We also installed an E Boost2 controller by TurboSmart. This gauge is one serious piece of kit and is used with some of the most reputable project cars around, pushing some serious power! The boost controller is a device to control the boost level produced in the intake manifold of a turbocharged or supercharged engine, by affecting the air pressure delivered to the pneumatic and mechanical wastegate actuator.
Without a boost controller, air pressure is fed from the charge air (compressed side) of the turbocharger directly to the wastegate actuator via a vacuum hose. This air pressure can come from anywhere on the intake after the turbo, including after the throttle body, though that is less common. This air pressure pushes against the force of a spring which is located in the wastegate actuator, this allows the wastegate to open and re-direct exhaust gas, so that it does not reach the turbine wheel. In this simple configuration, the spring’s springrate and preload determine how much boost pressure the system will achieve. Springs are classified by the boost pressure, they typically achieve, such as a “7 psi spring” that will allow the turbocharger to reach equilibrium at approximately 7 psi (0.48 bar).
One primary problem of this system is the wastegate will start to open well before the actual desired boost pressure is achieved. This negatively affects the threshold of boost onset and also increases turbocharger lag. For instance, a spring rated at 7 psi may allow the wastegate to begin to (but not fully) open at as little as 3.5 psi (0.24 bar).
Achieving moderate boost levels consistently, is also troublesome with this configuration. At partial throttle, full boost may still be reached, making the vehicle difficult to control with precision. Electronic systems can allow the throttle to control the level of boost, so that only at full throttle will maximum boost levels be achieved, and intermediate levels of boost can be held consistently at partial throttle levels.
Also to be noted is the way in which boost control is achieved, depending on the type of wastegate used. Typically manual “bleed type” boost controllers are only used on swing type (single port) wastegate actuators. To increase boost, pressure is taken away from the actuator control line, therefore increasing boost. Dual port swing type wastegate actuators and external wastegates generally require electronic boost control, although adjustable boost control can also be achieved on both of these with an air pressure regulator (This is not the same as a bleed type boost controller though) To increase boost with an external or dual port wastegate, pressure is added to the top control port to increase boost. When boost control is not fitted, this control port is open to the atmosphere.
Thanks WiKi!
So for us, the installation was fairly straight forward, although the cabling was a little awkward to plumb in throughout the car. We ended up having to buy new looms of cable, fuse holders, relays for the ignition switching, crimps and lots of connectors. The installation took around 3 – 4 days to complete of which I did most of the wiring myself, in order that the boys could carry on with some of the more important jobs.
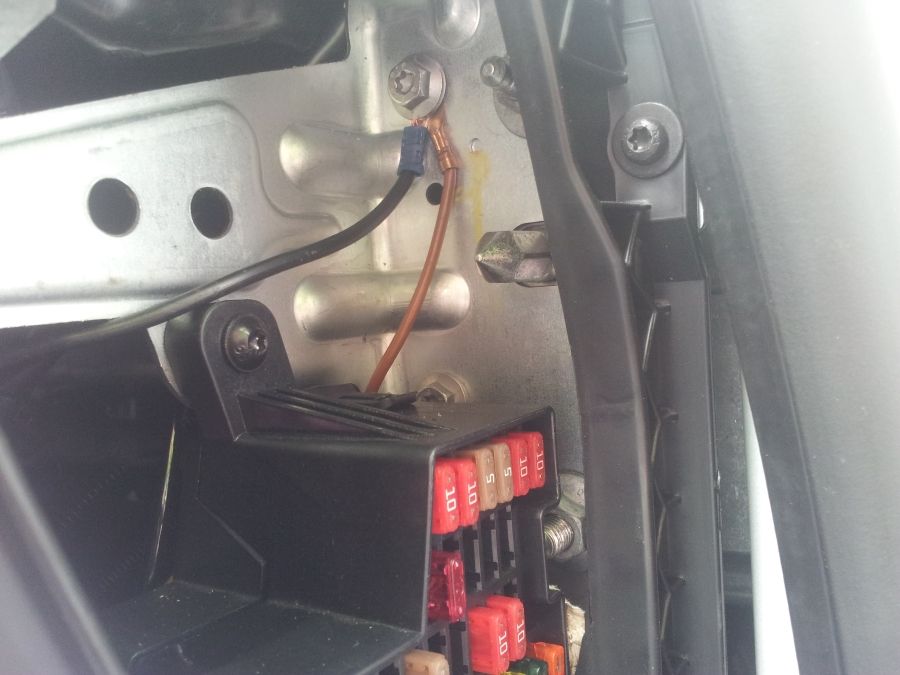
I had to install new 12V supplies for the gauges and the new water meth injection system. The most obvious place to draw the power was from the main fusebox inside the engine bay (next to the battery) This was only going to provide permanent supplies of which I subsequently installed an additional relay, for switching the system on with the ignition (otherwise the gauges would have been permanently powered up and would soon run down the battery)
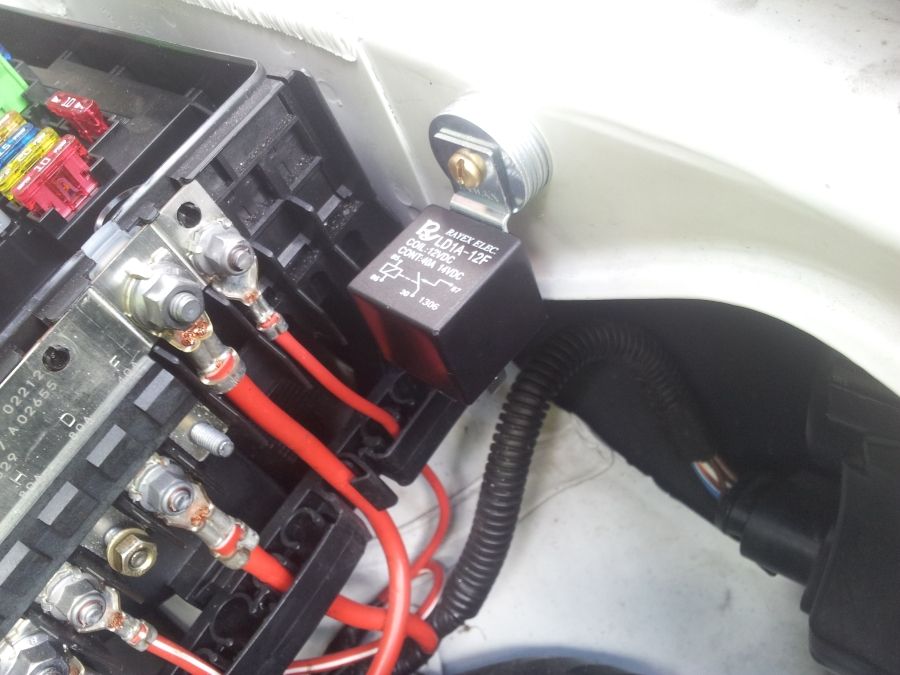
Picture below shows where we tapped into an ignition feed near the manifold, this was a low current source but was just enough whack to drive the coil on the additional relay (shown in the picture above)

A local earth source was taken from the car’s chassis behind the dashboard, this minimised the number of cables to be brought through from the engine bay:
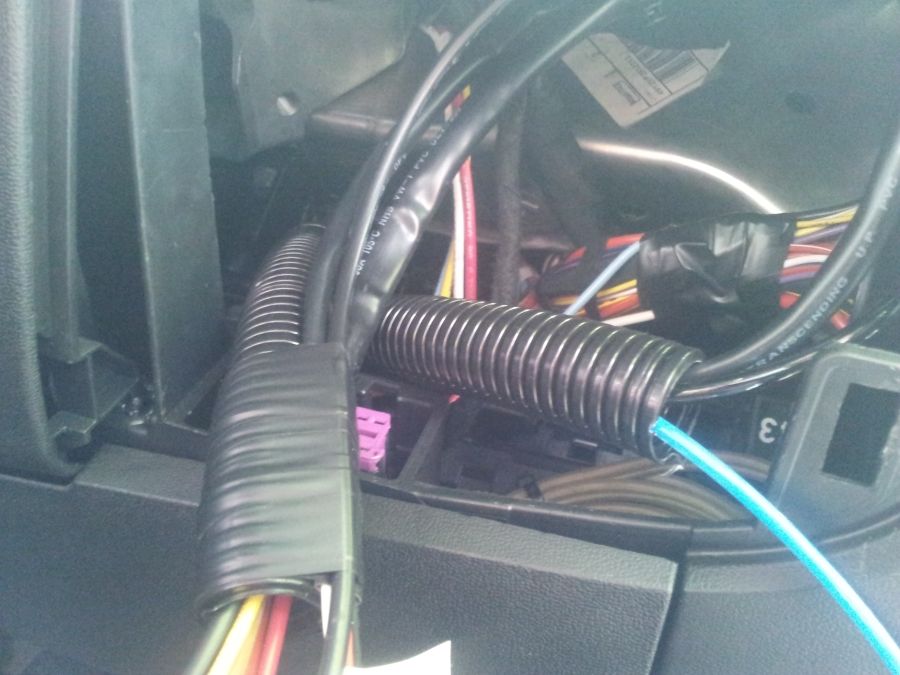
Pulling the cables through was quite awkward, the trick was to use some plastic copex that was routed through underneath the driver’s side of the dashboard, which poked through a plastic blanking plate that sat in between the cabin and the engine bay. Once installed, we could then pull everything through using a nylon draw tape (same tool used for pulling wires through conduit systems by electricians) tricks of the trade!
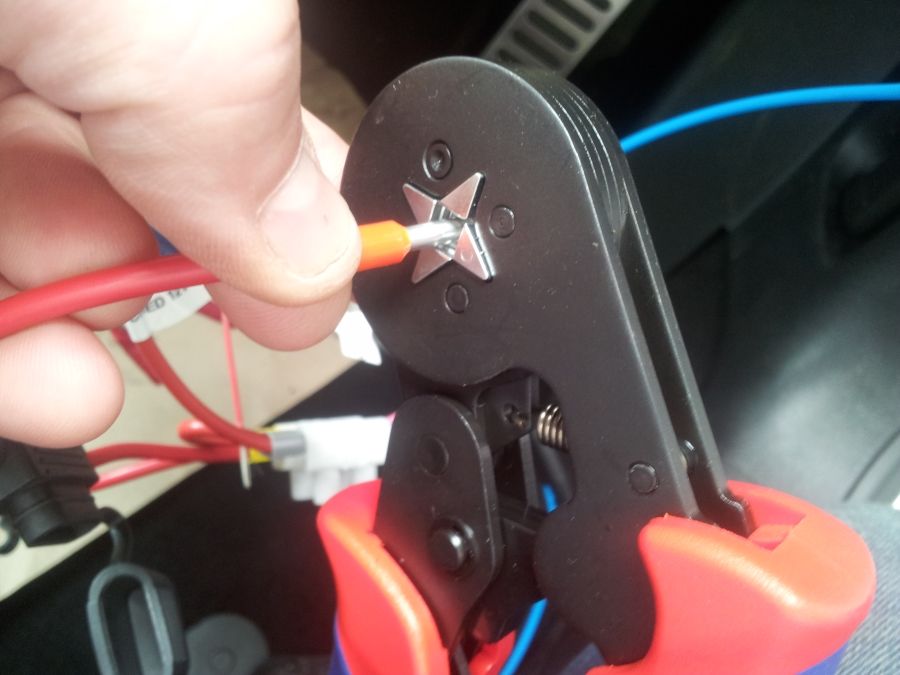
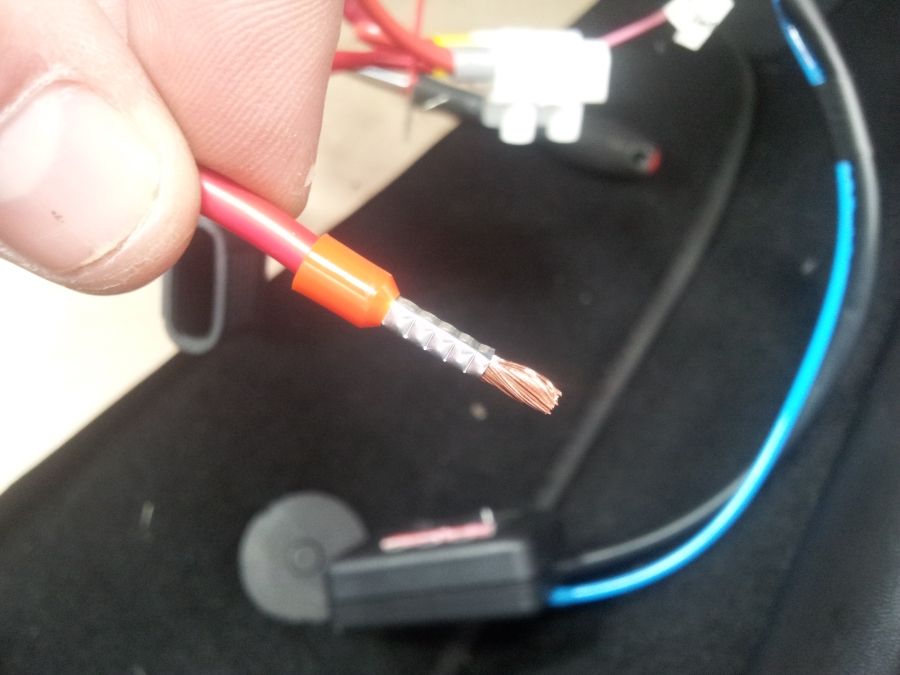
I used various crimps and connectors to ensure we had good solid electrical connections, the last thing you want is your gauges to conk out during mid race!
I’ve often had people teasing me about my slightly unorthodox way in wiring things up, perhaps an auto electrician would have something to say about my methods! But being an electrical engineer myself, the principals applied are the same when wiring things up safely, which is our main priority of course!
My advice is always to ensure you provide the appropriate fuses for every circuit, we don’t want fires!
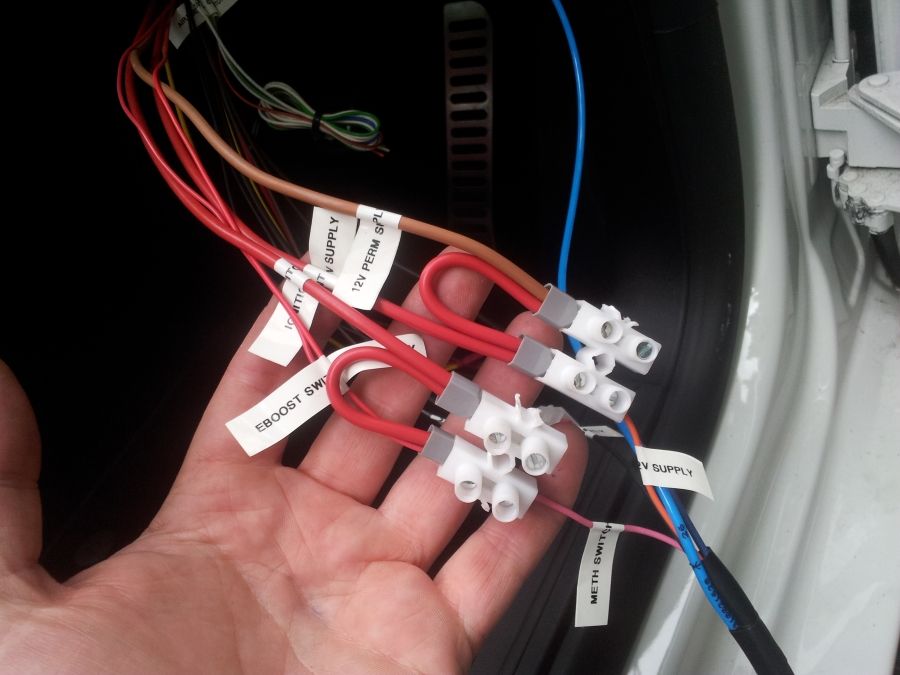
The main wiring loom shown below was for the gauges and water meth system. All connections were properly marked from a labelling machine, which would make life a little easier for diagnosing any faults:
Continue to part 2...
Hi Everyone… We’re back!!!!
You can follow our progress on our Facebook Project Page... see https://www.facebook.com/QuattroCupra
Well it’s been a long while since our last update, some of you may have developed grey hairs in the time we’ve been offline so apologies to keep you all waiting!!!
Firstly we have some great news to share with you all in that we have now secured another sponsor for the project. After many discussions and planning behind the scenes, we are very proud to announce our new partnership with REVO Technik!
Yes you’re reading this correctly… we’ve teamed up with the professors in Red to help transform Kung Fu into a thoroughbred racing machine!
This is a fantastic opportunity for us and a real privilege to be joining forces with them.
REVO are fast becoming one of the biggest and most reputable names in tuning and remapping software, with dealer networks all around the world, these guys are certainly making their mark in the world of motorsport.
Our project Cupra will soon be making its way down to REVO’s development centre, where REVO Kev (head of technical) and his men in white coats will put the car through its paces, getting everything finely tuned and setup for a jaw dropping result in performance and great drivability.
We`ll cover our plans in some more detail a bit later on…
Since our last update, the boys at Autotechnica have been very busy working behind the scenes, stripping Kung Fu down to the bare nuts and bolts, then building him back together again with all the toys one could only dream of!
List below shows all the hardware installed to date:
Engine Mods
REVO High Flow Air Filter Intake System
REVO Engine and Transmission Mount Kit
REVO PCV Revamp Kit
REVO Integrated Throttle Pipe
REVO Stage 4 Software (coming soon)
Eurojet Front Mount Intercooler
Devils Own Progressive Water Methanol Injection System (with twin nozzle injector upgrade)
ATP Turbo 3” Downpipe (with custom fabrication to Milltek System)
Milltek Custom Design 3” Full Exhaust System with Twin Tailpipes
HEP Stage 1 Inlet Manifold
Garrett GTX3076R Dual Bearing Turbo with 0.82 AR Housing
RS4 Injectors
NGK Iridium Spark Plugs
Wossner Forged Pistons (with custom machined valve pockets by Lee X!)
Integrated Engineering Forged Con Rods
New Cylinder Head with 1mm Oversized Bored Valves
Ferrea Valve Train Set
Camshaft Girdle Bolt Kit
ARP Head Stud Kit
Cat Cams Hot Street Stage 3 Cams
Cat Cams uprated Cam Pulley
New Cambelt
Loba 2.0 TFSi high pressure Fuel Pump
Audi RS3 Sender Fuel Pump
Customs Silicone Hoses (throughout)
Handling Upgrades
Bilstein B14 Pro Coilover Kit
H&R Anti-Roll Bars Front and Rear (rear using kit for Audi S3)
SuperPro Poly Bushings
Suprepro Anti-lift Kit
AWD Conversion & Transmission
Loba Stage 2 Clutch and Flywheel
Quaife Limited Slip Differential
Custom Welding and Fabrication Works to Rear Boot Floor Plan
Audi S3 8P 2007 Salvage Rear Axle Assembly
Front Transfer Box (Audi S3 8P) with new bearings
R32 Propshaft
R32 Saddle Tank and Sender
R32 Tank Sender fuel level meter for Saddle Tank
Modified Wiring Loom from the Golf R32
New AWD Gearbox Outer Casing
Electrics
AEM Wideband Air/Fuel Ratio Gauge
Turbosmart Eboost2 Gauge & Controller
Custom Electrical Cabling and Wiring Accessories
Scientific Grade Poly Tubing for Gauges, Copex and Fitting accessories
Planned Future Upgrades
Haldex Sport Controller for Rear Diff
REVO Big Brake Kit (front and rear)
An experienced driver with NO FEAR… REVO Kev?
Performance
BHP??? Not sure yet… you’ll have to wait and see! Ha
Our last update back in July was following one our biggest shows of the season, the GTI International Show at Shakespeare Country Raceway. The AWD conversion had just been completed on our Cupra, but with only days to go before this big event. This was exciting times for everyone involved and we received a lot of interest and support over that weekend.
We faced a hectic period getting everything ready for the show, but we were also busy planning our next phase of the project, the transformation to Stage 4 along with a big bag of tricks up our sleeves!
If we ever said the project was soon near to a graceful end… we lied!!!!!
We got the ball rolling back as early as April, carrying out some research along with discussions with our key partners and contacts, to evaluate the best direction for the project.
Ultimately two options came to the drawing board:
Option 1: Chase the fillies, rule the roost with the rollers, and lead the pack with the best pub talk around! But then we would run the risk of turning our Cupra into something somewhat un-drivable! Pushing everything to the absolute extreme until either, the engine explodes or the turbo flies off the car and takes someone’s head off! possibly not the best idea…
Option 2: Take a marginally less aggressive approach and focus our attentions on building something that will last more than a single season!!! But develop a machine that would still give most supercars a good run for its money! and provide great performance for both the track and the road.
Decisions decisions…
Well since the start of the project, we were soon to be on REVO radar, taking much interest in our plans for Kung Fu. It was important for us to build an example using readily available parts off the shelf i.e. show the world what is possible when following a strict list of hardware and software configurations, designed to get the best and most reliable results from the TFSi engine.
Naturally we did steer off the track a little when it came to the additional list of goodies we’ve now installed! But ultimately we have respected the advice and guidelines given to us by the REVO Team, and steered for Option 2! Our TFSi is running well and now performs more towards its natural power curve! he says…
REVO put a huge amount of time and investment into the research of tuning cars, along with many months of testing their products and software before launching to market. It’s an honour for us to demonstrate what really is possible with the REVO product portfolio, these guys are the King of Motorsport when it comes to giving reliable and spine tingling results!
We look forward to showing you all the up and coming results of the build in due course!
Stage 4… The Big Build – Meth & Gauges
So back in the summer, we were busy behind the scenes getting things ready for the next phase of the works i.e procurement of all the necessary parts required for Stage 4 and the next engine re-build. Whilst we were waiting for the main kit to arrive, we cracked on with some of the additional electrics and installation of the water methanol kit.
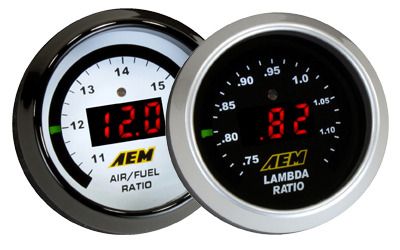
Two items that were going to be key for the correct setup of stage 4 were:
- Air/Fuel Ratio Gauge
- Boost Gauge and Controller
Using a wideband air/fuel controller during the tuning process allows you to monitor the AFR, and adjust the tuning parameters to optimize them for maximum power and efficiency.
We also installed an E Boost2 controller by TurboSmart. This gauge is one serious piece of kit and is used with some of the most reputable project cars around, pushing some serious power! The boost controller is a device to control the boost level produced in the intake manifold of a turbocharged or supercharged engine, by affecting the air pressure delivered to the pneumatic and mechanical wastegate actuator.
Without a boost controller, air pressure is fed from the charge air (compressed side) of the turbocharger directly to the wastegate actuator via a vacuum hose. This air pressure can come from anywhere on the intake after the turbo, including after the throttle body, though that is less common. This air pressure pushes against the force of a spring which is located in the wastegate actuator, this allows the wastegate to open and re-direct exhaust gas, so that it does not reach the turbine wheel. In this simple configuration, the spring’s springrate and preload determine how much boost pressure the system will achieve. Springs are classified by the boost pressure, they typically achieve, such as a “7 psi spring” that will allow the turbocharger to reach equilibrium at approximately 7 psi (0.48 bar).
One primary problem of this system is the wastegate will start to open well before the actual desired boost pressure is achieved. This negatively affects the threshold of boost onset and also increases turbocharger lag. For instance, a spring rated at 7 psi may allow the wastegate to begin to (but not fully) open at as little as 3.5 psi (0.24 bar).
Achieving moderate boost levels consistently, is also troublesome with this configuration. At partial throttle, full boost may still be reached, making the vehicle difficult to control with precision. Electronic systems can allow the throttle to control the level of boost, so that only at full throttle will maximum boost levels be achieved, and intermediate levels of boost can be held consistently at partial throttle levels.
Also to be noted is the way in which boost control is achieved, depending on the type of wastegate used. Typically manual “bleed type” boost controllers are only used on swing type (single port) wastegate actuators. To increase boost, pressure is taken away from the actuator control line, therefore increasing boost. Dual port swing type wastegate actuators and external wastegates generally require electronic boost control, although adjustable boost control can also be achieved on both of these with an air pressure regulator (This is not the same as a bleed type boost controller though) To increase boost with an external or dual port wastegate, pressure is added to the top control port to increase boost. When boost control is not fitted, this control port is open to the atmosphere.
Thanks WiKi!
So for us, the installation was fairly straight forward, although the cabling was a little awkward to plumb in throughout the car. We ended up having to buy new looms of cable, fuse holders, relays for the ignition switching, crimps and lots of connectors. The installation took around 3 – 4 days to complete of which I did most of the wiring myself, in order that the boys could carry on with some of the more important jobs.
I had to install new 12V supplies for the gauges and the new water meth injection system. The most obvious place to draw the power was from the main fusebox inside the engine bay (next to the battery) This was only going to provide permanent supplies of which I subsequently installed an additional relay, for switching the system on with the ignition (otherwise the gauges would have been permanently powered up and would soon run down the battery)
Picture below shows where we tapped into an ignition feed near the manifold, this was a low current source but was just enough whack to drive the coil on the additional relay (shown in the picture above)
A local earth source was taken from the car’s chassis behind the dashboard, this minimised the number of cables to be brought through from the engine bay:
Pulling the cables through was quite awkward, the trick was to use some plastic copex that was routed through underneath the driver’s side of the dashboard, which poked through a plastic blanking plate that sat in between the cabin and the engine bay. Once installed, we could then pull everything through using a nylon draw tape (same tool used for pulling wires through conduit systems by electricians) tricks of the trade!
I used various crimps and connectors to ensure we had good solid electrical connections, the last thing you want is your gauges to conk out during mid race!
I’ve often had people teasing me about my slightly unorthodox way in wiring things up, perhaps an auto electrician would have something to say about my methods! But being an electrical engineer myself, the principals applied are the same when wiring things up safely, which is our main priority of course!
My advice is always to ensure you provide the appropriate fuses for every circuit, we don’t want fires!
The main wiring loom shown below was for the gauges and water meth system. All connections were properly marked from a labelling machine, which would make life a little easier for diagnosing any faults:
Continue to part 2...
REVO Stage 4... The BIG BUILD! cont...
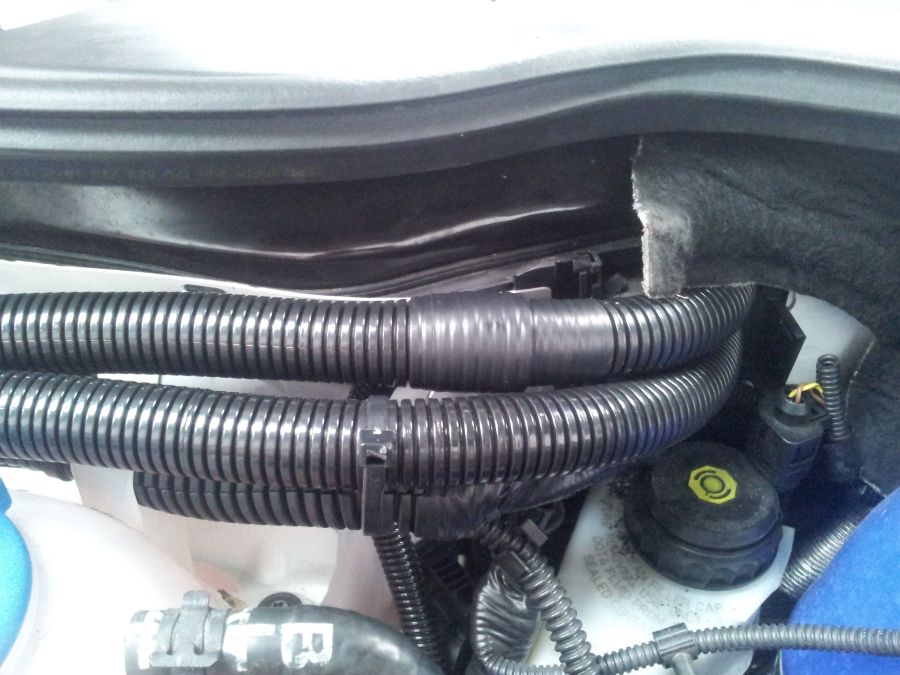
The picture below shows some nylon copex tubing that was installed between the main cabin and the engine. I had to make a couple of Y shaped junction points for where certain cables were to be routed to the different parts of the engine bay. A small trick was to cut a slot from the secondary tube and slide it over the primary piece before taping it up:
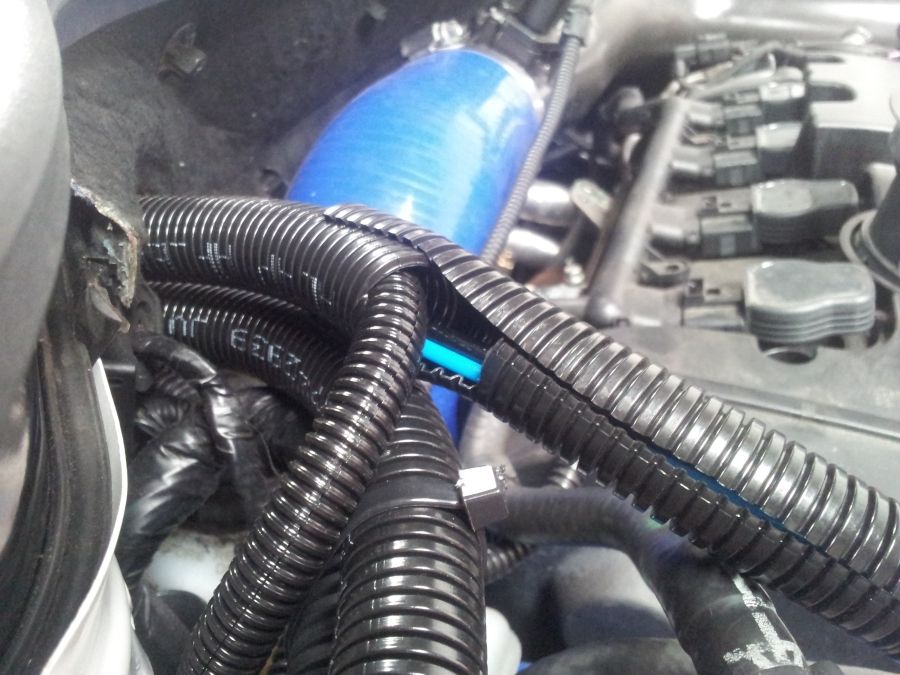
Perfect!
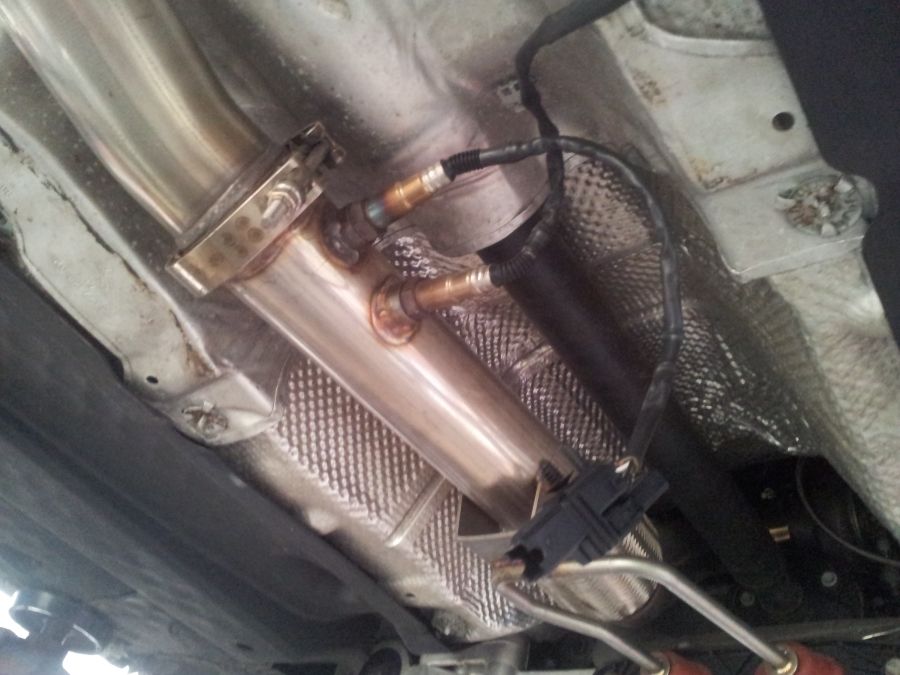
Milltek had very kindly installed the UEGO sensor bung for us for the AFR gauge, pre-welded into their custom exhaust system so the installation was fairly simple. A more permanent and professional fixture than using the optional fixing bracket from the AEM Kit:
Some wiring in progress in the cabin shown below, you can see the installation of the two gauges were starting to take shape. The AFR gauge was installed in place of the drivers side air vent. Some people aren’t too keen on this approach but for me it wasn’t an issue. There was no permanent damage caused by doing this, as we simply removed the original air vent assembly and put the new holder in its place. I rarely use the front vents for air circulation anyway, as it’s more important for me to keep the windscreen clear of fog and condensation.
There are very few options for the Leon when it comes to fitting additional gauges and equipment. For the E Boost2 controller, we bought a pillar pod from Nomad Racing which is made of a fibreglass construction and then finished in black. The unit may look a little flimsy in the photo, but is actually a really good product and looks really smart once installed. We also blacked out the little triangular window on the drivers side with sticky black plastic from the DIY store, in order to conceal the view through from behind:
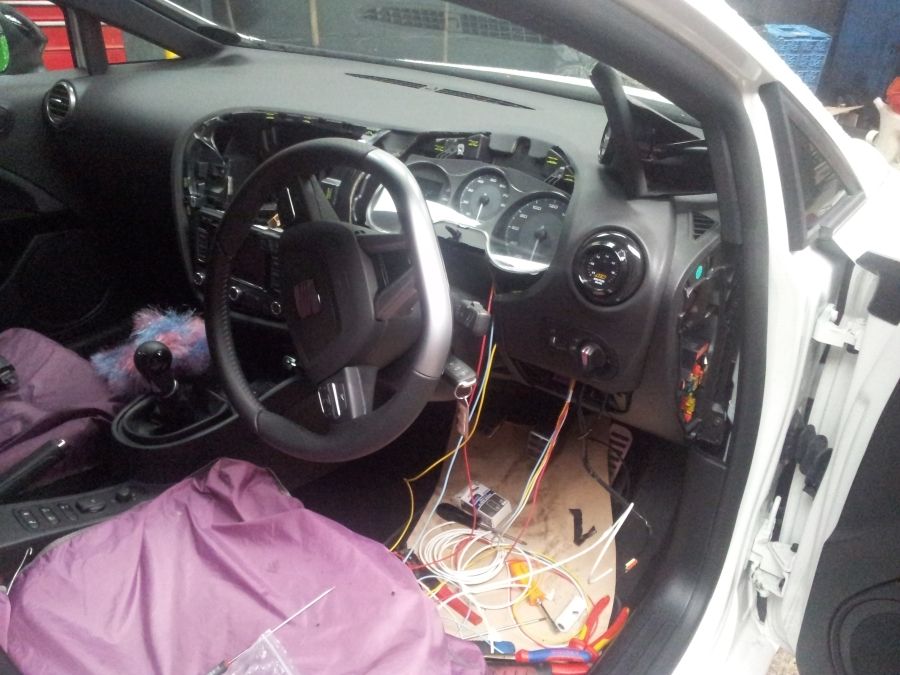
Water Methanol Injection
In internal combustion engines, water injection is also known as anti-detonant injection, the spraying of water into the incoming air or fuel-air mixture, or directly into the cylinder, in order to cool certain parts of the induction system where “hot points” could produce premature ignition.
It was used historically to increase the power output of military aviation engines for short durations such as dogfights or takeoff, however it is also used in motorsport and notably in drag racing. Many water injection systems, and in our case uses a mixture of water and alcohol (often close to a 50/50 mix), with trace amounts of water-soluble oil. The water provides the primary cooling effect due to its great density and high heat absorption properties. The alcohol is combustible, and also serves as an antifreeze for the water. We installed a meth injection system supplied from Devils Own. These guys sell their products all over the US but have a UK store as well.
When consulting the Devils Own team, they recommended using the DVC/30 Kit which is a progressive system. The progressive system provides more control over when the methanol mix is injected into the air/fuel mixture, also the volume of the fluid can be adjusted and progressively applied further up the rev range.
If you ever wondered why your car goes like the clappers in the rain, the water vapour holds more oxygen molecules which increase the rate of combustion. The other important factor is the more water in the air/fuel mixture, the lower the charge temps are as they reach the cylinder, this way we can add more boost safely to the engine without causing it to over heat.
I asked the Devils Own team of the dangers with the water/meth mix running out, they said it all depends on the software map, the timing and the boost levels of the engine. The higher the engine is pushed beyond the normal boost levels, the more the air/fuel mixture needs cooling.
More risk of overheating is applied in the absence of the required water/meth mixture, when present it will help to keep temps under control. Some people rely solely on the engine’s sensors to detect when the charge temps are too high, in which case the engine will normally reduce the timing back as a safety measure, this mechanism should not be relied on alone though.
We bought the standard kit which includes the pump, hosing, controller and a single nozzle injector. In the end we decided to opt for an additional nozzle, which would likely improve the flow of the mixture into the system. The two nozzles are fitted in different locations, one just after the intercooler and one just before the inlet manifold.
I would always advise speaking with the Devils Own team before installing a new kit, these guys are the experts and will advise on the best location for the nozzles, depending on your particular requirements, engine and setup.
Our first task was to empty the screen washer tank:
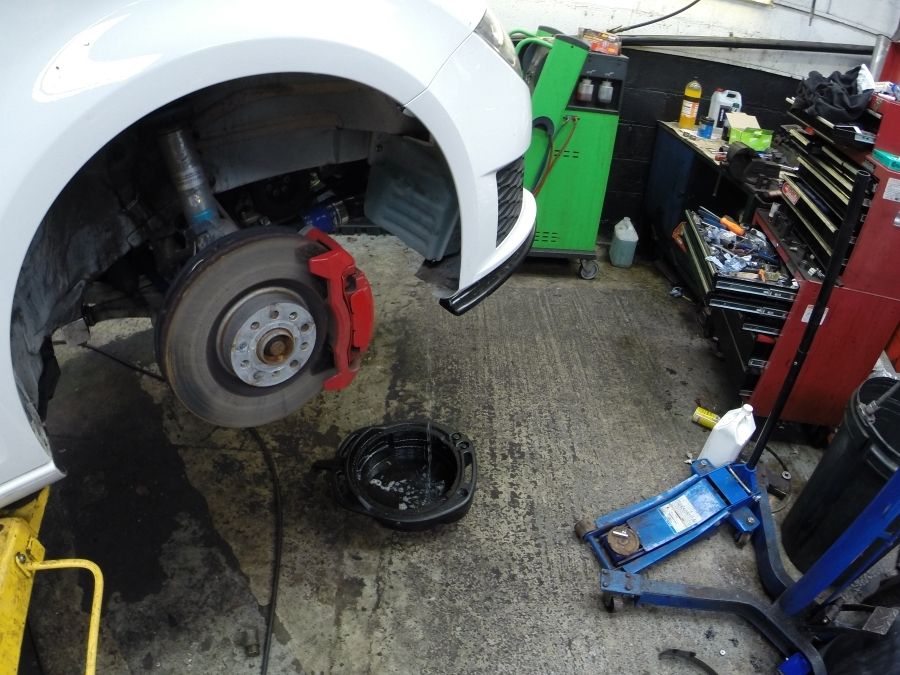
The bung was installed at the bottom of the tank (for obvious reasons!)
Removing it from the Cupra was a pain in the **** but we soon got it free from the car. Some people prefer to have a separate unit installed in the boot, but we preferred not to do this as it would have required a lot more tubing and cabling for the pump, also the longer the distance between the tank and the pump, the more likely you are to get some air gaps in the fluid.
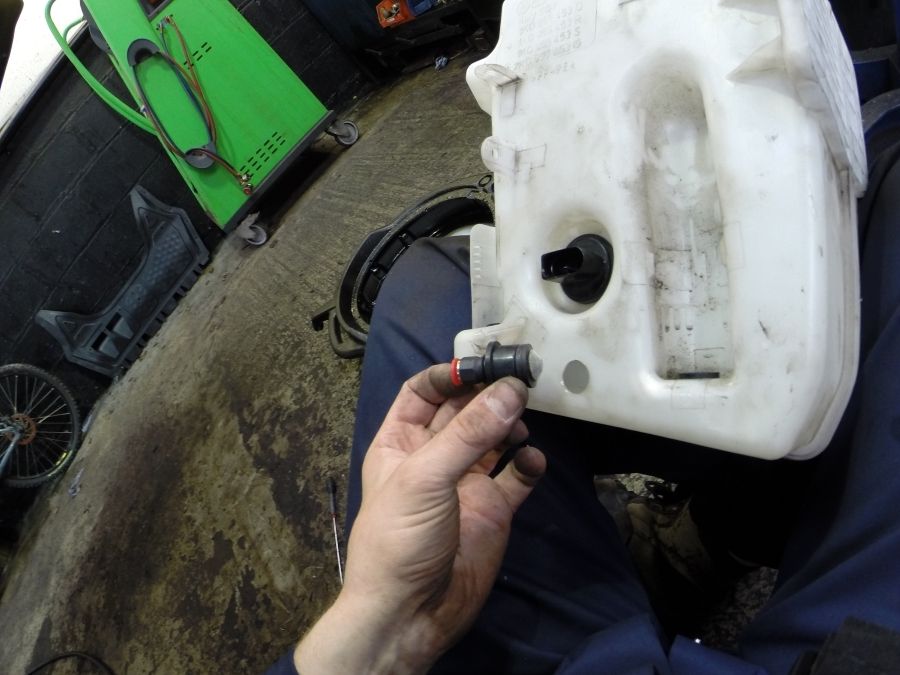
The bung had to be pushed through the top opening, in order to get it down inside to the bottom. Don’t use a spanner to tighten the nut otherwise you’ll simply break it! (I did actually break mine as they’re only meant to be finger tight so I had to order a new one! rats!
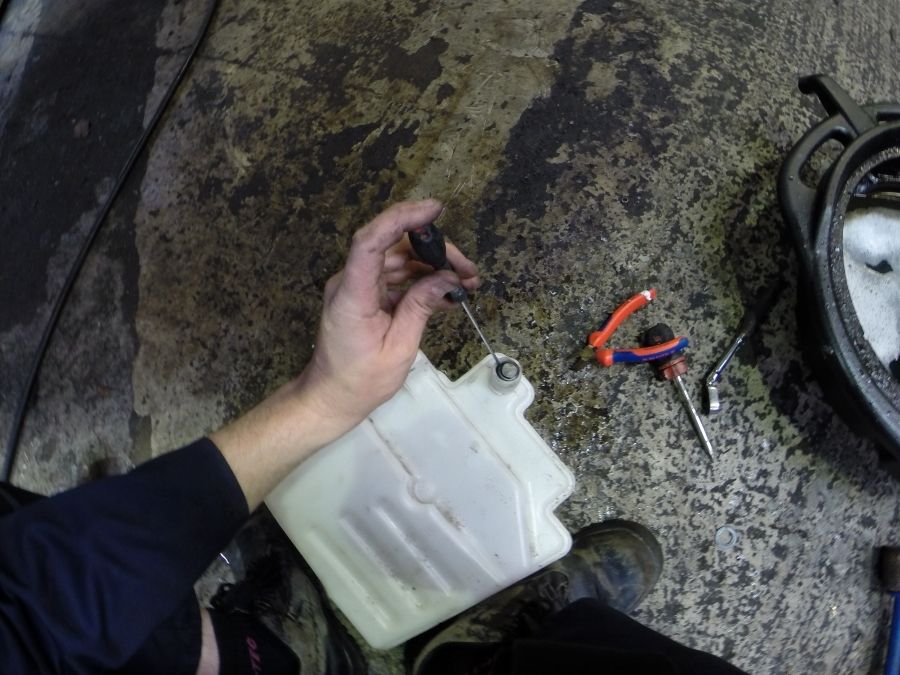
Washer tank re-installed:
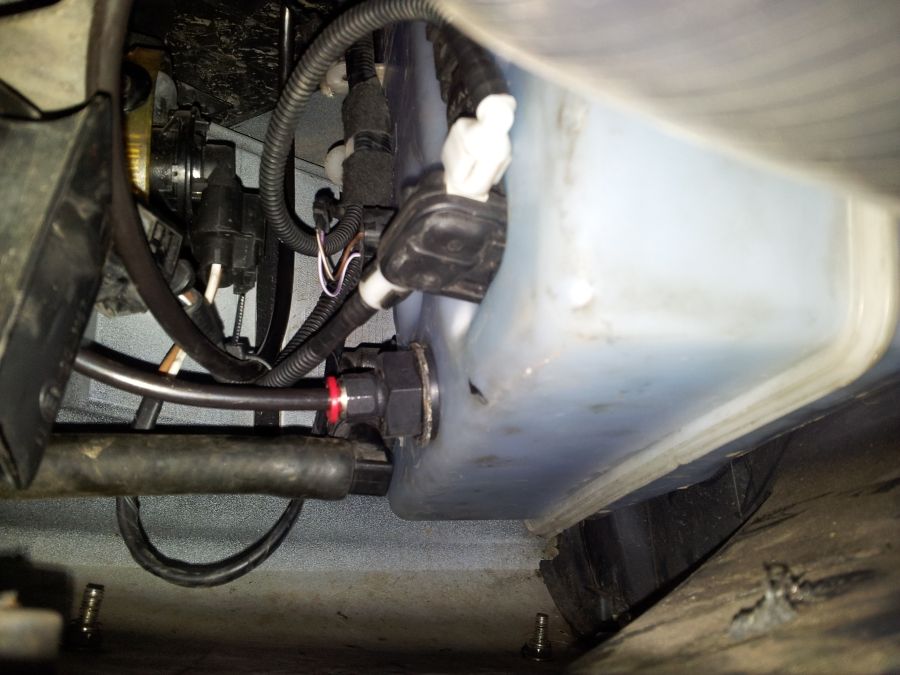
Installation of the lower jet nozzle, installed just after the intercooler:
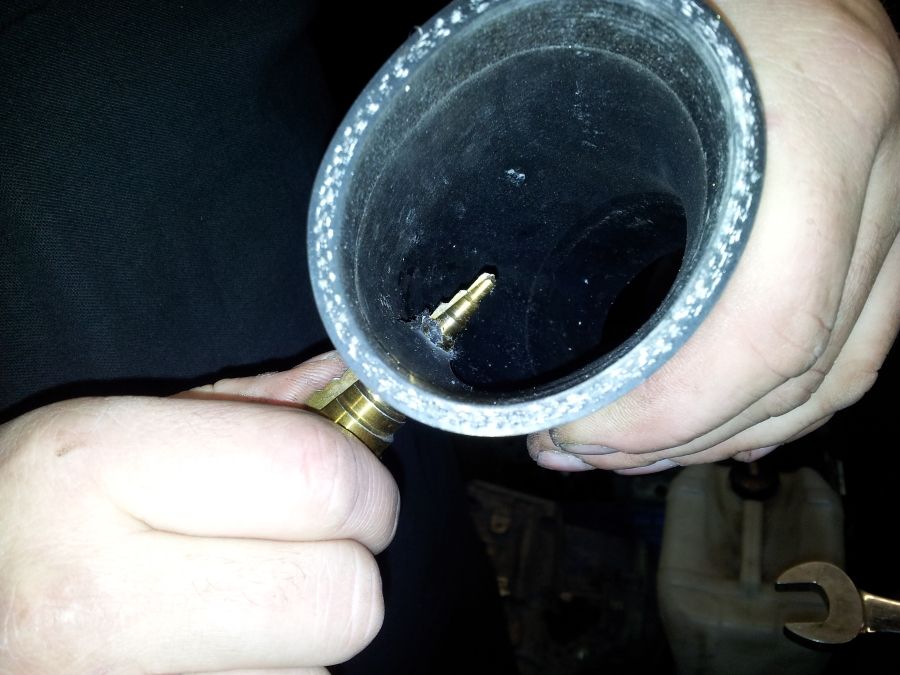
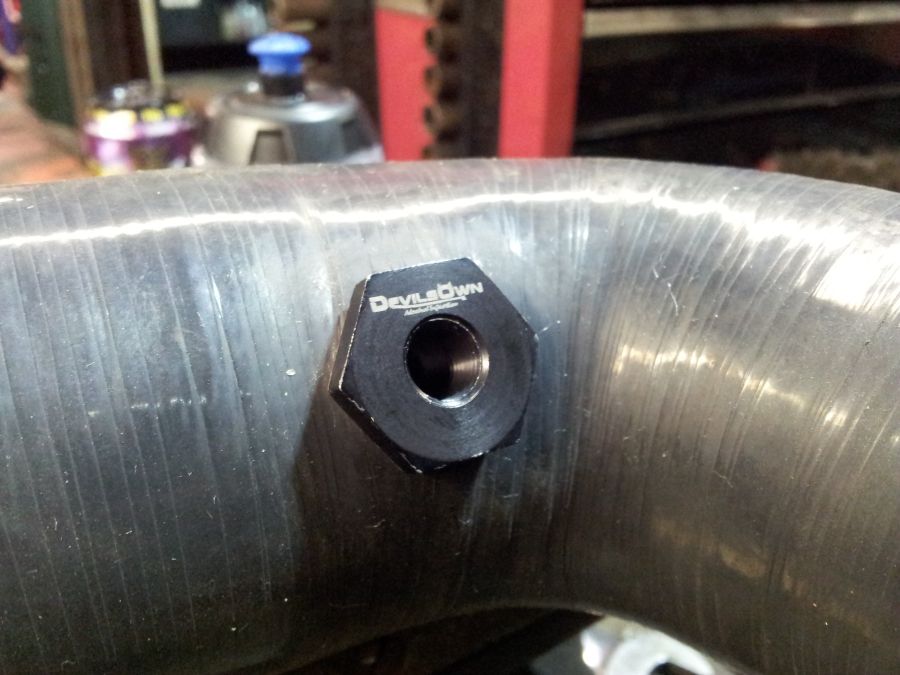
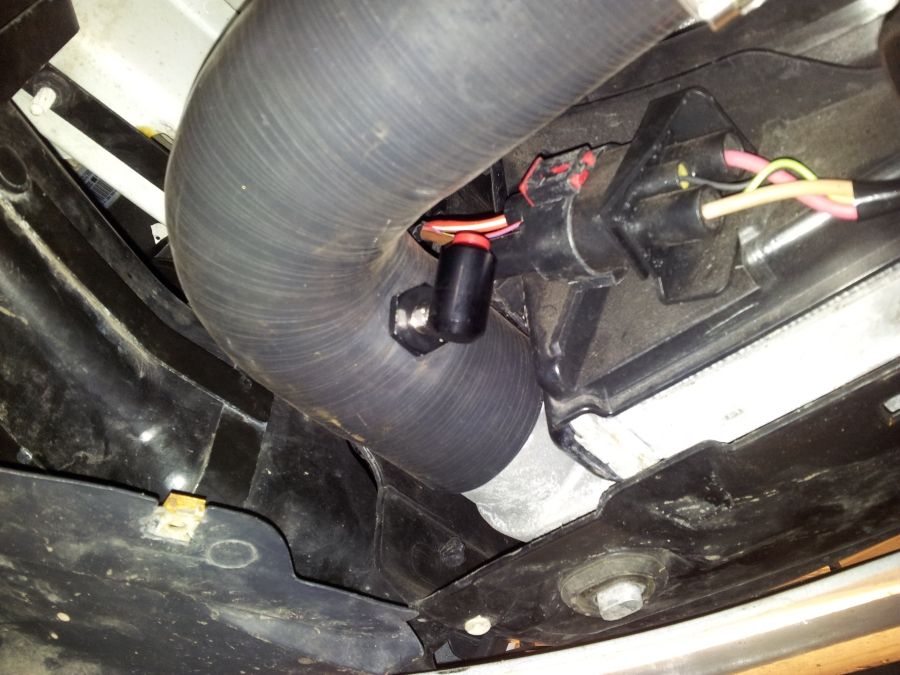
A tee piece shaped connector is used to split the flow of the fluid, the trick is to keep the length of tube to a bare minimum. The two nozzles also have different flow rates, with the faster flow rated unit being first in line i.e. the main portion of cooling is done just after the intercooler. The secondary optional nozzle is fitted just before the inlet manifold:
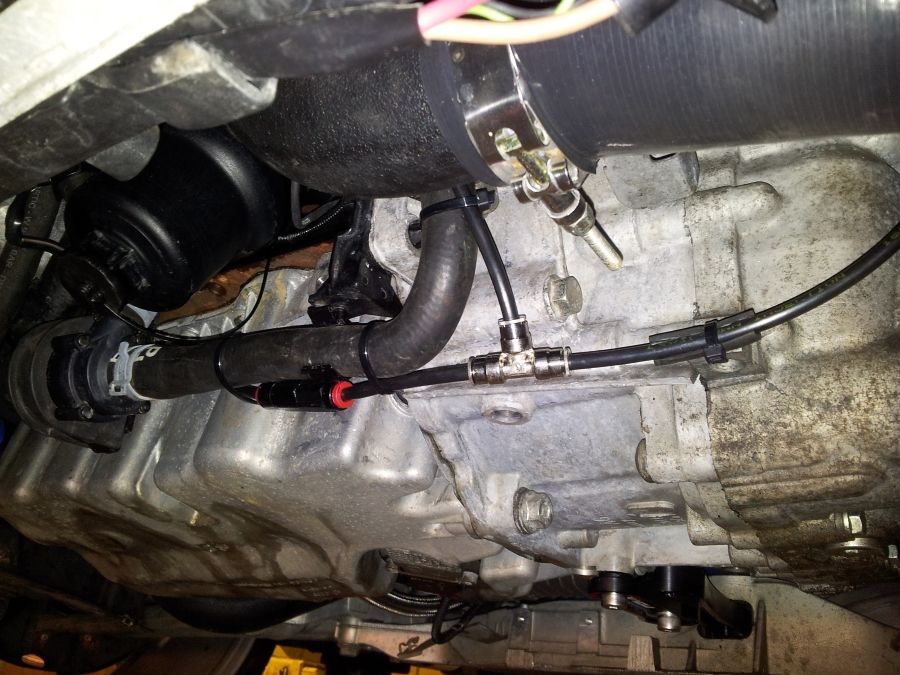
There wasn’t much space in the engine bay to install the pump, we tried fitting it behind the wheel arch but there wasn’t enough room. We made an aluminium plate which we fixed to the side of the chassis (as shown in the picture below) We then mounted fixtures for the pump, touching up the paintwork where we had drilled the chassis:
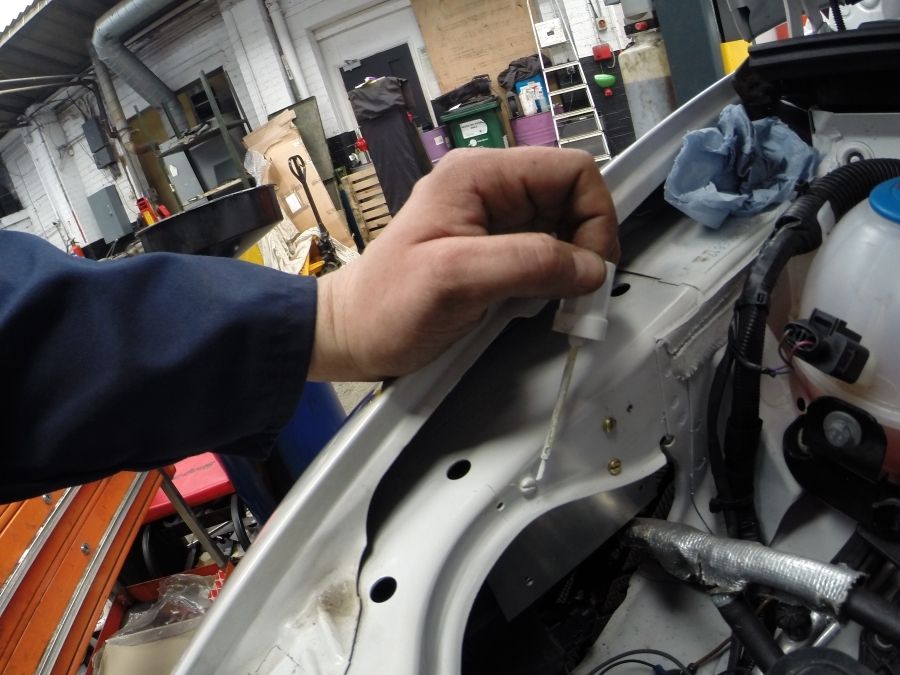
Pump installed into position… success!
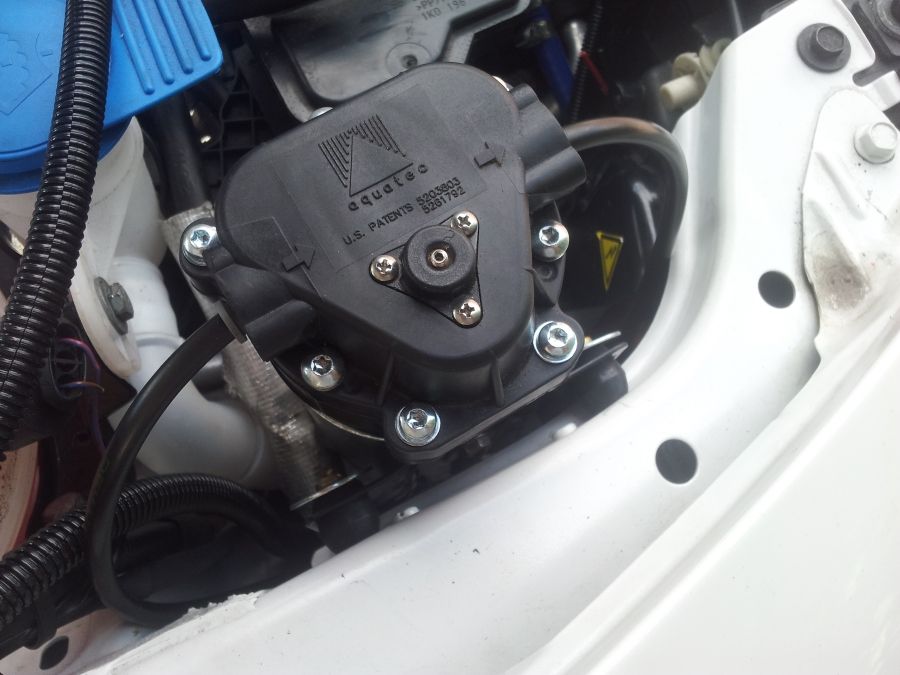
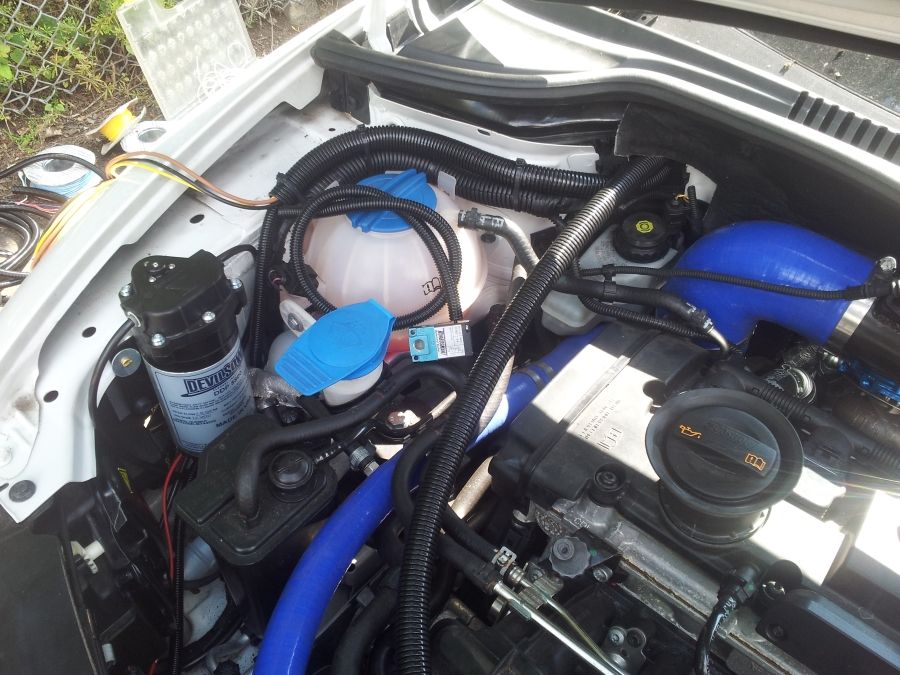
Stage 4… The Big Build – Engine Components
We bought quite a lot of the kit from our suppliers who for some, were overseas. Main components such as the GTX3076R Turbo upgrade came from our friends from ATP Turbo. A custom machined cylinder head, inlet manifold and other goodies were procured through Greg at USP Motorsports from the US.
The main reasons behind our route to market was due to the availability of the kit at the time, little did we know of the delays that were on the horizon, but this was of no fault from these two suppliers, both of whom provided a good level of service, help and support throughout the build.
We soon cracked on with removing some of the engine, first taking out the old cylinder head:
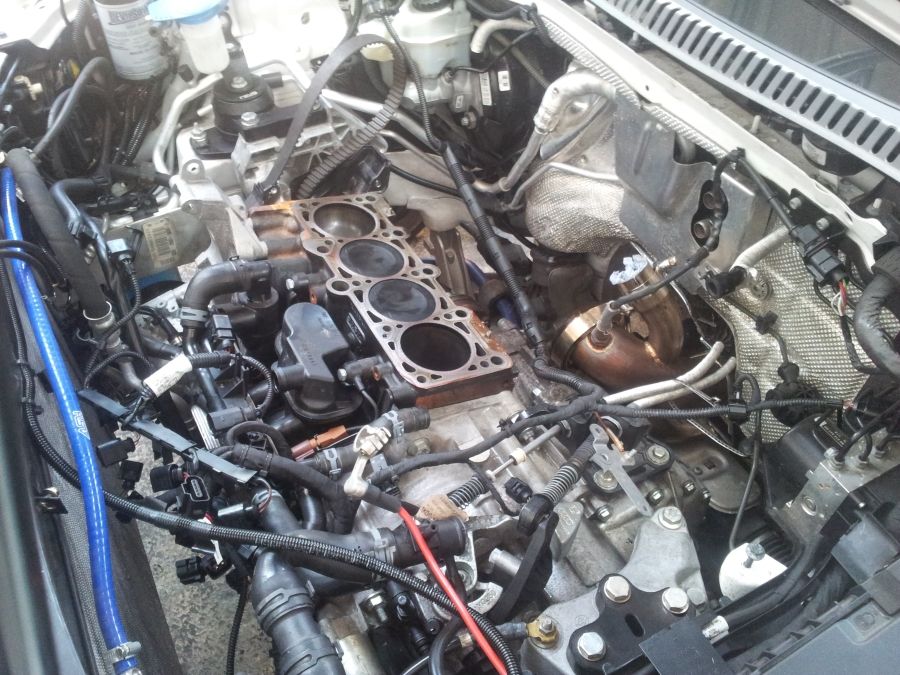
We then removed the sump tray and other components underneath so we could get to the pistons, cylinders and crank:
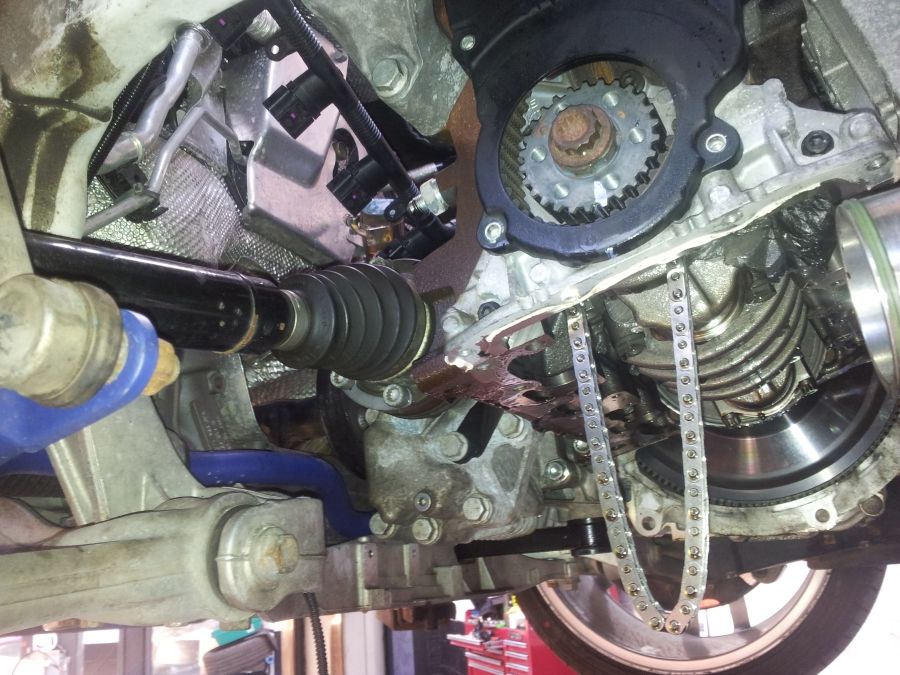
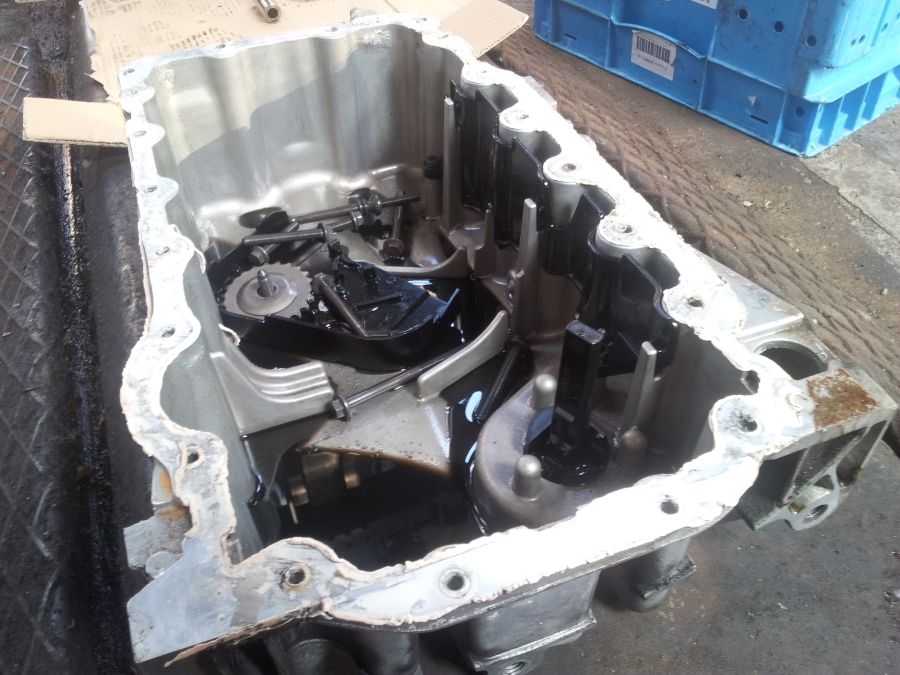
The last 8 months had been a real emotional rollercoaster. As with a lot of big projects, we faced a number of challenges, which at times really did test the patience of our team. But I’m pleased to report that all is now resolved and we have made some excellent progress with the build.
To date, the biggest issue of all things were the pistons. We had previously installed Wossner forged units during our last re-build when we went to REVO Stage 3. At the time we did not envisage fitting high lift cams, but then our plans for Stage 4 soon escalated. We soon realised its potential with more power!
We ordered Stage 3 Cams from CatCams which took some weeks to arrive as they were made specially to order.
When fitting high lift cams, one has to ensure the pistons have the correct clearances between the valves and the piston head. Naturally, higher lift cams will push the valves further into the cylinder as the engine turns over (from this we are able add more air and fuel into the cylinder for increased combustion i.e better performance)
The diagram below is indicative of a standard overhead cam valve assembly, the key item for consideration is the piston itself, which in the diagram below you will see has a flat face on the crown without the required pockets. When installing higher lift cams, we have to provide more clearance in the top of the piston head, to reduce the likelihood of collision.
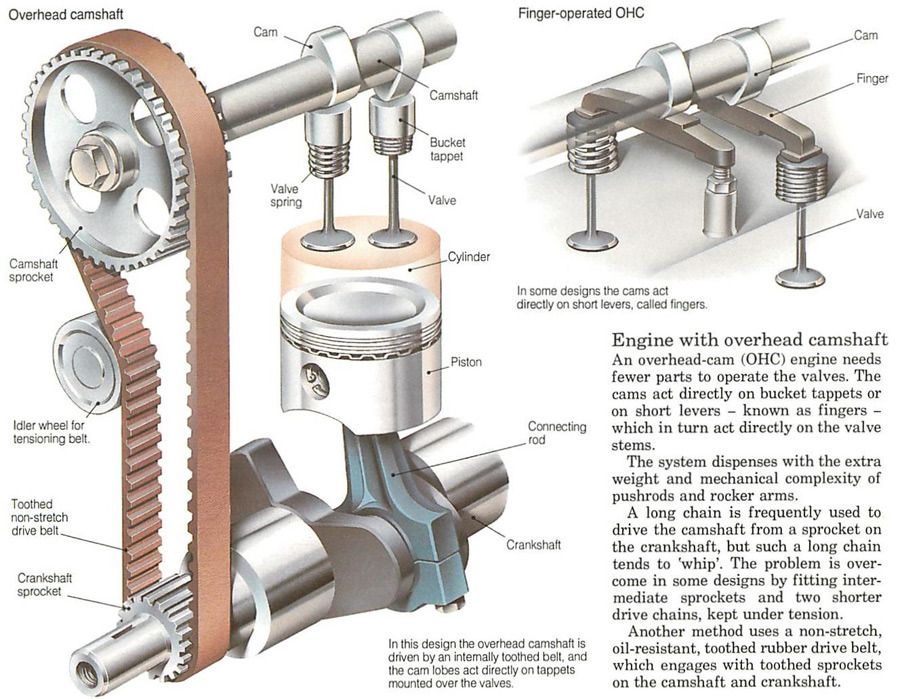
The Wossner pistions as standard do not have the required pockets in the crown to facilitate this clearance, this was a real shame given we had only done around 500 miles with the current units. So we were now faced with two options:
Option 1: Re-machine the Wossner pistons which would have cost more than they were worth.
Option 2: Buy a new set of pistons with deep enough pockets pre-made.
Wossner do actually provide custom pistons, but this was going to be a costly exercise. Understandably they put a certain number of caveats in place to ensure no liability is taken for any issues with their fitment, due to incorrect data given at the time of order. Wossner required some technical details from us including measurements of which we simply didn’t have available, and would have taken some time and resources to provide them. If we’d taken such measurements and got any of the angles wrong by a mere degree, then the pistons would have been fit for nothing. Although we could have pressed on and taken the risk, we felt it was a safer option to leave the calculations to one of our distributors who we’re the experts in this field.
Given the time frames of the project, we decided to buy a new set of pistons through a third party who were able to provide an alternative solution, a custom machined set provided by “Manufacturer X”
On the face of it, buying a new set of pistons was deemed the most appropriate solution at the time, given that the suppliers already had the relevant data required, which could be passed on to Manufacturer X.
So we processed the order, some weeks later the pistons arrived and we got straight onto fitting them, but there was a problem…
Within each of the four cylinders, the TFSi engine has oil jets that sit underneath the piston body, which are designed to squirt oil up underneath, this helps to keep the system cool during combustion. The original Wossner units, as with a lot of pistons come provided with a notch in the skirt wall, which gives the necessary clearance for the oil jets to sit underneath.
We installed the units from Manufacturer X and soon realised we had an issue, the tip of oil jet was positioned directly in line with the inner skirt wall of the piston body and therefore obstructed it from lowering any further into the cylinder. We tested this by manually turning the engine over with a spanner on the side of the crank, and could see we had a problem with its collision. This meant the only way to clear the inner skirt wall would have been to bend/re-manipulate the vertical stem of the oil jet, or rotate it round from the base.
We questioned Manufacturer X about this in which we provided the drawing below asking for some technical feedback over the issue.
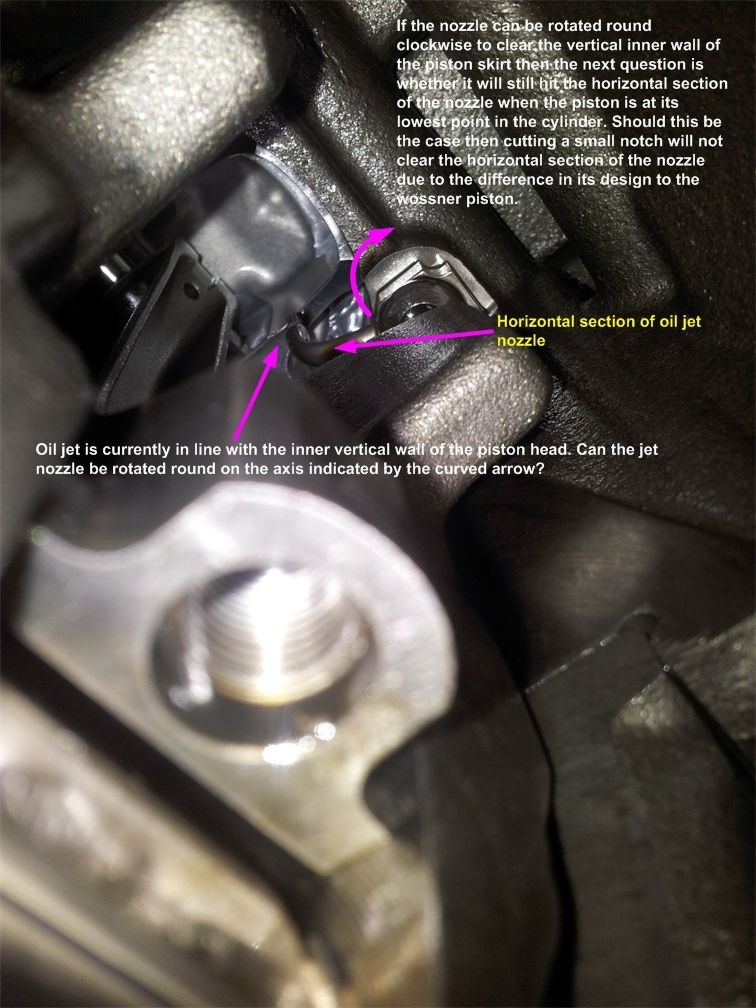
Continue to part 3...
The picture below shows some nylon copex tubing that was installed between the main cabin and the engine. I had to make a couple of Y shaped junction points for where certain cables were to be routed to the different parts of the engine bay. A small trick was to cut a slot from the secondary tube and slide it over the primary piece before taping it up:
Perfect!
Milltek had very kindly installed the UEGO sensor bung for us for the AFR gauge, pre-welded into their custom exhaust system so the installation was fairly simple. A more permanent and professional fixture than using the optional fixing bracket from the AEM Kit:
Some wiring in progress in the cabin shown below, you can see the installation of the two gauges were starting to take shape. The AFR gauge was installed in place of the drivers side air vent. Some people aren’t too keen on this approach but for me it wasn’t an issue. There was no permanent damage caused by doing this, as we simply removed the original air vent assembly and put the new holder in its place. I rarely use the front vents for air circulation anyway, as it’s more important for me to keep the windscreen clear of fog and condensation.
There are very few options for the Leon when it comes to fitting additional gauges and equipment. For the E Boost2 controller, we bought a pillar pod from Nomad Racing which is made of a fibreglass construction and then finished in black. The unit may look a little flimsy in the photo, but is actually a really good product and looks really smart once installed. We also blacked out the little triangular window on the drivers side with sticky black plastic from the DIY store, in order to conceal the view through from behind:
Water Methanol Injection
In internal combustion engines, water injection is also known as anti-detonant injection, the spraying of water into the incoming air or fuel-air mixture, or directly into the cylinder, in order to cool certain parts of the induction system where “hot points” could produce premature ignition.
It was used historically to increase the power output of military aviation engines for short durations such as dogfights or takeoff, however it is also used in motorsport and notably in drag racing. Many water injection systems, and in our case uses a mixture of water and alcohol (often close to a 50/50 mix), with trace amounts of water-soluble oil. The water provides the primary cooling effect due to its great density and high heat absorption properties. The alcohol is combustible, and also serves as an antifreeze for the water. We installed a meth injection system supplied from Devils Own. These guys sell their products all over the US but have a UK store as well.
When consulting the Devils Own team, they recommended using the DVC/30 Kit which is a progressive system. The progressive system provides more control over when the methanol mix is injected into the air/fuel mixture, also the volume of the fluid can be adjusted and progressively applied further up the rev range.
If you ever wondered why your car goes like the clappers in the rain, the water vapour holds more oxygen molecules which increase the rate of combustion. The other important factor is the more water in the air/fuel mixture, the lower the charge temps are as they reach the cylinder, this way we can add more boost safely to the engine without causing it to over heat.
I asked the Devils Own team of the dangers with the water/meth mix running out, they said it all depends on the software map, the timing and the boost levels of the engine. The higher the engine is pushed beyond the normal boost levels, the more the air/fuel mixture needs cooling.
More risk of overheating is applied in the absence of the required water/meth mixture, when present it will help to keep temps under control. Some people rely solely on the engine’s sensors to detect when the charge temps are too high, in which case the engine will normally reduce the timing back as a safety measure, this mechanism should not be relied on alone though.
We bought the standard kit which includes the pump, hosing, controller and a single nozzle injector. In the end we decided to opt for an additional nozzle, which would likely improve the flow of the mixture into the system. The two nozzles are fitted in different locations, one just after the intercooler and one just before the inlet manifold.
I would always advise speaking with the Devils Own team before installing a new kit, these guys are the experts and will advise on the best location for the nozzles, depending on your particular requirements, engine and setup.
Our first task was to empty the screen washer tank:
The bung was installed at the bottom of the tank (for obvious reasons!)
Removing it from the Cupra was a pain in the **** but we soon got it free from the car. Some people prefer to have a separate unit installed in the boot, but we preferred not to do this as it would have required a lot more tubing and cabling for the pump, also the longer the distance between the tank and the pump, the more likely you are to get some air gaps in the fluid.
The bung had to be pushed through the top opening, in order to get it down inside to the bottom. Don’t use a spanner to tighten the nut otherwise you’ll simply break it! (I did actually break mine as they’re only meant to be finger tight so I had to order a new one! rats!
Washer tank re-installed:
Installation of the lower jet nozzle, installed just after the intercooler:
A tee piece shaped connector is used to split the flow of the fluid, the trick is to keep the length of tube to a bare minimum. The two nozzles also have different flow rates, with the faster flow rated unit being first in line i.e. the main portion of cooling is done just after the intercooler. The secondary optional nozzle is fitted just before the inlet manifold:
There wasn’t much space in the engine bay to install the pump, we tried fitting it behind the wheel arch but there wasn’t enough room. We made an aluminium plate which we fixed to the side of the chassis (as shown in the picture below) We then mounted fixtures for the pump, touching up the paintwork where we had drilled the chassis:
Pump installed into position… success!
Stage 4… The Big Build – Engine Components
We bought quite a lot of the kit from our suppliers who for some, were overseas. Main components such as the GTX3076R Turbo upgrade came from our friends from ATP Turbo. A custom machined cylinder head, inlet manifold and other goodies were procured through Greg at USP Motorsports from the US.
The main reasons behind our route to market was due to the availability of the kit at the time, little did we know of the delays that were on the horizon, but this was of no fault from these two suppliers, both of whom provided a good level of service, help and support throughout the build.
We soon cracked on with removing some of the engine, first taking out the old cylinder head:
We then removed the sump tray and other components underneath so we could get to the pistons, cylinders and crank:
The last 8 months had been a real emotional rollercoaster. As with a lot of big projects, we faced a number of challenges, which at times really did test the patience of our team. But I’m pleased to report that all is now resolved and we have made some excellent progress with the build.
To date, the biggest issue of all things were the pistons. We had previously installed Wossner forged units during our last re-build when we went to REVO Stage 3. At the time we did not envisage fitting high lift cams, but then our plans for Stage 4 soon escalated. We soon realised its potential with more power!
We ordered Stage 3 Cams from CatCams which took some weeks to arrive as they were made specially to order.
When fitting high lift cams, one has to ensure the pistons have the correct clearances between the valves and the piston head. Naturally, higher lift cams will push the valves further into the cylinder as the engine turns over (from this we are able add more air and fuel into the cylinder for increased combustion i.e better performance)
The diagram below is indicative of a standard overhead cam valve assembly, the key item for consideration is the piston itself, which in the diagram below you will see has a flat face on the crown without the required pockets. When installing higher lift cams, we have to provide more clearance in the top of the piston head, to reduce the likelihood of collision.
The Wossner pistions as standard do not have the required pockets in the crown to facilitate this clearance, this was a real shame given we had only done around 500 miles with the current units. So we were now faced with two options:
Option 1: Re-machine the Wossner pistons which would have cost more than they were worth.
Option 2: Buy a new set of pistons with deep enough pockets pre-made.
Wossner do actually provide custom pistons, but this was going to be a costly exercise. Understandably they put a certain number of caveats in place to ensure no liability is taken for any issues with their fitment, due to incorrect data given at the time of order. Wossner required some technical details from us including measurements of which we simply didn’t have available, and would have taken some time and resources to provide them. If we’d taken such measurements and got any of the angles wrong by a mere degree, then the pistons would have been fit for nothing. Although we could have pressed on and taken the risk, we felt it was a safer option to leave the calculations to one of our distributors who we’re the experts in this field.
Given the time frames of the project, we decided to buy a new set of pistons through a third party who were able to provide an alternative solution, a custom machined set provided by “Manufacturer X”
On the face of it, buying a new set of pistons was deemed the most appropriate solution at the time, given that the suppliers already had the relevant data required, which could be passed on to Manufacturer X.
So we processed the order, some weeks later the pistons arrived and we got straight onto fitting them, but there was a problem…
Within each of the four cylinders, the TFSi engine has oil jets that sit underneath the piston body, which are designed to squirt oil up underneath, this helps to keep the system cool during combustion. The original Wossner units, as with a lot of pistons come provided with a notch in the skirt wall, which gives the necessary clearance for the oil jets to sit underneath.
We installed the units from Manufacturer X and soon realised we had an issue, the tip of oil jet was positioned directly in line with the inner skirt wall of the piston body and therefore obstructed it from lowering any further into the cylinder. We tested this by manually turning the engine over with a spanner on the side of the crank, and could see we had a problem with its collision. This meant the only way to clear the inner skirt wall would have been to bend/re-manipulate the vertical stem of the oil jet, or rotate it round from the base.
We questioned Manufacturer X about this in which we provided the drawing below asking for some technical feedback over the issue.
Continue to part 3...
Similar threads
- Replies
- 4
- Views
- 2K
