
-
Hey Guest👍👎 We're looking for reviews of your local CUPRA or SEAT Dealership - it's quick and easy to do: Leave a review now
Quattro Cupra R Mk2 Project
- Thread starter Gagwithgaffer
- Start date
You are using an out of date browser. It may not display this or other websites correctly.
You should upgrade or use an alternative browser.
You should upgrade or use an alternative browser.
Project Update

Hi Everyone… We’re Back!
Well it’s been a busy couple of months here at Autotechnica
Andy, Ben and the team have been working very hard on Project Cupra and we’ve made some great progress along the way. During the last update we got to the stage of cutting out the boot floor plan to make way for the Audi S3 Rear Axle. This was a scary moment of no return but it all went well.
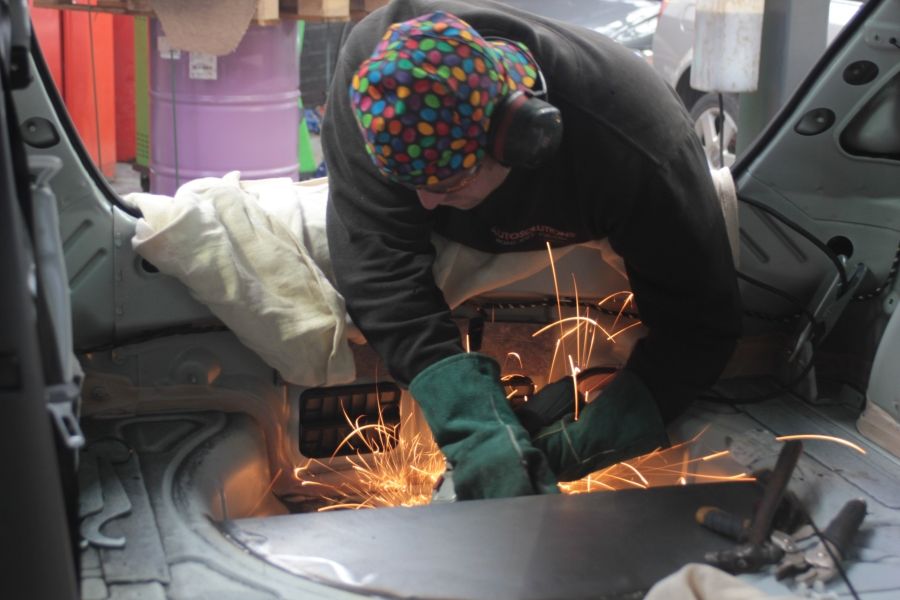
The welding and cutting works have been done by Andy’s mate Dave from Auto Solutions. Dave is an experienced welder who did an excellent job fabricating up a new box section for the boot floor. This guy is a real character and made us laugh when he did the first cut, he turned towards me with a rather large angle grinder in his hand and asked… are you nervous lad? Err… and before I had a chance to reply, a large whizzing sound erupted as he started cutting! Lol
So following on from the last update, the next job we looked at was to take the gearbox out, this had to be matched up with the front transfer box that we got from the R32 donor car. This was easier said than done and took a little while to sort but we got there in the end.
As Cupra Kung Fu had only done a very low mileage then naturally we were reluctant to change the gearbox for one off an S3/R32. It’s also unlikely we would have ever found one in the same condition without paying top dollar, so we thought we’d give it a go with the existing unit.
Ben started to strip down the box taken off the Leon. It’s amazing how many cogs; nuts and bolts there are in these things! A big boys Meccano Set!
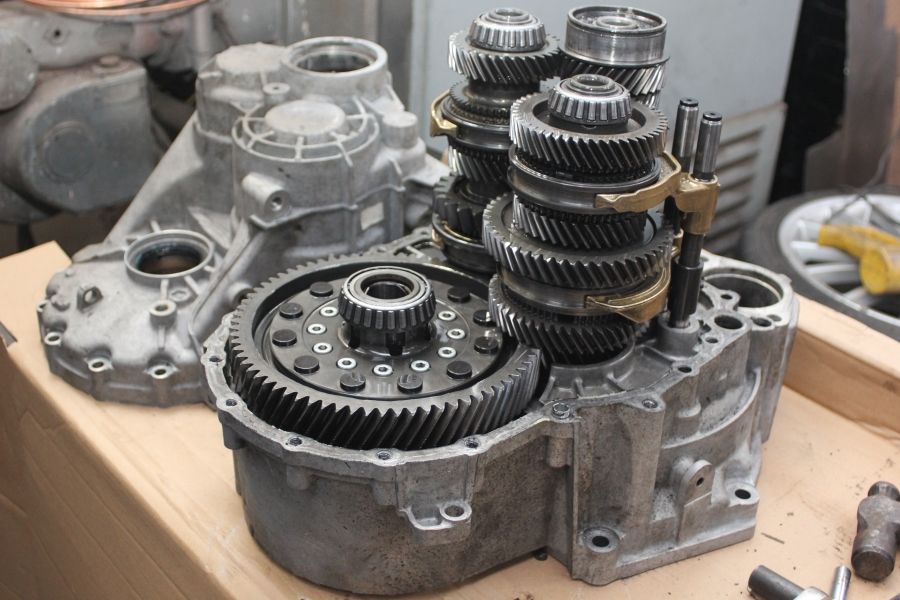
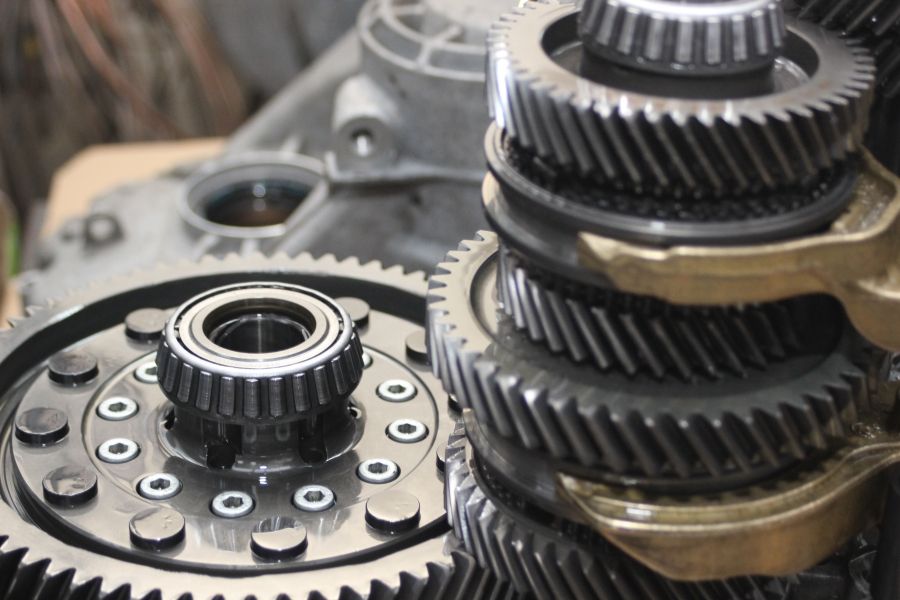
Photo below shows the engine bay once the gearbox was removed; exposing the Loba clutch and single mass flywheel that we installed just a few months back:
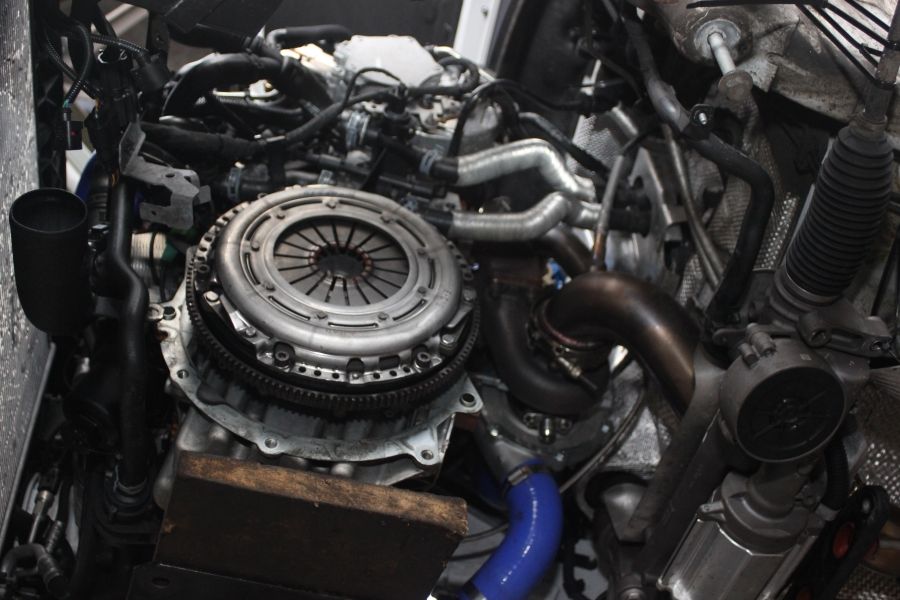
Photo below shows the GT3071R Turbo after we had removed the gearbox:

We recently bought a Quaife limited slip differential of which we had fitted just before XMAS when we went to REVO Stage 3. Most of the high performance cars on the road (or at least FWD cars) will be fitted with some sort of a limited-slip diff (LSD) and they are installed for a good reason.
Without an LSD, if one wheel loses traction and starts to spin, all the power is transferred to that wheel. This not only limits your acceleration, but it also upsets the handling, especially in front-wheel-drive cars, by causing severe on-throttle understeer. Not good. An LSD helps eliminates this.
Depending on its design, either by forcing both wheels to turn at similar speeds regardless of which has grip, or, in the case of the Quaife ATB diff, do the opposite of an open diff and transfer the power to the wheel with the most grip. So while, in theory, an LSD offers an advantage over an open diff, the question is, will it actually make that much of a difference to your car? Will your car be noticeably faster with a diff fitted; faster than if the money was spent on performance engine upgrades?
Well we were pleasantly surprised by Quaife’s engineering and had found a big difference in the car’s performance and road handling. When you go anything beyond 300 horses then you really start to struggle with the traction and will also find the cornering can be a real challenge. One has to realise however that all LSDs are not a complete solution but more a compliment to your handling.
If you thrash the car with big power on a FWD then of course both wheels will start to slip and spin against the tarmac. Having a decent mechanical LSD does however help to prevent this issue by transferring the power to the wheel that has the most traction. Straight line drag races will give the same annoyance, but it is more the cornering at high speeds where it comes into play. The best way to describe the difference between them is being pushed into a corner with little confidence that you’ll come out the other side, but with an LSD it’s a bit like being pulled around the corner with a big rope.
You can instantly feel the difference when an LSD is doing its job. The traction of the wheels crosses over from one wheel to another and the whole process is done in milliseconds backwards and forwards until you find the grip the car needs, or at least until you made it clear out of the bend.
With AWD, the Haldex system transfers power to the rear wheels when the car needs it the most. Having power to all wheels makes a massive difference to the car’s grip on the road, keeping the LSD in the mix will complement the situation giving better control of the front wheels.
It was real shame at the concept that we would lose the use of this fine piece of engineering having only had it for a few months, so we contacted Quaife to see what they could do to help. As it turned out they do in fact manufacture an LSD for the R32 and S3, so we did a little research to see what options there were.
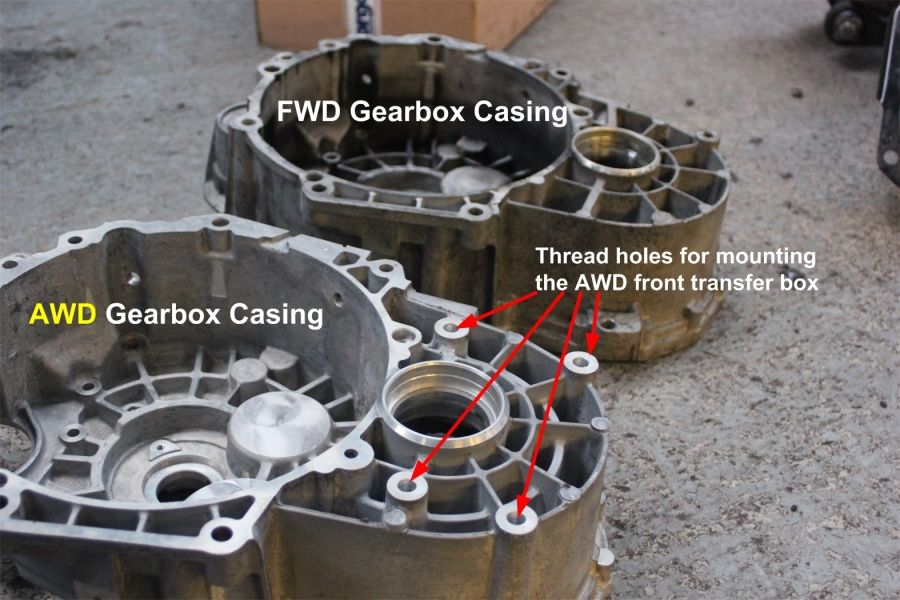
We contacted Dave King from Quaife, one of their technical engineers who advised on a workaround for our project. Basically the gearbox used on the Cupra MK2 and the S3/R32 are of a similar design, but there are subtle changes in the outer casing i.e. the mounting holes that are used when bolting on the front transfer box (the gearing that transfers power to the rear wheels)
In order for the LSD to reach the gearing on the front transfer box, we had to take apart the unit and replace the housing for one with a longer body (model off the AWD system) Dave and his team from Quaife were very helpful and were able to provide us with a new housing. They stripped it off another unit they had on the shelf so were able to send it up to the team at Autotechnica in a matter of days.
The photo below shows the FWD and AWD units:
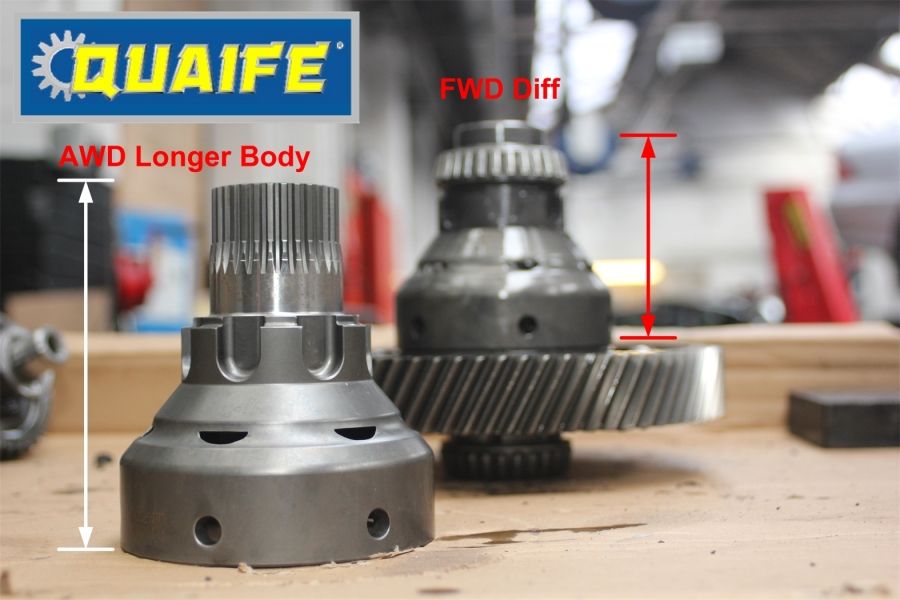
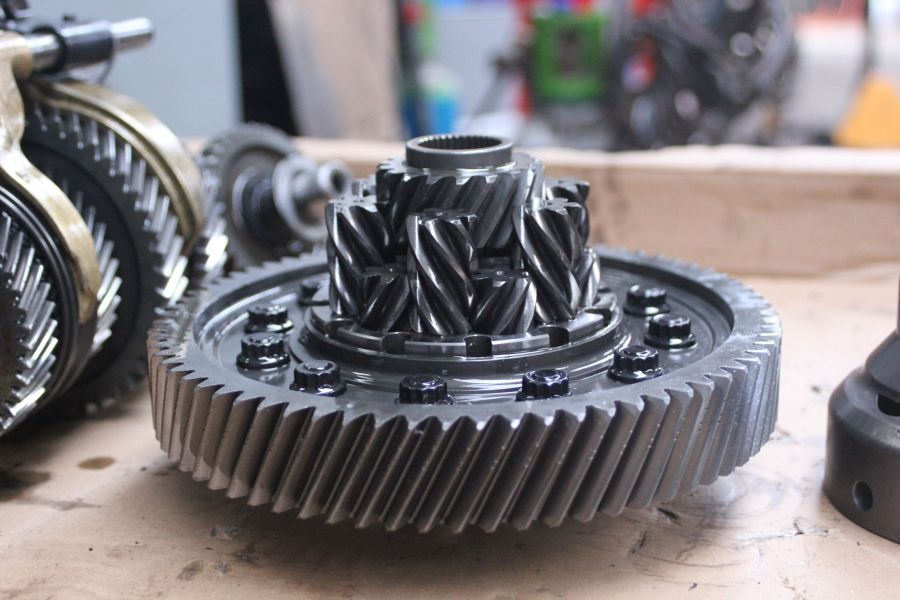
Photo shows the inside of the LSD, the helical gears which transfer the torque bias from one wheel drive link to another. A real piece of engineering!
So we put the two casings side by side and you can see the difference between the old and new. The housing on the right is the old unit and the one of the left is the new one:

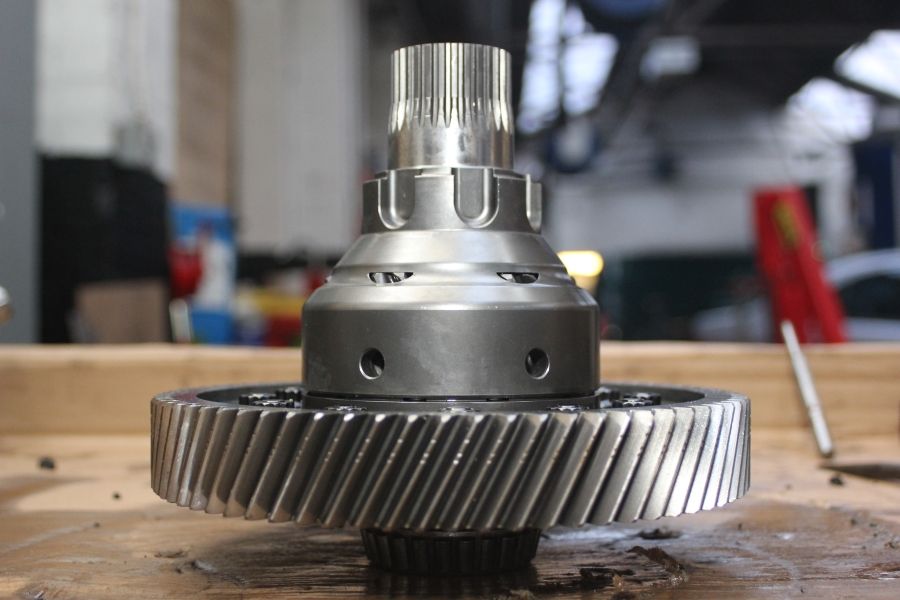
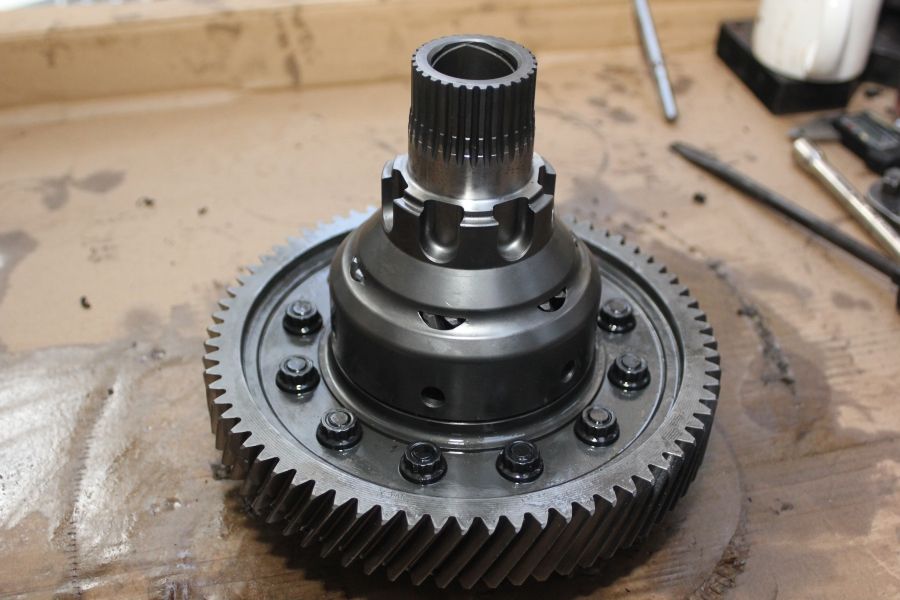
Photo below shows the new housing fitted to the gearing:
Once the new diff was installed then we looked at the re-assembly of the gearbox only to find there were no fixing points on the casing for attaching the front transfer box… rats! So these subtle differences we mentioned earlier are somewhat fundamental to the installation of the AWD running gear!
Well all we had to do was to order a new middle section casing for the S3/R32 which obviously does hold the correct fixing points in all the right places. Most car makers will always skimp on the manufacturing costs where ever possible and therefore will make most of the parts fit as many of their vehicles as possible. The main assembly of the gearbox between the various models all share a lot of the inner workings and therefore replacing the casing alone was all that was required to turn this Cupra gearbox into an AWD version.
Photo below shows the inner side of the two casings, no prizes to guess which one the new unit is! On the inside of the casing we could not see any difference in its construction, essentially they are both the same design:
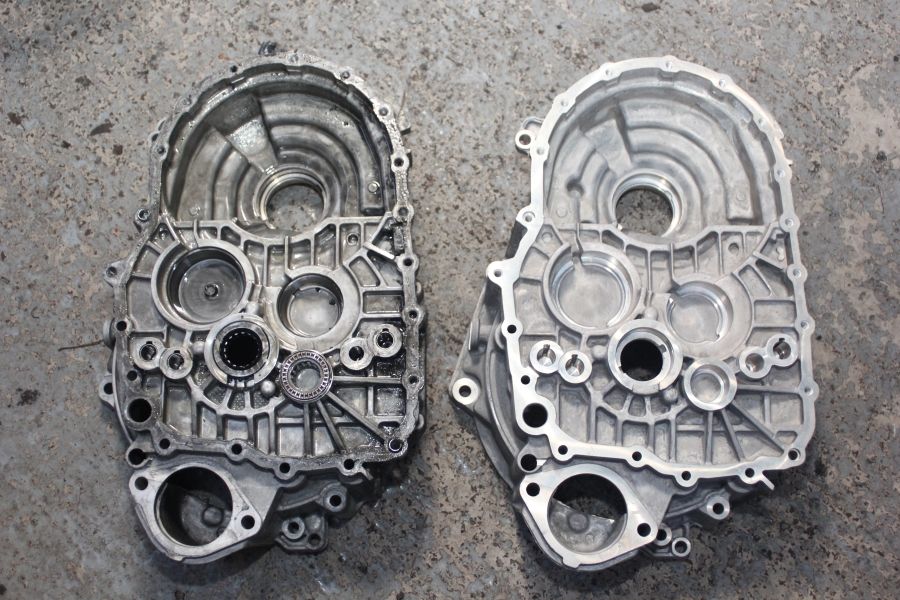
Casing then turned over, spot the difference?
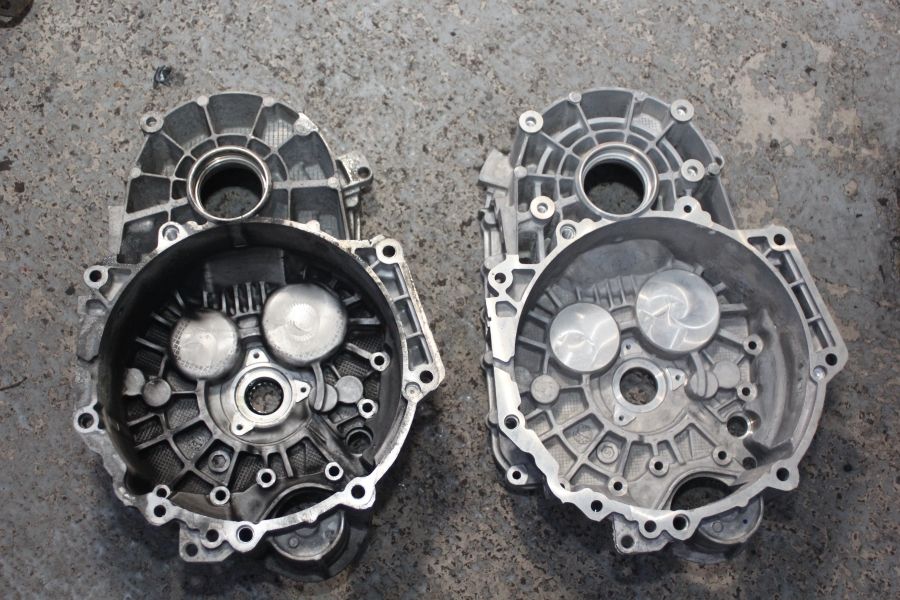
Photo below shows the two units, the newer casing has the mounting holes for the front transfer box:
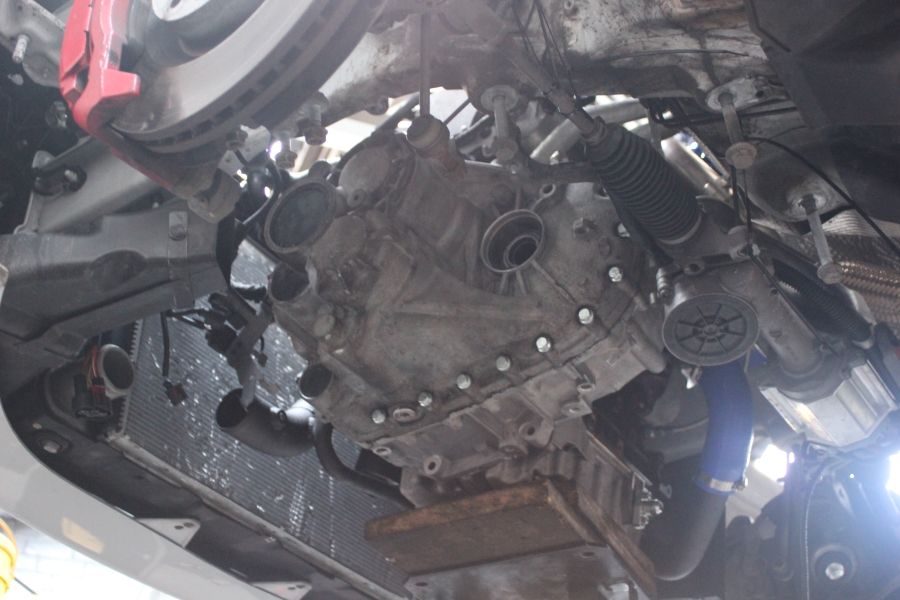
Once we put the gearbox back together again, we were able to install the front transfer box:
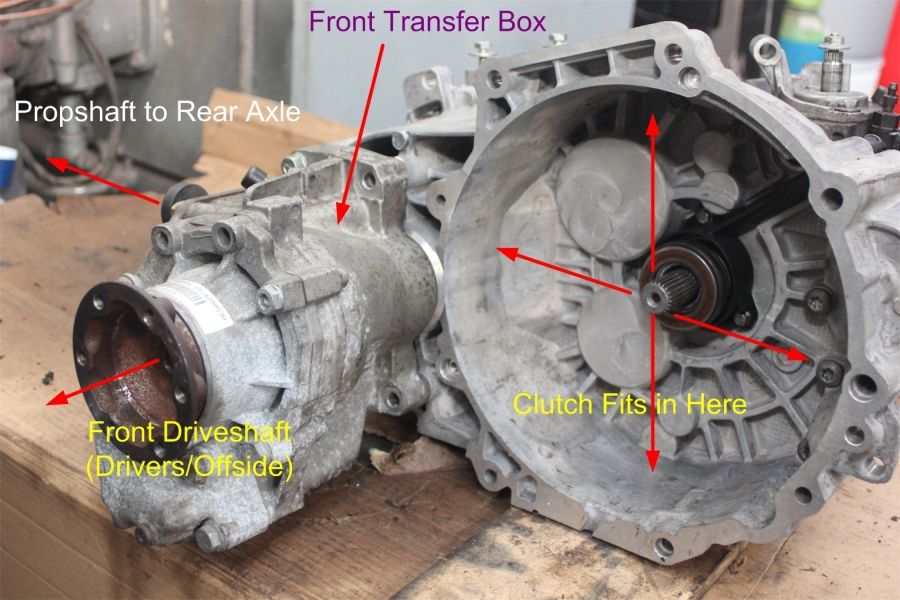
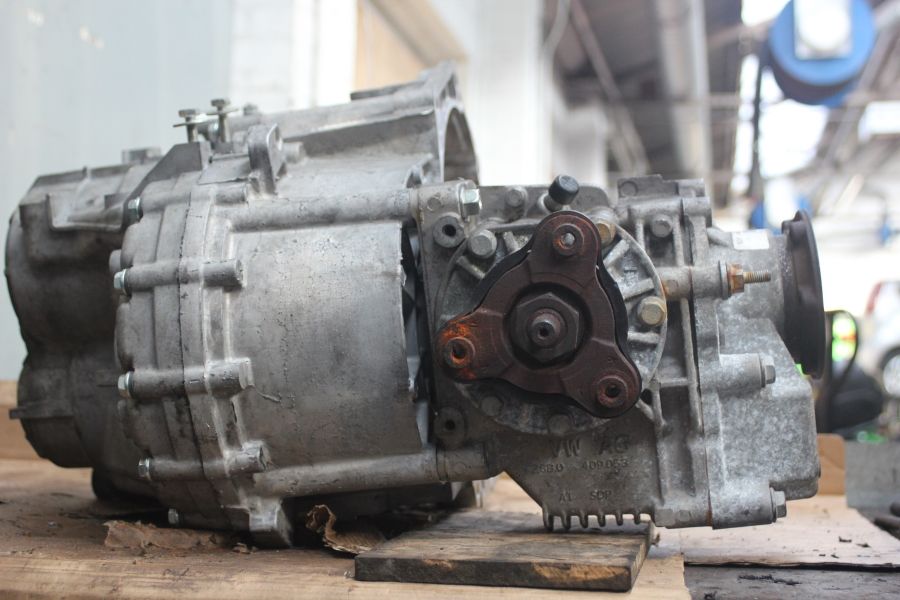
Closer look at the transfer box:
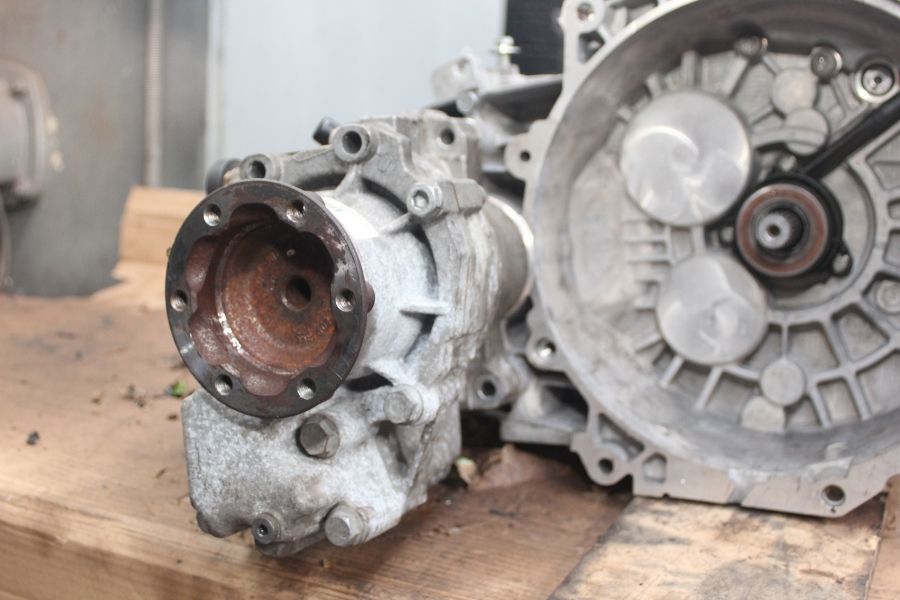
Photo below shows the rear view of the box assembly; the triangular spindle wheel drives the propshaft that sits underneath the tunnel of the chassis to the rear diff.
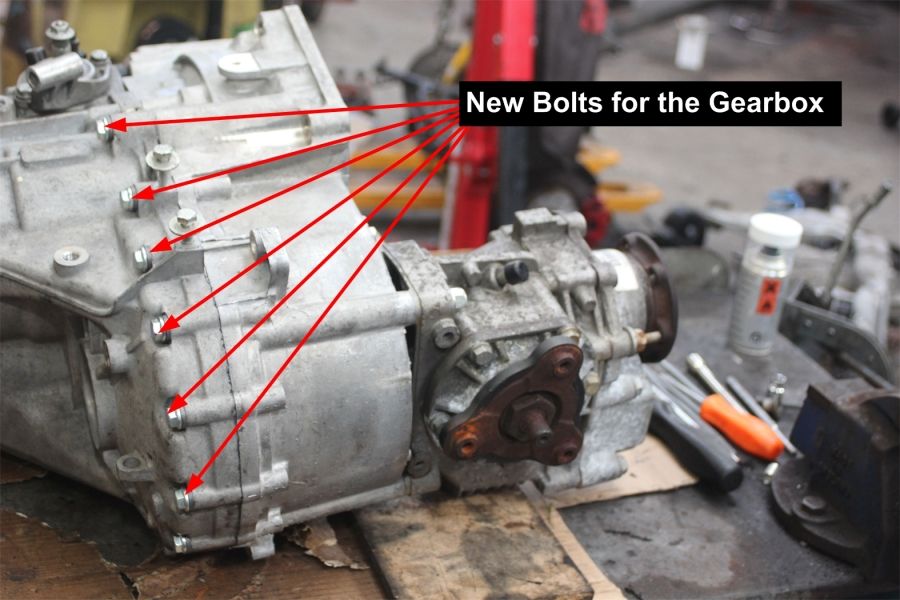
New bolts and fixings were used, advisable when re-building the box assembly:
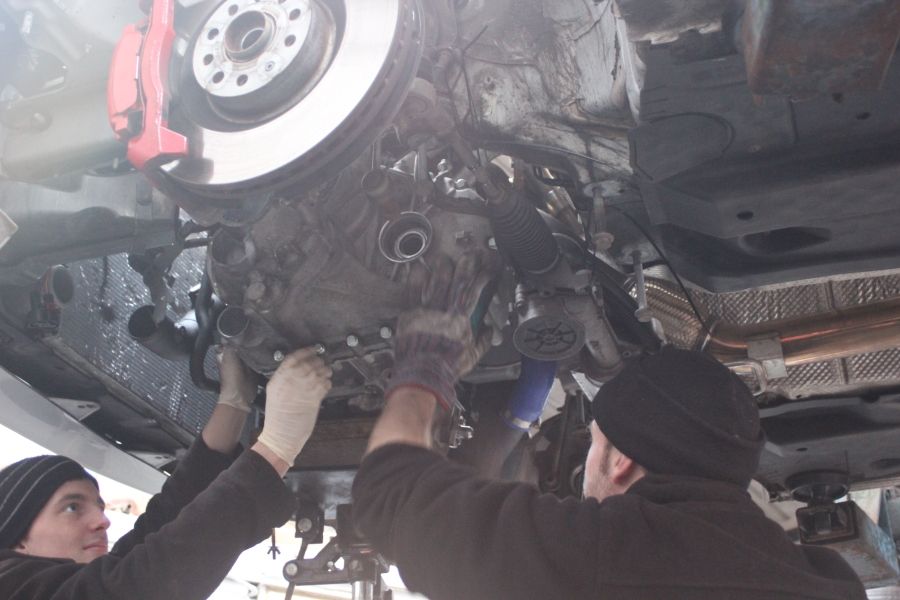
And now for fitting! The hefty lump was raised up on the hydraulic lifter ready to fix into position:
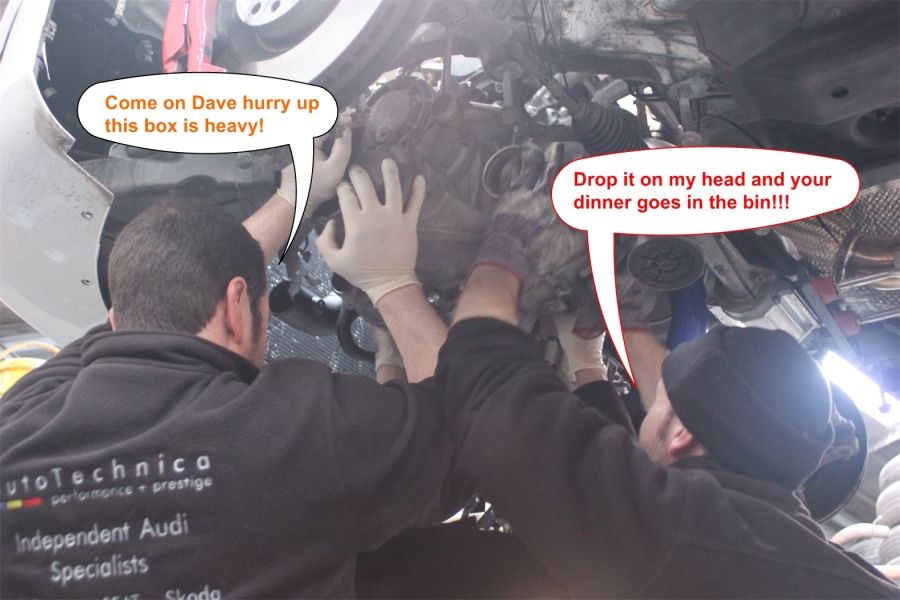
Now now boys!
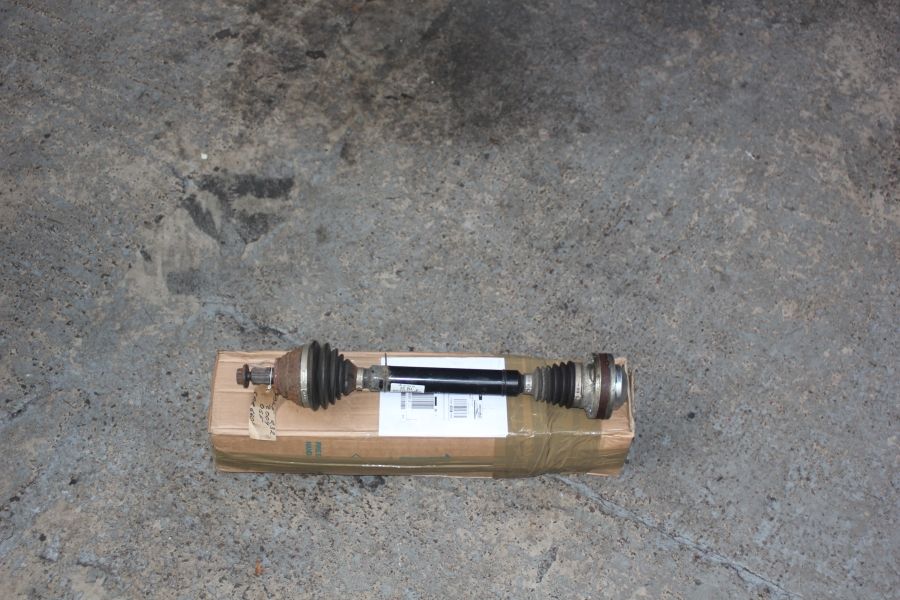
We also had to find a replacement driveshaft for the front offside side wheel. Once we’d fitted the transfer box into position, we realised that Cupra’s driveshaft was going to be too long. We went on the internet searching for a couple of weeks until we found an OEM unit.
These type of components are actually quite hard to come by because there are far fewer S3/R32s out there than the standard Audi/VW models. We looked at buying an aftermarket version but in the end we decided it would be better to find an original part considering the increased power being put through the wheels and we were unsure how strong the 3rd party units would be:
It was a bit of a milestone getting the gearbox fitted successfully. Once the transfer box was installed it was all a pretty tight fit. We had to reconfigure some of the hosing from the GT3071R Turbo to make space for the drive shaft assembly to the front offside wheel. Andy got a local company to fabricate a custom braided hose connector which now fits perfectly.
Nothing is ever straight forward with these type of projects and we have on many occasions had to tweak a few things here and there to make it all fit together, the joys of mechanical engineering!
Glad we got that job out of the way!
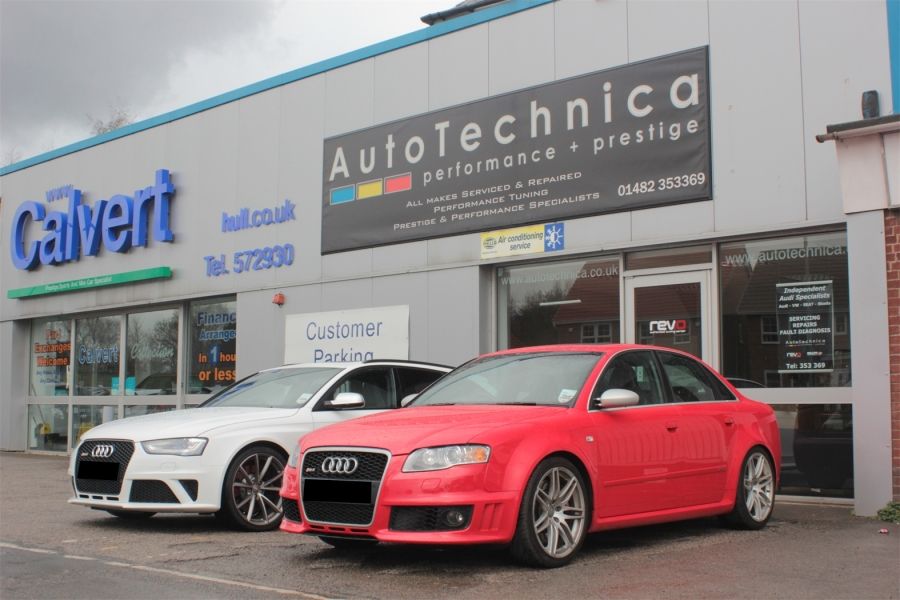
Now for a short break while the team get to play with a couple of RS4s for the day, definitively needed to test drive those new windscreen wipers!
A little while later we pressed on with the next phase of the works. Dave from Auto Solutions was busy laser cutting up a new box section for the boot floor plan so we had a couple of weeks to get the car ready for his return. There were two areas that needed to be prepared for the welding works, the first being the boot floor plan and the second was the tunnel underneath the chassis where the propshaft sits. The prop has an elbow joint approximately half way along where it is held up against the chassis by a heavy duty bracket. Mounting plates are usually built in with the S3/R32 but were not present on the Cupra so we ordered these in ready to be installed.
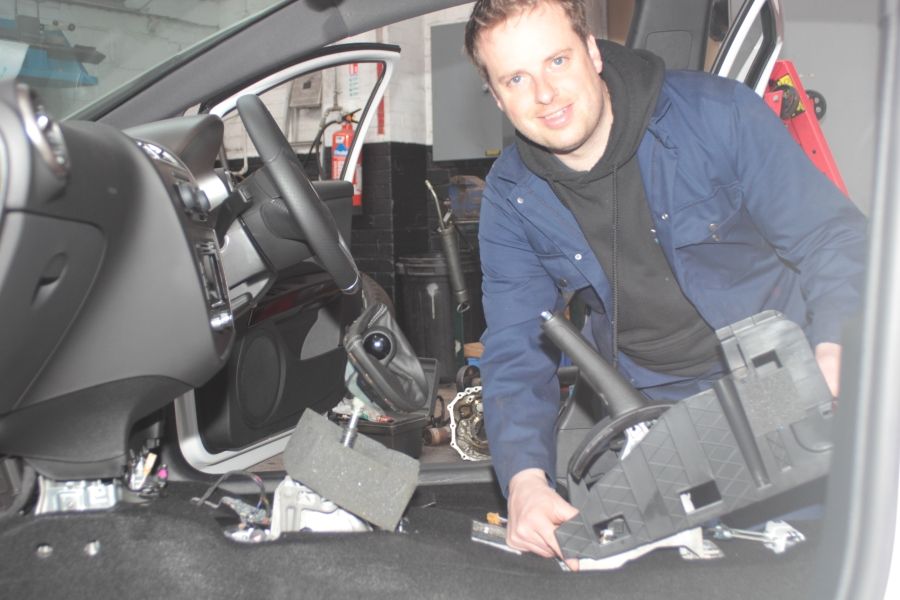
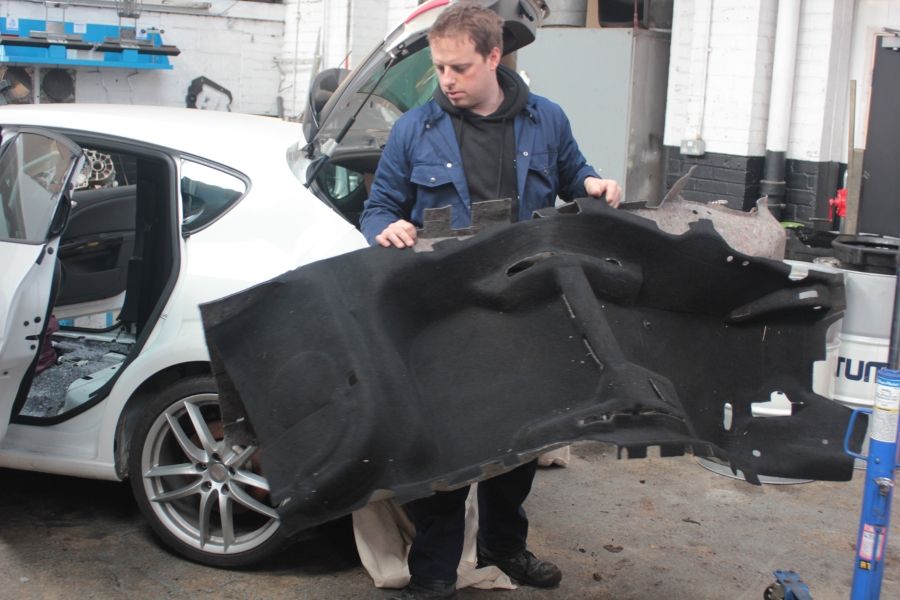
Welding underneath the car causes a lot of heat and we therefore had to strip out the interior to avoid the carpet from going up in flames! Dismantling the car’s interior was an awkward job but one that had to be done, a little pain for a big gain! I actually volunteered to do it myself as this would give the guys some breathing space to get on with other things. I went along one Saturday morning and it took me a good few hours to sort.
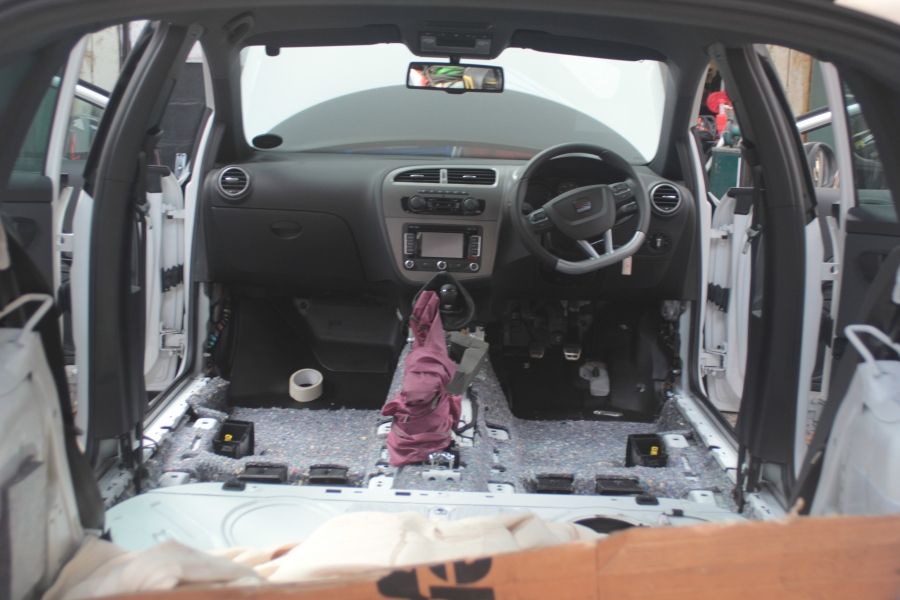
Gurr you wouldn’t believe how awkward SEAT interiors are to take out, mind you I’m sure most cars are the designed the same. To remove the carpet and underlay we had to strip out nearly every piece of plastic trim and panel there was! It was quite daunting to see the Cupra in so many pieces, not a sight we really want to see again!
Photo below shows me in action…removing the centre console which luckily came out in one piece. I still managed to trash one of the other panels though! easily replaced.
Small tip, front seats are a nightmare to remove when taking out through the front or rear doors. We ended up taking everything out through the boot which was a lot easier. The Darth Vader like rear seat covers on the Cupra R are made of a glossy shiny black plastic and can easily scratch if not removed carefully. Luckily all went well and we soon got everything out.
Write up in progress...
Hi Everyone… We’re Back!
Well it’s been a busy couple of months here at Autotechnica
Andy, Ben and the team have been working very hard on Project Cupra and we’ve made some great progress along the way. During the last update we got to the stage of cutting out the boot floor plan to make way for the Audi S3 Rear Axle. This was a scary moment of no return but it all went well.
The welding and cutting works have been done by Andy’s mate Dave from Auto Solutions. Dave is an experienced welder who did an excellent job fabricating up a new box section for the boot floor. This guy is a real character and made us laugh when he did the first cut, he turned towards me with a rather large angle grinder in his hand and asked… are you nervous lad? Err… and before I had a chance to reply, a large whizzing sound erupted as he started cutting! Lol
So following on from the last update, the next job we looked at was to take the gearbox out, this had to be matched up with the front transfer box that we got from the R32 donor car. This was easier said than done and took a little while to sort but we got there in the end.
As Cupra Kung Fu had only done a very low mileage then naturally we were reluctant to change the gearbox for one off an S3/R32. It’s also unlikely we would have ever found one in the same condition without paying top dollar, so we thought we’d give it a go with the existing unit.
Ben started to strip down the box taken off the Leon. It’s amazing how many cogs; nuts and bolts there are in these things! A big boys Meccano Set!
Photo below shows the engine bay once the gearbox was removed; exposing the Loba clutch and single mass flywheel that we installed just a few months back:
Photo below shows the GT3071R Turbo after we had removed the gearbox:
We recently bought a Quaife limited slip differential of which we had fitted just before XMAS when we went to REVO Stage 3. Most of the high performance cars on the road (or at least FWD cars) will be fitted with some sort of a limited-slip diff (LSD) and they are installed for a good reason.
Without an LSD, if one wheel loses traction and starts to spin, all the power is transferred to that wheel. This not only limits your acceleration, but it also upsets the handling, especially in front-wheel-drive cars, by causing severe on-throttle understeer. Not good. An LSD helps eliminates this.
Depending on its design, either by forcing both wheels to turn at similar speeds regardless of which has grip, or, in the case of the Quaife ATB diff, do the opposite of an open diff and transfer the power to the wheel with the most grip. So while, in theory, an LSD offers an advantage over an open diff, the question is, will it actually make that much of a difference to your car? Will your car be noticeably faster with a diff fitted; faster than if the money was spent on performance engine upgrades?
Well we were pleasantly surprised by Quaife’s engineering and had found a big difference in the car’s performance and road handling. When you go anything beyond 300 horses then you really start to struggle with the traction and will also find the cornering can be a real challenge. One has to realise however that all LSDs are not a complete solution but more a compliment to your handling.
If you thrash the car with big power on a FWD then of course both wheels will start to slip and spin against the tarmac. Having a decent mechanical LSD does however help to prevent this issue by transferring the power to the wheel that has the most traction. Straight line drag races will give the same annoyance, but it is more the cornering at high speeds where it comes into play. The best way to describe the difference between them is being pushed into a corner with little confidence that you’ll come out the other side, but with an LSD it’s a bit like being pulled around the corner with a big rope.
You can instantly feel the difference when an LSD is doing its job. The traction of the wheels crosses over from one wheel to another and the whole process is done in milliseconds backwards and forwards until you find the grip the car needs, or at least until you made it clear out of the bend.
With AWD, the Haldex system transfers power to the rear wheels when the car needs it the most. Having power to all wheels makes a massive difference to the car’s grip on the road, keeping the LSD in the mix will complement the situation giving better control of the front wheels.
It was real shame at the concept that we would lose the use of this fine piece of engineering having only had it for a few months, so we contacted Quaife to see what they could do to help. As it turned out they do in fact manufacture an LSD for the R32 and S3, so we did a little research to see what options there were.
We contacted Dave King from Quaife, one of their technical engineers who advised on a workaround for our project. Basically the gearbox used on the Cupra MK2 and the S3/R32 are of a similar design, but there are subtle changes in the outer casing i.e. the mounting holes that are used when bolting on the front transfer box (the gearing that transfers power to the rear wheels)
In order for the LSD to reach the gearing on the front transfer box, we had to take apart the unit and replace the housing for one with a longer body (model off the AWD system) Dave and his team from Quaife were very helpful and were able to provide us with a new housing. They stripped it off another unit they had on the shelf so were able to send it up to the team at Autotechnica in a matter of days.
The photo below shows the FWD and AWD units:
Photo shows the inside of the LSD, the helical gears which transfer the torque bias from one wheel drive link to another. A real piece of engineering!
So we put the two casings side by side and you can see the difference between the old and new. The housing on the right is the old unit and the one of the left is the new one:
Photo below shows the new housing fitted to the gearing:
Once the new diff was installed then we looked at the re-assembly of the gearbox only to find there were no fixing points on the casing for attaching the front transfer box… rats! So these subtle differences we mentioned earlier are somewhat fundamental to the installation of the AWD running gear!
Well all we had to do was to order a new middle section casing for the S3/R32 which obviously does hold the correct fixing points in all the right places. Most car makers will always skimp on the manufacturing costs where ever possible and therefore will make most of the parts fit as many of their vehicles as possible. The main assembly of the gearbox between the various models all share a lot of the inner workings and therefore replacing the casing alone was all that was required to turn this Cupra gearbox into an AWD version.
Photo below shows the inner side of the two casings, no prizes to guess which one the new unit is! On the inside of the casing we could not see any difference in its construction, essentially they are both the same design:
Casing then turned over, spot the difference?
Photo below shows the two units, the newer casing has the mounting holes for the front transfer box:
Once we put the gearbox back together again, we were able to install the front transfer box:
Closer look at the transfer box:
Photo below shows the rear view of the box assembly; the triangular spindle wheel drives the propshaft that sits underneath the tunnel of the chassis to the rear diff.
New bolts and fixings were used, advisable when re-building the box assembly:
And now for fitting! The hefty lump was raised up on the hydraulic lifter ready to fix into position:
Now now boys!
We also had to find a replacement driveshaft for the front offside side wheel. Once we’d fitted the transfer box into position, we realised that Cupra’s driveshaft was going to be too long. We went on the internet searching for a couple of weeks until we found an OEM unit.
These type of components are actually quite hard to come by because there are far fewer S3/R32s out there than the standard Audi/VW models. We looked at buying an aftermarket version but in the end we decided it would be better to find an original part considering the increased power being put through the wheels and we were unsure how strong the 3rd party units would be:
It was a bit of a milestone getting the gearbox fitted successfully. Once the transfer box was installed it was all a pretty tight fit. We had to reconfigure some of the hosing from the GT3071R Turbo to make space for the drive shaft assembly to the front offside wheel. Andy got a local company to fabricate a custom braided hose connector which now fits perfectly.
Nothing is ever straight forward with these type of projects and we have on many occasions had to tweak a few things here and there to make it all fit together, the joys of mechanical engineering!
Glad we got that job out of the way!
Now for a short break while the team get to play with a couple of RS4s for the day, definitively needed to test drive those new windscreen wipers!
A little while later we pressed on with the next phase of the works. Dave from Auto Solutions was busy laser cutting up a new box section for the boot floor plan so we had a couple of weeks to get the car ready for his return. There were two areas that needed to be prepared for the welding works, the first being the boot floor plan and the second was the tunnel underneath the chassis where the propshaft sits. The prop has an elbow joint approximately half way along where it is held up against the chassis by a heavy duty bracket. Mounting plates are usually built in with the S3/R32 but were not present on the Cupra so we ordered these in ready to be installed.
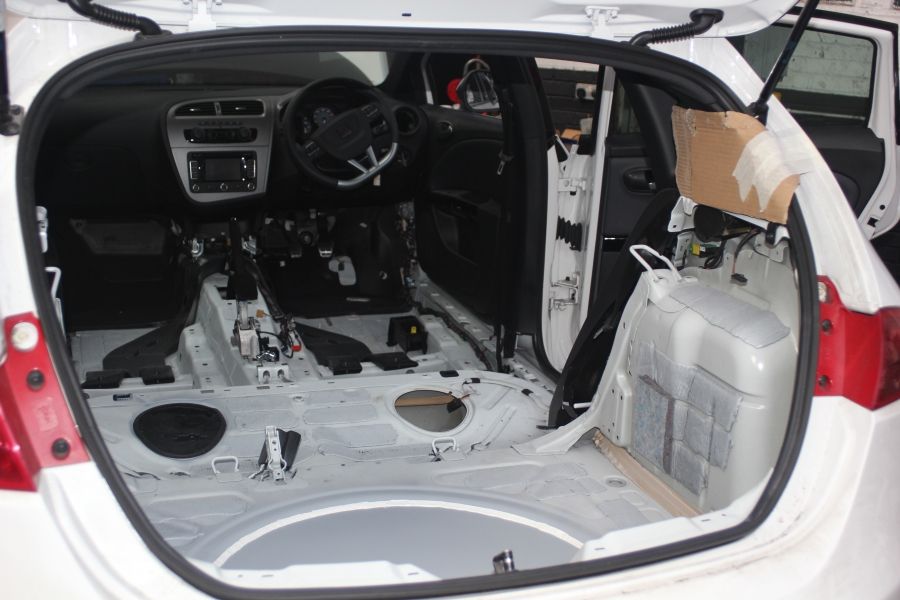
Welding underneath the car causes a lot of heat and we therefore had to strip out the interior to avoid the carpet from going up in flames! Dismantling the car’s interior was an awkward job but one that had to be done, a little pain for a big gain! I actually volunteered to do it myself as this would give the guys some breathing space to get on with other things. I went along one Saturday morning and it took me a good few hours to sort.
Gurr you wouldn’t believe how awkward SEAT interiors are to take out, mind you I’m sure most cars are the designed the same. To remove the carpet and underlay we had to strip out nearly every piece of plastic trim and panel there was! It was quite daunting to see the Cupra in so many pieces, not a sight we really want to see again!
Photo below shows me in action…removing the centre console which luckily came out in one piece. I still managed to trash one of the other panels though! easily replaced.
Small tip, front seats are a nightmare to remove when taking out through the front or rear doors. We ended up taking everything out through the boot which was a lot easier. The Darth Vader like rear seat covers on the Cupra R are made of a glossy shiny black plastic and can easily scratch if not removed carefully. Luckily all went well and we soon got everything out.
Write up in progress...
Project Update

So following on from the interior strip out, Dave from Auto Solutions soon returned back to Autotechnica to start the welding works.
Subsequently we had 2qty Dave’s in the workshop that day, just to confuse matters!
First fitting, we checked the new fabricated box section for size:
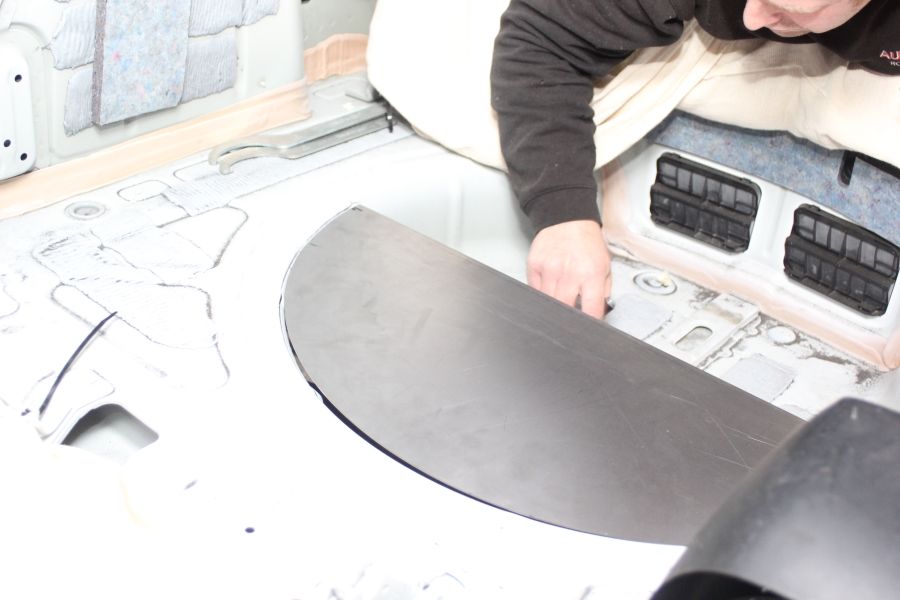
Perfect fit!

Attention to detail was key here to get the best fitment:

Some further cutting and tweaking to perfection! Dave you’re a real smarty pants!![[B)]](/forums/styles/seatcupra/oldforumsmileys/shades.gif "Cool [B)]")
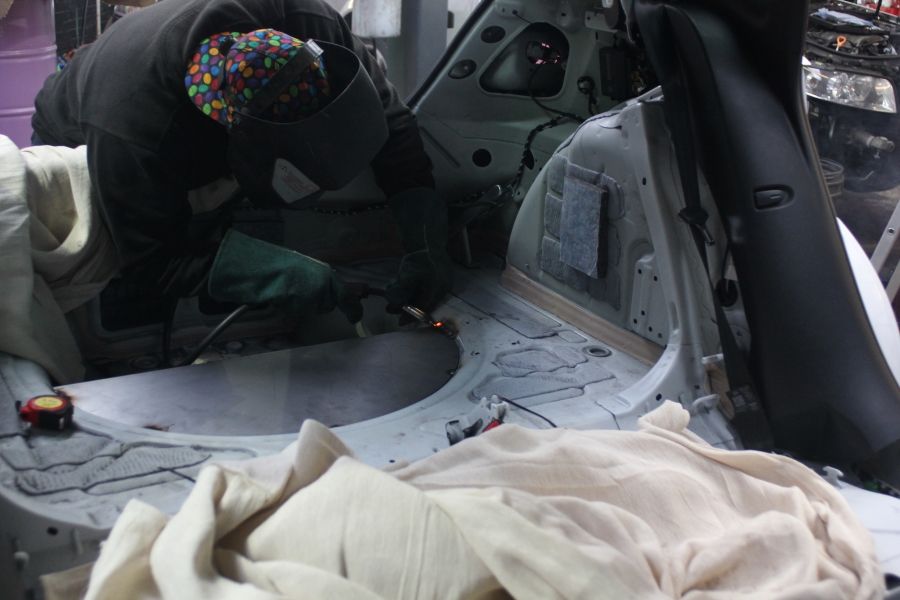
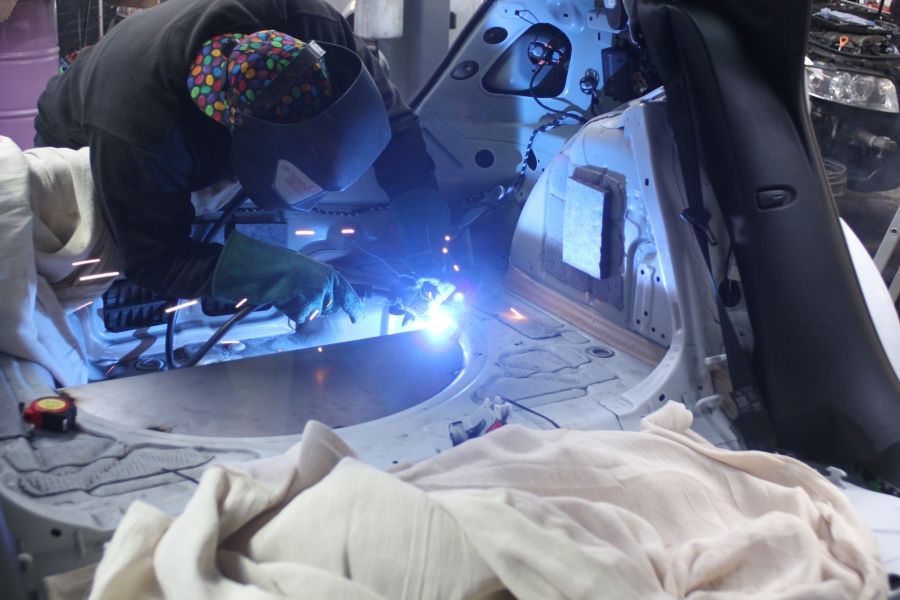
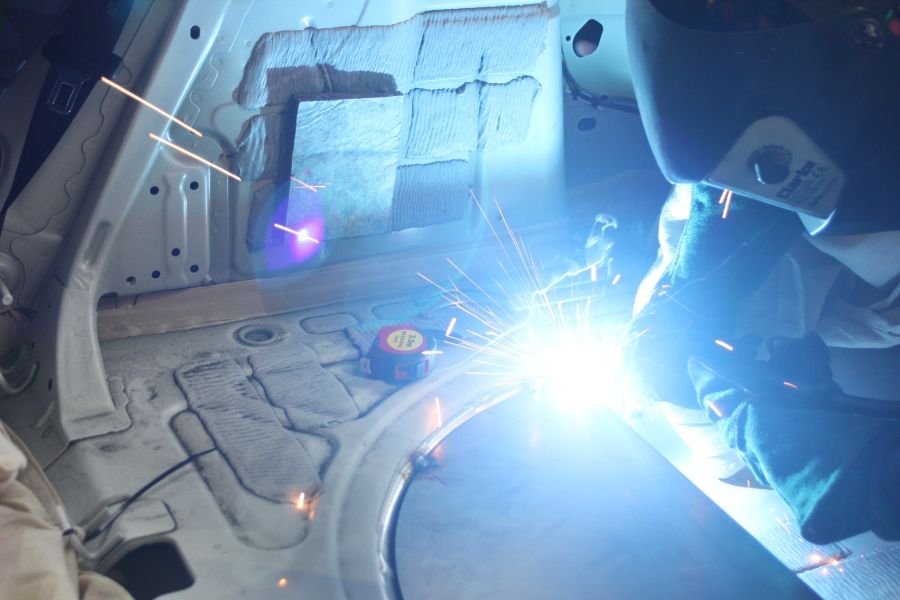
Welding begins!
Welding of the boot floor is complete:
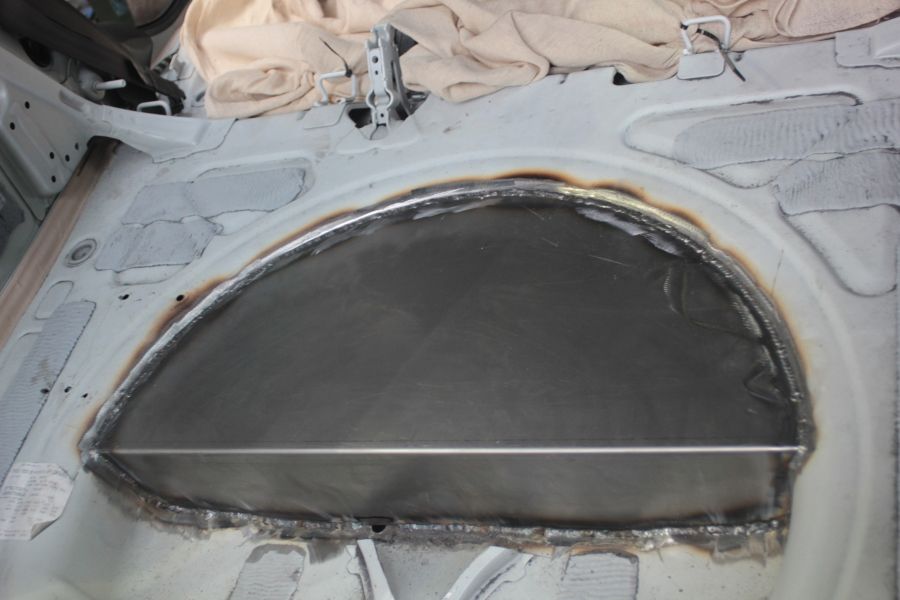
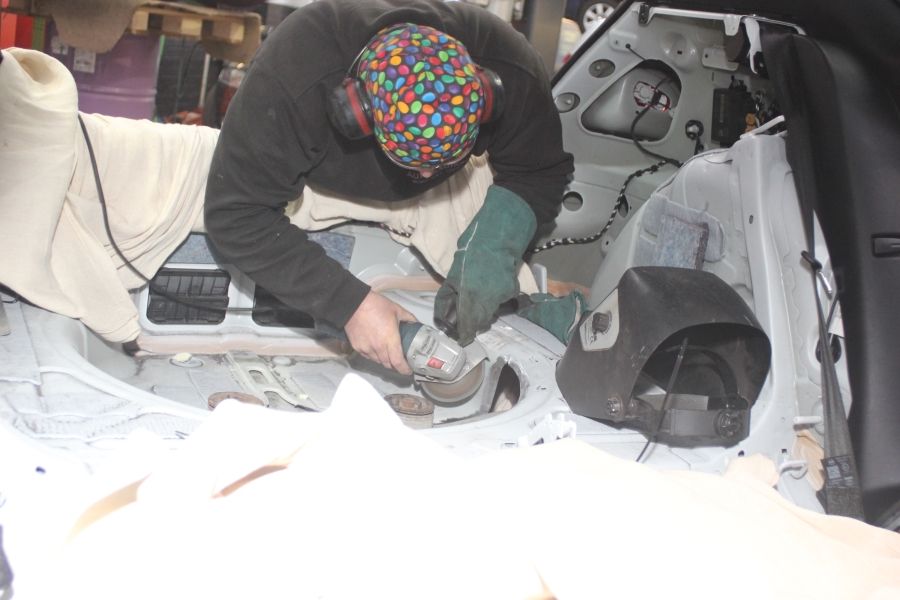
A little bit more grinding to finish off:
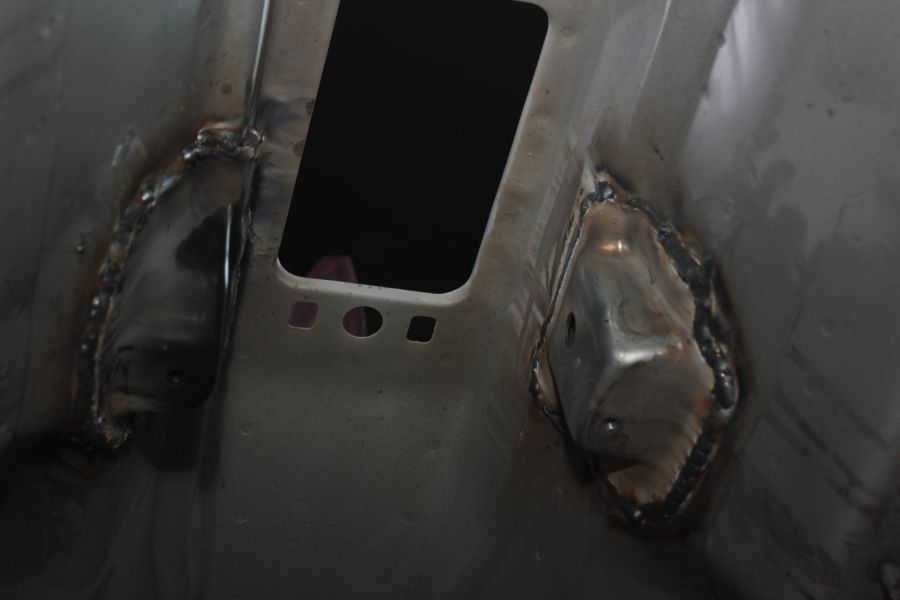
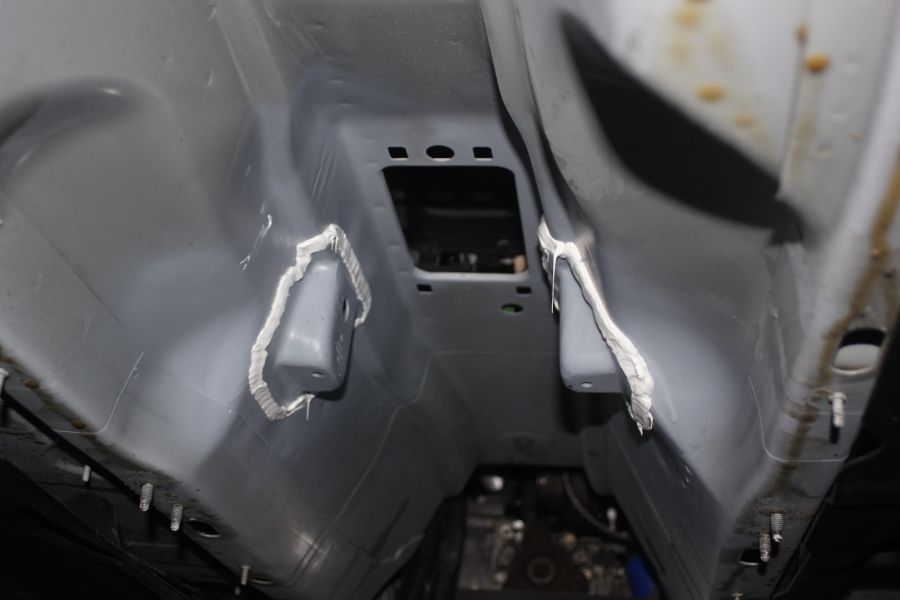
Next we fixed up the bracket for the elbow joint on the propshaft:
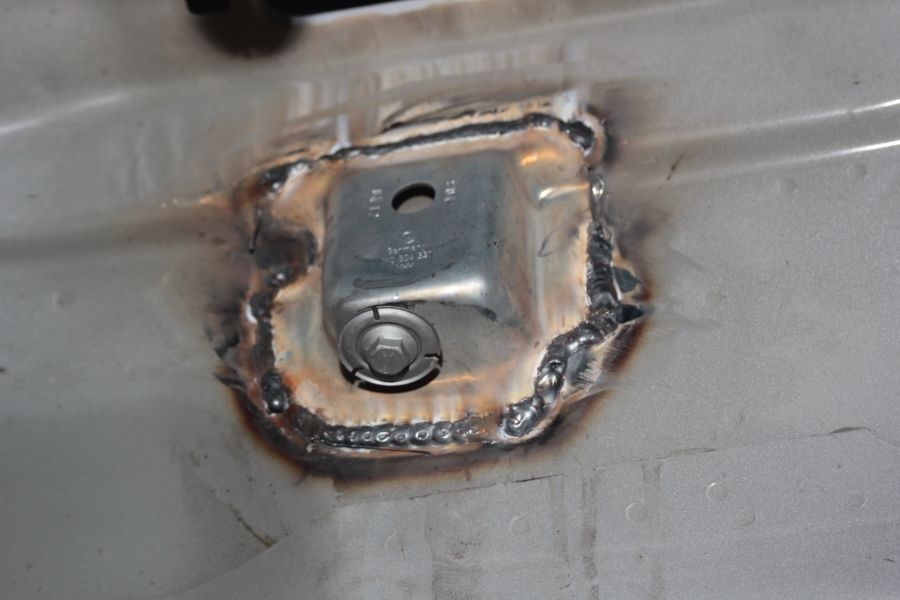
Photo below shows the two brackets fitted into position, the square opening through the tunnel is where the gear stick is located:
All welding works are complete. Big thanks to Dave for doing a fantastic job.
We then applied the first layer of automotive sealant around the welding seams ready to paint the underneath of the chassis:
We gave it a couple of days for the sealant to harden and then sprayed the first layer of primer:
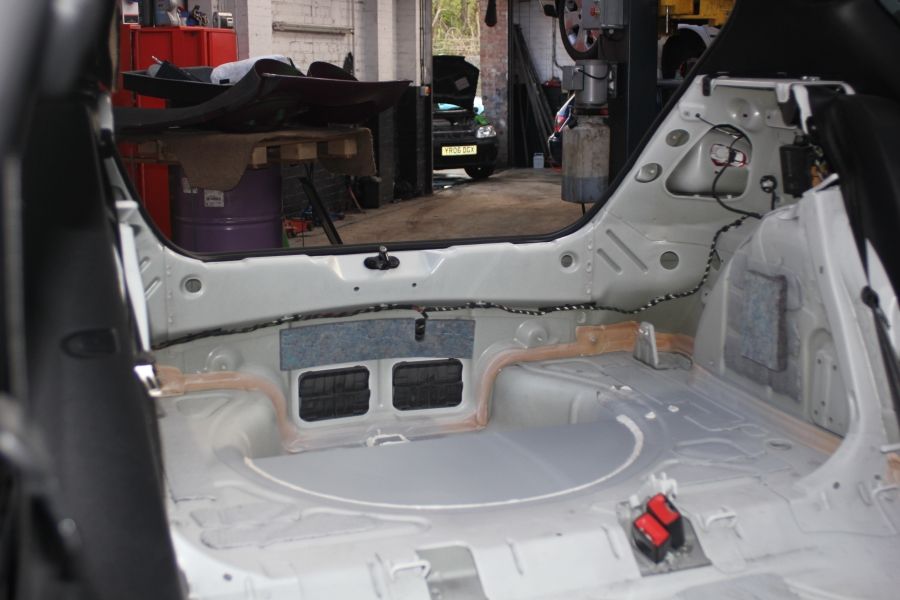
We also started to apply a similar process to the top side of the boot floor:
Things were starting to take shape now
We’ve also bought some OEM 'Candy White' paint for the spray gun of which we will be re-covering the boot floor. We want to make the conversion look as OEM as possible so will touch up the area once we got all the heavy duty works done.
Photo below shows the propshaft brackets covered in a protective paint finish with more sealant applied to help protect the welding joints. The sealant got sanded down and cleaned up once it had set:
Now the painting was complete, it was time to re-install the running gear into position.
During the last two months we had the S3 axle on and off the car like a yoyo! Fixing it up for the last time was a good day for everyone!
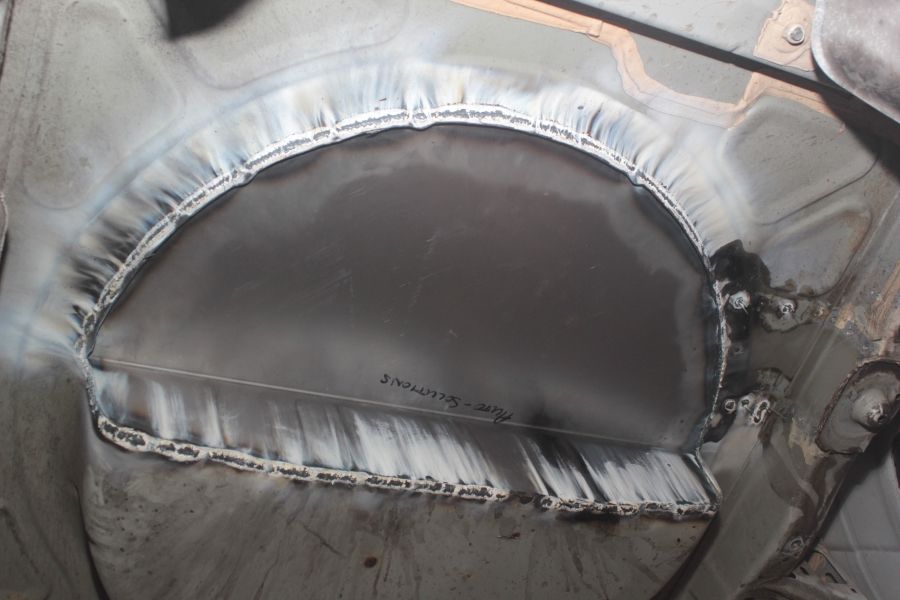
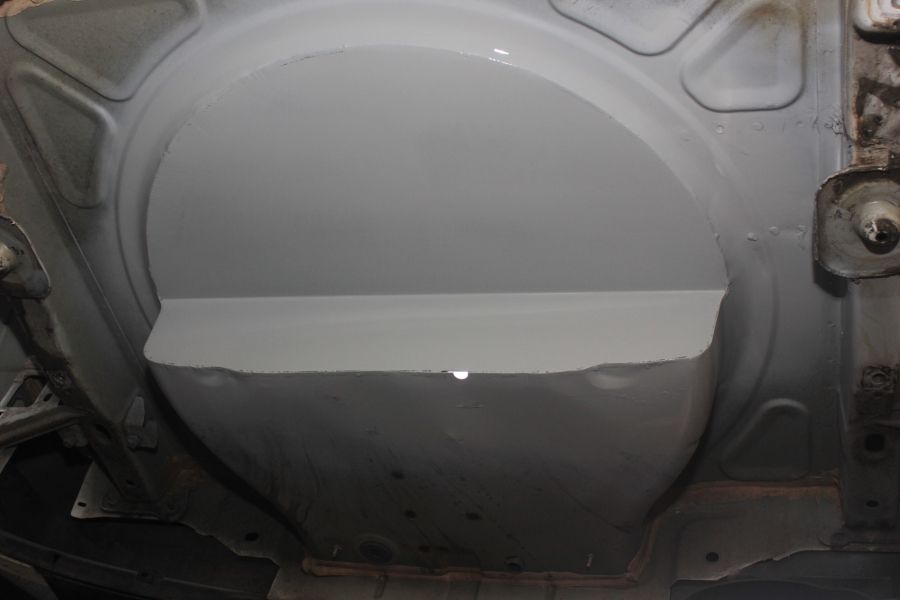
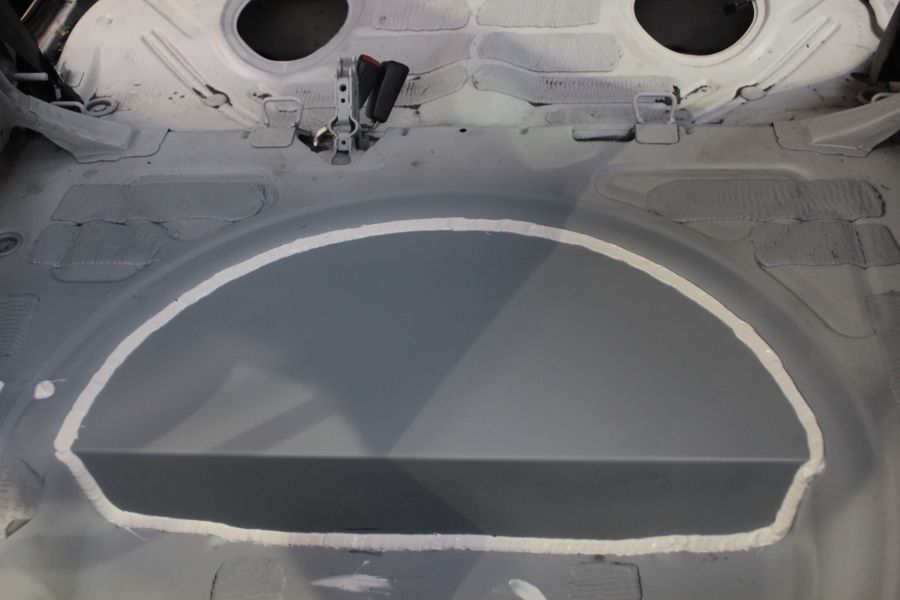
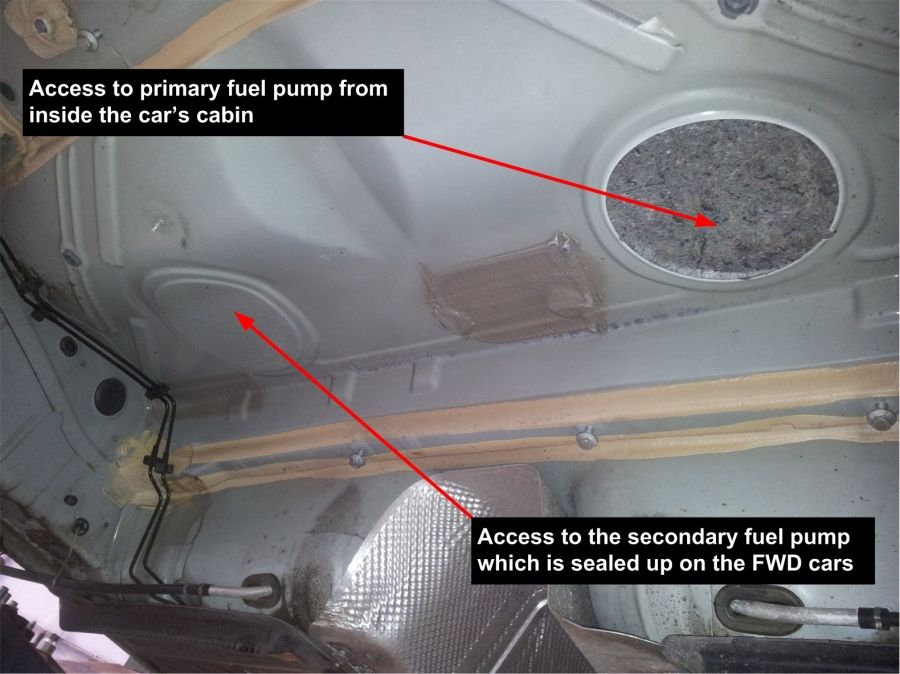
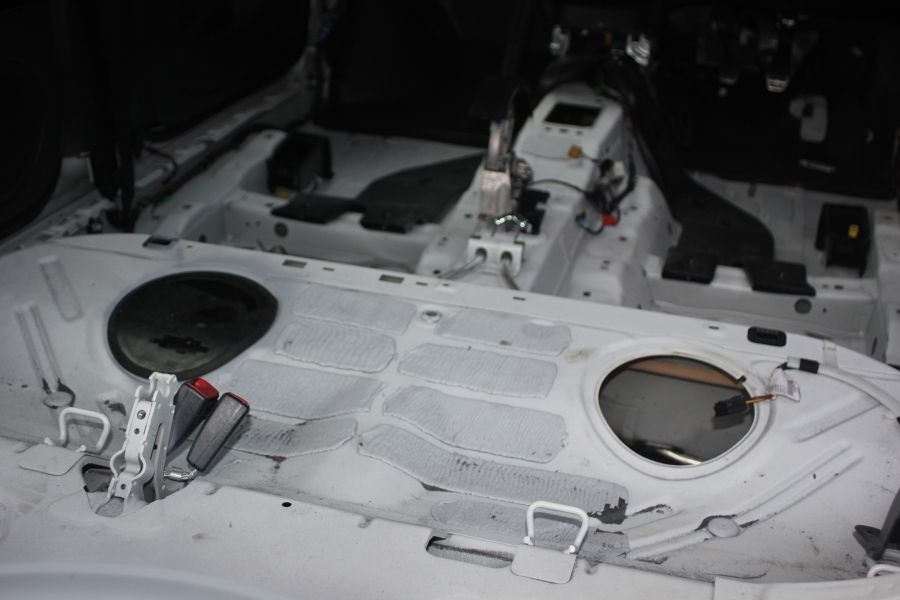
The next job was to install the R32 fuel tank. We found that the access hole was blocked up on the far side, this is only required on the AWD cars where a saddle tank is fitted and access is required to the secondary fuel pump:
More cutty cutty! then primed and sealed around the edges…
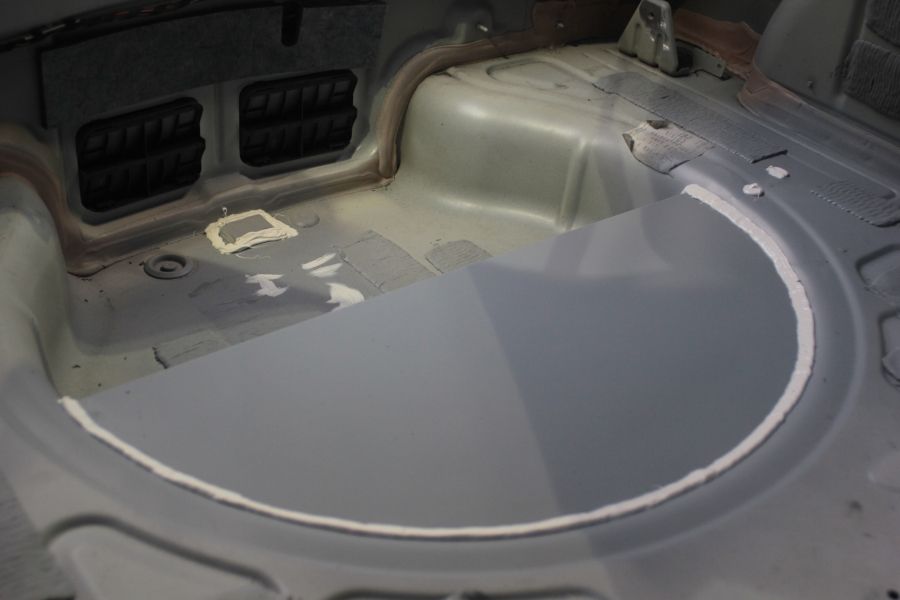
New fuel pump gasket fitted into position (one on the left hand side in the photo)
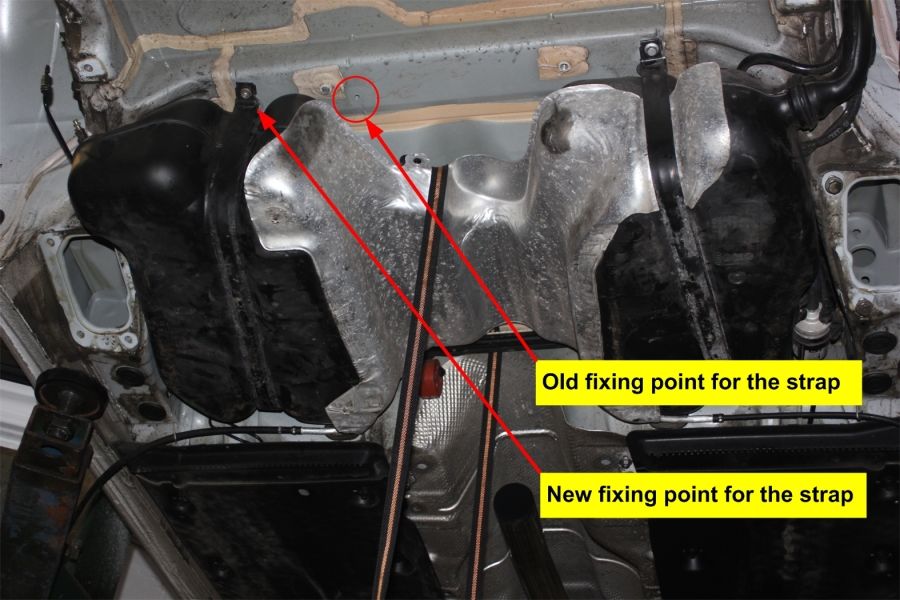
A new hole had to be drilled and threaded for fixing one end of the bracket strap that holds the R32 tank up against the chassis, the old one off the Cupra had a slightly different configuration and required a new fixing point.
Next we fitted a new down pipe from the GT3071R Turbo. The old one wasn’t compatible with the AWD system seeing as the pipe was positioned more centrally underneath the chassis tunnel and would have got in the way of the propshaft.
We contacted George from ATP Turbo in America to see if they could help. As it turns out they do in fact manufacture an AWD version for the S3 and Golf R, we explained to him the project in hand and they very kindly offer to sponsor us a new downpipe.
Big thanks to George and the his team for their support.

Propshaft fitted into position:
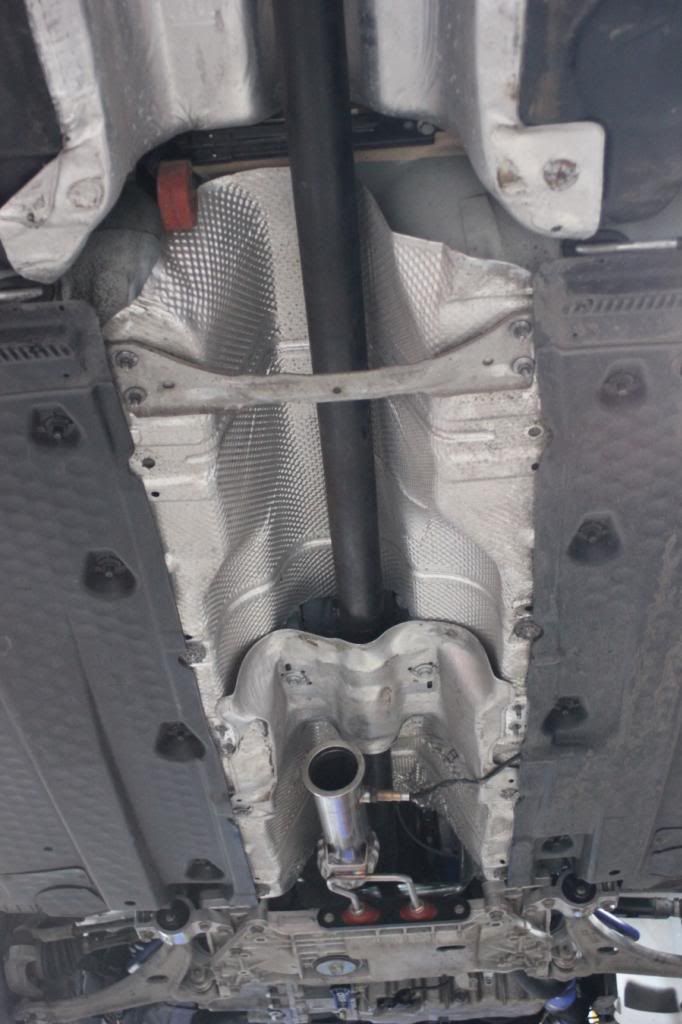
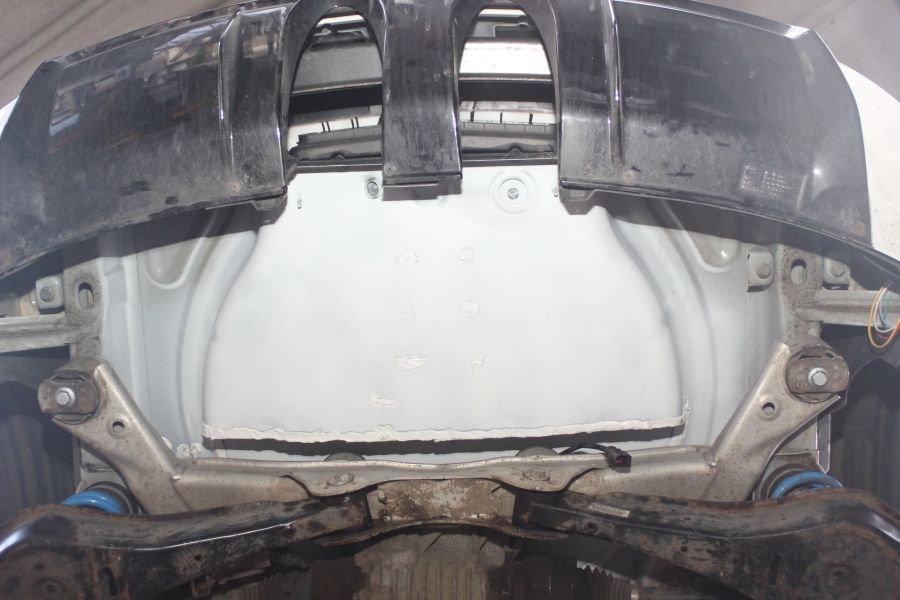
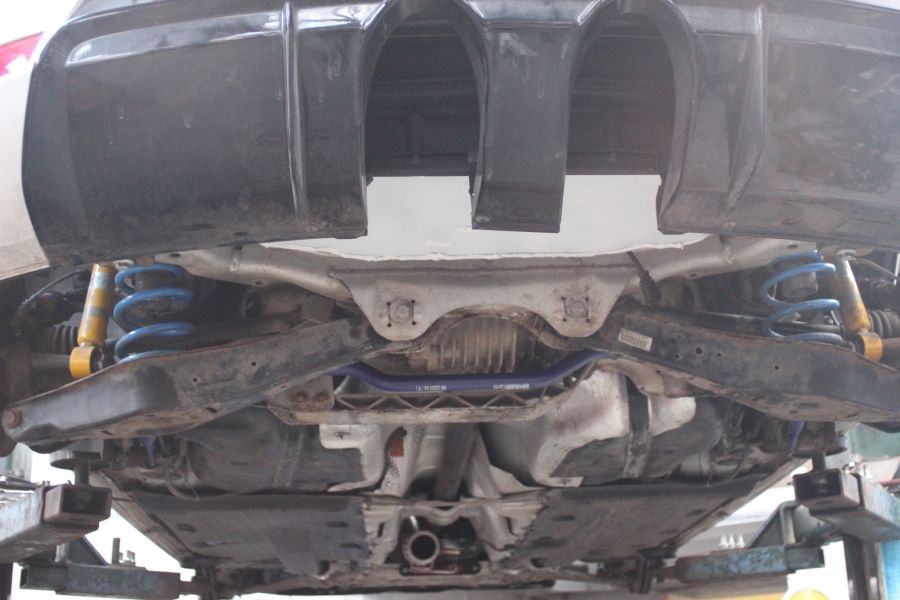
Photo below shows the S3 Axle fitted into its final position with the boot floor plan tidied and the final coat of paint applied:
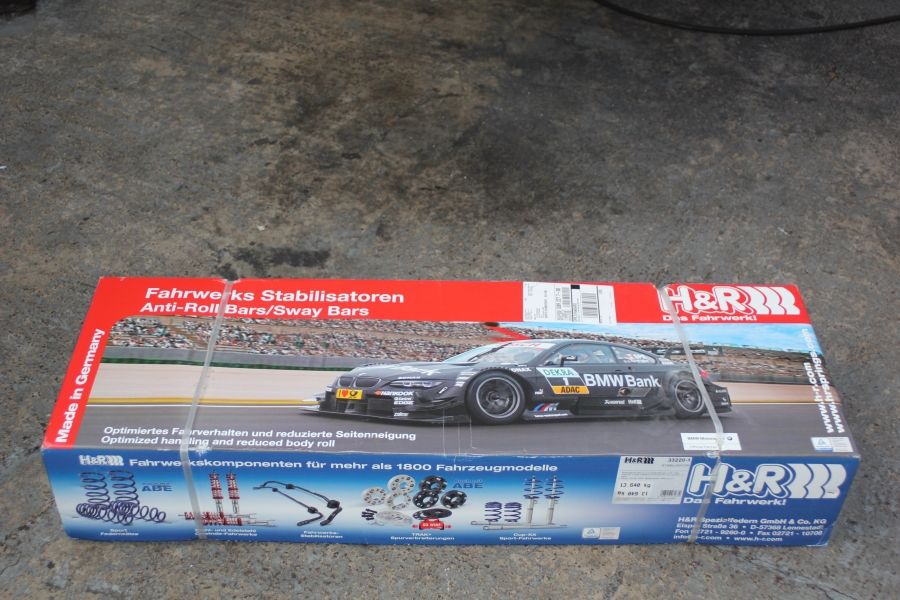
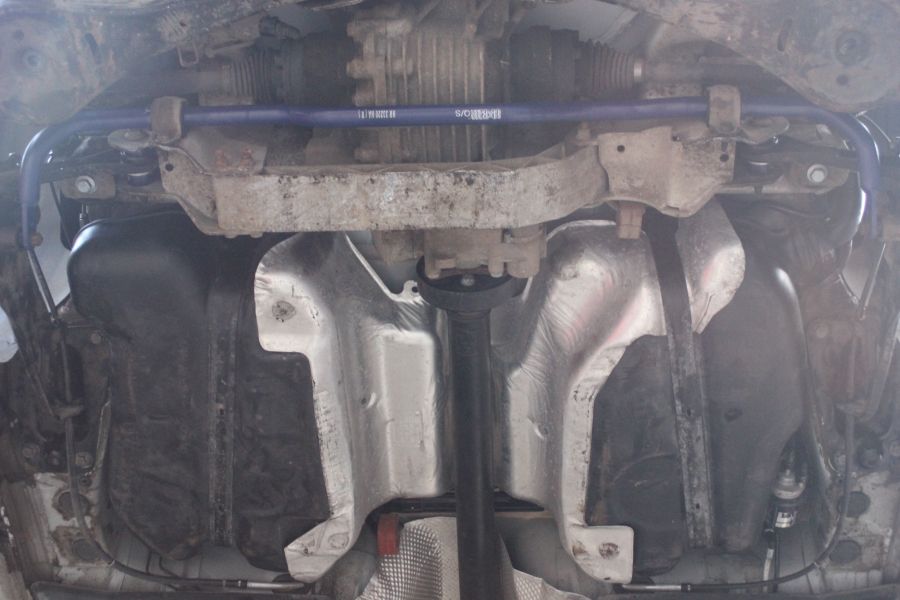
New toy arrives at Autotechnica! A set of S3 H&R anti-roll bars that were required for both the front and rear axles due to the difference in the running gear installed. These H&R bars are awesome! Excellent build quality with a solid powder coat finish, should last for many years to come.
New H&R anti roll bar installed on the rear axle:
New R32/S3 running gear complete!
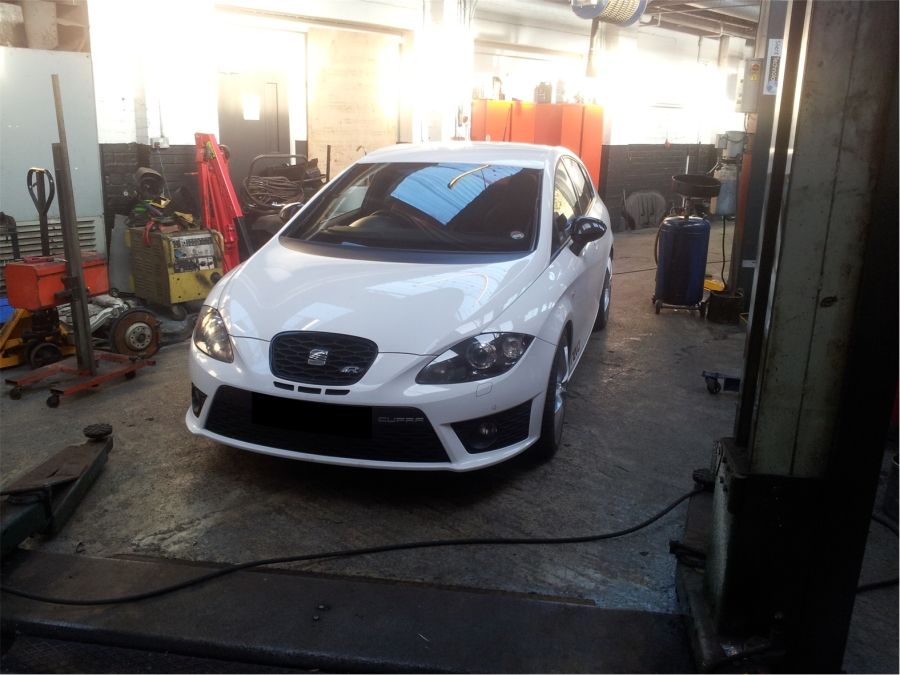
Cupra Kung Fu finally back on his own feet again! Brilliant job guys:
And now for the fun part! A little early in the process but we couldn’t resist…
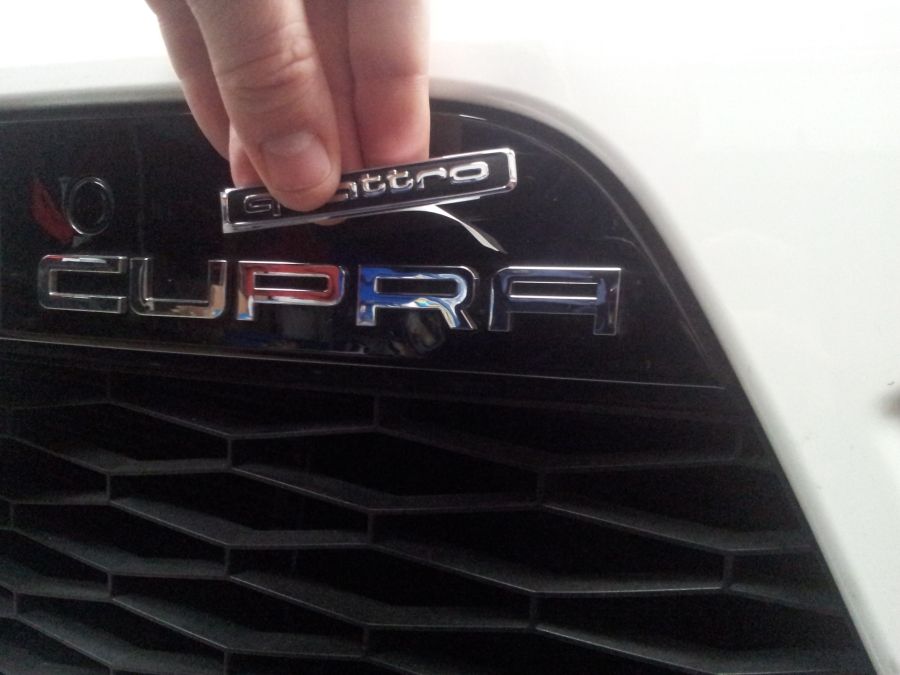
A long deserved medal for our project Cupra, badge for the rear coming soon…
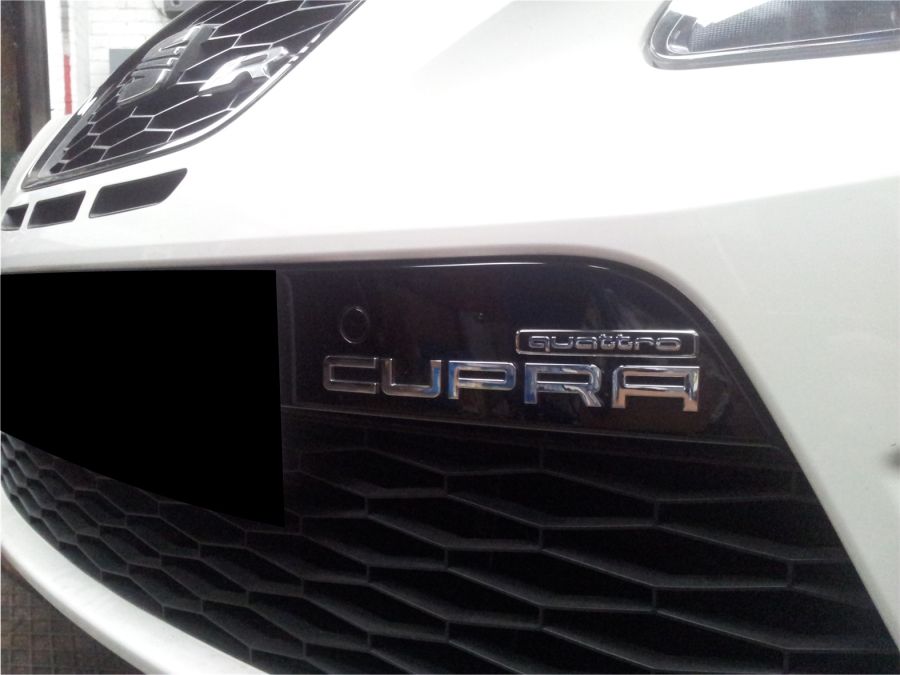
Play time over, back to work boys!
Next we started to install the additional wiring required for the Haldex rear diff and the secondary fuel pump. Now was the best time to get the wiring in seeing as we had the interior stripped out. Once the all the cabling is installed then we can start to re-fit the carpet, seats and trim. The new wiring has to be routed through to the electronics that sit behind the dashboard.
Luckily we got the full wiring loom from the R32 donor car so we have a form of template to see what terminations will be required, this is obviously backed up by documentation and schematics from Audi.
Photo below shows the wiring being installed to the rear Haldex unit:
There are currently five pins in use. We installed 8 wires so we have a few spare to play with should we need them. At a later stage in the project we will be installing a Haldex Sport Controller which sits in place of the factory unit but has been hard coded to change the handling characteristics of the traction (for the better)
We’ll cover this controller in more detail at a later time but for now we have to make sure we have the necessary cabling is installed. The sport controller has the option of switching between different modes i.e. road/track/race. One of the options is to fit a small switch that can mounted somewhere at the front of the car, hence the reason for the extra cores.
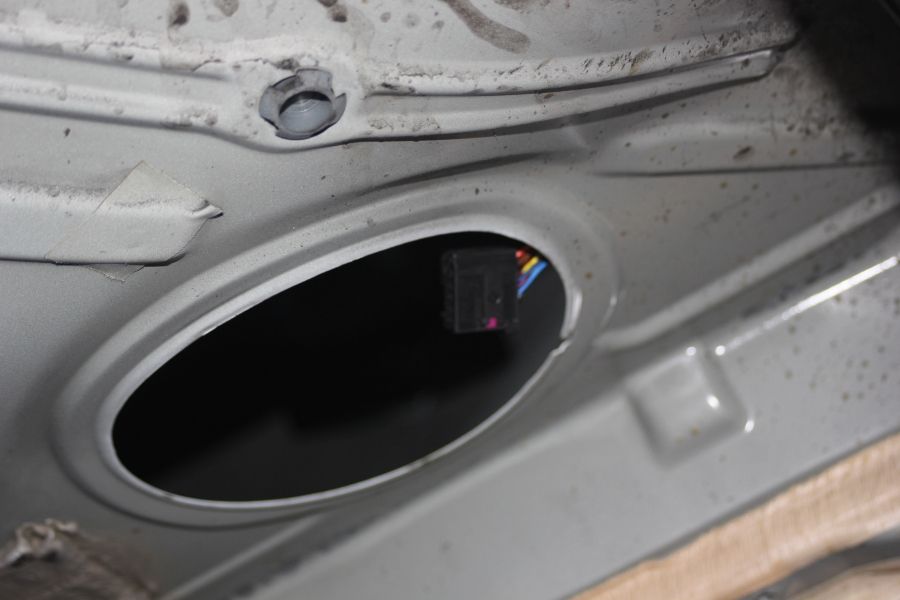
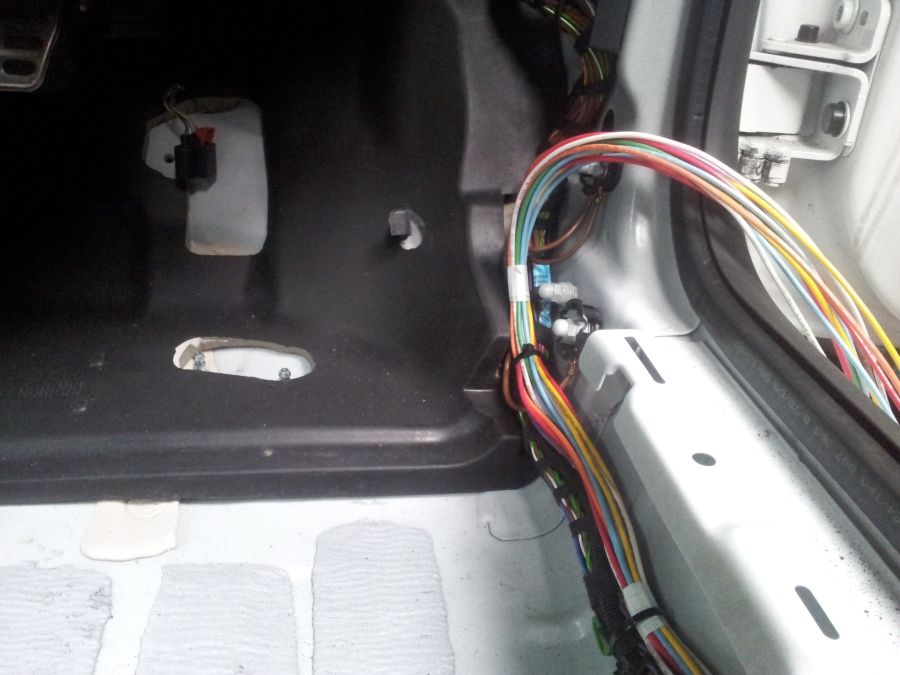
Next we installed the wiring loom to the secondary fuel pump. The wiring will sit nicely behind the interior carpet out the way. The secondary pump requires a 3 pin connection but again we ran extra cores just to be sure, we don’t want this carpet up again!
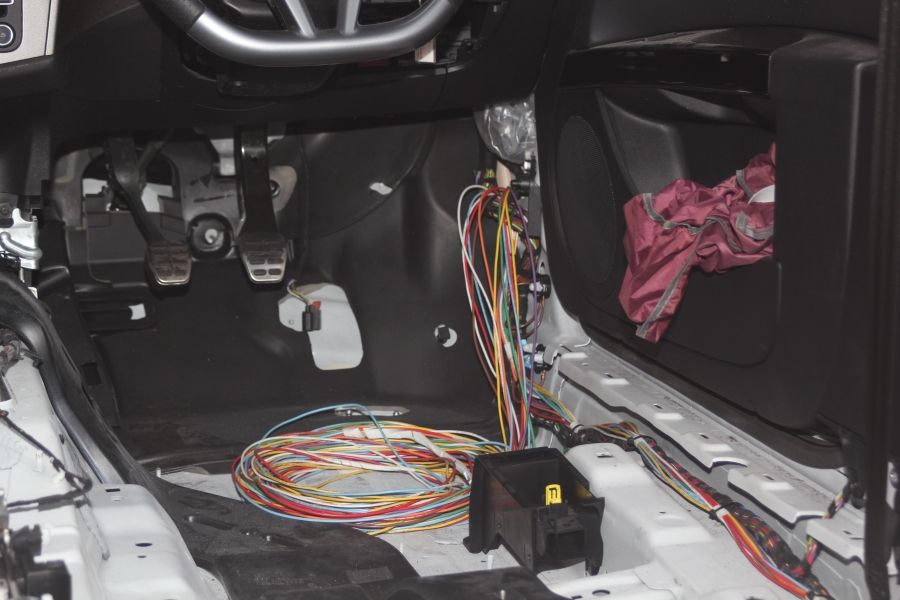
Fuel pump wiring joins the Haldex cables and routes along the drivers side along to the front of the car:
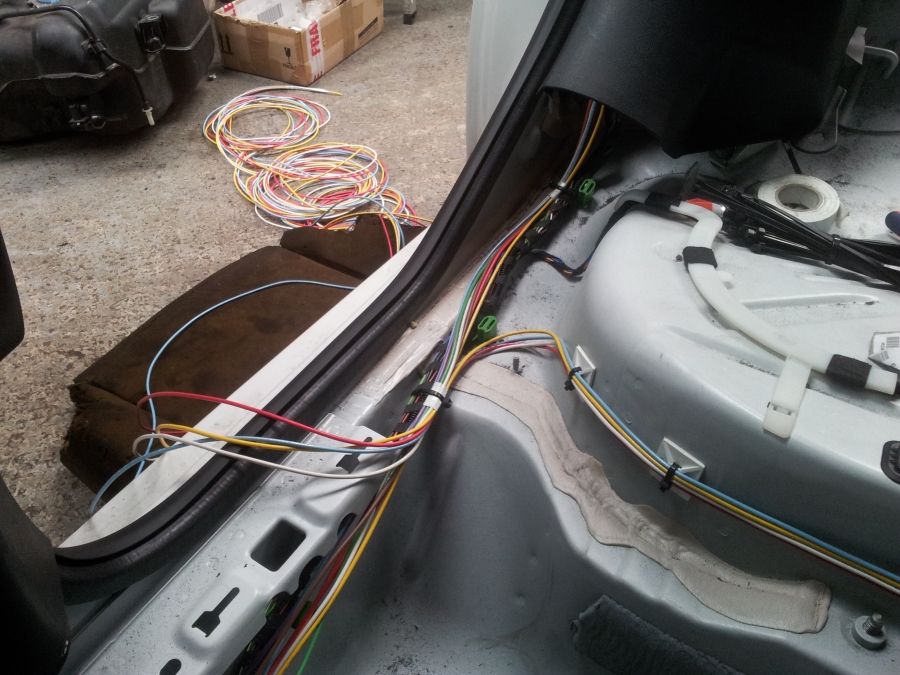
Wiring loom cores into position ready to be pulled up through behind the dashboard. Think we’ll have to get the continuity tester out as I forgot to mark them up! Sorry lads! Ha
One of the last stages of the mechanical works is to install the exhaust system.

You may have noticed that we have acquired sponsorship from Milltek Sport. We’re all very excited in teaming up with them for the coming season and are most grateful to Steve and his development team for their support.
Next week we take Kung Fu down to Nottingham on the back of a trailer to their development centre where we will be designing and installing a new custom stainless steel exhaust system. More on these works in the next update!
Meanwhile, whilst the team continue with their work over the coming weeks, thought I’d introduce you to a good friend of mine, Michel from Sweden. Michel did the first ever AWD conversion to a MK2 Cupra a couple of years ago and turned his ride into something rather special! We’re proud to form the UK arm of his mean green team and look forward to seeing him on his next tour.
I promised him I would post an exclusive photo of his ride to feast your eyes on!
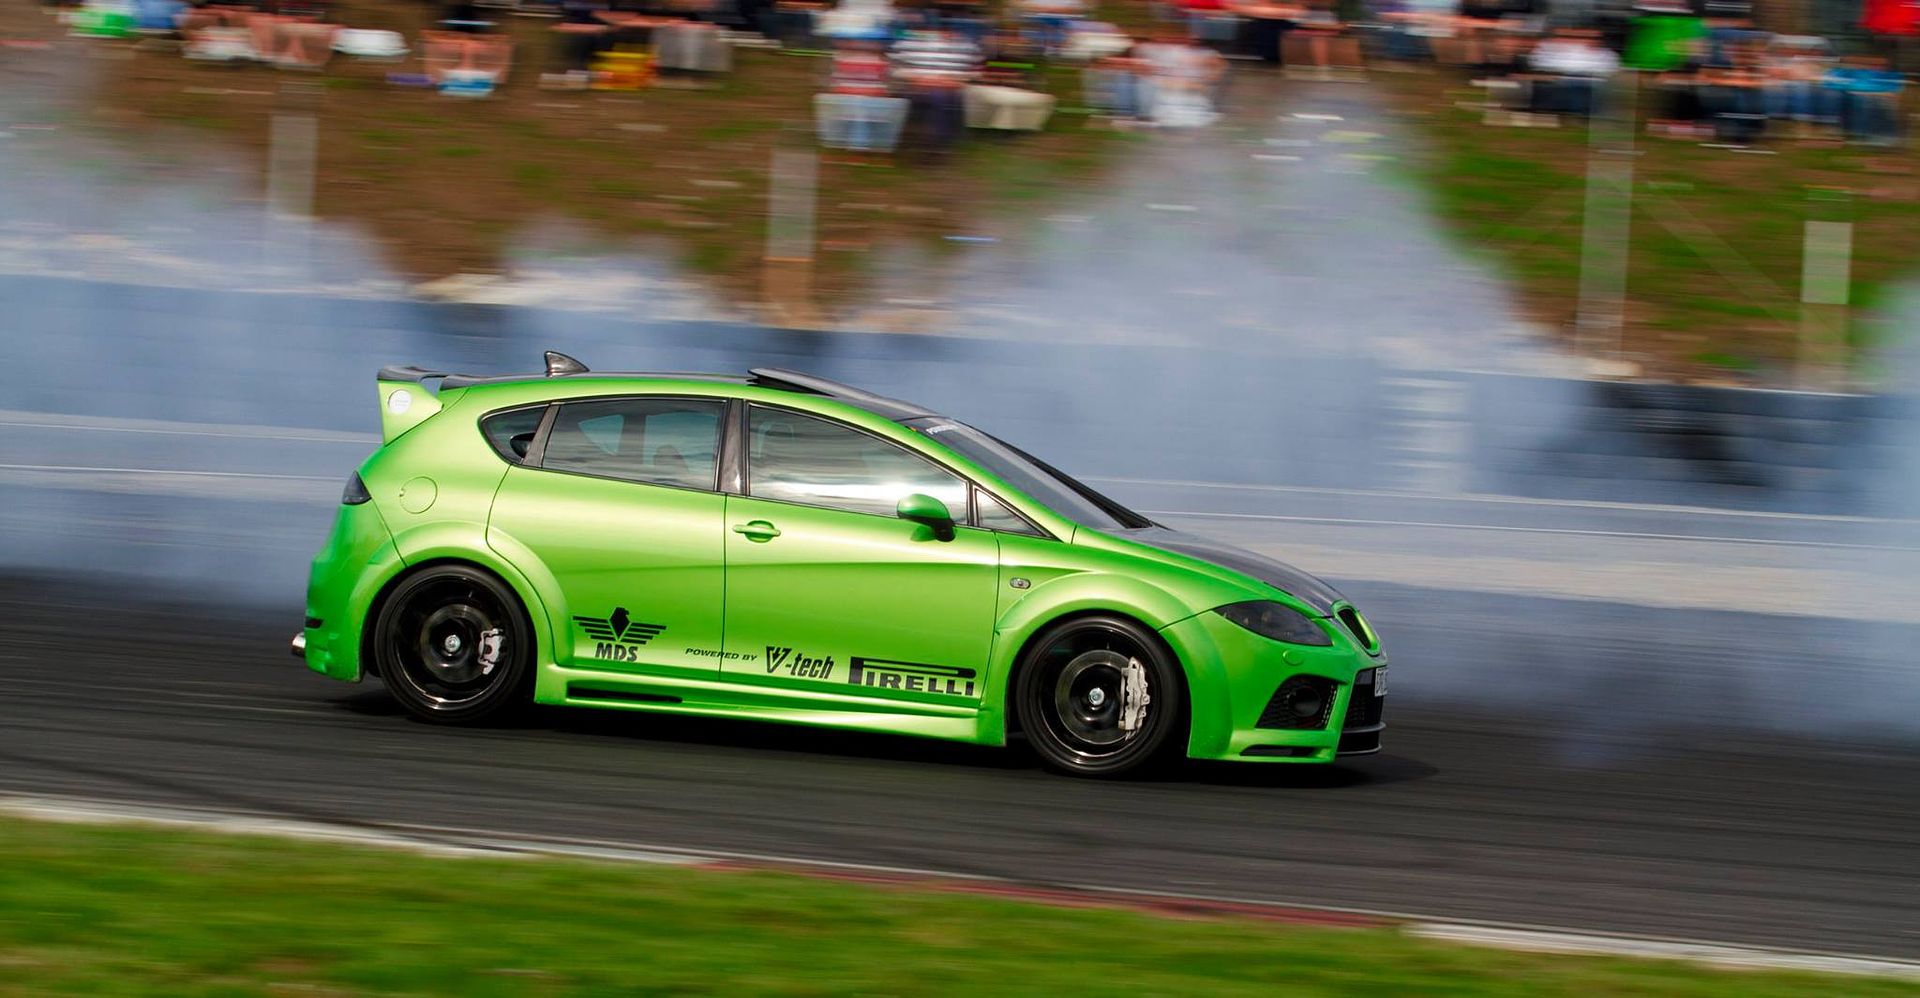
If you want to see what a 500bhp+ AWD Cupra can really do, see Michel's videos on UTUBE, a real Lambo killer!
UTUBE Link
Until the next update, we once again thank the readers from seatcupra.net for your continued support.
You can also follow Andy and his team from Autotechnica on Facebook , you can also find them by searching for their new page ‘REVO Performance Hull’
Credits
Big thanks due to Andy, Ben and the team from Autotechnica Hull for all the hard work done during the last few months. These guys are wizards of mechanical engineering and very much look forward to seeing the next stage of their developments.
Also thanks to Dave from Auto Solutions for doing a fine job on the welding and fabrication.
Many thanks to George from ATP Turbo for providing us with the new ATP downpipe.
Also big thanks to Steve and his team from Milltek Sport for their sponsorship of the project, very much look forward to seeing their guys in action fitting the new exhaust, more details of this in the next update.
Back soon...
So following on from the interior strip out, Dave from Auto Solutions soon returned back to Autotechnica to start the welding works.
Subsequently we had 2qty Dave’s in the workshop that day, just to confuse matters!
First fitting, we checked the new fabricated box section for size:
Perfect fit!
Attention to detail was key here to get the best fitment:
Some further cutting and tweaking to perfection! Dave you’re a real smarty pants!
Welding begins!
Welding of the boot floor is complete:
A little bit more grinding to finish off:
Next we fixed up the bracket for the elbow joint on the propshaft:
Photo below shows the two brackets fitted into position, the square opening through the tunnel is where the gear stick is located:
All welding works are complete. Big thanks to Dave for doing a fantastic job.
We then applied the first layer of automotive sealant around the welding seams ready to paint the underneath of the chassis:
We gave it a couple of days for the sealant to harden and then sprayed the first layer of primer:
We also started to apply a similar process to the top side of the boot floor:
Things were starting to take shape now
We’ve also bought some OEM 'Candy White' paint for the spray gun of which we will be re-covering the boot floor. We want to make the conversion look as OEM as possible so will touch up the area once we got all the heavy duty works done.
Photo below shows the propshaft brackets covered in a protective paint finish with more sealant applied to help protect the welding joints. The sealant got sanded down and cleaned up once it had set:
Now the painting was complete, it was time to re-install the running gear into position.
During the last two months we had the S3 axle on and off the car like a yoyo! Fixing it up for the last time was a good day for everyone!
The next job was to install the R32 fuel tank. We found that the access hole was blocked up on the far side, this is only required on the AWD cars where a saddle tank is fitted and access is required to the secondary fuel pump:
More cutty cutty! then primed and sealed around the edges…
New fuel pump gasket fitted into position (one on the left hand side in the photo)
A new hole had to be drilled and threaded for fixing one end of the bracket strap that holds the R32 tank up against the chassis, the old one off the Cupra had a slightly different configuration and required a new fixing point.
Next we fitted a new down pipe from the GT3071R Turbo. The old one wasn’t compatible with the AWD system seeing as the pipe was positioned more centrally underneath the chassis tunnel and would have got in the way of the propshaft.
We contacted George from ATP Turbo in America to see if they could help. As it turns out they do in fact manufacture an AWD version for the S3 and Golf R, we explained to him the project in hand and they very kindly offer to sponsor us a new downpipe.
Big thanks to George and the his team for their support.
Propshaft fitted into position:
Photo below shows the S3 Axle fitted into its final position with the boot floor plan tidied and the final coat of paint applied:
New toy arrives at Autotechnica! A set of S3 H&R anti-roll bars that were required for both the front and rear axles due to the difference in the running gear installed. These H&R bars are awesome! Excellent build quality with a solid powder coat finish, should last for many years to come.
New H&R anti roll bar installed on the rear axle:
New R32/S3 running gear complete!
Cupra Kung Fu finally back on his own feet again! Brilliant job guys:
And now for the fun part! A little early in the process but we couldn’t resist…
A long deserved medal for our project Cupra, badge for the rear coming soon…
Play time over, back to work boys!
Next we started to install the additional wiring required for the Haldex rear diff and the secondary fuel pump. Now was the best time to get the wiring in seeing as we had the interior stripped out. Once the all the cabling is installed then we can start to re-fit the carpet, seats and trim. The new wiring has to be routed through to the electronics that sit behind the dashboard.
Luckily we got the full wiring loom from the R32 donor car so we have a form of template to see what terminations will be required, this is obviously backed up by documentation and schematics from Audi.
Photo below shows the wiring being installed to the rear Haldex unit:
There are currently five pins in use. We installed 8 wires so we have a few spare to play with should we need them. At a later stage in the project we will be installing a Haldex Sport Controller which sits in place of the factory unit but has been hard coded to change the handling characteristics of the traction (for the better)
We’ll cover this controller in more detail at a later time but for now we have to make sure we have the necessary cabling is installed. The sport controller has the option of switching between different modes i.e. road/track/race. One of the options is to fit a small switch that can mounted somewhere at the front of the car, hence the reason for the extra cores.
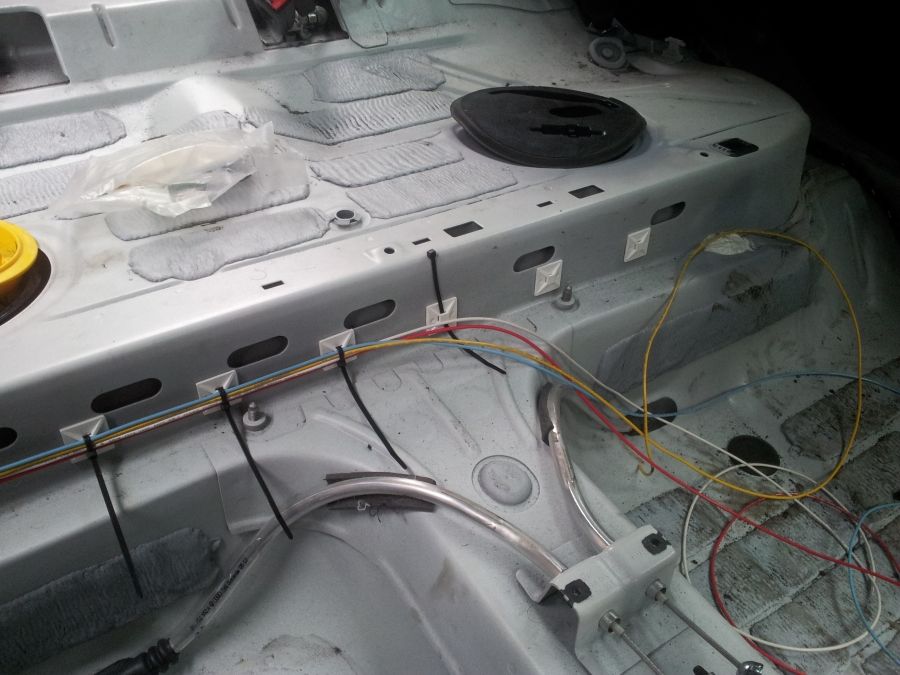
Next we installed the wiring loom to the secondary fuel pump. The wiring will sit nicely behind the interior carpet out the way. The secondary pump requires a 3 pin connection but again we ran extra cores just to be sure, we don’t want this carpet up again!
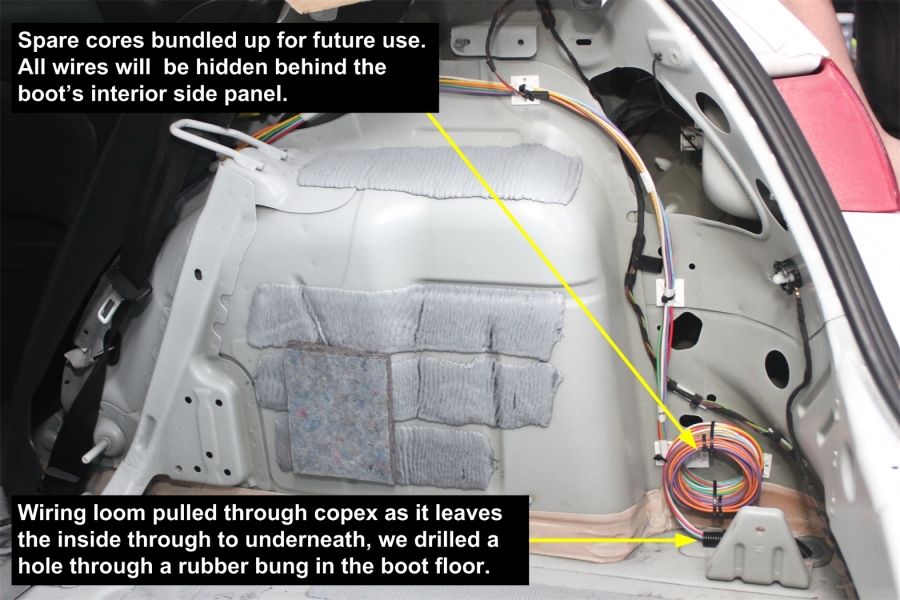
Fuel pump wiring joins the Haldex cables and routes along the drivers side along to the front of the car:
Wiring loom cores into position ready to be pulled up through behind the dashboard. Think we’ll have to get the continuity tester out as I forgot to mark them up! Sorry lads! Ha
One of the last stages of the mechanical works is to install the exhaust system.
You may have noticed that we have acquired sponsorship from Milltek Sport. We’re all very excited in teaming up with them for the coming season and are most grateful to Steve and his development team for their support.
Next week we take Kung Fu down to Nottingham on the back of a trailer to their development centre where we will be designing and installing a new custom stainless steel exhaust system. More on these works in the next update!
Meanwhile, whilst the team continue with their work over the coming weeks, thought I’d introduce you to a good friend of mine, Michel from Sweden. Michel did the first ever AWD conversion to a MK2 Cupra a couple of years ago and turned his ride into something rather special! We’re proud to form the UK arm of his mean green team and look forward to seeing him on his next tour.
I promised him I would post an exclusive photo of his ride to feast your eyes on!
If you want to see what a 500bhp+ AWD Cupra can really do, see Michel's videos on UTUBE, a real Lambo killer!
UTUBE Link
Until the next update, we once again thank the readers from seatcupra.net for your continued support.
You can also follow Andy and his team from Autotechnica on Facebook , you can also find them by searching for their new page ‘REVO Performance Hull’
Credits
Big thanks due to Andy, Ben and the team from Autotechnica Hull for all the hard work done during the last few months. These guys are wizards of mechanical engineering and very much look forward to seeing the next stage of their developments.
Also thanks to Dave from Auto Solutions for doing a fine job on the welding and fabrication.
Many thanks to George from ATP Turbo for providing us with the new ATP downpipe.
Also big thanks to Steve and his team from Milltek Sport for their sponsorship of the project, very much look forward to seeing their guys in action fitting the new exhaust, more details of this in the next update.
Back soon...

Similar threads
- Replies
- 4
- Views
- 2K
