BMW E46 330d Tourer

Jim@WD

Active Member
BMW E46 330d Tourer – Minor Correction with full Interior Detail and Leather Care.

23 hours put into this one – a fine turnaround I’m sure you’ll agree..

Product
• AutoSmart G101
• AutoSmart Bio-Brisk
• AutoSmart Tardis
• AutoGlym Glass Polish
• AutoGlym Vinyl and Rubber Care
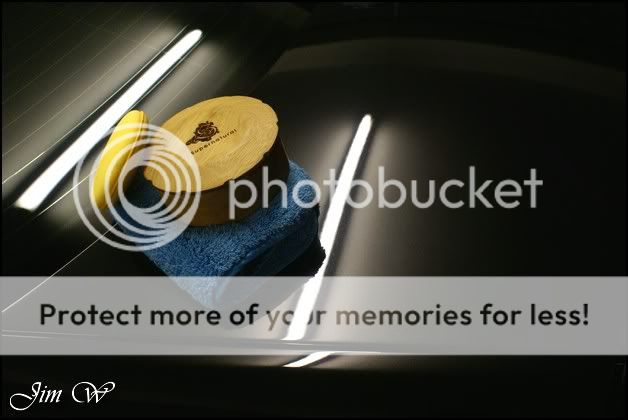
• Dodo Juice Supernatural
• Dodo Juice LimePrime
• Dodo Juice Born To Be Mild
• LTT Auto Ultra Foam
• LTT Auto Ultra Protect
• Meguiars Last Touch
• Meguiars Super-Degreaser
• Menzerna 203s
• Super Snowfoam
• Sonus Green Mild Clay
• Zaino Z8

Inspection Photos.

Exterior

DSC09172wd.jpg


DSC09179wd.jpg


DSC09178wd.jpg


DSC09199wd.jpg


DSC09174wd.jpg


DSC09175wd.jpg


Engine

DSC09164wd.jpg


DSC09166wd.jpg


DSC09167wd.jpg
DSC09169wd.jpg
 

Jim@WD

Active Member
DSC09218wd.jpg


DSC09231wd.jpg


DSC09221wd.jpg


DSC09222wd.jpg


DSC09224wd.jpg


Nice. Huh?

As it sits, the wheels really let the car down – contact details for a recommended alloy-refurber have been passed on. There was little I could do to revive the wheels; HEAVILY pitted, corroded and curbed. I’ll do what I can!

The doorcards on the inside were sticky to touch and the leather was filthy.. I’ve got my work cut out that’s for sure!

The plan for Day 1 was to transform the interior and to get the wash stages finished and out of the way, allowing for an early start the next morning for machine polishing.


First job, bag the bits! All obvious rubbish was thrown away, other belongings and bits were bagged.

DSC09235wd.jpg


Mats come out..

DSC09238wd.jpg


Before hoovering, I brushed all loose debris out of the crevices/channels/vents and onto the floor.

DSC09240wd.jpg


DSC09244wd.jpg


With the hoovering behind me, I started with the doorcards. They were nasty!!

This is the muck picked up off the drivers door alone:

DSC09245wd.jpg
 

Jim@WD

Active Member
Remember that handle?

DSC09202wd.jpg
DSC09248wd.jpg


DSC09247wd.jpg


Continued my way around the car with various brushes, cloths and G101 to clean.

DSC09250wd.jpg


Moving in slightly, I start with ‘things up high’:

DSC09253wd.jpg


DSC09257wd.jpg


As the sun-roof ‘visor’ had been pushed partially back for prolonged periods, an impressive dirt build-up had accumulated.

DSC09261wd.jpg


50/50:

DSC09266wd.jpg


DSC09269wd.jpg


Now onto the leather.

Ever wondered why your leather looks ‘shiny’? (See top half of next photo for example)

DSC09281wd.jpg
 

Jim@WD

Active Member
That’s because, chances are, it’s filthy!

DSC09272wd.jpg


DSC09274wd.jpg
DSC09279wd.jpg


DSC09283wd.jpg


DSC09289wd.jpg


Because it was so heavily soiled, I made a pass with a light mix of G101 to clean the majority. All photos were taken at this stage... Two more passes were then made with a gentler cleaner, LTT Auto Ultra Foam. This was followed by a series of ‘damp wipedown’ with a wet towel; trying to give back some moisture.

Once dry, all leather was then protected with LTT Auto Ultra Protect.


Interior ‘wet-work’..

The floor mats I took out earlier were pretty ‘engrained’..

Out with the VAX6131, AutoSmart Bio-Brisk, a Vikan upholstery brush and lots of microfibres!

50/50 on the rears:

DSC09294wd.jpg


50/50 on the passenger mat once in position:

DSC09299wd.jpg


DSC09301wd.jpg


Clean passenger vs dirty driver:

DSC09300wd.jpg


‘Clean’ driver after several minutes scrubbing, soaking, agitating, wetting, sucking and wiping.

DSC09302wd.jpg
 
Last edited:

Jim@WD

Active Member
Not 100%. The worst areas are those that have been worn by the drivers’ heels.


Stripped and ready to go:

DSC09304wd.jpg


And then the dirty water that was collected in the machine:

DSC09306wd.jpg


Interior carpets then went through a similar process:

DSC09308wd.jpg


DSC09310wd.jpg


^stain near the seat-rail on the above – couldn’t quite fully shift.


So I’ve spent the best part of a day working already, I’ve only done the interior basics!

Next up, sills and shuts.

More G101, Degreaser here and there and the odd spot of Tardis.

DSC09313wd.jpg


Petrol filler housing before:

DSC09316wd.jpg


After:

DSC09317wd.jpg


Then worked the engine bay in a similar way; G101, Degreaser, various brushes and lots of microfibres. Tardis also used to shift stubborn grease on the underside of the bonnet.

Dressed with AutoGlym Vinyl and rubber Care: (photos from Day 3 when entirely finished…)

A quick reminder of the before:

DSC09164wd.jpg


DSC09652wd.jpg


DSC09657wd.jpg
 

Jim@WD

Active Member
Before:

DSC09170wd.jpg


After:

DSC09656wd.jpg


Dark is falling now, no chance I’ll get the wash and clay stages finished today. Before I ran out of light completely, I thought I’d give the alloys and tyres a good scrub.

DSC09324wd.jpg


*as previously said, the alloys were shot. No cleaner, acid, brush or ‘tool’ will bring them up.. They’re due a full refurb.

DSC09326wd.jpg
DSC09327wd.jpg


DSC09329wd.jpg
DSC09330wd.jpg


DSC09331wd.jpg
DSC09335wd.jpg


End of Day 1. ~8 hours.

DSC09338wd.jpg
 

Jim@WD

Active Member
“Wakey wakey, hands off snakey” and I’m back with the car for 9am.

A few snaps of the ‘nearly finished’ interior after the leather had been fully worked:

DSC09342wd.jpg


DSC09344wd.jpg


DSC09345wd.jpg


And one dirty (..but with clean wheels!) BMW that needs a good wash.

DSC09347wd.jpg


Lots of time spent first of all ‘hitting’ the car with water. There was so much crud collected in all gaps, openings and joins. In the snowfoam stages, I tried to clean all ‘green’ areas the best I could..

DSC09348wd.jpg


DSC09351wd.jpg


DSC09353wd.jpg


Again, more thorough pressure washing ensuring all grit particles had been flushed away, and, trim pieces such as bump-strips, mirror-housing etc, were free of debris.

After this, a good wash. Warm water used along side a healthy serving of Dodo Juice’s Born To Be Mild.

Sonus Green Clay and Last Touch were used for the first step of the decontamination stage..

Here’s the bar after a small section of the roof:

DSC09356wd.jpg


DSC09357wd.jpg


DSC09358wd.jpg
 

Jim@WD

Active Member
I included the glass and light clusters in this stage; it surprised me how much it lifted off of the rear-window!

Rinsing as I go..

DSC09359wd.jpg
DSC09360wd.jpg


DSC09361wd.jpg


DSC09365wd.jpg


Said pick-up that was brought up off of the rear screen:

DSC09369wd.jpg


I only clay (at this stage..) as far down as the bump-strips. These areas need hitting with Tardis first to rid of all tar deposits as these instantly clog up your piece of clay..


A nice collection of tar seen on the o/s rear bumper:

DSC09371wd.jpg


After:

DSC09372wd.jpg


And again, more seen on the o/s front arch:

DSC09374wd.jpg


After the tar was ridden, I went over the same area lifting the containments out with the clay. This was a TIMELY process; both sides were seriously pitted and even “yellowed” in certain areas due to the amount of dirt within.


After a final blast with the pressure washer, the cars looking ten times better already:

DSC09376wd.jpg


…apart from the o/s rear quarter I notice.

DSC09378wd.jpg
 

Jim@WD

Active Member
At some point in its life, this has been re-sprayed (to an awful finish..(There was no reflection at all!))


Finally, water sheeted with an open-hose and then toweled off and brought inside for taping and measuring.

DSC09380wd.jpg


A bit of a pick ‘n mix this car – random sprayed areas all over!

DSC09382wd.jpg


Back to the o/s rear quarter, I noticed the top section still had some ‘life’ in it (as opposed to the lower sprayed area..)

DSC09383wd.jpg
DSC09384wd.jpg


Only the bottom half had been sprayed.

A quick image showing the difference in finish:

DSC09385wd.jpg


Some overspray spotted around the o/s door handles and on the passenger door itself:

DSC09389wd.jpg


DSC09488wd.jpg


Although this car was full of defects (swirls, random scratches etc) it was hard to photograph them.

Here is a section of the bonnet before:

DSC09405wd.jpg


And after:

DSC09406wd.jpg


As said, difficult to capture defects fully on camera.


DSC09415wd.jpg
 

Jim@WD

Active Member
A random before:

DSC09500wd.jpg


Random after:

DSC09499wd.jpg


A random before:

DSC09502wd.jpg


Random after:

DSC09507wd.jpg


Now down to the O/S quarter that had been sprayed..

Although I managed to lift the most of the swirls and lighter defects, the terrible orange peel remained.

DSC09512wd.jpg


Lack of clarity in the reflection:

DSC09523wd.jpg


Up the C-pillar and along onto the roof:

DSC09532wd.jpg
DSC09534wd.jpg


DSC09536wd.jpg


And some more nasties spotted down the N/S for a change:

DSC09545wd.jpg
 

Jim@WD

Active Member
After working my way round both sides, the roof and the bonnet, it was the end of Day 2. To complete: Tailgate. Lower doors. Bumpers. (Day 2 at ~10 working hours)


DSC09556wd.jpg
DSC09567wd.jpg


DSC09562wd.jpg


Day 3. Straight back into it.

General lower door before:

DSC09576wd.jpg


Afters:

DSC09577wd.jpg


DSC09570wd.jpg


Again, switching to smaller pads where required.

DSC09586wd.jpg


Light cluster before and after:

DSC09600wd.jpg


DSC09606wd.jpg


It’s pushing midday, and, it’s time to pack-away the rotary. Single stage machine polish complete.

DSC09628wd.jpg
 

Jim@WD

Active Member
Time to remove the complimentary polishing dust from the awkward areas:

DSC09630wd.jpg
DSC09632wd.jpg


Tape was removed and then given a beating with the pressure washing.


Pre-LSP (before protection) beading photos:

DSC09636wd.jpg


DSC09639wd.jpg


Car was carefully dried up and prepped for the wax application.

DSC09647wd.jpg


(With added drying towel left of the windscreen – oops!)


Reflection in o/s rear door:

DSC09644wd.jpg


Reflection in o/s rear quarter:

DSC09643wd.jpg


Poor.


Visually destroys the back end..

DSC09645wd.jpg


OK, normally at this point I like to catch a nice photo of the wax in question, along with the applicator and microfibre towel. However, I forgot.

Seeing as though it’s such a great shot, I’ll make-up for this loss and use one from last week; work on and Audi S8:

DSC09106wd.jpg


DSC09666wd.jpg
 

Jim@WD

Active Member
DSC09667wd.jpg
DSC09675wd.jpg


Once garaged again (sheltering from the rain/sleet/snow attempts), I finished off all remaining dressings, polished the windows, gutted the boot, and, dressed the tyres. A final wipedown was given of Zaino Z8 Grand Finale and I was out to chase the sun..

DSC09679wd.jpg


DSC09681wd.jpg


DSC09693wd.jpg


DSC09695wd.jpg


DSC09691wd.jpg


DSC09696wd.jpg


DSC09699wd.jpg


DSC09704wd.jpg
 

Jim@WD

Active Member
DSC09698wd.jpg


DSC09705wd.jpg


And finally, tucked away in the garage up until collection. (Which is two days away, so, will do my best in the meantime to catch some better after photos) Day 3 at ~6 working hours

DSC09708wd.jpg


DSC09714wd.jpg


DSC09719wd.jpg


Although it was tough going, I really enjoyed this one. Look forward to seeing the owners reaction come Friday afternoon..

Thanks for reading – sorry it was such a slog.

Jim.
 
Progressive Parts, performance parts and tuning specialists