
Spent a couple of hours in the drizzle yesterday fitting new springs, hope this helps.....
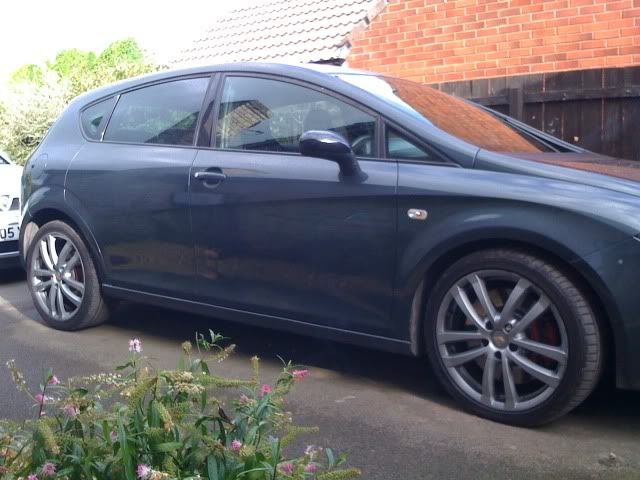
Before:
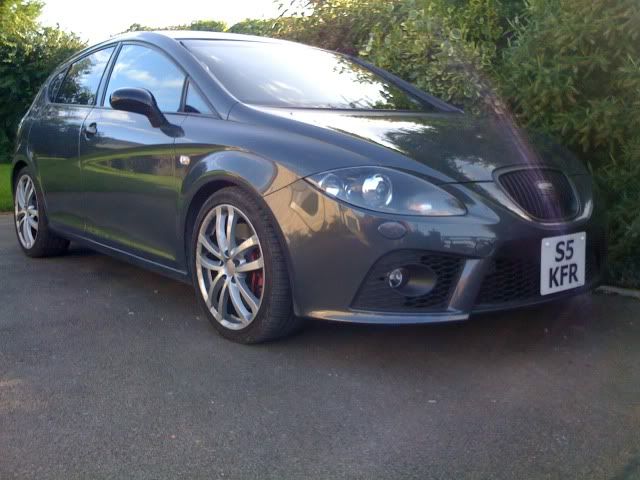
After:
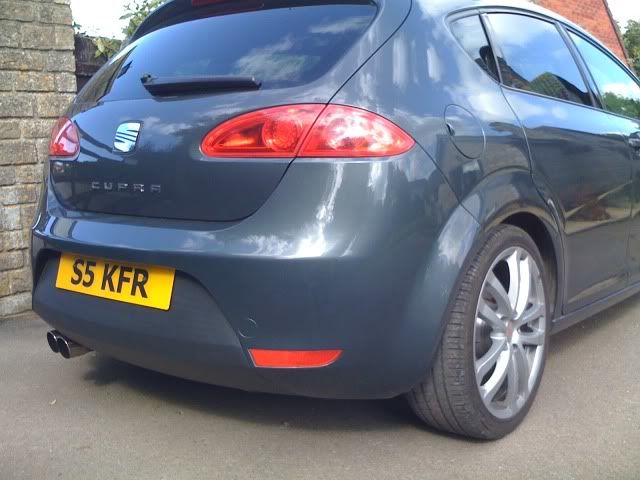
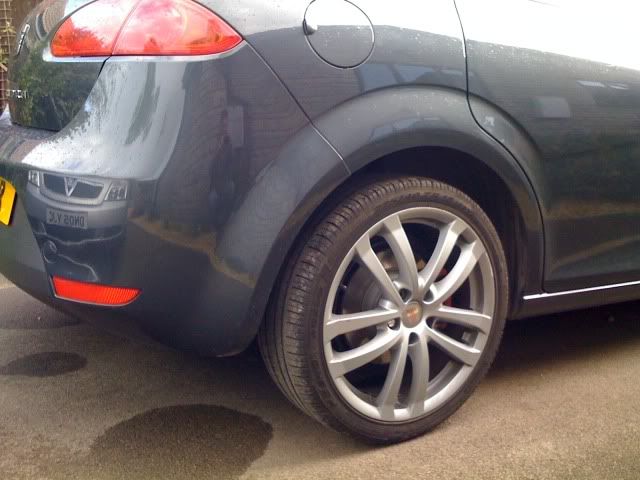
The car's dropped 15mm front and 40mm rear but I would expect it to settle another 5-10mm as the springs settle into the rubbers. Maybe a couple of 10mm wheel spacers on rear?
Tools needed:14mm spline socket, 27mm socket, T30 socket, 21mm or 13/16" plug socket, long 7mm allen key, spring compressors (optional), usual sockets ets.
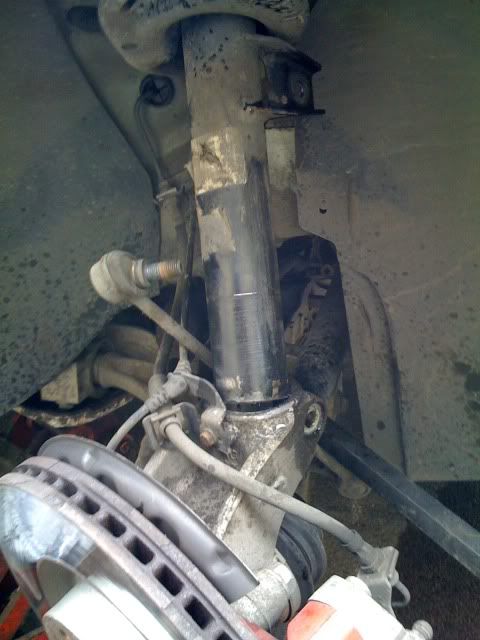
First jackup car and remove front wheel, you need to undo 27mm front hub nut, this will be tight so if you don't have an air gun handy (I did) take the centre cap out of the wheel, put wheel back on, lower to ground and undo, or get someone to put the brake on. With car back in air, undo 18mm anti roll bar top link nut, one side came off no prob, the other I had to hold the centre with a T30 and undo with a 18mm wrench. It's best to do both sides at the same time as the driver's side roll bar gets in the way later.
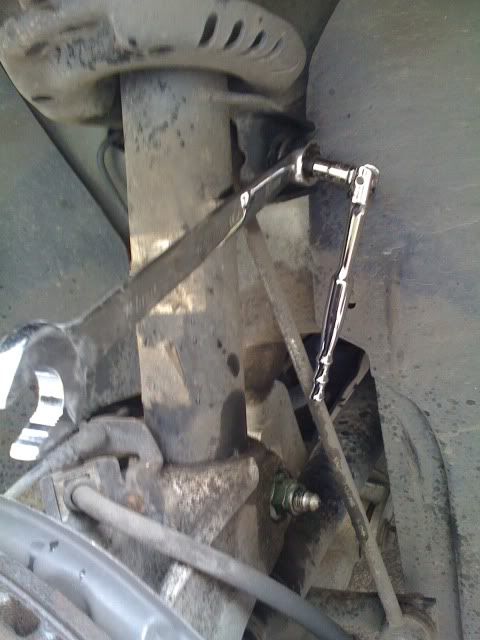
Then scribe a line on the strut where it goes into the hub for future reference and undo the pinch bolt at the base of strut with 14mm spline socket and 18mm socket, on passenger side undo the 10mm nut in bottom arm that holds the Hid leveller and move out the way. Worth checking the cable to this as mine was under tension so I eased the cable a bit where it's tied to the abs lead. Screw in the hub bolt 4/5 turns and bang in gently with a copper mallet so it's free to move and remove bolt. Now the fun starts! Using a medium flat-blade screwdriver bang it upwards carefully into the slit in the back of the alloy where the bottom of the strut goes in and liberally squirt some WD40 or similar. You need only to expand this enough so when the strut comes out the safety tab which has a couple of dimples can come free. Using the copper mallet, carefully bang down on the hub while levering the bottom arm down until the strut can come out of the hub, this is easier on the passenger side so maybe do this one first to get a feel for it. All the while make sure the driveshaft is free so it's not pulling out of the CV joint, maybe put the bolt in a couple of turns so you can tap it in.
Now the strut is free you can lift off the rubber trim at the base of the windscreen above the top mount and remove the 13mm top bolts, bit fiddly, I used a 1" wobbly extension and a shallow 6-sided socket on a stubby ratchet once I had cracked off the bolts (I'm a Snap-On tool dealer so a selection of tools isn't a problem, sorry!)
Lift out strut and onto bench.
Top mount on one strut buzzed off, but the other was stiff so had to use 21mm socket with hex on (13/16" plug socket) with long 7mm allen key.

Now, on the first one I compressed the spring as you would, but noticed when I fitted the new Eibach that it wasn't necessary, they're not under much tension, just be careful if you can't do this! Fit the new bump-stop, engage the bottom coil in the rubber locator and refit the top mount. Back on the car, I found it easiest to loosely bolt the top mount bolts and then reverse the levering/fiddling process to get the strut back in. This time you need to bang upwards to the point where the security tab just clears the through hole in the hub and your scribed mark (remember that?) lines up. Reassemble in reverse order! After fitting front springs I panicked a bit cos it didn't seem any lower, but all well once rears were done, maybe old front springs were a bit knackered?
On to the rear, piece of cake this, jack up, remove wheel, pull/lever down on spring and remove! You can lever new spring back in but I didn't want to scratch my new red paint so compress spring slightly and zip-tie it, put back in with rubber mount on top and release, easy-peasy!

Thats it, took about 2 hours all in, admittedly with all the right tools, bit fiddly at times but overall easy job and well worth £150 for the improvement in the stance, not too low but levelled out. Haven't had the driving time to comment on the handling, but got to be a bit better?!
Before:
After:
The car's dropped 15mm front and 40mm rear but I would expect it to settle another 5-10mm as the springs settle into the rubbers. Maybe a couple of 10mm wheel spacers on rear?
Tools needed:14mm spline socket, 27mm socket, T30 socket, 21mm or 13/16" plug socket, long 7mm allen key, spring compressors (optional), usual sockets ets.
First jackup car and remove front wheel, you need to undo 27mm front hub nut, this will be tight so if you don't have an air gun handy (I did) take the centre cap out of the wheel, put wheel back on, lower to ground and undo, or get someone to put the brake on. With car back in air, undo 18mm anti roll bar top link nut, one side came off no prob, the other I had to hold the centre with a T30 and undo with a 18mm wrench. It's best to do both sides at the same time as the driver's side roll bar gets in the way later.
Then scribe a line on the strut where it goes into the hub for future reference and undo the pinch bolt at the base of strut with 14mm spline socket and 18mm socket, on passenger side undo the 10mm nut in bottom arm that holds the Hid leveller and move out the way. Worth checking the cable to this as mine was under tension so I eased the cable a bit where it's tied to the abs lead. Screw in the hub bolt 4/5 turns and bang in gently with a copper mallet so it's free to move and remove bolt. Now the fun starts! Using a medium flat-blade screwdriver bang it upwards carefully into the slit in the back of the alloy where the bottom of the strut goes in and liberally squirt some WD40 or similar. You need only to expand this enough so when the strut comes out the safety tab which has a couple of dimples can come free. Using the copper mallet, carefully bang down on the hub while levering the bottom arm down until the strut can come out of the hub, this is easier on the passenger side so maybe do this one first to get a feel for it. All the while make sure the driveshaft is free so it's not pulling out of the CV joint, maybe put the bolt in a couple of turns so you can tap it in.
Now the strut is free you can lift off the rubber trim at the base of the windscreen above the top mount and remove the 13mm top bolts, bit fiddly, I used a 1" wobbly extension and a shallow 6-sided socket on a stubby ratchet once I had cracked off the bolts (I'm a Snap-On tool dealer so a selection of tools isn't a problem, sorry!)
Lift out strut and onto bench.
Top mount on one strut buzzed off, but the other was stiff so had to use 21mm socket with hex on (13/16" plug socket) with long 7mm allen key.
Now, on the first one I compressed the spring as you would, but noticed when I fitted the new Eibach that it wasn't necessary, they're not under much tension, just be careful if you can't do this! Fit the new bump-stop, engage the bottom coil in the rubber locator and refit the top mount. Back on the car, I found it easiest to loosely bolt the top mount bolts and then reverse the levering/fiddling process to get the strut back in. This time you need to bang upwards to the point where the security tab just clears the through hole in the hub and your scribed mark (remember that?) lines up. Reassemble in reverse order! After fitting front springs I panicked a bit cos it didn't seem any lower, but all well once rears were done, maybe old front springs were a bit knackered?
On to the rear, piece of cake this, jack up, remove wheel, pull/lever down on spring and remove! You can lever new spring back in but I didn't want to scratch my new red paint so compress spring slightly and zip-tie it, put back in with rubber mount on top and release, easy-peasy!
Thats it, took about 2 hours all in, admittedly with all the right tools, bit fiddly at times but overall easy job and well worth £150 for the improvement in the stance, not too low but levelled out. Haven't had the driving time to comment on the handling, but got to be a bit better?!
Last edited:
")
