I thought some of you may find these few pictures of some use, I know I would have when installing my gauges!
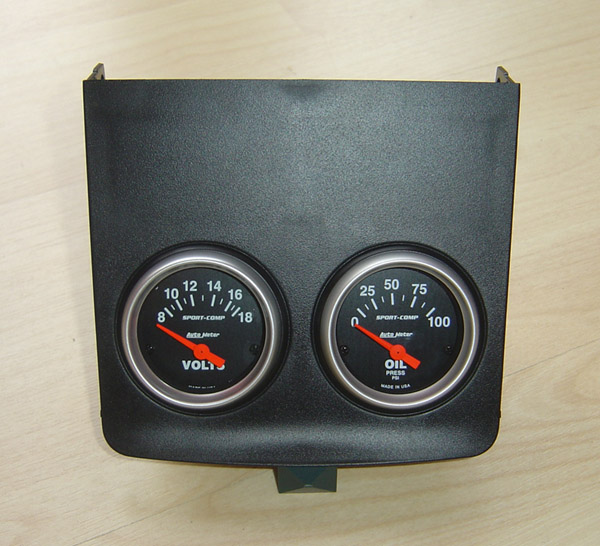
Let’s start with the main factor, choosing your gauge style and where to mount it, in my case I went for some 52mm gauges that will fit in the Cupra R centre console gauges.
Next is the electrics, remember your gauges will not come with any wire or fitting. You will need some relatively decent wire for the positive live and earth, however the back lighting can be ran off a finer gauge wire. Also needed is some scotch blocks (unless you choose to cut and soldier in/around the dash areas) and some hooped fittings to attach the wires onto the gauge with.
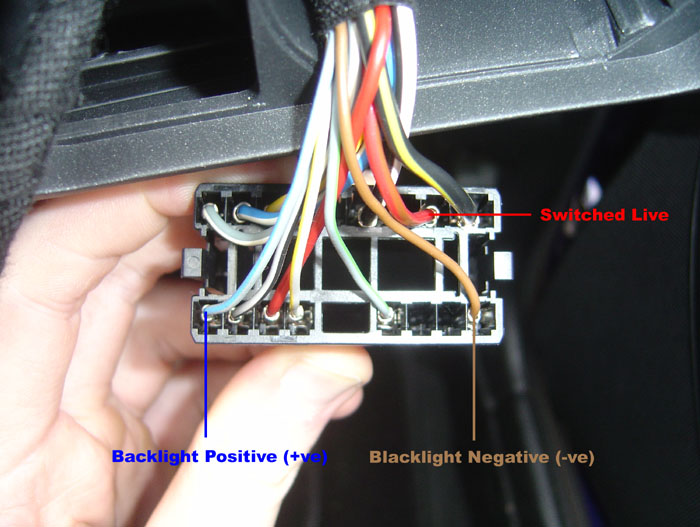
The wiring can be taken from the headlight switch and dimmer switch area, this allows you to have a switched live supply and a dimmed supply so your gauges match the brightness of your dash lights.
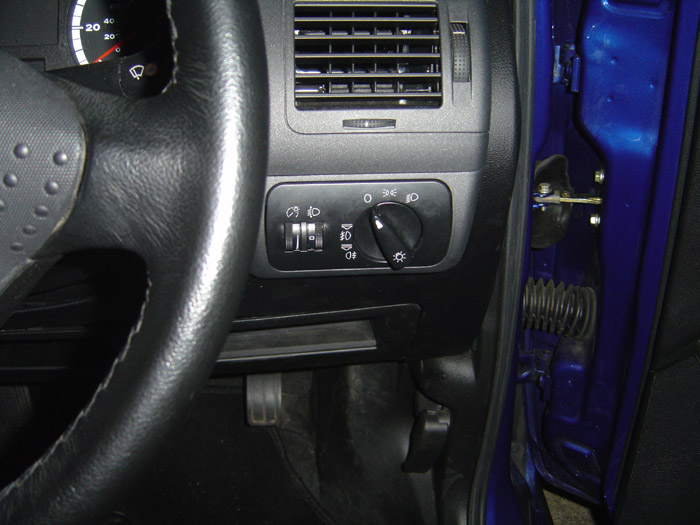
First locate the headlamp switch, to remove it from the dash push the switch used to turn the headlights on in and turn it to the right, it will pop in and stay there, now pull on the switch, the whole unit should come out like a cassette.
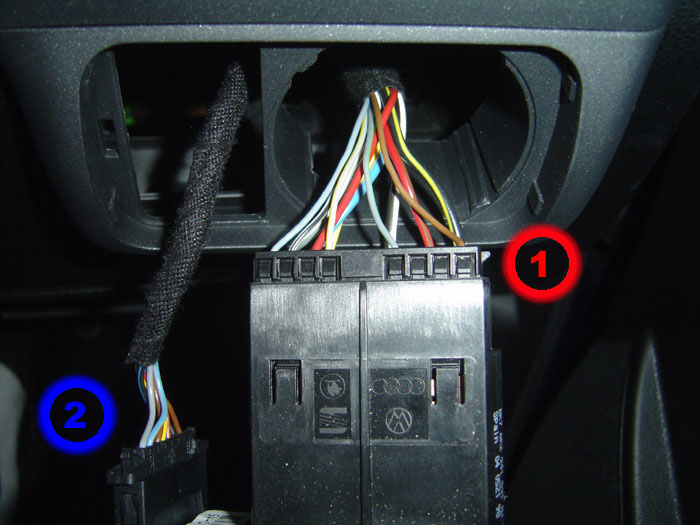
In front of you, you will have the two switches 1 & 2 all the wires will be run off switch 1.
The above picture shows which wires you can run your supply off, I choose to take my earth directly off the engine, after all I had to route one wire through the firewall for the oil pressure gauge sender unit, so routing a second one was no
problem what so ever.
Next is fitting the oil pressure sensor, first you’ll need to locate the blanking plug which can simply be removed using a 6mm Allen key.
Once the blanking plug has been removed you can just screw in the oil pressure sensor, once screwed in your can attach the wire to it. The wire needs to run into the dash area, if you look around the coolant expansion tank area you should be able to see a rubber firewall bung.
You can access this bung by removing the passenger’s side footwell dash trim which is held on by 2 screws, you’ll need a flexible arm but you should be able to just pop it out. I then cut a small hole for the wires, run the wires through it and re-fitted it into the firewall. This means the wires won’t rattle on the metal firewall hole and possibly get sliced and short out and it also ensures no water will get through to the dash area.
These are just the brief key points to installing some gauge’s, other useful tips would be;
-
Routing the wires: I found that running the wires from the light switch to the centre console was best done following the current wiring loom, all you need to do is unclip one rubber strap at a time and place the wires into place and re-strap the rubber strap.
-
Gauge lighting: The gauges I bought came with some 501 type bulbs and some rubber coloured caps, these colour caps are known to fade over time, and the bulbs blow. So I bought two 6 Cluster 501 Type LED’s this also meant the matched the dash lighting.
Hope I haven’t just wasted my time and this brief
guide will
help a few people out!

")