Dephead2004 asked me to add my pictures and info in removing the rear light from another thread, so here it is
")
I had to replace one of my rear lights last month as I was getting condensation in it and noticed a tiny tiny internal crack where it's bonded together.
I can't believe the way the rear lights are mounted and not obvious if you have never had to remove them before. I am referring to the two side lugs in the grommets of course, and easy when you know how
I did a little guide over on another Seat forum with some pictures to help out anyone else that may have trouble.
Anyway, here it is...
hi guys,
Got my replacement light yesterday and fitted between the showers and all seems good now
Cost me £61 (Full price is £146) as I don't think they added the vat on
Not sure if all Seat, VW, Skoda, Audi are the same fitment wise, but I assume so, so will add a little how to to save some of you breaking you're outer rear lights
Should be simple really and is when you know how but if you can't see how the light mounts, it's very easy to break bits
There is a diagram in the manual and even I thought I understood it but obviously not.
Anyway, first open boot, Locate the little carpet cover which is parallel to the light and remove to reveal the light mounting bolt.
Remove the mounting bolt with a 17mm hex key or a flat head screwdriver by turning anti clockwise.
Once you have removed the bolt from the boot, you need to look at the top right edge of the light on the rear wing. I was removing drivers side, it would be top left side if doing the passenger side.
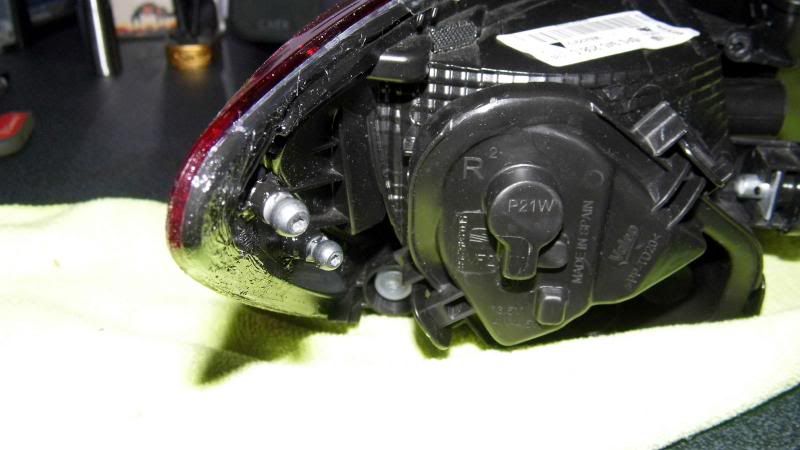
There are two lug bolts which are a push fit into rubber mounts in the rear quarter panel, these are the lugs...
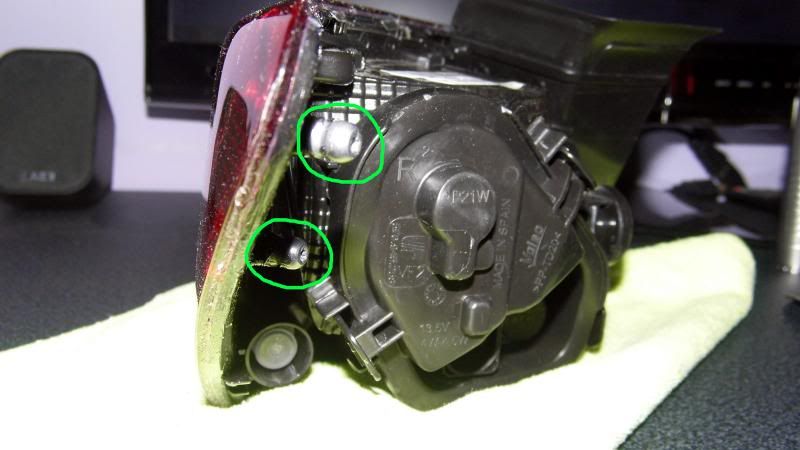
The lugs are here when light is fitted to vehicle...
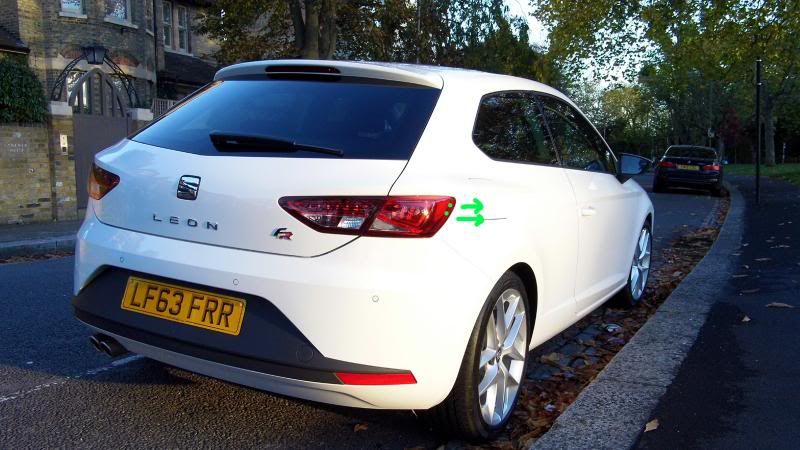
Standing at the side of the car with the rear wheel facing you, you will need to grab the outer edge of the light and pull it towards you to release the bolts.
Remember they are push fit so there is nothing to undo.
Pull the light directly away from the car from the edge of the light where the lugs locate into the body. It can be a little stiff because the grommets create a sort of vacuum but be patient and the lugs will pop out of the grommets.
Don't wiggle the light around like a madman trying to remove the light or you WILL snap the lugs on the light.
Once the two lugs are clear, the light will slide out to the rear of the car, then unplug the wiring harness.
You will need a small screwdriver to pop the tab in to unhook the connector.
Replacement is straight forward.
Reconnect the wiring plug, slide the unit into position, Locate the lugs and press into the grommets noting the angle that they need to be to go straight in.
As always, lube will always help when putting something into a tight hole so a bit of fairy liquid or Vaseline will help
I used firm pressure with the palm of my hand to push the light back into place.
Once you have pushed the lugs back into the grommets fully, it should be lined up and flush fitting.
Then replace the bolt in the boot and don't over tighten it, this is why I used a screwdriver myself.
Replace the carpet cover and go test everything is working
I was careful but tried wiggling the light a bit before I knew how it was attached and both the push fit bolts had snapped off on the old light
It is pretty easy to remove now that I know how lol
I would have also been more careful removing something that was not already broken

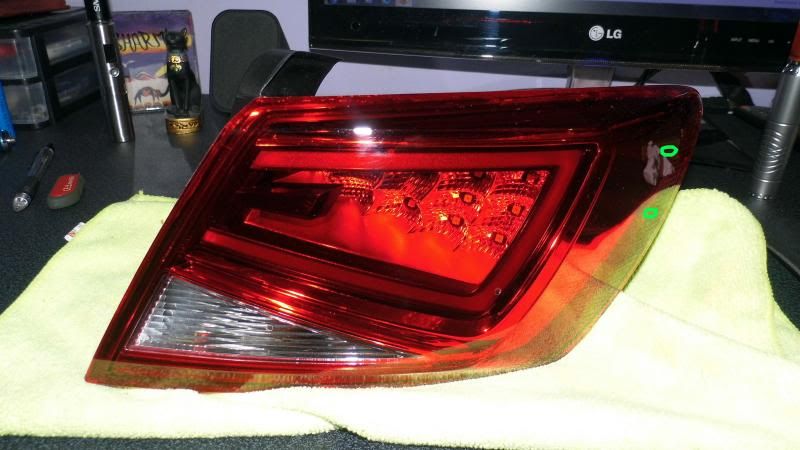
Pictures are of the original light which had the crack in the glass, I have managed to dry it all out, glue bolts back on and silicone sealed the light all the way round so is all good for a spare now if I ever need it
The only time you will really need to remove the outer lights is if you need to replace the part, or replace a bulb, or upgrade to LED's.
If you have rear led lights, the only bulbs that I can see that are replaceable are the indicator bulbs.
I am in no way responsible if you follow this guide blah blah blah lol
And if you do muck it up, maybe this will help lol
Hope this helps someone in future

 www.seatcupra.net


![[B)]](/forums/styles/seatcupra/oldforumsmileys/shades.gif "Cool [B)]")
