AWD is alive!
Hi Everyone,
In this update we have some exciting news! Our Cupra is alive and now driving all four wheels!

The last few weeks have been manic to say the least! We left ourselves with little time to get Kung Fu ready for the first show of the season. Rest assured, Andy and his team from
Autotechnica worked around the clock to get the final stages of the works completed and we were then able to carry out the first road trials.
During the last update, we painstakingly put the Cupra’s interior put back in again and had got all necessary cabling for the Haldex and secondary fuel level sensor to the front of the car.
We started to wire in the Haldex system which communicates onto the system CAN Bus, a vehicle bus standard designed to allow microcontrollers and devices to communicate with each other within a vehicle without a host computer. The modern CAN Bus system greatly reduces the amount of cabling required in a modern motor, in essence it simplifies the communications topology between main components that require data from the engine’s ECU and main electrical components.
So Ben got to work on the wiring, well once he’d finished his cup of tea!
The next job was to wire in the cables from the secondary fuel level sensor which involved removing the speedometer and clock assembly. To remove the speedometer, we had to take out the centre air vent console, this then allowed access to some of the fixings that hid behind the dashboard.
You’ll also notice we’ve started to wire up the AEM Fuel/Air Ratio sensor and Turbosmart E Boost Controller. These will come in handy when we start to push the boost levels beyond the reading capacity of the engine’s ECU.
There aren't that many options for gauge pods with the MK2, unfortunately we couldn't find any vertical pillar mounts available on the market. For the AEM gauge, we decided to use an air vent adaptor which requires the removal of the existing air vent assembly. This is done by removing the side panel to the fuse board (of which you can see in the photo above) You then have to unclip the vent mechanism from the inside of the dashboard.
The Turbosmart boost gauge is mounted using a pod pillar holder that sits within the front triangular window adjacent the dashboard, the first job was to black out the window so no one can see the wiring to the gauge from the outside. This little window is a real bugger to work on! I bought a roll of black plastic vinyl wrapping from Homebase. We originally looked at using window tint film, but to be honest the area to be covered was so small, it really wasn’t worth the bother and still looks good with the plastic covering anyway.
Weblinks for the gauge holders:
Vent Pod Gauge
Triangular Pillar Pod
We’re pleased with both above items, the gauge pillar pod from Nomad Racing is made from a tough fibreglass construction, looks are a bit deceptive on the website as it appears to be made from moulded plastic, but it is well made and very durable. The unit is sprayed black once constructed. It is installed using just one countersunk screw that holds the pod up against the interior lining of the car.
Photo below shows the Nomad Racing pod before we mounted it into it’s final position. The power cable and plastic air hose was pulled through a hole that was drilled using a 20mm hole saw and arbour. We made the opening through the plastic trim that sits behind where the pod holder is fixed. No wiring will show once it’s installed.
So we finally completed the terminations of the cabling required for the Haldex. We had just three days before the first show of the season so the pressure was on!
We plugged the laptop into the ECU port, opened up the VAG Com software and got to work on the configuration. Some hours later and a bit of head scratching, we pulled out the lead and got the car up on the ramp.
So we gripped our teeth, started up the engine and then drove successfully through the all the gears. All four wheels started whizzing round…. and guess what!
We didn’t see any fault lights or ESP/ABS warnings appear! Hoorah!
So we now started getting rather excited at the possibility that we had a working car!
For some videos on the action, find us at the
remappers.com UTUBE channel
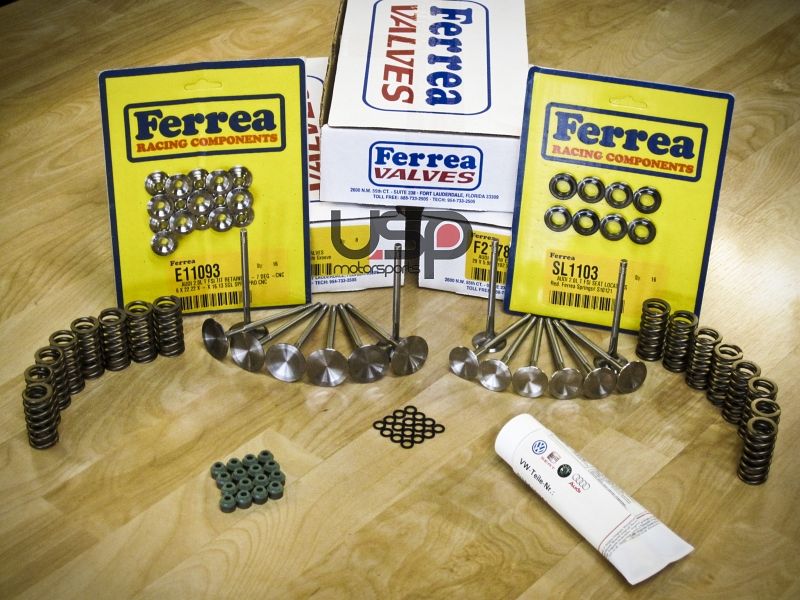
So the first stage was a success, but more testing was required. Andy and Dave took the Cupra out on the road and put it through its paces. They were very pleased to find that everything worked first time!
This was a massive relief given some of the troubles that others had previously encountered. Further road tests were carried out and we didn’t see any fault lights come on once! Just pure AWD heaven!
We now had just one day left before the car show, I went to Hull on the Saturday. Dave and I fitted a new front splitter from Triple R Composites (photos shown later on in the thread). We got the Autotechnica van packed up with the trade tent, slung a few plastic chairs and tables in the back and then I got to take Kung Fu back home for the very first time since January!
Aghhh I was so excited, my first drive in the Cupra as an AWD!
First pull out onto the main road and I could instantly feel the difference! The rear Haldex started kicking in almost instantly!
So I set off on my journey home with a big cheeky grin on my face!
Every now and then slamming the throttle in the low gears to see what Kung Fu could really do. About an hour later I arrived back in my home town and rushed straight for the hills! lol
Before the AWD conversion was done, first and second gear was a complete waste of time, with 450bhp through the front wheels alone, I was starting to lose my faith in the Cupra.
And now...
Woosh! First and second gear is absolutely awesome! There was ZERO Wheelspin as it flew up the hill climbs like a wasp on steroids! Cornering is also massively improved, with new antiroll bars and the Billstein B14 Pro coilover kit, this Cupra sticks to the road like a roller coaster on rails!
So I had a couple hours of fun but then it was straight back home and down to work, I had a lot of cleaning, hoovering and polishing to do ready for the show in morning.
First Show of the Season
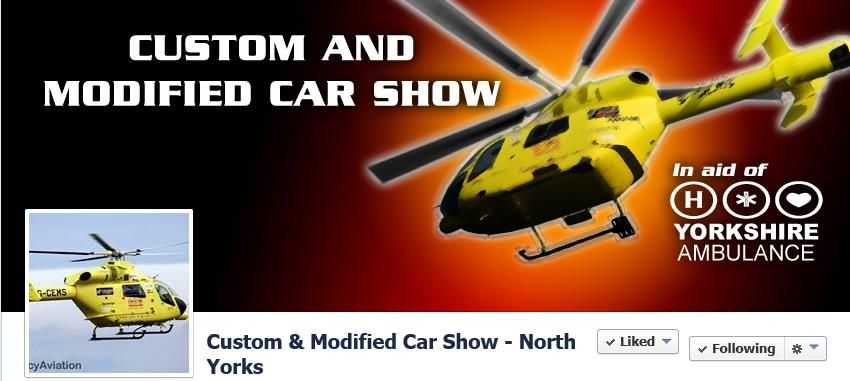
About the show:
Extract from the Facebook Page
This is a custom modified car show , everyone welcome. This is a tribute day to the late Andy Harrison who tragically passed away aged 37. We are showing our grateful appreciation to this fantastic Charity. We will have Show & Shine competitions with trophies to the winners 4 classes to enter. special 7' rides, VW club ..., TVR and other clubs are invited plus cruise clubs. Also the Helicopter will be attending as will the Police, Fire and Ambulance displays .Confirmed Mark Dixon from tv trucks , trains & planes, Mike Newman the blind land speed record holder and worlds fastest Postman Pat Van. Lets make this a special day by showing your support.
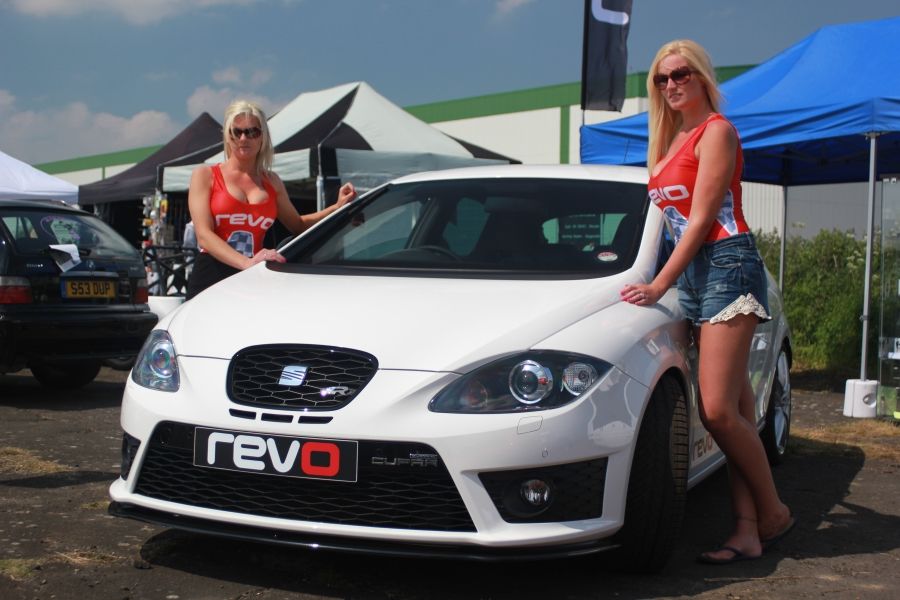
The REVO team had been in touch with Andy and had asked us to hold the REVO stand on their behalf. This was really exciting and a real privilege for our Cupra to take prime position at the show. Andy also took his own car down to join Kung Fu at the stand, an Audi S3 with plenty of goodies under the hood and a rather nice new set of rims which sparkled in the heat of sun!
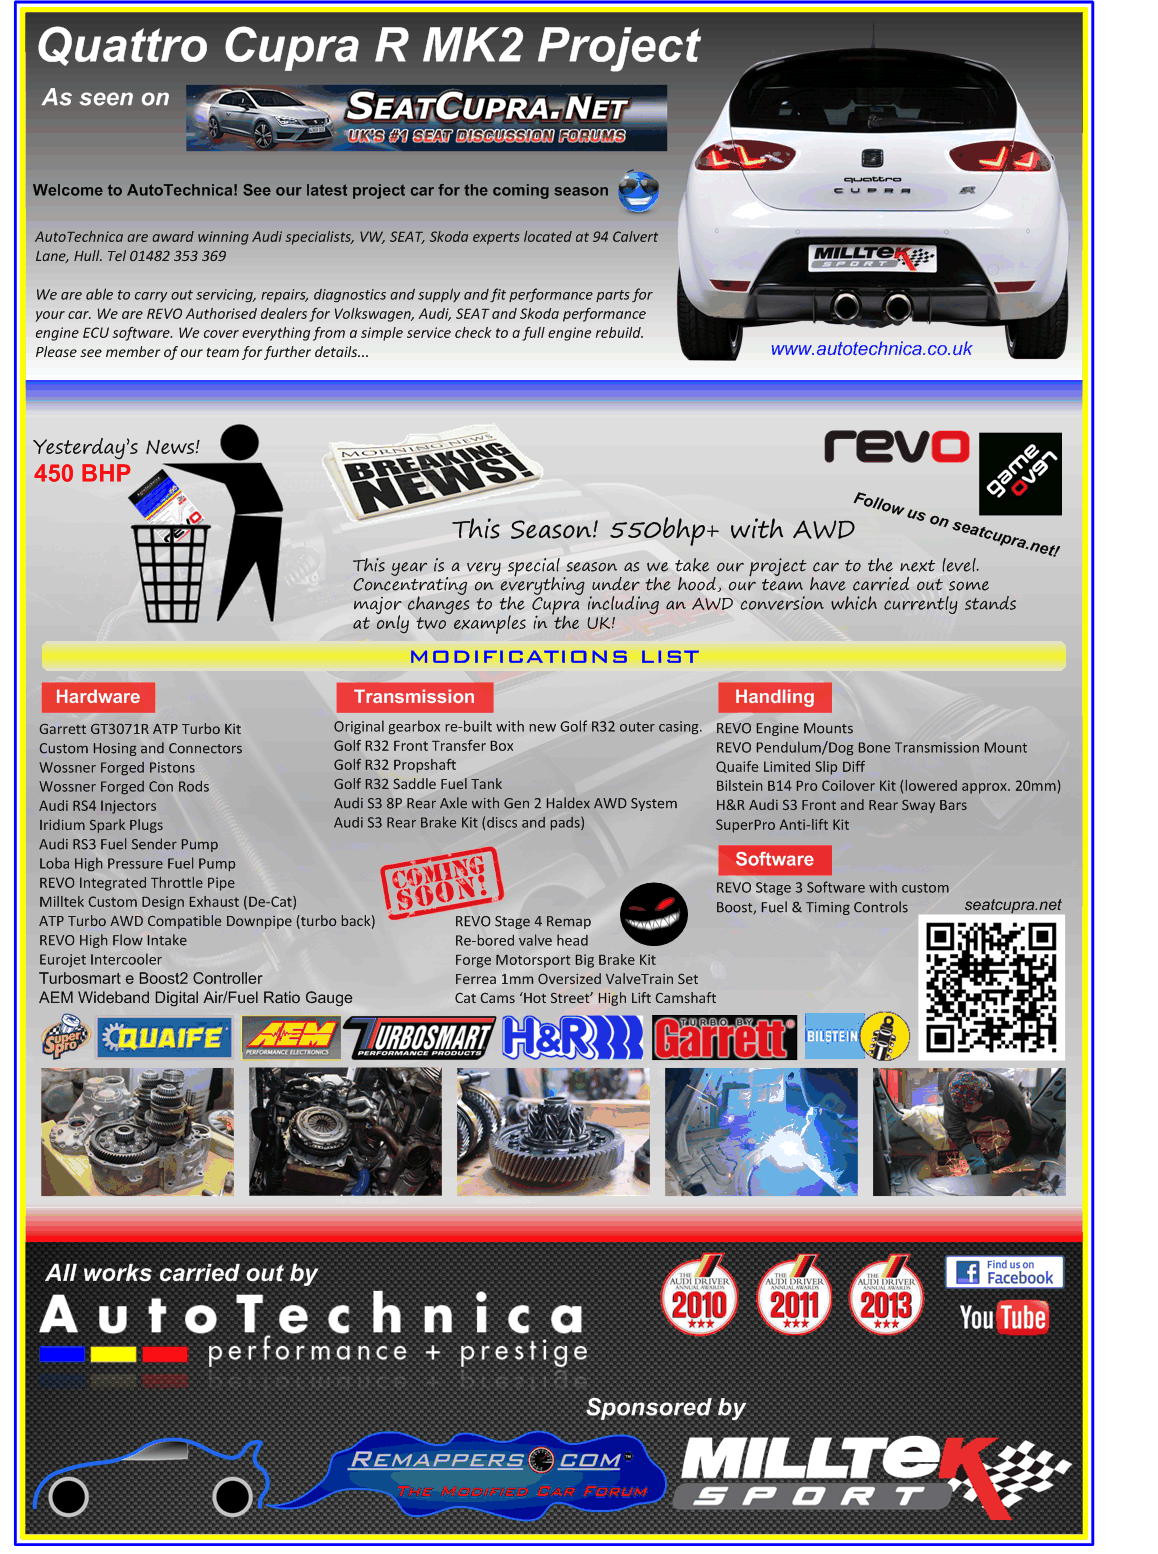
The picture below shows the car spec sheet that we designed for the show.
Photo below shows the REVO trade stand hosted by ourselves and James Leng, President & Chief Operating Officer for the REVO Group. James bought a highly tuned supercharged S5 with him to compliment the car display. It was a great opportunity to meet him and discuss our up and coming plans for the project:
Mark Dixon, a familiar face on the TV from the Eddie Stobart Series was also there as one of the organisers. Mark also had 2qty Revo Ladies by his side so I asked him very nicely if I could borrow them for 5mins!
We were all very pleased with the new front splitter from Triple R Composites, given the car is black and white, it really blends in looking very much an OEM product, almost like it was always meant to be there. The splitter finishes off the bumper just nicely, not too low to the ground but it pokes out at the front just enough to give the car a smarter and more aggressive stance.
The splitter was quite easy to fit, it took Dave and I about an hour to install it. The only awkward part was accessing the nuts and bolts around the side, we had to unfasten the front wheel arch plastic inner linings to get access to the fixings inside the front bumper. Anyone with skinny arms to reach those inner fixing points will be an advantage! lol
The Cupra parked up alongside the spec sheet for everyone to see. We got plenty of interest from lots of people which was really cool:
We left the boot floor open most of the day so people could see it was no ordinary Cupra!
We also left the front windows open for people to have a peek inside, but then trouble appeared! The Yorkshire Air Ambulance chopper arrived and landed only 50 metres away, blasting every car in the near vicinity with runway dust and particles of burnt tyres!
Aghhhhh it took me ages to hoover Kung Fu out the night before… Rats!
Later on I discovered a fine film of dust all over the car! so I had to go back over the body work with a polishing cloth several times that day! We were positioned quite close to the main stage where all the action was taking place and the chopper had parked up!
One of the main features of the show was the Lassa Drift Team who were awesome! Hats off to the guys for managing to show off their talent in such a small area:
Part of their show was to drive donuts around some volunteers who were stood in the middle of the tarmac whilst the drift cars skimmed around them within an foot of their legs! On this particular occasion I have to say Mark Dixon’s girlfriend looked a bit little concerned! I’m just glad I was wearing sun glasses that day because the spray of burnt rubber in your face was not a nice experience! Especially as it was approaching the hottest day of the year so far!
At one point we thought one of the drivers was going to collide with one of the girls, he skidded his rear wheels around and parked up right next to her with an inch to spare, apparently this was all part of the stunt though! (we hope) Try telling her that!
![[:@]](/forums/styles/seatcupra/oldforumsmileys/furious.gif "Furious [:@]")
To be continued...


![[B)]](/forums/styles/seatcupra/oldforumsmileys/shades.gif "Cool [B)]") i see you're from yorkshire! You should join vagcars.co.uk too, it's a local forum with lots of nice metal, one of the members is doing a 4wd
i see you're from yorkshire! You should join vagcars.co.uk too, it's a local forum with lots of nice metal, one of the members is doing a 4wd