REVO Stage 4... The BIG BUILD! cont...

Manufacturer X support team’s response was we could simply bend the oil jets out the way of the skirt wall in order to avoid the collision. We immediately thought this was a bad idea and entered into some weeks of hard debate over the suitability of their suggestion. It transpired that we could not rotate the jet round on the axis anyway, the bolt holding it in place had a square edge and could not be altered.
The above situation drew some differences in opinion of whether re-manipulating the oil jet was an acceptable solution, some modded car tuners have been known to completely remove the oil jets from their cylinder when encountering such a situation.
Some points of consideration though:
We were re-building this engine with a hefty gain in power on the cards, this obviously increases the cylinder temps by far to the point we have to ensure we give the engine the best possible chance of cooling under heavy load.
Why was Manufacturer X telling us to re-manipulate a component that was never designed to be altered and would likely weaken it, given the oil jet was hollow in its construction and would likely buckle the tubing under heavy bending and load.
What problems might we encounter after bending the jet into its new position i.e having suitable clearances from other key engine components
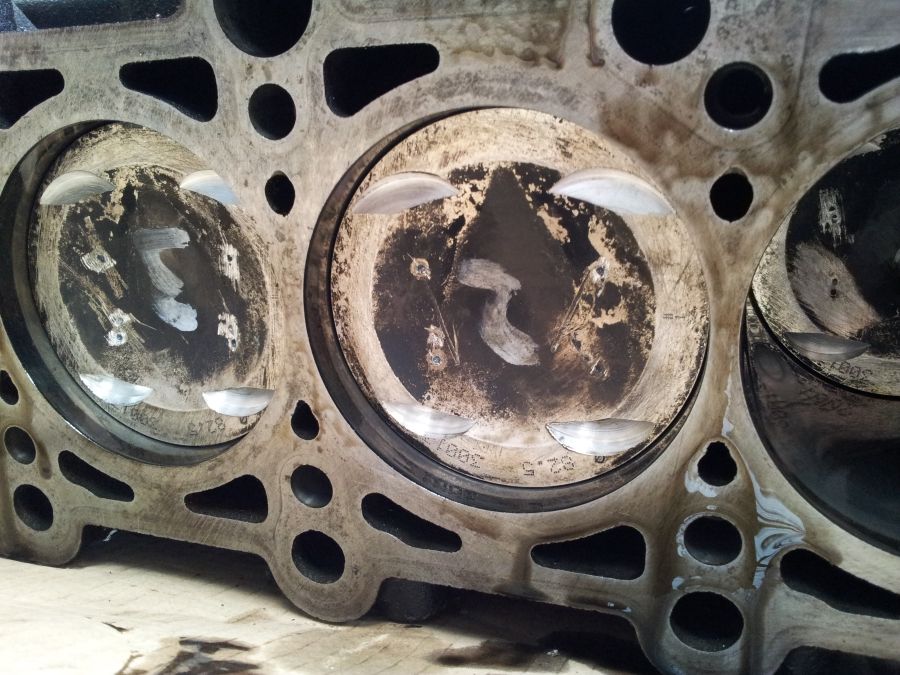
Despite our concerns, we followed the advice given from Manufacturer X and tried bending one of the jets outwards, before putting the unit back into the cylinder and checking for the correct fitment:
It was quite awkward to see what we were doing, but the issues in hand were pretty evident:
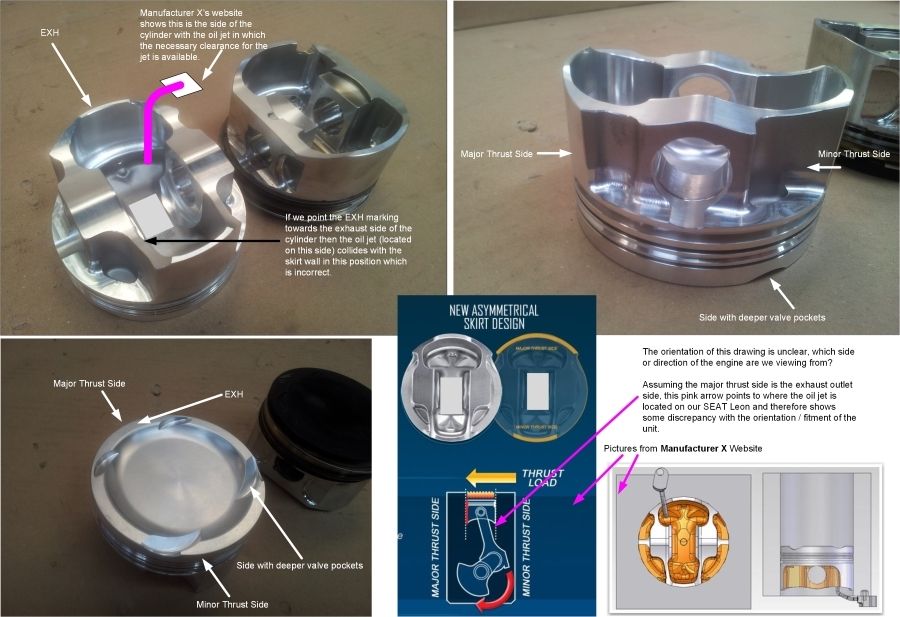
The only way to get the correct clearance from the inner skirt wall was to bend the vertical stem outwards, far enough into the cylinder chamber in that we then faced another issue! The tip of the jet was positioned so close to the con rod that it was almost touching. This obviously wasn’t a viable solution, so we went back to Manufacturer X with our findings:
We continued scratching our heads whilst their tech support team kept telling us to bend the jet out of the way. We did some further research by referring to the manufacturer’s website and reviewing their technical documentation:
Some weeks had passed following a ping pong of emails backwards and forwards.
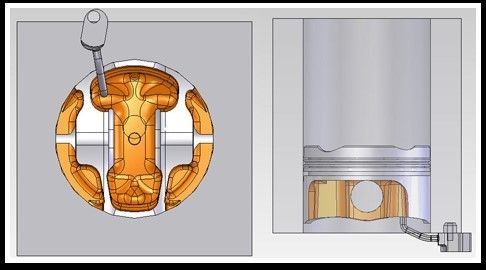
We came to our own conclusion that these pistons, although listed for our engine, were not in fact designed specifically for the 2.0 TFSi. Whether these units were taken from a base design off the shelf and some assumptions were made about their correct fitment we don’t know for sure. In reality we were given pistons that did technically fit correctly within the cylinder, but the clearance designed for the oil jets were positioned on the opposite side of the piston to where our jets were actually located.
After some further digging, to our amazement we then discovered an extract from the manufacturer’s website which pre-warned of the dangers in re-manipulating the oil jets for installation:
Will they clear my oil squirters?
“Yes. In fact, Manufacturer X’s engineering department created a computerized 3D model of all factory oil squirters during the design of the asymmetrical pistons to ensure proper clearance. Furthermore, the design of the forging allows for the oil to spray in the correct position to keep the pistons cool. Be cautious with other piston designs that require the oil squirters to be removed or block the oil from spraying in the manufacturers intended location.”
Given our above findings, we realised we had to find another solution, so we put our case forward to Manufacturer X and requested a refund from our suppliers straight away.
This issue put many weeks of delays back on our build and our sense of morale was shrinking by the day. We were back to square one and could not see a quick resolution in sight.
After some further enquiries we got in touch with an engine machinist who said they could help.
Unfortunately the story didn’t end here though, our dealings with this machinist was soon to bring another nightmare to the process!
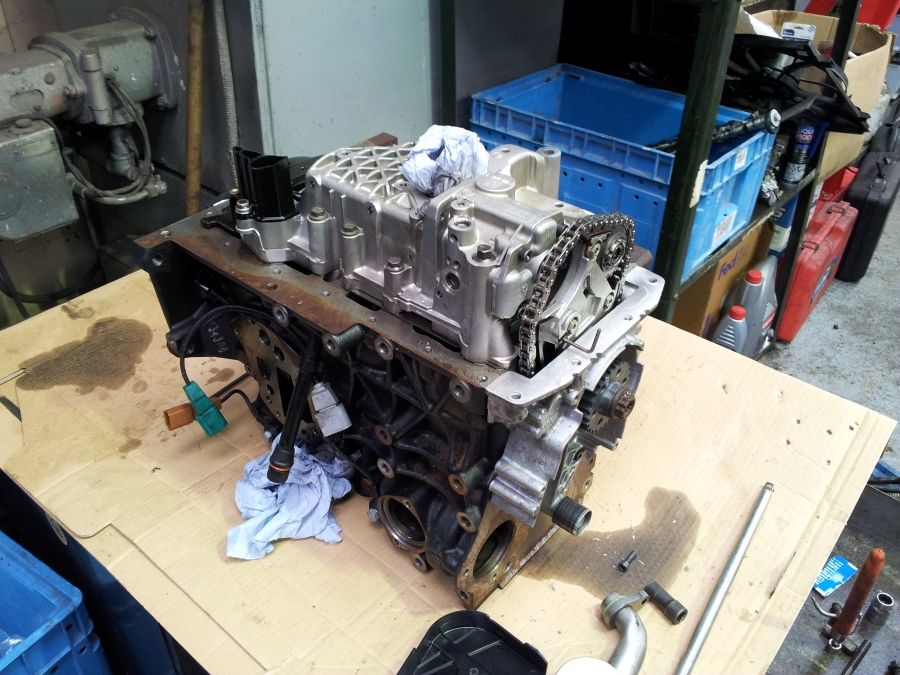
Machinist X offered to take on our original Wossner pistons and drill new custom pockets into the head, in order that we could get the necessary clearance for the new cams. After some discussion with the team, we felt this was the best option moving forward and decided to go ahead with the works. In order for Machinist X to carry out the task, we had to send away the head, block and pistons, so we ended up having to remove the whole engine (which otherwise wouldn’t have been required) This obviously added more time to the project, but was a necessity for us to move forward.
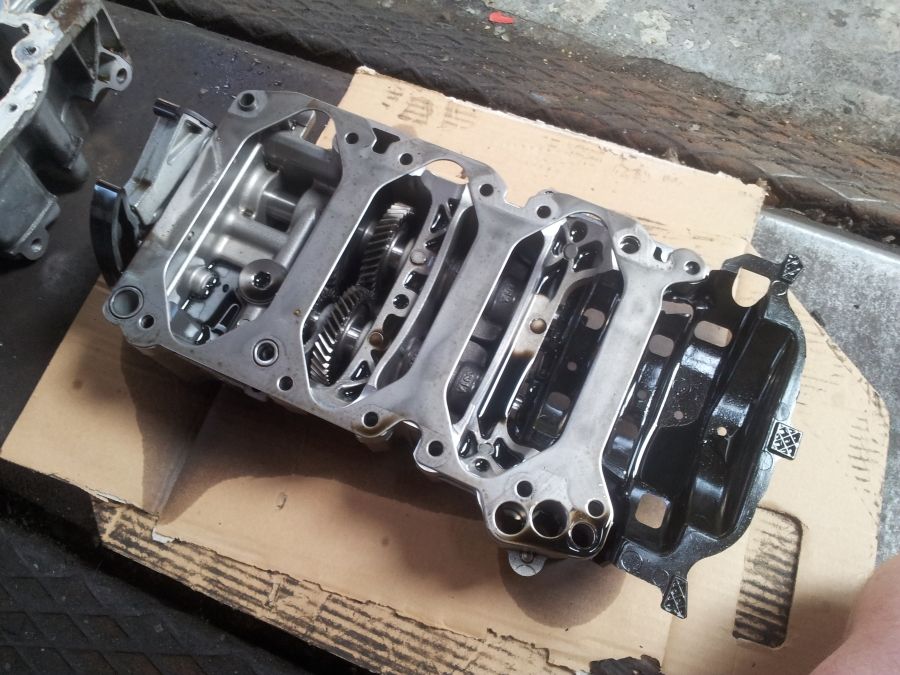
The engine block was removed from the car and sat patiently on the side until we gathered all the kit ready to send away…

It was a little daunting to see Kung Fu without a heart! But Andy and his team do these jobs day in day out and was of course no issue or concern for these professionals! Stripping out the car’s interior before during the AWD conversion was a little scary! but more so because I did that laborious task myself! lol
Kung Fu had now become one of the slowest Cupra Rrrrs in existence! but not for long")
The engine laid on a shelf for some weeks until the pistons arrived back from Machinist X
The Wossner units are well formed in that the crown is deep enough to drill the pockets without weakening the head, a great design and solid construction, they would take some real hammering before any troubles are encountered.
We eventually got the Wossner units back from Machinist X and took one look at them…. the room went silent!
One of the challenges for this task was the machinist had to find the centre point of the valve and mark the correct location for drilling the pockets. In order to find this centre point, certain measurements had to be carried out and using specialist tools to mark the centre points for drilling.
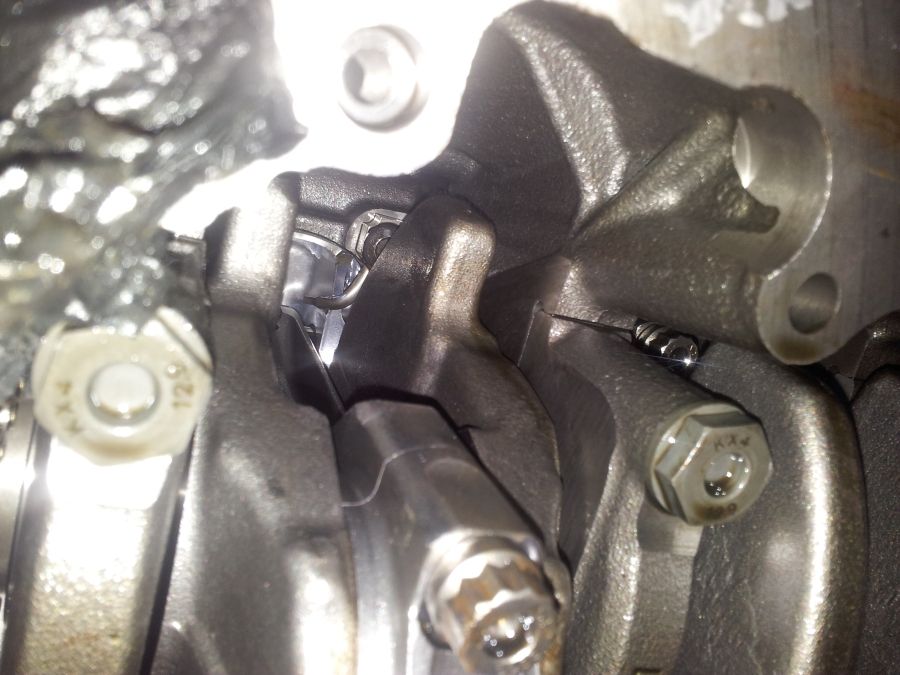
Looking at the photo below, it was pretty evident that Machinist X had used inappropriate tools for the job, using some kind of a punch tool or similar device, they hammered four big dimple marks into the top of the crown with a lot of force! We were left with deep indents and some uneven surfaces, along with rough edges that had to be ground out. The method used for marking these centre points left us with permanent damage to piston heads and we couldn’t see any means of rectification.
These indents were bound to create hot spots in the cylinder and would likely damage the piston over time under heavy loads. The valve pockets were also machined quite poorly, leaving rough filings around the edges!
I got in contact with Machinist X who claimed there was no issue with the works carried out, in our opinion, this clearly wasn’t the case.
One Saturday morning, one of our contacts (Lee X who is a specialist engine machinist) popped by to inspect the units for us and condemned the works. I had to go back to Machinist X and battle out our concerns which put even more delays on the project. We reviewed the issue amongst our own team and concluded that we could not carry on with the pistons in this condition.
So after this second attempt, we were back to square one…AGAIN! Grrrrrrrrr
After further discussions with Lee, he very kindly offered to help us. Lee was a silent partner for the project, but was key to the completion of this phase of works and therefore offer our upmost appreciation for his help and support.
Lee has many year’s experience with specialist machining and fabrication for automotive projects, he is currently installing a V8 engine into the back of his van and converting it to rear wheel drive. The guy is a real character and a bit of a nutter! but very very talented! lol
Luckily I did not pay Machinist X for the works they had done, but IMO they had wrecked a perfectly good pair of pistons and as such, I had to purchase a new set from Wossner to start the process all over again! Including the additional labour I was now 600 smackers down!
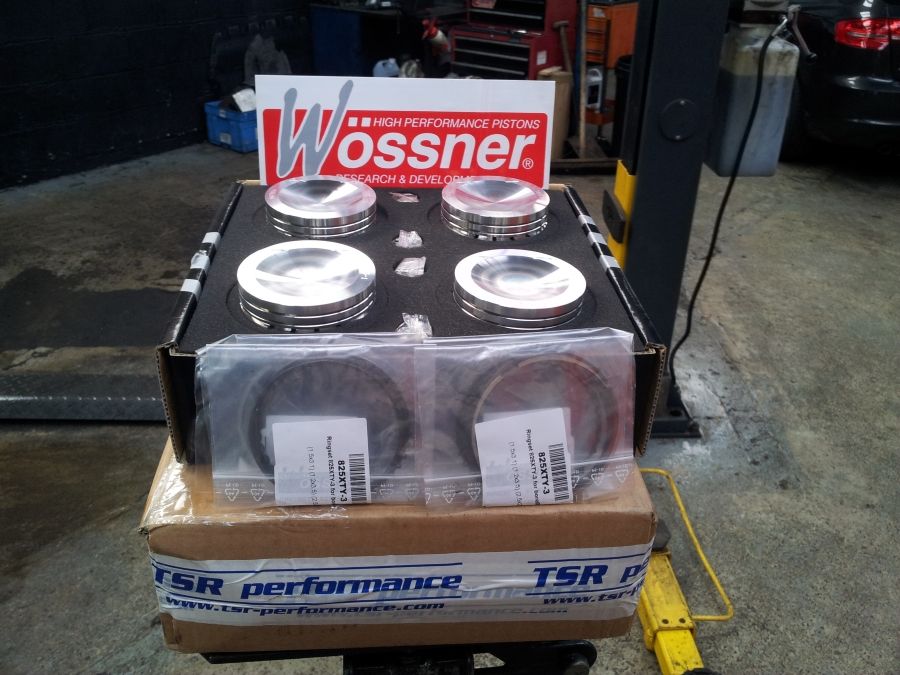
We bought a new set of Wossners from Rob at TSR Performance who was a great help during the crisis. We were lucky enough to get hold of another set, given Wossner no longer stocked these original units. The newer series required a larger wrist pin diameter and therefore faced the threat of having to purchase a new set of con rods to match.
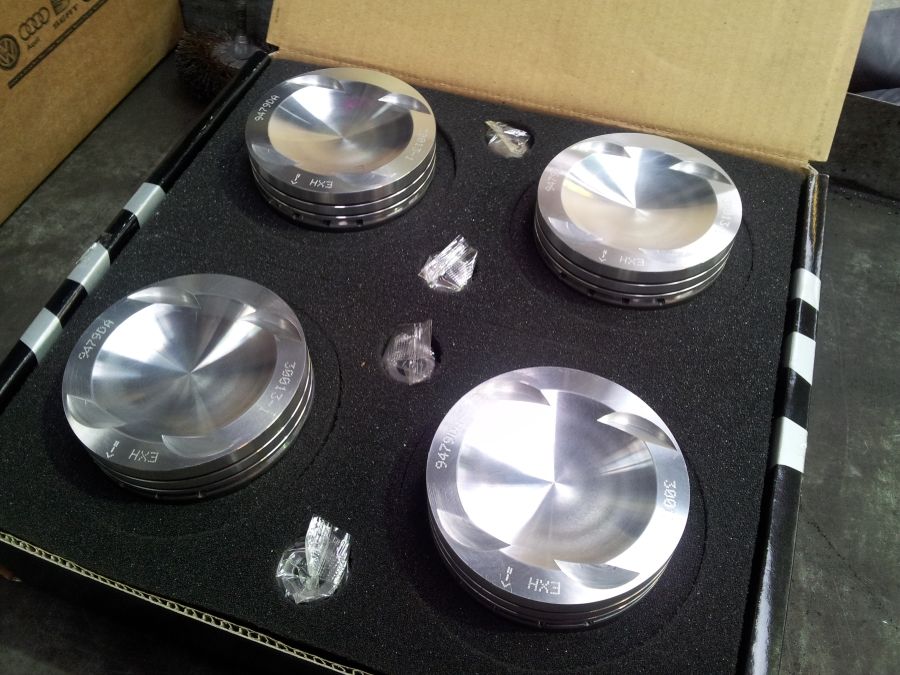
The new pistons arrived the following day and we were now back on track:
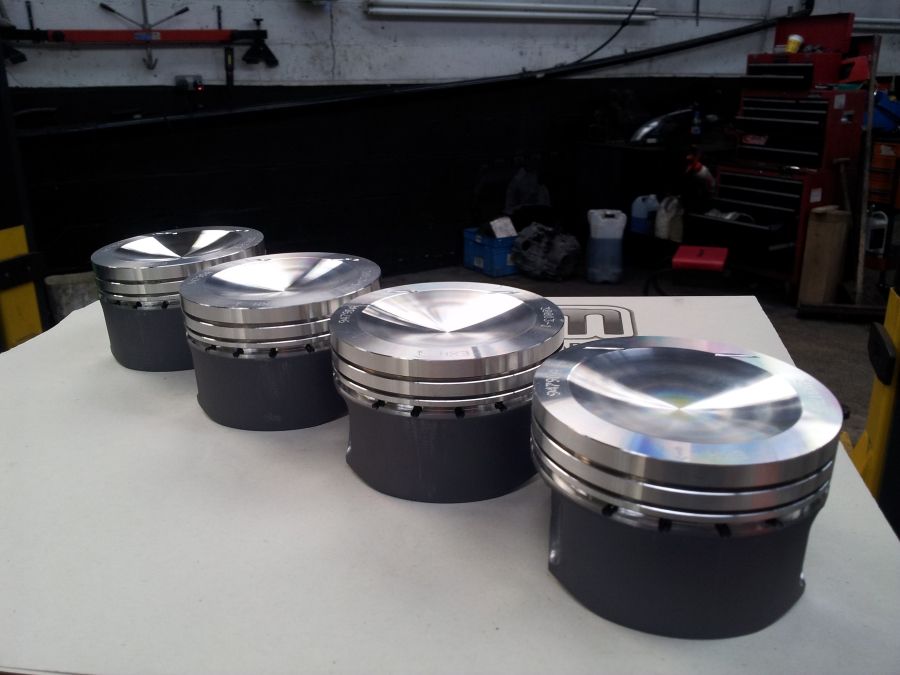
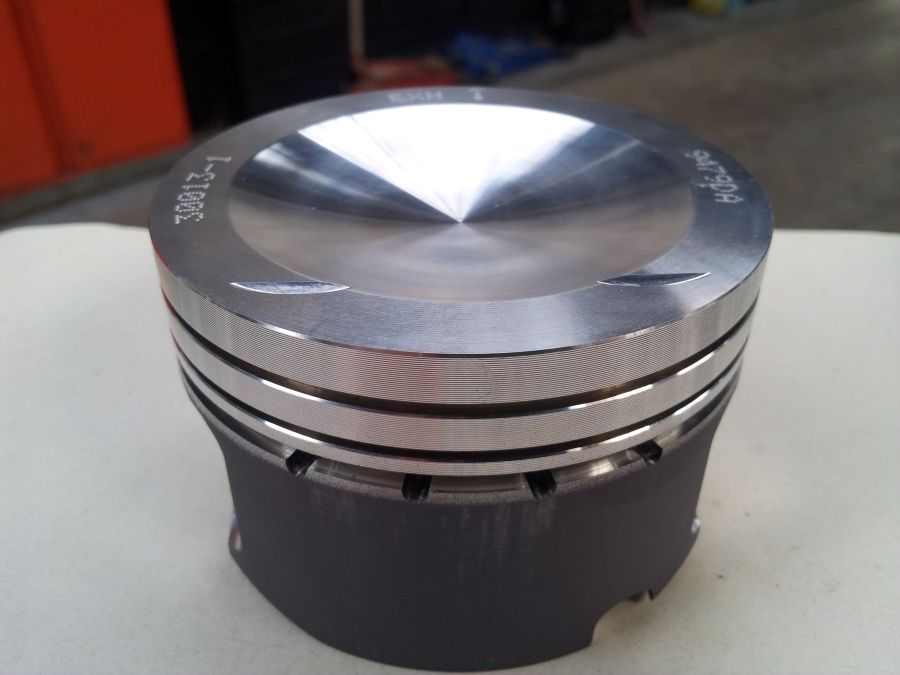
Lee took away the new units, along with the head and block. He came back only a week later with a top result! We could immediately see the difference from the quality of Lee’s work.
All the pockets were machined beautifully as promised, without any punch marks or indents on the piston face! Lee advised us that the pockets on the previous units were not entirely square and questioned the methods that had been used when marking them up.
In Lee’s case, he’d done a fantastic job, by which the pistons were professionally engineered using a computerised CNC process, along with performing all the correct measurements and angles required for locating the correct centre points of the valves.
So finally we had a result! We were now able to fit the pistons, we flipped up the bonnet and carried back on with the rest of the build.
This was a big break through with our progress for the build, the year was soon approaching to an end, the clocks were ticking and we were itching to get stuck in again. There were various other jobs going on in the background during this difficult period, but given the pistons were an integral part of the engine, there was little we could do to carry on with the build until we had a working set again.
Fitting high lift cams had introduced a number of challenges, something that would deter most people away, but we were absolutely determined to rise to the challenge and in the end it all paid off.
All was now good to carry on, headaches over, the fun part had commenced… We got the rest of toys out the box and carried on with the rest of the build
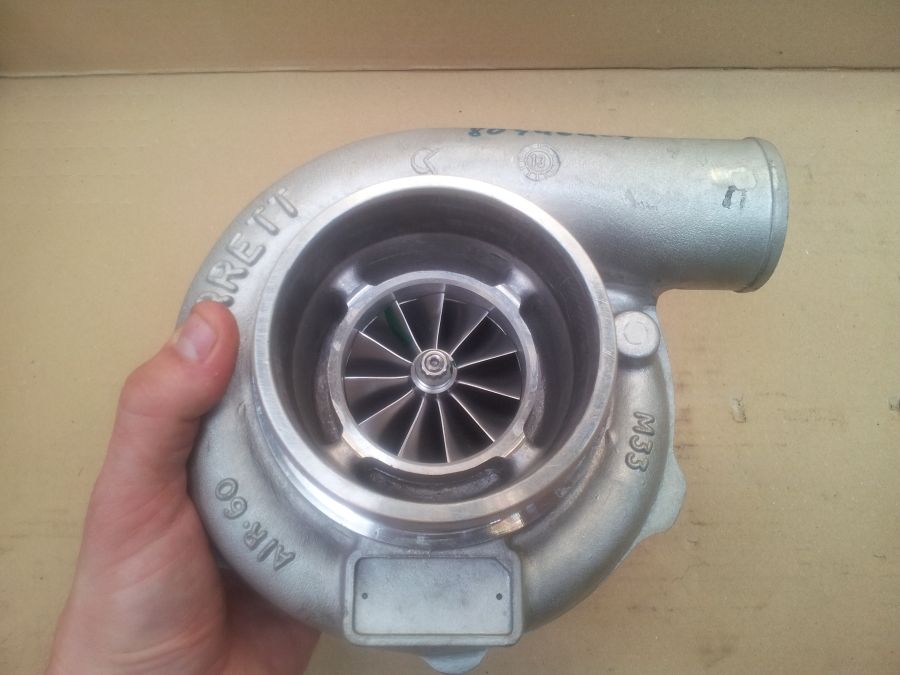
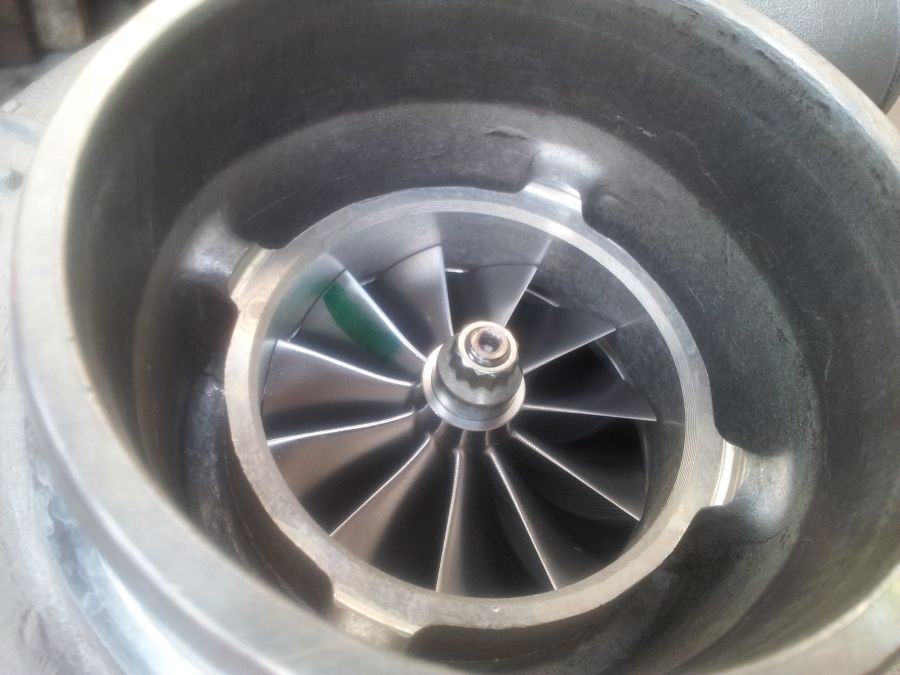
The new Garrett GTX3076R Turbo…
Continue to part 4...
Manufacturer X support team’s response was we could simply bend the oil jets out the way of the skirt wall in order to avoid the collision. We immediately thought this was a bad idea and entered into some weeks of hard debate over the suitability of their suggestion. It transpired that we could not rotate the jet round on the axis anyway, the bolt holding it in place had a square edge and could not be altered.
The above situation drew some differences in opinion of whether re-manipulating the oil jet was an acceptable solution, some modded car tuners have been known to completely remove the oil jets from their cylinder when encountering such a situation.
Some points of consideration though:
We were re-building this engine with a hefty gain in power on the cards, this obviously increases the cylinder temps by far to the point we have to ensure we give the engine the best possible chance of cooling under heavy load.
Why was Manufacturer X telling us to re-manipulate a component that was never designed to be altered and would likely weaken it, given the oil jet was hollow in its construction and would likely buckle the tubing under heavy bending and load.
What problems might we encounter after bending the jet into its new position i.e having suitable clearances from other key engine components
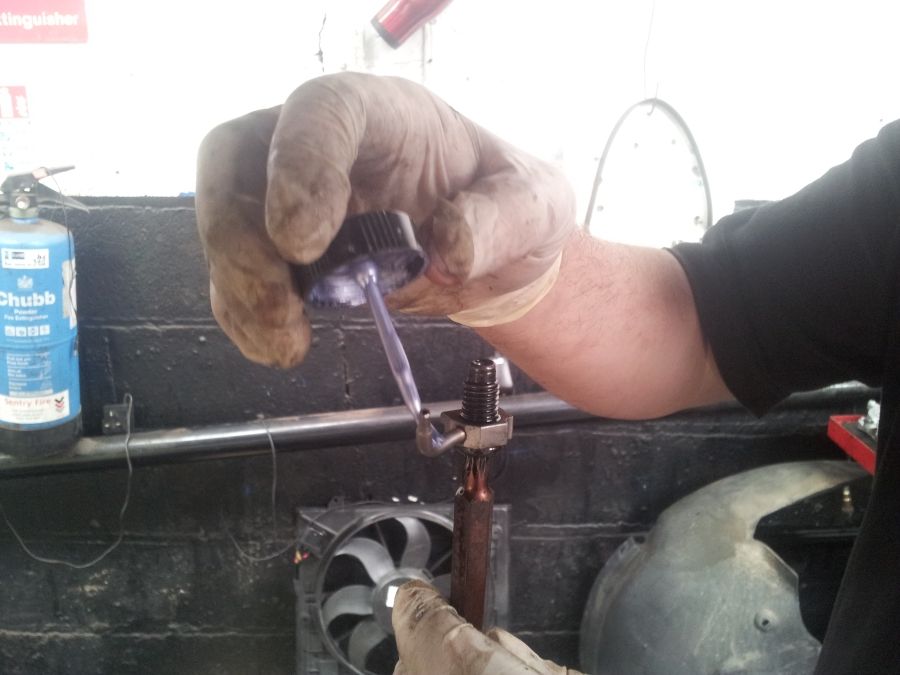
Despite our concerns, we followed the advice given from Manufacturer X and tried bending one of the jets outwards, before putting the unit back into the cylinder and checking for the correct fitment:
It was quite awkward to see what we were doing, but the issues in hand were pretty evident:
The only way to get the correct clearance from the inner skirt wall was to bend the vertical stem outwards, far enough into the cylinder chamber in that we then faced another issue! The tip of the jet was positioned so close to the con rod that it was almost touching. This obviously wasn’t a viable solution, so we went back to Manufacturer X with our findings:
We continued scratching our heads whilst their tech support team kept telling us to bend the jet out of the way. We did some further research by referring to the manufacturer’s website and reviewing their technical documentation:
Some weeks had passed following a ping pong of emails backwards and forwards.
We came to our own conclusion that these pistons, although listed for our engine, were not in fact designed specifically for the 2.0 TFSi. Whether these units were taken from a base design off the shelf and some assumptions were made about their correct fitment we don’t know for sure. In reality we were given pistons that did technically fit correctly within the cylinder, but the clearance designed for the oil jets were positioned on the opposite side of the piston to where our jets were actually located.
After some further digging, to our amazement we then discovered an extract from the manufacturer’s website which pre-warned of the dangers in re-manipulating the oil jets for installation:
Will they clear my oil squirters?
“Yes. In fact, Manufacturer X’s engineering department created a computerized 3D model of all factory oil squirters during the design of the asymmetrical pistons to ensure proper clearance. Furthermore, the design of the forging allows for the oil to spray in the correct position to keep the pistons cool. Be cautious with other piston designs that require the oil squirters to be removed or block the oil from spraying in the manufacturers intended location.”
Given our above findings, we realised we had to find another solution, so we put our case forward to Manufacturer X and requested a refund from our suppliers straight away.
This issue put many weeks of delays back on our build and our sense of morale was shrinking by the day. We were back to square one and could not see a quick resolution in sight.
After some further enquiries we got in touch with an engine machinist who said they could help.
Unfortunately the story didn’t end here though, our dealings with this machinist was soon to bring another nightmare to the process!
Machinist X offered to take on our original Wossner pistons and drill new custom pockets into the head, in order that we could get the necessary clearance for the new cams. After some discussion with the team, we felt this was the best option moving forward and decided to go ahead with the works. In order for Machinist X to carry out the task, we had to send away the head, block and pistons, so we ended up having to remove the whole engine (which otherwise wouldn’t have been required) This obviously added more time to the project, but was a necessity for us to move forward.
The engine block was removed from the car and sat patiently on the side until we gathered all the kit ready to send away…
It was a little daunting to see Kung Fu without a heart! But Andy and his team do these jobs day in day out and was of course no issue or concern for these professionals! Stripping out the car’s interior before during the AWD conversion was a little scary! but more so because I did that laborious task myself! lol
Kung Fu had now become one of the slowest Cupra Rrrrs in existence! but not for long
The engine laid on a shelf for some weeks until the pistons arrived back from Machinist X
The Wossner units are well formed in that the crown is deep enough to drill the pockets without weakening the head, a great design and solid construction, they would take some real hammering before any troubles are encountered.
We eventually got the Wossner units back from Machinist X and took one look at them…. the room went silent!
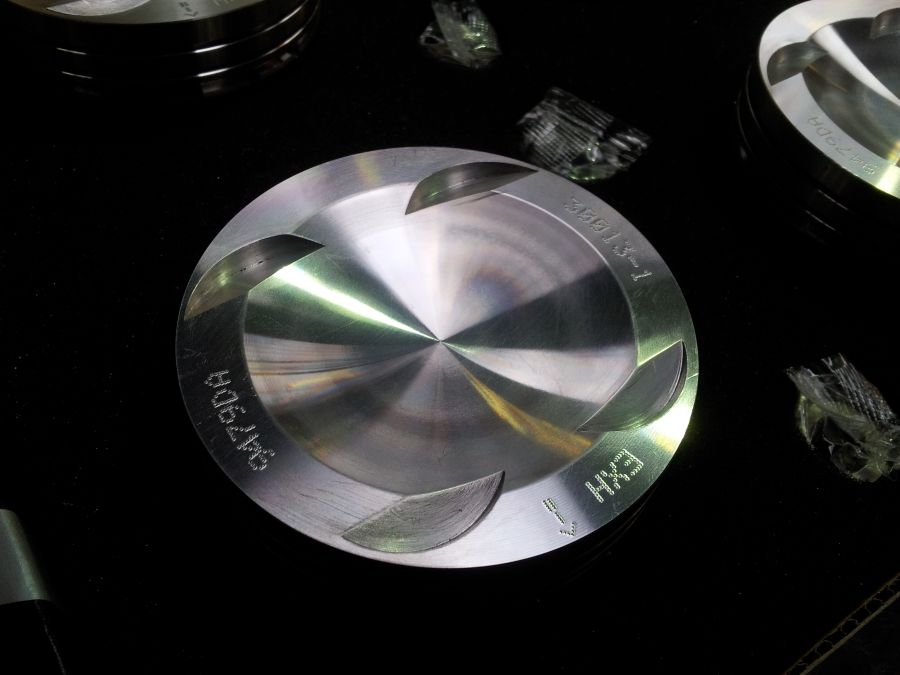
One of the challenges for this task was the machinist had to find the centre point of the valve and mark the correct location for drilling the pockets. In order to find this centre point, certain measurements had to be carried out and using specialist tools to mark the centre points for drilling.
Looking at the photo below, it was pretty evident that Machinist X had used inappropriate tools for the job, using some kind of a punch tool or similar device, they hammered four big dimple marks into the top of the crown with a lot of force! We were left with deep indents and some uneven surfaces, along with rough edges that had to be ground out. The method used for marking these centre points left us with permanent damage to piston heads and we couldn’t see any means of rectification.
These indents were bound to create hot spots in the cylinder and would likely damage the piston over time under heavy loads. The valve pockets were also machined quite poorly, leaving rough filings around the edges!
I got in contact with Machinist X who claimed there was no issue with the works carried out, in our opinion, this clearly wasn’t the case.
One Saturday morning, one of our contacts (Lee X who is a specialist engine machinist) popped by to inspect the units for us and condemned the works. I had to go back to Machinist X and battle out our concerns which put even more delays on the project. We reviewed the issue amongst our own team and concluded that we could not carry on with the pistons in this condition.
So after this second attempt, we were back to square one…AGAIN! Grrrrrrrrr
After further discussions with Lee, he very kindly offered to help us. Lee was a silent partner for the project, but was key to the completion of this phase of works and therefore offer our upmost appreciation for his help and support.
Lee has many year’s experience with specialist machining and fabrication for automotive projects, he is currently installing a V8 engine into the back of his van and converting it to rear wheel drive. The guy is a real character and a bit of a nutter! but very very talented! lol
Luckily I did not pay Machinist X for the works they had done, but IMO they had wrecked a perfectly good pair of pistons and as such, I had to purchase a new set from Wossner to start the process all over again! Including the additional labour I was now 600 smackers down!
We bought a new set of Wossners from Rob at TSR Performance who was a great help during the crisis. We were lucky enough to get hold of another set, given Wossner no longer stocked these original units. The newer series required a larger wrist pin diameter and therefore faced the threat of having to purchase a new set of con rods to match.
The new pistons arrived the following day and we were now back on track:
Lee took away the new units, along with the head and block. He came back only a week later with a top result! We could immediately see the difference from the quality of Lee’s work.
All the pockets were machined beautifully as promised, without any punch marks or indents on the piston face! Lee advised us that the pockets on the previous units were not entirely square and questioned the methods that had been used when marking them up.
In Lee’s case, he’d done a fantastic job, by which the pistons were professionally engineered using a computerised CNC process, along with performing all the correct measurements and angles required for locating the correct centre points of the valves.
So finally we had a result! We were now able to fit the pistons, we flipped up the bonnet and carried back on with the rest of the build.
This was a big break through with our progress for the build, the year was soon approaching to an end, the clocks were ticking and we were itching to get stuck in again. There were various other jobs going on in the background during this difficult period, but given the pistons were an integral part of the engine, there was little we could do to carry on with the build until we had a working set again.
Fitting high lift cams had introduced a number of challenges, something that would deter most people away, but we were absolutely determined to rise to the challenge and in the end it all paid off.
All was now good to carry on, headaches over, the fun part had commenced… We got the rest of toys out the box and carried on with the rest of the build
The new Garrett GTX3076R Turbo…
Continue to part 4...
![[B)]](/forums/styles/seatcupra/oldforumsmileys/shades.gif "Cool [B)]")