Going to build a race 1m

Manic172

https://m.facebook.com/ManicMotorsport1
Dec 4, 2018
1,255
1,274
Hemel hempstead
www.seatcupra.net
Had a few hours after work so I had time to play cars... I bolted the front panel on and then bolted the wings loosely.
Fitted the bonnet and hinges. Gave it all a rough line up. It's all fibreglass so nothing is going to be perfect.
One problem I had is the edge of the bumper where it lines up to to the front wing it had a different twist and needs holding in position. Again being fibreglass nothing has any holes or brackets.
You can see the edge where the wheel is. It's not bad and then it just sticks out.
20201125_203944.jpg


So in the wing I drilled a hole and put the a m6 bolts and then a washer and a tallish my lock nut too. Then drilled a hole in the bumper for it to locate in to
20201125_204118.jpg

Moving forward I then drilled threw the bumper and the wing . 20mm in the bumper a
20201125_204751.jpg


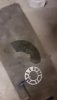
These are the things I found on eBay.. cost £5 for 4 of them.
20201125_204737.jpg
20201125_204742.jpg


The final result isn't to bad I think
20201125_205131.jpg


Then press and it all comes away
20201125_205147.jpg
and from a distance angina when the car is painted black I don't think you will see them
20201125_205304.jpg
 

Manic172

https://m.facebook.com/ManicMotorsport1
Dec 4, 2018
1,255
1,274
Hemel hempstead
www.seatcupra.net
Evening all.
Another Saturday afternoon in the workshop playing.... put the parking sensor on the other side and the locating bolt... and remembered I had the o ring with cottern reel set up things I could use to hold up the rear of the bumper.
16065911936516073791695801963703.jpg

Also found the splitter sapports I had laying about the fitted them.
16065912673392032968995181096015.jpg
then started fitting the aero catches to the slam panel and cutting the bonnet. They are looking good.
16065913907981244237219569381783.jpg


Now just thinking on ideas of that to do for the grills next t o the head lights and the centre grill. Not sure wether to mesh the lot.. but don't wanna go to much of a Halfords hero style.. so might fit some originals .. or make some thing but not sure what.... please share your ideas and things you have done.
16065915381737994306079037409120.jpg
 

Manic172

https://m.facebook.com/ManicMotorsport1
Dec 4, 2018
1,255
1,274
Hemel hempstead
www.seatcupra.net
Got stuck at work in till about 2ish today so didn't get to long down the workshop..
Any way as I am rebuilding this thing I am trying to replace all the fixings with either ally or stainless steel. I did find some one who was selling stainless selftappers for the front wings but I decided to go for m6 x 10mm dome headed stainless bolts. So I had to make some threads in the inner wings.
There was a bit of talk about nutserts so I took pics and thought I would do a write up. Right here goes

This is a nut set.. (m6 this one is )
20201205_153408.jpg
and this is one style of tool used to make them squash up and hold in a panel/hole
20201205_153359.jpg


When squeezed up they look like this
20201205_153434.jpg

As we know this being an m6 it's 6mm roughly on the out side of the thread of the bolt it's self. But we need to measure the out side size of the nut sert
20201205_153249.jpg
yep batteries are flat... any way these are about 9mm. So wack a 9mm drill bit in your drill.and make a hole...

Befor
20201205_153312.jpg


After
20201205_153508.jpg

Put a bit of paint around the bare metal then wind a nut sert on to the tool and push in to the hole.. tighter bit the better so it has more material to hold on to. Squeeze tight then unwind the tool and you will be left with a thread now in your panel
20201205_153538.jpg


Then a quick test fit.
20201205_153608.jpg
20201205_153608.jpg


I think they look better than the originals.. unless you making some thing look like how it left the factory.
20201205_153610.jpg
once you get the hang of it it takes seconds.. with 5 along the top of the wing . 2at the front under the bumper..2 down the inner of the wheel arch and 2 at the bottom of the wing in the sill. So that's 10 per wing... 20 over all it took an hour or so. That was with me striping the front off it ( wasn't a lot there to start with )
20201205_154256.jpg
 

Manic172

https://m.facebook.com/ManicMotorsport1
Dec 4, 2018
1,255
1,274
Hemel hempstead
www.seatcupra.net
Then I started to make my brake cooling ducts.

I had two rings water jet cut some time ago.. now I gone for the bigger brake set up my old idea was now no good... So this was with a grinder and a lot of hopeing
20201205_170550.jpg
I took the ring and cut a chunk of it or to a rough size I needed
20201205_170553.jpg

Then cut some more off. I help it in position and looked where it was hitting on. It was the too ribs of the his so cut them out too.
20201205_170556.jpg
I lined it up so it would bolt threw the 2 6mm holes where the abs sensor goes. But one of them sticks out a lot. So with trusty grinder in hand I cut that back and tapped it all the way threw. The lower hole sat back a bit so that is spaced with a couple of washers
20201205_170612.jpg

A hold in place and Mark the back of it threw the holes to get a position and then drilled them.
Bolted in to position and checked for clearance and all seemed ok.
20201205_171239.jpg

Next up is some 45mm carbon tube I cut to length
20201205_175613.jpg


Then I realised I have my hole saws at work. So with a grinder I rounded off the edges and marked where I need the hole to be for the ducking to mount to.
20201205_175839.jpg
So now at work on Monday I need to drill them and fit with some epoxy glue to hold the tube In to place...
Last week looked like a jump forward with every th8ng bolted on... But now it's 2 steof forward 10 back lol
20201205_183928.jpg


Any way you gotta break and egg to make a cake so I can make a mess ....
 

Attachments

  • 20201205_170556.jpg
    20201205_170556.jpg
    226.6 KB · Views: 148

Manic172

https://m.facebook.com/ManicMotorsport1
Dec 4, 2018
1,255
1,274
Hemel hempstead
www.seatcupra.net
Still gotta drill the back plates for the brake ducts..... I can't find my hole saws so will be buying some tomorrow.
Right on to my mistake. I was gonna keep this quiet lol... but we all make mistakes now and again.... mine was building this car lol...
Right I wad fitting the aerocatches as seen
20201128_190934.jpg

All looking good... So you would think. But where I put the eyelet catch threw the front panel. Marked in a circle and arrowed.....
Screenshot_20201212-164541_Gallery.jpg
. Then marked and drilled the bonnet. The cut big holes to fit the catch.
All good...till I tried to shut the bonnet. Where I had fitted threw the high point of the front panel. I can't get it Low enough for the bonnet to line up. So ?. After lots of bad bad words being shouted.. Then loads of head scratching. It was out with the grinder.
20201212_145939.jpg
cut a shape. I could have just cut a chunk out and ran a plate under it and it would have done... but oh no..... I can't do it a simple way so I cut it so it ramped down.. went flat then back up and look a bit better... Then it was out with the scissors and cardboard and cutting shapes... I did forget to do pics threw the process ... I will on the other side.after about 2 hours a 5 coffees I have plates welded in. Just grind back the welds and it should be not too bad
20201212_163934.jpg


It should look better then ground and just even primered ....
 
  • Like
Reactions: MATT RILEY

Manic172

https://m.facebook.com/ManicMotorsport1
Dec 4, 2018
1,255
1,274
Hemel hempstead
www.seatcupra.net
Love this thread and all the home engineering. They're my favorite builds seeing peoples creativity come out.

Thanks for the kind words mate.. this car is being built by an idiot with a tool box and his son..... if it works and goes it will be a good achievement. Also I have to thank the people in here for the help and guidance too. I think I might have given up by now
 
  • Like
Reactions: iammooks

Connor H

Active Member
Dec 19, 2019
1,015
498
Essex
Thanks for the kind words mate.. this car is being built by an idiot with a tool box and his son..... if it works and goes it will be a good achievement. Also I have to thank the people in here for the help and guidance too. I think I might have given up by now

Rather this than a thread of bolt on mods any day, i learn stuff i didnt know existed from tyour posts haha

my eventual aim is to have a full blown project like this when i move and get a garage, albeit it'll be a rwd car for mad skids
 
  • Like
Reactions: iammooks

Thai-wronghorse

Self proclaimed Cupra R addict & butcher!
Dec 3, 2015
2,198
1,037
Kent
This is true, you can also use the mk4 Golf 4motion and R32 rear floorpan but its a huge undertaking.
I've seen so many of these conversions abandoned over the years.
Personally I'd opt for shipping or driving one back from Germany and do a RHD conversion on it.

Sent from my SM-G986B using Tapatalk
 

Manic172

https://m.facebook.com/ManicMotorsport1
Dec 4, 2018
1,255
1,274
Hemel hempstead
www.seatcupra.net
Made some brackets quickly just to mount the rear bumper.from some 59x50 1.5mm ally angle
20201227_135619.jpg

I took off the old bracket and marked the holes to mount to the body then cut the corners to angles and fitted nut serts
20201227_135629.jpg


Quick.test fit
20201227_142829.jpg
20201227_142841.jpg

I am going to remove the brackets and lighten them with holes and rou ding the corners more.
On to the rad. Well.i ordered this about 3 to 4 years ago when I was planning on a fast road car. But any way. The leon is ment to have like stumps on the side then you get rubber mounts to mount to the front panel. But as life goes on this build nothing, absolutely nothing is simple. This one has holes like it's ment to be bolted to the front panel. So some more ally brackets .
20201227_162443.jpg


It's getting there . I have also had to order some m8 rubber mounts to hold the rad to the brackets
20201227_162412.jpg
 

Manic172

https://m.facebook.com/ManicMotorsport1
Dec 4, 2018
1,255
1,274
Hemel hempstead
www.seatcupra.net
Don’t forget todo some mounts for the bottom off the rear bumper too
I am designing some that go to the sides as it will have a carbonfibre defuser go on to it. I have to support that and line it up with the botton of the fuel tankard the rest of the flat floor set up too. Oh the joys of it

Sent from my iPhone using Tapatalk
 
  • Like
Reactions: Yellow fr
Adrian Flux insurance services - discount for forum members.