
-
Hey Guest👍👎 We're looking for reviews of your local CUPRA or SEAT Dealership - it's quick and easy to do: Leave a review now
Leon - 29/08/13 Poly Resin, Adjustable top mounts, Canards....
- Thread starter deutsch
- Start date
You are using an out of date browser. It may not display this or other websites correctly.
You should upgrade or use an alternative browser.
You should upgrade or use an alternative browser.


so the work goes on despite the cold, I have been wanting to remove the front bumper for ages, and finally got round to it tonight
Bumper off


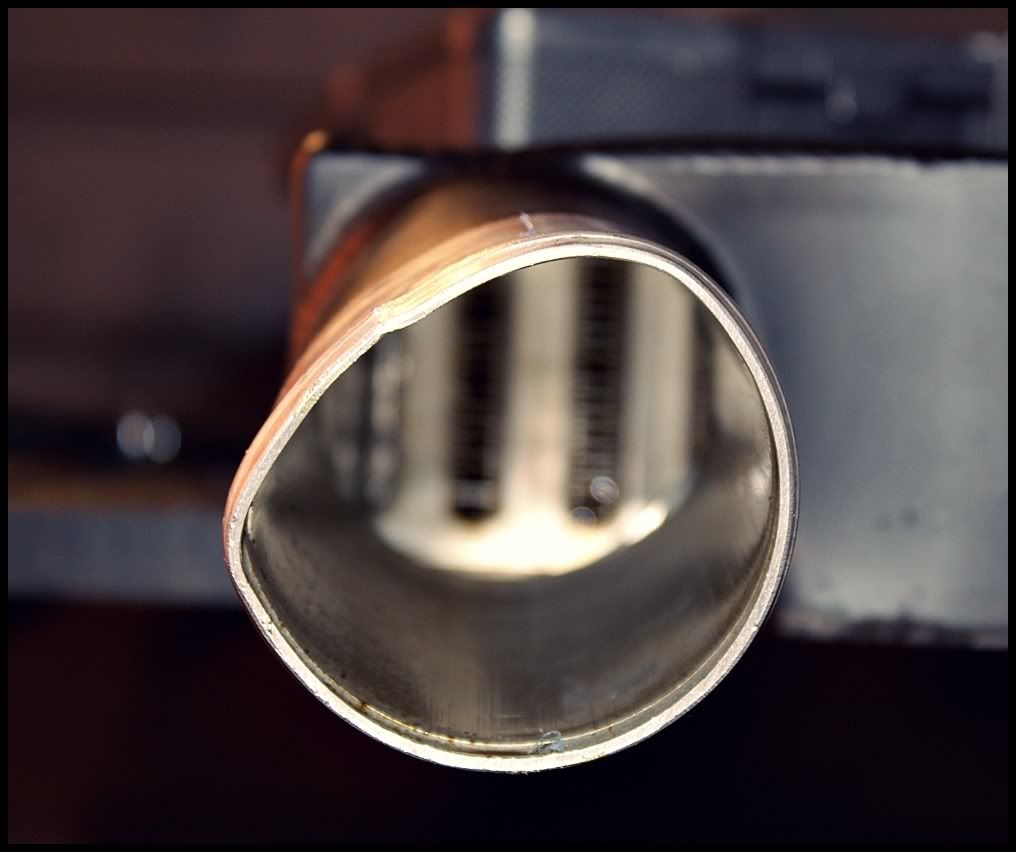
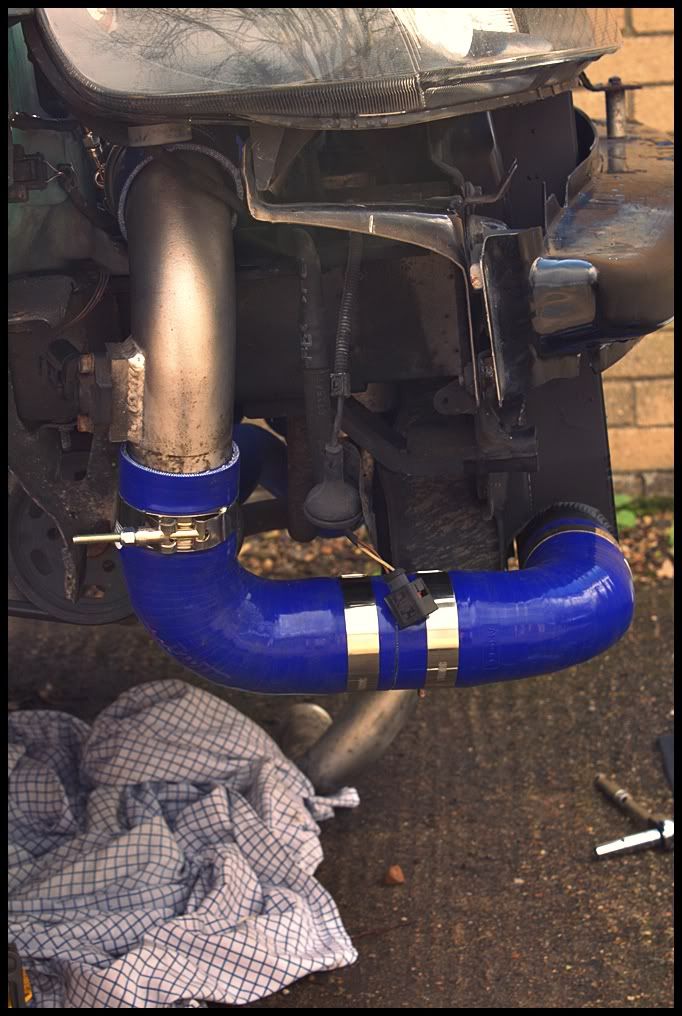
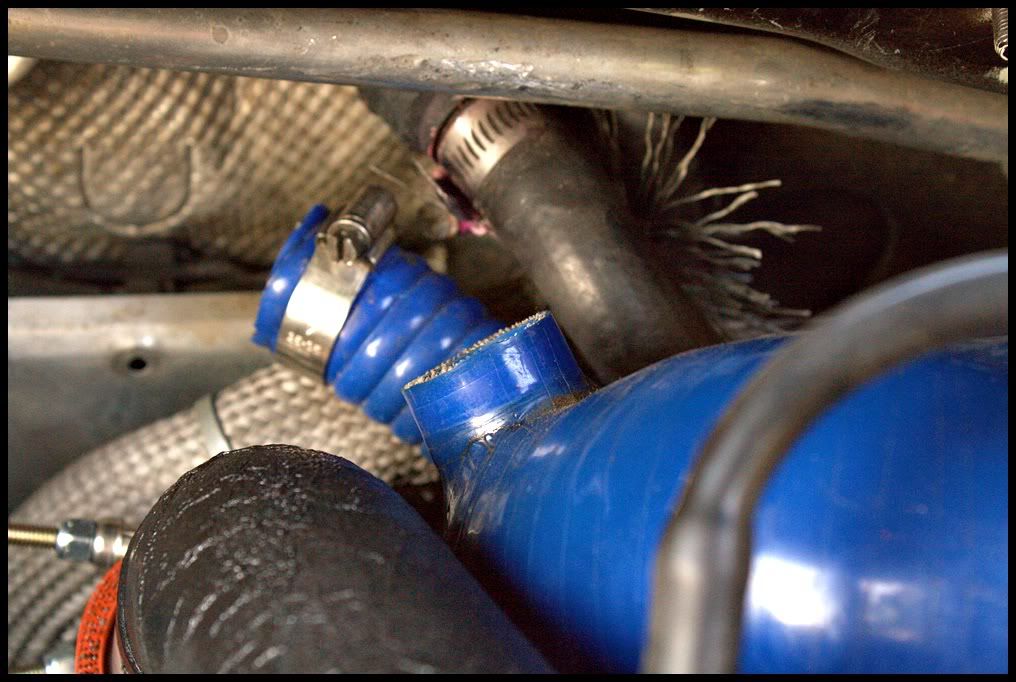
You can't see it that well in this pic, but the samco is definitely kinked

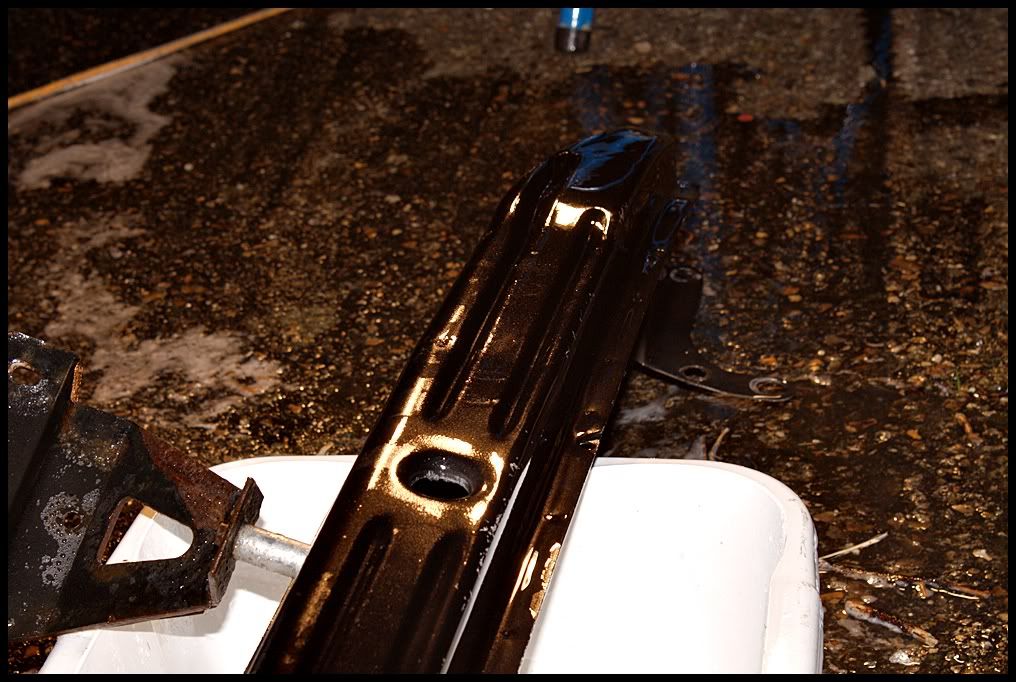
Then I found this. Now the front bumper had a crack in it, but I thought that was the only damage...obviously not, and it was hiding this surprise for me
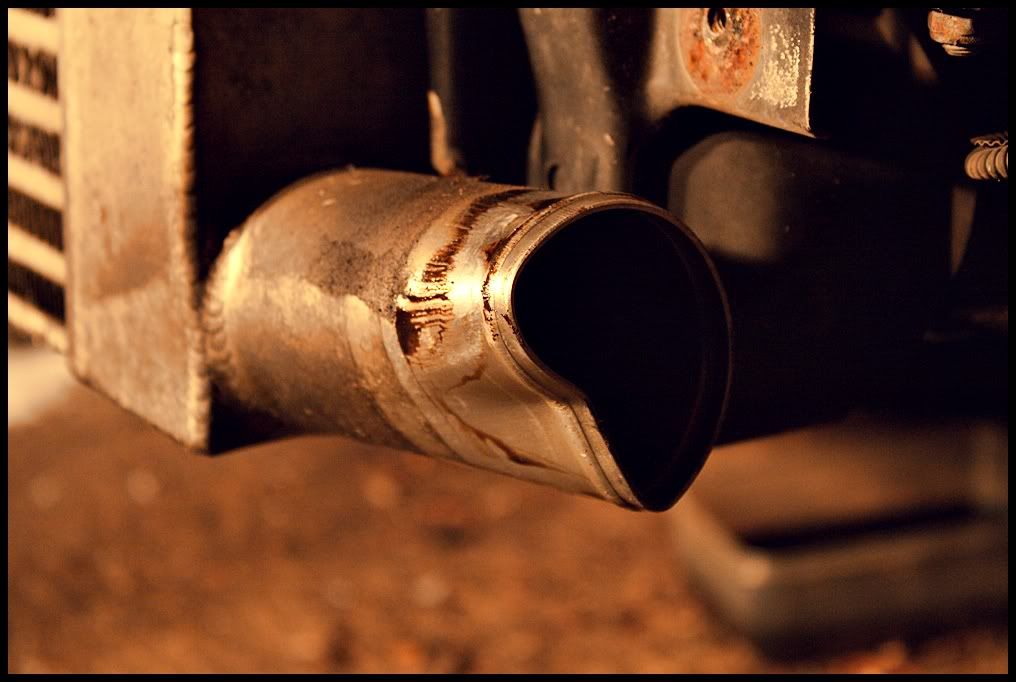
either tempted to take off the FMIC and get it rolled out, OR get a hammer and see if I can bang it out, but the risk of cracked the weld. I can fit the samco over the bent part, as past this dent the end tank goes back to being round...so does it cause that much of a problem, but being me, this will really bother me
I knew there was oil in the pipes, but there was quite a lot which spilled out. Another key reason why I wanted to pull this all apart to remove the oil
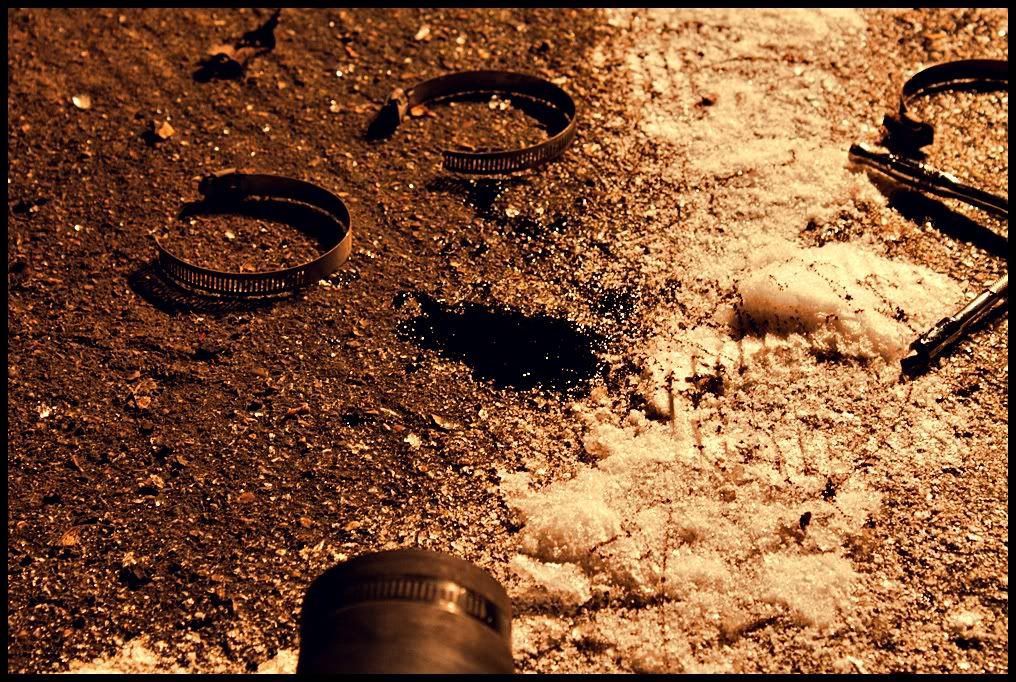
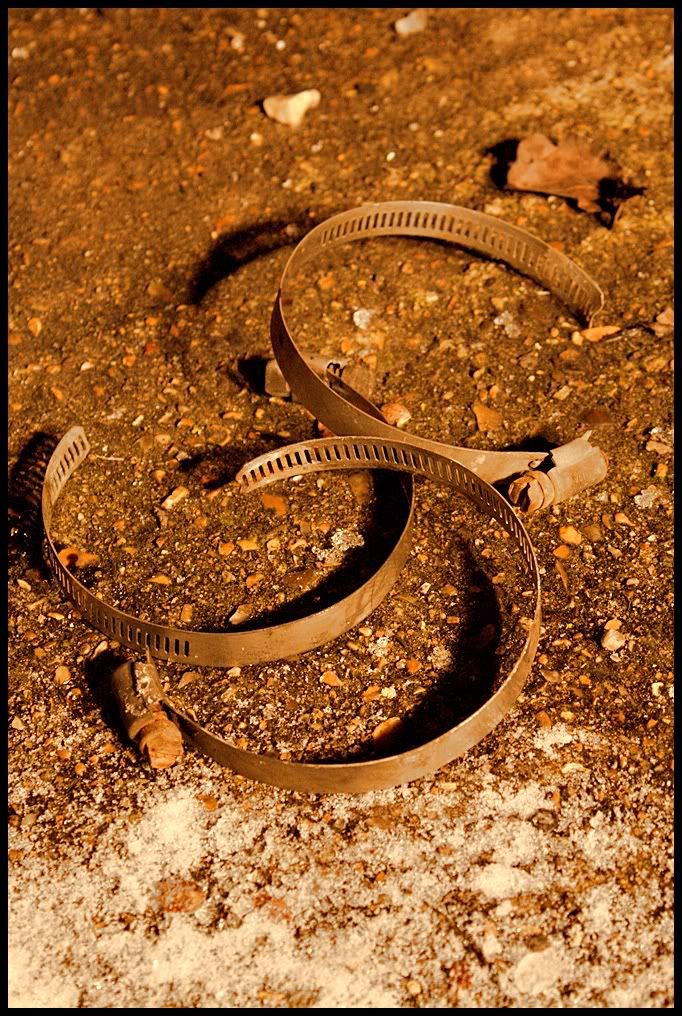
I wanted the bumper off, to be able to replace these with some proper tbolt clamps, as these have seen better days (cheap and nasty also)
Finally, now these are all off, the other phase is to cut the inside of the bumper back as its rubbing on the pipes. Pro Alloy also fitted some pretty shitty hoses which are very soft, so these will be replaced with some decent blue forge ones

By this point its about -3 outside, so I called it a night
Bumper off
You can't see it that well in this pic, but the samco is definitely kinked
Then I found this. Now the front bumper had a crack in it, but I thought that was the only damage...obviously not, and it was hiding this surprise for me
either tempted to take off the FMIC and get it rolled out, OR get a hammer and see if I can bang it out, but the risk of cracked the weld. I can fit the samco over the bent part, as past this dent the end tank goes back to being round...so does it cause that much of a problem, but being me, this will really bother me
I knew there was oil in the pipes, but there was quite a lot which spilled out. Another key reason why I wanted to pull this all apart to remove the oil
I wanted the bumper off, to be able to replace these with some proper tbolt clamps, as these have seen better days (cheap and nasty also)
Finally, now these are all off, the other phase is to cut the inside of the bumper back as its rubbing on the pipes. Pro Alloy also fitted some pretty shitty hoses which are very soft, so these will be replaced with some decent blue forge ones
By this point its about -3 outside, so I called it a night
thank god for this mild weather, so much easier to work on the car with
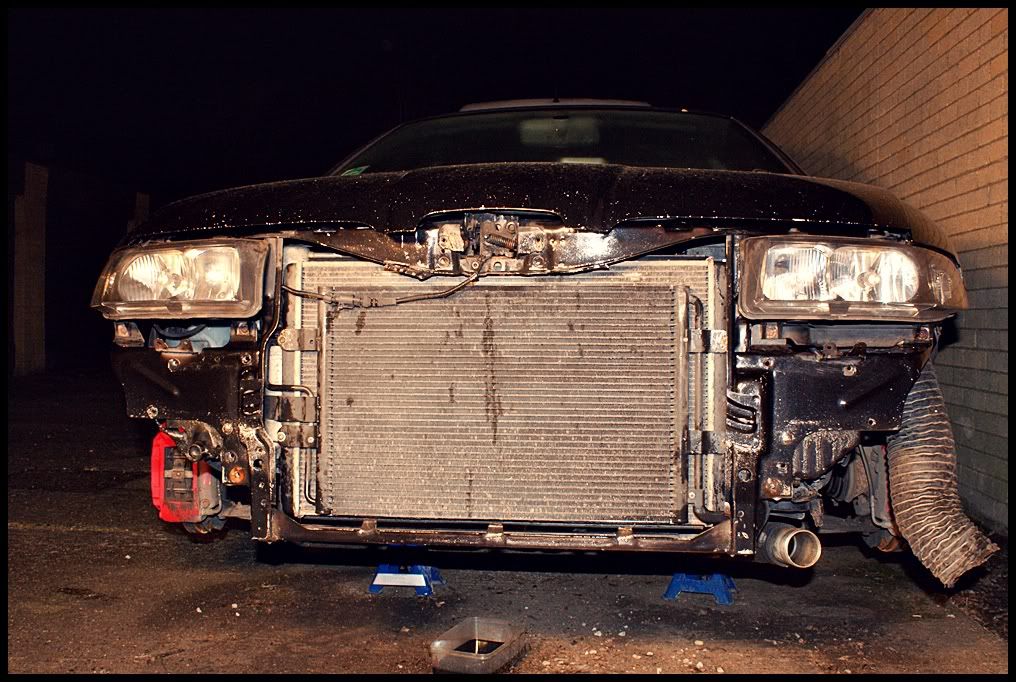
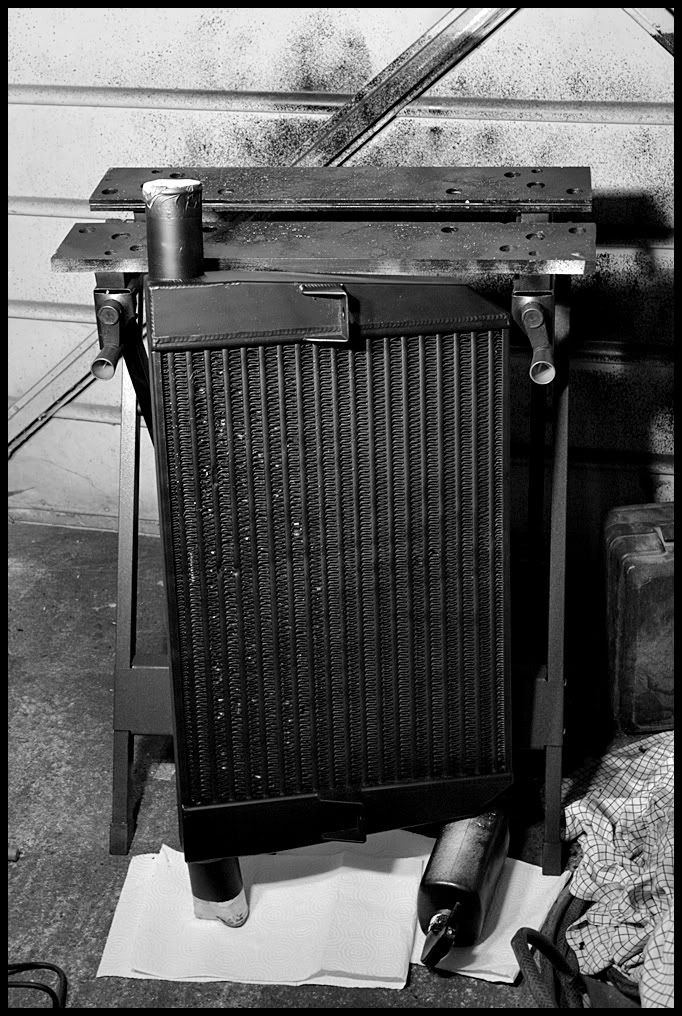
So now with the bumper off, I could separate the FMIC and the crash bar, ready for painting (just awaiting the paint to turn up....hopefully it will be here tomorrow)
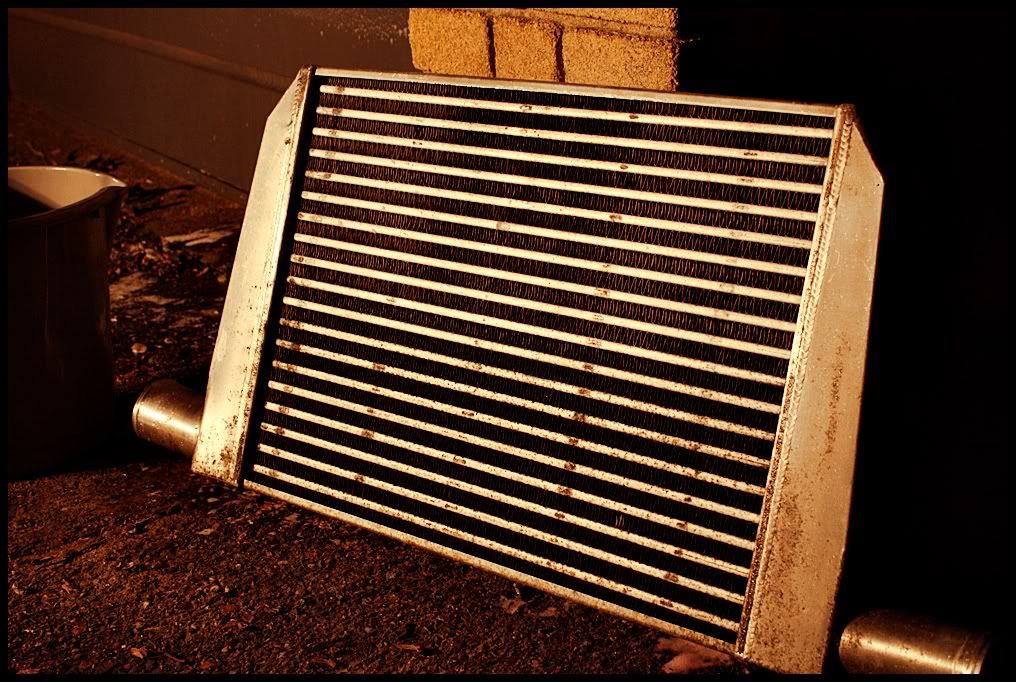
FMIC During cleaning

Cleaned...about the best its going to get, but 99% of the dirt was off it, and its going to be sprayed black anyhow with special radiator paint
Dirty Crash bar

Clean Crash bar (debating whether to paint or seal this)
Decided to clean the front end also

Clean
These turned up today (apologies for the crap phone picture)

and I came across a very old pic of her

oh and essential fuel for working on the car

So now with the bumper off, I could separate the FMIC and the crash bar, ready for painting (just awaiting the paint to turn up....hopefully it will be here tomorrow)
FMIC During cleaning
Cleaned...about the best its going to get, but 99% of the dirt was off it, and its going to be sprayed black anyhow with special radiator paint
Dirty Crash bar
Clean Crash bar (debating whether to paint or seal this)
Decided to clean the front end also
Clean
These turned up today (apologies for the crap phone picture)
and I came across a very old pic of her
oh and essential fuel for working on the car
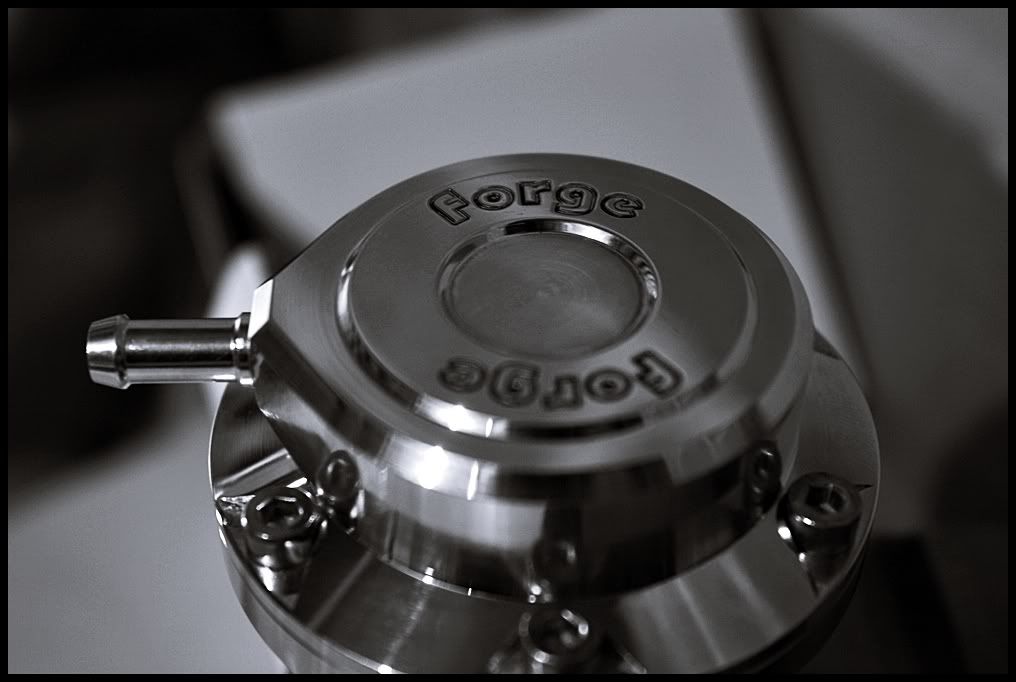
SO.....the paint arrived today, and so did my Forge actuator (despite being told it would take 2 weeks to arrive, it was delivered in a couple of days)
Special radiator paint, which does not clog the fins on the radiator like generic paint, so perfect for the FMIC. Got some more crinkle paint to finish off the mani, battery cover and charge pipe.
Also in the pic I got a small clamp, to clamp the fuel filter at some point.

Forge Actuator
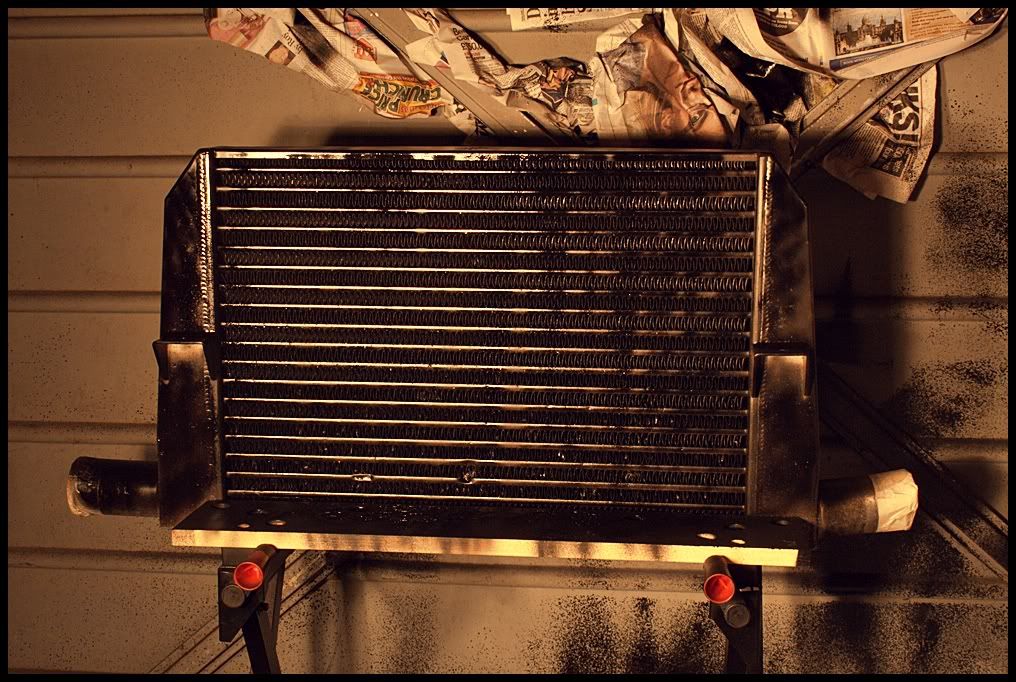
Now for the FMIC
Before

First coat (patchy)
All that is left now is to buy some new nuts and bolts on the bumper to replace the rusty ones and then put it back together for springfest, tax and MOT...sounds simple (famous last words!!)
Special radiator paint, which does not clog the fins on the radiator like generic paint, so perfect for the FMIC. Got some more crinkle paint to finish off the mani, battery cover and charge pipe.
Also in the pic I got a small clamp, to clamp the fuel filter at some point.
Forge Actuator
Now for the FMIC
Before
First coat (patchy)
All that is left now is to buy some new nuts and bolts on the bumper to replace the rusty ones and then put it back together for springfest, tax and MOT...sounds simple (famous last words!!)

got round to doing another little job tonight, cutting the bumper some more to stop it rubbing against the FMIC pipework

Cut (and sanded it back since)

I then noticed a crap load of oil still in the FMIC
So to try and get the last out of it, I have just turned it on its side and left it to drain, hopefully some might come out
Ordered the last parts from Seat today as well, so hopefully now all the parts are sprayed and ready for the engine bay, I can start putting it back together
Cut (and sanded it back since)
I then noticed a crap load of oil still in the FMIC
So to try and get the last out of it, I have just turned it on its side and left it to drain, hopefully some might come out
Ordered the last parts from Seat today as well, so hopefully now all the parts are sprayed and ready for the engine bay, I can start putting it back together

And ordered two smaller t bolt clamps for my TIP as my other ones were too big.

Ordered my 19mm T piece today as well for the catch can, and picking up the bumper bolts off Seat tomorrow morning
so...to solve this issue
I bought this today - £16 from Germany
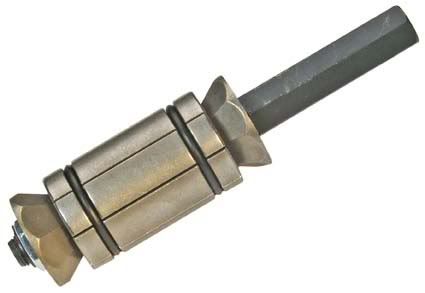
Pipe expander 34-64mm
I could have just heated it up and hammered it back out, but I would have never of got a round finish to the end tank, and as this is where a hose is going to be connected, it needs to be in a decent round shape, so the hose grips properly and there are no leaks
Ordered my 19mm T piece today as well for the catch can, and picking up the bumper bolts off Seat tomorrow morning
so...to solve this issue
I bought this today - £16 from Germany
Pipe expander 34-64mm
I could have just heated it up and hammered it back out, but I would have never of got a round finish to the end tank, and as this is where a hose is going to be connected, it needs to be in a decent round shape, so the hose grips properly and there are no leaks
Last edited:
so with the pipe shaper arriving, I got round to reforming the FMIC end tank
During
After - The end of it is not perfectly round, but it is a lot more round. You can't see it in the picture, but the centre of the pipe has now been properly reformed, and not at a sharp angle
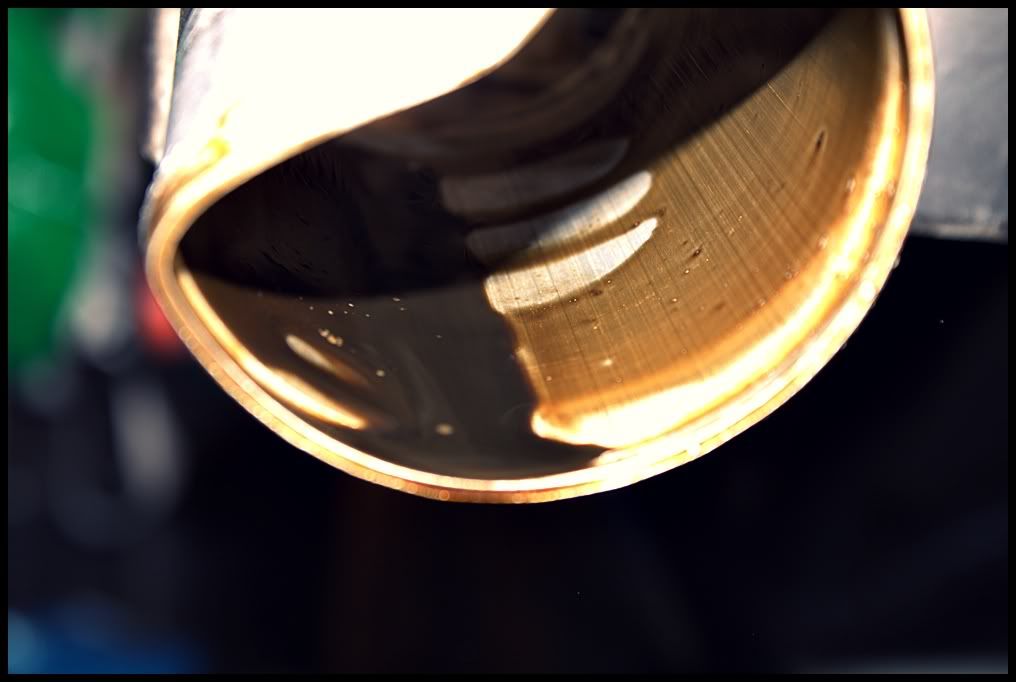
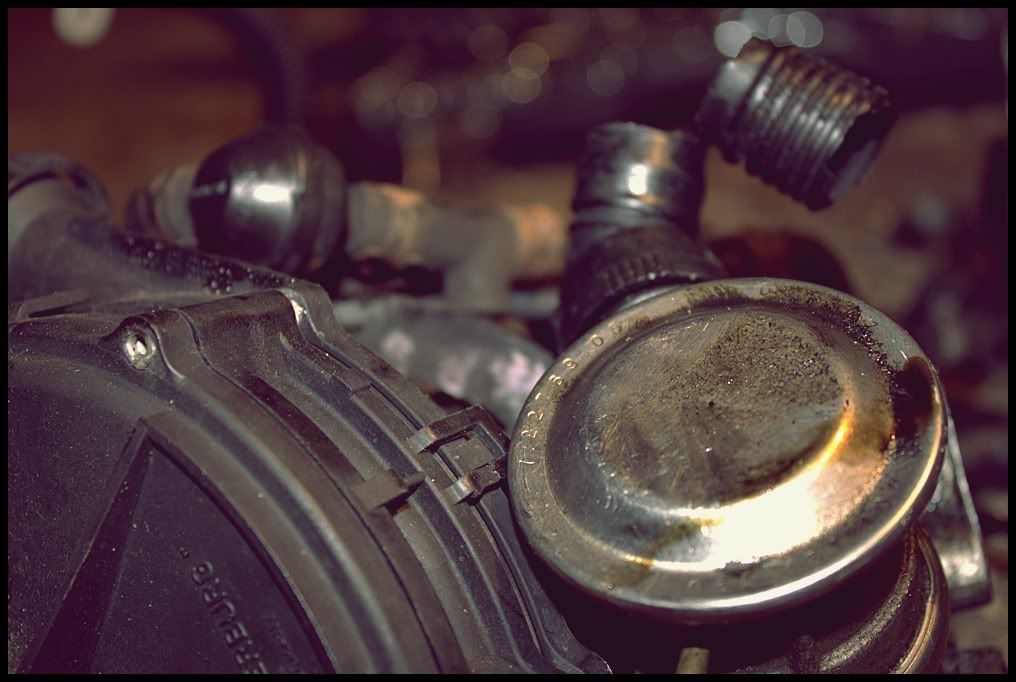
While I was looking to get the oil filter off (which I couldn't do in the end...so thats another thing to do) I noticed this pipe had a massive dent in it, so as well as the previous owner denting the end tank on the FMIC, he managed to do this

Before

After - end is not perfect, but the centre has now been properly reformed as it was almost squashed in half

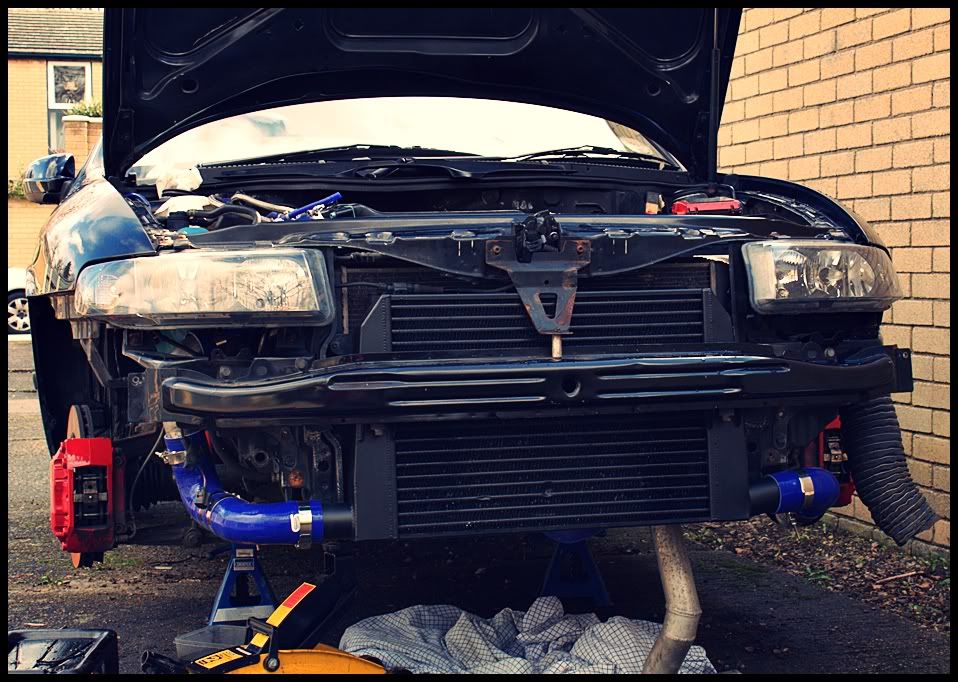
I then got round to mounting the FMIC and crash bar back on
Before:
After:

During
After - The end of it is not perfectly round, but it is a lot more round. You can't see it in the picture, but the centre of the pipe has now been properly reformed, and not at a sharp angle
While I was looking to get the oil filter off (which I couldn't do in the end...so thats another thing to do) I noticed this pipe had a massive dent in it, so as well as the previous owner denting the end tank on the FMIC, he managed to do this
Before
After - end is not perfect, but the centre has now been properly reformed as it was almost squashed in half
I then got round to mounting the FMIC and crash bar back on
Before:
After:
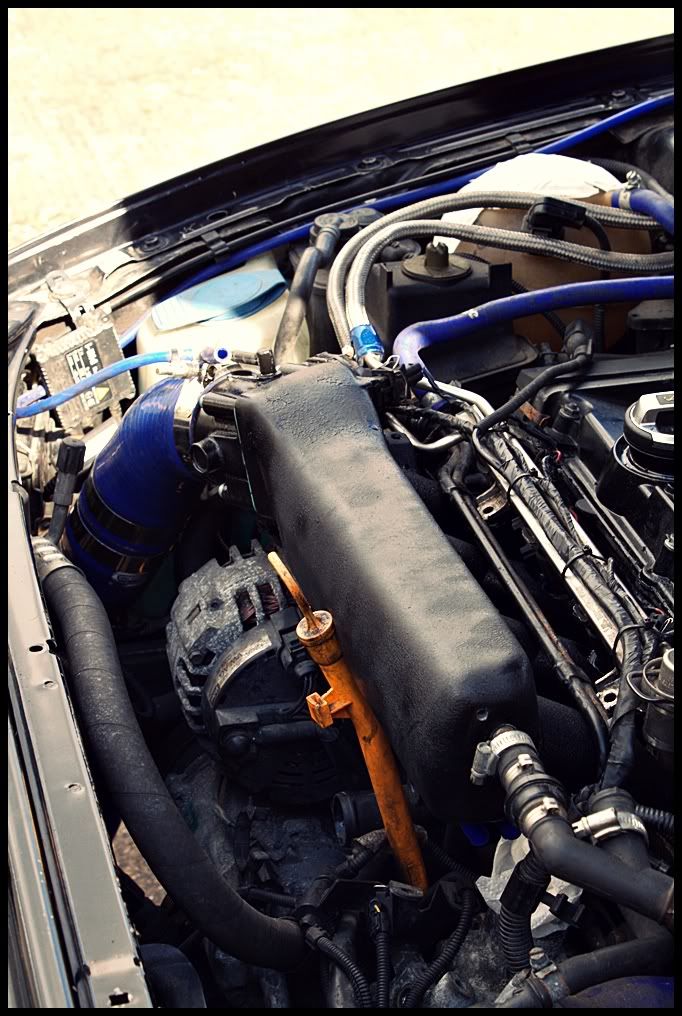
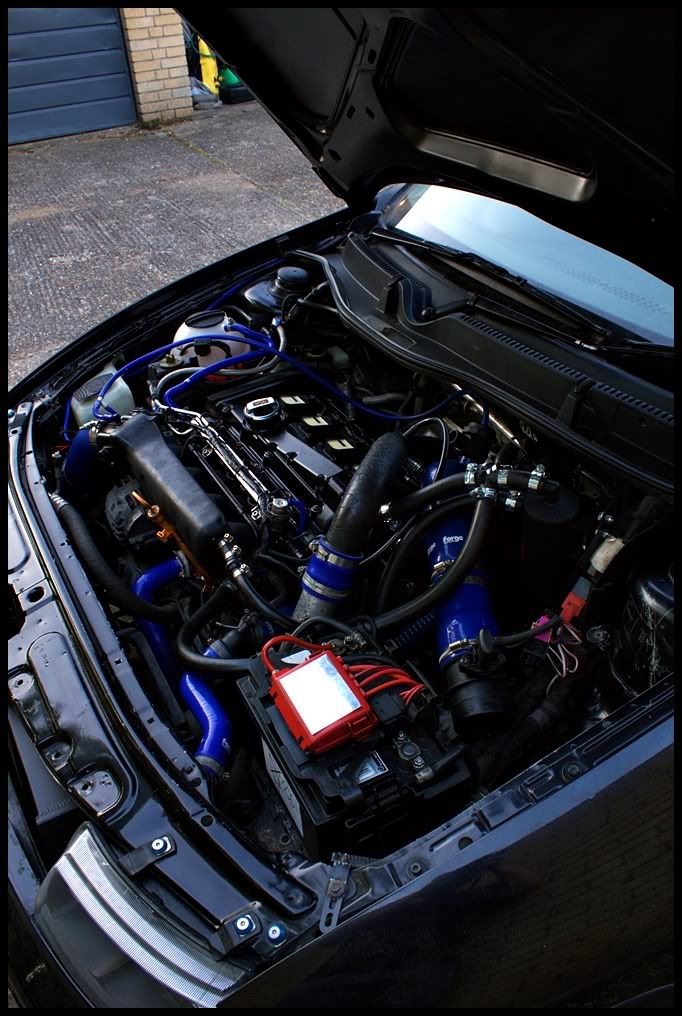
Engine bay junk has now been binned. Engine bay looks so much tidier already with the SAI pump all removed, and the mass of old pipes underneath the manifold have been removed as well (major cause for boost leaks)

Now need to get a plate for this (Forge goodness on this way)

I'm not a strong or experienced mechanic so all of this is a learning curve for me and the first time I have ever done stuff like this
Now need to get a plate for this (Forge goodness on this way)
I'm not a strong or experienced mechanic so all of this is a learning curve for me and the first time I have ever done stuff like this
So I thought I would get the FMIC pipework back on, and the bumper. I also got one arch liner back on, but need to get the arch liner clips from Seat to secure the lining
Also got the inlet mani back on the other night (it aint pretty, but its functional and black looking)
Fresh clean pipework

Also got the inlet mani back on the other night (it aint pretty, but its functional and black looking)
Fresh clean pipework
got round to doing a few bits tonight
dropped the car back on its wheels tonight for the first time in months

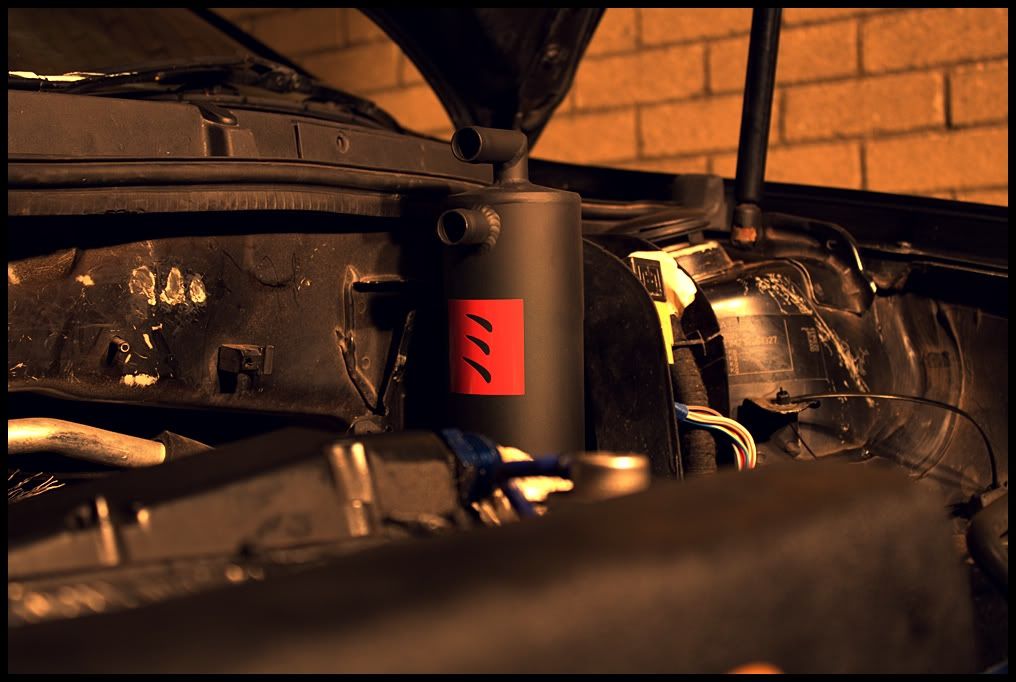
installed the catch can....although then released its sitting too high so I will have to remount this
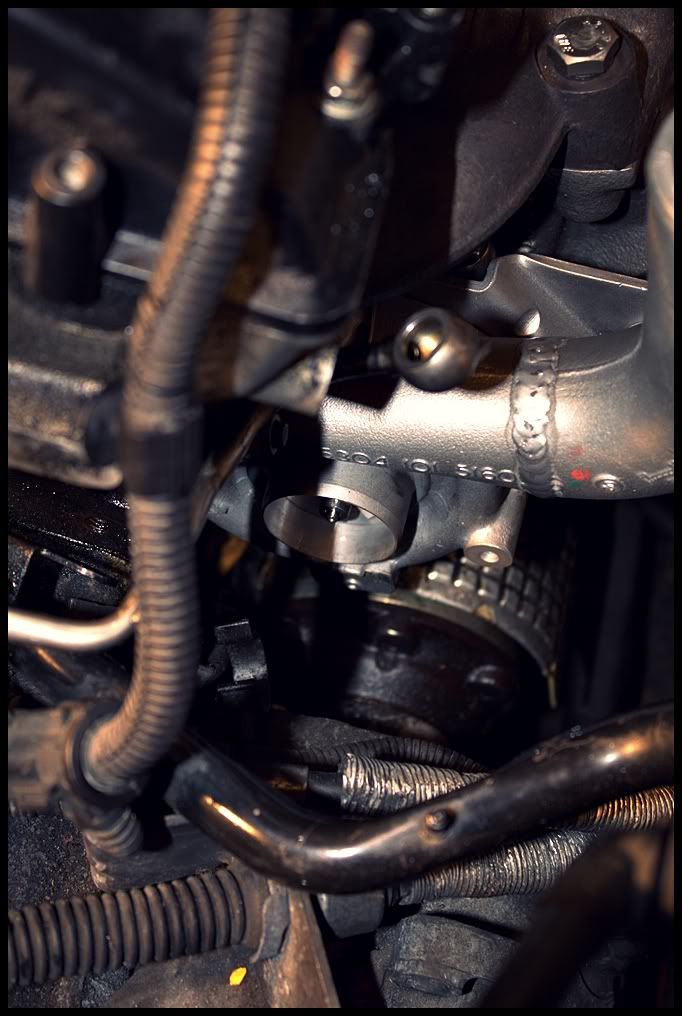
Then installed the turbo, but Seat have given me the wrong sodding gasket from the turbo to mani
anyway, initially installed it for now, but not fully tightened
dropped the car back on its wheels tonight for the first time in months
installed the catch can....although then released its sitting too high so I will have to remount this
Then installed the turbo, but Seat have given me the wrong sodding gasket from the turbo to mani
anyway, initially installed it for now, but not fully tightened
So a few bits that arrived over the past few days <!-- s --><!-- s -->
Crackle effect Forge DV

Alu 19mm bung for the TIP

Billet Bitz M6 screws and blue tabs (these screw into the brackets which hold the head lights on)

Forge SAI blanking plate

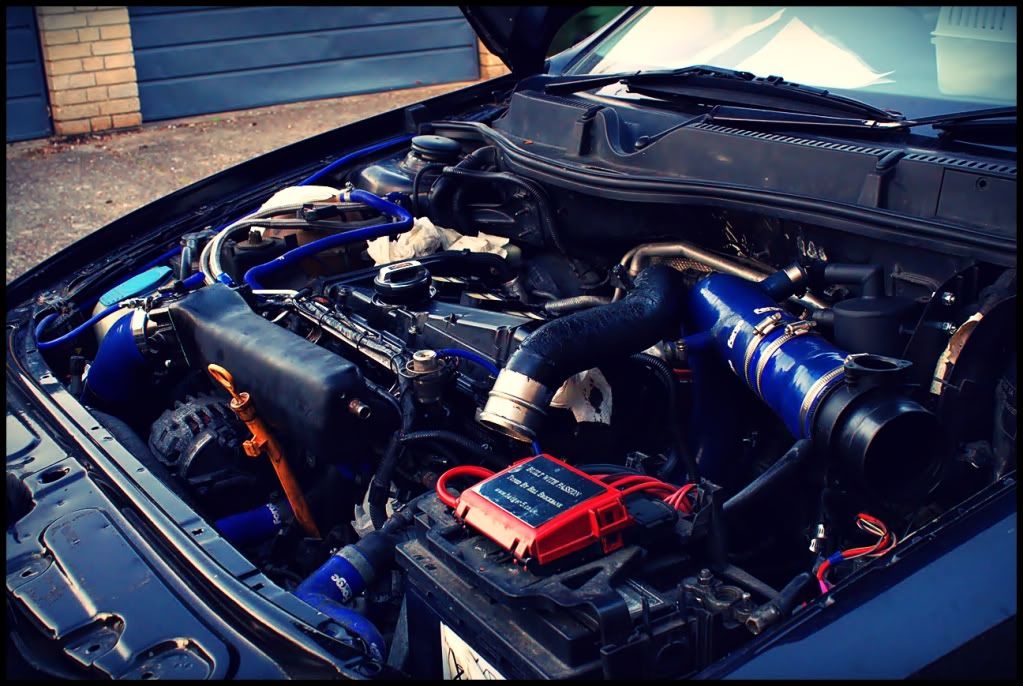
And a cheeky shot of the bay coming back together (needs a clean!)
--><!-- s -->Crackle effect Forge DV
Alu 19mm bung for the TIP
Billet Bitz M6 screws and blue tabs (these screw into the brackets which hold the head lights on)
Forge SAI blanking plate
And a cheeky shot of the bay coming back together (needs a clean!)
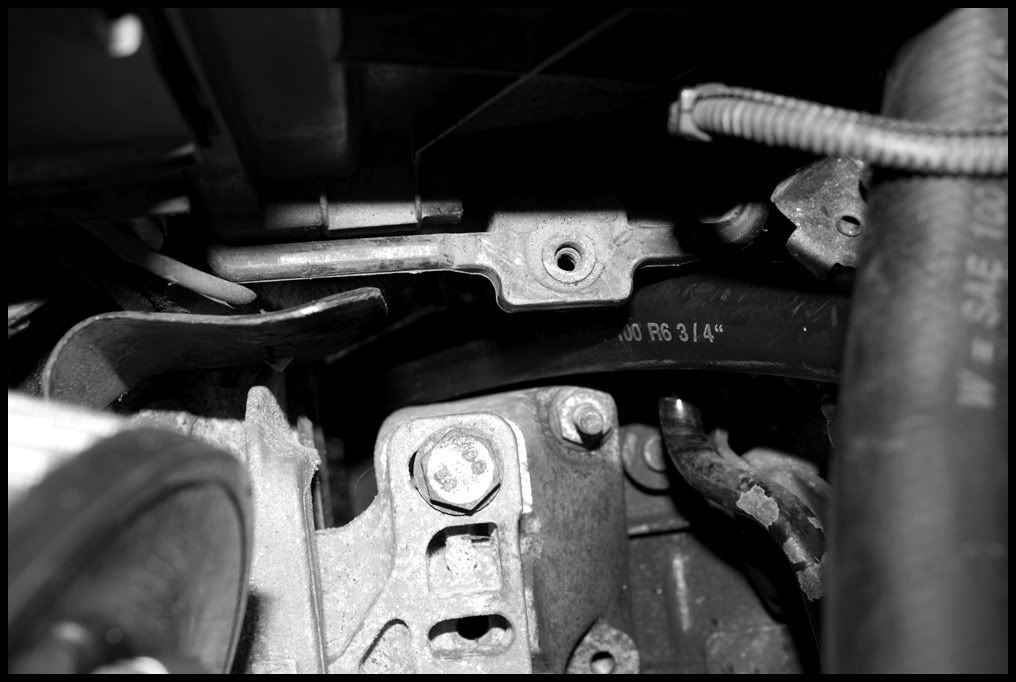
as all the piping from underneath the manni has been removed, the brake booster line needed to either be blocked or tidied up, so I bought some 12mm piping to make it look neater with just a single line onto the inlet mani

final caps arrived for the 8mm pipe under the inlet mani, so this is now capped off
turbo, downpipe, and TIP are now all properly screwed in. Not far to go now
final caps arrived for the 8mm pipe under the inlet mani, so this is now capped off
turbo, downpipe, and TIP are now all properly screwed in. Not far to go now
So I started her up last night and she was running like a dog. Fuel was pissing out, and I found one of the braided fuel lines had been crushed, probably from when I was removing and reinstalling the inlet manifold some how. Replaced this and it was still running rough...I think this was due to air pockets some where, so I called it a night
I then tried restarting her today, and she started up fine, and ticked over nicely. Bit smoky initially, due to the new tubby, but this is going slowly.
So after 6 months, working on it through the bloody snow and freezing cold, she is finally alive. Unfortunately I had to jump start her from my Diesel so the sound of this drowns it out a bit, but still she is alive, and initial revving around 20 seconds on in the video
SERIOUSLY CHUFFED

MOT and Tax next week
I then tried restarting her today, and she started up fine, and ticked over nicely. Bit smoky initially, due to the new tubby, but this is going slowly.
So after 6 months, working on it through the bloody snow and freezing cold, she is finally alive. Unfortunately I had to jump start her from my Diesel so the sound of this drowns it out a bit, but still she is alive, and initial revving around 20 seconds on in the video
SERIOUSLY CHUFFED
MOT and Tax next week
so got round to cleaning the interior tonight and cleaning off all the mould!
Used autoglym interior cleaner, really good stuff

Then took out the plastic centre that surrounded the handbrake. Unfortunately my knob was so mouldy I had to pull it off

Front seats back in finally
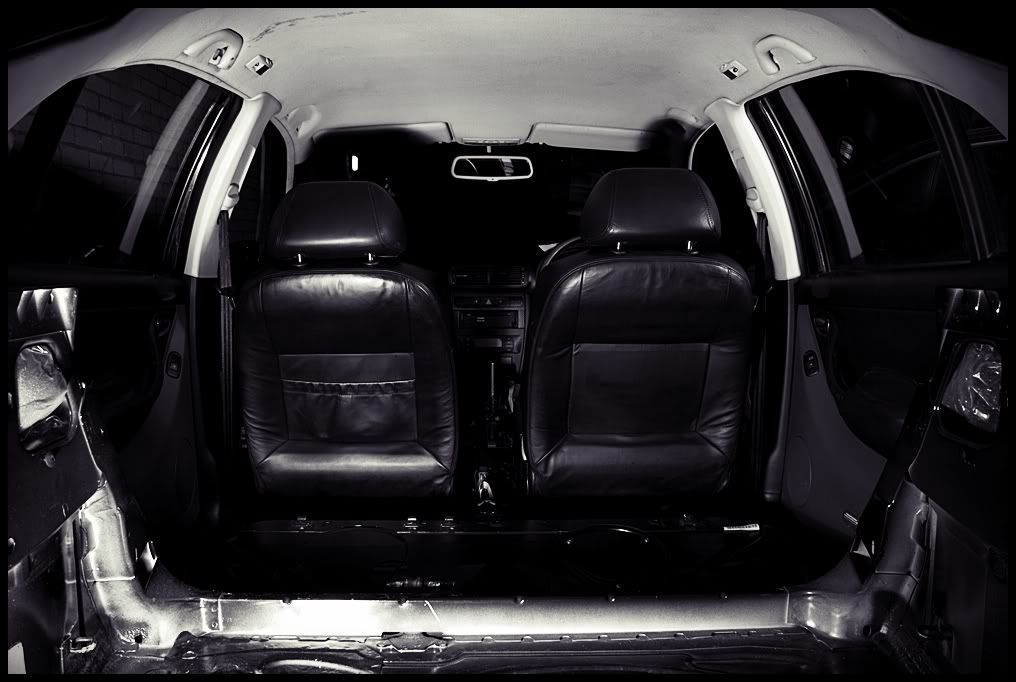
The front looking a lot cleaner
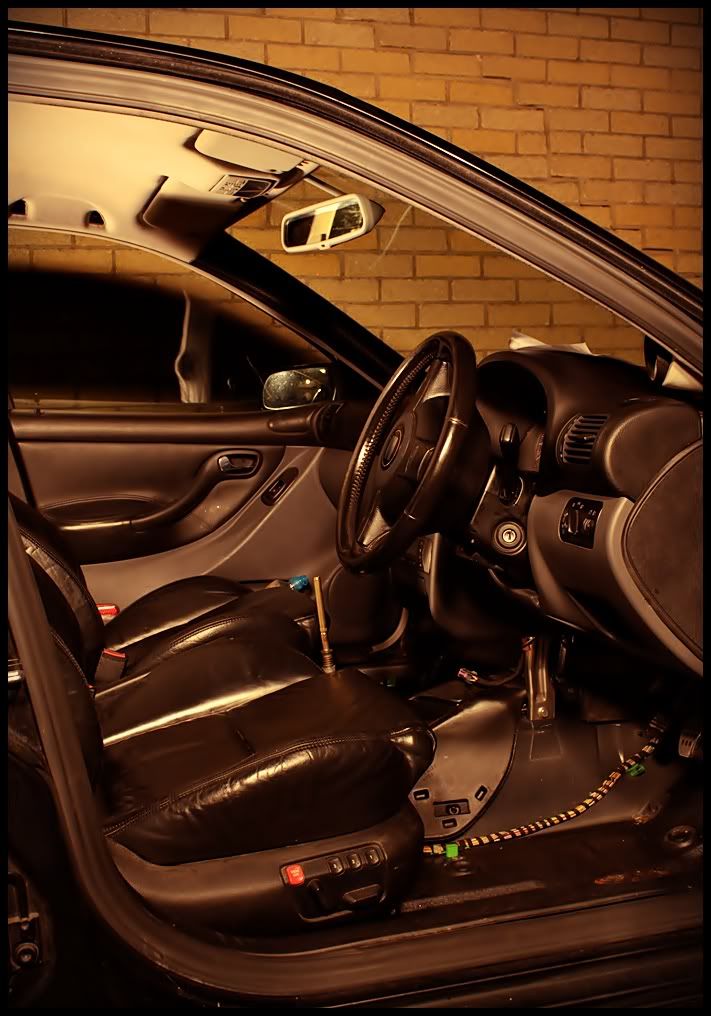
I may extend the gear stick touring car style and fit a short shifter.....
All thats left now is to fit one pipe onto the catch can, but awaiting the fitting to arrive for the rocker cover, then its MOT time
Used autoglym interior cleaner, really good stuff
Then took out the plastic centre that surrounded the handbrake. Unfortunately my knob was so mouldy I had to pull it off
Front seats back in finally
The front looking a lot cleaner
I may extend the gear stick touring car style and fit a short shifter.....
All thats left now is to fit one pipe onto the catch can, but awaiting the fitting to arrive for the rocker cover, then its MOT time


So bit of a nightmare at the moment. Had a right mare with the gear linkages, and they are still not right, but better than before slightly, although I don't have to push down to select reverse anymore, so will have to keep on trying with it
Then the part I had ordered for the AN fitting to the rocker cover was the wrong size so I could not finish off my catch can piping....at this point I thought sod it, and called it a night.
Not much progress again tonight, more measuring things up, and fitted a few resistors.
Current bodged piping for the catch can just to get it through it's MOT

The DV is too tight and sits right up against the metal pipe, and it is also kinking the silicon hose onto it, so I am going to run a 45 degree metal joiner and move the DV away from the TIP, so the silicon is not kinked
Split OEM pipe has finally had its day, but it got me through the MOT (probably explain why the engine management light came on)

Missing grill....old one has had it so bought a badgeless grill. Also ordered a new bonnet catch as the current one is screwed and it wont lock the bonnet properly

and finally the money shot

Then the part I had ordered for the AN fitting to the rocker cover was the wrong size so I could not finish off my catch can piping....at this point I thought sod it, and called it a night.
Not much progress again tonight, more measuring things up, and fitted a few resistors.
Current bodged piping for the catch can just to get it through it's MOT
The DV is too tight and sits right up against the metal pipe, and it is also kinking the silicon hose onto it, so I am going to run a 45 degree metal joiner and move the DV away from the TIP, so the silicon is not kinked
Split OEM pipe has finally had its day, but it got me through the MOT (probably explain why the engine management light came on)
Missing grill....old one has had it so bought a badgeless grill. Also ordered a new bonnet catch as the current one is screwed and it wont lock the bonnet properly
and finally the money shot
so, finally finished off the catch can tonight. I orginally ordered an AN12 finisher, but it was a straight one and I then realised because of the stiff piping, it was kinking which was my fault and I didn't think about this
so I then had to buy another AN12 connector but with a 45 degree bend, fitted nice and tight


The catch can is venting to air, and I found a perfect place to lay the pipe which sits between the engine mount and the battery block
I bought some engine bay cleaner earlier today and gave the engine a quick once over. Lots to do still and things to tidy up but this is how it stands at the moment
While cleaning, I then found this...
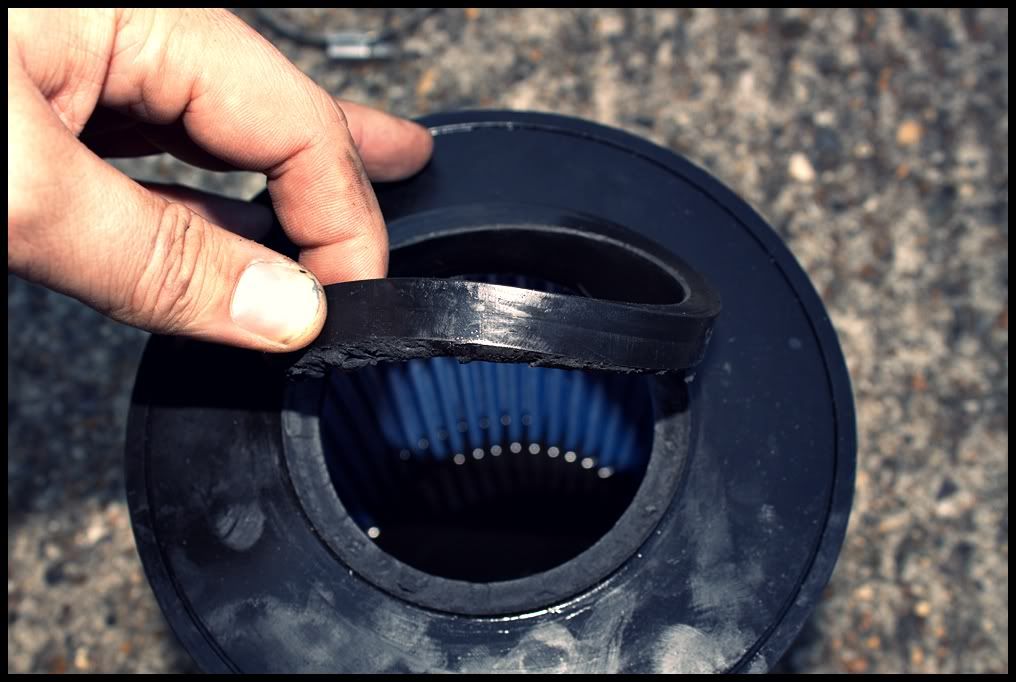
fecking wank filter. Got to contact them now, as filters can take a while to arrive I find, and its not far off the 8th June. Worst case scenario I have a crap filter that came on the car when I bought it back
Think I will just fork out the money and buy a green or proper Jetex filter off Bill
so I then had to buy another AN12 connector but with a 45 degree bend, fitted nice and tight
The catch can is venting to air, and I found a perfect place to lay the pipe which sits between the engine mount and the battery block
I bought some engine bay cleaner earlier today and gave the engine a quick once over. Lots to do still and things to tidy up but this is how it stands at the moment
While cleaning, I then found this...
fecking wank filter. Got to contact them now, as filters can take a while to arrive I find, and its not far off the 8th June. Worst case scenario I have a crap filter that came on the car when I bought it back
Think I will just fork out the money and buy a green or proper Jetex filter off Bill
Similar threads
- Replies
- 13
- Views
- 3K
- Replies
- 47
- Views
- 16K
