
-
Hey Guest👍👎 We're looking for reviews of your local CUPRA or SEAT Dealership - it's quick and easy to do: Leave a review now
You are using an out of date browser. It may not display this or other websites correctly.
You should upgrade or use an alternative browser.
You should upgrade or use an alternative browser.
Just went up to Shrewsbury, where my good mate Mo and myself got all muddy and took some snaps of the car.
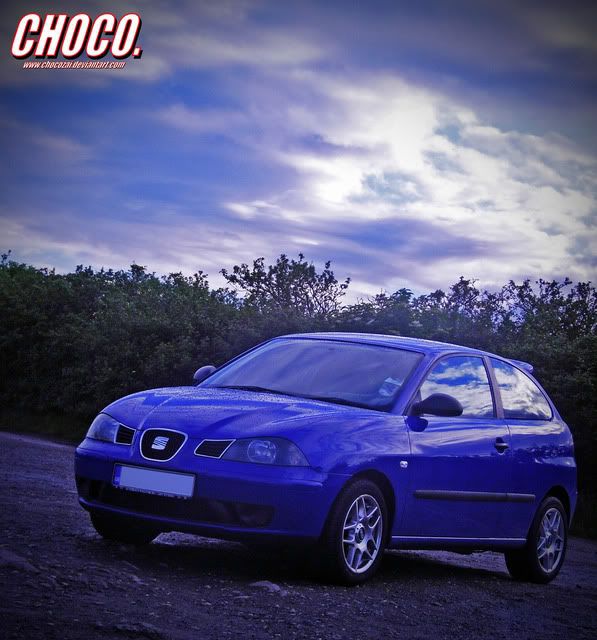
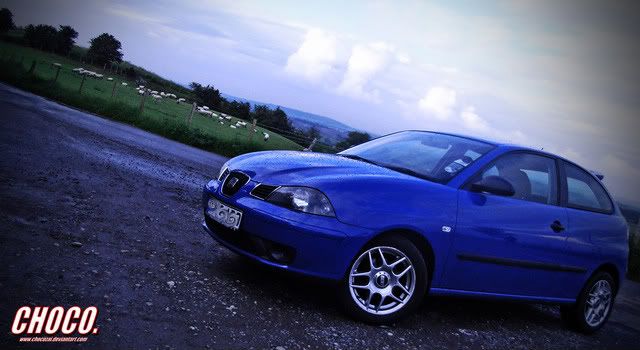
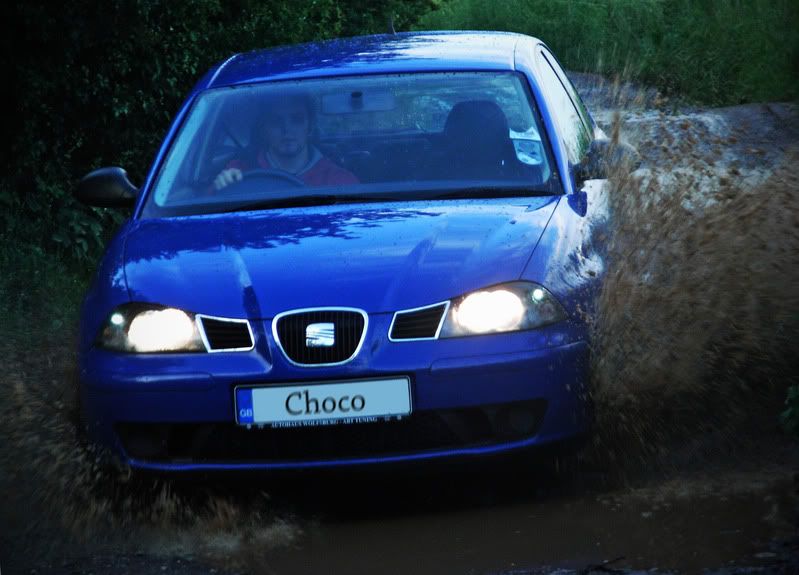
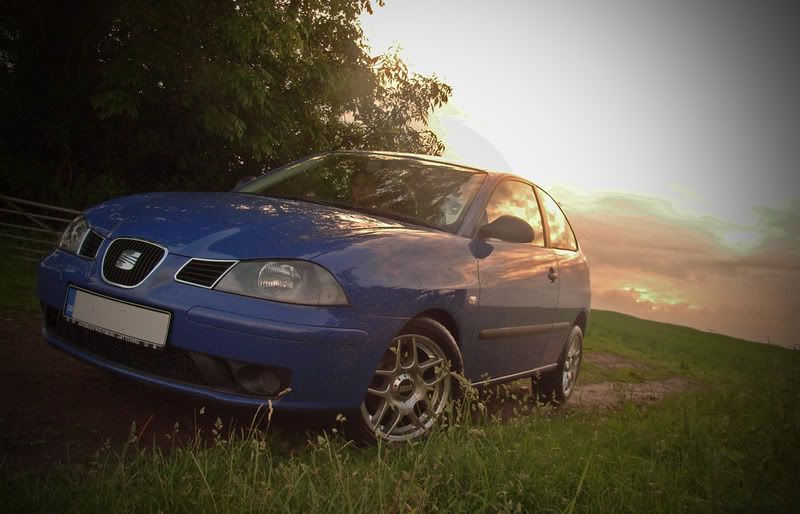
Pretty neat, huh?
Pretty neat, huh?
Last edited:
Thanks, man!
Got some insulation stuff (cheapo dynamat knock-off) lying around, waiting for me to put in my doors to help control the speaker-plastic vibrations. Not only that, I've also recieved a driver's side Cupra rear light cluster, just need the passenger side now
Nice car yourself, love the sig. Looks damn nice. How'd you colour code your mirrors? Use Halfords paint and lacquer?
Thanks, man!
Got some insulation stuff (cheapo dynamat knock-off) lying around, waiting for me to put in my doors to help control the speaker-plastic vibrations. Not only that, I've also recieved a driver's side Cupra rear light cluster, just need the passenger side now
Nice car yourself, love the sig. Looks damn nice. How'd you colour code your mirrors? Use Halfords paint and lacquer?
Sweet
can't wait to see more picsI had some paint left over from the bumper, primed it, painted and lacquered it. Had it done using a special spray gun rather than cans. Had to have the paint specially made up as it was hard to match, looks much better now. And thanks
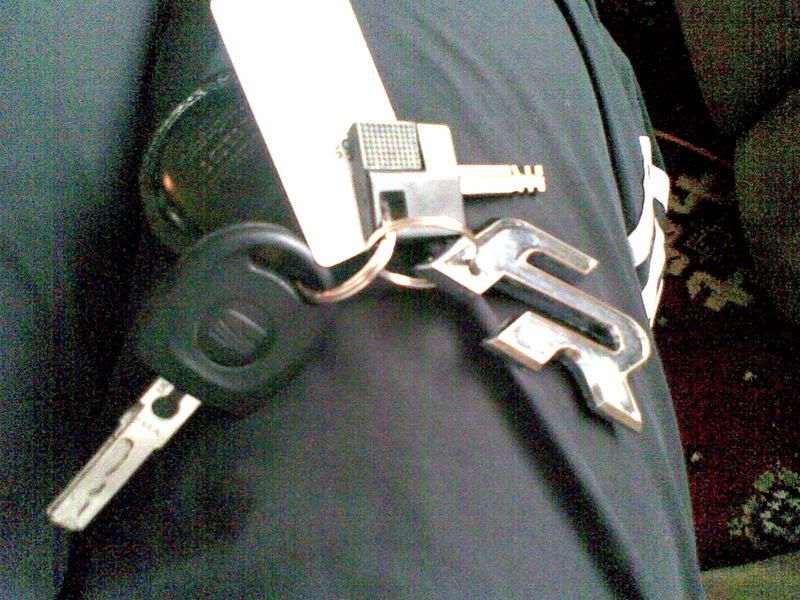
Oeeeeeeiiiiiiieyyyyyyyyyyyyy finally an update! Unfortunately I've been extremely busy lately, and will be in the future, so don't have much time or money to be spending on the car! I've just done this though - a while ago I bought a fake FR badge off the internet (big mistake!) to put on the interior of my car. Got bored of it pretty soon, it make me look like a bit of a pillock. But then I had the idea to take off the coloured stickers and terrible adhesive material to make a chromed emblem, and now I've drilled in a hole to make a keyring.
Nothing to write home about, but it's a cute little item!
you in wales at the moment?
Sorry man, not at the moment! I'm working in London, I'll be back in Cardiff next month. Why do you ask?
we have a show in swansea at the end of the month - was wondering if you where interested
Not this month mate, sorry! What show is it? Some sort of Dubs meetup? You guys have fun without me this time, unfortunately

Hey guys, rather large update.
As some of you may have noticed my posts earlier, I was experiencing problems with my handbrake sensor going off all the time. Must have been pulled off my all THE INSANE G'S I WAS PULLING DOWN DEM MOUNTAIN ROADS AT 185 MPH LOL
(My apologies, Photobucket has for some reason refused to downsize my pictures, even if it says it has done so)
Regardless, it got REALLY bad at one point, so a fix, even a temporary one had to be made. Toothpicks are normally quite good for this! Hard part was of course doing this with the centre panel still on, through the tiny gap under the handbrake, but it was doable!
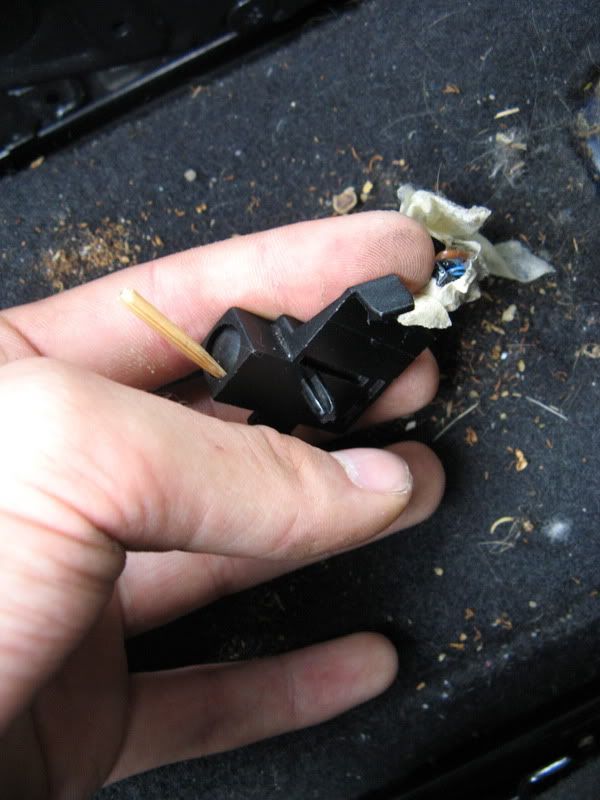
(NB : I obviously only took the picture today,after stripping everything)
A proper fix meant stripping the whole thing, and taking off my Richbrook handbrake lever. Now this was an utter &$%! to get on, so there was no way I would put it back on after taking it off. This meant of course, getting another handbrake lever, as I had butchered the original one, as I needed to bottom half of it to fit my Richbrook. The delightful David from Sere Motors was only happy to oblige, and I bought a Cupra lever from him.
Leather gaitor came off, first and foremost :

Then the handle and gear gaitor :
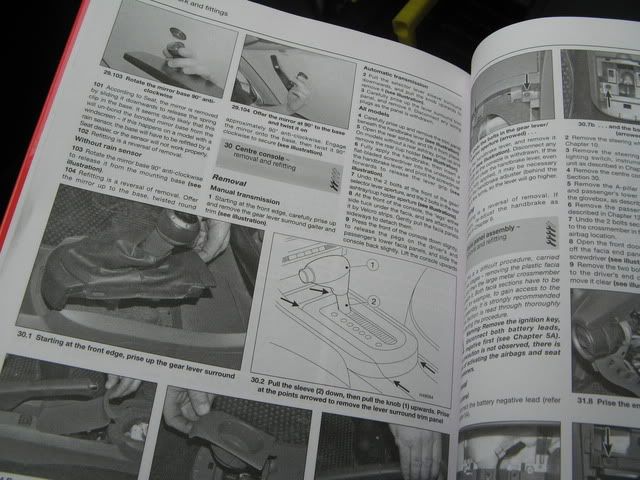
The new Haynes manual is incredibly handy, and I couldn't recommend it enough:
Out came the ashtray:
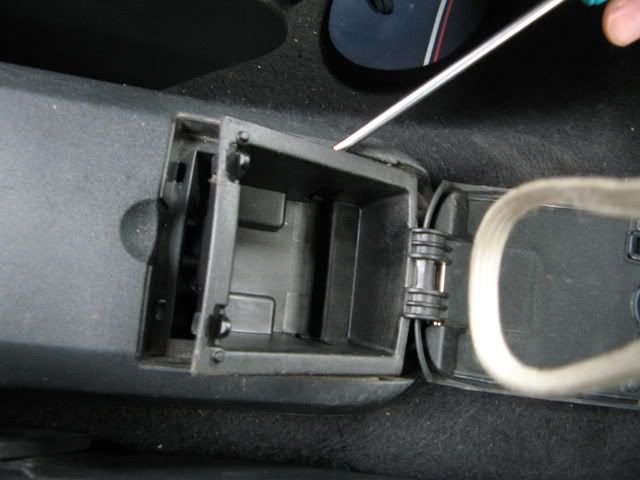
Off came some bolts to take off the centre trim:
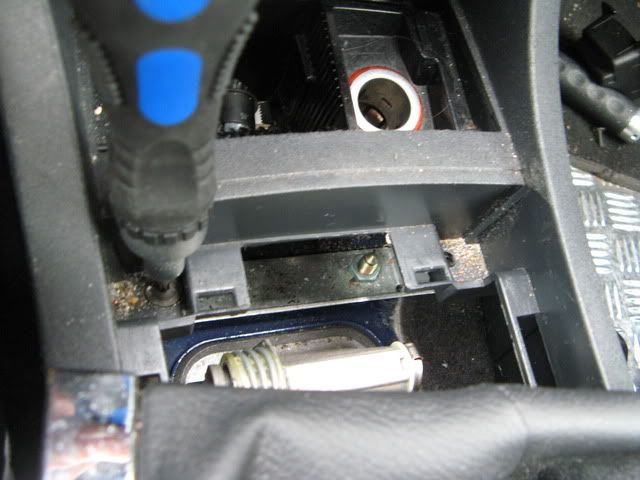
(There are 4 screws in total - 2 under the gear gaitor near the cigarette lighter, and 2 under the ashtray - you need not touch any others!!)
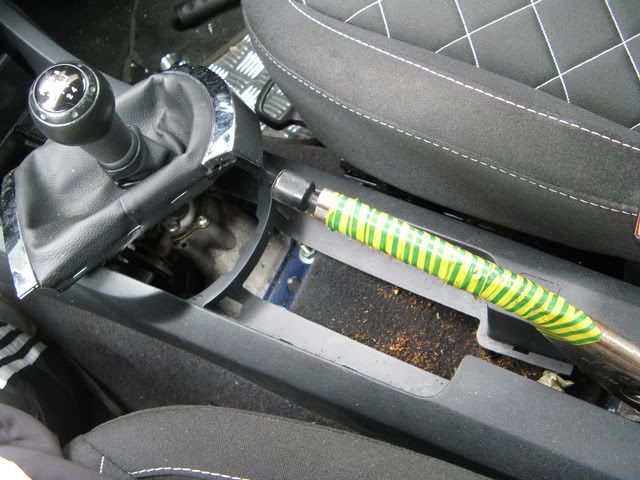
After using my hands to pry out the tray between the gearstick and handbrake, the centre trim could now be moved:
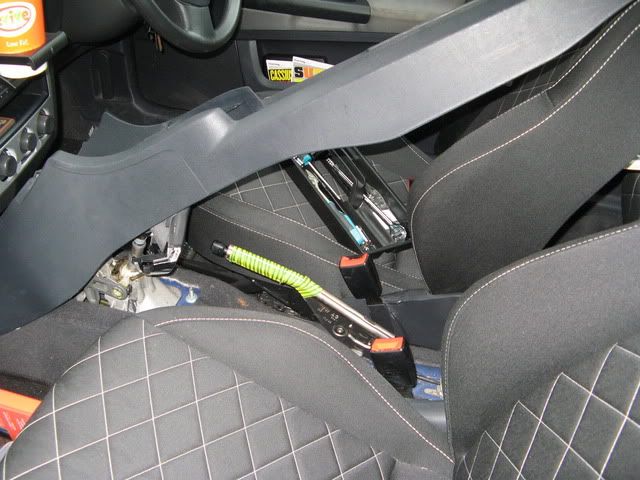
Handbrake sans centre trim:
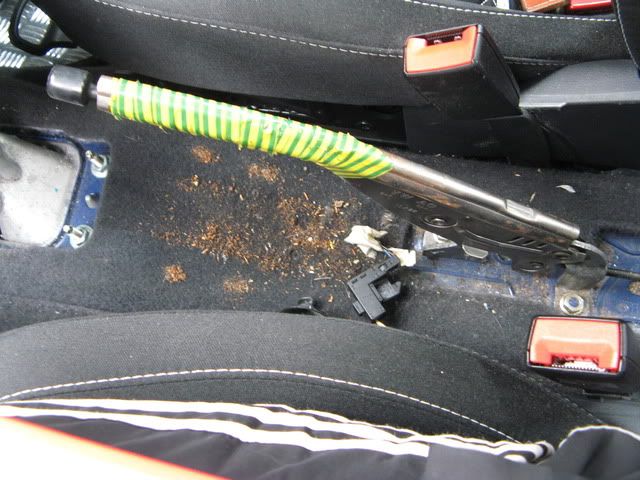
Switch is now back in place, clipped on under the handbrake:
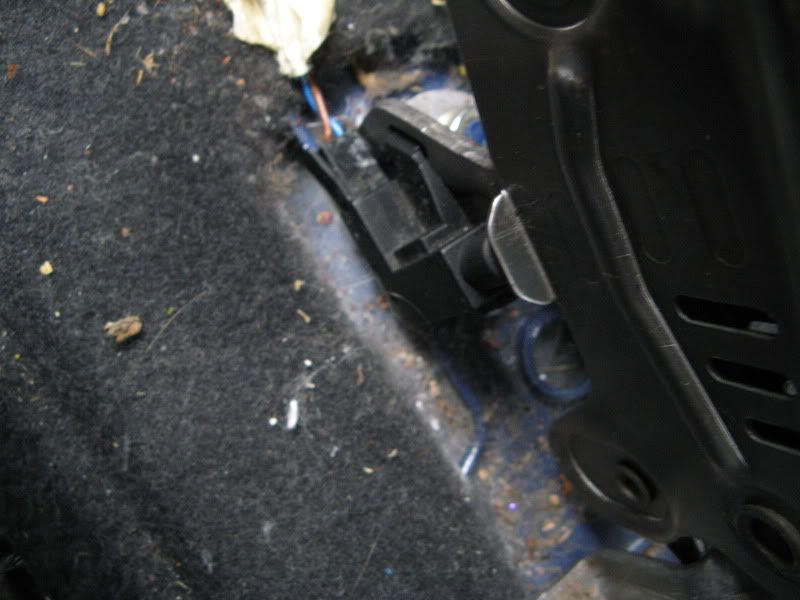
The finished item, after some hoovering up and re-assembling - not bad huh?

As some of you may have noticed my posts earlier, I was experiencing problems with my handbrake sensor going off all the time. Must have been pulled off my all THE INSANE G'S I WAS PULLING DOWN DEM MOUNTAIN ROADS AT 185 MPH LOL
(My apologies, Photobucket has for some reason refused to downsize my pictures, even if it says it has done so)
Regardless, it got REALLY bad at one point, so a fix, even a temporary one had to be made. Toothpicks are normally quite good for this! Hard part was of course doing this with the centre panel still on, through the tiny gap under the handbrake, but it was doable!
(NB : I obviously only took the picture today,after stripping everything)
A proper fix meant stripping the whole thing, and taking off my Richbrook handbrake lever. Now this was an utter &$%! to get on, so there was no way I would put it back on after taking it off. This meant of course, getting another handbrake lever, as I had butchered the original one, as I needed to bottom half of it to fit my Richbrook. The delightful David from Sere Motors was only happy to oblige, and I bought a Cupra lever from him.
Leather gaitor came off, first and foremost :
Then the handle and gear gaitor :
The new Haynes manual is incredibly handy, and I couldn't recommend it enough:
Out came the ashtray:
Off came some bolts to take off the centre trim:
(There are 4 screws in total - 2 under the gear gaitor near the cigarette lighter, and 2 under the ashtray - you need not touch any others!!)
After using my hands to pry out the tray between the gearstick and handbrake, the centre trim could now be moved:
Handbrake sans centre trim:
Switch is now back in place, clipped on under the handbrake:
The finished item, after some hoovering up and re-assembling - not bad huh?
Last edited:
Looking good! Doesn't look like the drivers mat has been hoovered tho
I didn't hoover the whole car, just the handbrake-y bits! Don't worry, a full clean is coming though! Thanks man!
Excellent little guide that Choco, I'll be using this to take my handbrake off! Had a feeling I'd need to take the seats out... not anymore.
Looks lovely inside your car mate, REALLY love those seats, they're the dogs danglies.
I was indeed lucky to find those seats, hahaha. My "guide" here wasn't quite complete - I missed some bits out.
- There's also two screws under the ashtray
- The bit between the handbrake and gear gaitor can be prised off with you hands
I think that's it. You only need to undo those 4 screws basically, don't touch any other ones.
![[B)]](/forums/styles/seatcupra/oldforumsmileys/shades.gif "Cool [B)]")
Similar threads
- Replies
- 1
- Views
- 515
- Replies
- 19
- Views
- 3K
