
-
Hey Guest👍👎 We're looking for reviews of your local CUPRA or SEAT Dealership - it's quick and easy to do: Leave a review now
Mk5 Ibiza 6j 2.0tdi FR
- Thread starter jdmsx
- Start date
-
- Tags
- 2.0tdi black magic ibiza mk5
You are using an out of date browser. It may not display this or other websites correctly.
You should upgrade or use an alternative browser.
You should upgrade or use an alternative browser.
Visit to the forum for a nosey and an update.
Couple weeks back had a electrical issue where the wiring loom shorted out against the gearbox causing a fuse to blow and the fuel system to cut out (half 6 in the morning which was fun way to start my Monday) car was recovered and fixed within the week.
New Ferodo discs and pads all round last month.
Darkside EGR Cooler delete is needing to be fitted alongside booking in for a custom 2.5” downpipe and a fresh set of glowplugs wouldn’t go amiss. Quite a bit of maintenance has been undergone through this weird year while I’ve had a chance and time to.
Wheels have now been powdercoated, and ceramic coated with KKD R-Evolve as of last weekend, just need to order up 2x new tyres for them and some wheel bolts.
Insurance was just renewed as of today
(22 years old, 2.0tdi, mods declared with additional benefits: NCB protection, Excess protection, breakdown cover, legal cover, personal accident cover, take a guess at what I’ve paid") )
)
MOT due next month too, hopefully pass with no issues. Will update with more stuff soon!
Couple weeks back had a electrical issue where the wiring loom shorted out against the gearbox causing a fuse to blow and the fuel system to cut out (half 6 in the morning which was fun way to start my Monday) car was recovered and fixed within the week.
New Ferodo discs and pads all round last month.
Darkside EGR Cooler delete is needing to be fitted alongside booking in for a custom 2.5” downpipe and a fresh set of glowplugs wouldn’t go amiss. Quite a bit of maintenance has been undergone through this weird year while I’ve had a chance and time to.
Wheels have now been powdercoated, and ceramic coated with KKD R-Evolve as of last weekend, just need to order up 2x new tyres for them and some wheel bolts.
Insurance was just renewed as of today
(22 years old, 2.0tdi, mods declared with additional benefits: NCB protection, Excess protection, breakdown cover, legal cover, personal accident cover, take a guess at what I’ve paid
)MOT due next month too, hopefully pass with no issues. Will update with more stuff soon!
Thanks mate, very happy with them, was doing my weekly pitstop this morning and looking out the window at it just looks great, just the right stance, some minor tweeks to it but overall I love itLove the wheels man! shes sits lovely on them ?
Update Time:
Stripped off all the front grills as I decided it was time to get them painted

Been commuting like this for the last 2 weeks while they were away haha. Now returned and spent the afternoon of light and dry weather building the bumper back up. Quite a pain in the arse to get the lower one out and even worse putting it back in. Managed after a bit of time struggling.


Needs a good wash and a couple of ends tidied up but looks much better.
Stripped off all the front grills as I decided it was time to get them painted
Been commuting like this for the last 2 weeks while they were away haha. Now returned and spent the afternoon of light and dry weather building the bumper back up. Quite a pain in the arse to get the lower one out and even worse putting it back in. Managed after a bit of time struggling.
Needs a good wash and a couple of ends tidied up but looks much better.
Also finally got the downpipe made up for this! Now running a full 2.5” straight pipe system.

I wanted to give my personal review of each of the different exhaust stages I’ve went through and how they’ve changed the performance of the vehicle...
*All stages were during when the car was remapped*
Stock exhaust w/ dpf and cat: Not much to write in this section, fairly average
Stock exhaust, DPF + EGR deleted, cat still present: Apart from getting rid of the annoying regens, and issues that the dpf and egr give, torque was felt to be improved in the lower rev range, noticeable straight away when first pulling out of a junction. The car seemed much happier and not held back as much.
2.5” Cat-back, DPF Delete, Cat present, Stock Downpipe:
Made a difference through the whole rev range, less throttle was needed to achieve the same speeds. So on my normal drive home where I know the road and speeds needed to drive comfortably, where I’d usually travel at 40mph, I automatically ended up driving the same parts at 50mph with no difference to driving style. Noise was good, slight owl noise during gear changes like the old pd engines do, quiet on idle, throaty on boost.
Full 2.5” system, No Cat, No DPF:
So I only have minimal experience so far (45mins worth actually) but I’ll add to it in a few weeks. First thing I instantly noticed was the jet turbine whistle coming from it as soon as I started it up. On boost it rips very loud, almost sounds like it’s rattling like most straight piped diesels do. I also felt that the car didn’t bog as much during the 1st > 2nd shift change. Unfortunately it sounds like the owl noise has disappeared due to the new dp which is up to personal preference if that’s a good thing or not haha. Happy overall with it, I’ll keep tabs on fuel economy and other subtle things I pick up on.


(Photos for rear view of exhaust)
I wanted to give my personal review of each of the different exhaust stages I’ve went through and how they’ve changed the performance of the vehicle...
*All stages were during when the car was remapped*
Stock exhaust w/ dpf and cat: Not much to write in this section, fairly average
Stock exhaust, DPF + EGR deleted, cat still present: Apart from getting rid of the annoying regens, and issues that the dpf and egr give, torque was felt to be improved in the lower rev range, noticeable straight away when first pulling out of a junction. The car seemed much happier and not held back as much.
2.5” Cat-back, DPF Delete, Cat present, Stock Downpipe:
Made a difference through the whole rev range, less throttle was needed to achieve the same speeds. So on my normal drive home where I know the road and speeds needed to drive comfortably, where I’d usually travel at 40mph, I automatically ended up driving the same parts at 50mph with no difference to driving style. Noise was good, slight owl noise during gear changes like the old pd engines do, quiet on idle, throaty on boost.
Full 2.5” system, No Cat, No DPF:
So I only have minimal experience so far (45mins worth actually) but I’ll add to it in a few weeks. First thing I instantly noticed was the jet turbine whistle coming from it as soon as I started it up. On boost it rips very loud, almost sounds like it’s rattling like most straight piped diesels do. I also felt that the car didn’t bog as much during the 1st > 2nd shift change. Unfortunately it sounds like the owl noise has disappeared due to the new dp which is up to personal preference if that’s a good thing or not haha. Happy overall with it, I’ll keep tabs on fuel economy and other subtle things I pick up on.
(Photos for rear view of exhaust)
Think youve inspired me to get the plastics sprayed up this weekend. Makes a huge difference to the look. Ive had my straight through 2.5 from the turbo, since i decided to change the ehaust, you should notice the pick up between gear shifts better, i get a little turbo flutter aswell which i think sound great but i know thats preference. looks great tho mate ?
Cheers mate, yeah the grills were a nightmare to paint apparently, not the best finish but look much better than the raw plastic effect. Still need to put my AEM Dryflow on but gonna do some logging of the downpipe and see what it does for fuel and performance every day drivingThink youve inspired me to get the plastics sprayed up this weekend. Makes a huge difference to the look. Ive had my straight through 2.5 from the turbo, since i decided to change the ehaust, you should notice the pick up between gear shifts better, i get a little turbo flutter aswell which i think sound great but i know thats preference. looks great tho mate ?
Few updates:
Finally got a hold of a black cupra headliner and all pillar trims. Tackled this a few weeks ago, not a hard job at all, ibiza interior is particularly easy to take apart. So glad the cream has gone!


While pulling apart the interior, I remembered both rear speakers had died some time ago, and never got round to changing them. The rear panel covering them is easily accessible so ordered a few things and surprise, the speaker adapters don’t fit, so back to modifying them and trying to go a neater install then the front ones I done some time ago.

Edge of the adapter had to be cut off as it wouldn’t fit flush inside the car. Few rough marks but tried to file and sand the worst of them out. At the end of the day, this surface will never be visible.

Box of fasteners I had lying about has came in very handy. I bought a rivnut kit so I can do a tidy install, and the fastener kit just happened to have perfect bolts to fit through the adapter and also secure the speaker to the adapter. So began mocking everything together.


Next is to install into the car, drill bit acquired to open out the oem speaker rivet holes so we can get down to squeezing the rivnuts in position. Will update later this week with more on this.
And finally, more suspension upgrades. For a while I’ve felt uncomfortable with the handling of the car, and running on the lowest heights on the STX coilovers has lead to burst shocks so I done some digging and found these on facebook marketplace...

Creme de la creme of functional/low stance coilovers. Bargain of a price with minimal usage. Should be perfect for what I need and I’m very excited to get these on. I like to do helpful reviews for anyone who reads this forum so I will do the BC v STX coilover comparison in a couple of weeks.
Finally got a hold of a black cupra headliner and all pillar trims. Tackled this a few weeks ago, not a hard job at all, ibiza interior is particularly easy to take apart. So glad the cream has gone!
While pulling apart the interior, I remembered both rear speakers had died some time ago, and never got round to changing them. The rear panel covering them is easily accessible so ordered a few things and surprise, the speaker adapters don’t fit, so back to modifying them and trying to go a neater install then the front ones I done some time ago.
Edge of the adapter had to be cut off as it wouldn’t fit flush inside the car. Few rough marks but tried to file and sand the worst of them out. At the end of the day, this surface will never be visible.
Box of fasteners I had lying about has came in very handy. I bought a rivnut kit so I can do a tidy install, and the fastener kit just happened to have perfect bolts to fit through the adapter and also secure the speaker to the adapter. So began mocking everything together.
Next is to install into the car, drill bit acquired to open out the oem speaker rivet holes so we can get down to squeezing the rivnuts in position. Will update later this week with more on this.
And finally, more suspension upgrades. For a while I’ve felt uncomfortable with the handling of the car, and running on the lowest heights on the STX coilovers has lead to burst shocks so I done some digging and found these on facebook marketplace...
Creme de la creme of functional/low stance coilovers. Bargain of a price with minimal usage. Should be perfect for what I need and I’m very excited to get these on. I like to do helpful reviews for anyone who reads this forum so I will do the BC v STX coilover comparison in a couple of weeks.
Part 2 of the Rear Speaker install:

OEM speaker removed, drilled out rivets and open up to allow rivnuts in. Connector cut off.

Wires spliced, and adaptor bolted up.

Tesa tape for oem+ points.

View from behind showing rivnut installation.

Speaker attached and wiring rerouted.
All tested before putting panels back on,
and success?
OEM speaker removed, drilled out rivets and open up to allow rivnuts in. Connector cut off.
Wires spliced, and adaptor bolted up.
Tesa tape for oem+ points.
View from behind showing rivnut installation.
Speaker attached and wiring rerouted.
All tested before putting panels back on,
and success?
Thanks very much! I understand that parts can be expensive especially being a student. It takes time to build up a car, I have been an apprentice while building this car which is why it has taken me almost 4 years to get it near where I am happy with it.Hey mate, sorry to bother you, but as I live in a non EU country, ordering parts from Europe is very expensive, and I am a student with only a Saturday and Sunday job, I have to mostly buy used parts for my Ibiza. The front splitter you have on your Ibiza is the best I have seen on this forum and I was wondering could you confirm to me is this the one you have.
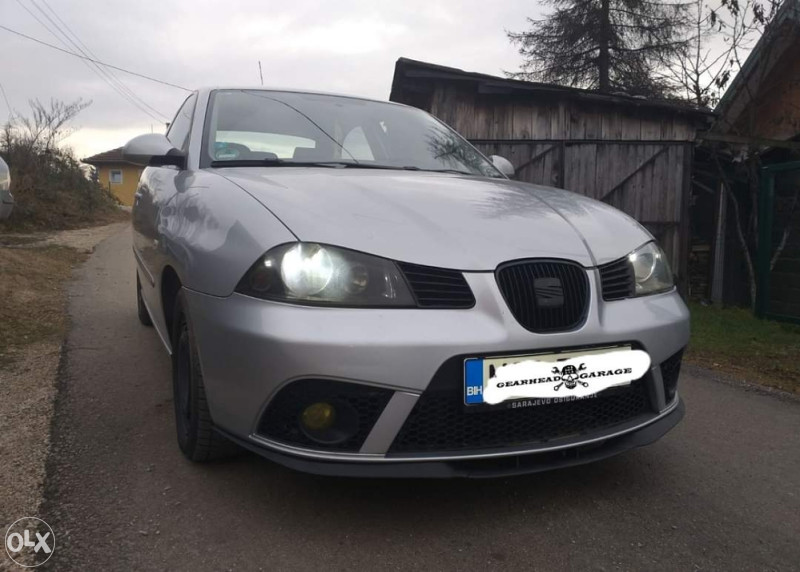
Seat 6l leon cupra lip plastika ABS GG
Seat 6l leon cupra lip plastika ABS GG, Novi Grad, 50 KM, 1www.olx.ba
85KM is around 30 pounds, but to me that is not little money, and I do not want to gamble on if it is the splitter you have or if it is not.
Thank you very much in advance, and I have to say you have the best looking Ibiza on this forum.
In regards to the splitter, it is a genuine Seat Leon Cupra Mk1 splitter. The one you have sent seems to be a replica of it but still the same style and would probably be fine to use, as I had to cut mine to fit anyway. I hope this helps. I have added a photo of the slight difference in the two, which is really only the clips/mounting tabs.
Hope this helps!
- Joe
A remap will make your car completely different, great thing to have done. For the splitter all you need to do is use some screws and work your way round the edges pushing them to the shape of the bumper!Thank you for the feedback, I will buy it then and hopefully be skillful enough to mount it. It is a replica, the original is twice the price, and I would rather buy the replica for now and use the spare money and some extra I am saving for a new remap. The current 90 hp is not enough.
- Had a busy few weeks recently. Attended Cumbriavag/first proper show since the pandemic started. And had a lot of prep to do before then and
not leaving myself much time to do it.
- Finally got the whole front end painted along with the rear bumper, getting rid of the stone chips and lacquer peel.
- BC Racing coilovers finally went on, along with Powerflex -10mm top mounts.
- Day before leaving was 4 new Falken tyres and an alignment to make sure everything was good. Opted to go for a 195/40/17 tyre instead of the previous 205/40/17 and feel the new size really changes the way the wheels look.
- 2xcite headlights fitted, wanted to change it up a bit and quite liked the look of these especially installed on a black car.
- Cumbriavag ended up being a good night/day, didn’t stay as long as I had hoped though, but a few hours in the Show and Shine was nice after all the work that’s went in over the years.
- Just had all 4 injectors changed today with some secondhand ones which I sent away for professional testing before having fitted. For best part of a year I’ve had lazy starts with quite a lot of unburnt fuel passing through, which are common symptoms of leaky injectors. Will see how we get on now!
Photo Update:
Similar threads
- Replies
- 5
- Views
- 1K
