
The following guide was created by a community member.
The following is the steps I took to replace the indicators in my wing mirrors.
In this case I have used Dynamic Indicators but the following steps are the same for Stock as well.
Firstly turn you mirror in to face the car (I found It was also better if I pointed down as well)
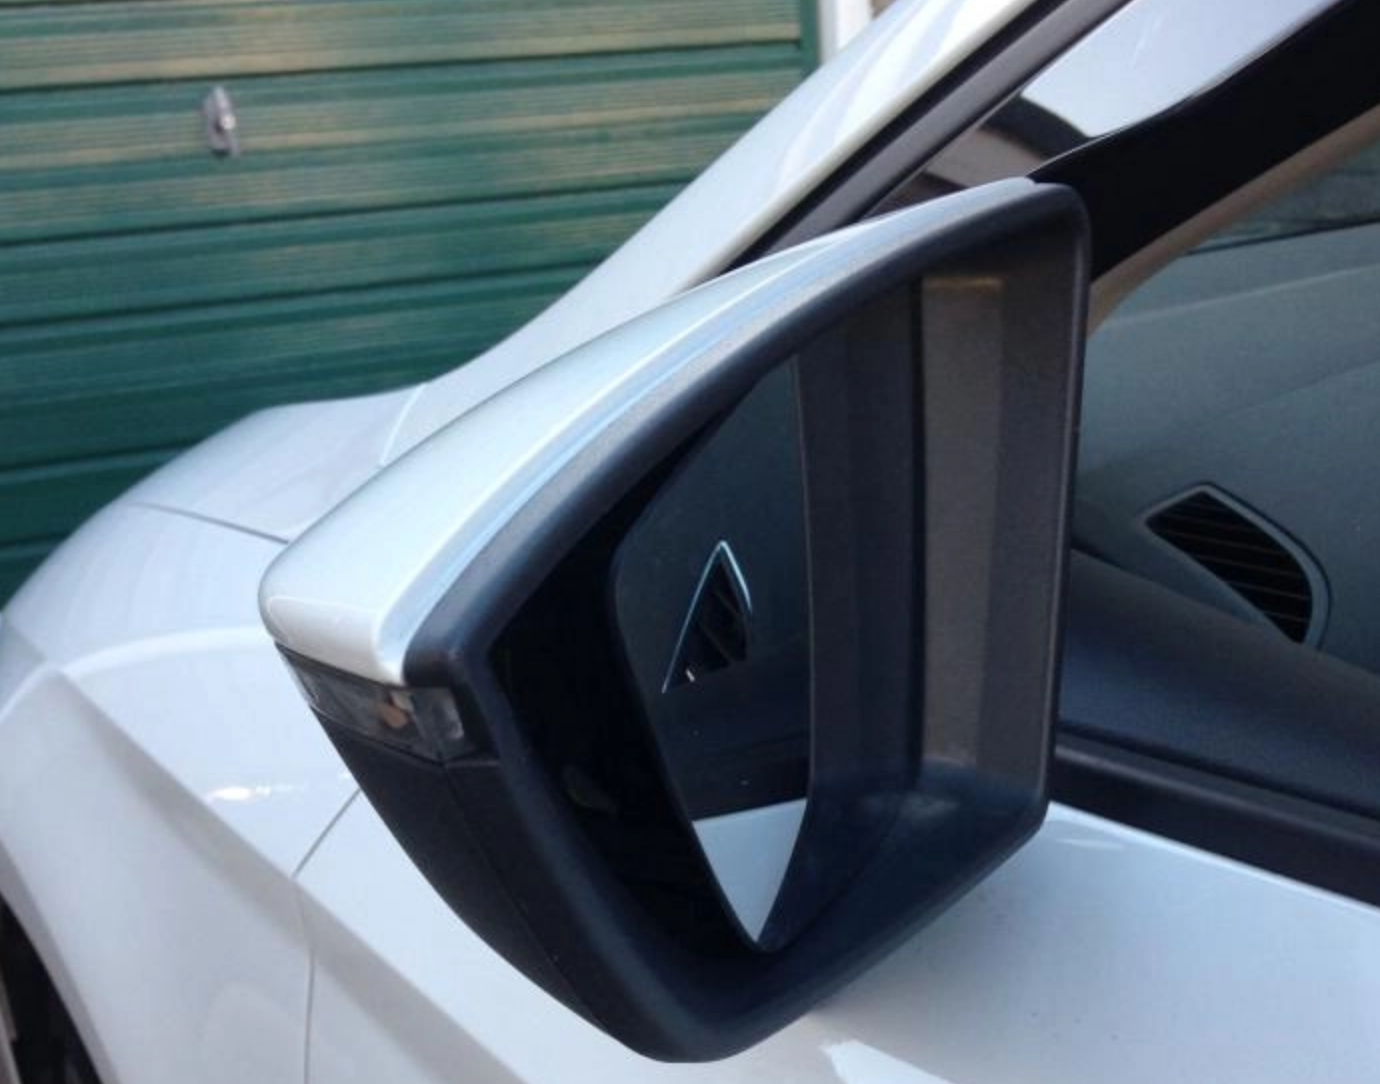
Picture taken from https://forums.seatcupra.net/index.php?threads/removing-the-wing-mirror-cap.408610/ thanks
What you are doing is to give you room to get your fingers in behind the mirror, Put your finger or thumb in behind it and gently pull towards the car, It is just cliped on.
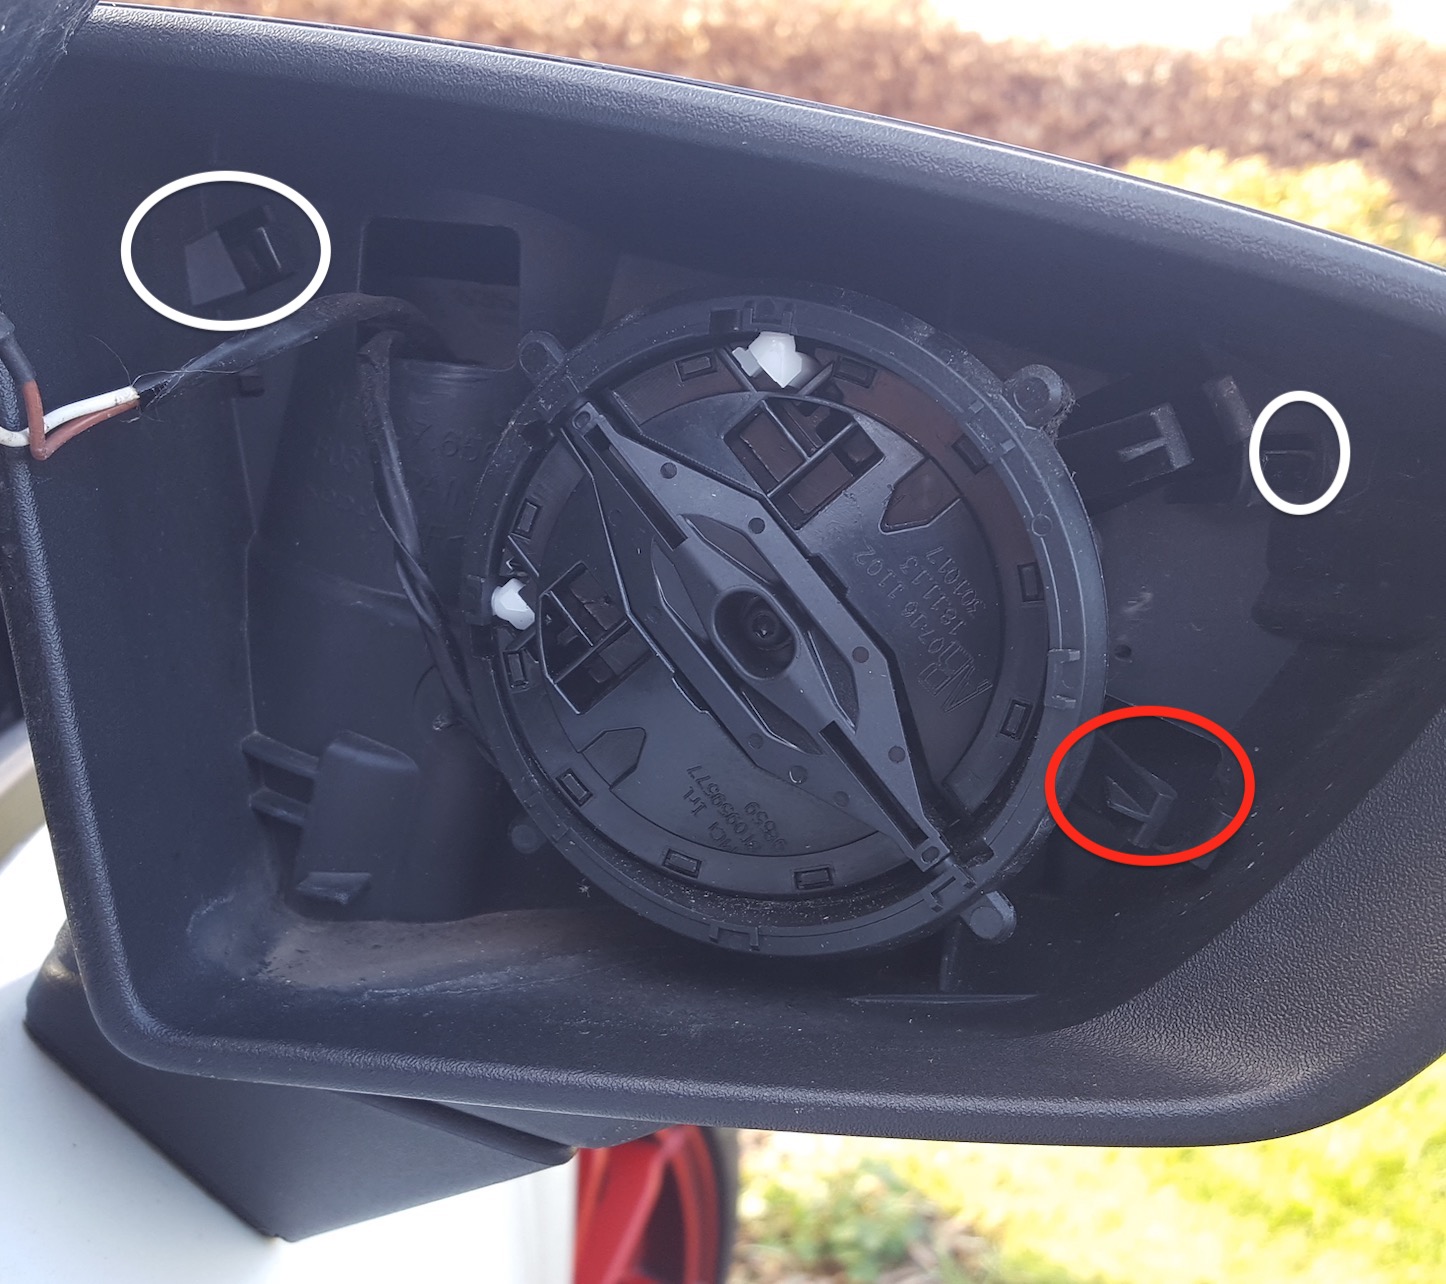
If you have heated mirrors the mirror will have two wires connected to it, just pull them off but make a note of which side the wires are connected to.
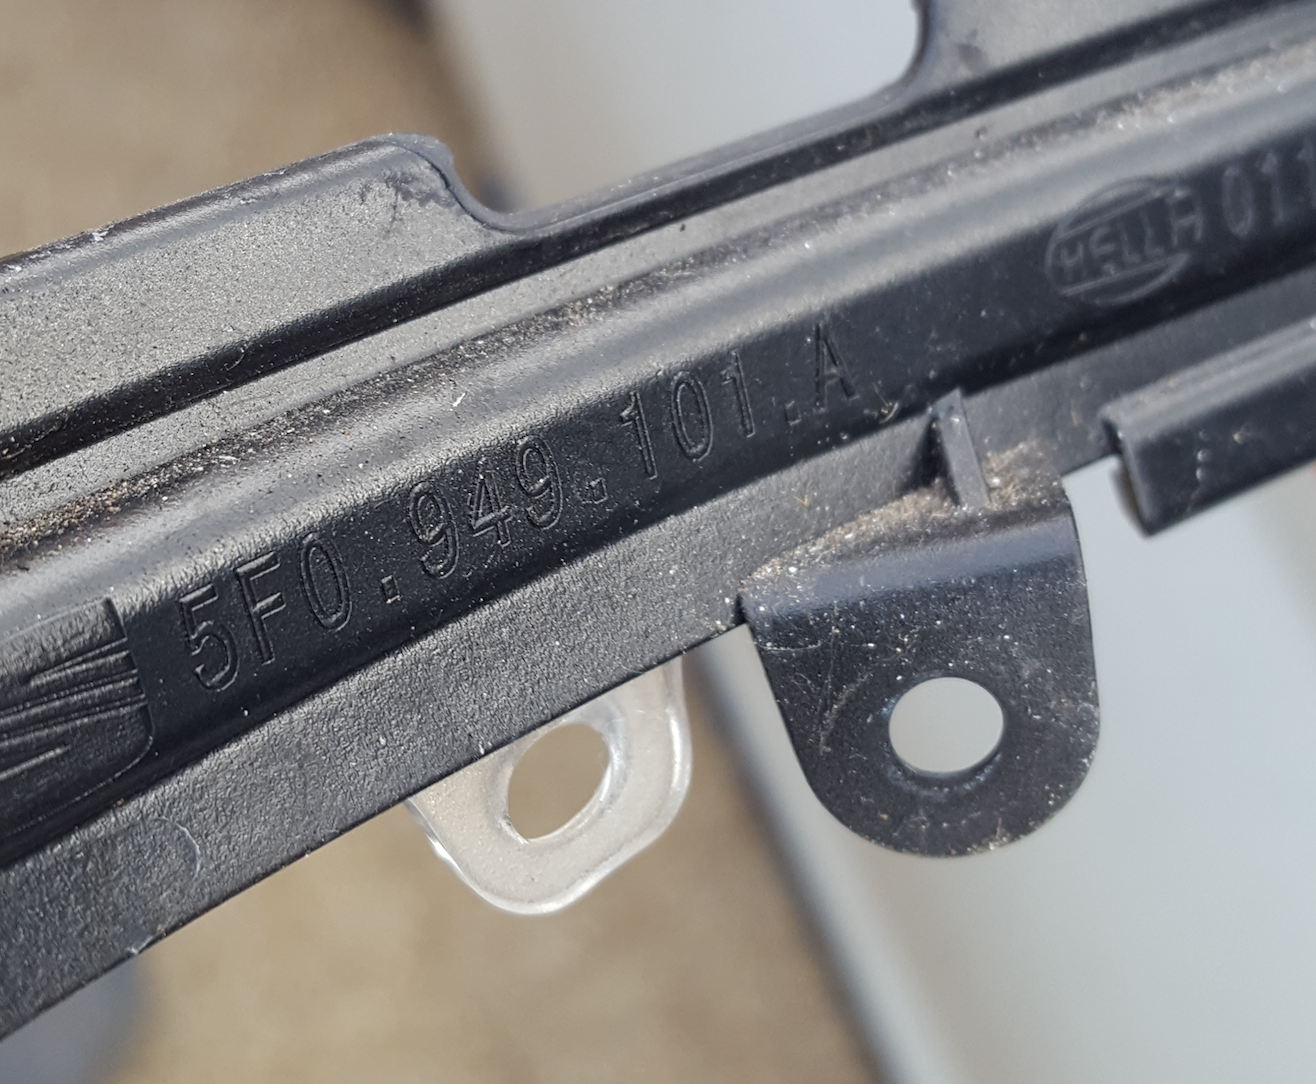
The wing mirror will now look like this

The Circular part is what the mirror clips on to and moves when you use the controls in the car.
You can see the heater wires top left of the picture.
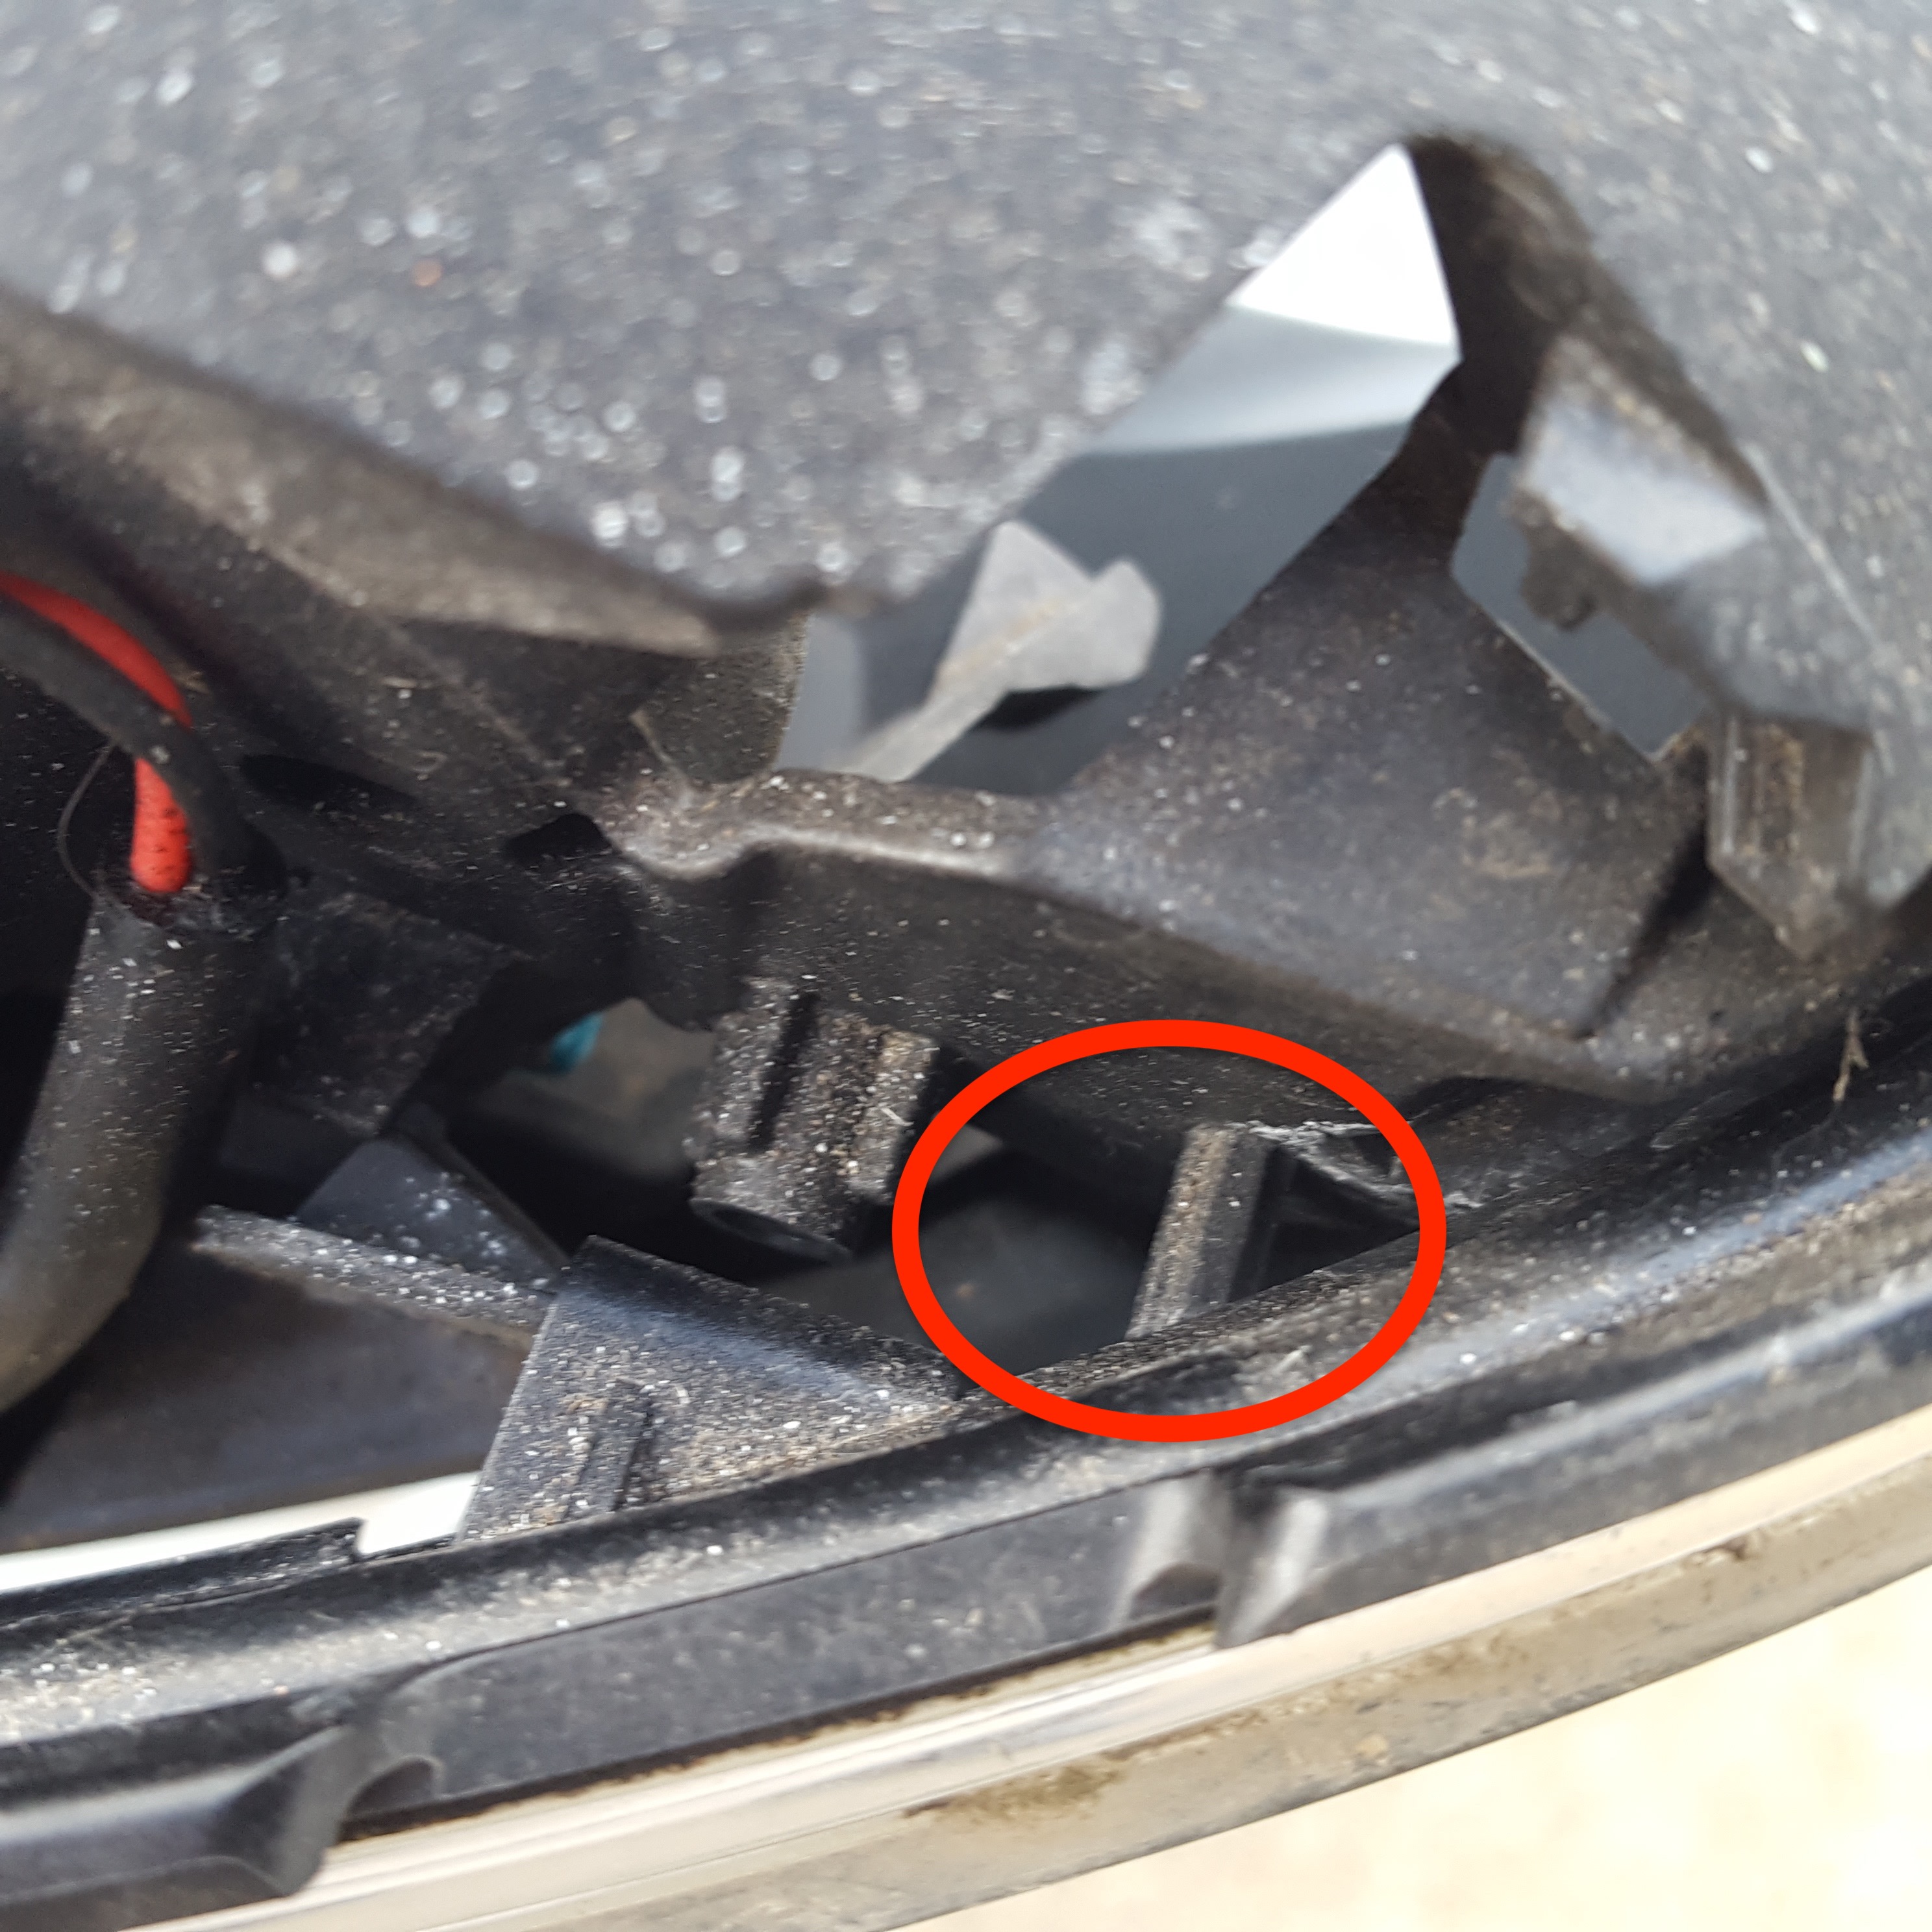
The cover has 4 clips that attach to the body on my car I found that I had to un clip the top two clips (circled in white). I then slowly wiggled the body and found that the bottom two clips came free and then the cover is released. Please note when i tried this the first time I tried to release the clip (circled in Red) but in the end i broke it off. What I did was super glue it back on and then pack it with Plastic Padding to make it strong again. This has worked out fine.
So with the top off you will see this on the mirror side
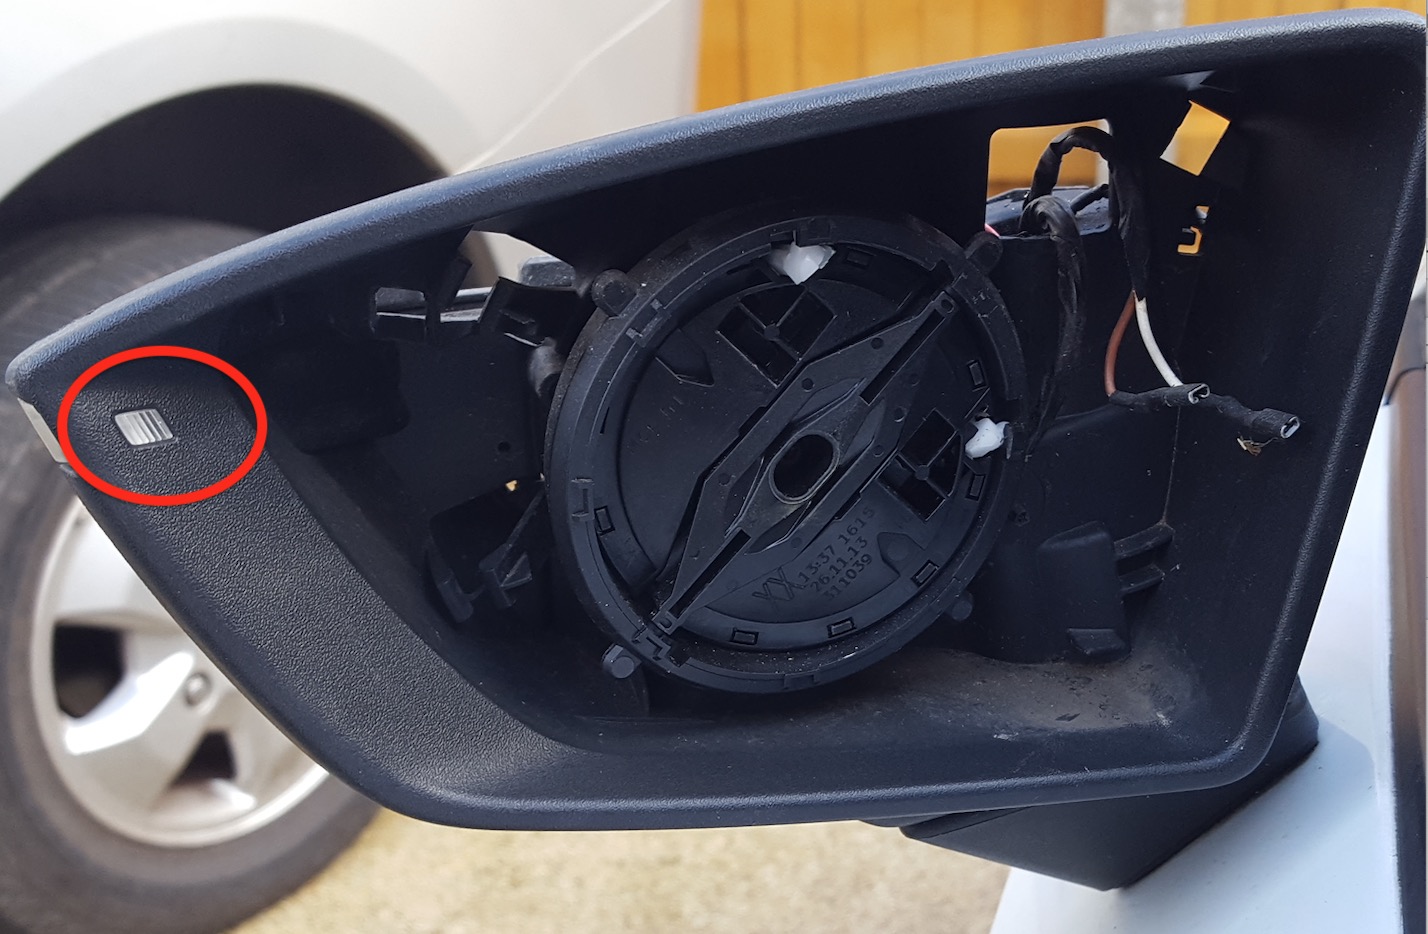
You will need to push the little indicator light slightly in once you have released the light bulb.
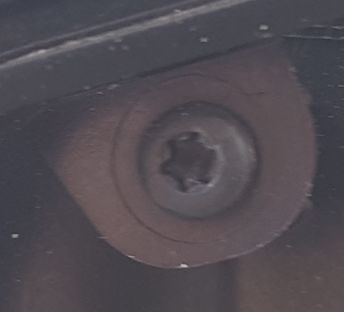
The light bulb is held in place with 3 screws (see pic below), and two plastic prongs plus the above part clipped in.
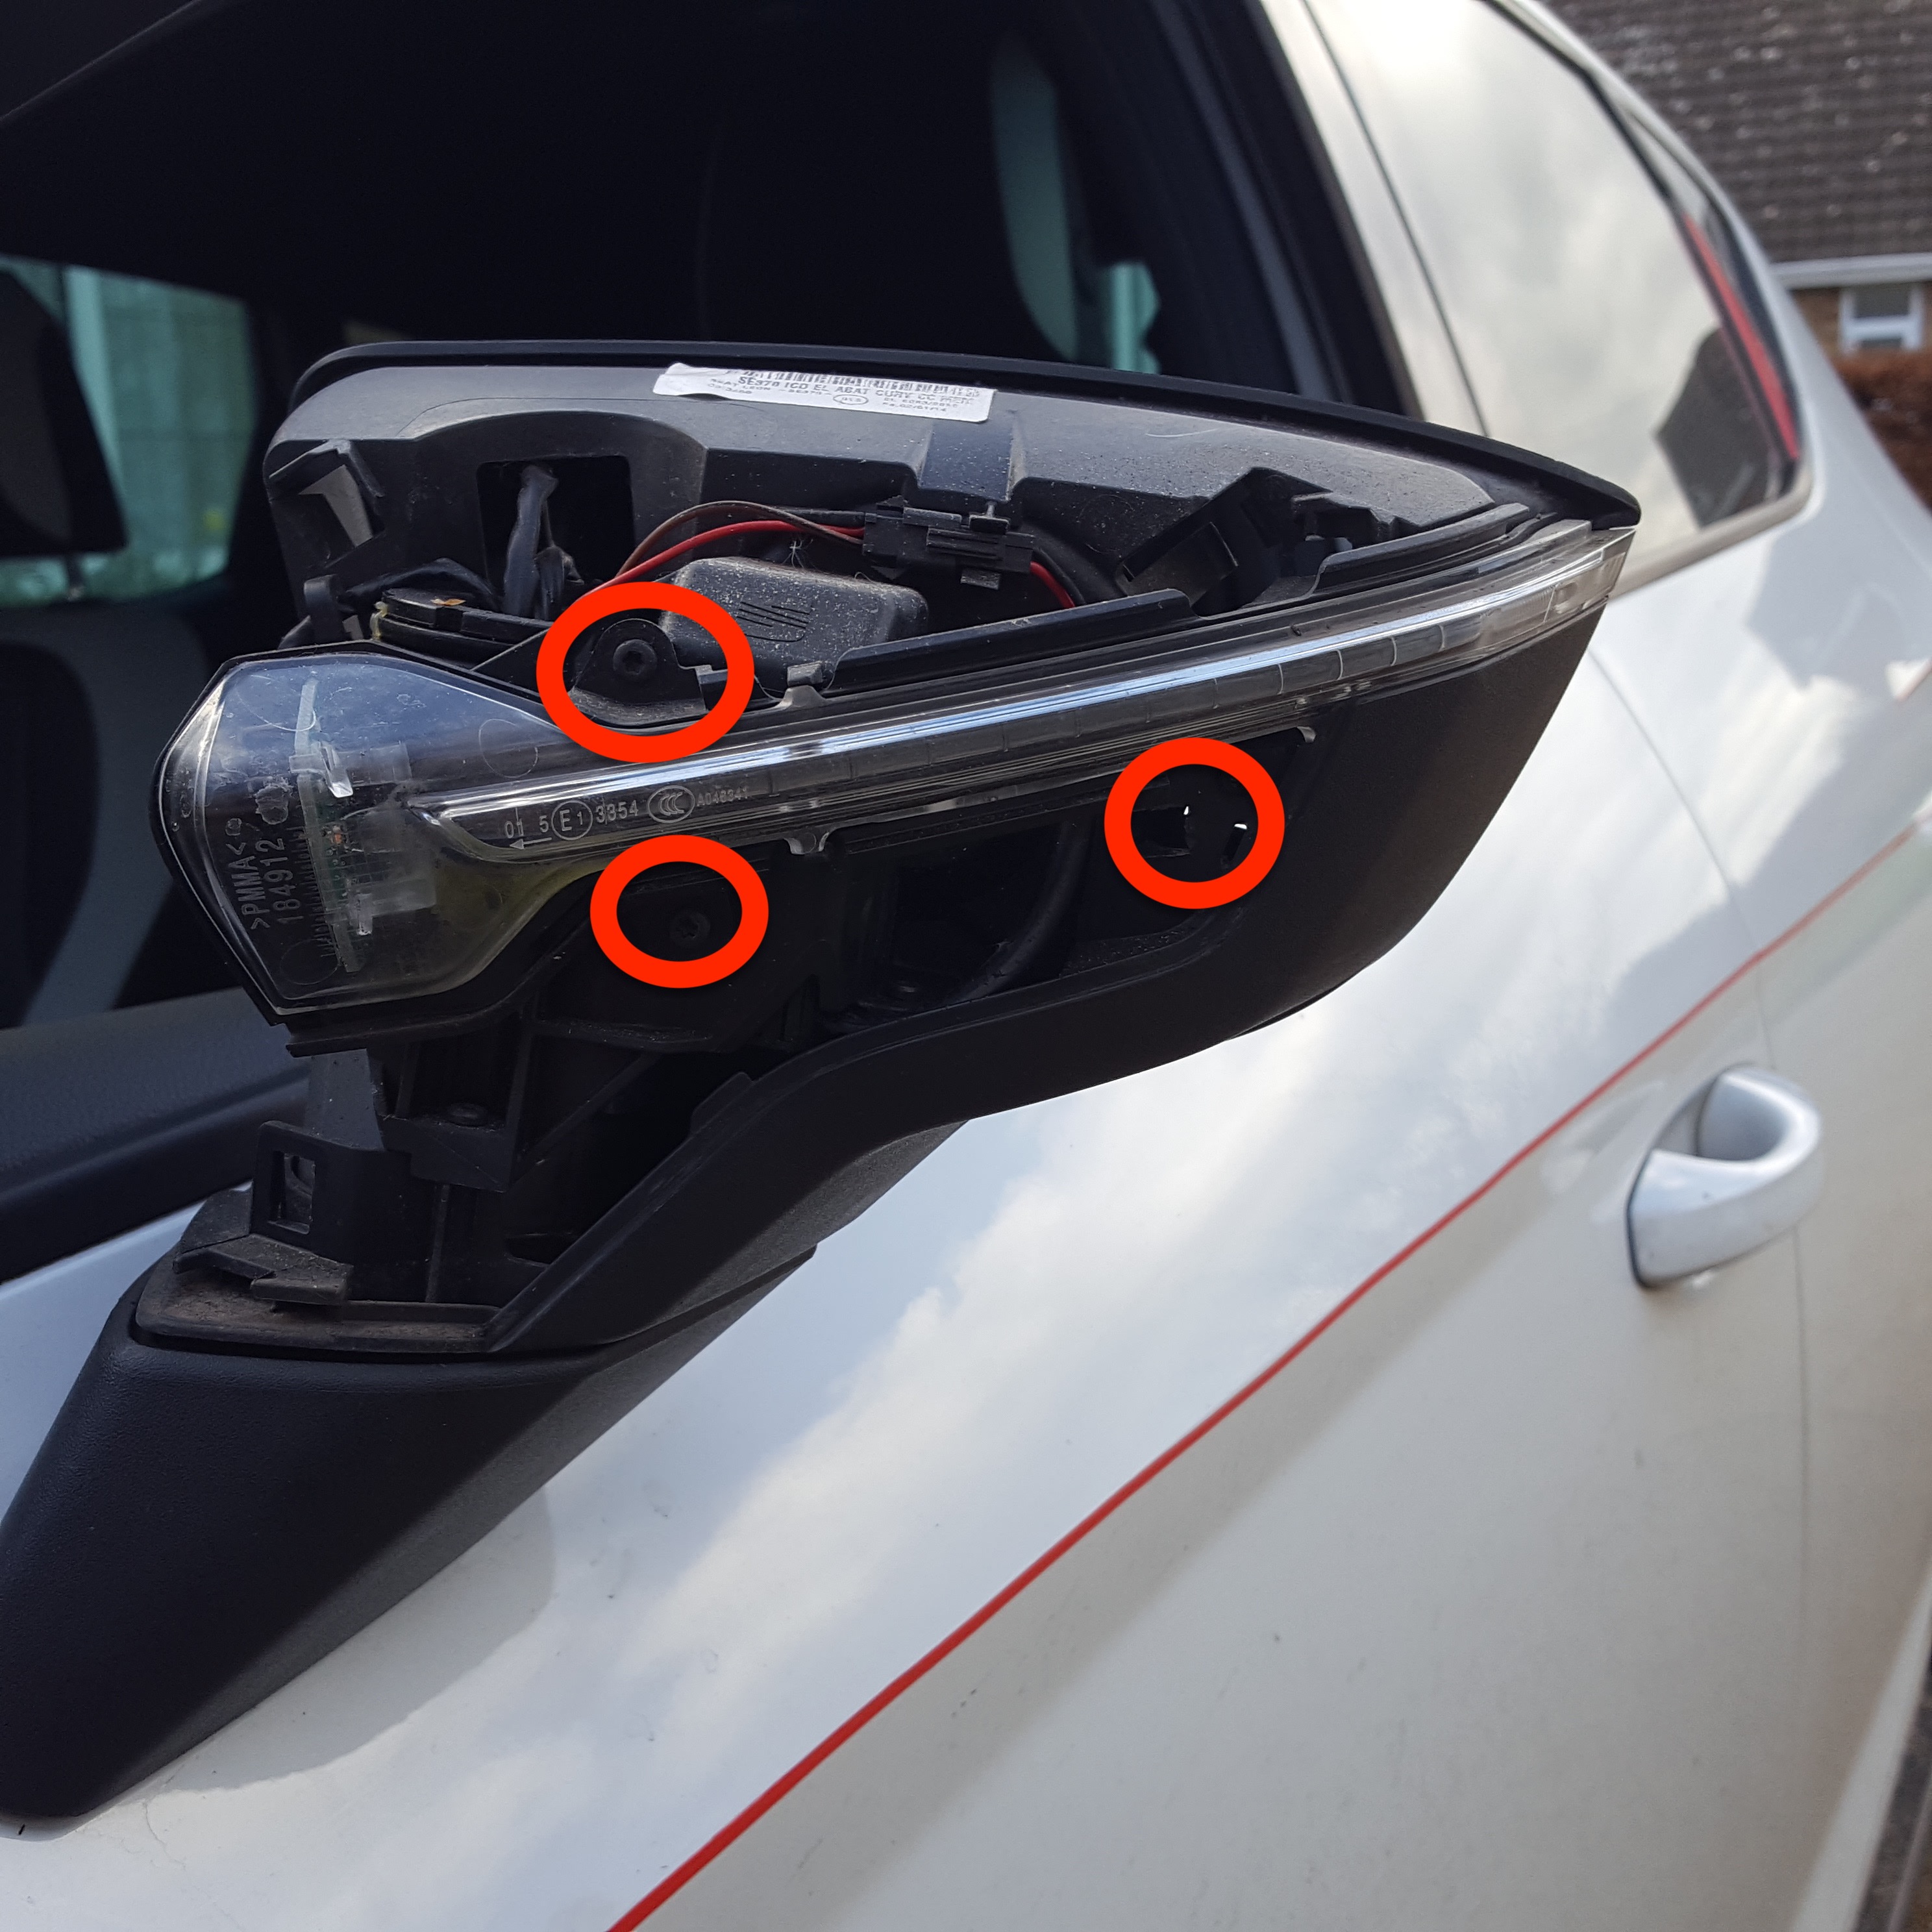
I dont know what you call these screw heads but its not a normal flat or philips screw head.
On the bottom of the light bulb on the right hand side you will see the two wholes, The black one is one of the tabs used to screw onto the body of the wingmirror. The Clear one clips over
the little tab (it just holds it in place)
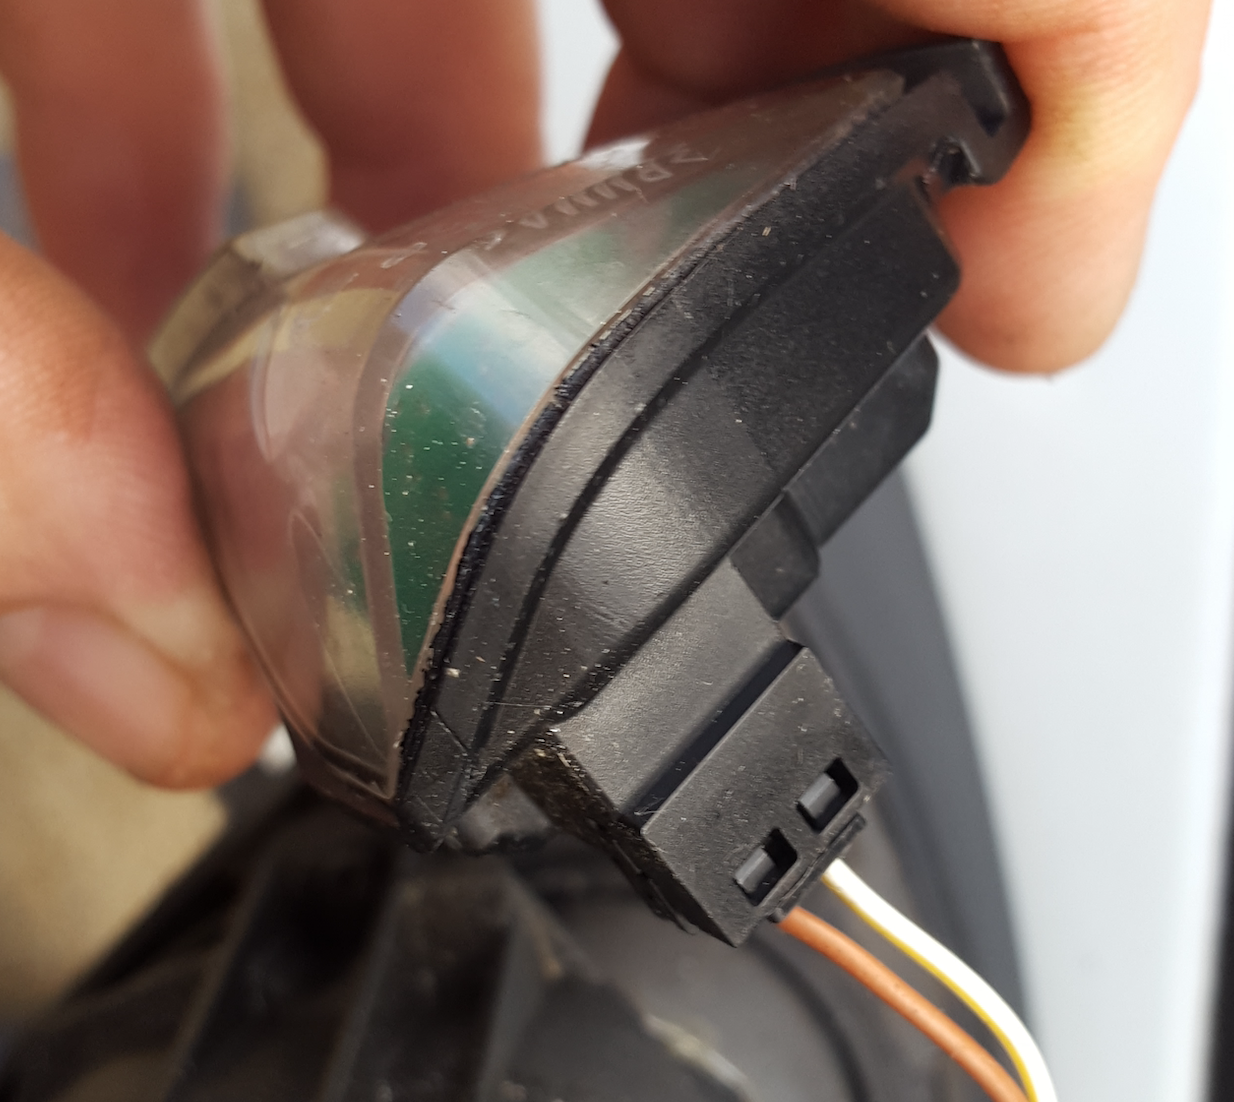
Once you have released the light bulb you can now disconnect the electrics
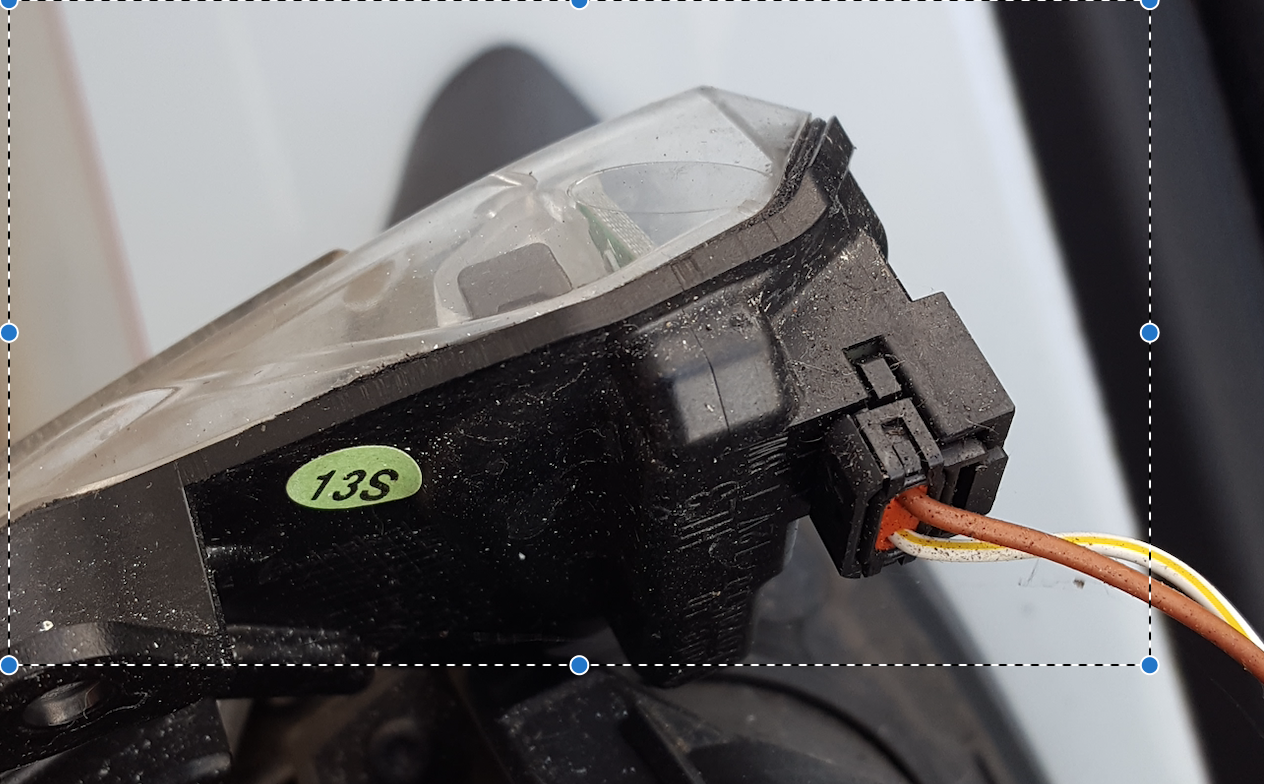
Turn it on its side and you can push in the two clips to release the plug.
Fit in your new bulb and just do the reverse to put it back in.
Only word of warning just push the wingmirror cover on slowly to make sure you have it all lined up correctly before pushing it hare (it will give a small click so you know its locked on).
The following is the steps I took to replace the indicators in my wing mirrors.
In this case I have used Dynamic Indicators but the following steps are the same for Stock as well.
Firstly turn you mirror in to face the car (I found It was also better if I pointed down as well)
Picture taken from https://forums.seatcupra.net/index.php?threads/removing-the-wing-mirror-cap.408610/ thanks
What you are doing is to give you room to get your fingers in behind the mirror, Put your finger or thumb in behind it and gently pull towards the car, It is just cliped on.
If you have heated mirrors the mirror will have two wires connected to it, just pull them off but make a note of which side the wires are connected to.
The wing mirror will now look like this
The Circular part is what the mirror clips on to and moves when you use the controls in the car.
You can see the heater wires top left of the picture.
The cover has 4 clips that attach to the body on my car I found that I had to un clip the top two clips (circled in white). I then slowly wiggled the body and found that the bottom two clips came free and then the cover is released. Please note when i tried this the first time I tried to release the clip (circled in Red) but in the end i broke it off. What I did was super glue it back on and then pack it with Plastic Padding to make it strong again. This has worked out fine.
So with the top off you will see this on the mirror side
You will need to push the little indicator light slightly in once you have released the light bulb.
The light bulb is held in place with 3 screws (see pic below), and two plastic prongs plus the above part clipped in.
I dont know what you call these screw heads but its not a normal flat or philips screw head.
On the bottom of the light bulb on the right hand side you will see the two wholes, The black one is one of the tabs used to screw onto the body of the wingmirror. The Clear one clips over
the little tab (it just holds it in place)
Once you have released the light bulb you can now disconnect the electrics
Turn it on its side and you can push in the two clips to release the plug.
Fit in your new bulb and just do the reverse to put it back in.
Only word of warning just push the wingmirror cover on slowly to make sure you have it all lined up correctly before pushing it hare (it will give a small click so you know its locked on).

