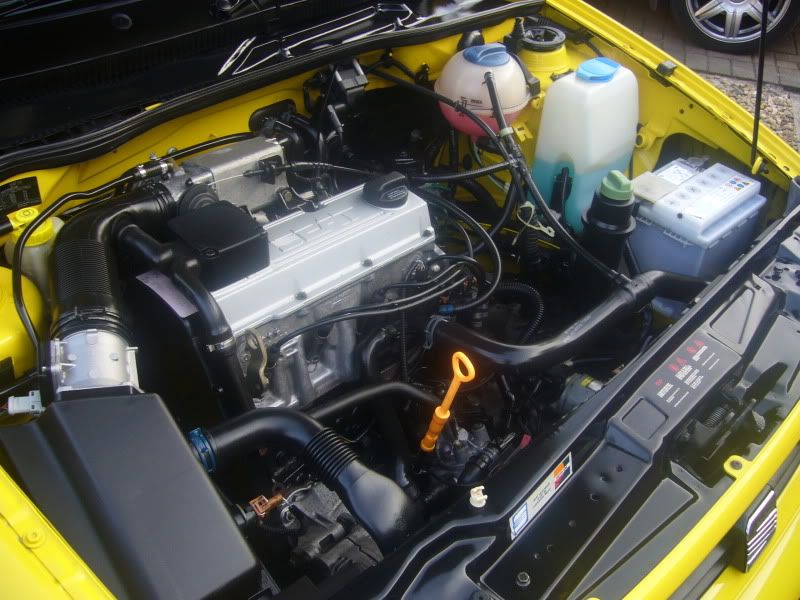
DC's 8v mk2 Ibiza GTi Cupra Sport *Back on the road!*

LMJ

Previously CEY_CLS :-)
May 4, 2009
1,789
1
Bangor, North Wales
P1010128.jpg


How did you (or what did you use) on the inlet manifold? I just can't seem to get mine looking like new.

(Here's mine as a reference);
283236_10150332698730586_524120585_10051874_4110377_n.jpg
 
Jun 14, 2005
920
2
Northants.
That's the way it's always been since New! I just keep it lightly oiled to stop it corroding.

That's a very tidy engine bay you've got there! They look identical !

DC
 
Last edited:
Jun 14, 2005
920
2
Northants.
Further progress to report!

Well I decided to jump in feet first into a complete rear suspension/running gear overhaul as I just couldn't bear to see all the work I'd put into the new suspension and front be let down by the shabby looking back!

P1060295.jpg


So began the most depressing and messy part! - Using my trusty Haynes manual I began stripping all the components, cleaning, assessing and labelling.

Rear beam and splash plates:

Decided that I would get these blasted and then powder coated.
P1060319.jpg


P1060312.jpg

P1060327.jpg

P1060330.jpg

P1060332.jpg


After pressing out the old bushes they were blasted (Twice - don't ask!), zinc primed and then powder coated in Satin Black for a more OE look! I gave instructions for as near to 100% coverage as possible inside and out and I was quite pleased with the results! New genuine VW bushes carefully pressed in at a local garage:

P1060435.jpg

P1060411.jpg
P1060449.jpg
P1060419.jpg
 
Last edited:
Jun 14, 2005
920
2
Northants.
Stub Axles

I had made a real pigs ear of cleaning up the stub axles a few years ago and it hadn't lasted:

P1060351.jpg

P1060352.jpg


This time I was trying to achieve a more thorough and lasting finish.

I started by chiseling off all the loose flaking rust followed by a session with a dremmel, wire brush and grinding stone. Predictably the ABS sensor was seized in and then broke whilst trying to remove so the remnants had to be drilled out.

P1060346.jpg


Next step was a soaking in Bilt Hamber Deox-C rust killer for 24 hours:

P1060356.jpg


After a wash/scrub with water, a stiff brush and drying the results are amazing:
P1060360.jpg

P1060368.jpg


I then gave them two coats of Bilt Hamber's Hydrate 80 coating to resist further rusting:
P1060369.jpg

P1060373.jpg


This dries black and provides a base for a top coat which for this I used Eastwoods Extreme Chassis Paint - Satin applied in two brush coats to finish:
P1060377.jpg

P1060479.jpg
 
Last edited:
Jun 14, 2005
920
2
Northants.
Used the same method to restore the Handbrake cable hangers that push into the rearbeam. Two coats of Eastwoods Extreme Chassis paint were applied by aerosol.

Before:
P1060386.jpg


After:
P1060513.jpg


I'am replacing every nut, bolt and clip with new from VW along with new Febi ABS sensors from AVS.
P1060533.jpg


Quick image of collective parts:
P1060542.jpg
 
Last edited:

Mythbuster

Active Member
Oct 6, 2010
352
0
Made, The Netherlands
I so wish I can EVER in my life own a car with this age in this condition, I really really do... Everything is so perfect. And I agree, it seems a shame that this gets used every day. Seems like one of those cars that should never even see rain... Big respect to you sir!
 
Jun 14, 2005
920
2
Northants.
Hi all,

Thanks for all the positive comments!

I just get great satisfaction and enjoyment from being as thorough as I can with what ever work I've done - its very addictive!!

True the daily use does take its toll eventually and a lot of work gets undone so another car would be the solution but I never intended that. I'am just hoping I can keep on top of it in terms of condition and mechanicals - but I'll see how it goes!

Besides I like driving it to much!

With regards the brackets I don't know the part no's as they are the originals blasted then powdercoated.

With regards removing the rear beam its pretty straight forward so long as your methodical, patient and have a Haynes manual. The difficult bit is resisting the urge to refurbish/renew EVERYTHING!

Thanks again - more progress to follow!
 
Last edited:
Jun 14, 2005
920
2
Northants.
More progress!

Before re-fitting the refurbished rear beam I gave the underneath/hidden areas, arches and suspension turrets a clean and some protection.

The factory protection has lasted well with very little if any corrosion so all I did was apply AG Engine Cleaner, rinse, wash with Megs shampoo/washmitt and apply AG Vinyl and Rubber care. In the arches/turrets some localised use of Tardis to remove tar spots, polish with AGSR and a coat or two of Collonite insulation wax.

After the photo's I applied a spray coat of Waxoyl clear protection to some of the more venerable areas.

P1060607.jpg

P1060594.jpg

P1060617.jpg

P1060615.jpg

P1060601.jpg
 
Last edited:
Jun 14, 2005
920
2
Northants.
Maneuvering the beam into position before lifting and attaching at the pivot joints.
P1060620.jpg


Having been supplied with the wrong springs (Polo) I ordered a correct new set directly from FK and these were built onto the rear shocks using new genuine top plates which were treated to two extra coats of Eastwoods Extreme Chassis Paint.

P1060561.jpg
P1060509.jpg


After questioning the fitment of the spring to the lower spring plate FK supplied me with these alloy spacers to prevent any lateral movement. These were not supplied originally so useful info for others.

P1060565.jpg


These were then fitted and secured to the beam.
 
Last edited:
Jun 14, 2005
920
2
Northants.
New Febi ABS sensors fitted to the stub axles.
P1060524.jpg


And then attached to the beam with the splash plates using new genuine bolts. The greasy looking coating in these images is the Waxoyl.

P1060644.jpg

IMG_0862.jpg

P1060984.jpg


Also fitted new genuine handbrake cables using new clips and brackets and re-connected the brake lines.


At this point I turned my attention to refurbishing the Brake Calipers, Carriers and disks.

Update on these to follow soon!

DC
 
Last edited: