JamJay's 290bhp Ovni Yellow LCR - Latest: SOLD & Replaced With A BMW 335i Cabrio

Which Cat-Back System Should I Choose?

  • Longlife Custom 3" Non-Resonated - £429 Fitted

    Votes: 12 12.4%
  • Hayward & Scott (Essex) 3" Non-Resonated - £550 Fitted

    Votes: 5 5.2%
  • Blueflame 2.76" Non-Resonated - £400 Delivered

    Votes: 16 16.5%
  • Milltek 2.76" > 3" Non-Resonated - £400 Delivered

    Votes: 38 39.2%
  • Powerflow Custom 3" Non-Resonated - £330 Fitted

    Votes: 26 26.8%

  • Total voters
    97

JamJay

California Bound
Custom Heat Shield

Hi everyone, a little update here for you.

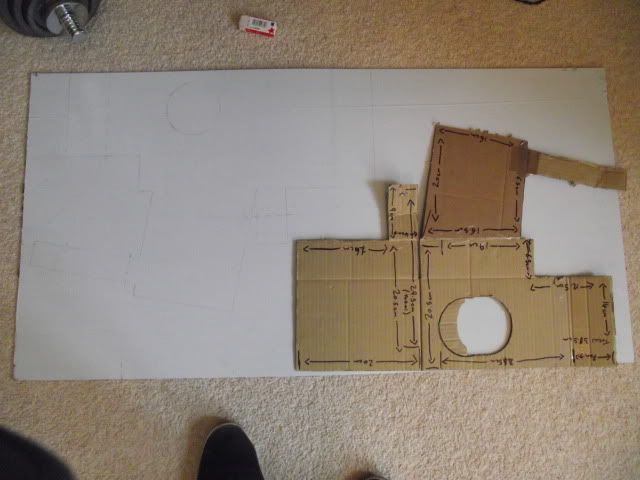
I've decided to start work on my custom heat shield to help out the Jetex cone a little. Sadly my tin snips haven't turned up so it will be Monday when I receive them most likely and next weekend before I am able to make the proper aluminium version however, here are the pics of the cardboard mock up, I'm very pleased :).

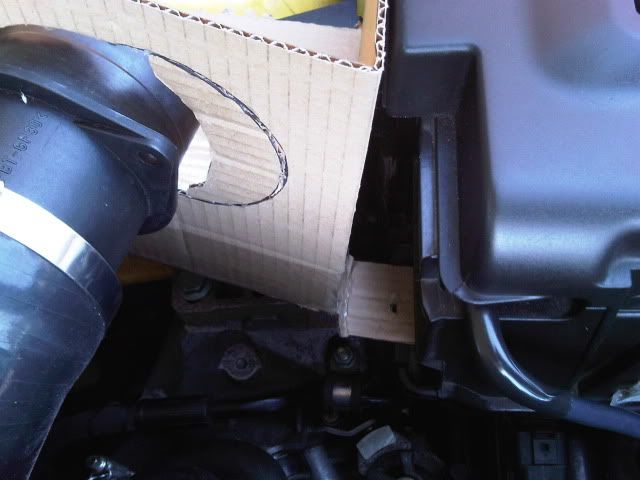
Version 1. As you can see I had to play around a bit with a larger MAF hole so I'd know where it would sit.

utf-8BSU1HMDAwMTctMjAxMTAzMTItMTAyNS5qcGc.jpg


utf-8BSU1HMDAwMTgtMjAxMTAzMTItMTAyNS5qcGc.jpg


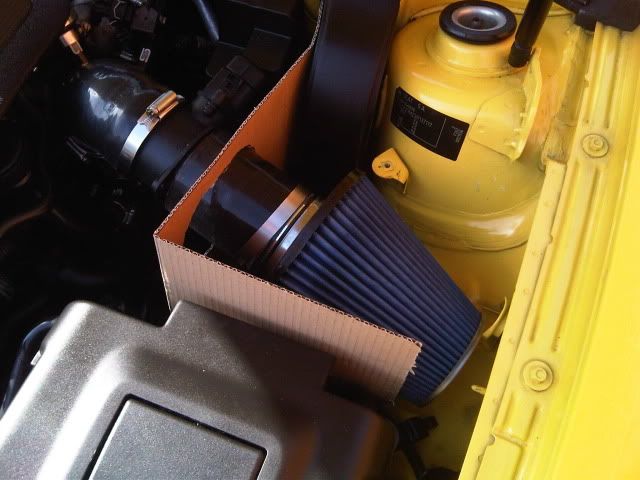
The shield was also too long and high so it was a close shave with the bonnet & hydraulic when closed.

utf-8BSU1HMDAwMTktMjAxMTAzMTItMTAyNi5qcGc.jpg


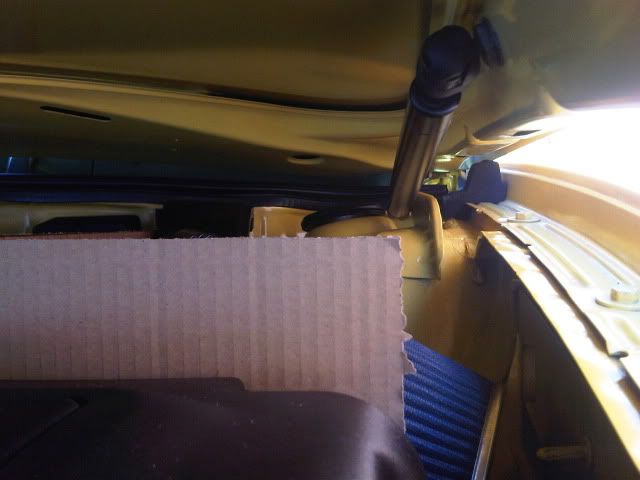
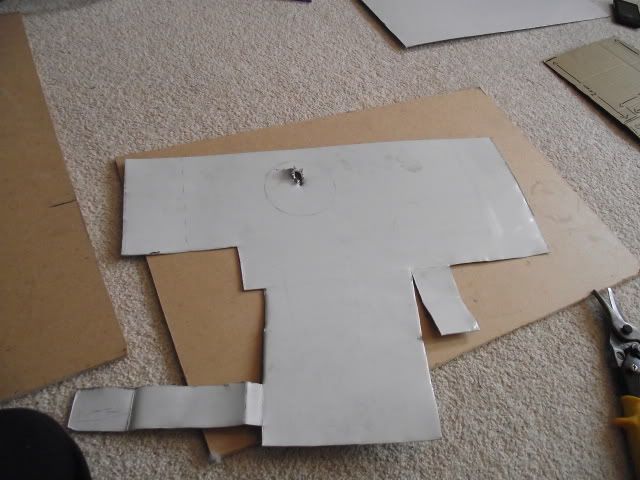
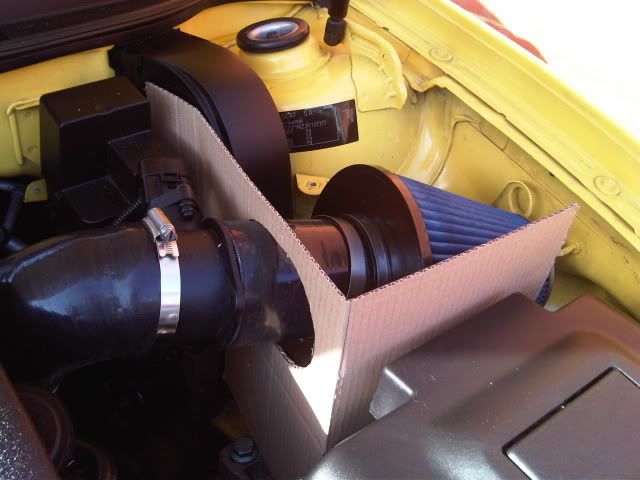
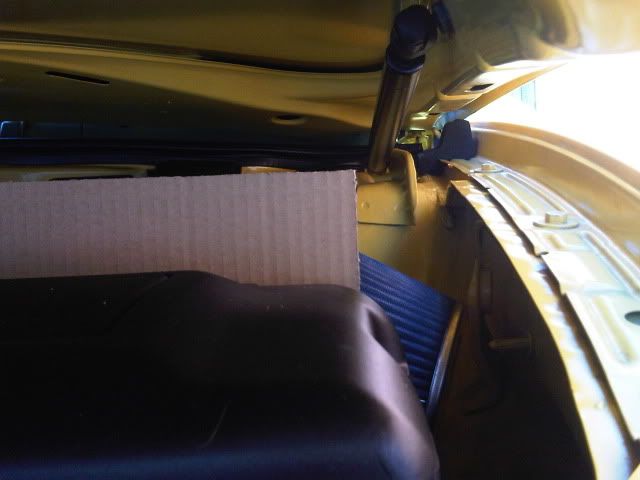
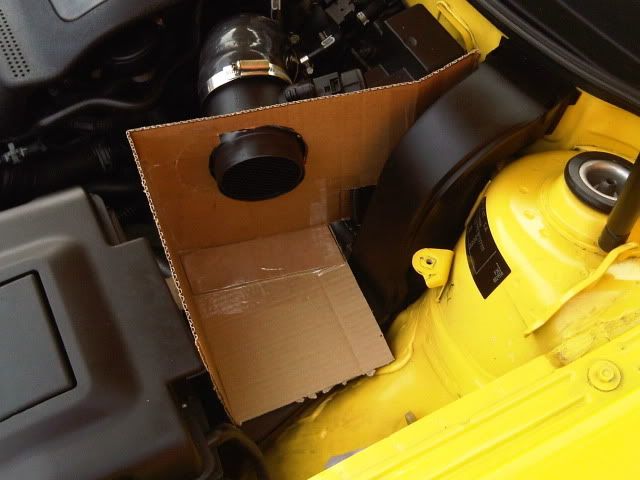
So I set about making V2 now that I know where everything needs to go. I cut the shield down and as you can see it clears the bonnet and hydraulic nicely.

utf-8BSU1HMDAwMjEtMjAxMTAzMTItMTAzMC5qcGc.jpg


The MAF hole was waaay too big so I closed that up. I'd also not included a bracket to secure the shield on V1 so I added that in too.

utf-8BSU1HMDAwMjMtMjAxMTAzMTItMTEyMi5qcGc.jpg


The filter was still quite exposed to heat from the turbo in V1 so I added some extra protection.

utf-8BSU1HMDAwMjItMjAxMTAzMTItMTEyMS5qcGc.jpg


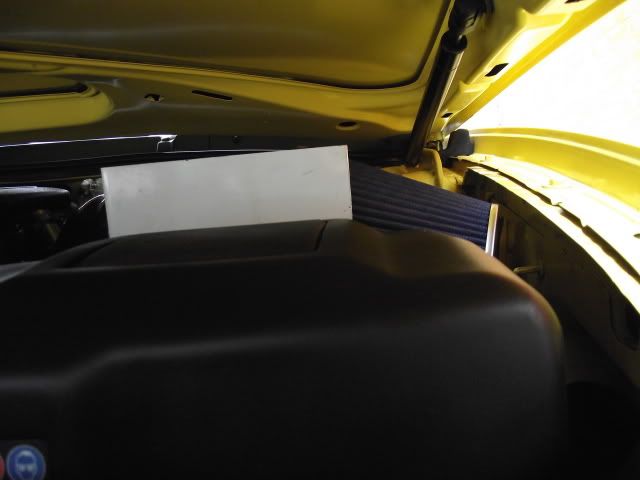
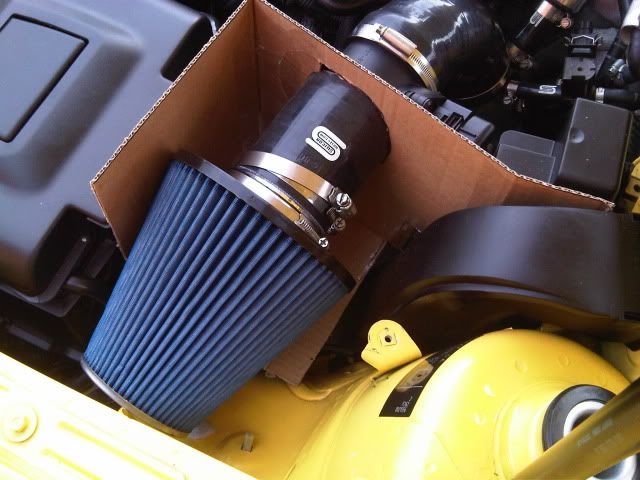
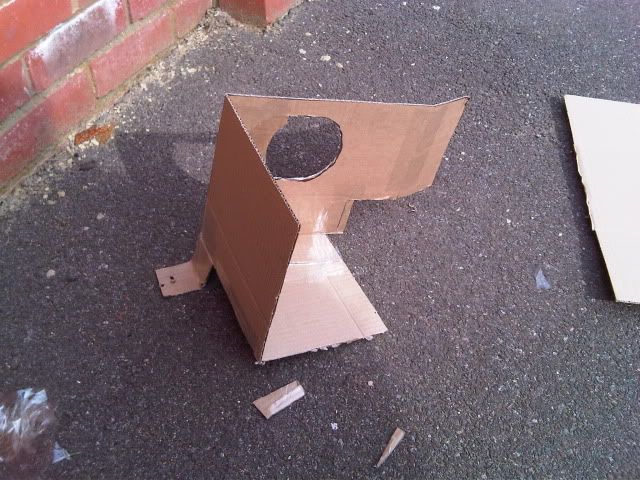
And here is V2 complete. I will be cutting along the bends when I get my snips and laying it flat against the aluminium sheet to use as a template. The best thing about the design of this shield is that it is all one piece so no rivets or welding needed.

utf-8BSU1HMDAwMjQtMjAxMTAzMTItMTEyMy5qcGc.jpg


utf-8BSU1HMDAwMjUtMjAxMTAzMTItMTEyOC5qcGc.jpg


I'm probably going to spray the finished product in matt black to help it blend, I'm sure I'll make a couple of additional mods to it also and depending on how secure it is I might fabricate an extra bracket for the suspension turret mount.

I really enjoyed being creative and making this up, I am hopeful that the metal work will now be the easy part.
 
Last edited:

h7 cya

Active Member
Jun 3, 2009
453
0
Good on ya for having a go yourself mate, i cant justify the price for a jabba one.
 

Aimez

Active Member
I never got a cone filter for my car cos of the location (same place as yours!) as everyone said rightly so it will just suck in heat. Most people just put them on for the noise but prob make the car slower without something like what you are going to do.
 

traumapat

Leon Cupra IHI
Jul 24, 2005
5,925
4
sunny sussex
Just for info the jabba one fits very close to the bonnet, you can feel/hear it creating a vacuum so getting the height right is worth the effort:)
 

sambryant

RoadRunner meep meep
Mar 26, 2009
4,847
2
Bristol
jamjay i dont get it, the neuspeed heat shield is a perfect fit with the badger 5 tip. infact there is so much adjustment it fits better than the forge tip. few pics of mine fitted, also i have a catch can and dv relocation kit.


JamJay

California Bound
Just for info the jabba one fits very close to the bonnet, you can feel/hear it creating a vacuum so getting the height right is worth the effort:)

No bonnet lining so I'll never get a tight seal but this is as close as I'll get.

jamjay i dont get it, the neuspeed heat shield is a perfect fit with the badger 5 tip. infact there is so much adjustment it fits better than the forge tip. few pics of mine fitted, also i have a catch can and dv relocation kit.

Wouldn't fit at all. The TIP came up too high for the shield to be fitted so I had to get rid and make my own or butcher the TIP. Yours may have come trimmed a little more than mine, your top hose looks a lot shorter so it looks like they all come trimmed differently but I wasn't prepared to risk trimming it any more than I did. The shield that I am making will shield the filter better than the Neuspeed anyhow, it's basically a Neuspeed/Jabba hybrid.
 

JamJay

California Bound
I had to trim loads of the top and bottom elbows to get mine to fit with the airbox

Exactly, I trimmed about 2" of and then reality hit home before I went nuts with the stanley blade. The 2" I cut were needed so that the filter sat straight (horizontally) at least but It would need a lot moe modification to get it to fit with the old shield. Anyhow I have sold on the Neuspeed so what this is costing me is absorbed :).

No bonnet lining here either ;). It dont look bad from the pics so I think youll get a similar result:)

It's as close to the bonnet as I could get it without touching so it should be ok :). All the lengths are to the nearest 0.5mm funnily which makes measuring it up for cutting all that easier. Currently debating on 0.5mm, 0.8mm or 1mm aluminium sheet, I'm concerned that 0.5mm will be too flimsy but should be held rigid by the design and mounts but on the other side I am concerned that 1mm will be too thick to work easily with the tin snips :think:...0.8mm compromise?
 

sambryant

RoadRunner meep meep
Mar 26, 2009
4,847
2
Bristol
i had to cut around 5" in hight, 2 1/2" from the bottom hose and 2 1/2" from the top. the hose are far to big as they are. bill stated on the first page that the tips will need cutting inorder to make a perfect fit.
 

JamJay

California Bound
cant be much difference working between 0.8 and 1mm so go for the latter. ;)

Off to Ye Olde EBAY it is then, can't beat their prices. Been looking at online metal merchants and while their metal is cheap, delivery is £20 vs EBAY £6 ;).

i had to cut around 5" in hight, 2 1/2" from the bottom hose and 2 1/2" from the top. the hose are far to big as they are. bill stated on the first page that the tips will need cutting inorder to make a perfect fit.

Yeah I knew it needed cutting but I like the way it sits currently, better than it did with the old TIP so didn't want to cut it up more.
 

JamJay

California Bound
I've made my heat shield!

It needs a little refinement, spraying black, drilling for the mounts and MAF and some edging strip and then it's good to go.

Tools:

- Tin Snips (Straight cut - Yellow, Left Cut - Red if you're right handed or Right cut - Green if left handed)
- 1000mm x 500mm x 1mm aluminium sheet or 750mm length will do. 1000mm will allow you to make two shields in case you screw up the first one
- Pencil to mark where to cut
- Drill to make a hole for the MAF, mounting bracket & MAF fixings holes
- Coarse sand paper for rubbing down the edges of the cut metal
- Gloves to prevent cutting yourself
- Hammer and a block of wood to flatten any parts that you had to bend to give room for cutting

1. Trace round the cardboard mock up

DSCF0174.jpg


2. Cut it out using straight cut tin snips

DSCF0175.jpg


3. Punch a hole or drill the centre of the MAF hole, then cut round to the edge in a circle using right cut or left cur tin snips.

DSCF0177.jpg


4. Bend it all back into shape, flatten out the edges if they've curled a little, then fit it and see what you've got :)

DSCF0181.jpg


DSCF0178.jpg


DSCF0179.jpg


Cutting a tab for the bottom to attach to the front wall might have meant that things didn't line up right so instead I have made a bracket to attach them together which I shall drill and rivet.
 
Last edited:

8bit

Active Member
Feb 11, 2010
3,401
3
Aberdeen
Good job mate, +10 DIY points :) I'd never try anything like that myself, if I succeeded then the mrs. would have me spending all my free weekend days putting up shelves etc....
 

JamJay

California Bound
Good job mate, +10 DIY points :) I'd never try anything like that myself, if I succeeded then the mrs. would have me spending all my free weekend days putting up shelves etc....

It's pretty easy TBH, the longest part is making the cardboard version as it has to go in and out of the engine bay a hundred times before it fits. The rest is just tracing and using tin snips on metal this thin is like cutting paper.
 
Last edited:
SEATCUPRA.NET Forum merchandise